Pokémon Go Buddy distance chart for when Buddy Pokémon drop rewards
Which Buddy Pokémon produce Candy faster than others?


Pokémon Go Buddy Distances allow you to work out which Buddy to accompany you everywhere you go to earn some free Candy.
Similar to Egg hatching in Pokémon Go, it's a background activity that you set and, after a certain distance, will give you rewards.
It'll work slightly differently according to which Pokémon you Buddy up with - in short, rarer Pokémon will take longer to produce Candy - and there's a few quirks and exceptions you should take note of, too.
Buddy distances also correspond to the cost of unlocking a second move for a Pokémon, with further distances requiring higher costs.
On this page:
Why Pokémon Go's Buddy feature is useful
To enable Pokémon Go's Buddy feature, tap your Trainer icon in the corner, select the burger icon in the bottom right corner (for more options) and it's listed there.
Then, select the Pokémon of your choosing, and you'll be given a goal in kilometers to travel. Once you have reached the target - be it 1km, 3km or 5km, depending on the creature - you'll be given some Candy.
Pokémon Go's Buddy feature allows you to work towards two late-game activities; powering up your Pokémon to take on Gyms, and filling out your Pokedex by evolving the creatures you've already caught.
In order to get more Candy you have to either catch it in the wild or hatch it from an Egg, and since the best Pokémon are usually the hardest to find, Candy is also very difficult to come by.
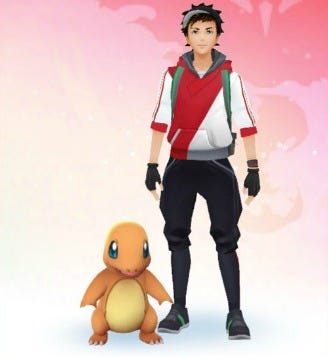
The Buddy system solves this problem quite nicely. For example, if you provided you catch one Dratini, as long as you keep walking and collecting Candy from your Buddy, you'll one day get your hands on that all elusive Dragonite.
Though, with 1-2 Candy dropping every 5km walked, it could take a while!
Thanks to The Silph Road reddit for help with the below lists, including SilverKylin for Gen 4 listings.
1km Buddy Distance chart
- Caterpie
- Metapod
- Butterfree
- Weedle
- Kakuna
- Beedrill
- Pidgey
- Pidgeotto
- Pidgeot
- Rattata
- Raticate
- Spearow
- Fearow
- Pikachu
- Raichu
- Clefairy
- Clefable
- Jigglypuff
- Wigglytuff
- Zubat
- Golbat
- Geodude
- Graveler
- Golem
- Magikarp
- Gyarados
- Sentret
- Furret
- Hoothoot
- Noctowl
- Ledyba
- Ledian
- Spinarak
- Ariados
- Crobat
- Pichu
- Cleffa
- Igglybuff
- Slugma
- Magcargo
- Remoraid
- Octillery
- Poochyena
- Mightyena
- Zigzagoon
- Linoone
- Wurmple
- Silcoon
- Beautifly
- Cascoon
- Dustox
- Taillow
- Swellow
- Surskit
- Masquerain
- Whismur
- Loudred
- Exploud
- Aron
- Lairon
- Aggron
- Gulpin
- Swalot
- Wailmer
- Wailord
- Spoink
- Grumpig
- Swablu
- Altaria
- Barboach
- Whiscash
- Starly
- Staravia
- Staraptor
- Bidoof
- Bibarel
- Kriketot
- Kricketune
- Burmy (any cloak)
- Wormadam (any cloak)
- Mothim
- Cherubi (both Overcast and Sunny form)
- Cherrim
- Patrat
- Watchog
- Lillipup
- Herdier
- Stoutland
- Purrloin
- Liepard
- Pidove
- Tranquil
- Unfezant
- Woobat
- Swoobat
- Sewaddle
- Swadloon
- Leavanny
- Venipede
- Whirlipede
- Scolipede
- Cottonee
- Whimsicott
- Petili
- Liligant
- Basculin (both Red and Blue-striped form)
- Maractus
- Dwebble
- Crustle
- Emolga
- Tynamo
- Eelektrik
- Eelektross
- Bunnelby
- Diggersby
- Fletchling
- Fletchinder
- Talonflame
- Scatterbug
- Spewpa
- Vivillon
- Pikipek
- Trumbeak
- Toucannon
- Yungoos
- Gumshoos
- Grubbin
- Charjabug
- Vikavolt
- Cutiefly
- Ribombee
- Stufful
- Bewear
- Wimpod
- Golisopod
- Skwovet
- Greedent
- Obstagoon
- Lechonk
- Oinkologne
- Nymble
- Lokix
- Tadbulb
- Bellibolt
3km Buddy Distance chart
- Bulbasaur
- Ivysaur
- Venusaur
- Charmander
- Charmeleon
- Charizard
- Squirtle
- Wartortle
- Blastoise
- Ekans
- Arbok
- Sandshrew
- Sandslash
- Nidoran♀
- Nidorina
- Nidoqueen
- Nidoran♂
- Nidorino
- Nidoking
- Vulpix
- Ninetails
- Oddish
- Gloom
- Vileplume
- Paras
- Parasect
- Venonat
- Venomoth
- Diglett
- Dugtrio
- Meowth
- Persian
- Psyduck
- Golduck
- Mankey
- Primeape
- Growlithe
- Arcanine
- Poliwag
- Poliwhirl
- Poliwrath
- Abra
- Kadabra
- Alakazam
- Machop
- Machoke
- Machamp
- Bellsprout
- Weepinbell
- Victreebel
- Tentacool
- Tentacruel
- Ponyta
- Rapidash
- Slowpoke
- Slowbro
- Magnemite
- Magneton
- Doduo
- Dodrio
- Seel
- Dewgong
- Grimer
- Muk
- Shellder
- Cloyster
- Gastly
- Haunter
- Gengar
- Drowzee
- Hypno
- Krabby
- Kingler
- Voltorb
- Electrode
- Exeggcute
- Exeggutor
- Cubone
- Marowak
- Lickitung
- Koffing
- Weezing
- Rhyhorn
- Rhydon
- Tangela
- Kangaskhan
- Horsea
- Seadra
- Goldeen
- Seaking
- Staryu
- Starmie
- Tauros
- Ditto
- Porygon
- Chikorita
- Bayleef
- Maganium
- Cyndaquil
- Quilava
- Tyhlosion
- Totodile
- Croconaw
- Feraligatr
- Chinchou
- Lanturn
- Togepi
- Togetic
- Natu
- Xatu
- Bellossom
- Marill
- Azumarill
- Politoed
- Hoppip
- Skiploom
- Jumpluff
- Aipom
- Sunkern
- Sunflora
- Yanma
- Wooper
- Quagsire
- Murkrow
- Slowking
- Misdreavus
- Wobbuffet
- Girafarig
- Dunsparce
- Snubbull
- Granbull
- Quilfish
- Shuckle
- Heracross
- Sneasel
- Teddiursa
- Ursaring
- Swinub
- Piloswine
- Corsola
- Houndour
- Houndoom
- Kingdra
- Phanpy
- Dolphan
- Porygon2
- Stantler
- Smeargle
- Treecko
- Grovyle
- Sceptile
- Torchic
- Combusken
- Blaziken
- Mudkip
- Marshtomp
- Swampert
- Lotad
- Lombre
- Ludicolo
- Seedot
- Nuzleaf
- Shiftry
- Wingull
- Pelipper
- Shroomish
- Breloom
- Makuhita
- Hariyama
- Azurill
- Nosepass
- Skitty
- Delcatty
- Meditite
- Medicham
- Electrike
- Manectric
- Plusle
- Minun
- Volbeat
- Illumise
- Roselia
- Carvanha
- Sharpedo
- Numel
- Camerupt
- Torkoal
- Spinda
- Cacnea
- Cacturne
- Zangoose
- Seviper
- Lunatone
- Solrock
- Corphish
- Crawdaunt
- Baltoy
- Claydol
- Lileep
- Cradily
- Anorith
- Armaldo
- Shuppet
- Banette
- Duskull
- Dusclops
- Wynaut
- Snorunt
- Glalie
- Spheal
- Sealeo
- Walrein
- Clamperl
- Huntail
- Gorebyss
- Luvdisc
- Turtwig
- Grotle
- Torterra
- Chimchar
- Monferno
- Infernape
- Piplup
- Prinplup
- Empoleon
- Budew
- Roserade
- Combee
- Vespiquen
- Buizel
- Floatzel
- Shellos (both West and East Coast forms)
- Gastrodon (both West and East Coast forms)
- Ambipom
- Bunerary
- Lopunny
- Mismagius
- Honchkrow
- Glameow
- Purugly
- Stunky
- Skuntank
- Bronzor
- Bronzong
- Hippopotas
- Hippowdon
- Croagunk
- Toxicroak
- Finneon
- Lumineon
- Snover
- Abomasnow
- Weavile
- Magnezone
- Licklicky
- Rhyperior
- Tangrowth
- Togekiss
- Yanmega
- Mamoswine
- Porygon-Z
- Probopass
- Dusknoir
- Froslass
- Snivy
- Servine
- Serperior
- Tepig
- Pignite
- Emboar
- Oshawott
- Dewott
- Samurott
- Pansage
- Simisage
- Pansear
- Simisear
- Panpour
- Simipour
- Blitzle
- Zebstrika
- Roggenrola
- Boldore
- Gigalith
- Drilbur
- Excadrill
- Audino
- Tympole
- Palpitoad
- Seismitoad
- Darumaka
- Darmanitan
- Scraggy
- Scrafty
- Yamask
- Cofagrigus
- Trubbish
- Garbodor
- Minccino
- Cinccino
- Gothita
- Gothorita
- Gothitelle
- Solosis
- Duosion
- Reuniclus
- Ducklett
- Swanna
- Vanillite
- Vanillish
- Vanilluxe
- Deerling
- Sawsbuck
- Karrablast
- Escavalier
- Foongus
- Amoonguss
- Joltik
- Galvantula
- Ferroseed
- Ferrothorn
- Elgyem
- Beheeyem
- Cubchoo
- Beartic
- Shelmet
- Accelgor
- Mienfoo
- Mienshao
- Bouffalant
- Heatmor
- Durant
- Chespin
- Quilladin
- Chesnaught
- Fennekin
- Braixen
- Delphox
- Froakie
- Frogadier
- Greninja
- Litleo
- Pyroar
- Falbébe
- Floette
- Florges
- Pancham
- Pangoro
- Espurr
- Meowstic
- Inkay
- Malamar
- Binacle
- Barbaracle
- Skrelp
- Dragalge
- Clauncher
- Clawitzer
- Helioptile
- Heliolisk
- Dedenne
- Klefki
- Bergmite
- Avalugg
- Rowlet
- Dartrix
- Decidueye
- Litten
- Torracat
- Incineroar
- Popplio
- Brionne
- Primarina
- Crabrawler
- Crabominable
- Oricorio
- Mareanie
- Toxapex
- Dewpider
- Araquanid
- Fomantis
- Lurantis
- Morelull
- Shiinotic
- Salandit
- Salazzle
- Bounsweet
- Steenee
- Tsareena
- Comfey
- Oranguru
- Passimian
- Sandygast
- Palossand
- Togedemaru
- Bruxish
- Wooloo
- Dubwool
- Perrserker
- Sirfetch'd
- Runerigus
- Sprigatito
- Floragato
- Meowscarada
- Fuecoco
- Crocalor
- Skeledirge
- Quaxly
- Quaxwell
- Quaquaval
- Pawmi
- Pawmo
- Pawmot
- Smoliv
- Dolliv
- Arboliva
- Varoom
- Revavroom
- Greavard
- Houndstone
- Cetoddle
- Cetitan
- Annihilape
- Clodsire
5km Buddy Distance chart
- Onix
- Hitmonlee
- Hitmonchan
- Chansey
- Mr. Mime
- Scyther
- Jynx
- Electabuzz
- Magmar
- Pinsir
- Lapras
- Eevee
- Vaporeon
- Jolteon
- Flareon
- Omanyte
- Omastar
- Kabuto
- Kabutops
- Aerodactyl
- Snorlax
- Dratini
- Dragonair
- Dragonite
- Mareep
- Flaaffy
- Ampharos
- Sudowoodo
- Espeon
- Umbreon
- Unown
- Pineco
- Forretress
- Gligar
- Steelix
- Scizor
- Delibird
- Mantine
- Skarmory
- Tyrogue
- Hitmontop
- Smoochum
- Elekid
- Magby
- Miltank
- Blissey
- Larvitar
- Pupitar
- Tyranitar
- Ralts
- Kirlia
- Gardevoir
- Slakoth
- Vigoroth
- Slaking
- Nincada
- Ninjask
- Shedinja
- Sableye
- Mawile
- Trapinch
- Vibrava
- Flygon
- Feebas
- Milotic
- Castform
- Kecleon
- Tropius
- Chimecho
- Absol
- Relicanth
- Bagon
- Shelgon
- Salamence
- Beldum
- Metang
- Metagross
- Shinx
- Luxio
- Luxray
- Cranidos
- Rampardos
- Shieldon
- Bastiodon
- Pachirisu
- Driloon
- Drifblim
- Chingling
- Bonsly
- Mime Jr.
- Happiny
- Chatot
- Spiritomb
- Gible
- Gabite
- Garchomp
- Munchlax
- Riolu
- Lucario
- Skorupi
- Drapion
- Carnivine
- Mantyke
- Electivire
- Magmortar
- Leafeon
- Glaceon
- Gliscor
- Gallade
- Rotom
- Timburr
- Gurdurr
- Conkeldurr
- Throh
- Sawk
- Sandile
- Krokorok
- Krookodile
- Sigilyph
- Tirtouga
- Carracosta
- Archen
- Archeops
- Zorua
- Zoroark
- Alomomola
- Klink
- Klang
- Klinklang
- Litwick
- Lampent
- Chandelure
- Axew
- Fraxure
- Haxorus
- Cryogonal
- Stunfisk
- Druddigon
- Golett
- Golurk
- Pawniard
- Bisharp
- Rufflet
- Braviary
- Vullaby
- Mandibuzz
- Deino
- Zweilous
- Hydreigon
- Larvesta
- Volcarona
- Furfrou
- Tyrunt
- Tyrantrum
- Amaura
- Aurorus
- Phantump
- Trevenant
- Pumpkaboo
- Gourgeist
- Noibat
- Noivern
- Rockruff
- Lycanroc
- Turtonator
- Drampa
- Jangmo-o
- Hakamo-o
- Kommo-o
- Mr. Rime
- Falinks
- Wyrdeer
- Kleavor
- Bombirdier
- Frigibax
- Arctibax
- Baxcalibur
- Gimmighoul
- Gholdengo
20km Buddy Distances explained
All Legendary Pokemon and Ultra Beast require 20km before they drop Candy, such as the Articuno, Moltres and Zapdos from Gen 1, Lugia and Ho-Oh from Gen 2, and so on.
With such high distances, we recommend you use Rare Candy to level up these creatures instead.
The World of Wonders season has come to Pokémon Go. Wiglett can now be caught as part of Rediscover Kanto, but don't forget to complete the World of Wonders quest. Don't forget to try out Routes, Gift Exchange and Party Play while you're hunting down rare Pokémon, fighting in the Go Battle League or competing in PokéStop Showcases.
Other things to know about Pokémon Go's Buddy system

- While most Pokémon will be alongside you on the Trainer screen, walking a total of 10km with Pikachu as your Buddy will see him sit on your shoulder, showing a sign of your close friendship. Togepi, meanwhile, will be held in your arms. Cute!
- Contrary to some rumours, you don't receive any XP for walking your Buddy Pokémon, just Candy.
- It's believed there is no daily limit to the amount of Candy you can earn through the Buddy system in one day.
- Like hatching Eggs, using Pokémon Go Plus will contribute to the distance walked for your Buddy.
- Any Pokémon currently assigned as your Buddy can't be withdrawn from your inventory to defend a friendly Gym. To get around this, be sure to use a lower tier of that Pokémon evolution family (a Dratini instead of a Dragonite, for example) or just another of that same creature. You can, however, use it to fight in Gyms.
- All creatures in the same evolution chain require the same amount of walking distance for Candy to drop - allowing you to put their later evolutions to work in Gyms.
- Pokémon that have fainted can be used as your Buddy.
- Evolving your Pokémon will reset your Candy counter, so time those evolutions wisely.
- Buddy distances are used to calculate the cost of unlocking a second move for a Pokémon. The further the distance, the higher the cost.