A Call from the Depths in Zelda Tears of the Kingdom explained
Where to find all four statue eyes to complete A Call from the Depths side quest.

To complete the A Call from the Depths quest in Zelda: Tears of the Kingdom, you need to travel to four different Chasms around the Great Plateau and track down eyes that a statue in the Depths is missing. Then, it's your job to return the eyes to the statue, but several obstacles stand in your way.
As with many other quests in Zelda: Tears of the Kingdom, this one will force you to use your problem-solving skills to get to your end goal. Before you embark on this quest, we recommend collecting quite a few Brightbloom Seeds as you'll be in the Depths a lot.
Without further ado, we're going to show you how to complete the A Call from the Depths quest in Zelda: Tears of the Kingdom.
On this page:
If you'd like to learn more about Link's adventure, visit our Zelda: Tears of the Kingdom walkthrough.
How to start the A Call from the Depths quest in Zelda Tears of the Kingdom
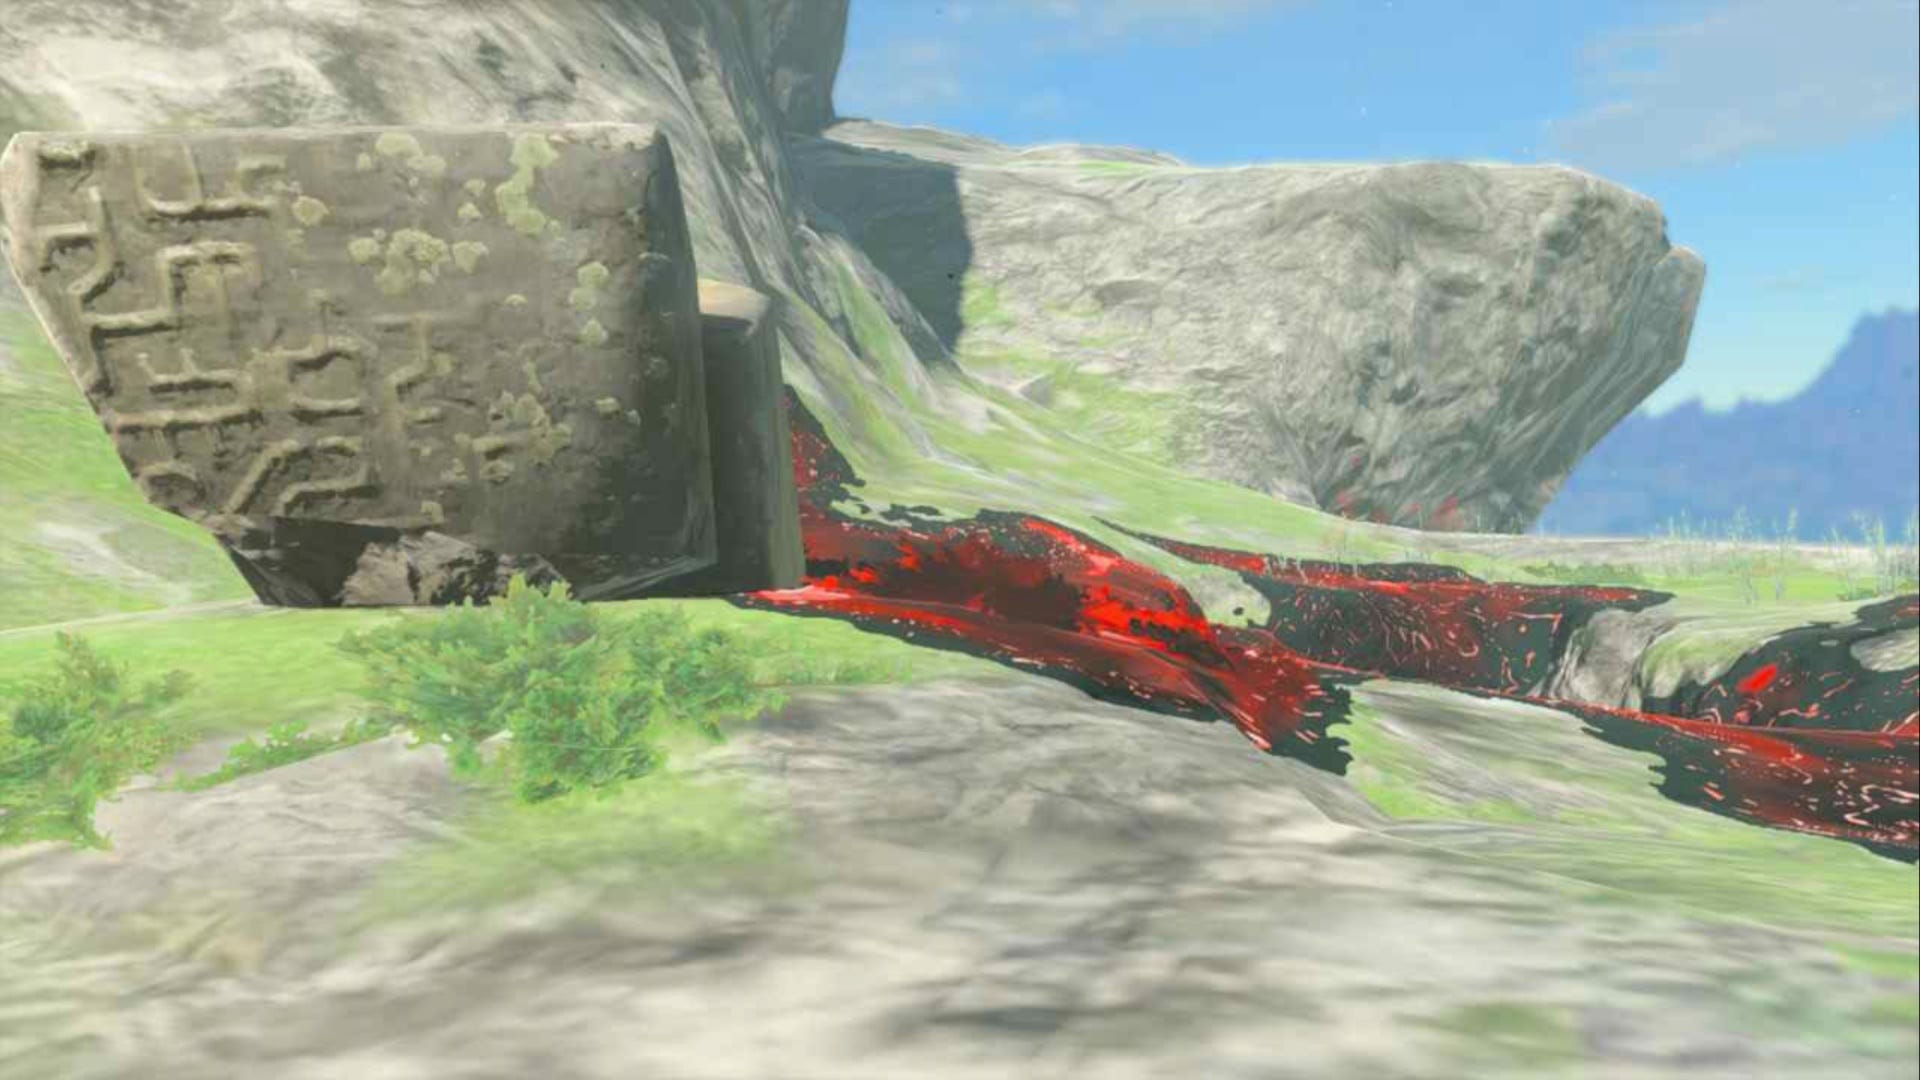
To start the A Call from the Depths side quest in Zelda Tears of the Kingdom, you need to head to a blocked entrance at these coordinates (-0571, -1526, 0021). We've marked its exact location on the map below:
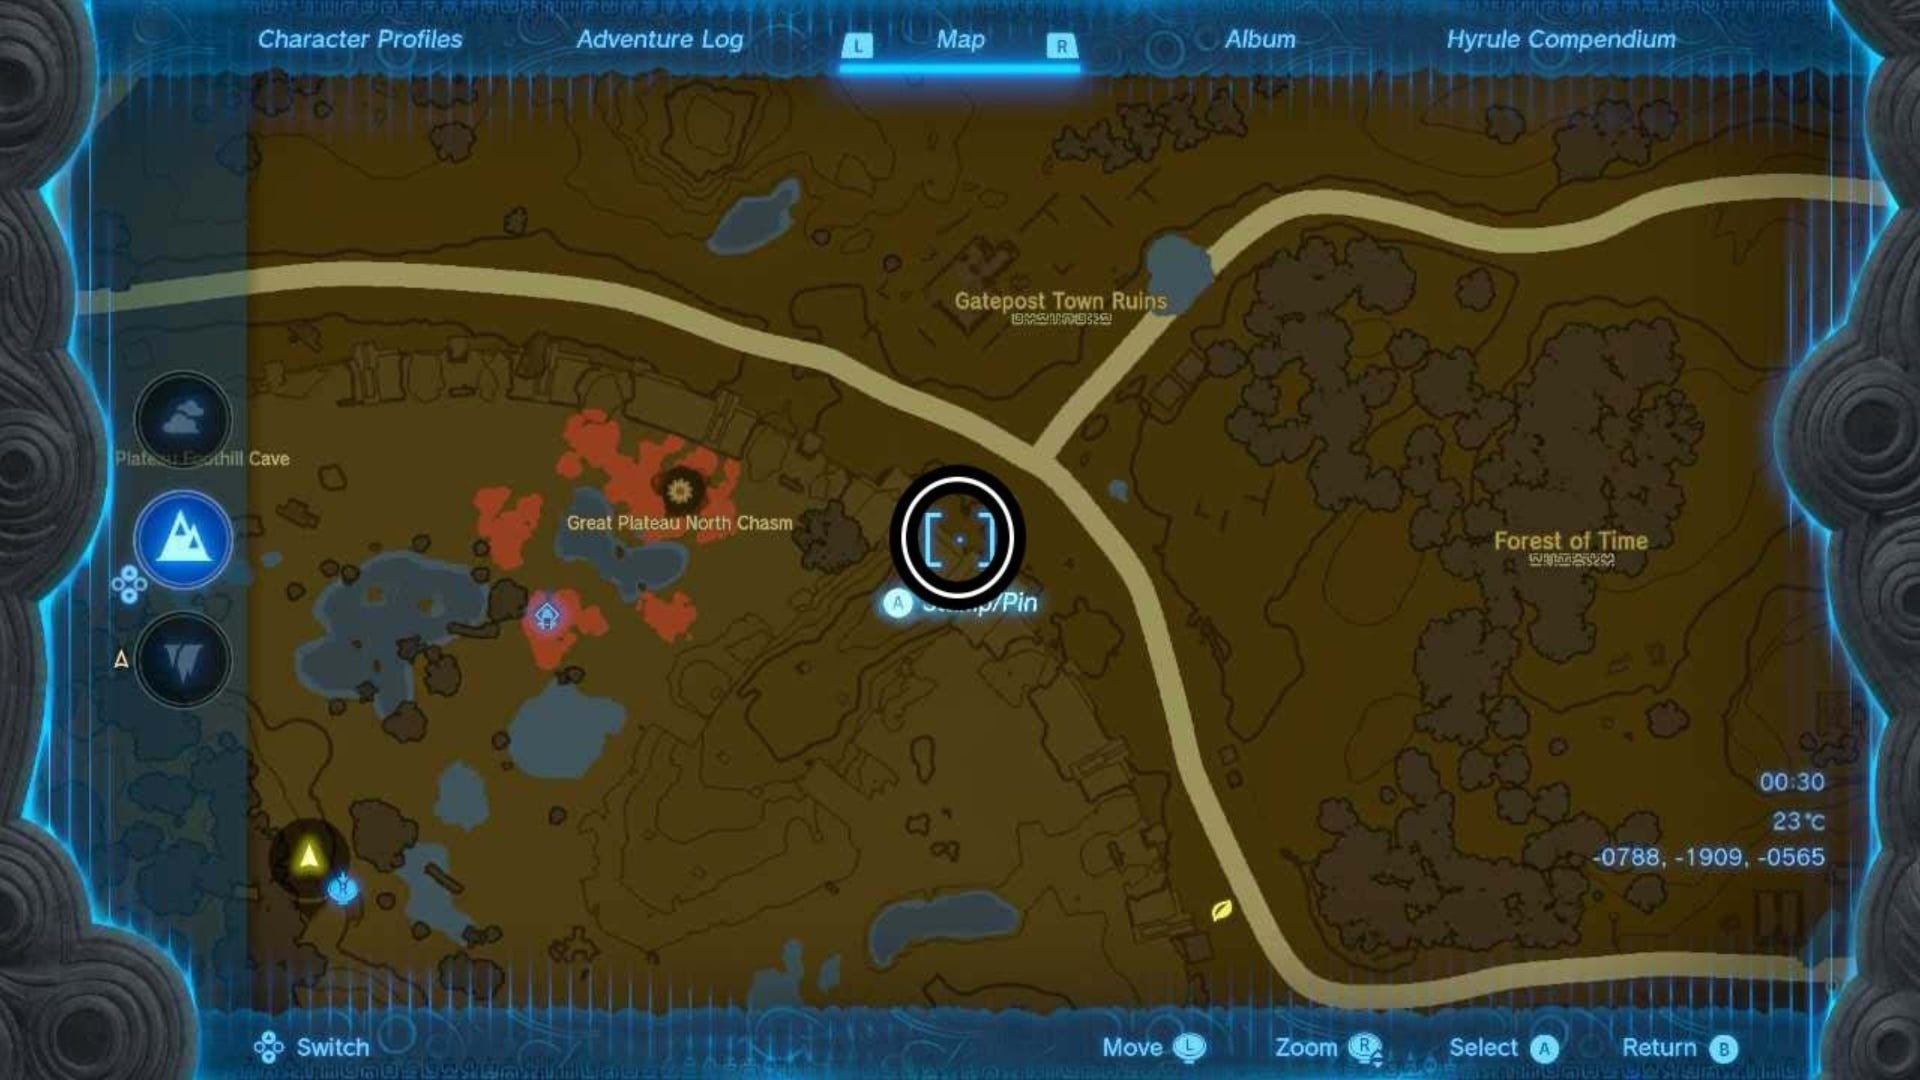
This should take you to the southern part of Hyrule Field, east of Great Plateau North Chasm, west of the Forest of Time, and south of Gatepost Town Ruins. This is also near the Kyokugon Shrine.
When you get here, you should see a doorway blocked with stones. Break these however you want to, we threw a Bomb Flower.
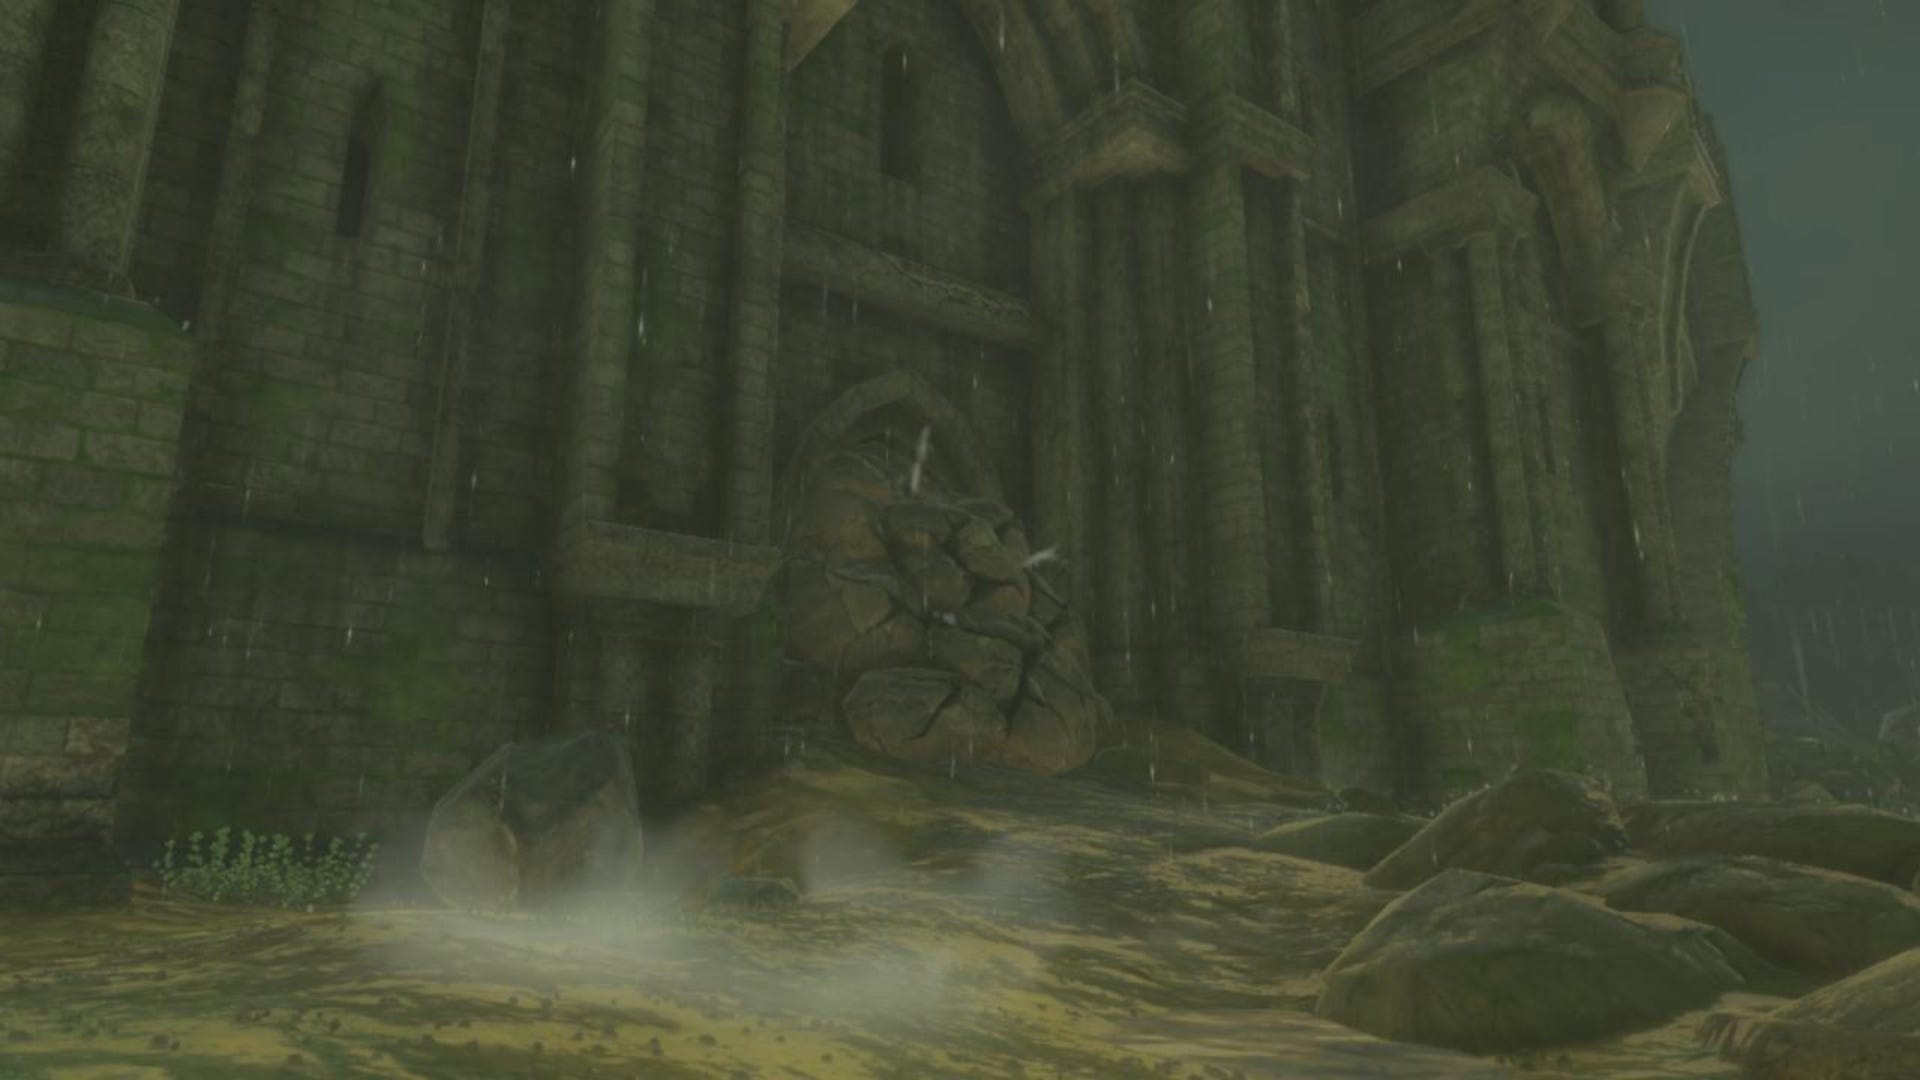
When you destroy the rocks, water will drain out from above and reveal a new entrance where the rocks used to be.
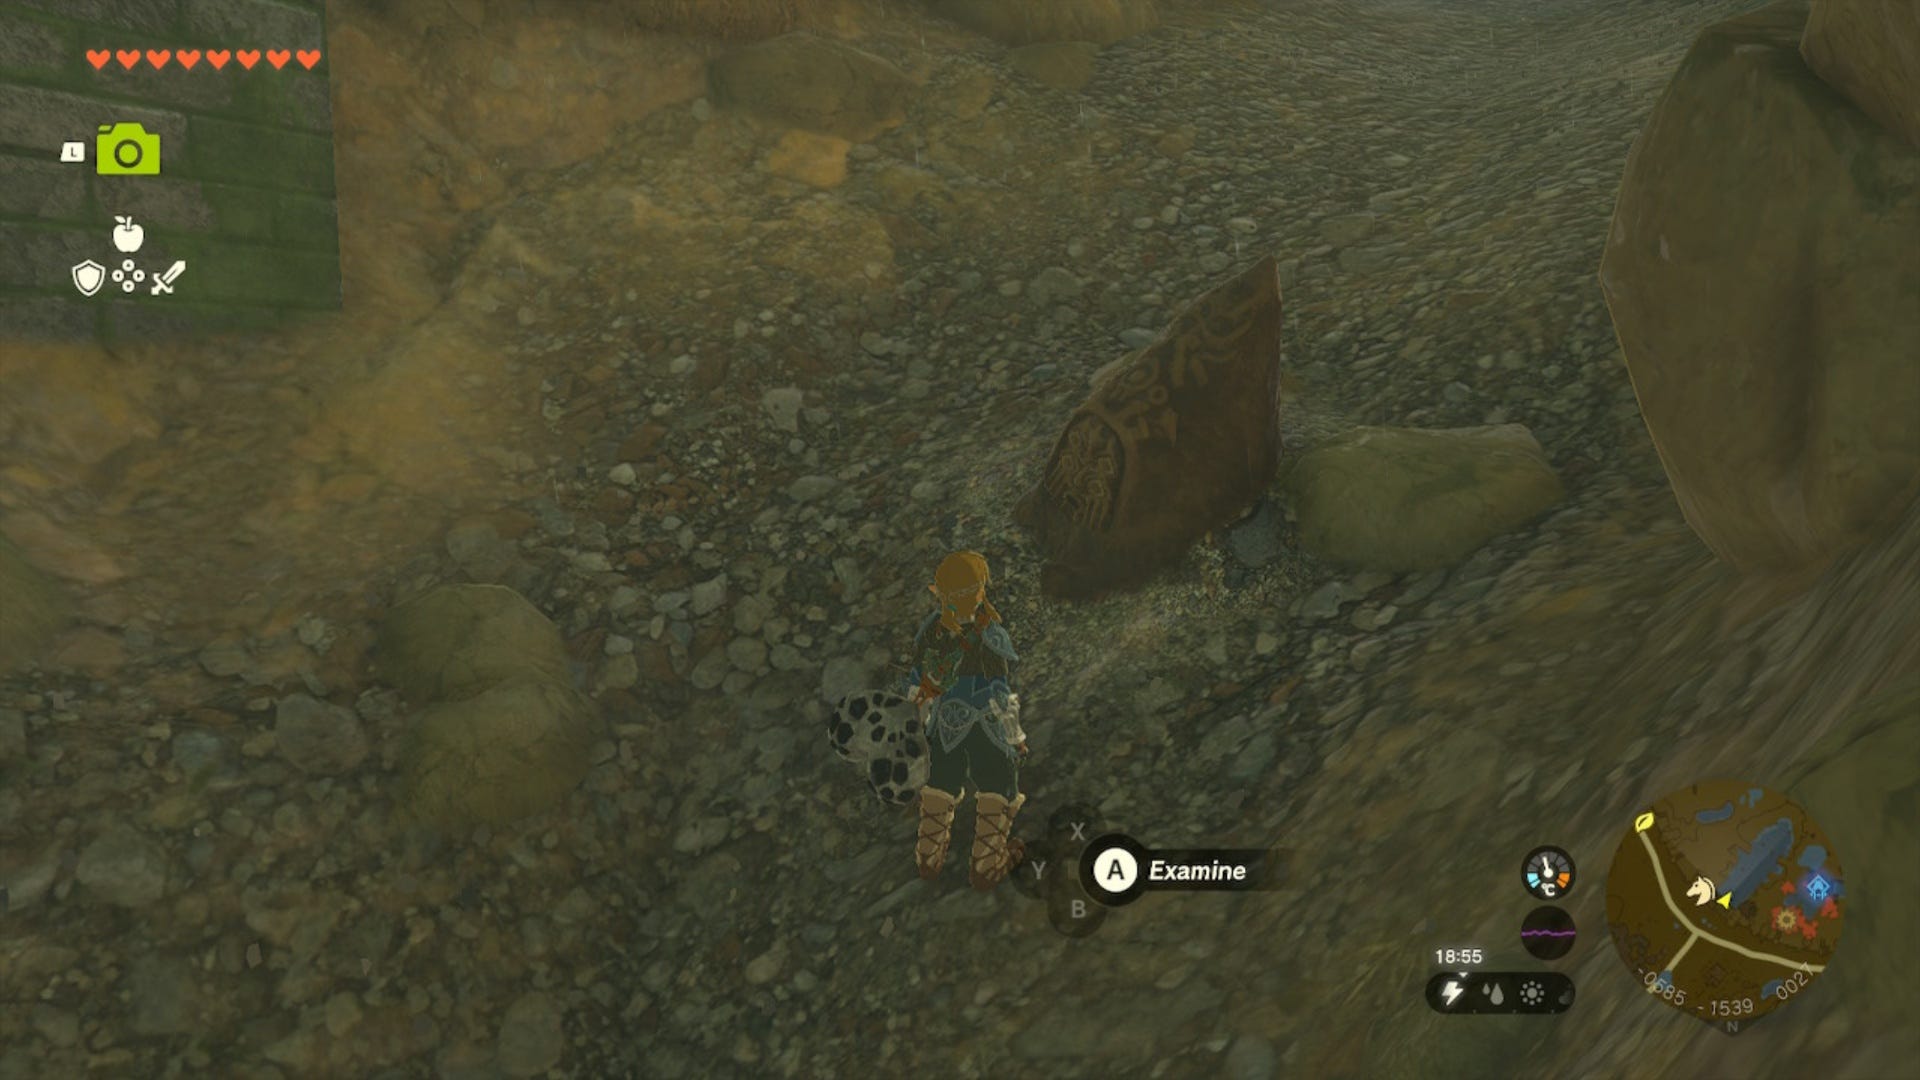
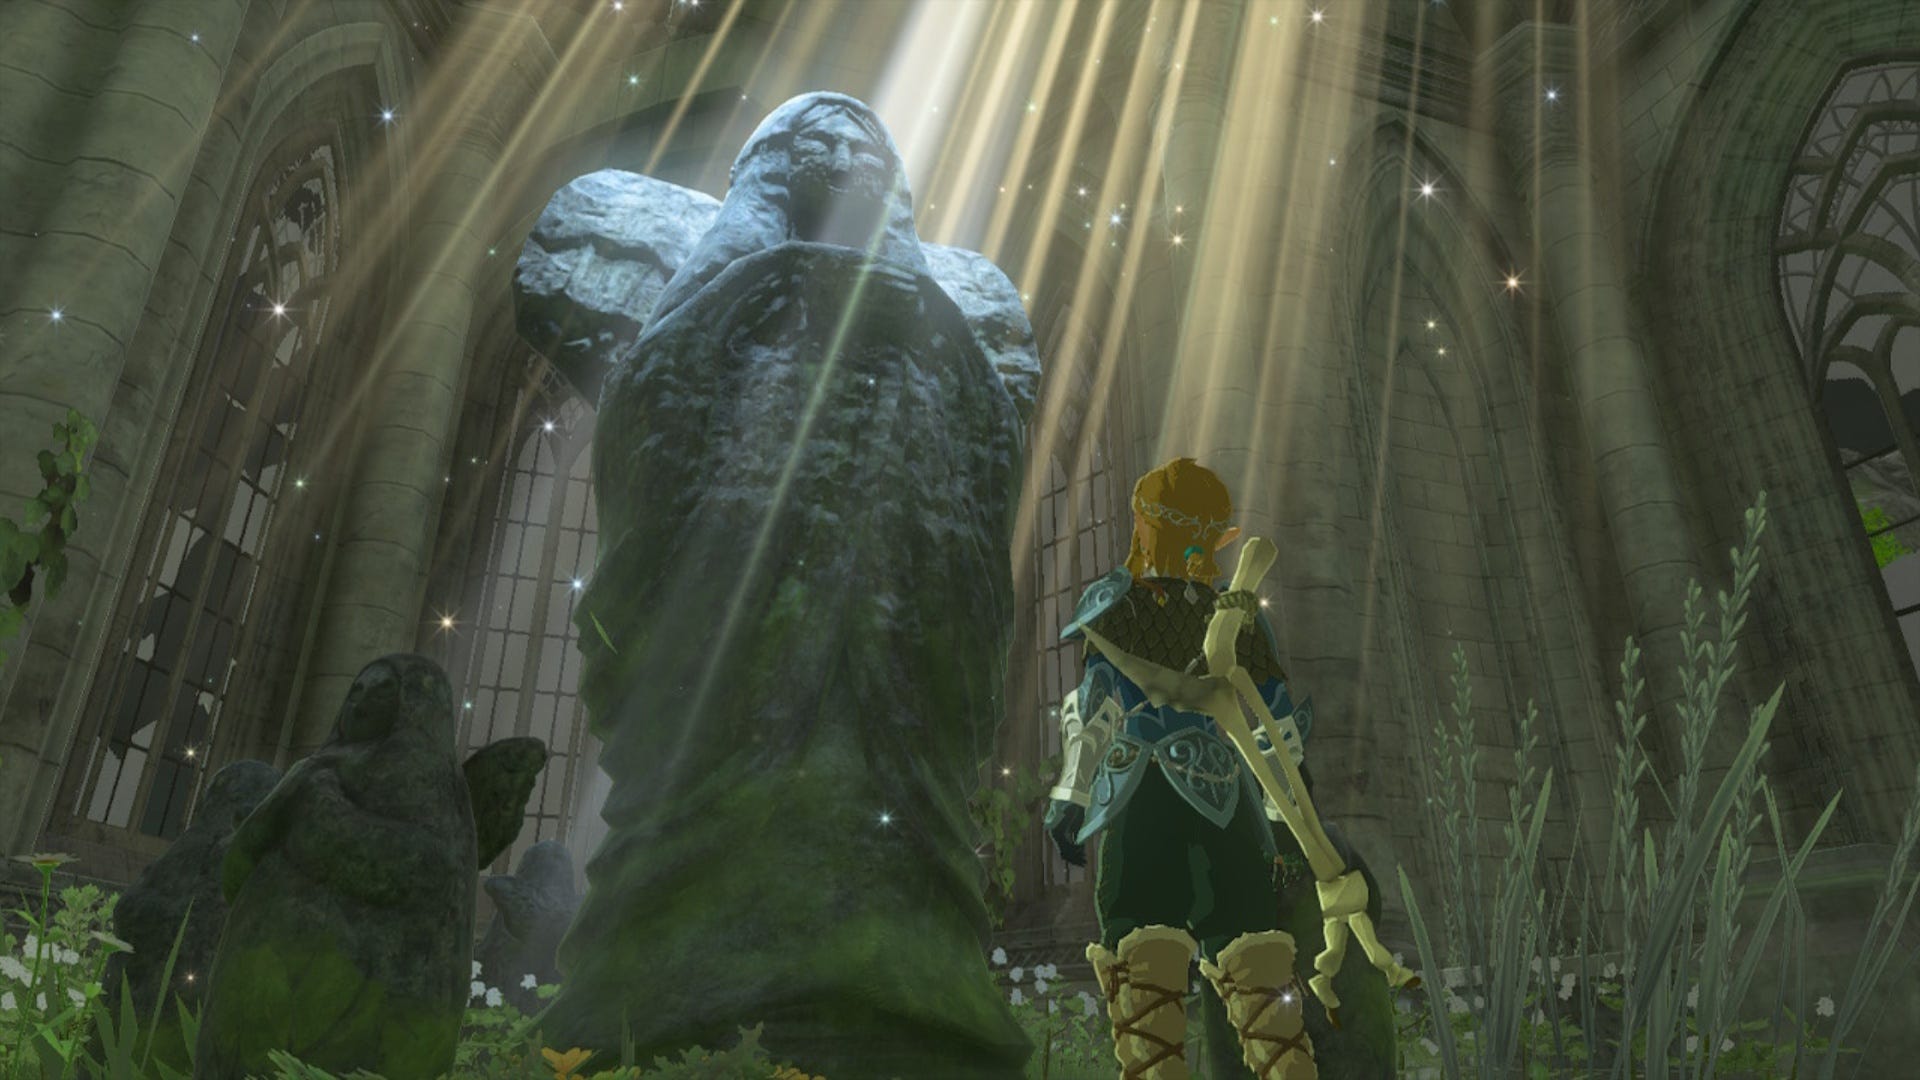
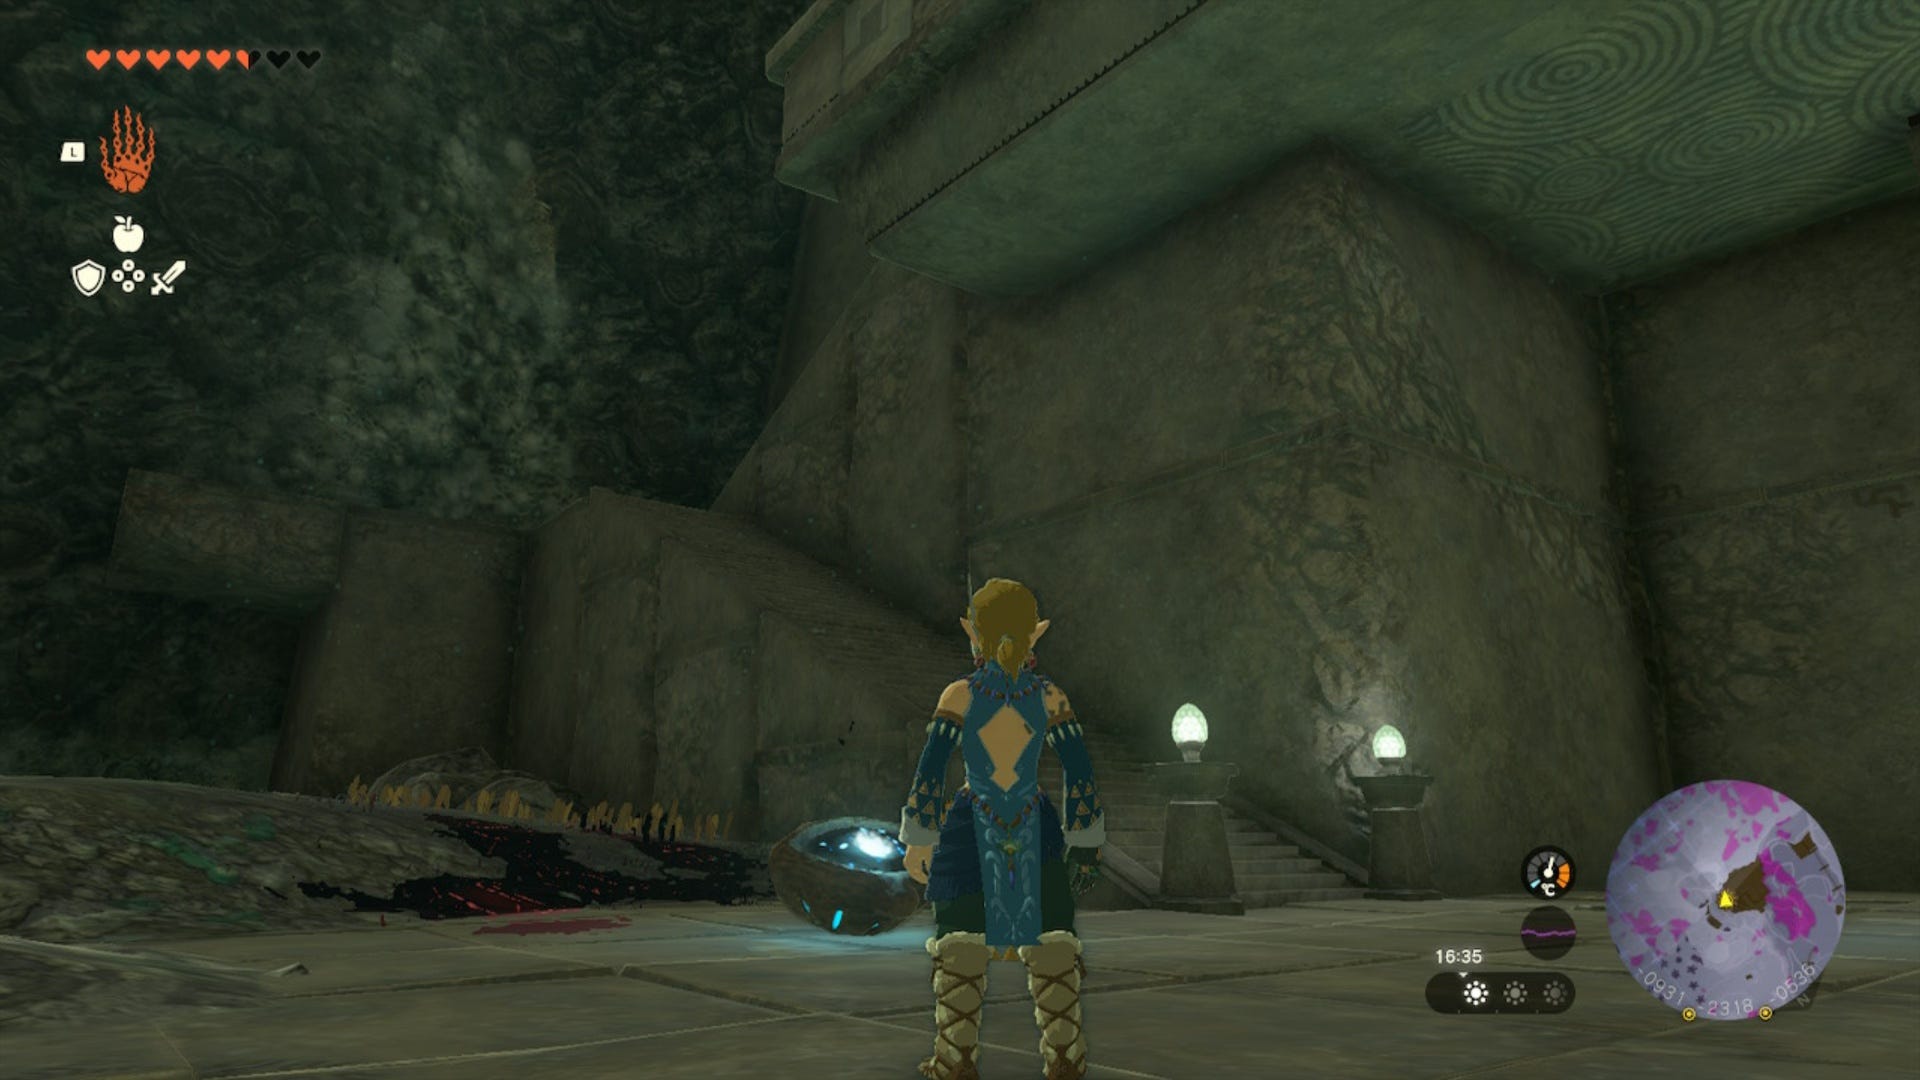
Head through this entrance and speak to the statue that's just a few steps through the opening at (-0585, -1539, 0027). They will then tell you that you need to find them again in the Temple of Time Ruins.
You can find the Temple of Time Ruins at (-0811, -1968, 0116). We've marked the location of the Ruins and the route we took to get there on the map below:
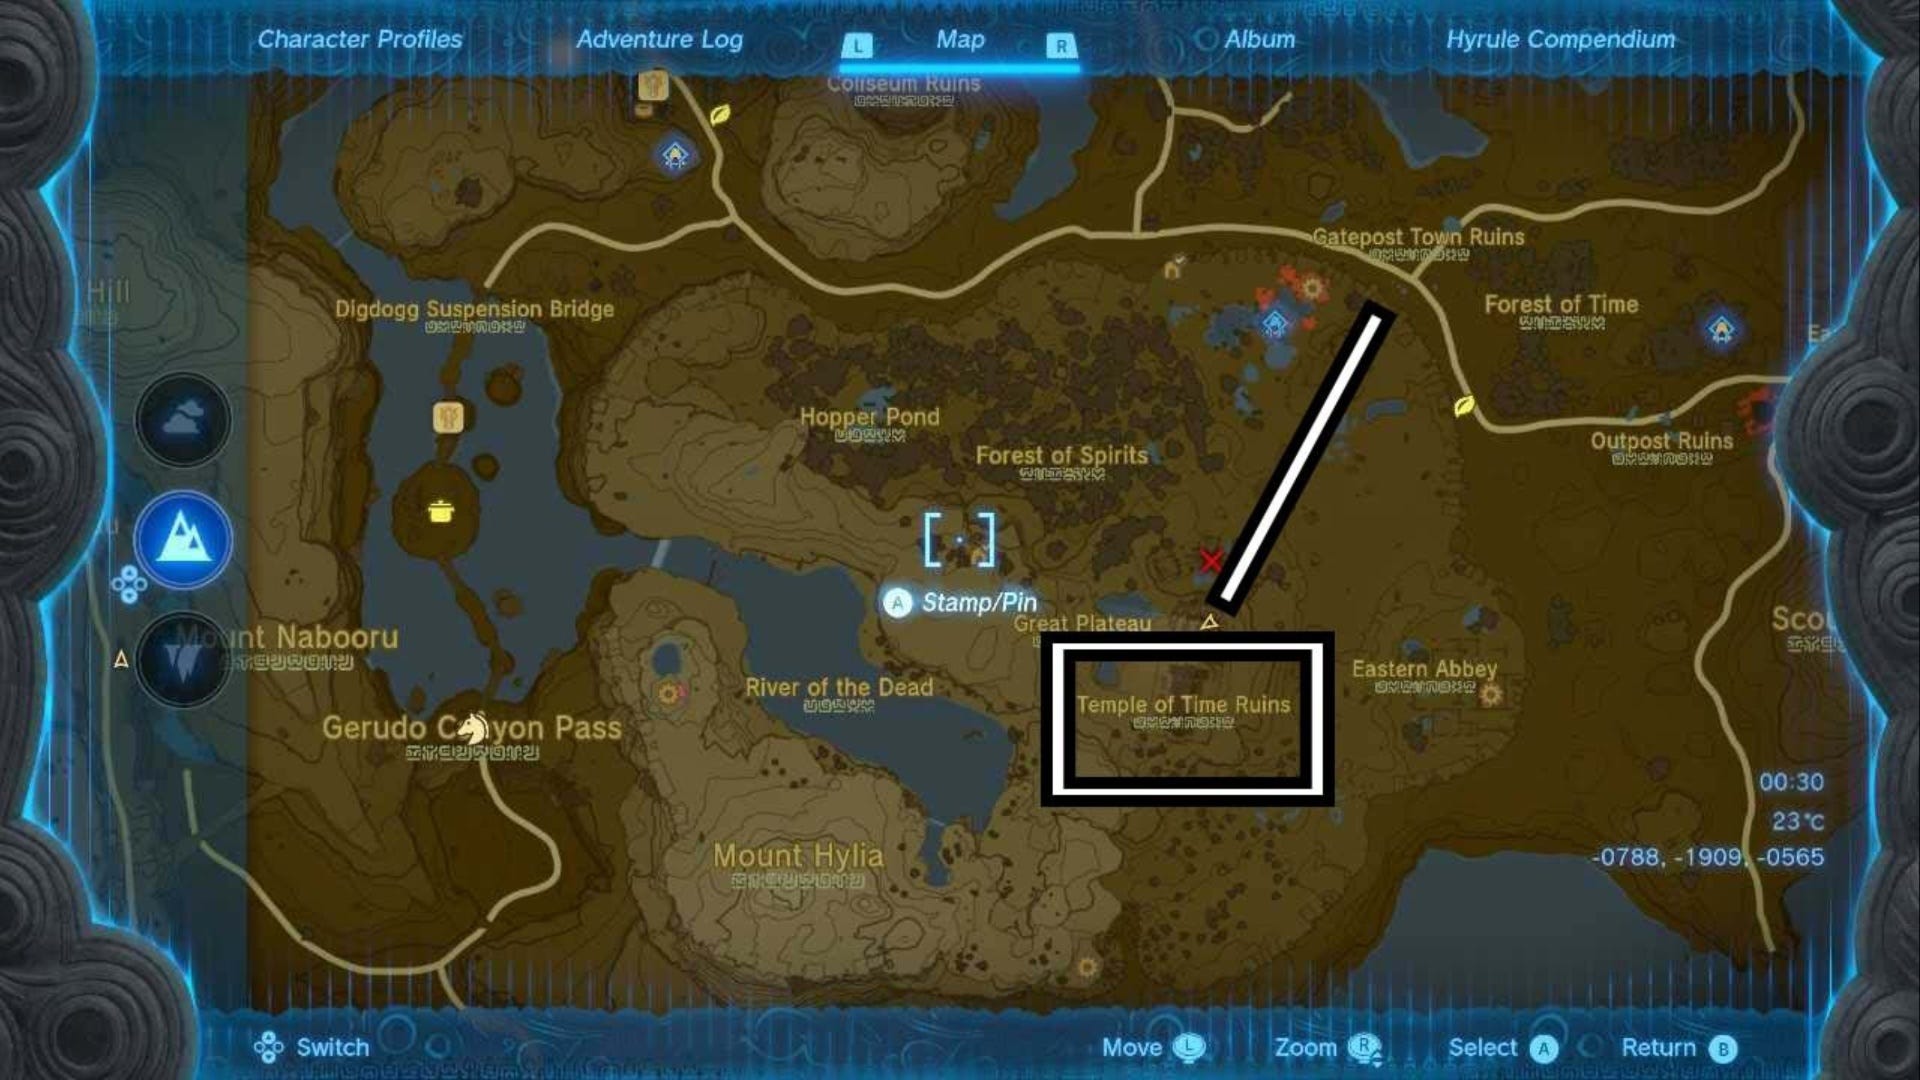
Once you get to the Ruins, head inside and speak to the large Goddess Statue here. This will then begin the A Call from the Depths quest.
You can also get a hint about starting this quest by speaking to this statue before going to free the one underwater.
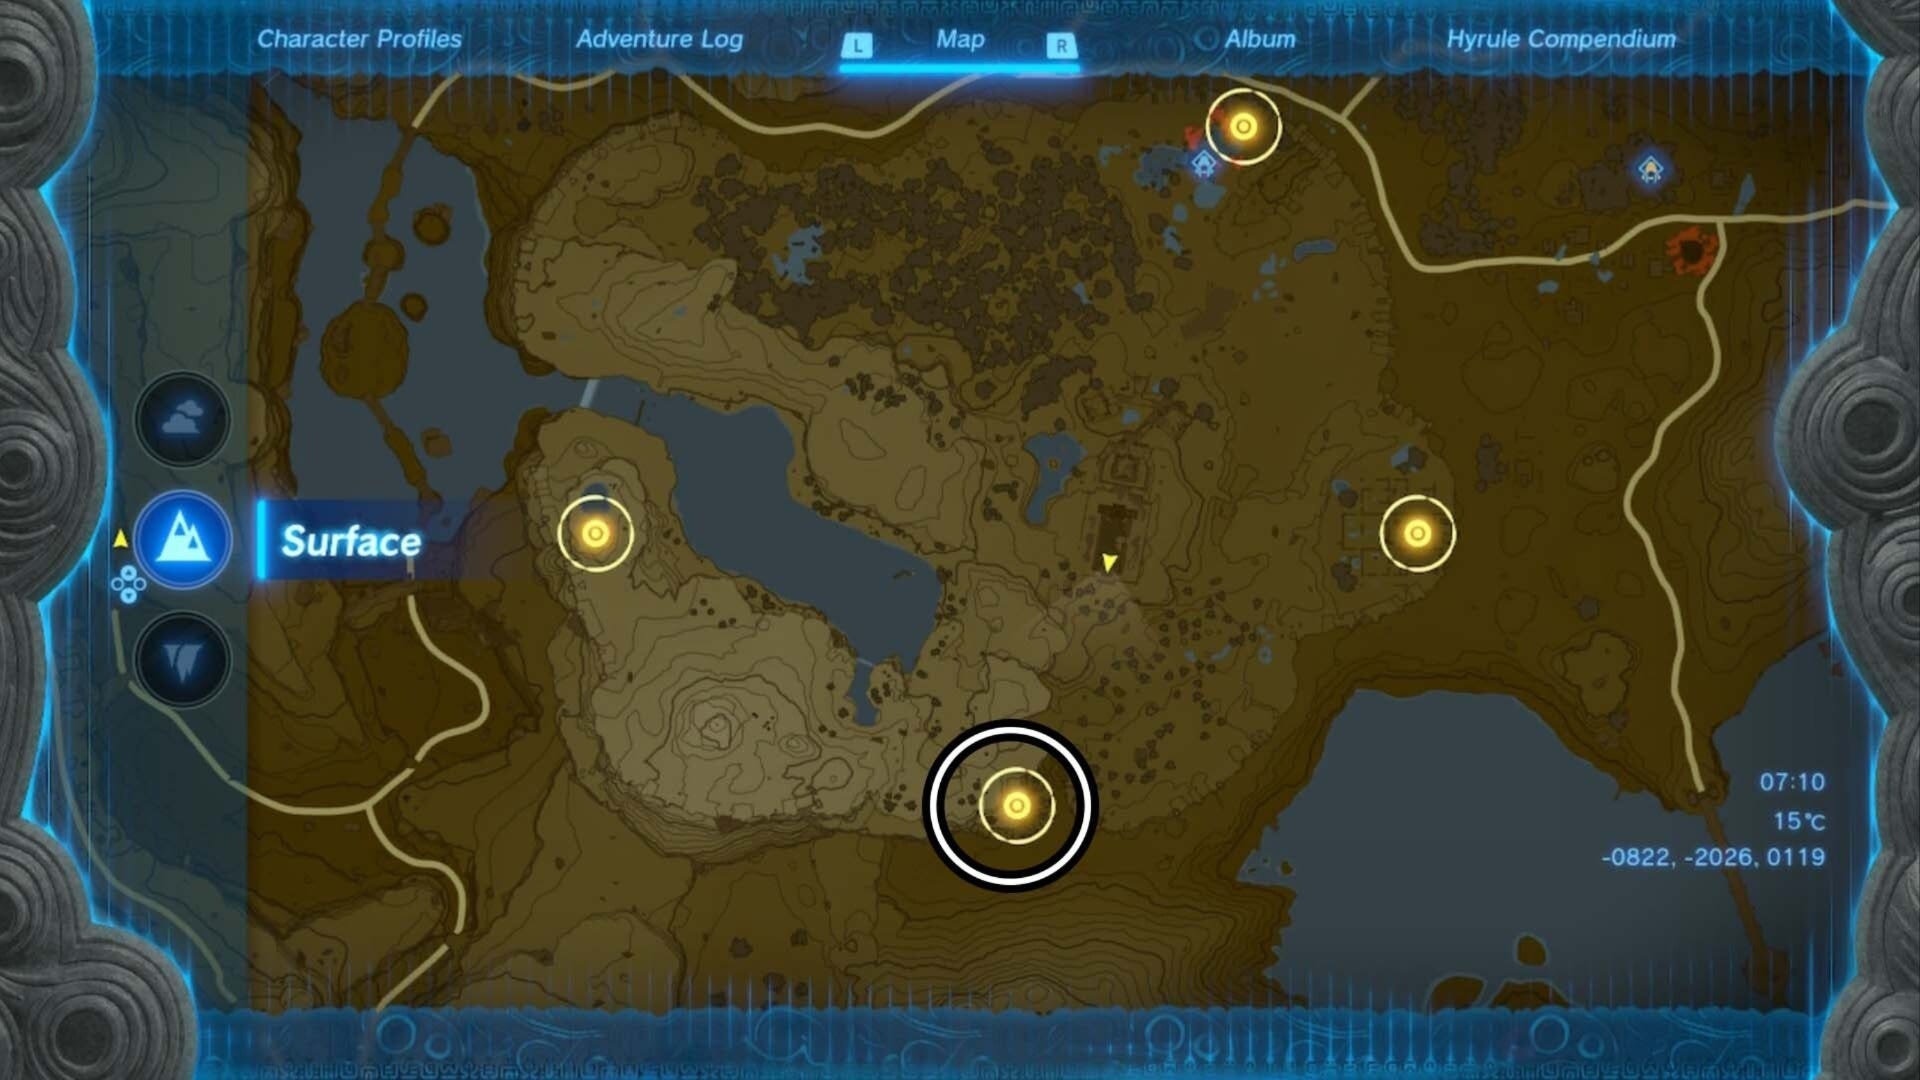
The statue will mark four separate Chasms on your map. All of them are in the Great Plateau area, you need to go each Chasm and find an eye at each one. Then, throw the eye into the nearest Chasm and return it to the real statue in the Depths below.
Great Plateau West Chasm eye location in Zelda Tears of the Kingdom
We're going to start with the Great Plateau West Chasm that's west of the River of the Dead and east of Gerudo Canyon Pass. We've marked its exact location on the map below but the Great Plateau West Chasm coordinates are (-1434, -1980, 0232).

There are multiple ways to reach this Chasm, including simply travelling across the Great Plateau, but here's how we did it.
Go to Gerudo Canyon Pass and up to the point where Naia is guarding the entrance to the Canyon. Then, use Ascend to get up to the very top of the stone archway above Naia (you may need to use Ascend a few times on different parts to get all the way to the top).
Then, once at the top, glide across to the cliff that's just below the Chasm on your map and look around for a piece of rock that has fallen from the sky. If there isn't one there you can always try to climb up to the Chasm or wait for one to appear nearby.
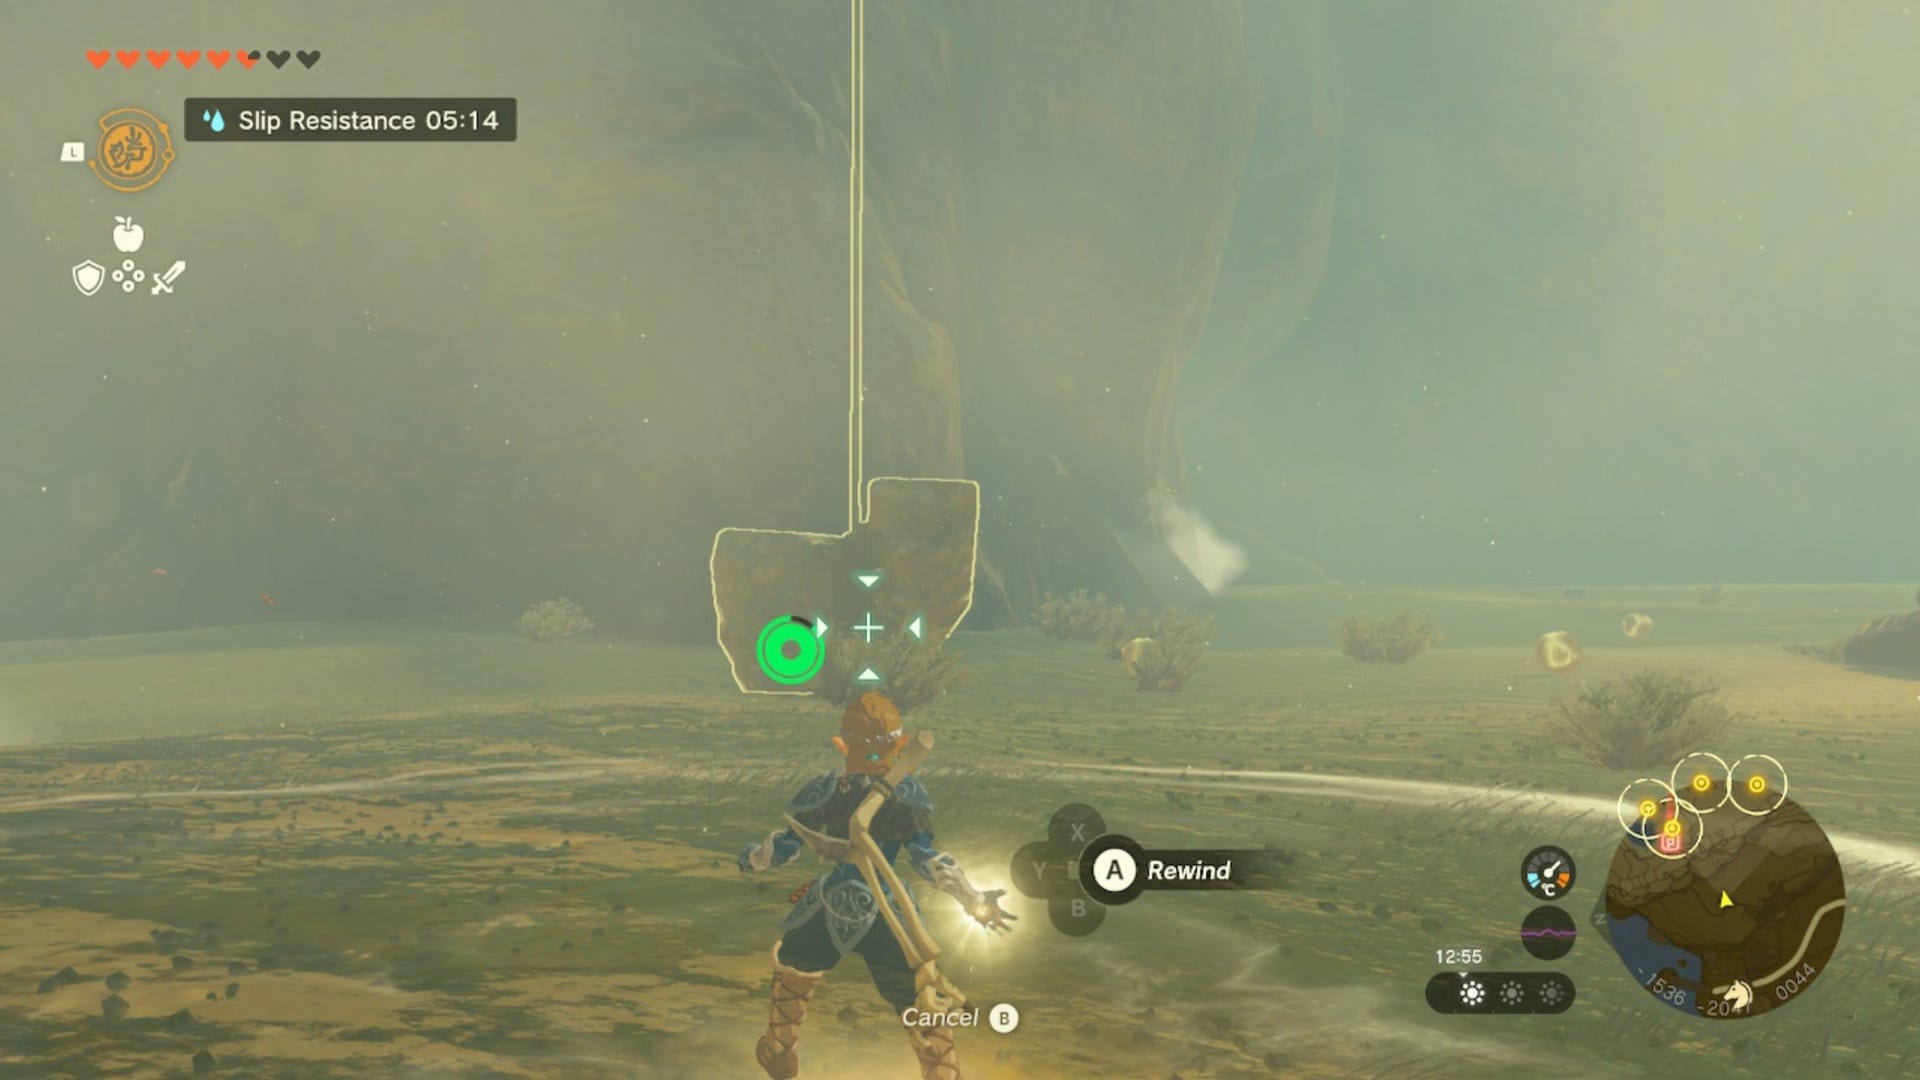
Once you have your fallen rock, climb onto it and use Rewind to send it back into the sky. Once you are high enough, use your Paraglider to jump off and float down to the Chasm.
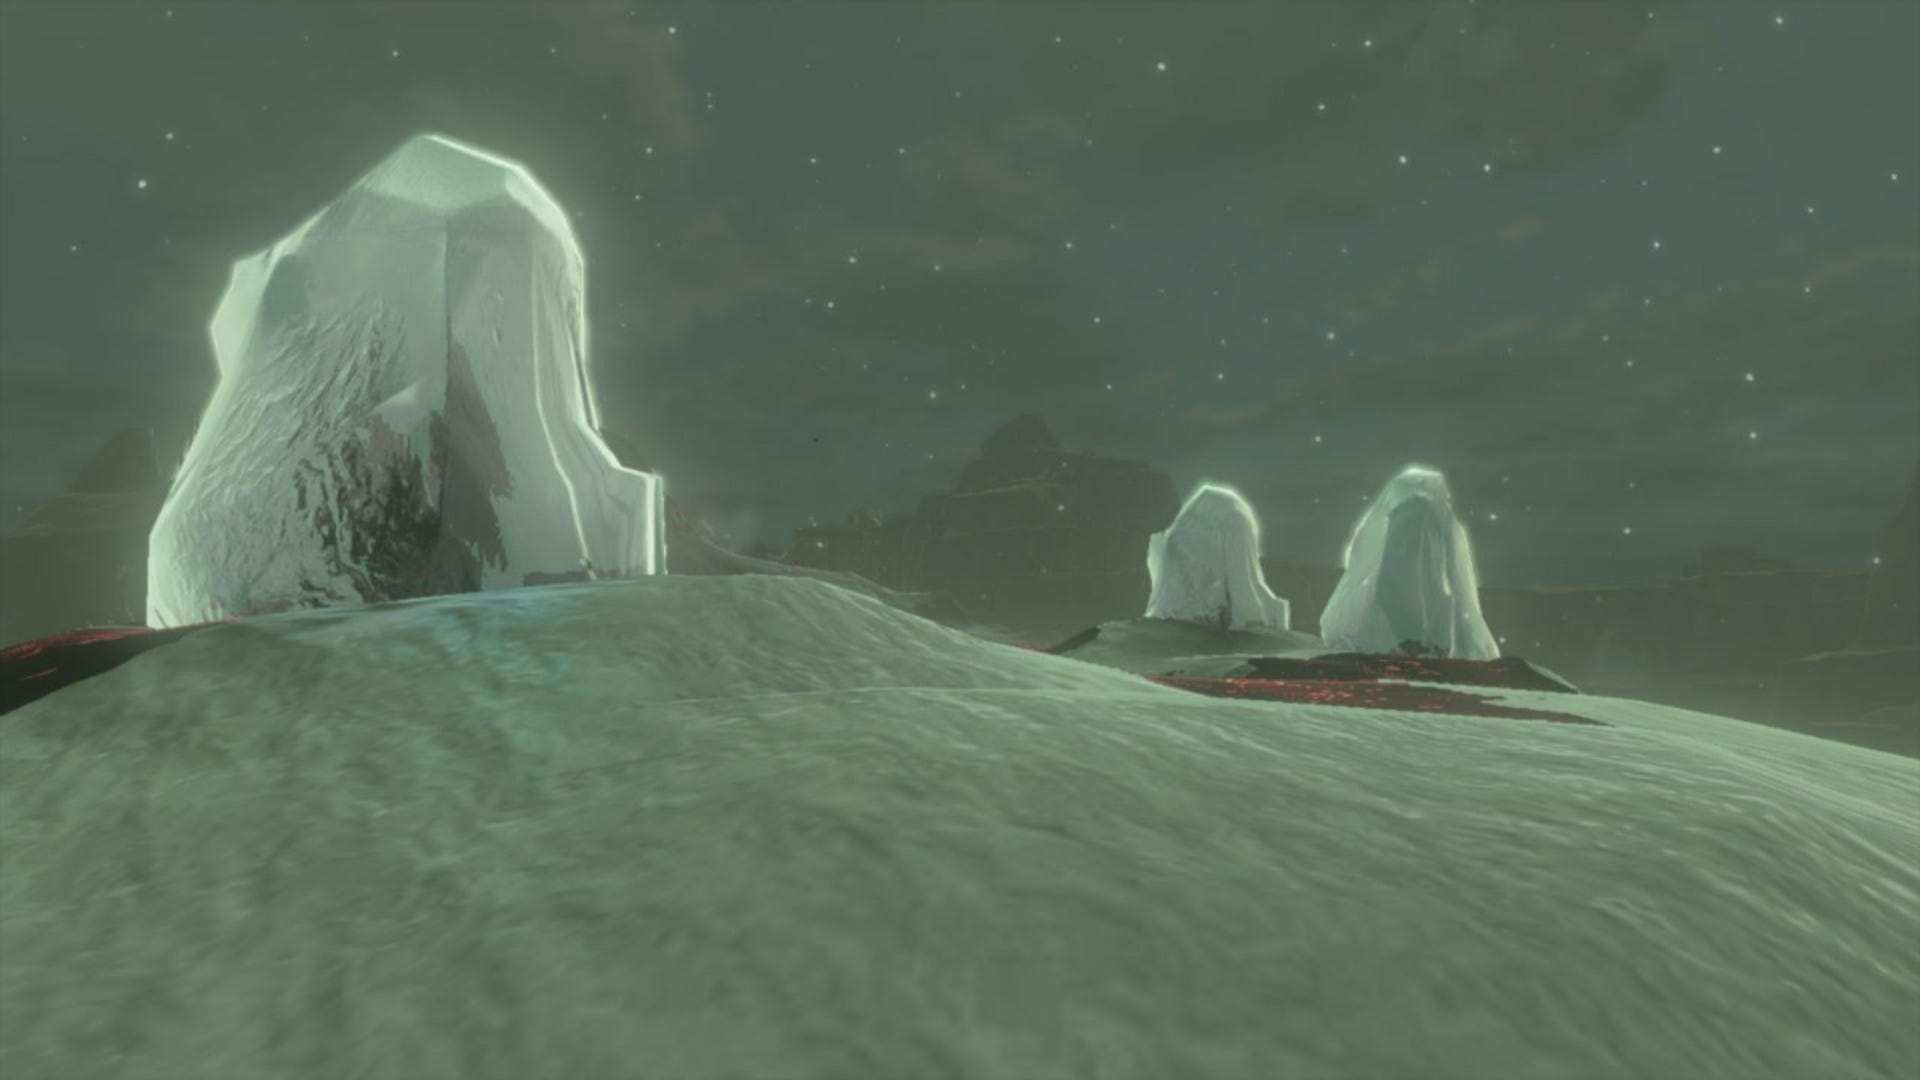
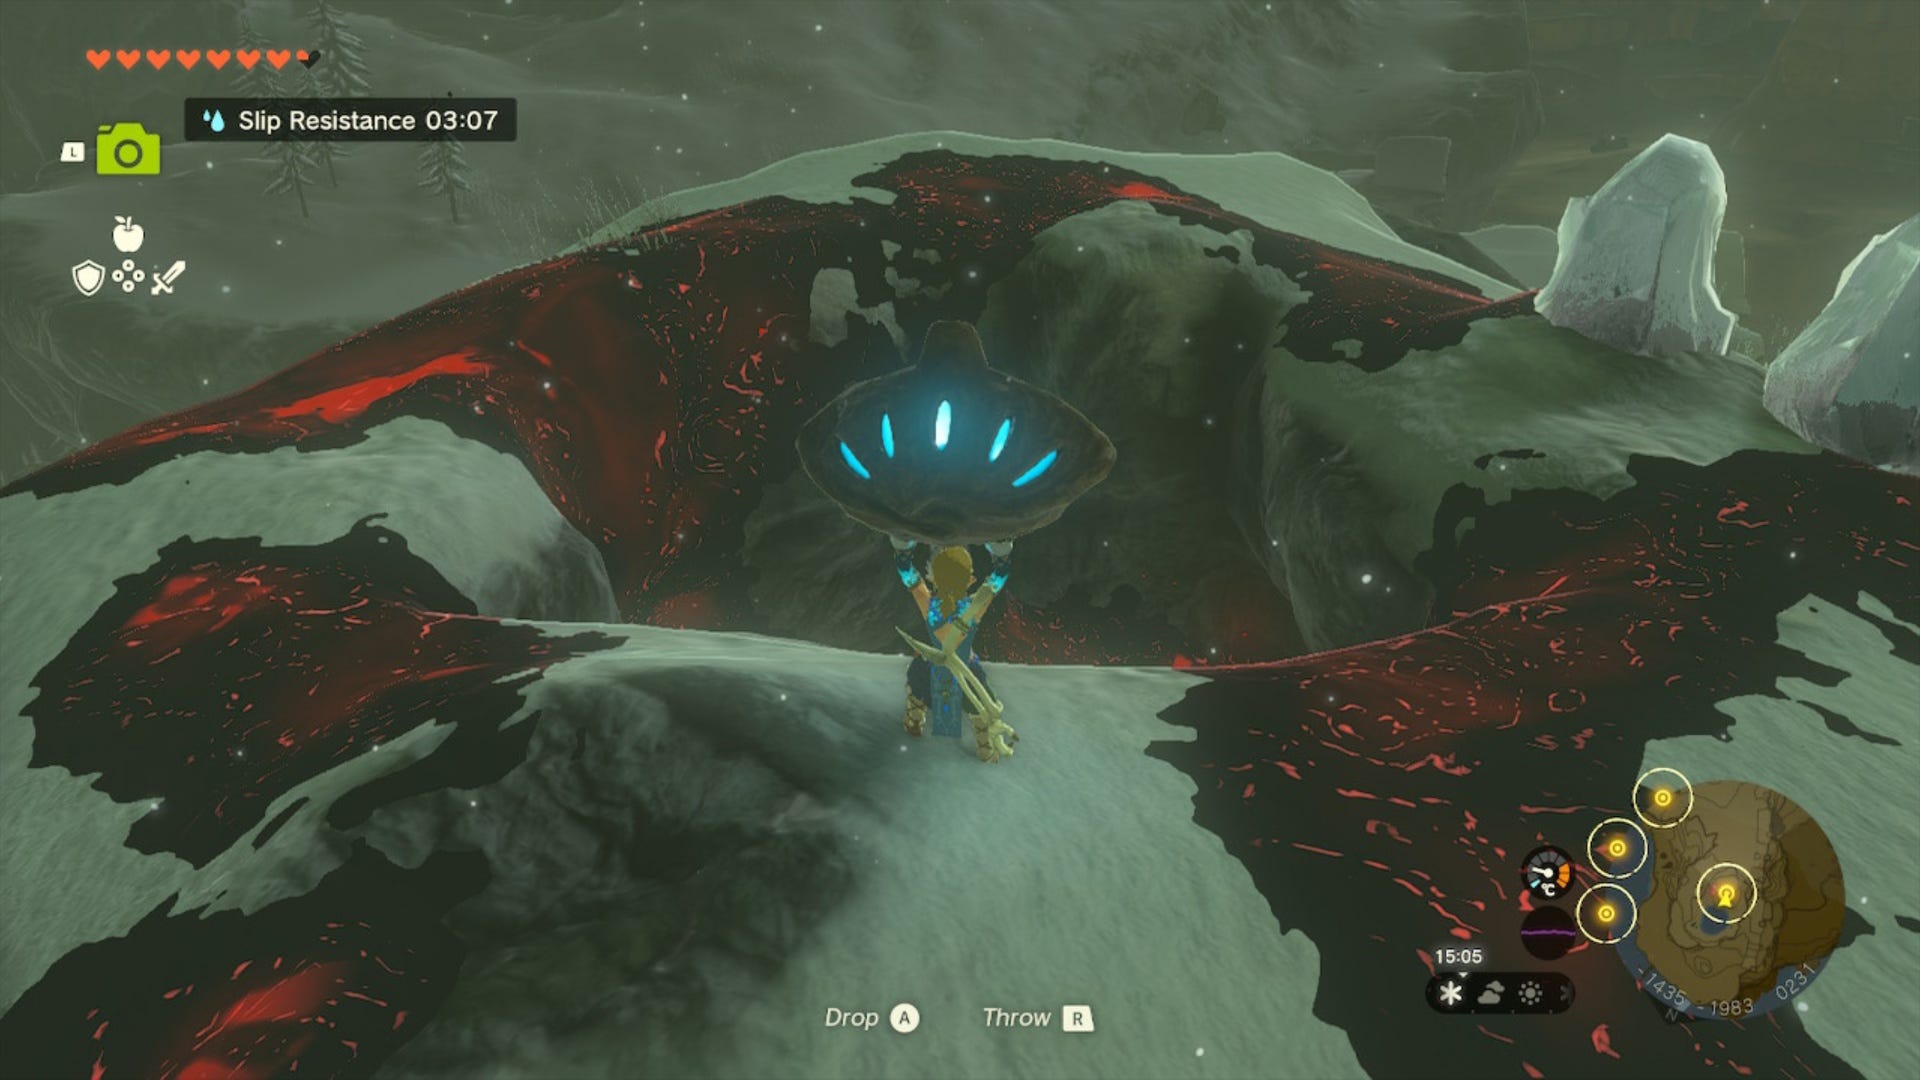
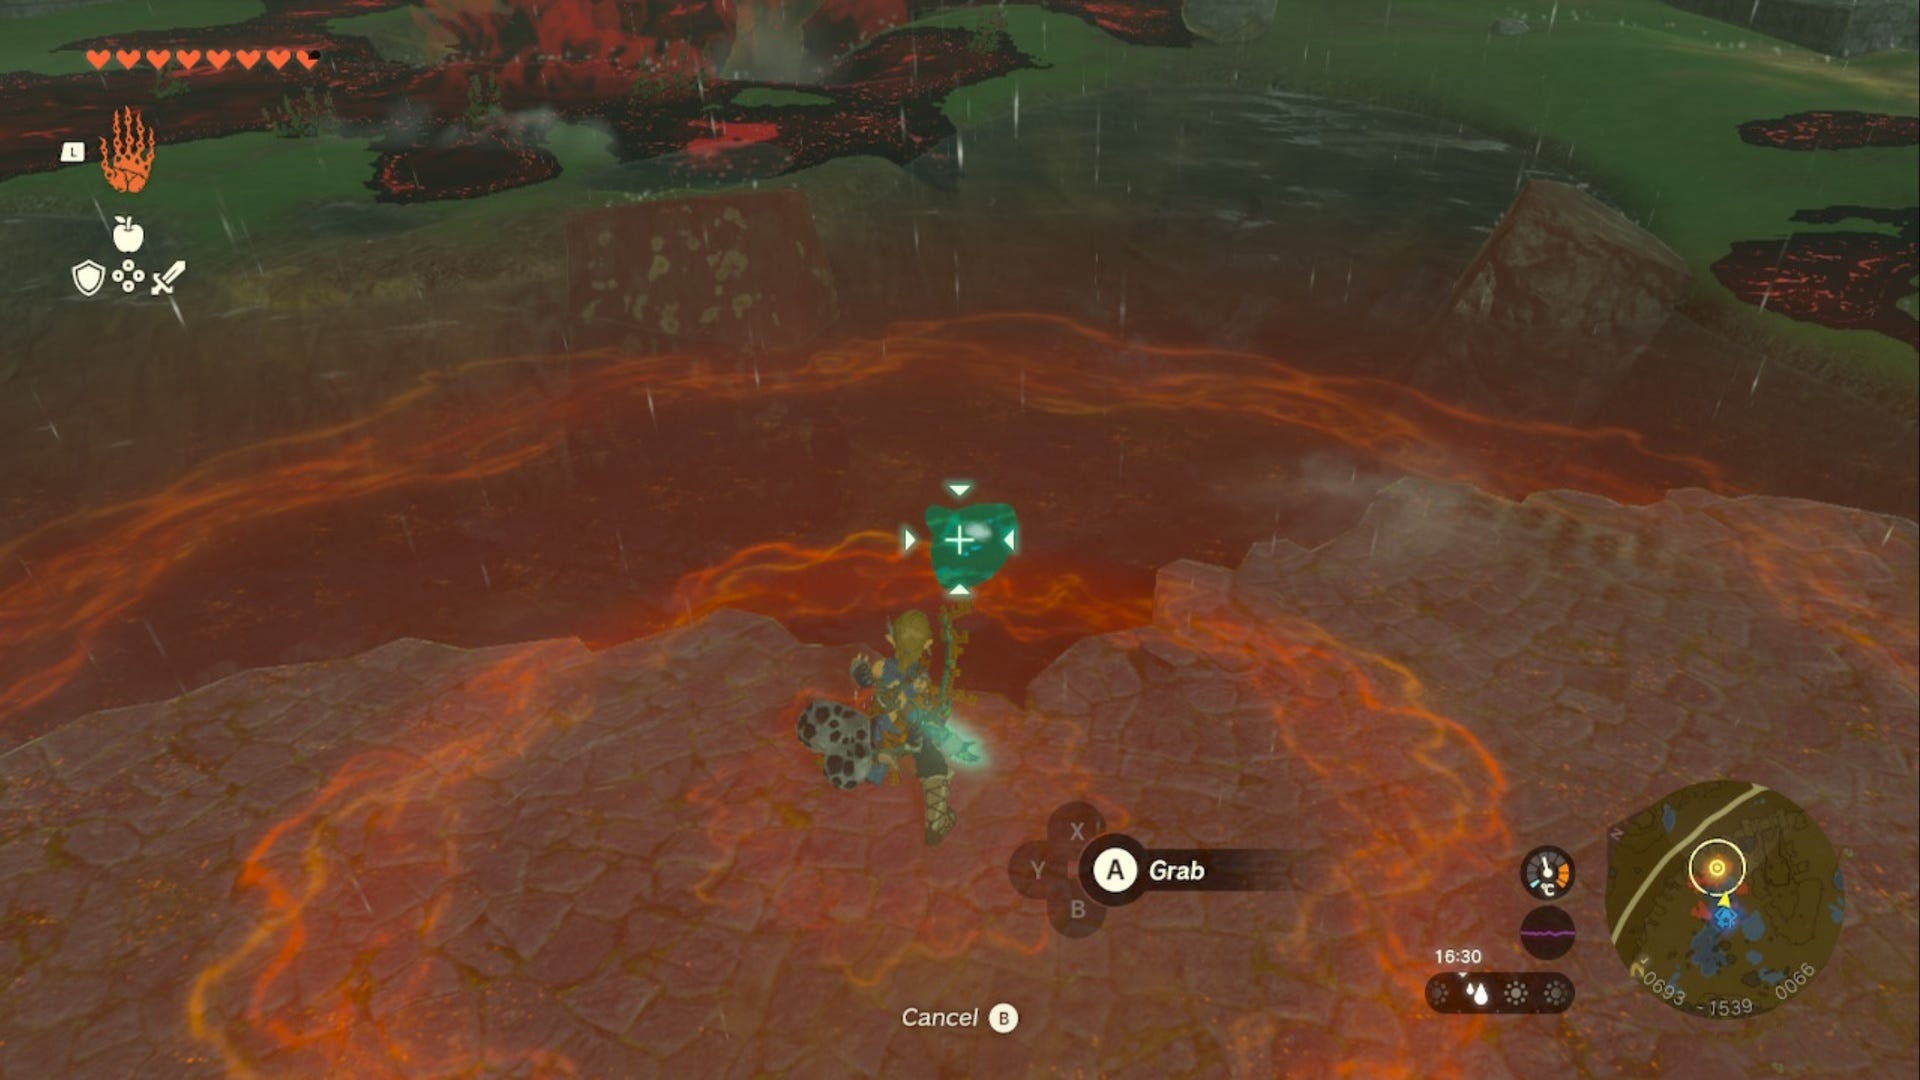
When you're at the edge of the Chasm (remember to avoid the Gloom!), you'll notice that there are three ice clumps around the edge. You'll want to melt the ice clump that's on its own as the eye is in there.
After you melt the ice and grab the eye, walk to the edge of the Chasm and press 'R' to throw it down into the Depths below. Once you've thrown the eye, you need to follow it down.
If you need to, use some Brightbloom Seeds to brighten up the area around you as it will make this next part much easier.
From where you landed in the Depths, look around you until you see a structure with a small set of steps on it.
Pick up the eye and carry it up the small set of steps, then along the long platform to your right until you come to stand on a mesh platform that has some Zonai Fans on it. You don't need to move this fans or do anything to them other than activate them. Easy right?
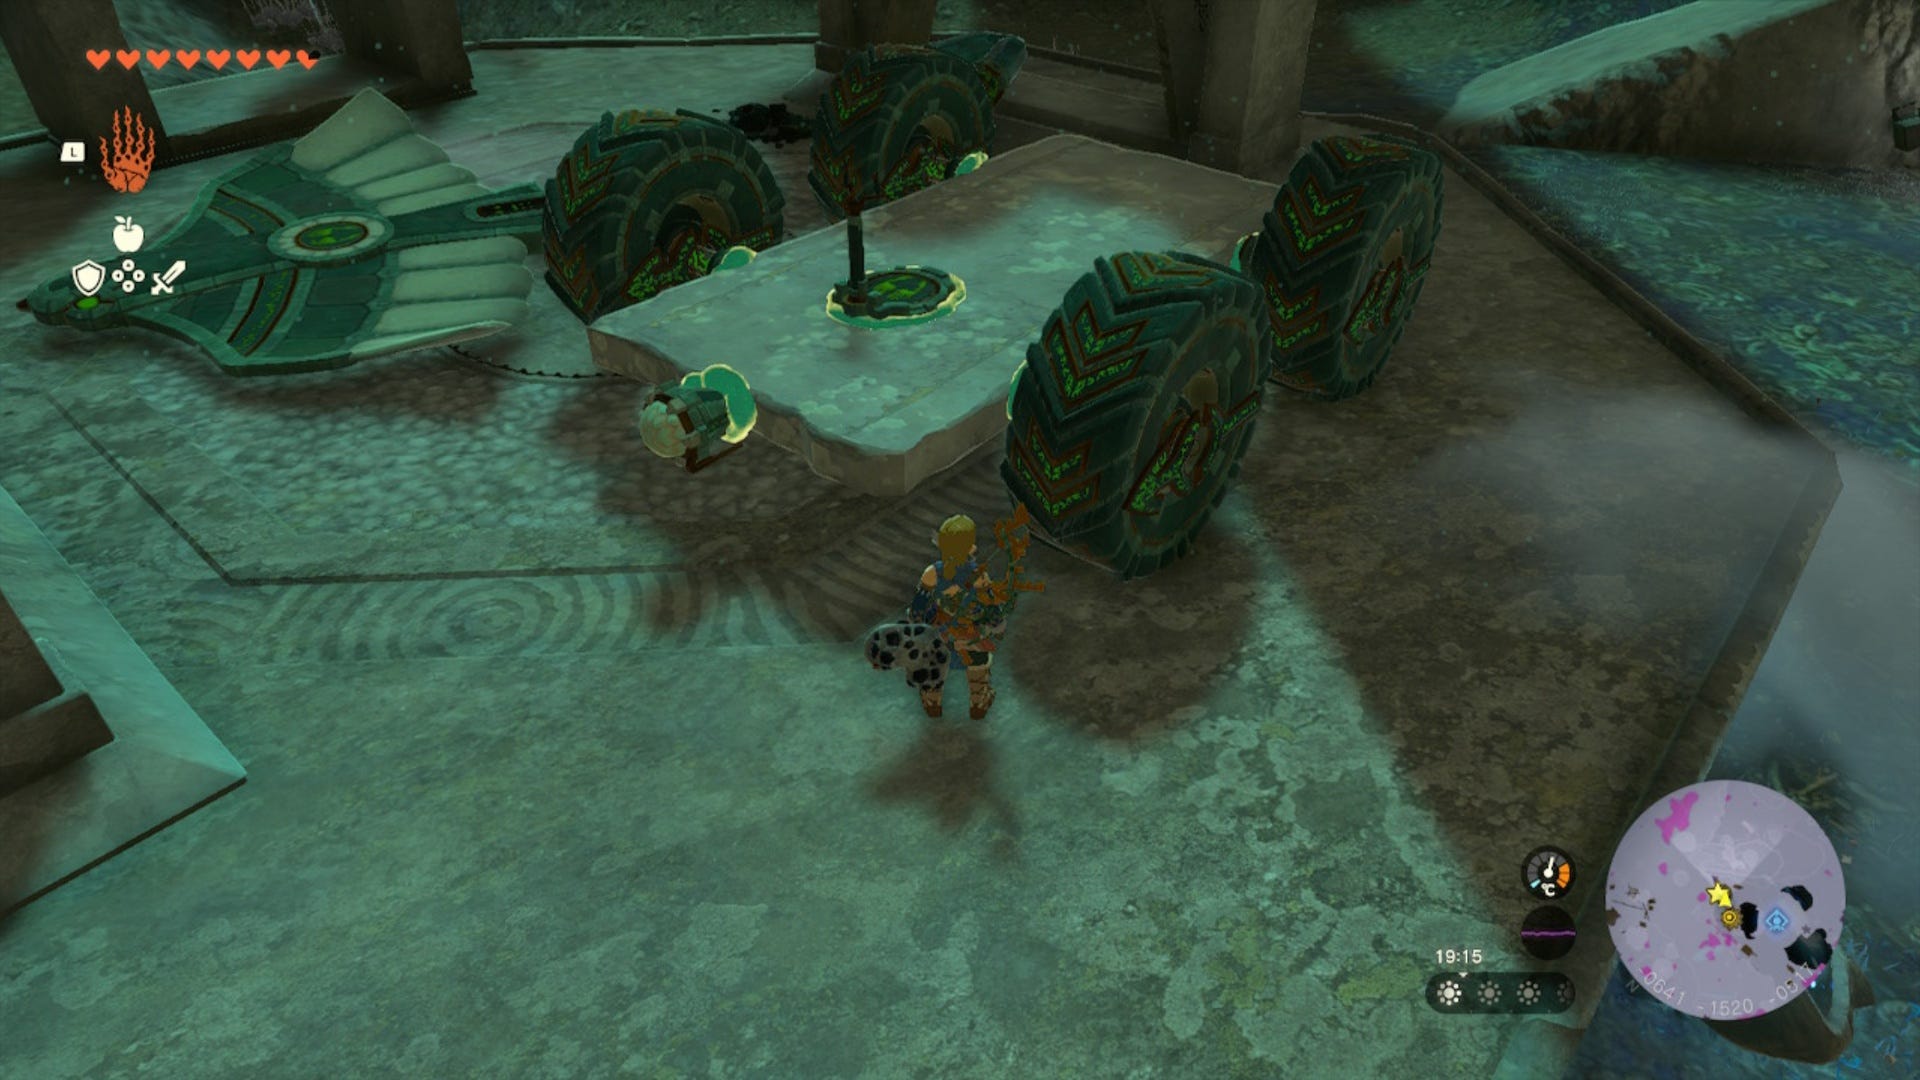
Ride the 'elevator' up until it stops, then carry the eye off until you are standing on the solid platform next to the 'elevator'. Then, carry the eye along the path here until you reach the area that has a couple of Rails in it and some carts.

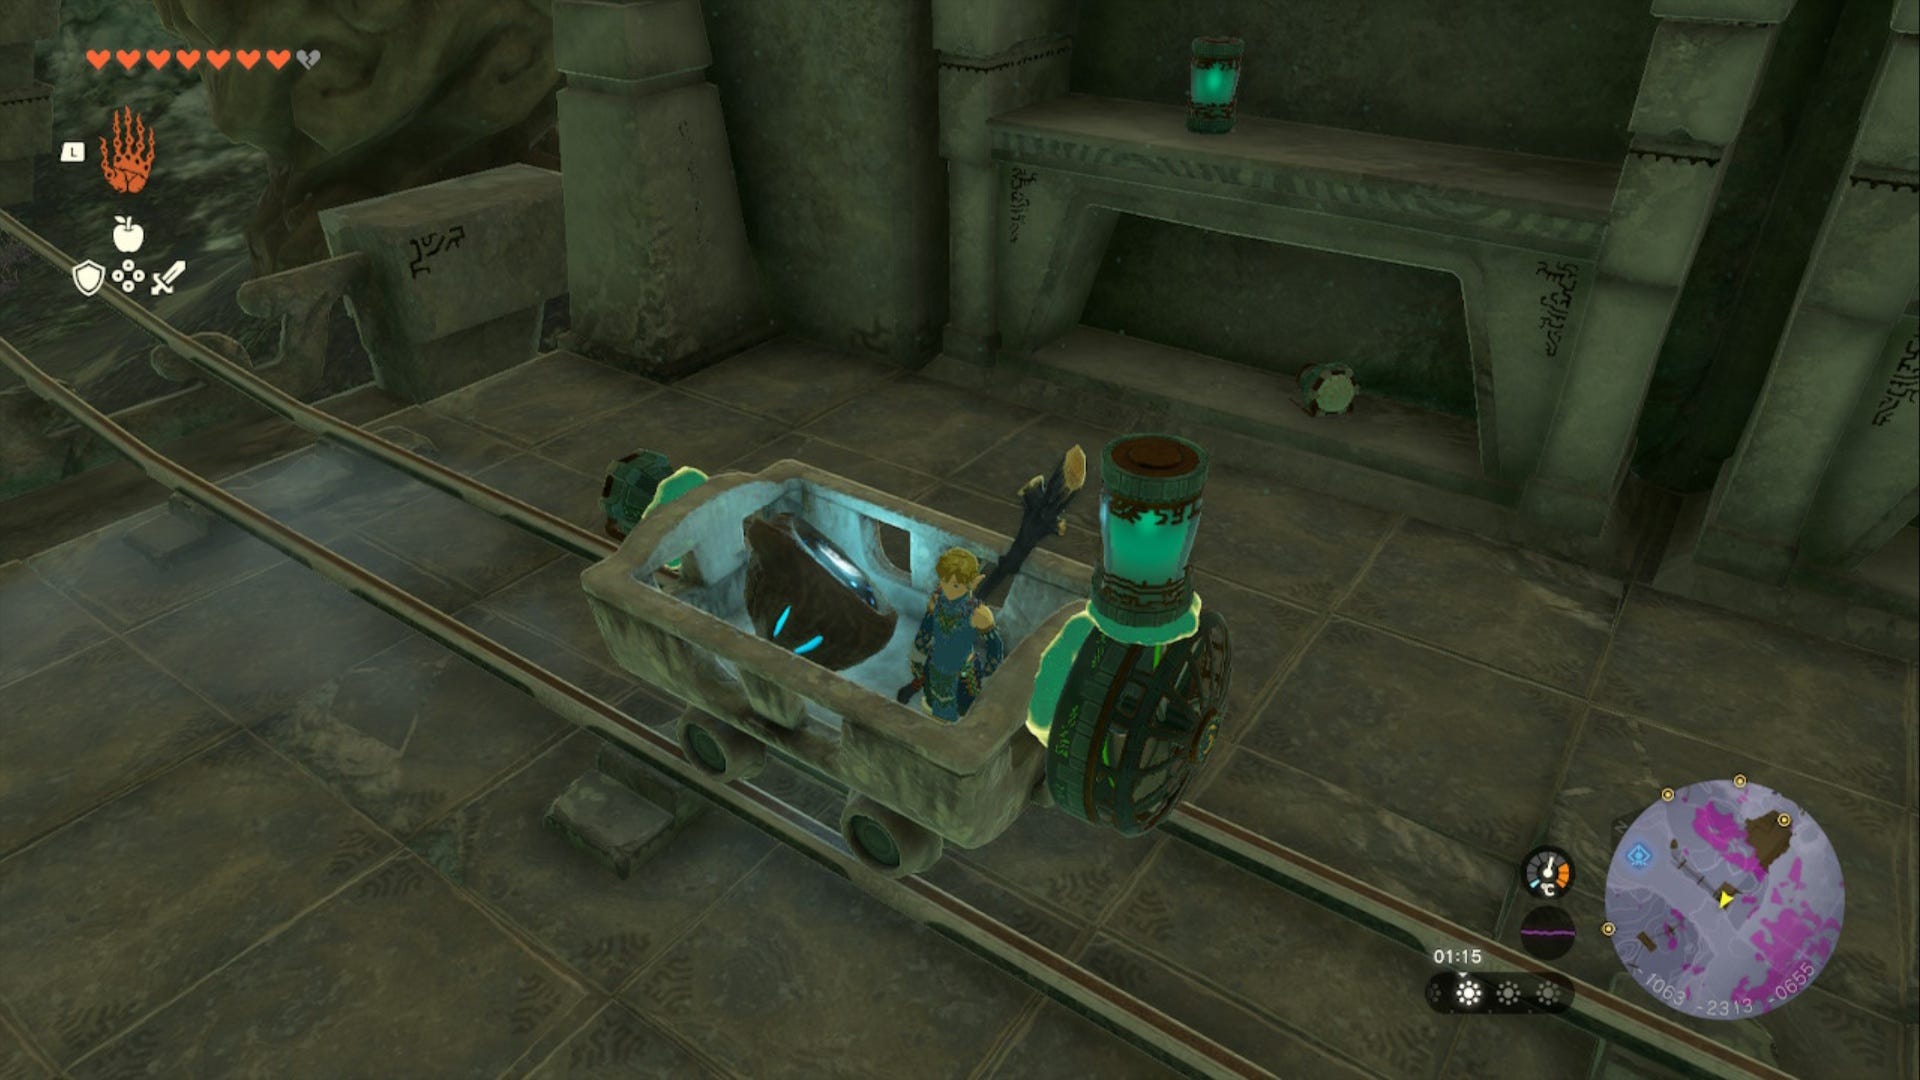
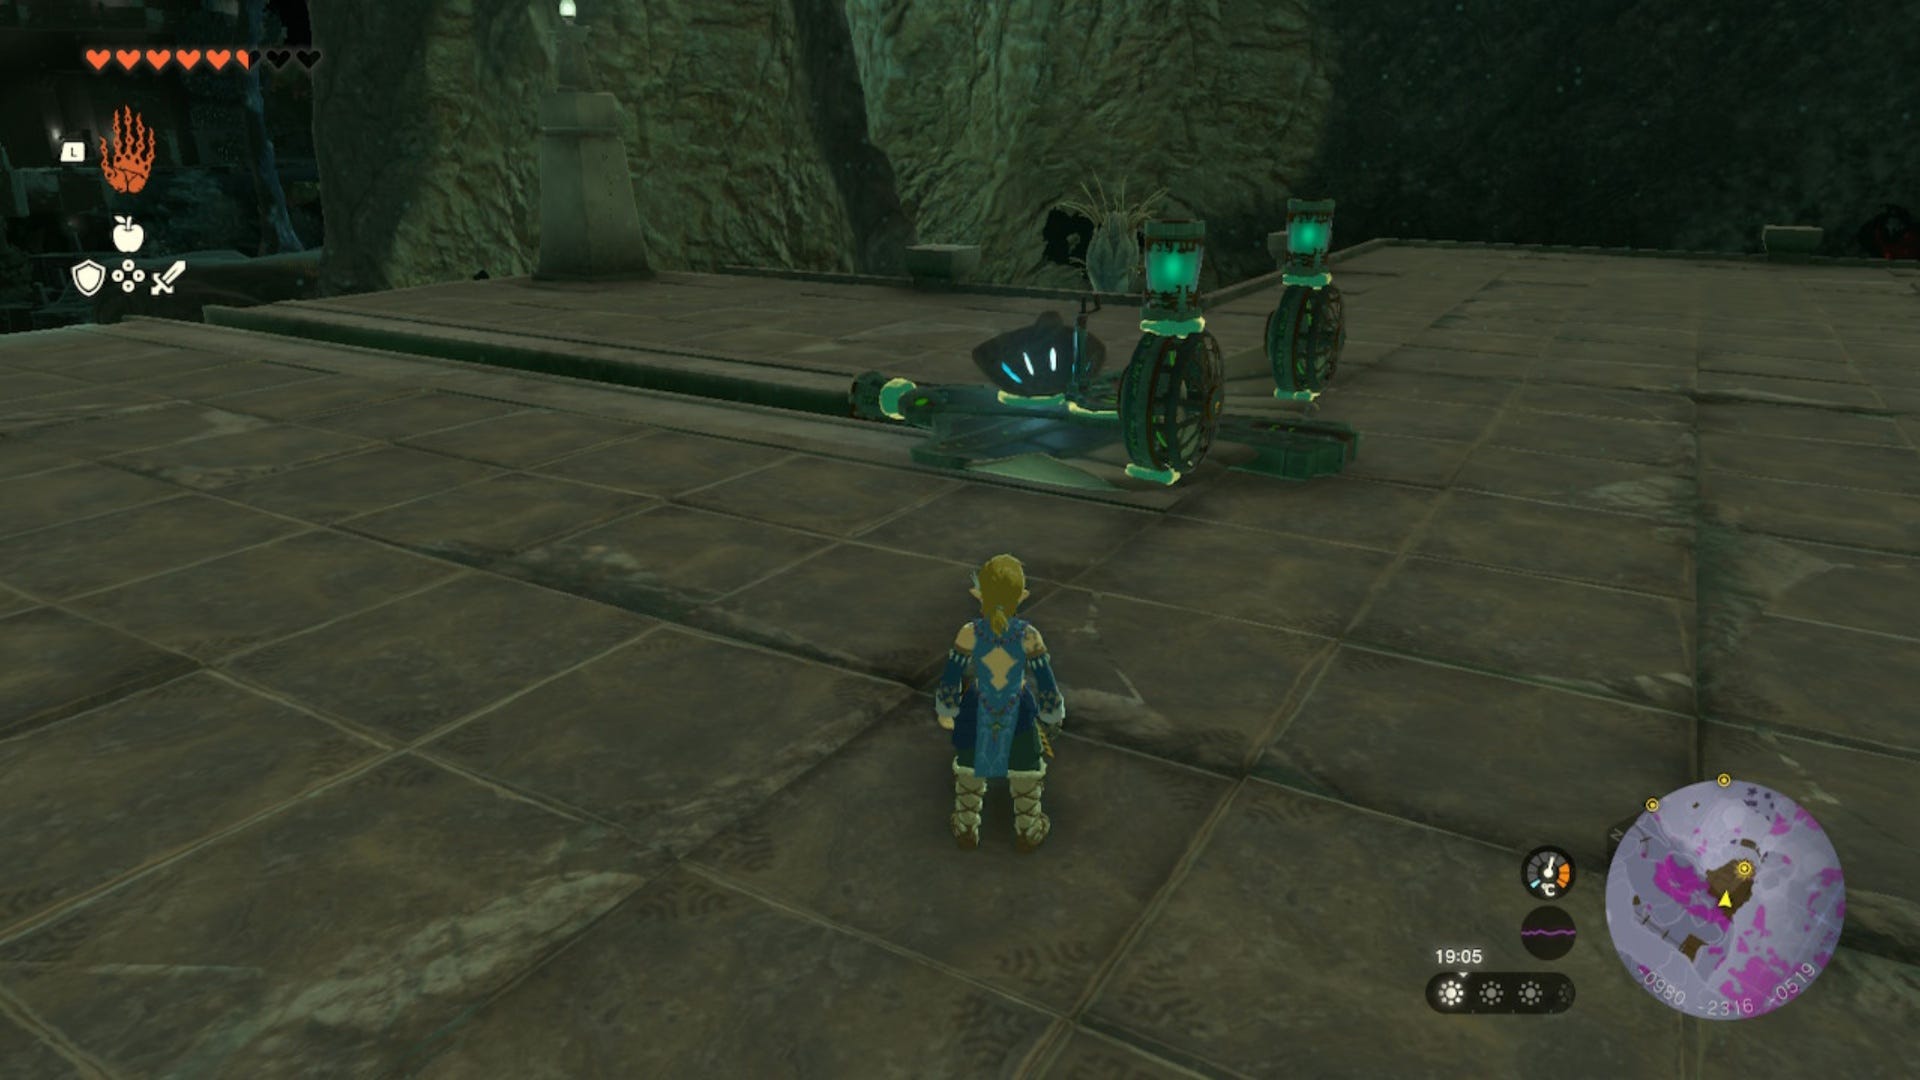
Look at the statue in the middle of this area and then look to the left, you should see a cart that already has a Zonai fan, torch, and battery attached to it. Carry the eye over here and put it down next to the cart, not in the cart yet. Then, pick the cart up and put it on the tracks on the left, making sure that the Zonai fan is at the back so that it will propel the cart forward.
Then, once the cart is safely on the tracks, you can put the eye into the cart and then you need to get into the cart too. After you've climbed in, activate the cart and ride it to the end of the track.
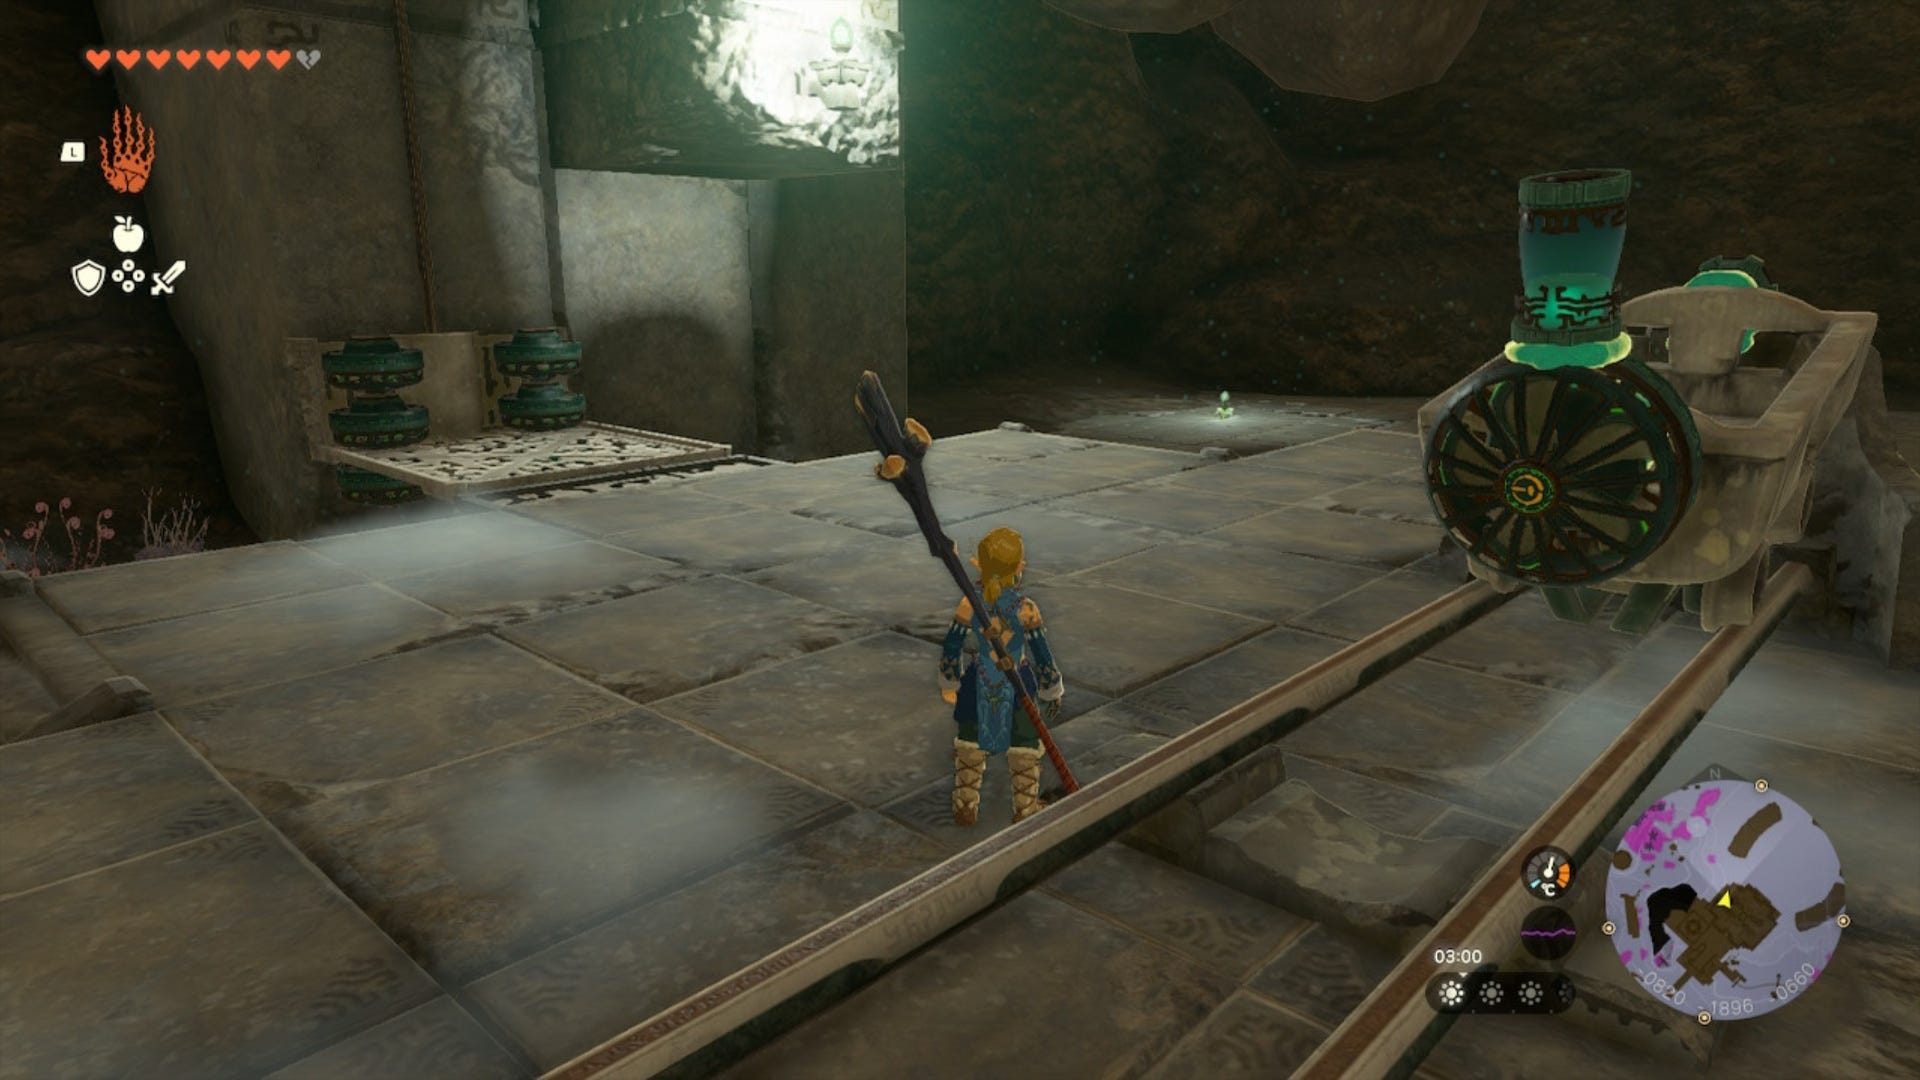
When the cart stops, you'll be notified that you are in Hylia Canyon Mine, but this is not where we want to be, so let's keep going. When the rails end, get off the cart and carry the eye up the set of steps on your right. Here, you'll see more carts and Zonai Devices.
Build another Fan-propelled cart using the devices here and place it on the tracks in this area. Again, make sure the fan is positioned so that it will propel the cart forward. Once ready, place your creation on the rails, put your eye in it and get in, then ride it until the rails end.
When the tracks end, you'll be in a pretty dark area, and you'll now be in the Great Abandoned Mine so feel free to use some more Brightbloom Seeds again.
Get out of the cart and take the eye with you. Then, look to your left, you should see another mesh platform with Zonai fans on it. Carry the eye over here, get onto the mesh platform and ride it to the top until it stops.
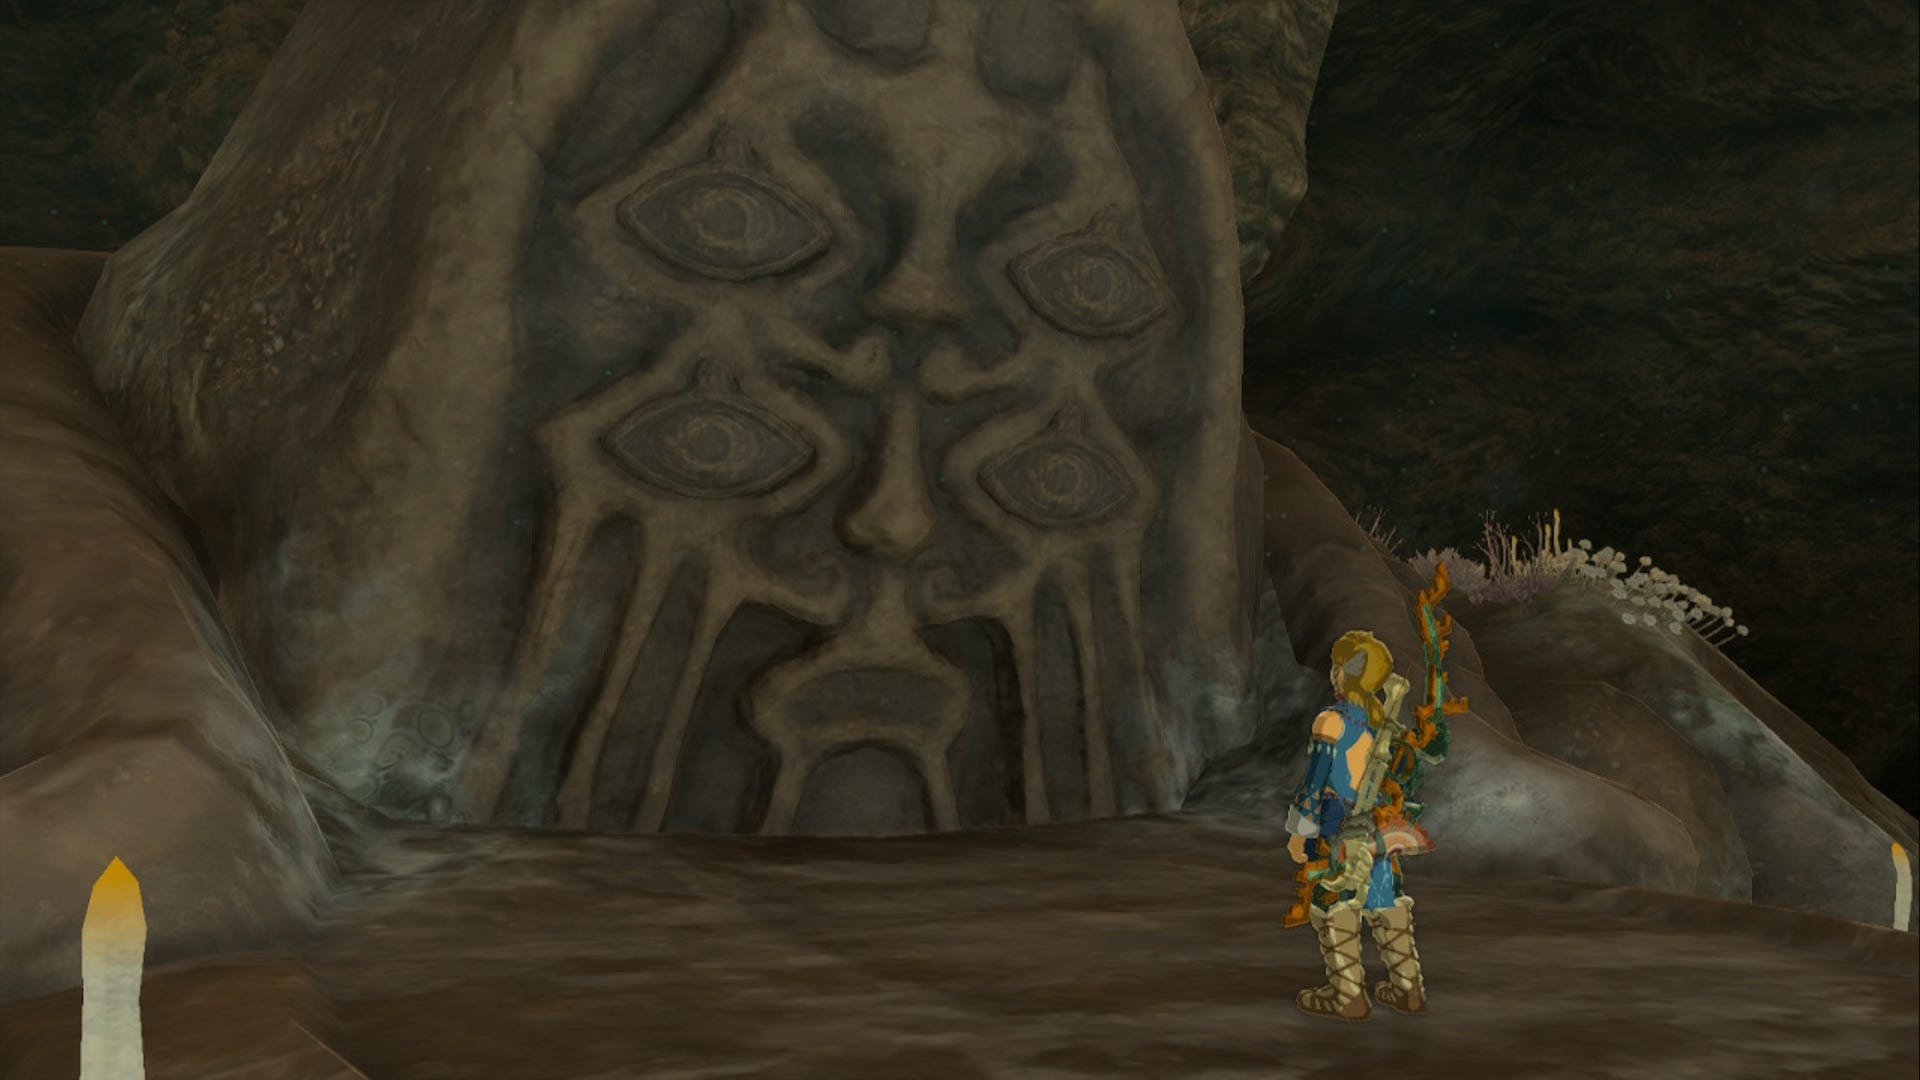
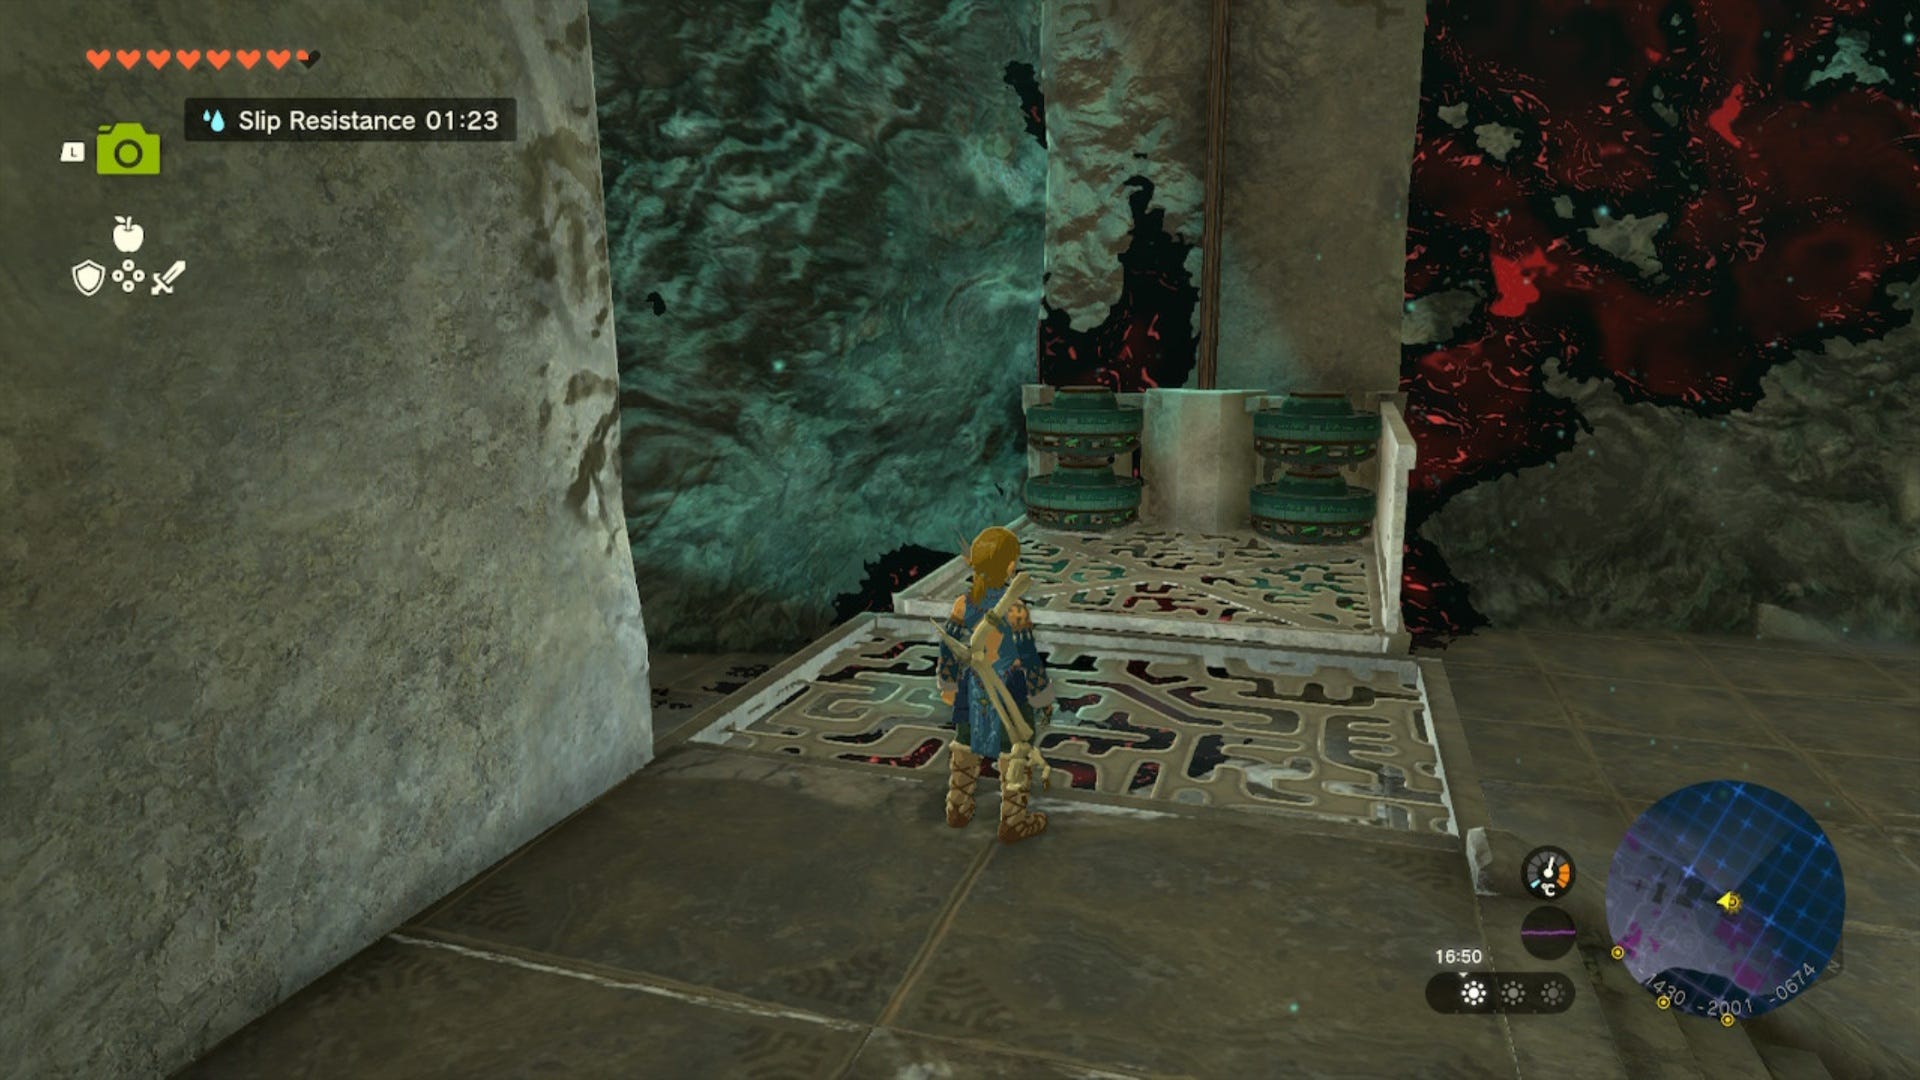
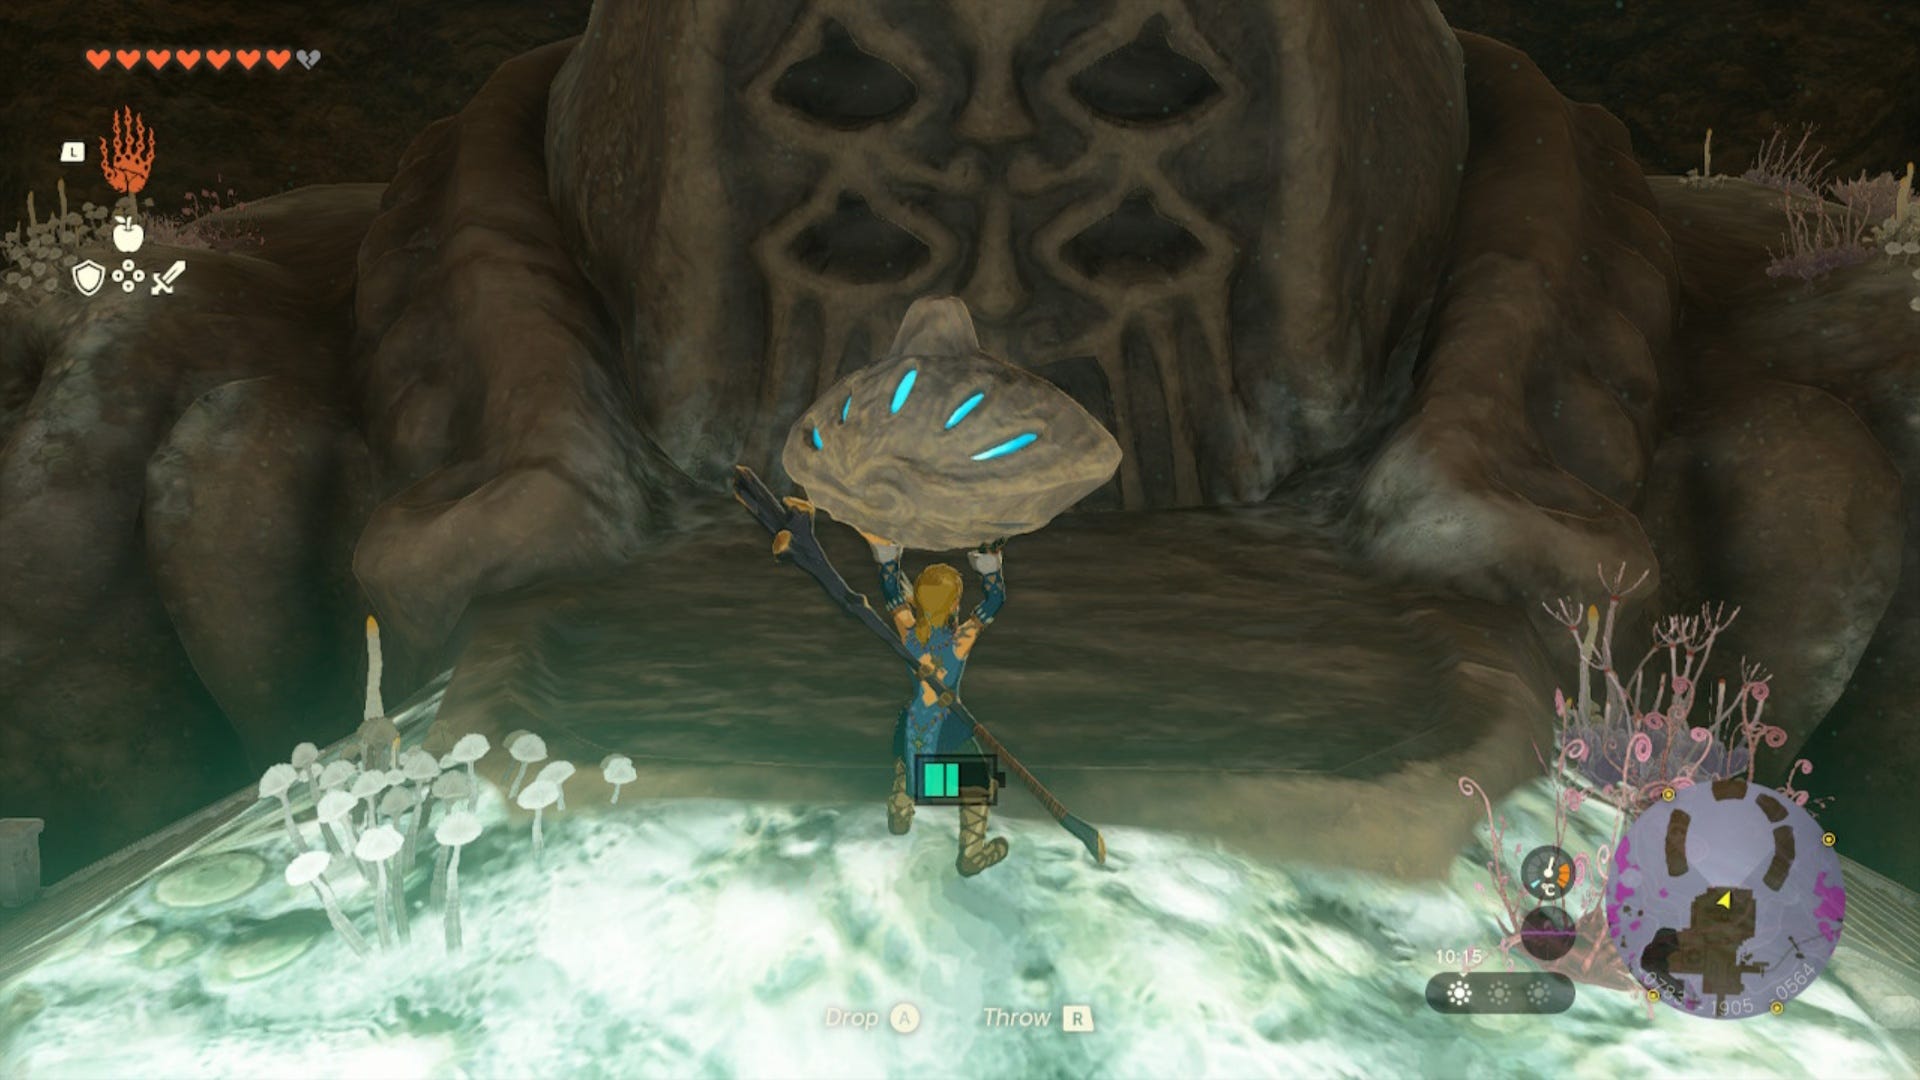
Once it stops, get off the platform and follow the path around until you come across a large statue that is missing its eyes. All you need to do now is use Ultrahand to slot the eye into one of the missing slots. The statue will register that you have collected one eye and remind you that three remain. So, let's get to it!
Great Plateau South Chasm eye location in Zelda Tears of the Kingdom
The next one we're going to go to is the Great Plateau South Chasm. We've marked its exact location on the map below but the coordinates for the Great Plateau South Chasm are (-0941, -2332, 0168)
Again, you can reach this Chasm by travelling across the Great Plateau once you are out of the Depths. However, here's the way we did it.
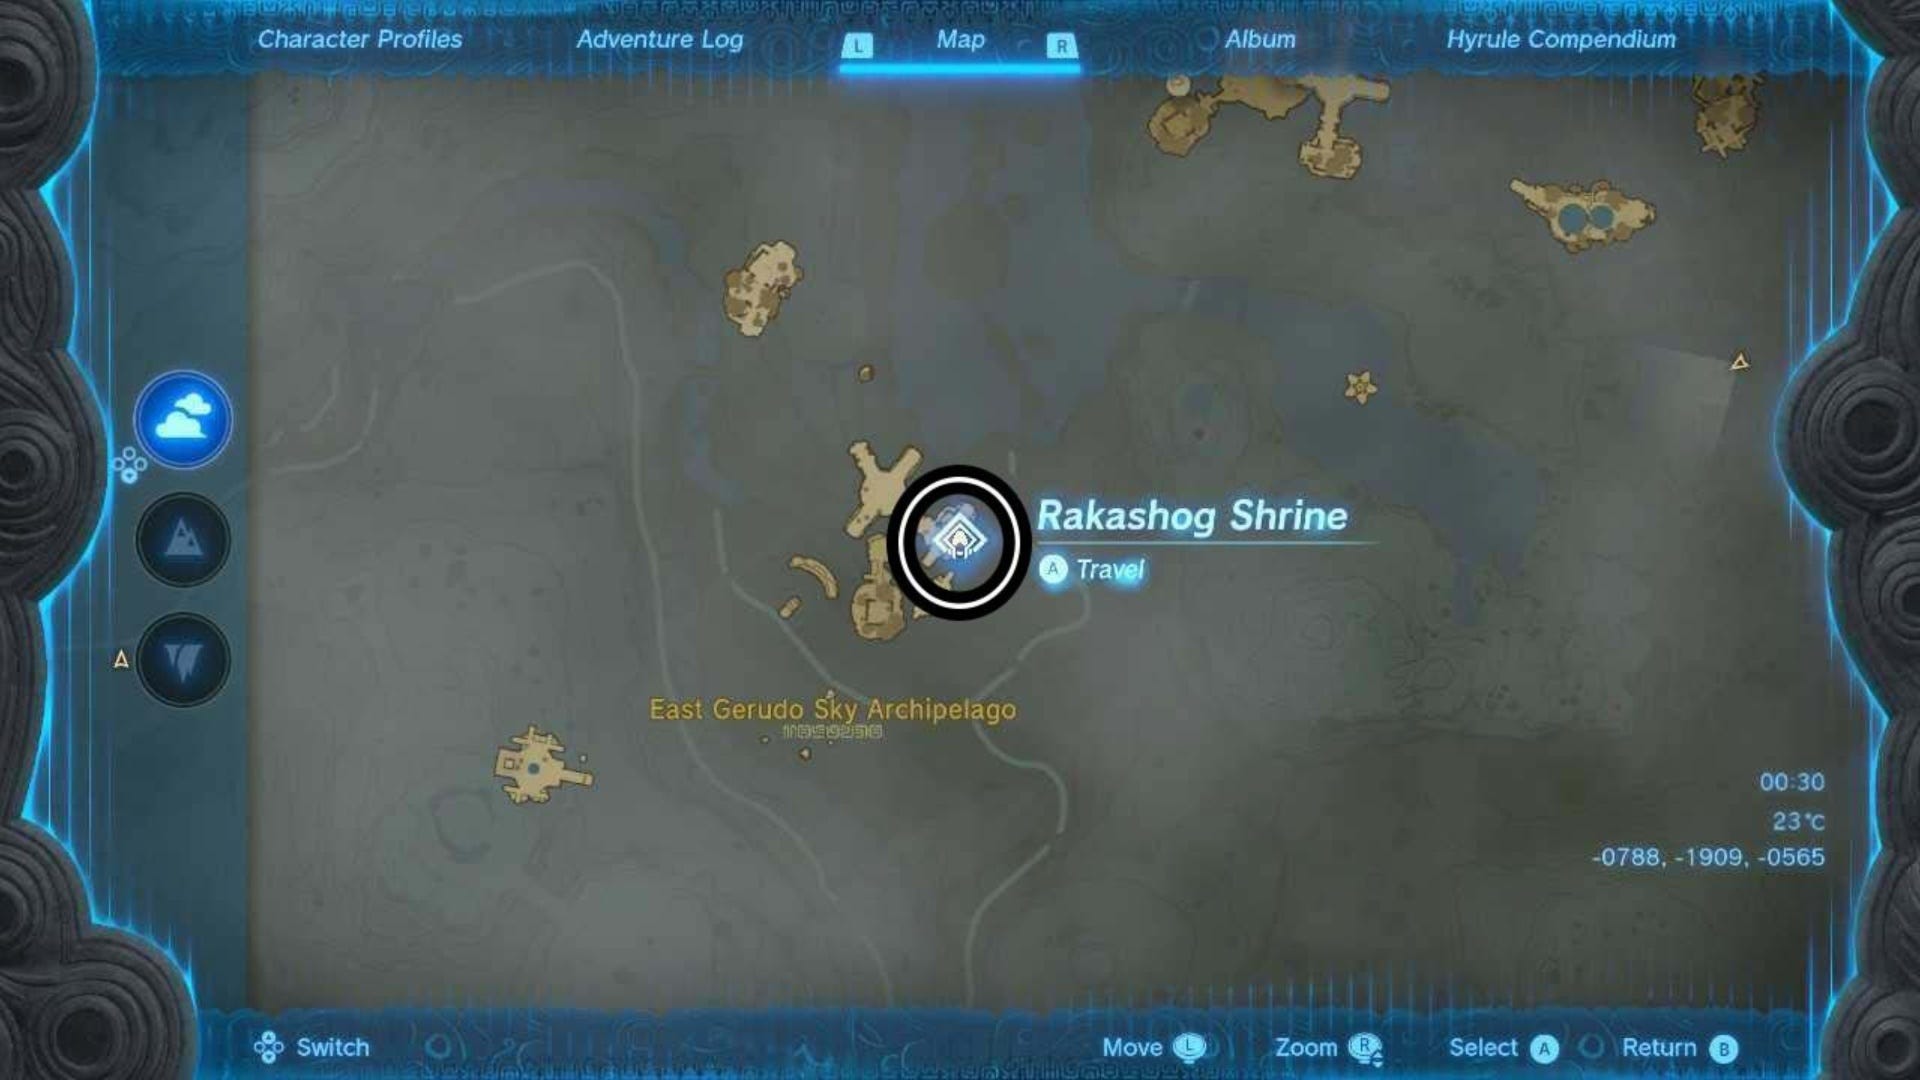
From being in the Depths after putting the previous eye into the statue, we found that the easiest way to get to the Great Plateau South Chasm quickly is to Fast Travel to the Rakashog Shrine in the East Gerudo Sky Archipelago. Then, pin the location of the Chasm on your map.
Then, from the Shrine, glide down to the Chasm. You will roughly need around two full stamina wheels to make it all the way to the Chasm, but we found it a lot easier than climbing around the enemies on the mountain.
Once you get to the Chasm, you should see that there's a large rock next to it. Use Ultrahand to pick the rock up and fling it wherever you want, this isn't important. When you move the rock, the eye will be underneath it.
As you did with the last eye, pick this one up and throw it into the Chasm then follow it down into the Depths.
Once down in the Depths, pick up the eye and carry it up the large set of steps. Keep following the steps up until you reach a large area with a Wing and a few Zonai Devices on it.
Now, you'll need to build a flying machine using the Wing and Zonai Devices here. As you probably already know, there are numerous ways to build machines to fit your needs, but here's how we built ours:
- Place the Wing flat on the ground.
- Attach two Zonai Fans to the rear of it, so that they will propel the Wing forward.
- Attach a Zonai Torch to the 'Beak' of the Wing so you can see where you're flying.
- Attach a Battery to each Fan.
- Place a Steering Stick on the circle in the middle of the Wing so you can control it.
Once you've got your flying machine, attach the eye to it. If you just balance it on your machine, it's highly likely it will fall off when you start to move.
After you attach the eye to the machine, lift it up using Ultrahand and place it on the launch rails opposite the Zonai Device shelves.
When the machine is safely on the launch rails, jump onto the Steering Stick and press 'A' to control the Flying Machine to get it to launch. Once you are in the air, you'll want to go forwards then lean to the right. You're aiming for this area:
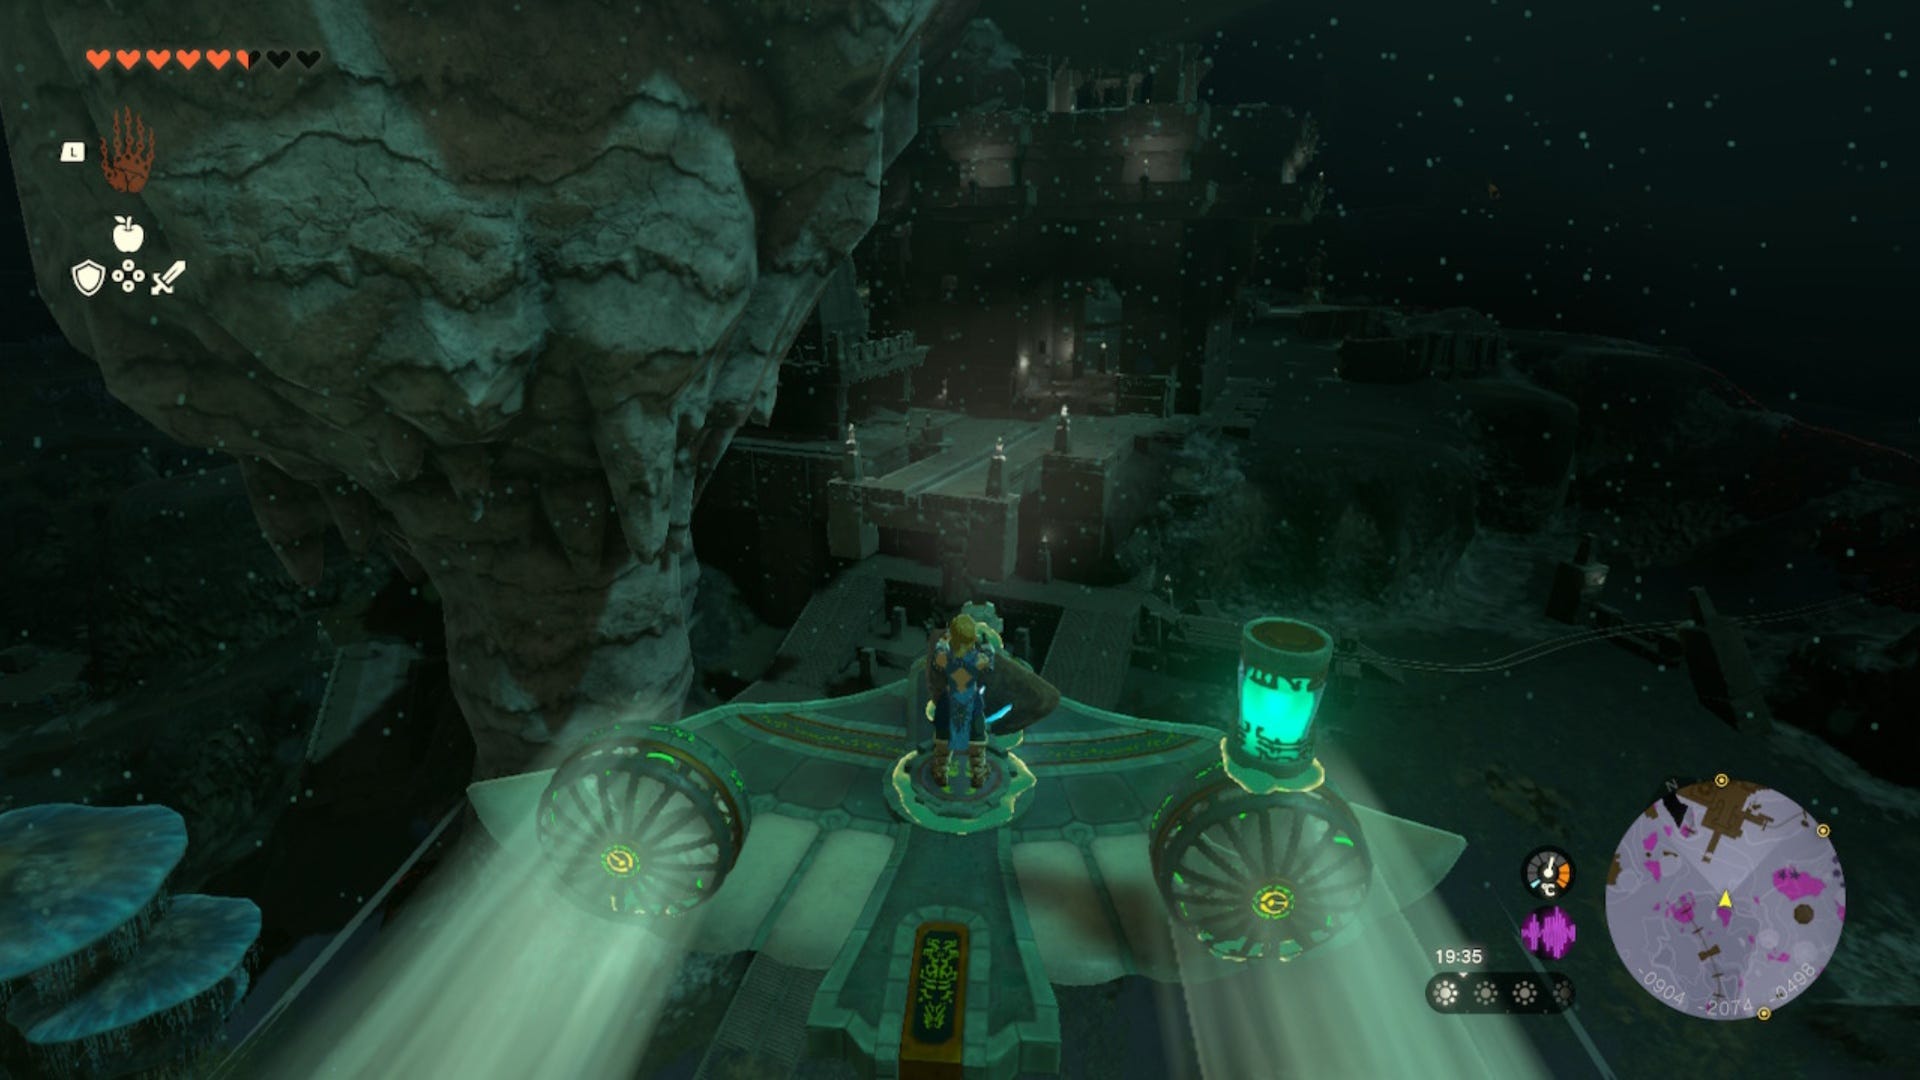
Once closer, try to land on the lower part of this structure where the stairs are.
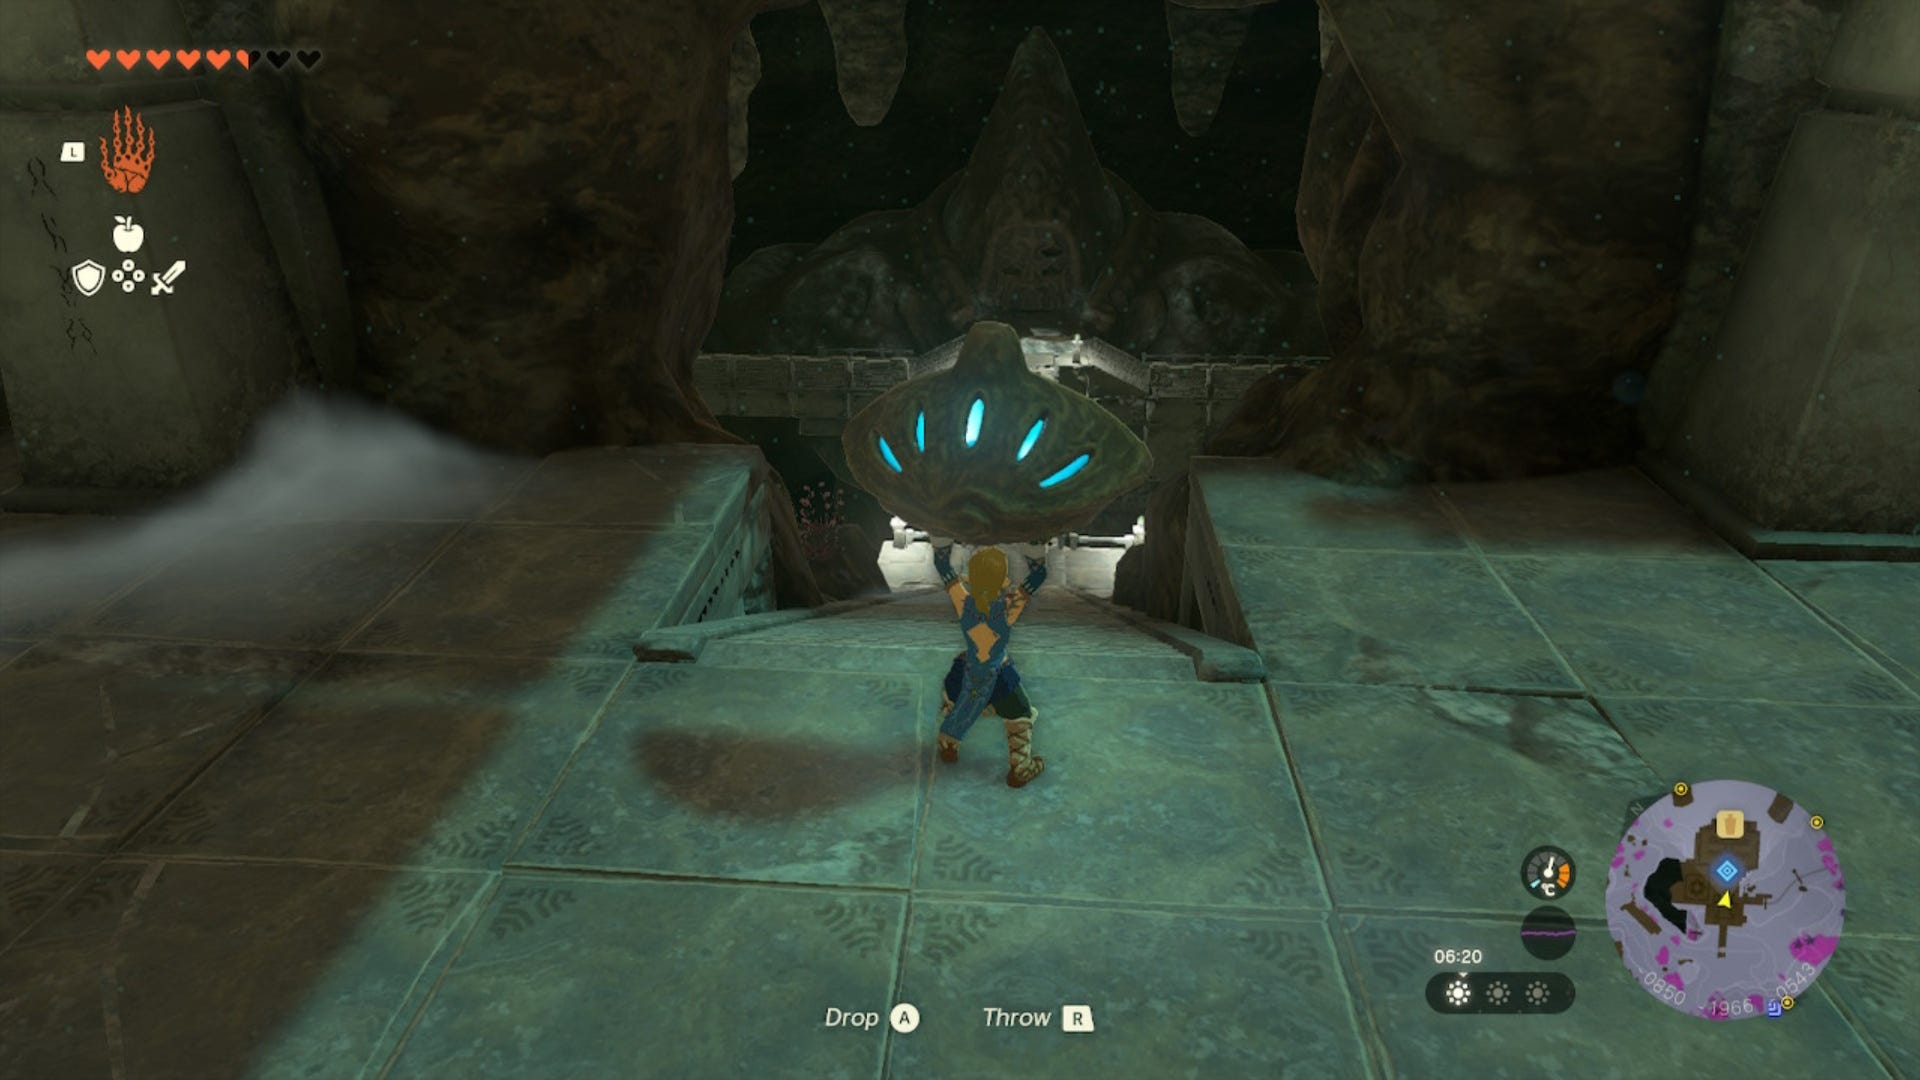
After you've landed, grab the eye and carry it up to a small opening at these coordinates (-0849, -1966, -0543). Once you get to the opening, you should see that there's a large set of stairs that lead down and the statue you put the previous eye in will also be visible.
Follow the steps and path down, then put the second eye into one of the spare slots on the statue.
Great Plateau East Chasm eye location in Zelda Tears of the Kingdom
Next up is the Great Plateau East Chasm in the Eastern Abbey. We've marked its exact location on the map below and the Great Plateau East Chasm coordinates are (-0444, -1983, 0072). You can travel to this location by making your way across the Great Plateau on the surface of Hyrule if you want to.

From being in the Depths after placing the last eye in the statue, we found that the quickest way of getting to the Great Plateau East Chasm is to fast travel to the In-Isa Shrine on the Great Sky Island. Then, pin the Chasm location on your map using the quest markers.
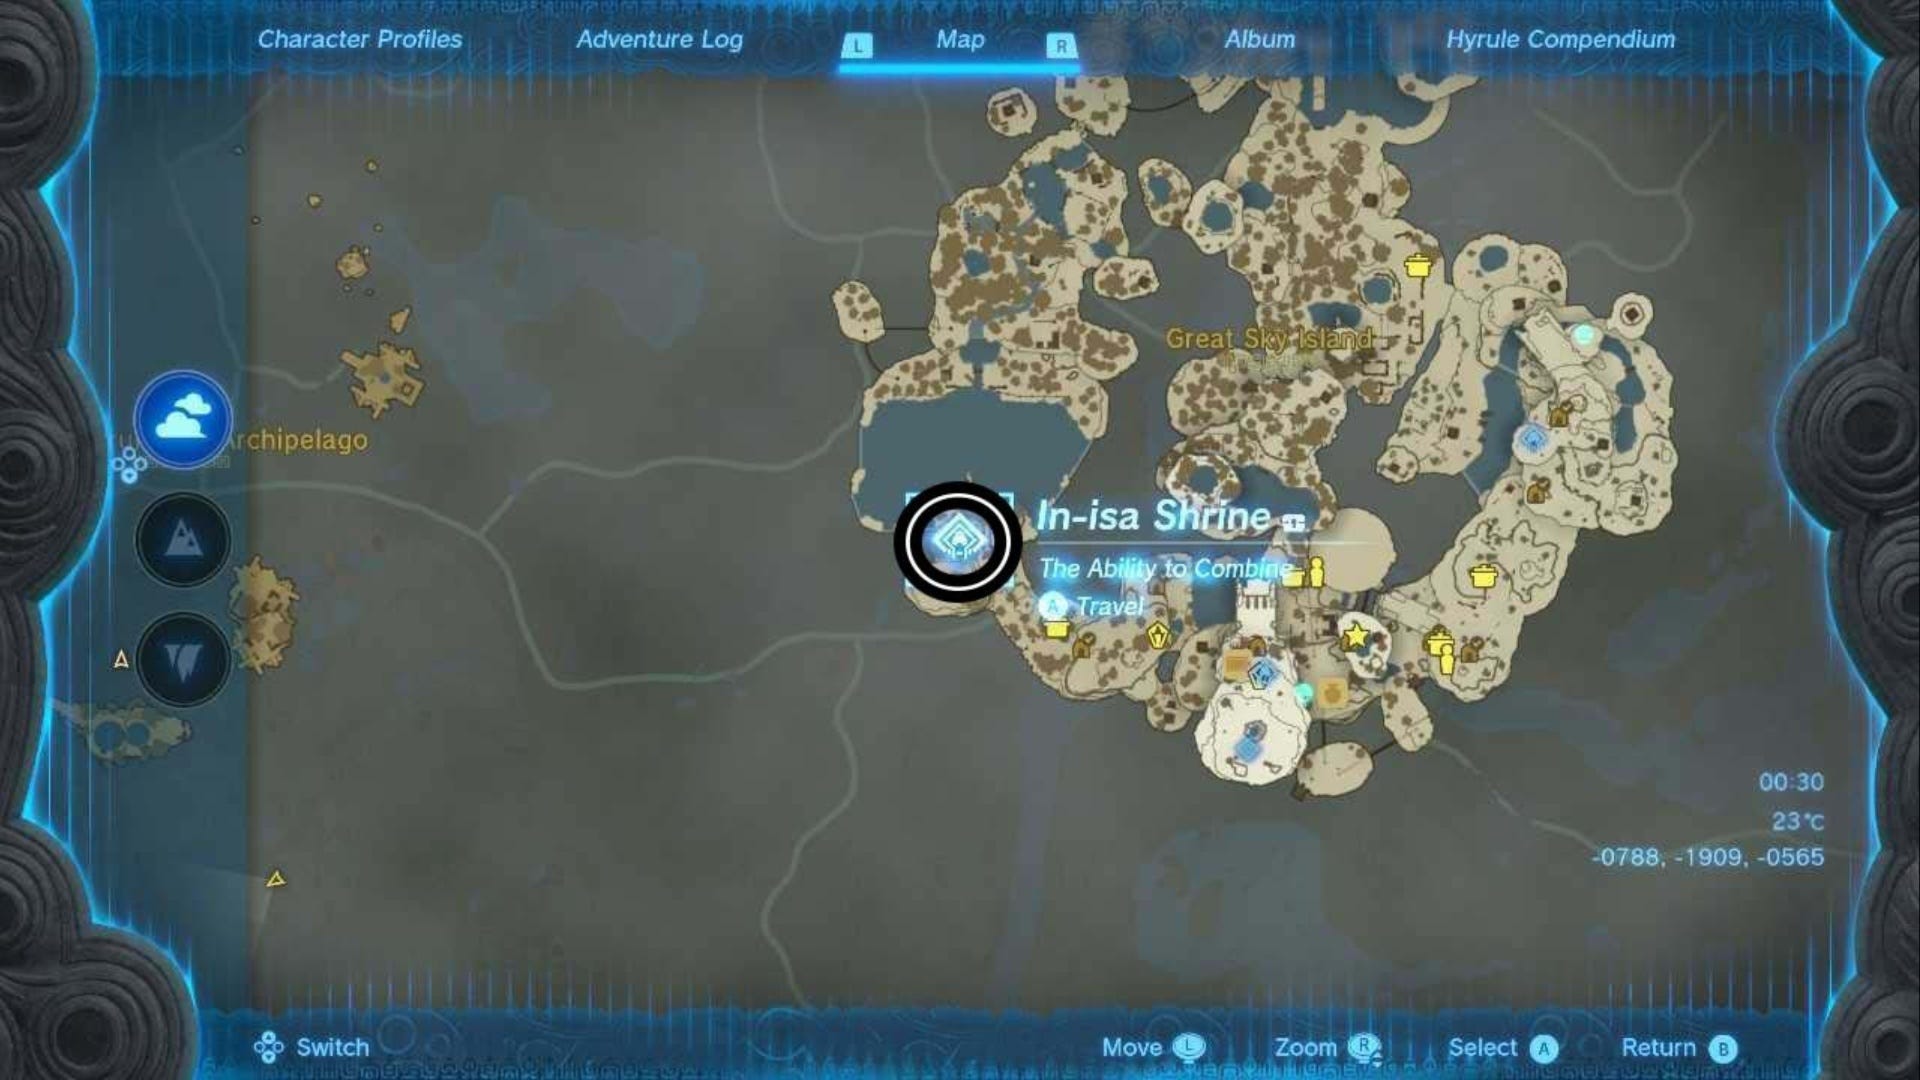
When ready, dive off of the Great Sky Island and head down to the Chasm using your Paraglider. Again, around two full wheels of stamina will be enough to get you there safely.
When you get to the Chasm, look around until you see a doorway blocked with rocks. Like you did with the blocked doorway earlier on, destroy the rocks and the eye will be revealed.
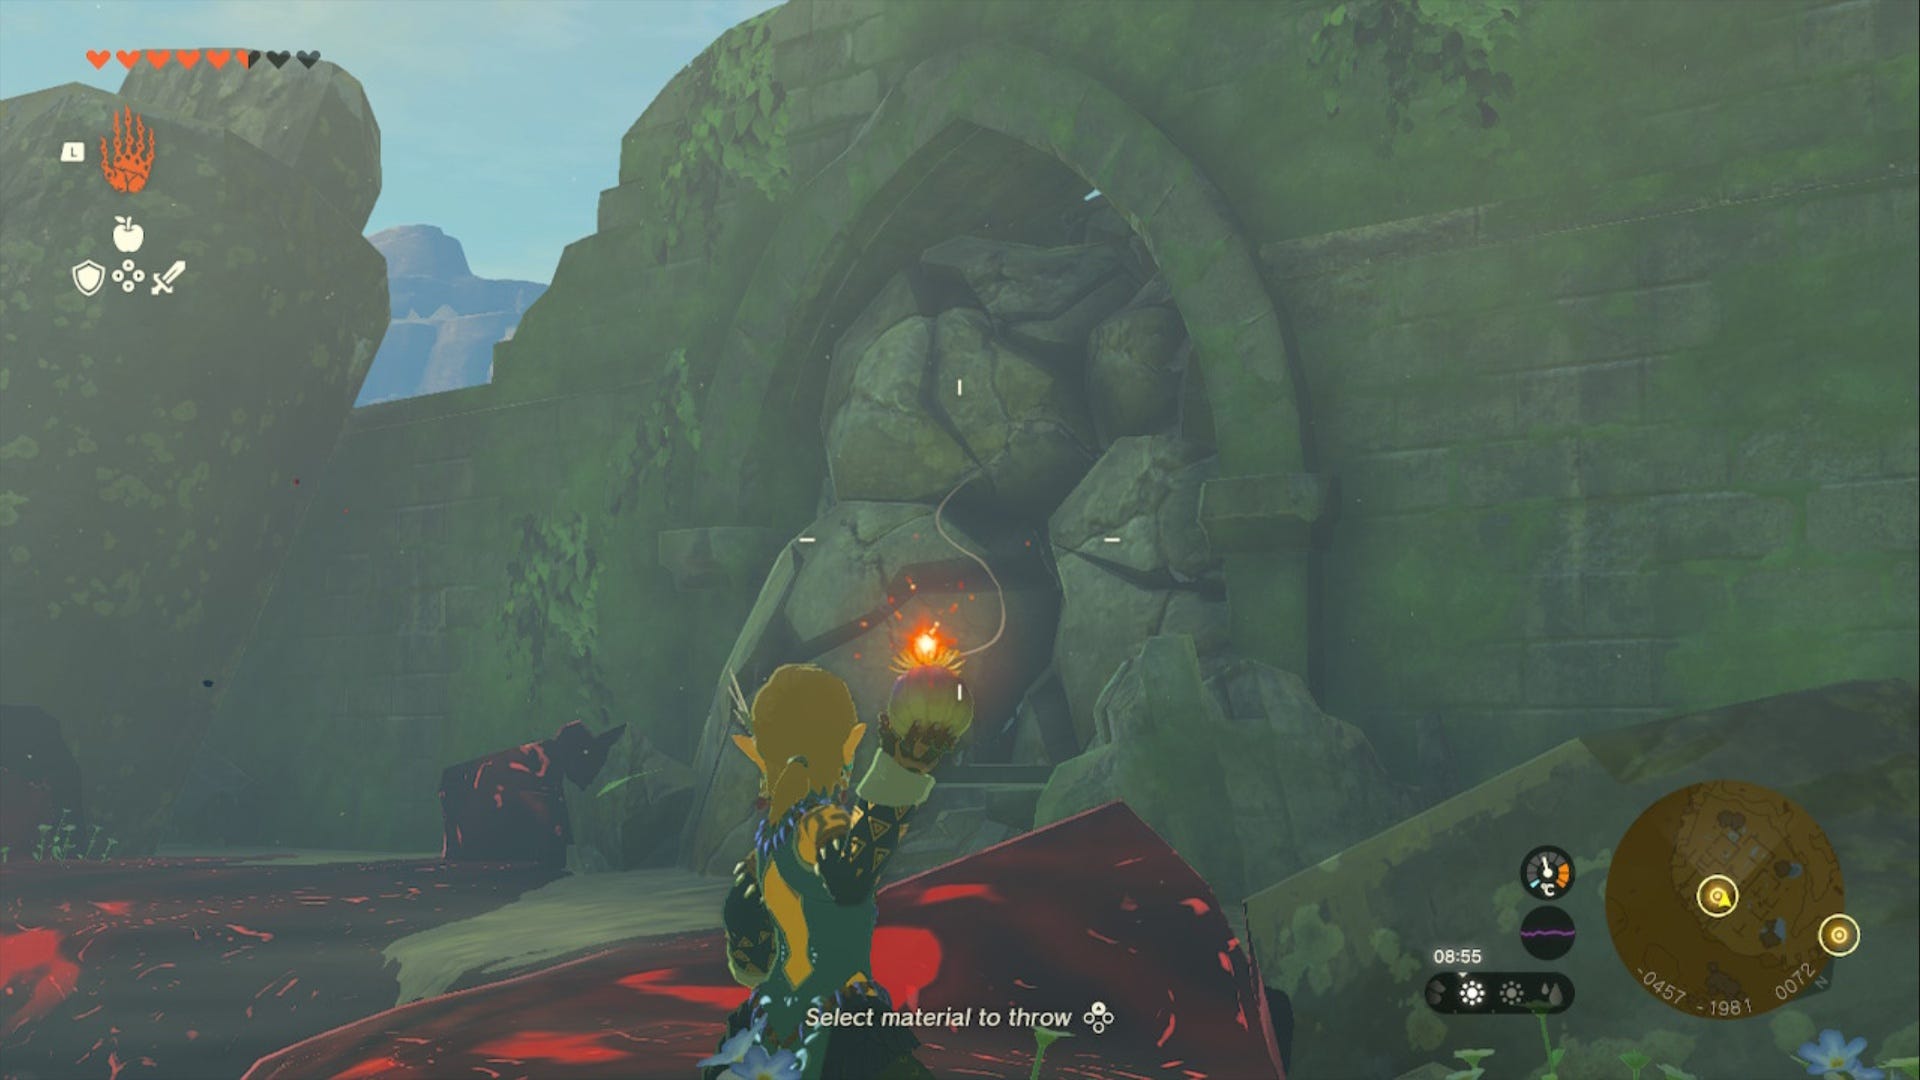
Grab the eye and throw it down the Chasm into the Depths, then follow it down once more.
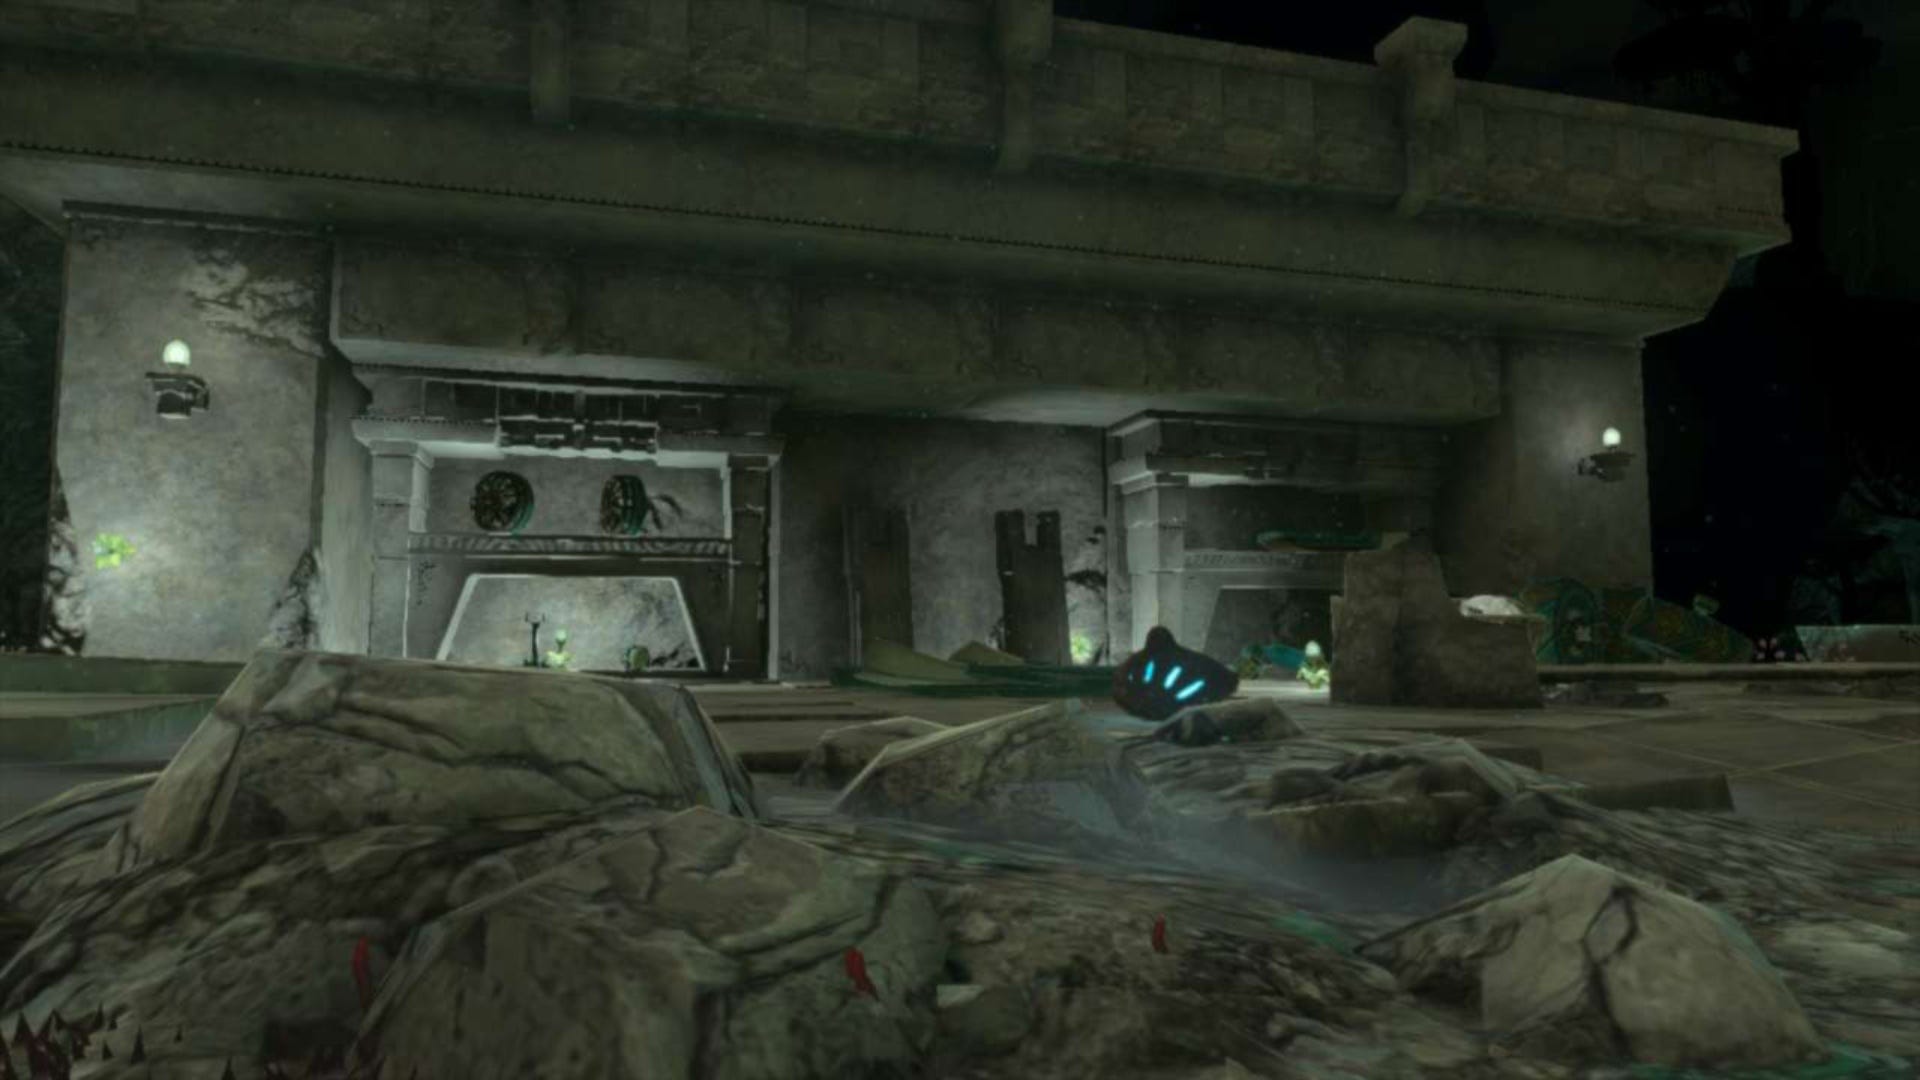
It was really dark when we got down to this area, so we recommend using a few Brightbloom Seeds to light the place up. It will make the next step a lot easier if you do.
Pick up the eye and carry it across to an area with Zonai Devices and Carts in it at (-0480, -2029, -0522).
Put a Zonai Fan on the back of a cart so that it will propel it forward and put a Zonai Torch on the front of the cart to light the way. Then, place the cart onto the rails, drop the eye into the cart and climb in. Once you're in, ride the cart along the rails until it stops.
Get off the cart at the end of the tracks and you will be in the Great Abandoned Mine again. Grab the eye and carry it to the small opening you went to with the previous eye at (-0849, -1966, -0543).
Carry the eye down and place it into the next slot in the statue.
Great Plateau North Chasm eye location in Zelda Tears of the Kingdom
The final place you need to go to is the Great Plateau North Chasm. We've marked its exact location on the map below and the Great Plateau North Chasm coordinates are (-0661, -1519, 0066).
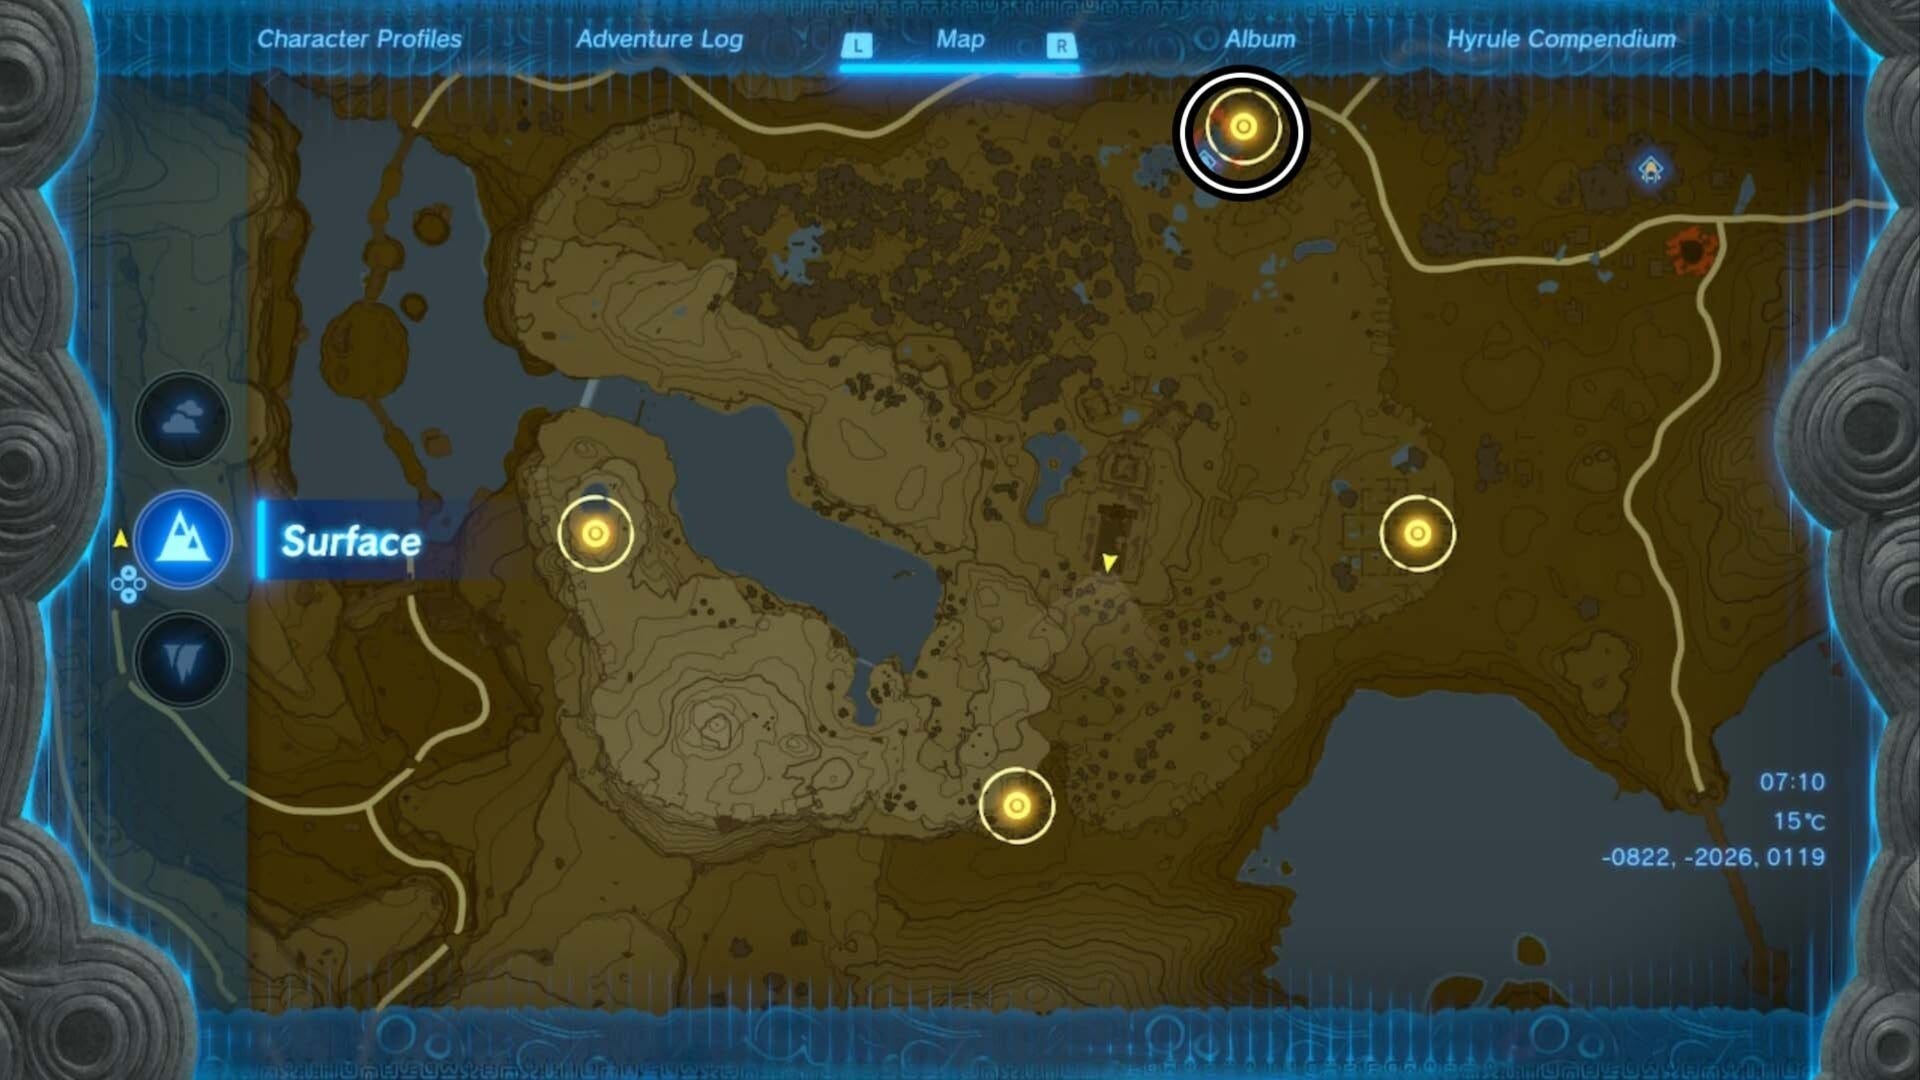
As with the previous Chasm, you can simply get here by travelling across the Great Plateau, but we found it easiest to fast travel to the In-Isa Shrine on the Great Sky Island and skydive down to this Chasm.
When you reach the Chasm, the eye is pretty easy to find. It's in the pond next to the Chasm, and all you need to do is to activate Ultrahand to be able to see it. Use the same ability to pull the eye out of the pond. Then, you know what to do, throw it into the Chasm and follow it down into the Depths below.
Once you're down in the Depths with the eye, pick it up and carry it to these coordinates (-0642, -1521, -0516). If you landed in the Depths like us, this will be to your right. Here, you'll find a bunch of Zonai Devices.

Now, you're quite far away from the Great Abandoned Mine here. There are plenty of devices on offer that you can use to build different machines to help you get there, but here's how we did it:
- Grab the large long slab and separate it from the other slabs.
- Place four large Zonai Wheels facing forwards on the slab so that it looks like a car.
- Place a Zonai Torch on the front of the slab.
- Place a Steering Stick on top of the 'car'.
Ta da! You've basically made a car here that's actually capable of driving over Gloom patches without getting you hurt.
When you're happy with your creation, attach the eye to the top of it near the Steering Stick, then hop onto the Steering Stick and press 'A' when prompted to begin driving your car.
We followed the path on the ground marked by periodic appearances of large stone slabs. The route rook us through the Grove of Spirits and around to the front of the Great Abandoned Mine at (-910, -2014, -0577).
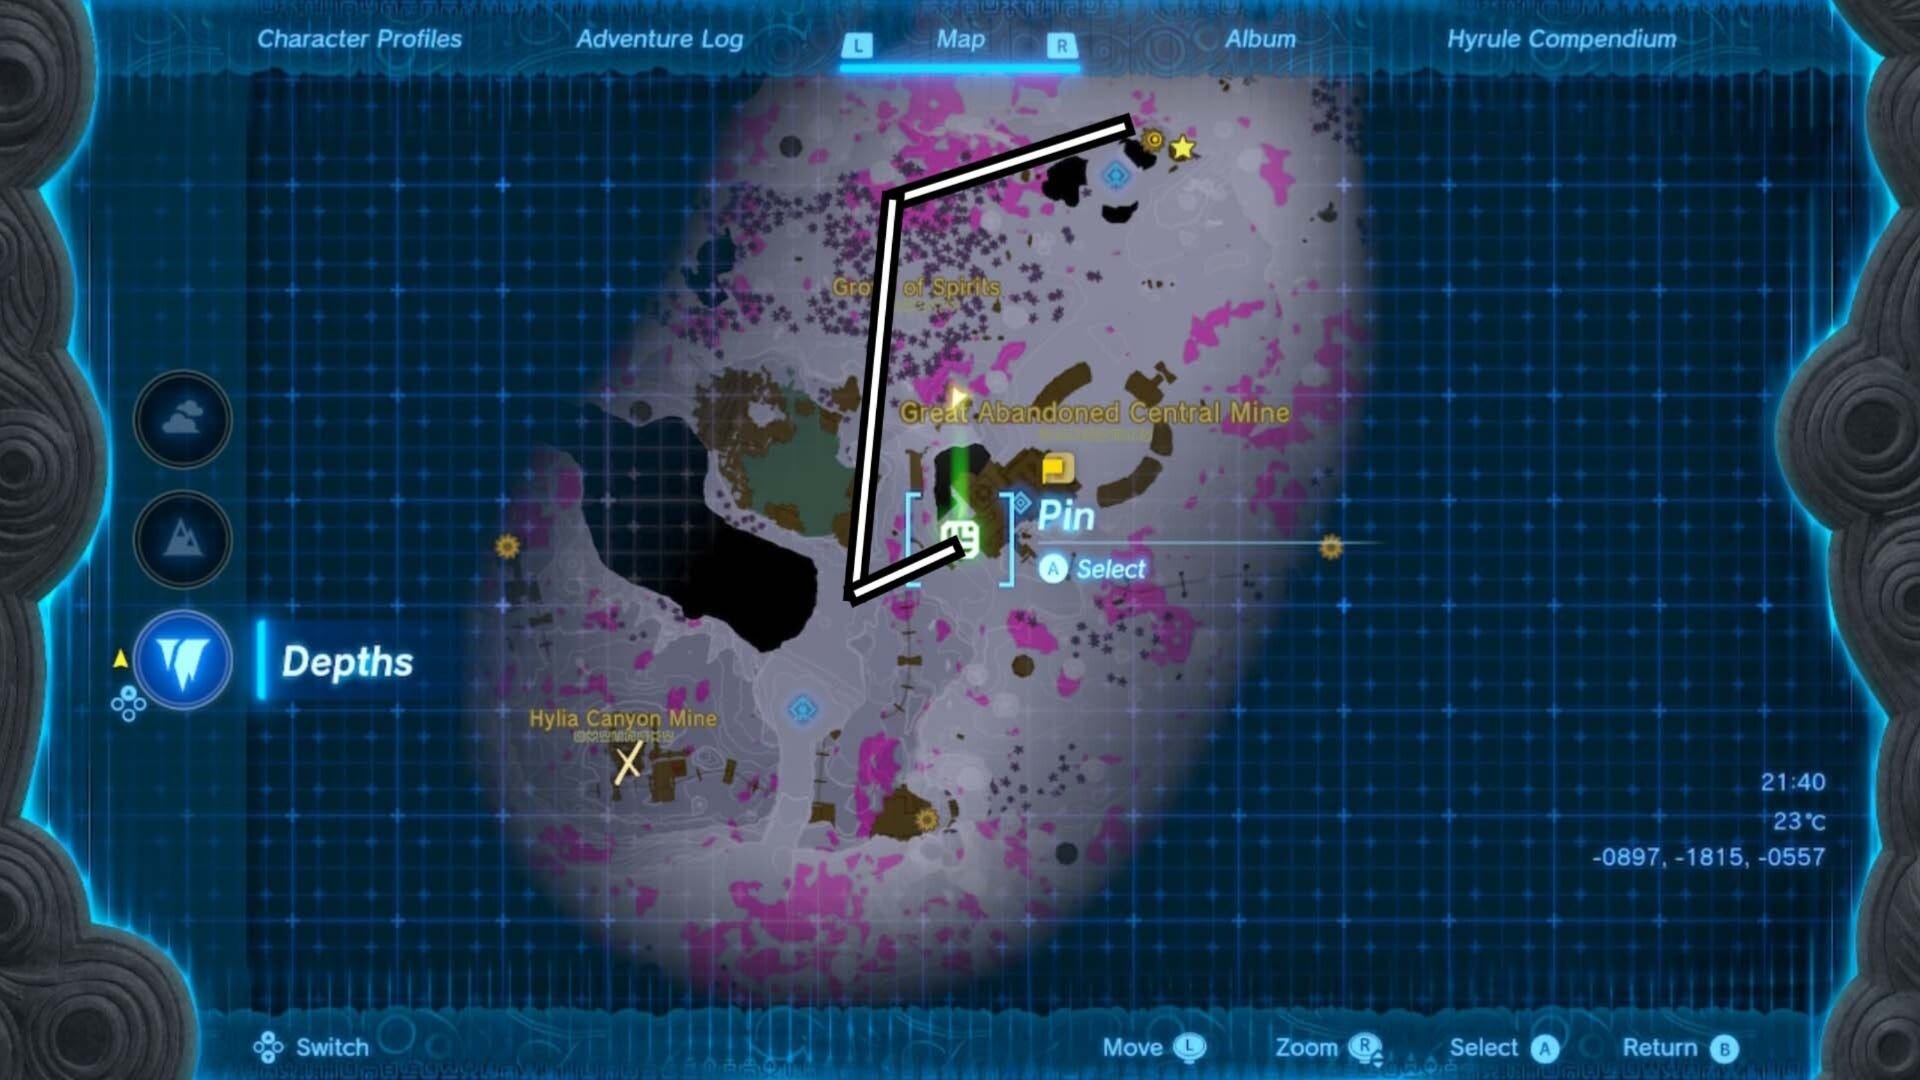
Once you get to the front of the Mine, grab the eye and carry it up the stairs to the same opening you used for the previous two eyes at (-0849, -1966, -0543).
Now, place the fourth and final eye into the last slot in the statue. As a reward, the statue will offer you a Heart Container or a Stamina Vessel. You can only choose one of these items, but they are free and will not cost you any Lights of Blessing this time around.
After you collect the item you choose, the statue will begin to function like any other Bargainer Statue across Hyrule.
Well done on completing the A Call from the Depths quest! If you need more help in your adventure across Hyrule, check out our Shrine locations guide or our Skyview Tower locations guide to find your way around.