Star Wars Jedi Survivor Rancor tips and strategy
Snack attack.
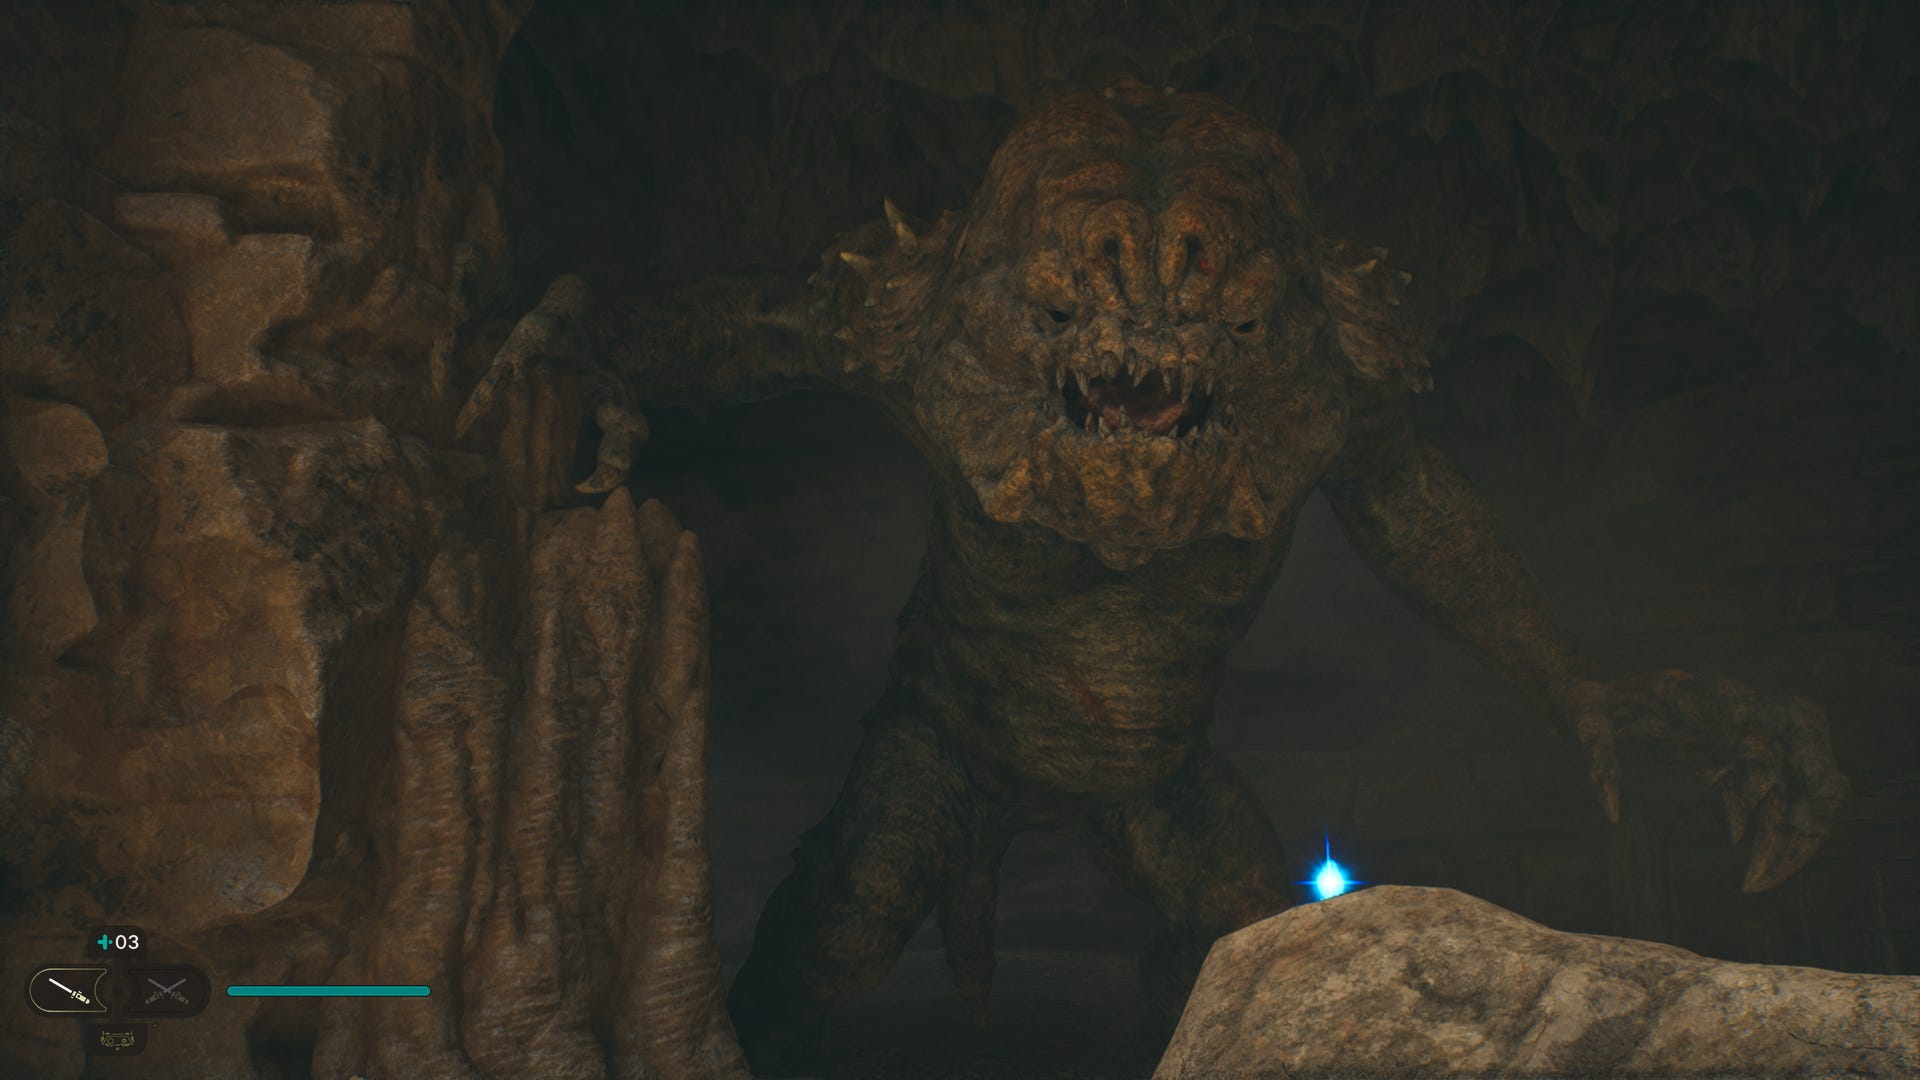

The Rancor is a legendary optional boss you can encounter fairly on in Star Wars Jedi: Survivor, and compared to any fights you’ve had in the story, it’s the first real challenge Cal Kestis will face even on the standard Jedi Knight difficulty.
An iconic monster since its appearance in Return of the Jedi, you’ll have the option to find the Rancor shortly after you first arrive on the planet of Koboh, just before you reach Pyloon Saloon at the Rambler’s Reach outpost. There’s a prospector nearby you can talk to who will tell you about some other prospectors who went to explore a nearby mine who haven’t returned, prompting a Rumour for you to investigate. The mine’s entrance will be just right behind you.
As your fights with the Empire up until this point will have been fairly easy going in Star Wars Jedi: Survivor, this is a good side quest to go test your Jedi abilities, and also where you’ll be able to access a very useful Perk early on. This guide will provide you all the information and tips you’ll need to defeat this hulking brute.
On this page:

How to prepare for Rancor in Star Wars Jedi Survivor
As this will boss is available in the first three hours of the game, Cal will not have levelled up his skills too much at this point, so you may find yourself less prepared for this fight if you decide to tackle the Rancor as soon as you learn about the Rumour related to the nearby mines by Rambler’s Reach.
Because the Rancor hits very hard and is quite capable of one-shotting you, increased health will be vital for surviving the fight. We recommend upgrading the Resilience skill tree so that Cal’s maximum life is increased at least once. You also have the option to reset your skills at any time so it doesn’t hurt to spend five skill points to unlock expert survival skills.

Finding more stimpacks to recover Cal’s life during the fight will also be important. We were able to complete this fight with just three stimpacks, but you might want to have found more before considering going down the mines. If you do die during the fight, your lost XP will appear as a gold glowing spot in the arena where you fight the Rancor, and touching it will also restore your life and force meter. So provided you don’t have too much XP you fear losing, instead of going to the gold spot immediately, it’s worth keeping it as a back-up if you’ve run out of stimpacks.
After you’ve explored the mines, known as the Sodden Grotto, at the very bottom you’ll find an arena pit. There’s a meditation spot nearby where you can rest and prepare your skills. Once you’re ready, jump in the pit. However, if the odds feel stacked against you, you also have the option to turn around and climb back out of the pit!
Need some assistance with Chamber puzzles? Check out our walkthroughs for the Chamber of Clarity, Chamber of Reason, and Chamber of Duality. We also have guides to help you learn how to get into the Forest Array and solve the Crypt of Uhrma puzzle. Want to travel in style? Then you can learn how to tame and ride animals. If you want to upgrade your weapons, we can show you how get the Quickdraw Blaster and the Crossguard Stance too. Upgrades like this may come in handy when you need a strategy for defeating the Rancor.
How to defeat Rancor in Star Wars Jedi Survivor
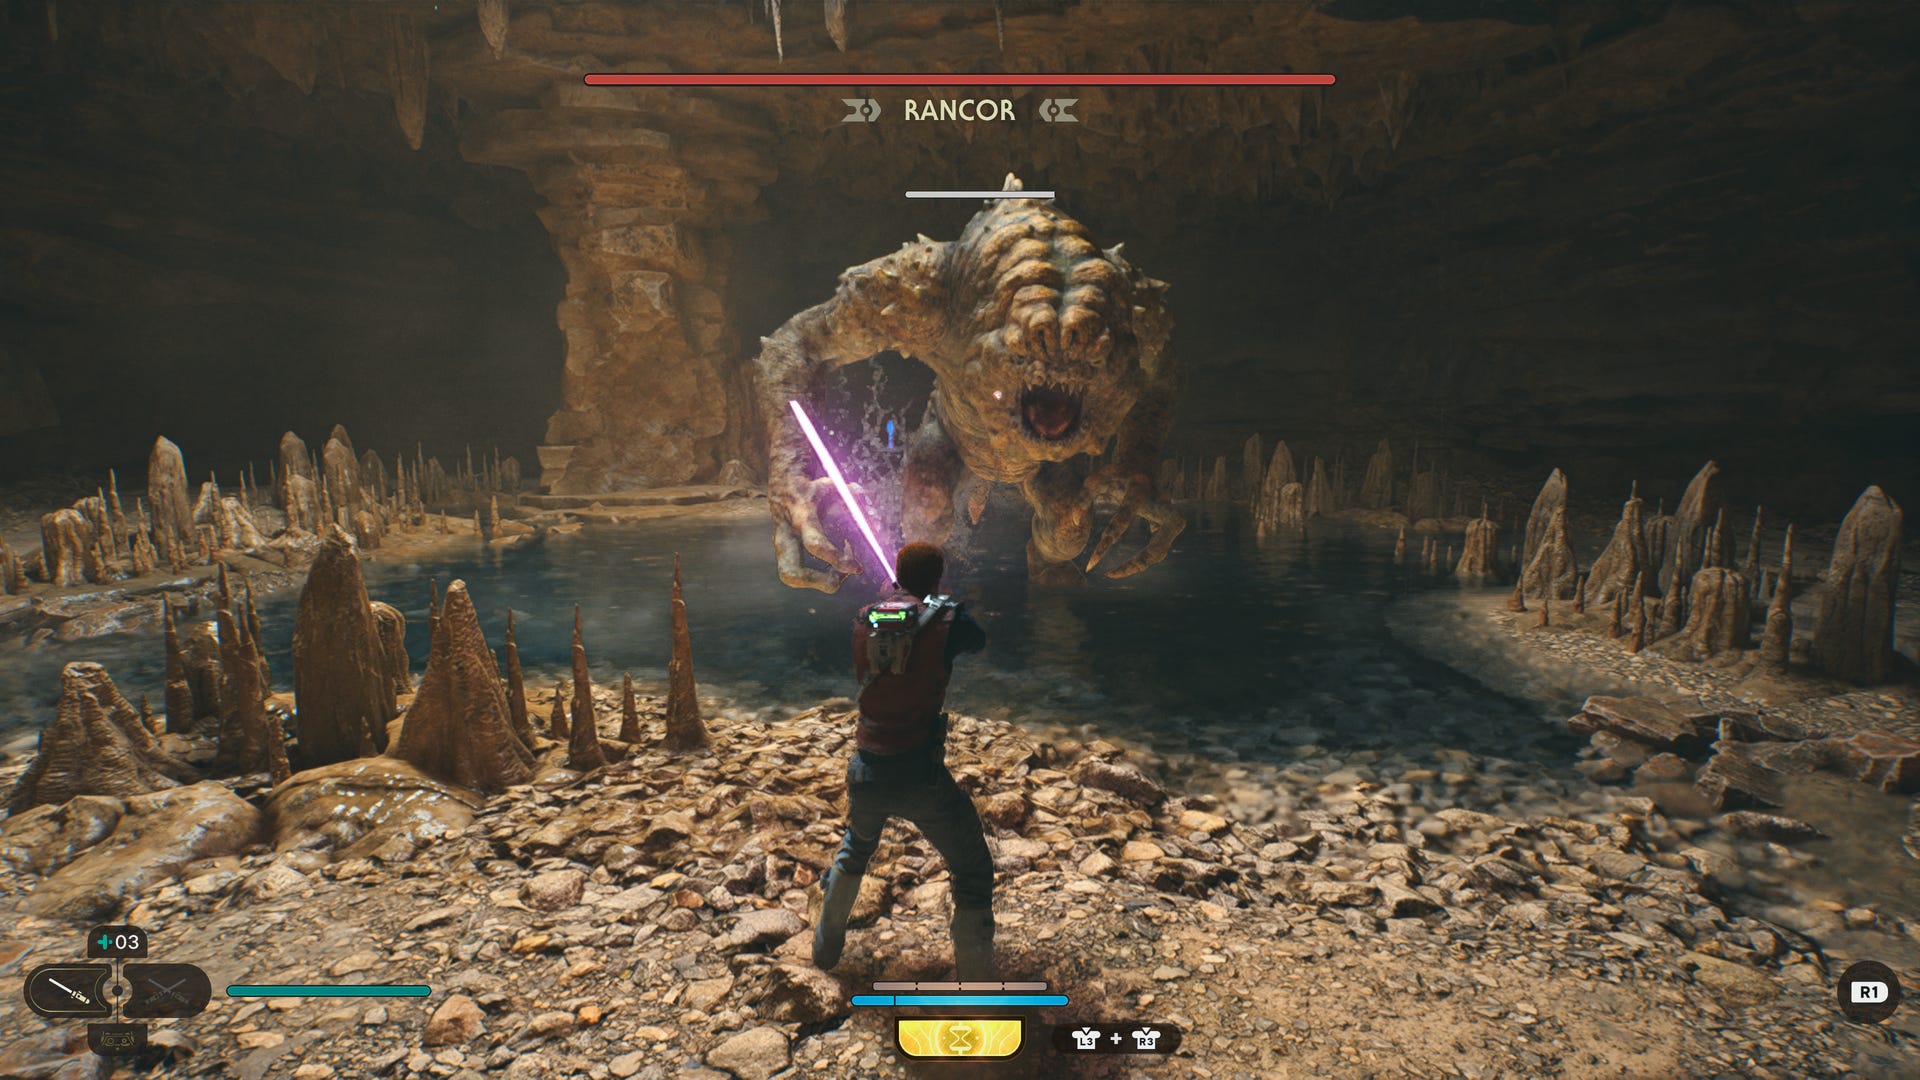
The Rancor is slow and lumbering to begin with but can hit very hard. It’s got three basic attacks, each having a one-two combo. With its claws, it can swipe with the left followed by the right, and another where it slams the left claw down followed by the right with a slightly slower rhythm. Getting hit with even one of these attacks is enough to put your health in the red so getting hit by the full one-two will kill you.
It can also try to stamp you with its feet, again with the left followed by the right, but this also causes AOE damage from the ground, although the AOE is not as damaging as the direct claw attacks. In any case, taking this Rancor means either parrying each one-two attack as it comes or keeping your distance. It can, however, close the distance by leaping forward quickly.
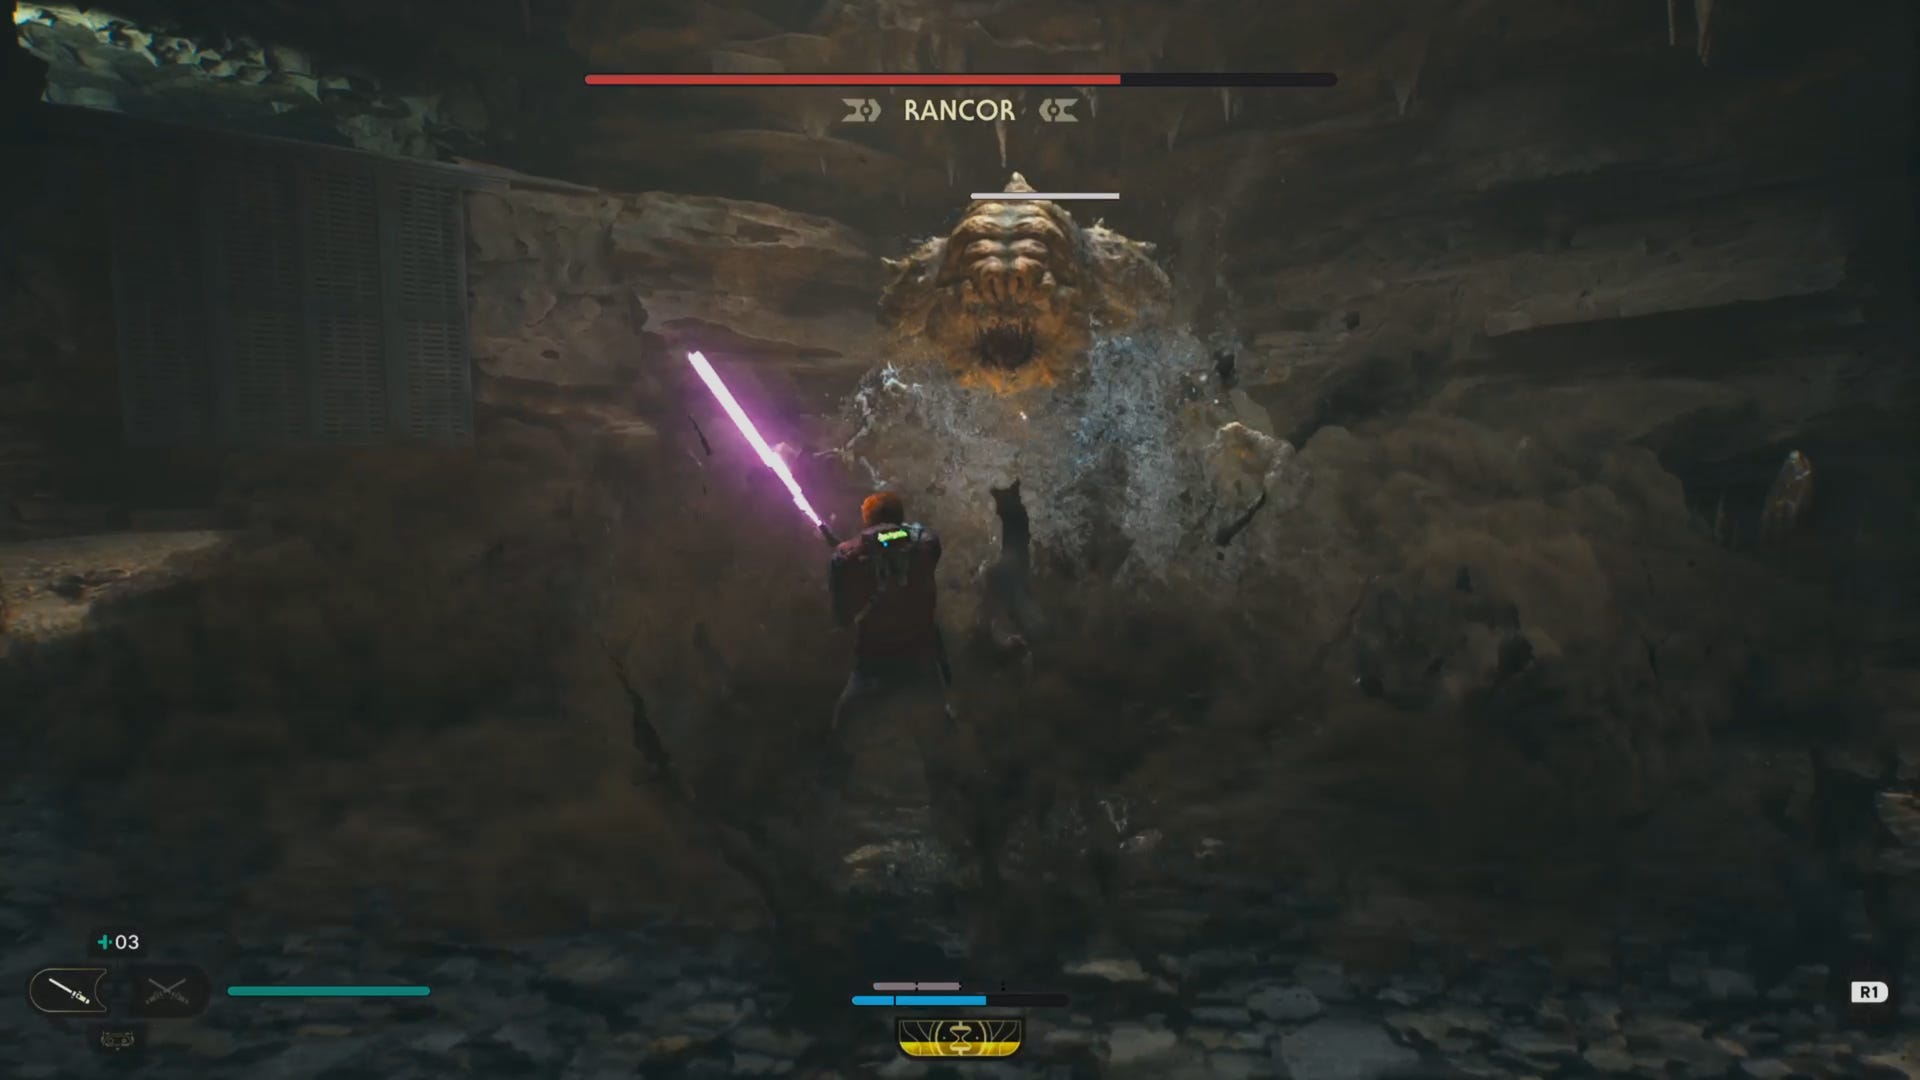
The Rancor also has a couple nasty unblockable attacks that it telegraphs by glowing red first. One is where it raises both claws above its head and then slams it down in front, sending a shockwave at you from the ground, usually if you’re fighting from a distance. You can dodge sideways when this happens, although you’ll probably be too far away from the Rancor to follow up with an attack.
The one to dread is where it raises its claws to its chest and then charges at you. If it grabs you then you’re unfortunately going to be its snack right there as it takes you in his jaws, while the camera just tilts slightly upwards to spare you the gory details.
There’s only so much you can do from a distance aside from throwing your lightsaber at it before your force meter runs out, and you can’t really use the rock pillar, where the Rancor first emerges from behind, as cover as it will just plough right through it like it’s nothing. So you’re ultimately going to have to face it head on. If you’re not as confident with parrying, the best thing to do is try to bait the unblockable charge. After dodging that, it’s an easy way to get in some free hits afterwards, which then also builds back up a unit of your force meter so you have a safe lightsaber throw.
You can also stall the beast with his own past meals. In the pit, there are bones lying around that you can use force telekinesis to pick up and then chuck at the Rancor’s mouth. This will keep it disabled for a few precious seconds allowing you to also get in some free hits or a moment to catch a breather. Note that the Rancor’s block meter is only affected by parries so any attack you land on it will take down its health.
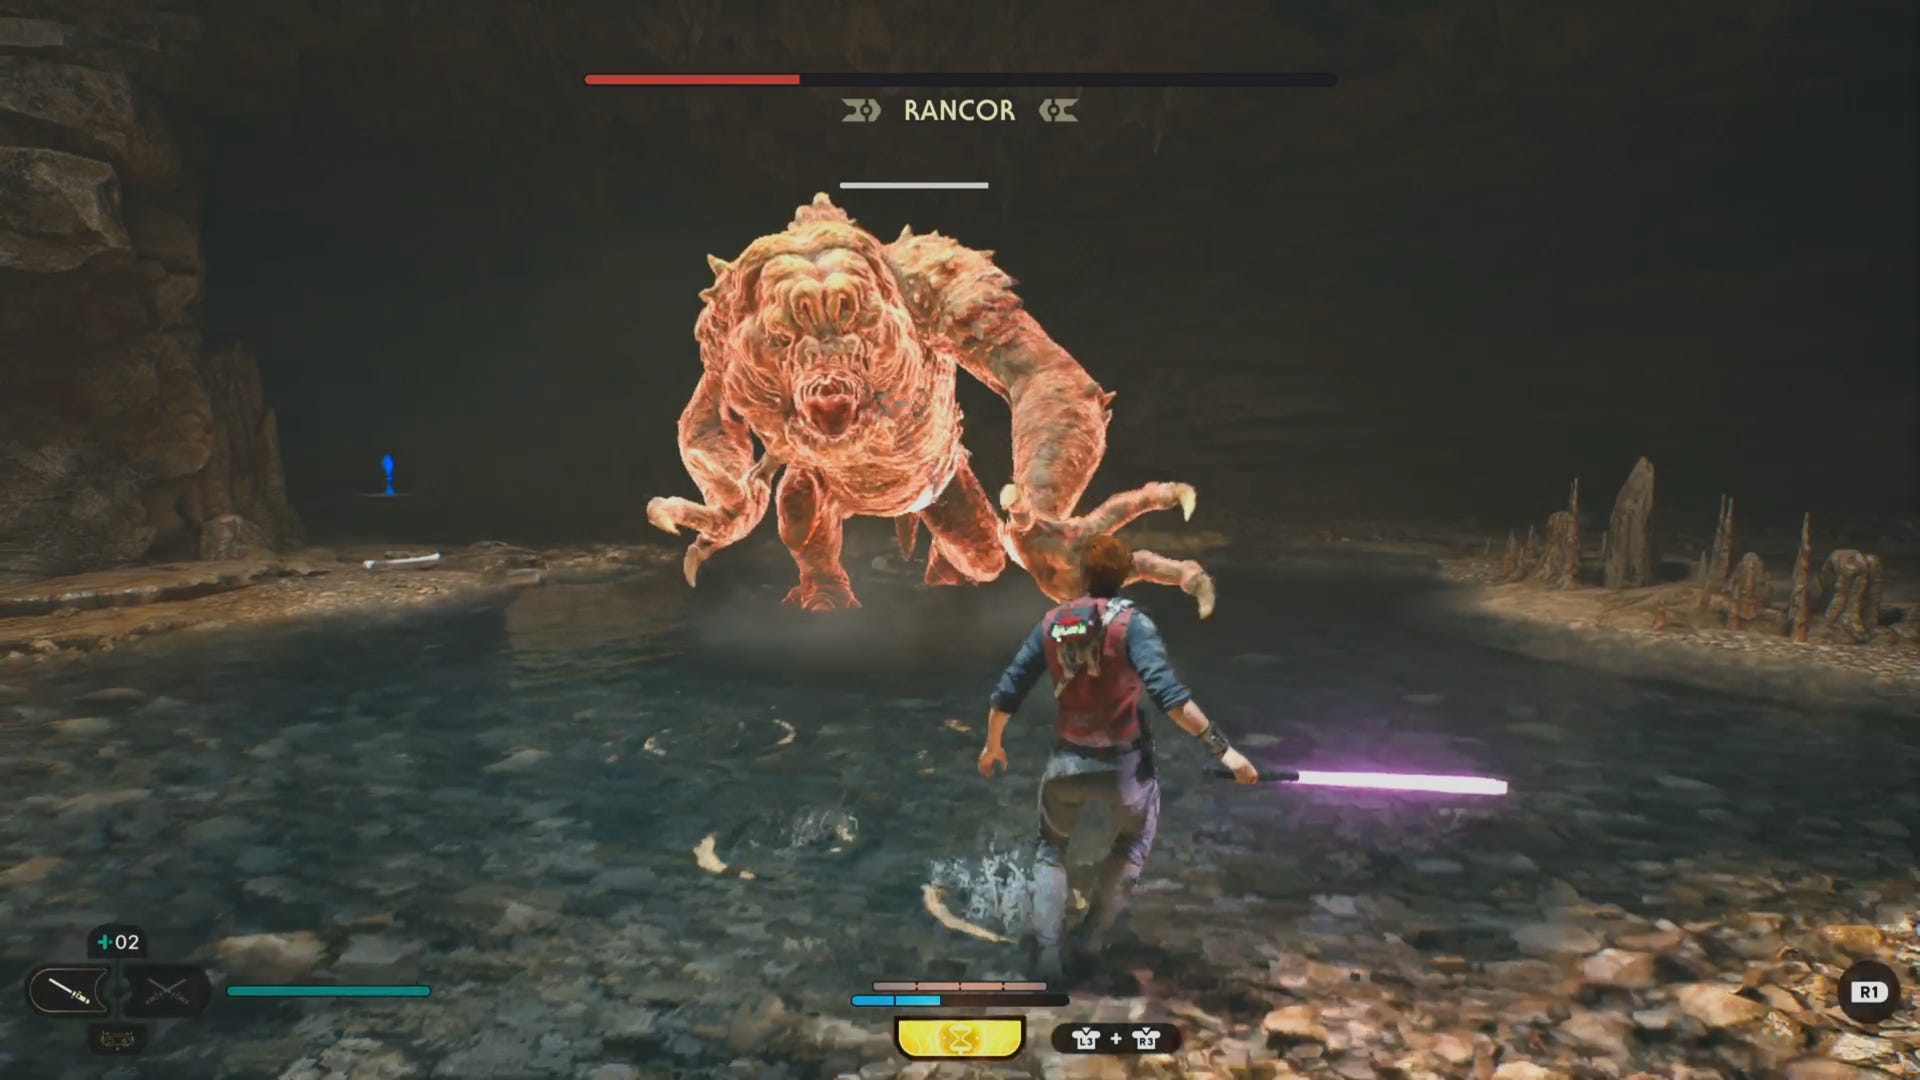
You won’t have to take the Rancor’s health down completely by yourself, as when it’s got just a tiny percentage of its bar left, the game will launch into a cutscene as Cal finishes the beast off.
Rancor reward in Star Wars Jedi Survivor
Killing the Rancor will net you a whole skill point’s worth of XP and end the missing prospectors rumour sidequest. You may have noticed a shining blue item at the end of the Rancor’s lair. Once you’ve defeated it, you’ll be able to examine it and unlock the Shatter Perk. This is a really handy perk to equip early on as it will make breaking an enemy’s block meter with your attacks considerably quicker.

Although the quest is considered complete upon defeating the Rancor, it’s worth revisiting the prospector who tipped you off in the first place. Speaking to her, you’ll discover she had known about the Rancor all along and wanted you to get rid of it so that she could have the mine all to herself. Let’s just hope for her sake another Rancor doesn’t show up!
With this legendary enemy out of the way, you’ll be a little stronger and wiser for the rest of Star Wars Jedi: Survivor’s campaign.