Zelda Tears of the Kingdom Kamizun Shrine solution
How to find and complete the Proving Grounds Beginner Shrine.

The Kamizun Shrine in Zelda: Tears of the Kingdom can be found in Hyrule Field, near the Forest of Time.
Whilst most Shrines in Zelda Tears of the Kingdom provide thought-provoking puzzles that require well-executed usage of Link’s ability set, Kamizun Shrine challenges you with a survivability challenge that’ll test your mettle in combat being the Proving Grounds: Beginner Shrine.
Prepare to make use of your Fuse ability, and read on to learn the Kamizun Shrine location and solution in Zelda: Tears of the Kingdom.
On this page:

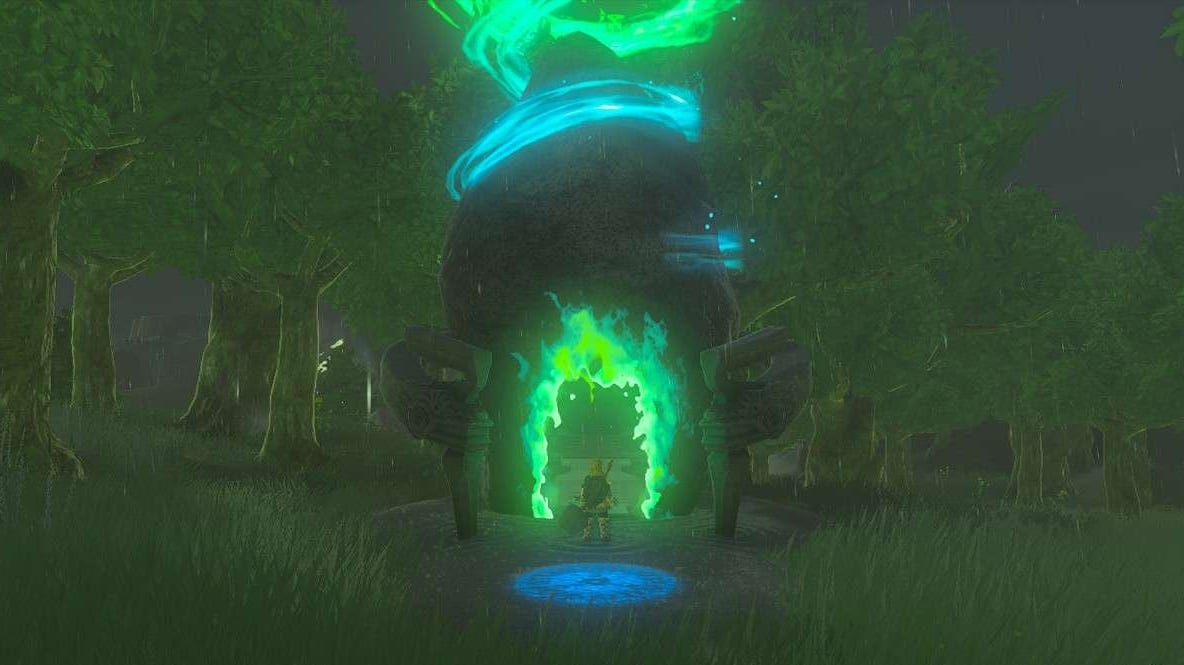
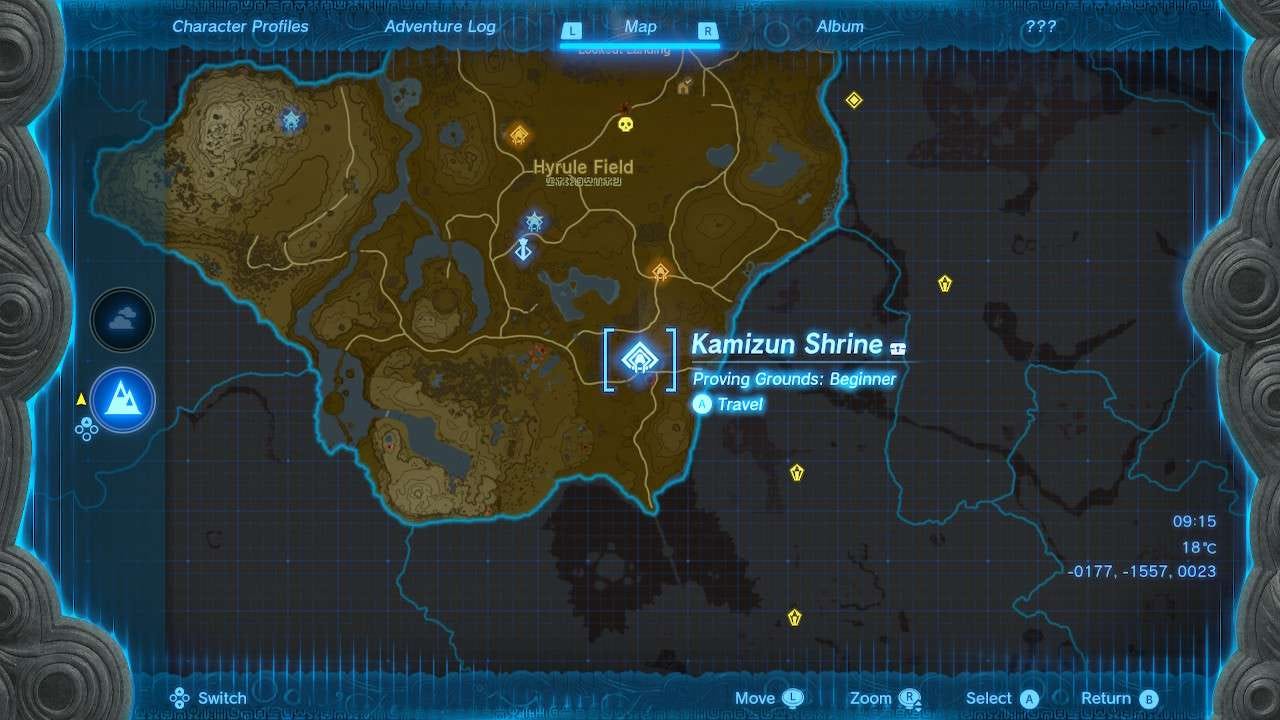
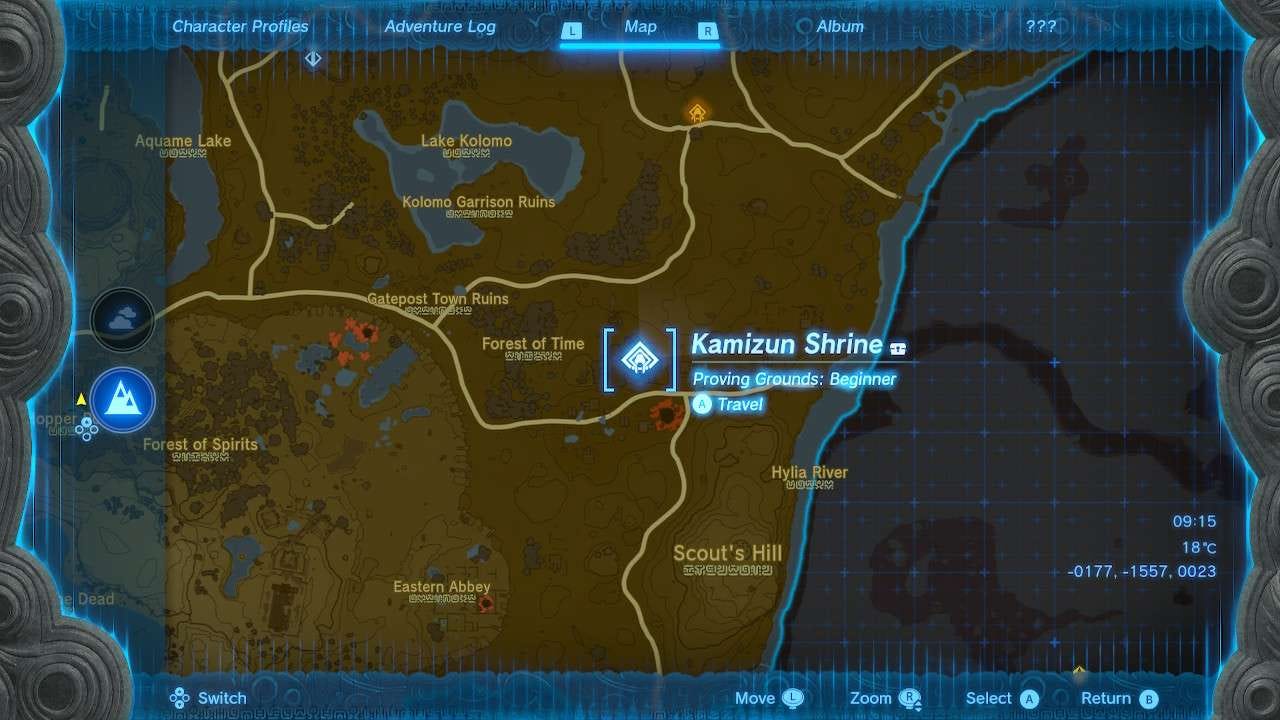
Kamizun Shrine location in Zelda Tears of the Kingdom
The Kamizun Shrine is located in the lower end of Hyrule Field, next to the Forest of Time, and above Scout’s Hill. Its precise coordinates are (-0177, -1557, 0023).
Kamizun Shrine solution in Zelda Tears of the Kingdom
As mentioned at the beginning, the Kamizun Shrine has less of a puzzle focus, and more of a combat focus being the Beginner Proving Grounds shrine. That is to say the challenge here is more about your survivability in battle, rather than clever use of abilities.
That said, there’s still a lot of strategy that can be implemented since the game tests you in combat without any of your gear.
You’ll notice upon entering, all of your gear and materials have been temporarily removed, though you still have access to core abilities such as Ultrahand, Fuse etc. Instead, you’ll have to make do with what’s provided.
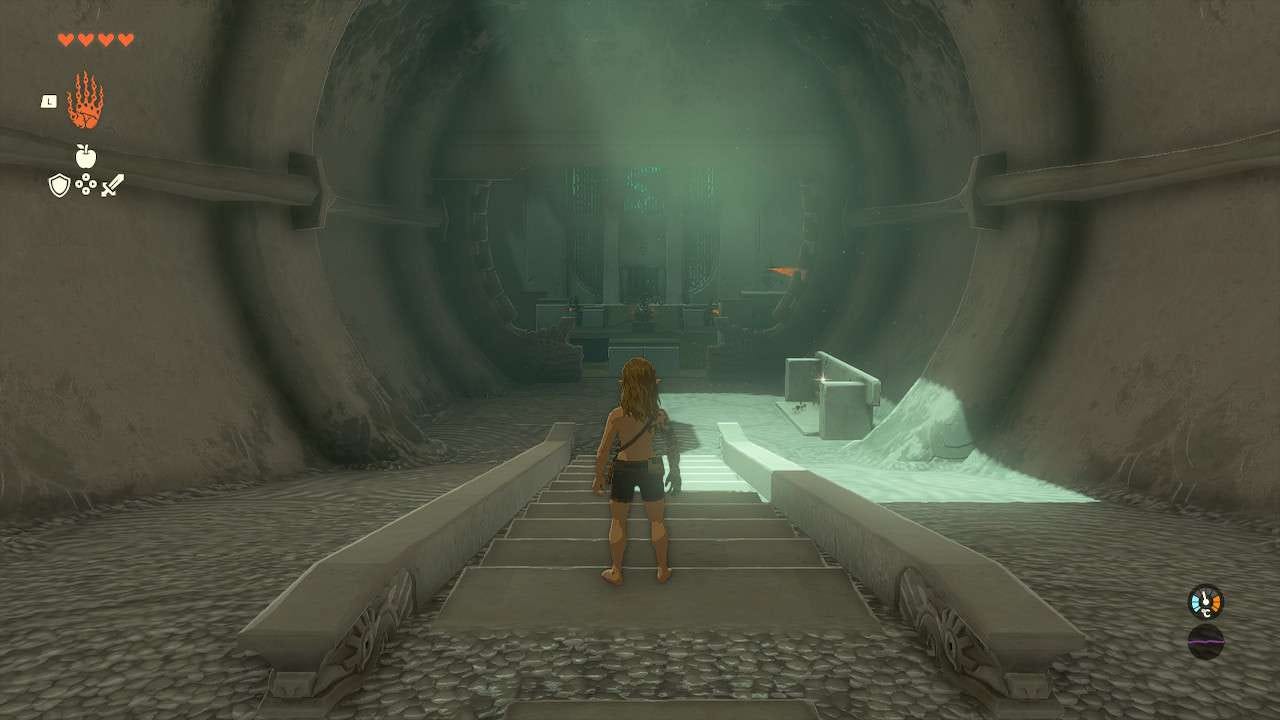
Before progressing too far, to the right of the archway, you’ll notice a collection of items to pick up – a set of starting gear is available, including a Wooden Stick, Old Wooden Shield, Old Wooden Bow and 10 Arrows.
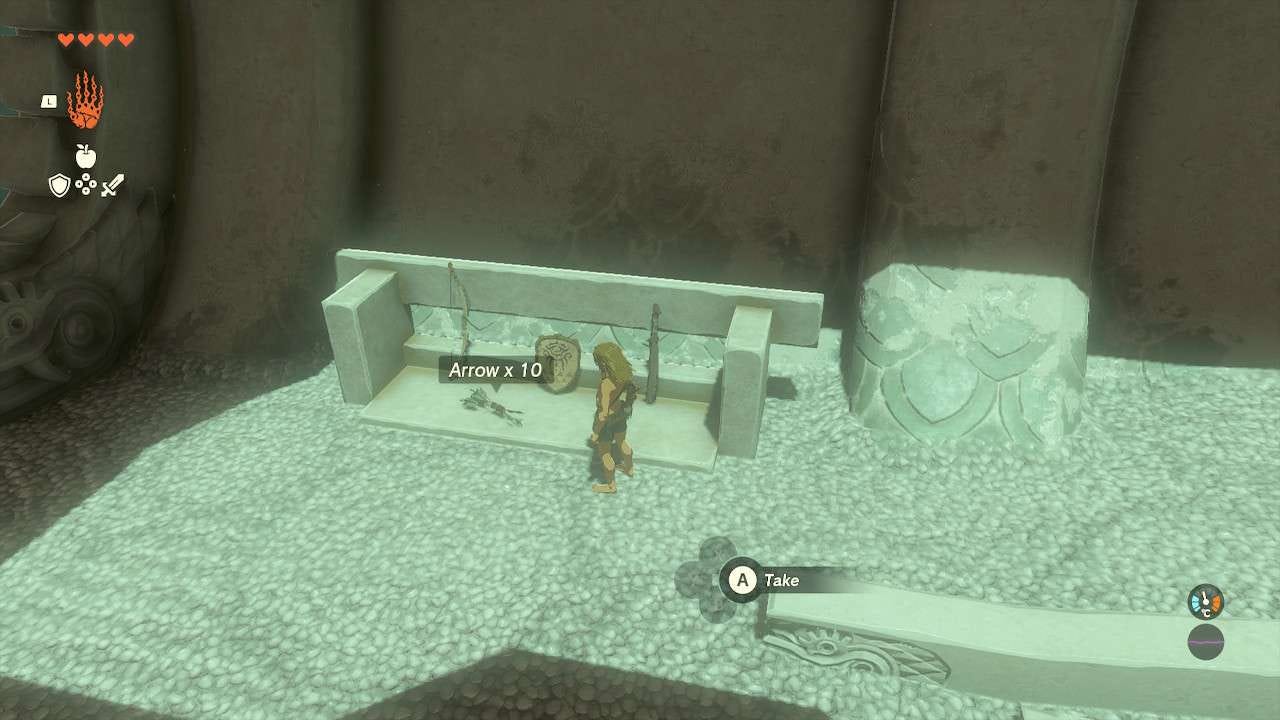
Whilst that’s what you start with, it can always grow to something more with some thoughtful usage of your Fuse ability however.
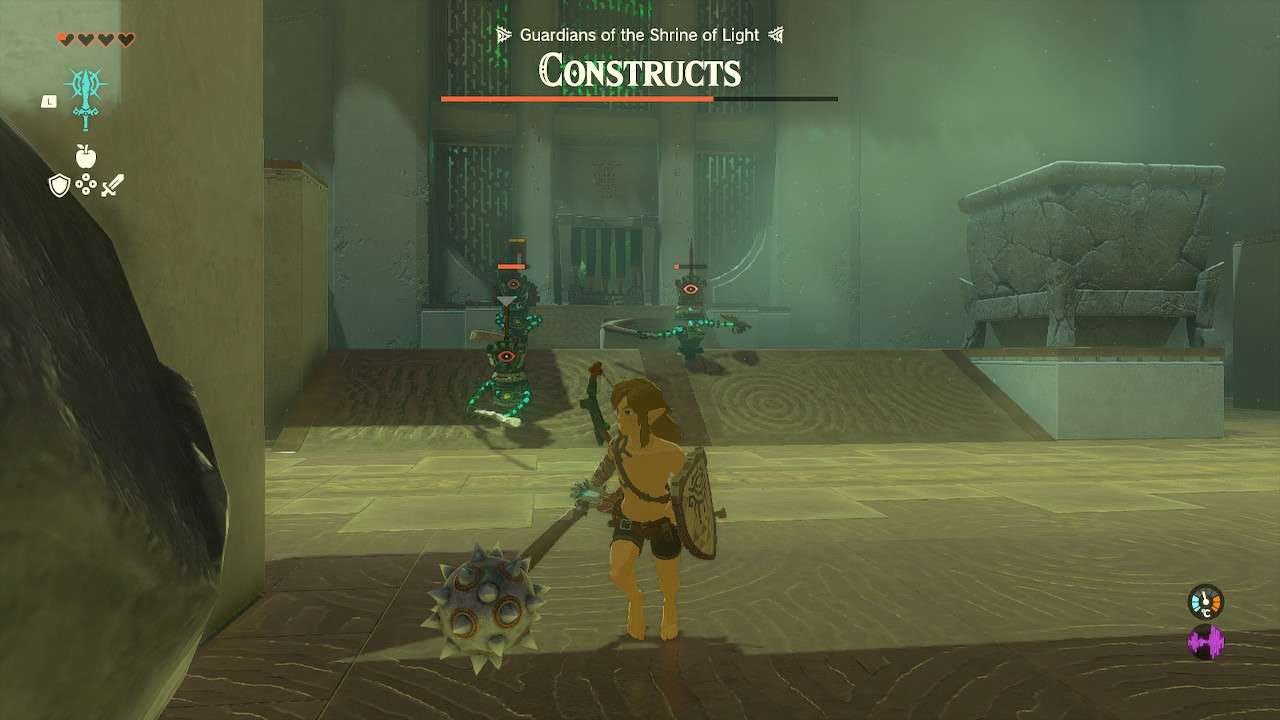
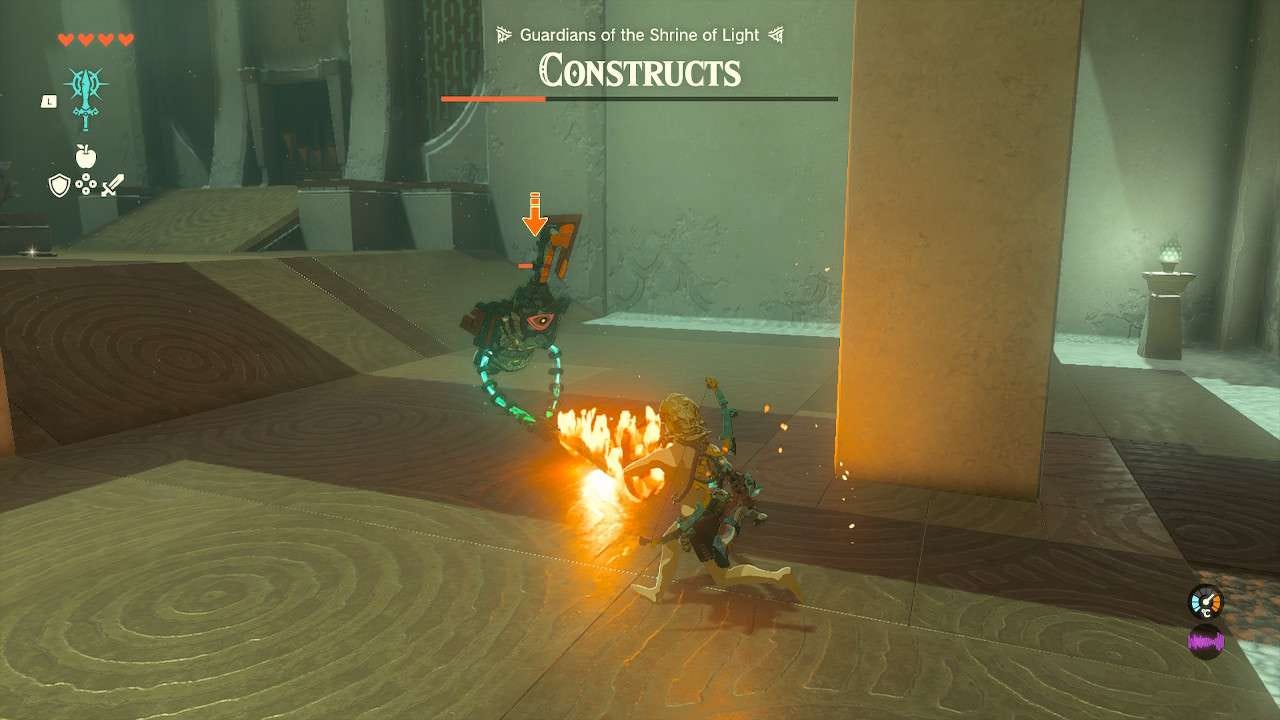
In the arena ahead, you’ll encounter four Construct enemies – one will be perched atop a pillar, whilst the other three will be hanging around the opposite side of the room.
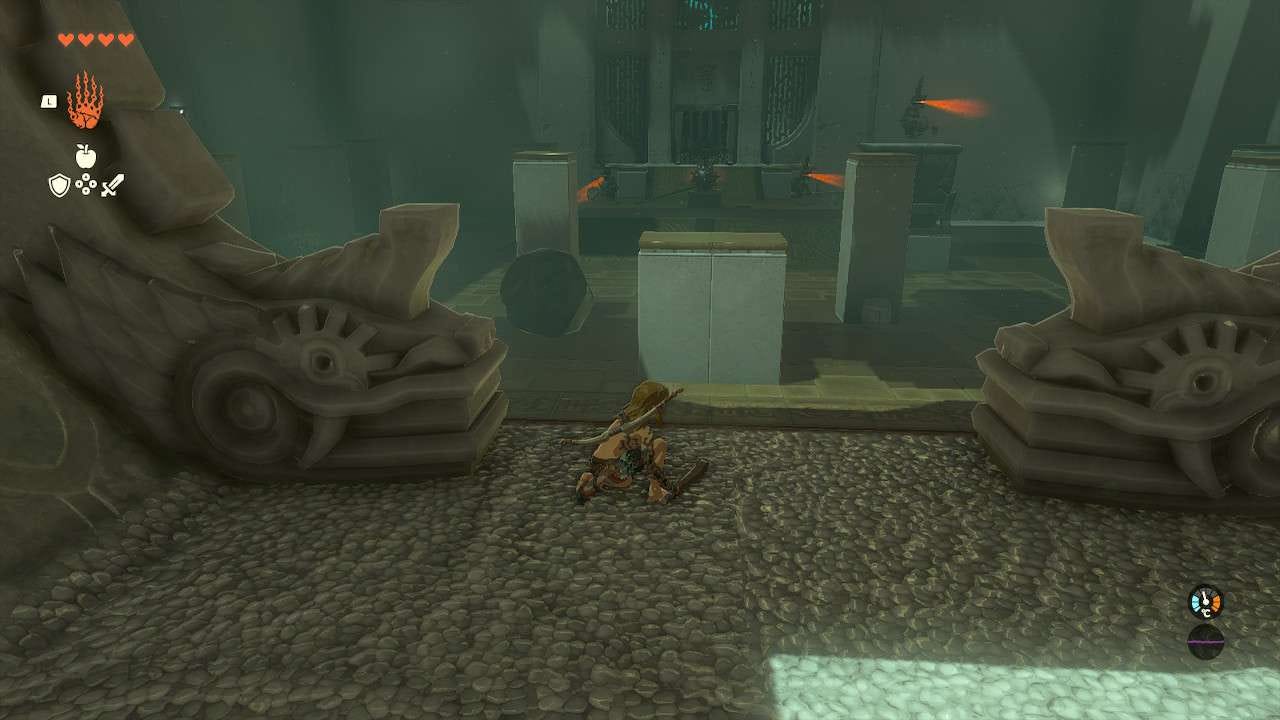
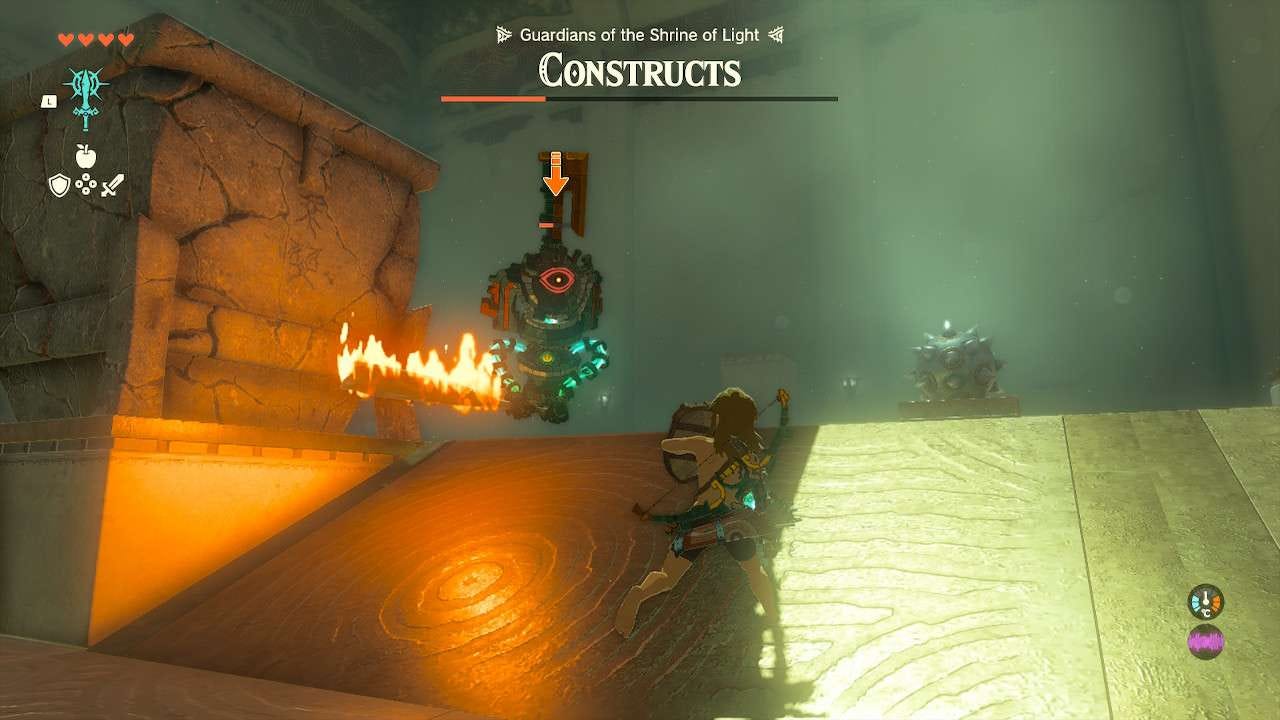
Three of these enemies are the standard Constructs you will have encountered in the opening hours of the game, whilst the fourth is a more heavily-armoured and stronger Construct who deals greater damage.
The strategy we’re recommending here starts with a bit of stealth – before the enemies spot you, you’ve got the chance to thin the waves, or at least put a dent in their collective health.
To do so, we recommend using the bow to eliminate the Construct on the pillar – one accurate shot to its head should do, leaving only three enemies remaining.
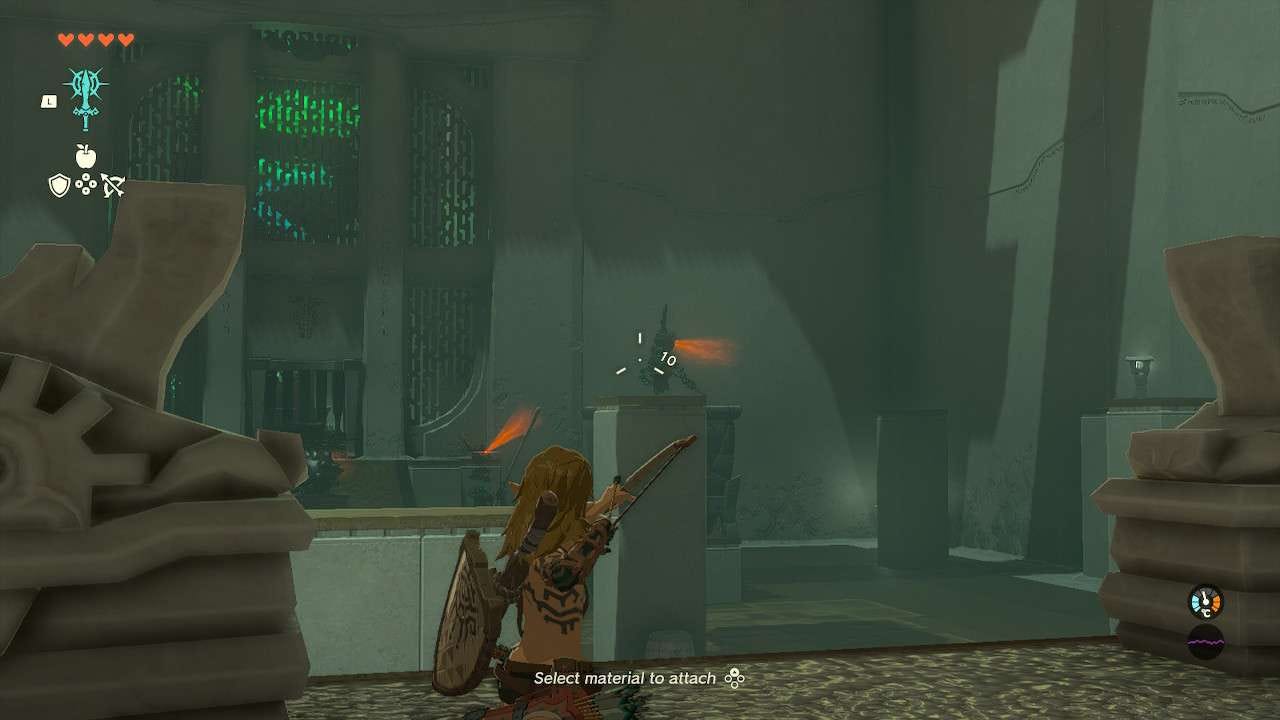
You can continue with stealth if they still haven’t spotted you, firing arrows for more headshots, but should the enemies spot you, a boss-like health bar will appear at the top of the screen, representing the collective health of the remaining enemies.
As you move around this arena, you’ll spot various objects and items that can be fused onto your weapons, and if you make it to where the first Construct dropped its loot to, you’ll find a Construct Bow too.
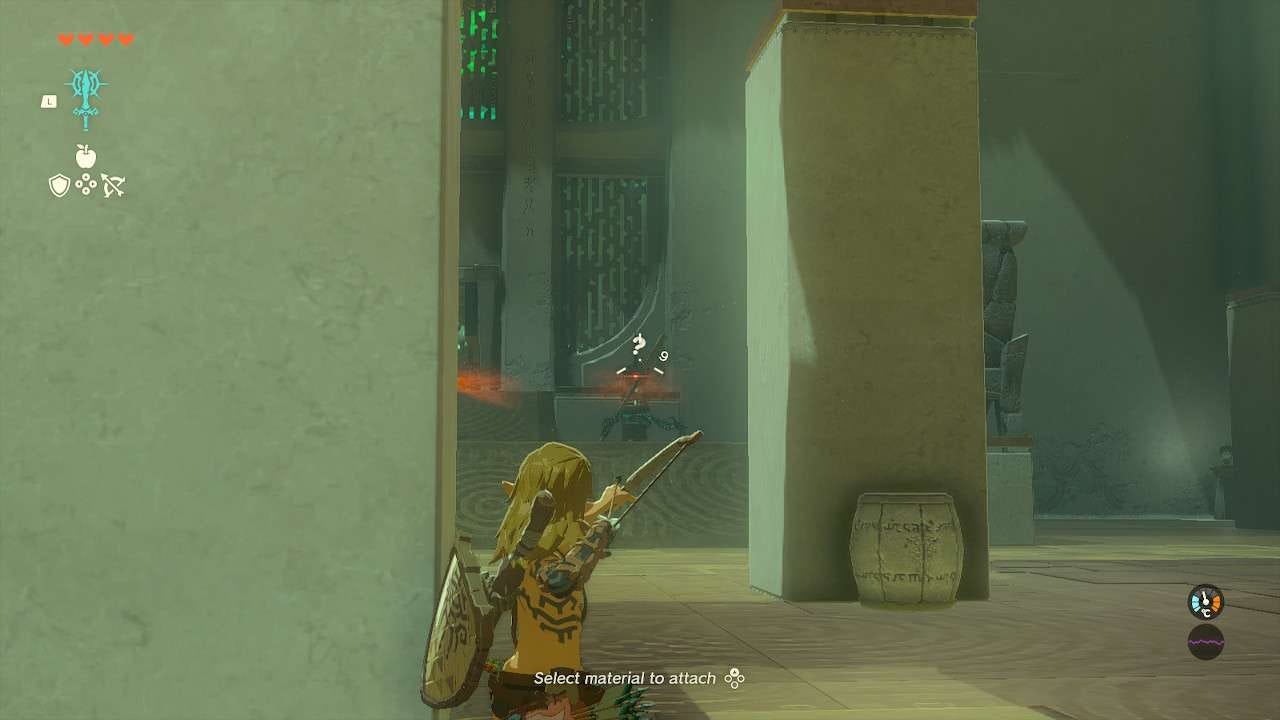
In terms of those Fuse-able items, you can find a boulder to the left as you enter the arena, with a spiked, metal ball opposite from the arena’s entrance.
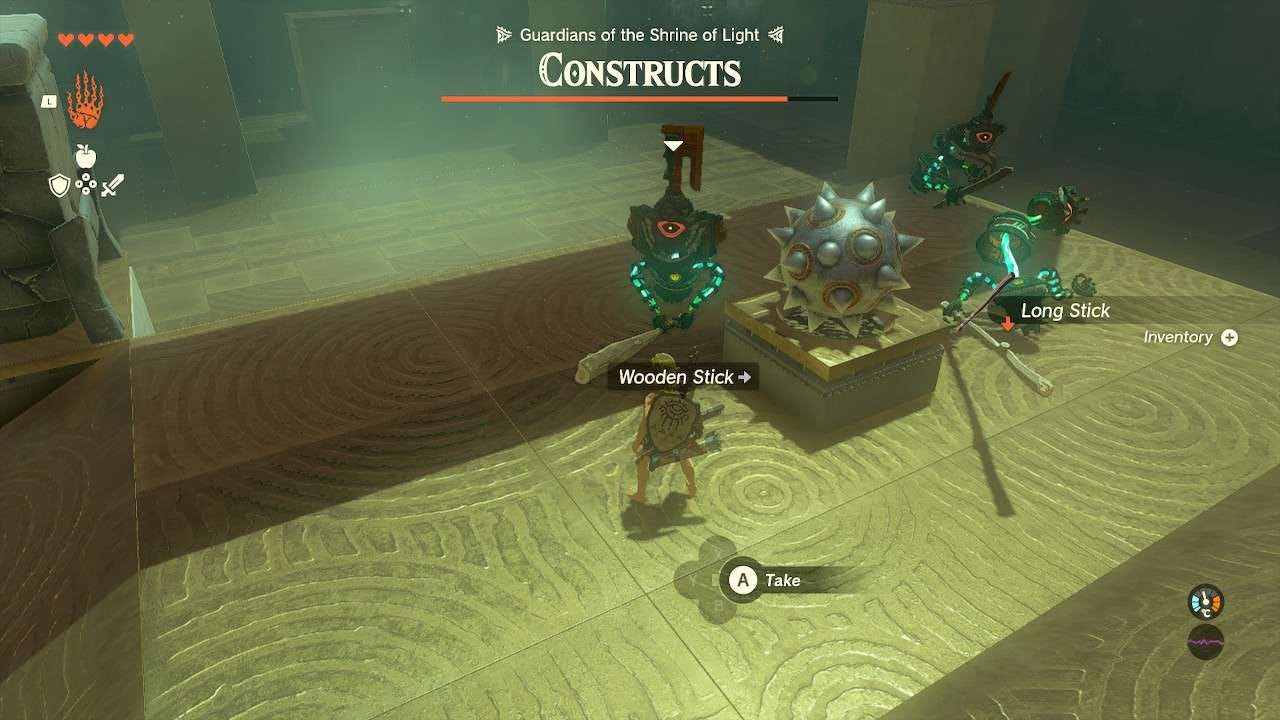
There are also a set of Fire Fruit you can find on the left side of the room, as well as a couple of weapons laying next to the aforementioned spiked ball.
This is without mentioning the items dropped by the Constructs you defeat.
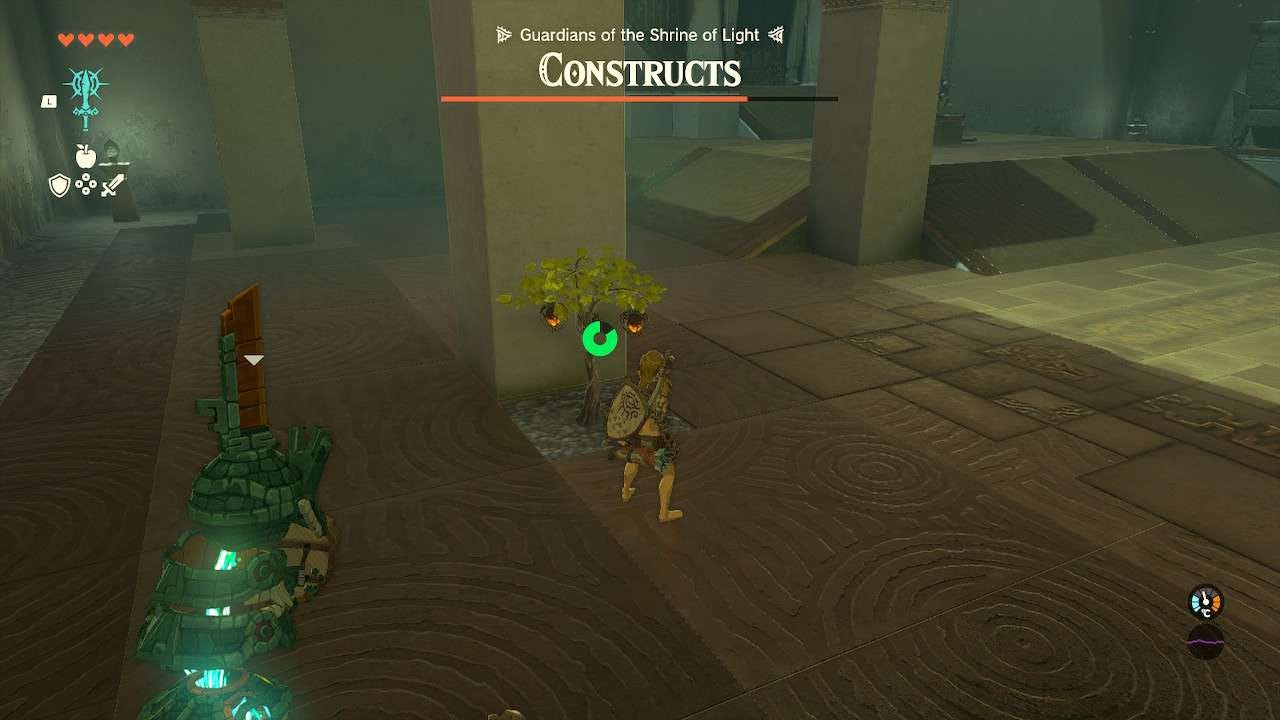
All in all, this challenge isn’t particularly demanding compared to other combat encounters in the game, but that doesn’t mean the enemies can’t catch you off guard or easily swarm you – be sure to keep moving if spotted, keeping good distance between you and the enemies, and making effective use of your environment.
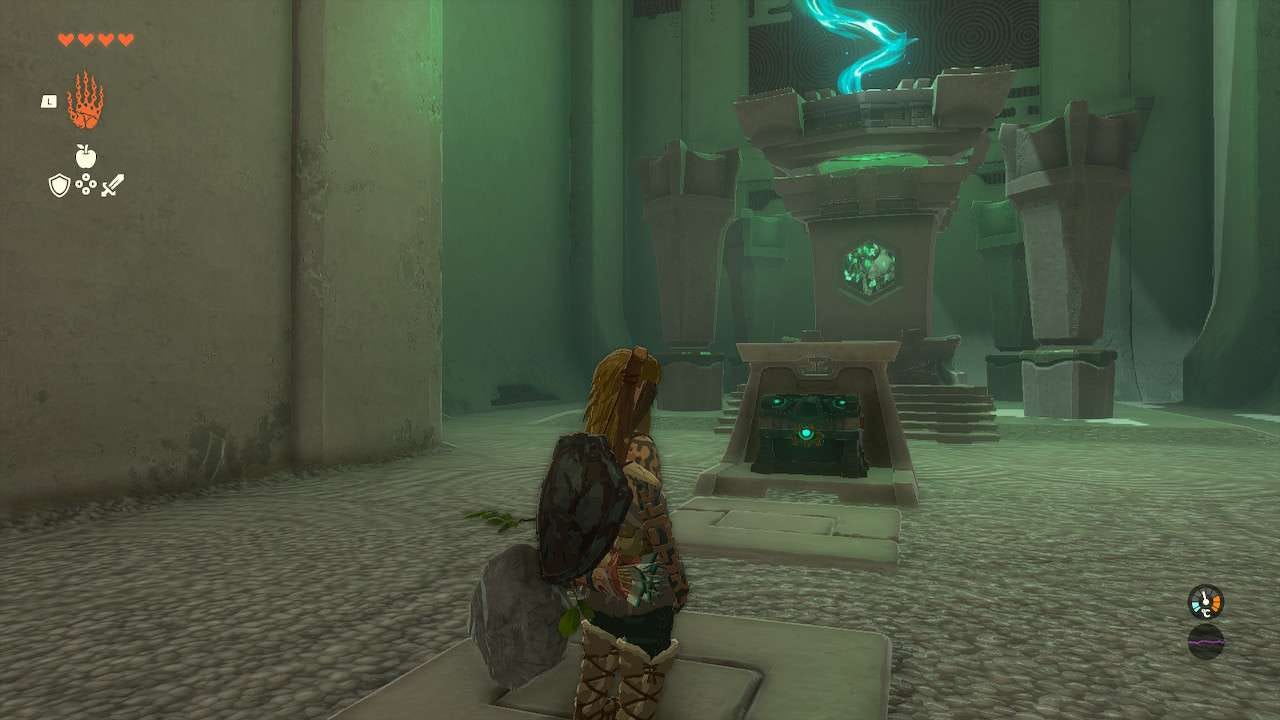
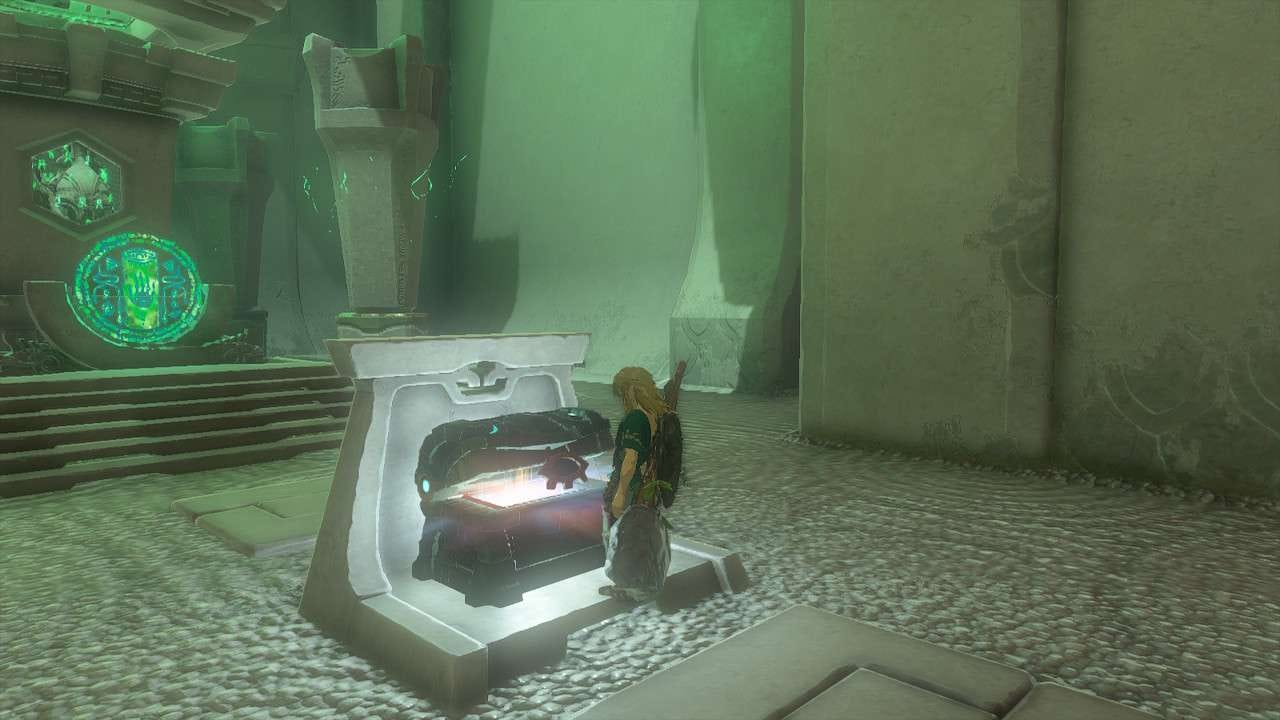
Once all the enemies are defeated, you’ll have all your gear returned to you, allowing you to forage and loot what’s left to collect in the arena before heading out the newly-opened door to complete the Shrine.
On your way out, you’ll be rewarded not only by the usual Light of Blessing, but also a chest in front of it too – collect both of them and interact with the statue to complete and exit the Shrine.
If you’re looking for more tips and tricks and anything of the like, be sure to check out our Zelda Tears of the Kingdom walkthrough detailing a variety of things to do, find and collect.