The Division 2 guide hub - Division 2 tips, mission list walkthrough and quest structure for taking back Washington
Our main guide hub for The Division 2 tips, guides and all you need to know.
The Division 2 guide hub you'll find here on this page gathers together all of our current guides, explainers, and help on one page, including a big list of our main Division 2 tips that we've picked up from playing so far.
We also include a Division 2 mission walkthrough and an explanation of the game's slightly unclear quest structure, so you know what missions become available when. We'll link out to any particularly tough or unusual ones with dedicated walkthrough pages as we get to them, too.
In other words then, this page is your one-stop-shop for all our The Division 2 guides pages, and should keep you covered with everything you'll need to know about the game from launch to the months beyond.
On this page:
The Division 2 guide hub and quest structure explained
Our Division 2 guides are still very much in-progress, so expect this list to grow considerably over the coming days after launch.
The Division 2 guides
- The Division 2 best weapons, damage stats and talents list - all weapon damage stats, charts, and weapon talents
- The Division 2 Skills and Perks - the best Skills and best Perks in The Division 2 explained
- The Division 2 Hyena Key locations - Factions Keys, Outcasts Keys, True Sons Keys
- The Division 2 Error Codes explained - Mike-01, Alpha-02, Bravo, Delta-03 error code meanings and how to fix them
More to follow!
The Division 2 quest structure explained
The Division 2 is sort of linear in structure - at least, there are missions which unlock in a certain order as you progress - but it's still very much an open experience with a lot of freedom there for you to choose what to tackle and when.
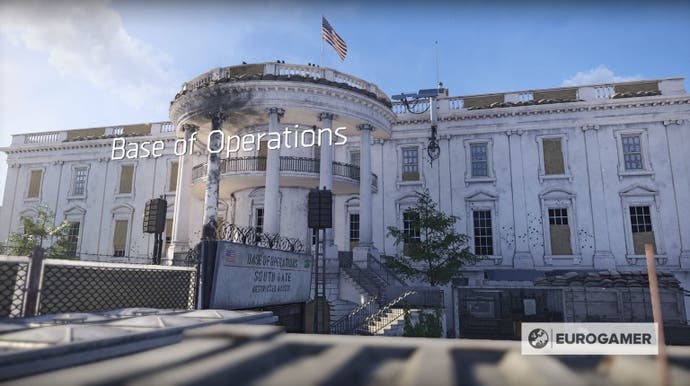
The first couple of missions right at the start of the game are properly linear: you'll do a quick prologue, watch an intro cutscene, then have to fight your way to the White House and head to your first Settlement, the Library, to begin with. After that things open up.
From then on it's a case of choosing your missions according to two things: your level (which caps at 30), and what you want to get out of it. Every mission has a level recommendation attached to it, and often story missions will unlock, but be a higher level than you are when you've unlocked them. In that case you'll need to do a spot of grinding - some side quests or world activities, for instance - until you high a high enough level to take them on.
As for the rewards, they vary: some give you SHD Tech, which is a kind of resource you spend on upgrading your Perks; some grant Skill Unlock points that can be spent on unlocking skills (shockingly); most grant loot, which is detailed in advance (a certain number of certain-rarirty equipment from killing the boss, for instance); and many count towards other things like improving your Settlements.
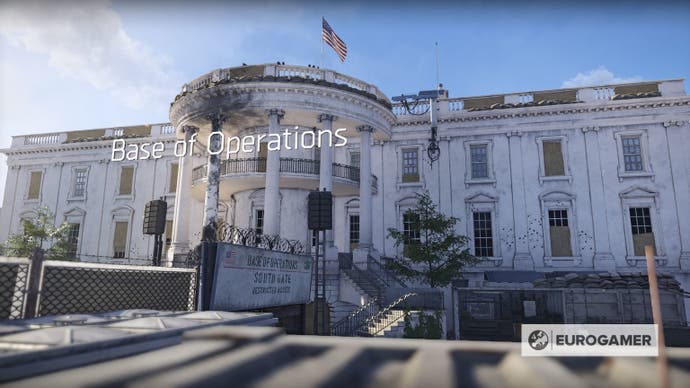
That's probably the final important thing to know about mission structure: there's a split between story missions and side missions, but also within story missions themselves. Some story missions are classed as SHD Missions, which grant large amounts of SHD Tech and develop your main base, the White House, allowing you to unlock new functions there. The others are Settlement Missions, which are tied to a specific Settlement (like the first one, the Theater) and completing them will, in addition to the standard rewards, unlock new functionality at that Settlement.
There's also the odd bit of busywork thrown in for fun, too - like being tasked with checking out a nearby Safe House early on, which is usually optional - and so we'll detail all of this and how it all ties together, and in what order, in a hopefully clear mission walkthrough list just below!
The Division 2 missions walkthrough list
Our walkthrough and mission list for The Division 2 is in-progress for now, but here's what we know so far:
| Quest Name | Level | SHD Tech | Skill Unlock | Unlocked After | Mission Type | Description |
|---|---|---|---|---|---|---|
| Prologue: Dawn's Early Light | 1 | 0 | 1 | - | - | - |
| Unlock Skill | 2 | 0 | 0 | Prologue | - | - |
| The Theater | 2 | 0 | 0 | Unlock Skill | - | Find Odessa Sawyer at the Theater |
| Grand Washington Hotel | 2 | 0 | 1 | The Theater | Settlement | Rendezvous with Agent Kelso and stage a daring assault to rescue Eleanor Sawyer from the Hyenas. |
| Downtown East Safe House | 2 | 0 | 0 | Grand Washington Hotel | Safe House | Unlocks avitivities, projects and SHD Tech Caches in the area. |
| Jefferson Trade Center | 4 | 10 | 0 | Grand Washington Hotel | SHD / Base | Reactivate the ISAC node beneath the centre and rescue the missing Division agent. |
| ViewPoint Museum | 6 | 0 | 1 | Grand Washington Hotel | Settlement | Seize the ViewPoint building from the True Sons |
| American History Museum | 8 | 0 | 1 | Grand Washington Hotel | Settlement | Extract interrogation data from the True Sons stockade. |
| Air and Space Museum | 10 | 0 | 1 | Grand Washington Hotel | Settlement | Investigate True Sons activity at the Air and Space Museum |
| Space Administration HQ | 12 | 10 | 0 | Jefferson Trade Center | SHD / Base | Re-establish the Division satellite network. |
The Division 2 tips and tricks for beginners and returning experts
Finally, here's a quick rundown of some early tips and tricks, which should be worthwhile to both brand new and returning players who're feeling a little rusty. We'll be expanding these as well as our walkthrough and guides sections above in the coming days after launch!
- Underground Areas are your friend - keep a constant eye out for Underground Areas - signified with a yellow circle with a downwards arrow on it on your minimap (and visible on the main map in areas you've visited before if you zoom in very close). These contain no enemies (that we've found so far at least), but plenty of really decent loot. It's a great way to stock up if you're behind, but most of all by far the best way to get Faction Keys. More on those in our dedicated Division 2 Hyena Key, Outlaws Key, True Sons Key and Faction Keys explained guide!
- Explore, explore, explore - following on from that, The Division 2 is actually a game about exploring your evironment, even if you wouldn't guess it at first from all the waypoints and hand-holding. Zoom in on the map to uncover a litany of icons for different things - food stashes, activities, hidden areas, and so on - and just have a general poke around the world as you go. Not only is a great way to find useful loot and items, but it's also just a much nicer way to experience the game.
- Embrace the grind - you'll frequently find yourself slightly underlevelled for the next mission, as they jump up two levels at at time but you'll gain a maximum of one level for completing them. Go tackle some side quests or other activities and you'll be rewarded with some great loot, like Faction Crates that can only be opened with those Faction Keys we linked to above, as well as some decent missions in general.
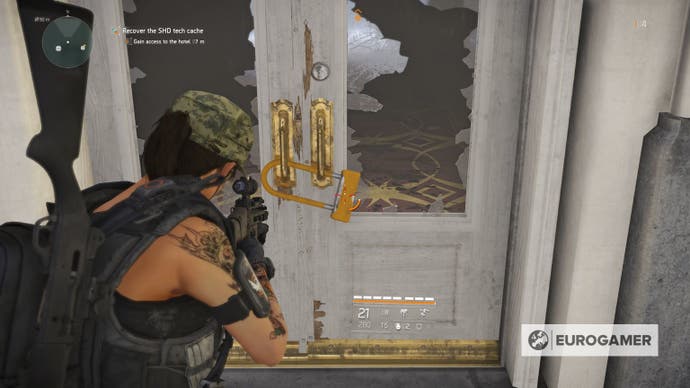
- Look for destructible locks - as a rule of thumb, if you can see loot, you can reach it. If something's seemingly locked behind a gate or door, look at the lock of the door itself - if it's yellow, like the one in the picture below, shoot it to destroy it and gain access! In other areas like the underground spots you might need to take a more long-winded route to get that loot, but it's always doable, so be patient!
- Unlock the XP Perk early - Perks, unlocked with SHD Tech, are a kind of skill tree in The Division 2, but one of the very best is the one that boosts your XP for various things (like headshots, multi-kills and so on). Unlock the lot of them as soon as possible, as they don't cost much and will be a massive help in the background as you gradually level up, getting you through those levels to the cap much faster.
- Use your Skills as if they were an Ultimate - using your skills, like attack drones or riot shields, is a case of timing as much as anything. Save them for the bigger battles and they'll be game-changers, but waste them too early and have them stuck on cooldown and those boss fights and swarms of enemies will be much harder work.
- Experiment with builds as you play - the real 'build' phase of the game is the endgame, when you've hit the Level 30 cap. Until then, use your story playthrough to experiement and have fun. Keep swapping out weapons so you know which kind you gel with for the late game, and then you'll already have a decent idea for a build in mind, be it the good old Assault Rifle builds or something a bit more fancy.
- Keep your favourite weapons and gear - there's a decent amount of storage space between your inventory and your stash, so keep hold of weapons that you particularly enjoy using, or have nice perks attached to them. You can upgrade weapons through crafting to bring them up to a higher level, but we'll dive into that in more detail further after launch!
That's all for now, but expect this page - and our general roster of guides - to expand drastically in the near future. For now then, enjoy!
