Zelda Tears of the Kingdom Kikakin Shrine solution
How to complete the Shining in Darkness Shrine.
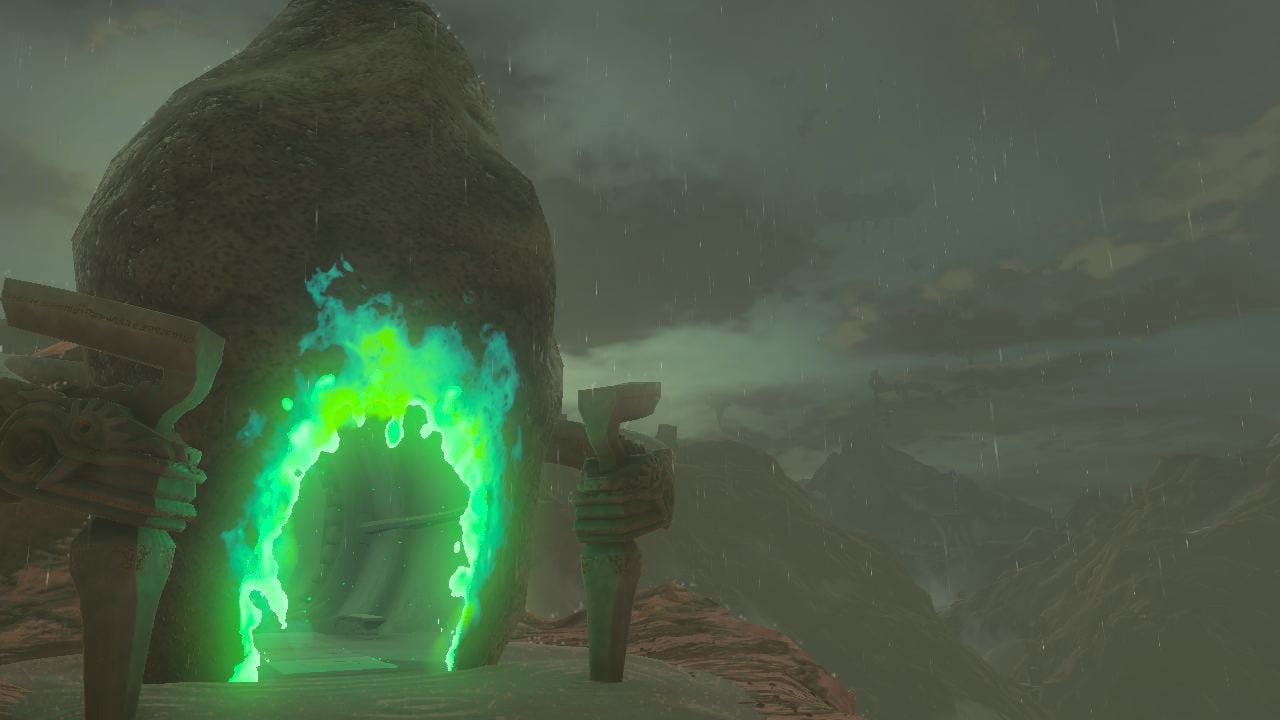

The Kikakin Shrine in Zelda Tears of the Kingdom is a blacked out maze, making up the Shining in Darkness puzzle.
This is a challenge of navigation and without any light it can be a very tricky shrine. However, like with some of the other Tears of the Kingdom shrines, there are multiple chests to find, so you’ll want to make sure you don’t miss anything in the darkness.
This guide will walk you through the Shining Darkness Shrine, showing you the Kikakin Shrine solution, its location, and the steps to get all its chests.
On this page:
If you’d like to learn more about Link’s adventure, visit our Tears of the Kingdom Walkthrough.
Kikakin Shrine location in Zelda Tears of the Kingdom
The Kikakin Shrine can be found close to Great Hyrule Forest. That puts it in the north section of the map, sitting at the coordinates (-0395, 2736, 0287).
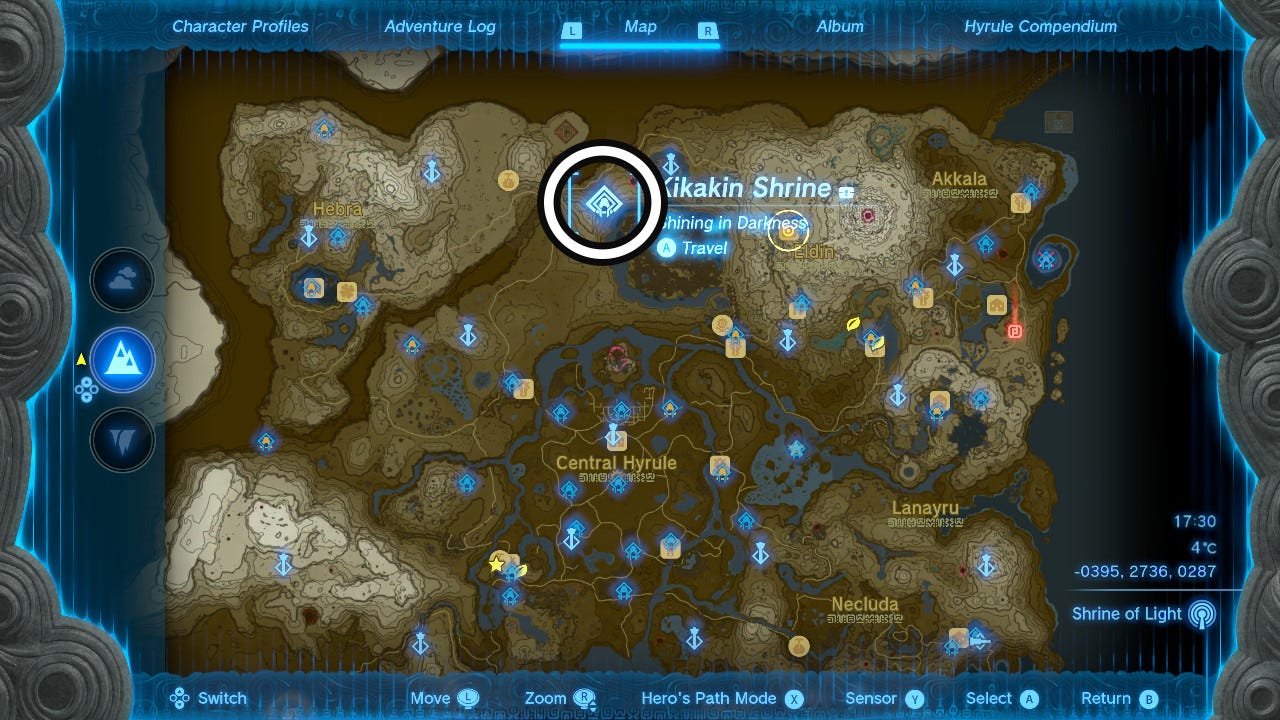
It’s in an area of rough terrain with lots of climbing, so it may be easiest to glide down from Thyphlo Ruins Skyview Tower.
Kikakin Shrine puzzle solution in Zelda Tears of the Kingdom
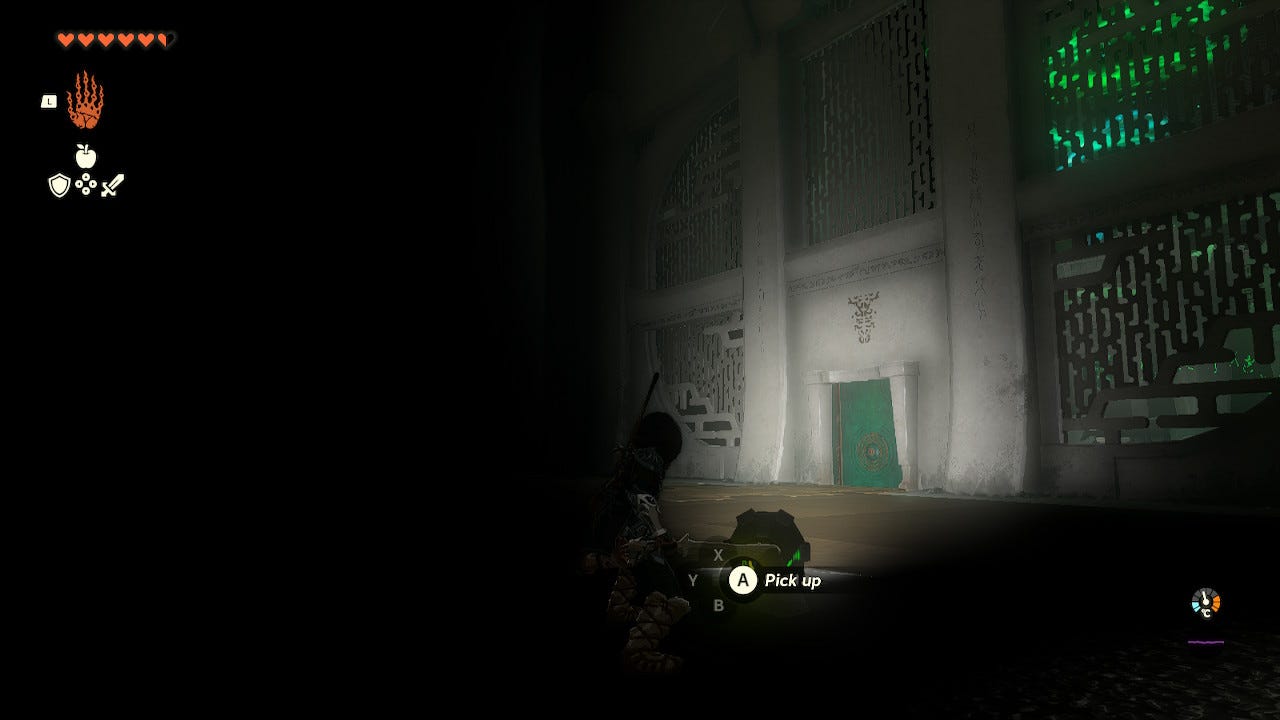
To solve the Kikakin Shrine you're going to need to deal with the darkness first. When you first enter the shrine, you will see that it is very dark, and although there is a Zonaite device to pick up and provide some light, it’ll still be a struggle to see.
However, we recommend bringing Brightbloom seeds as these really help brighten up the space as well as marking your route. You’ll see that we’ve done so in these images, so if you don’t, expect it to be a lot darker.
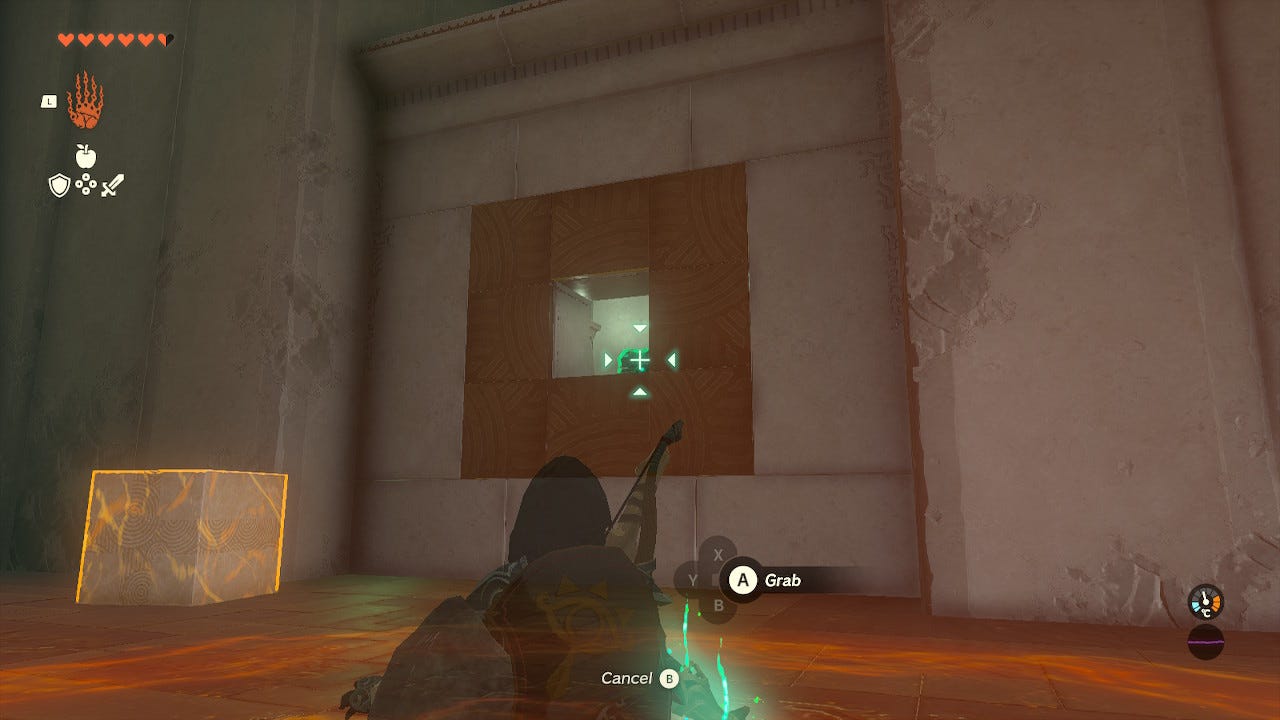
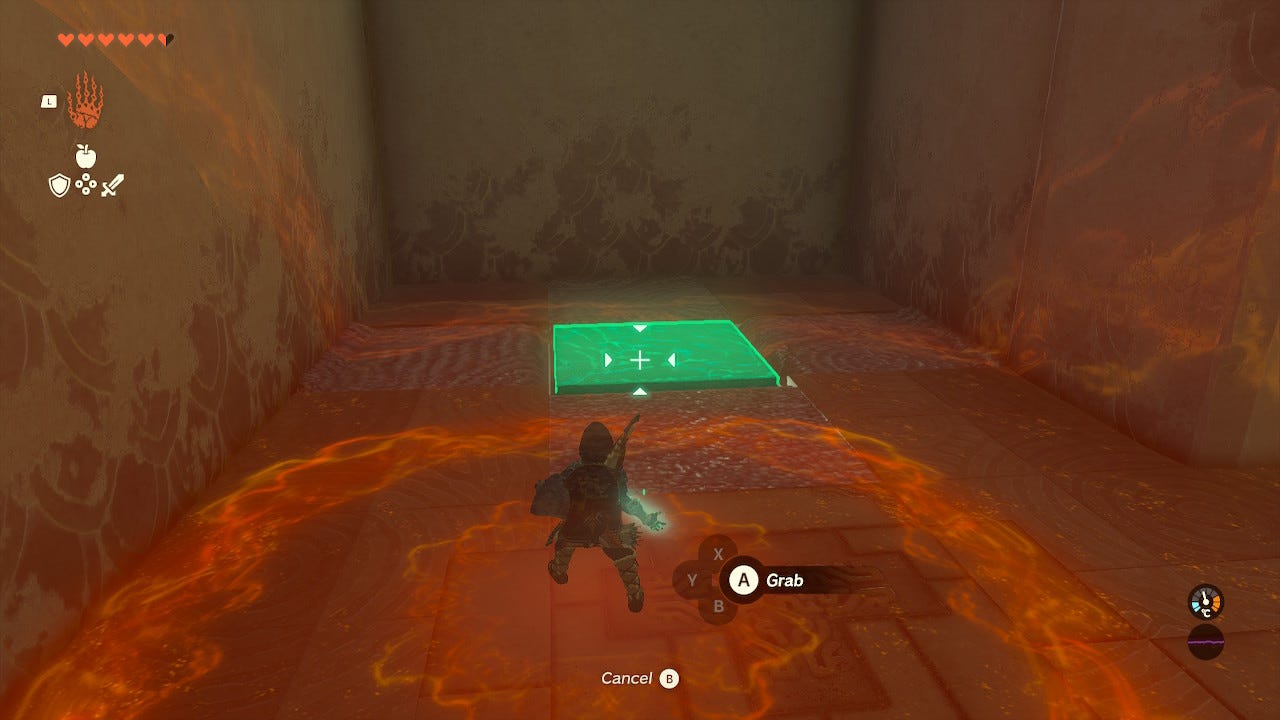
First, head for the passage at the back left of the starting area. Move past the spikes and look for a square in the wall on the right. Use Ultrahand to pull out a block and then the chest hidden behind it. You will get four Amber from it.
Keep going down the corridor towards the spikes on the wall. At the end of the corridor, turn left, then take the first right. This corridor doglegs back on itself, with spiked platforms that extend and retract. Be careful with your timing as you progress, but once through, you’ll reach a chest containing a Luminous Stone.

Return back past the moving spike platforms and turn right, then right again to reach another moving spike platform. On the ground is a floor tile that can be lifted with Ultrahand revealing another chest. This one contains the Small Key that you will need to complete the Kikakin Shrine. However, there are still more chests with extra rewards to find.
Return to the main corridor and look for the two moving spike platforms that meet in the middle. From there, look up and you'll find a platform that you can Ascend to. Ascend up to it, and you'll find a chest containing a Zonaite Bow.
Glide back down and pass between the two moving spike platforms. On the left you will see a corridor with three red laser beams. Pass by these, without touching them, towards the spiked wall at the back, and look to the left. Surprise! It’s another chest. This one contains an Opal.
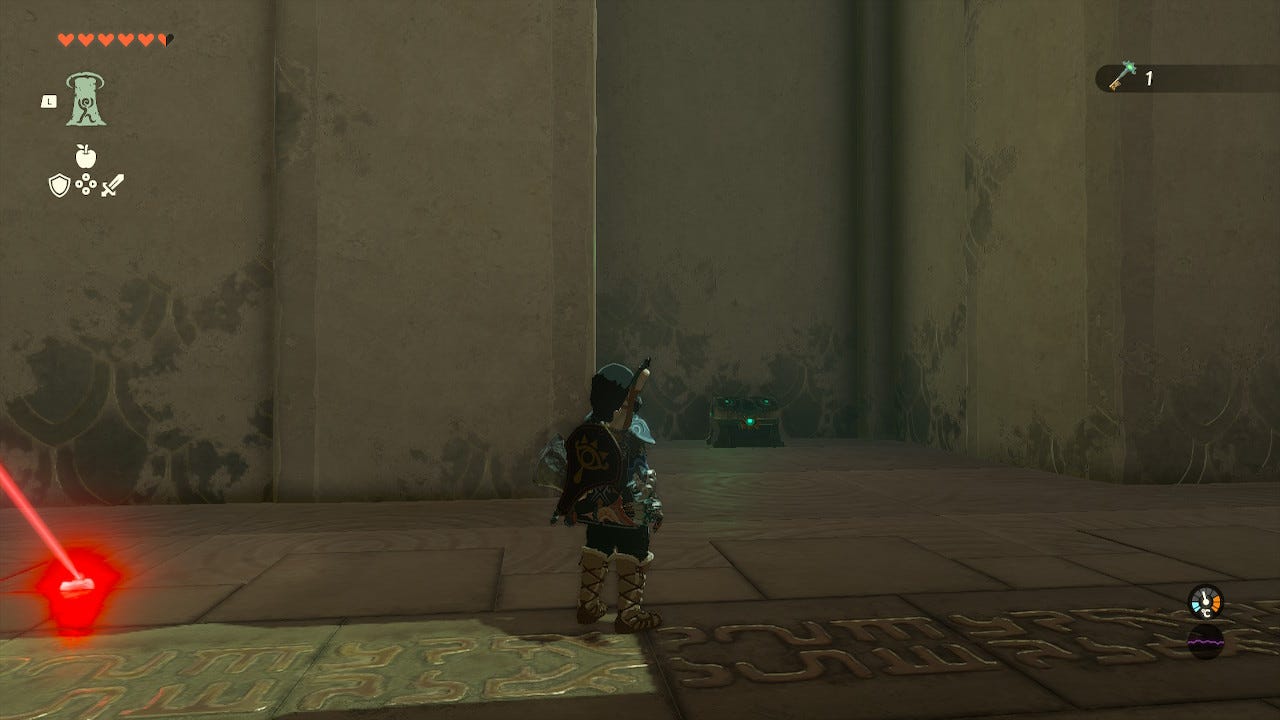
Finally, that’s all the chests, so head back past the lasers and turn right immediately, and then right again to make it back to the entrance room. You can then open the door with the Small Key and claim your Light of Blessing.
If you’d like to learn more about Link’s quest, visit our Zelda: Tears of the Kingdom walkthrough.