Starfield: Into the Unknown walkthrough
How to get the Anti-Gravity Field Power.

The main quest 'Into the Unknown' in Starfield starts after the previous quest The Old Neighborhood.
We're supposed to meet up with a person named Vladimir Sall and learn more about the search for artifacts on the outskirts of space. The target is a location called The Eye, a star station orbiting Jemison.
Talk to Vladimir
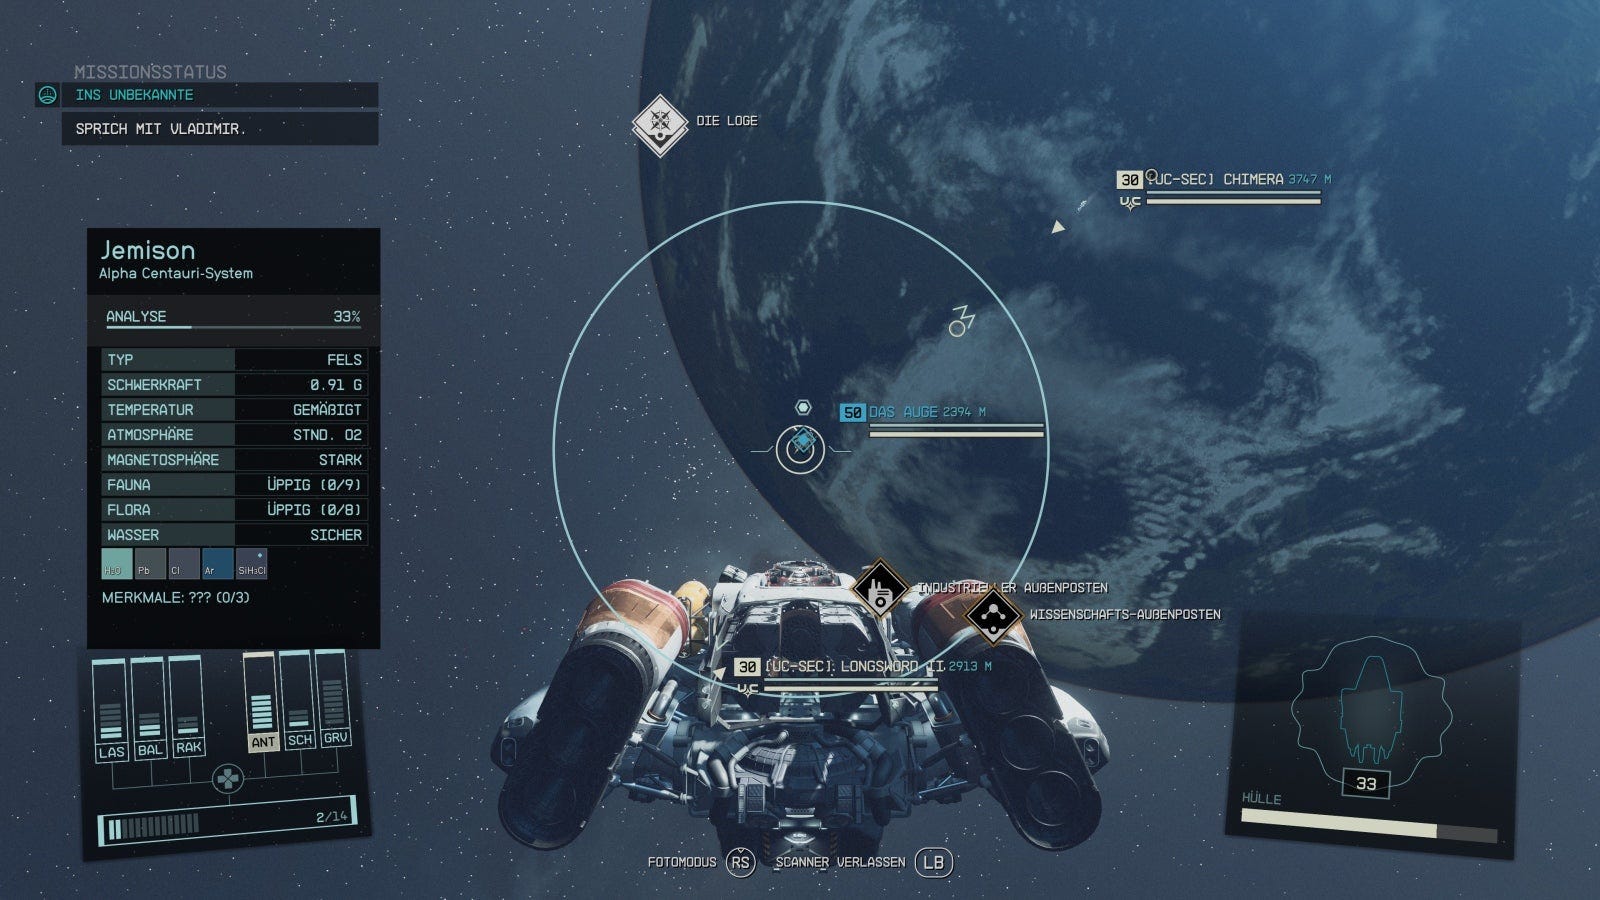
With the ship and via the mission map you are in the corresponding area in no time at all. Fly over to the station. For this you should click the marker above 'The Eye' after arriving in orbit and then select 'Travel':

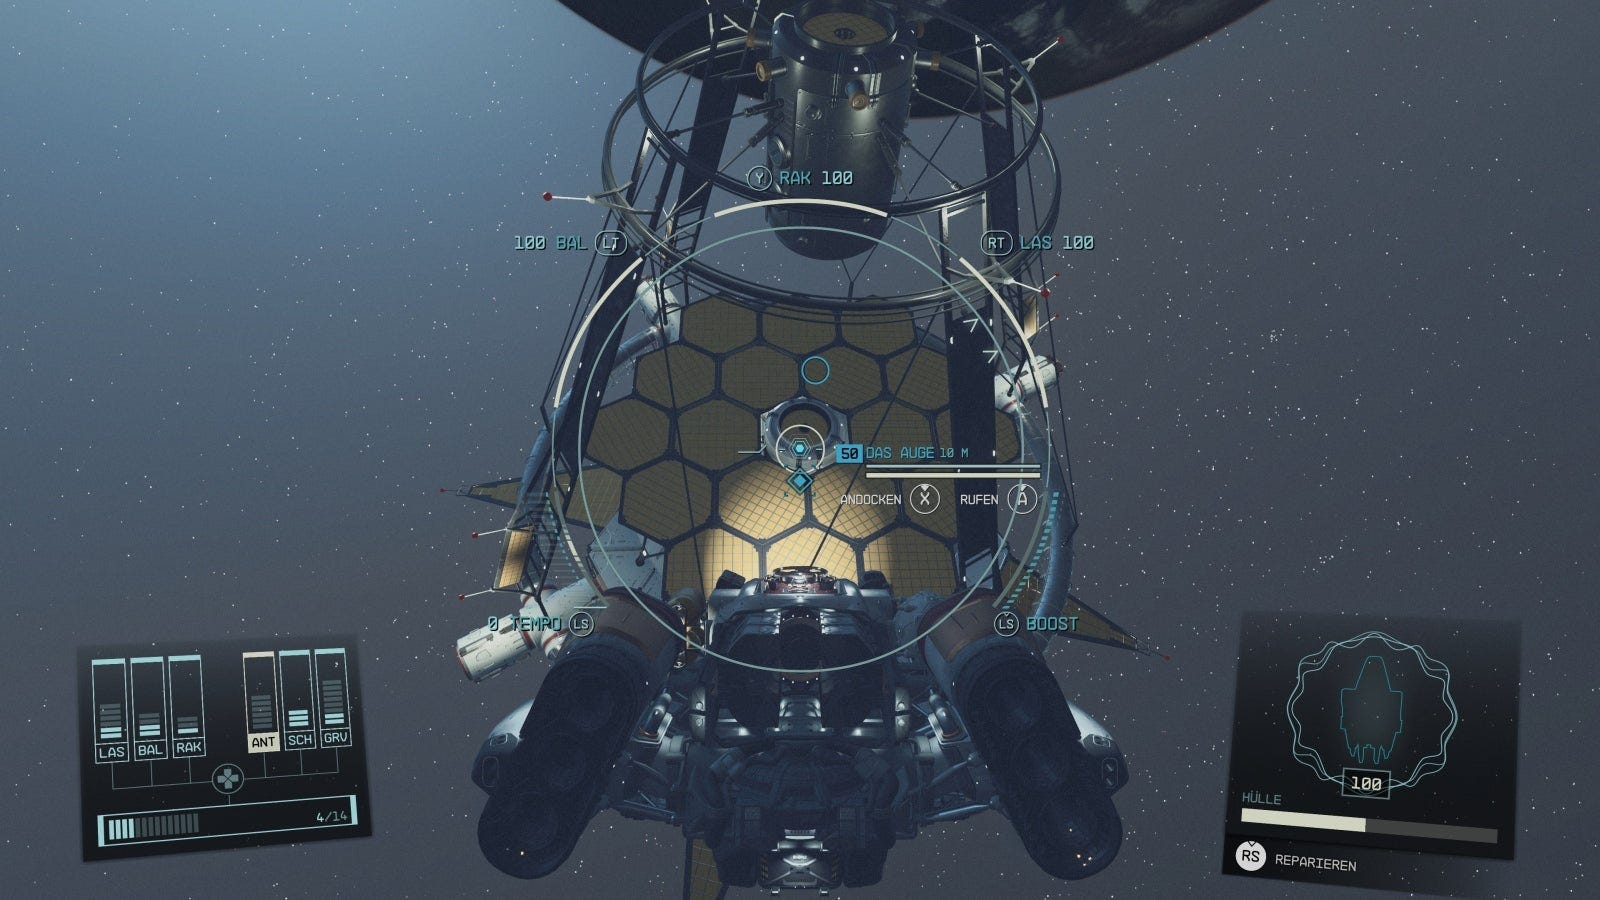
Fly close enough to dock. This can be difficult, especially with too much momentum, as the station is quite sharp-edged and the ship is easily damaged.
You don't even have to fly as close as in the picture below (500 meters is enough), you also have to click A on 'The Eye' next to the station so that the icon for docking appears:
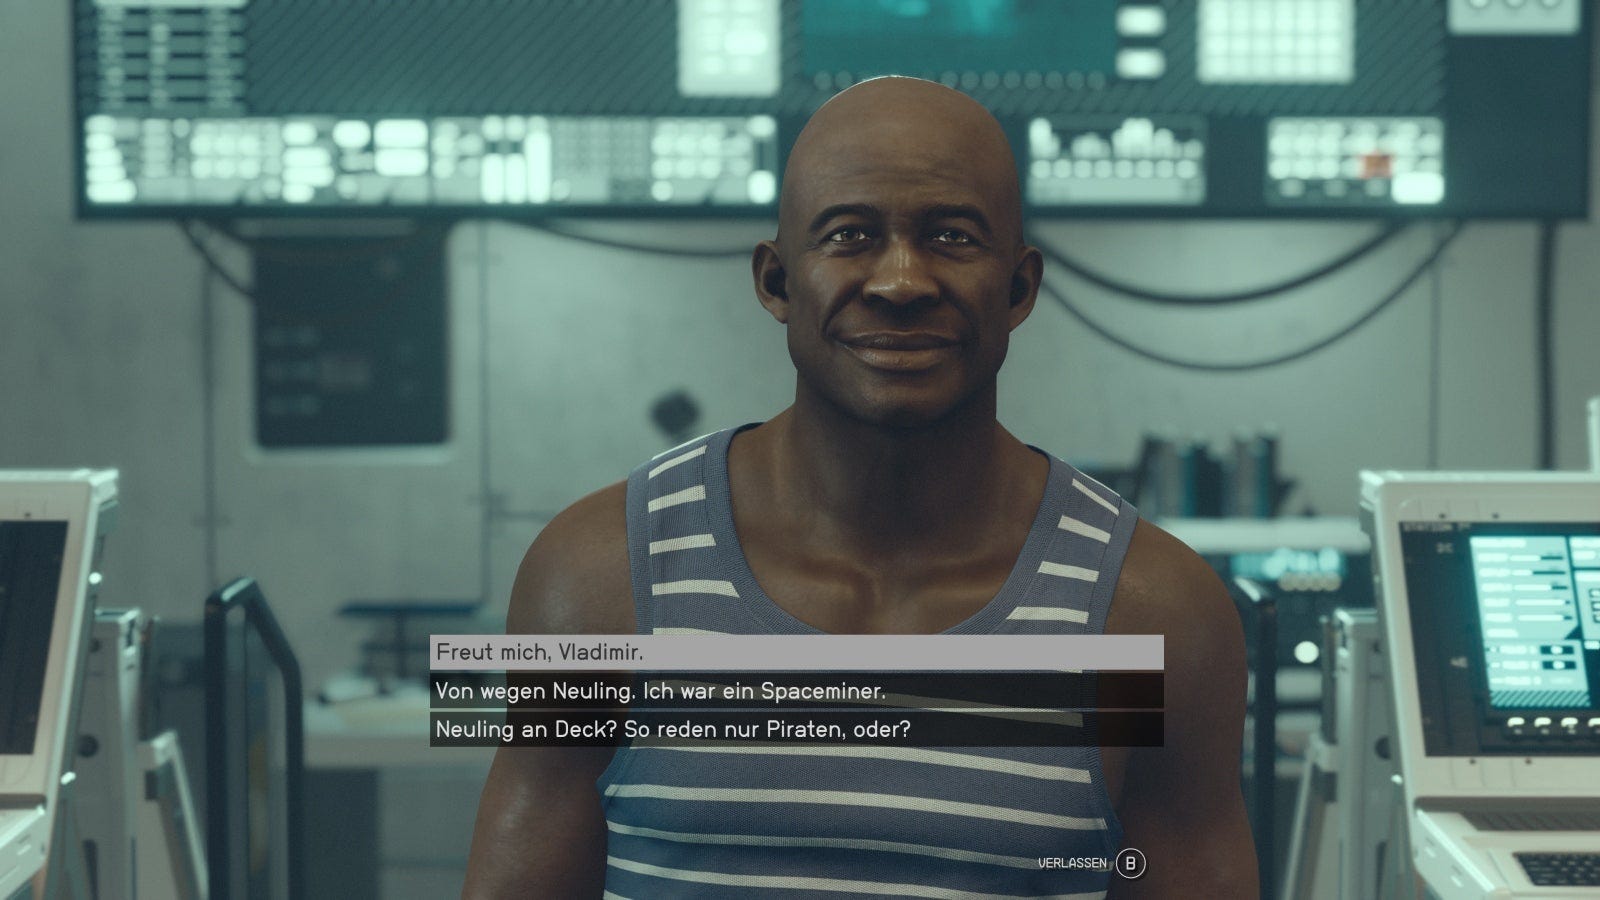
Inside you simply walk straight ahead and come directly to the person you are looking for. Exchange a few words with Vladimir. He worries about a Constellation member named Andreja.
She's been following the same leads he's putting us on: two places where artifacts may be hidden. We have no choice but to approach them both one after the other.
Note: The names of the planets you must travel to vary by playthrough. The first time we were sent to Tau Ceti VIII-8 and Tau Ceti II, the second save to Piazzi IV-C and Niira. This makes no difference to the progress of the quest.
Go to the planet Tau Ceti VIII-8
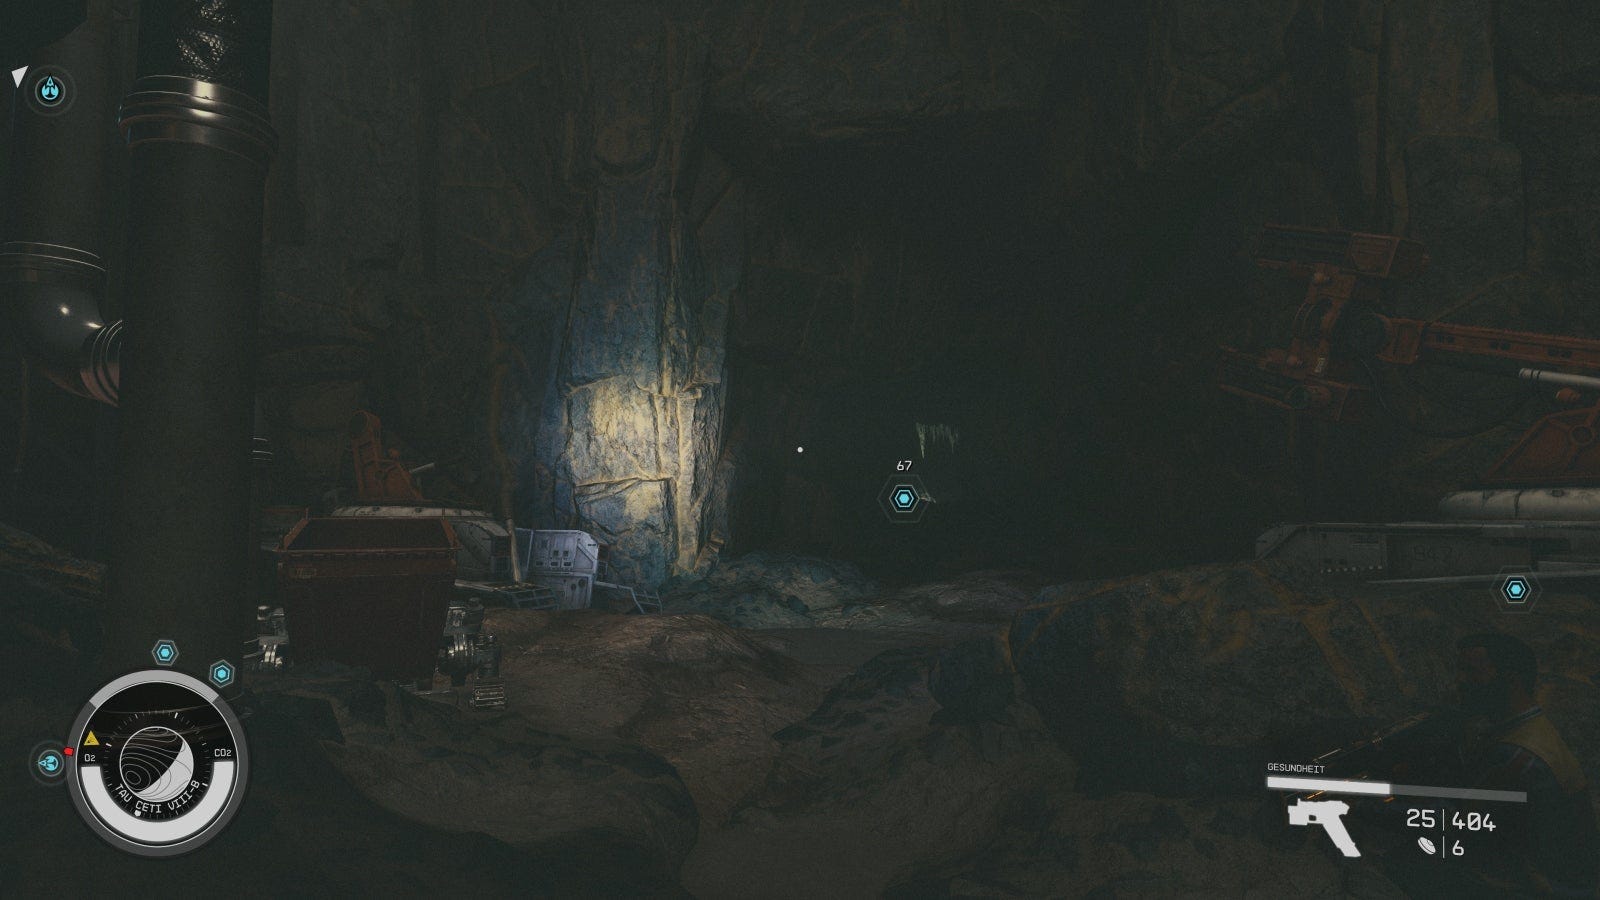
The jump there is a bit further, but manageable. Look for the Abandoned Mine location and land there. After getting off, head southwest to where the mine will be marked.
Be careful, the way there is partly secured with pedal traps. Look for this entrance and use it to enter the Deep Cavern:
Upon entering, we already see the young lady defending herself against some Va'ruun fanatics: Andreja. That was fast.
Find the artifact
She will join you for now and you can explore the rest of the cave together. Dangers come in the form of Ecliptic Mercenaries. If you like, you can activate a robot guard here on this computer terminal:
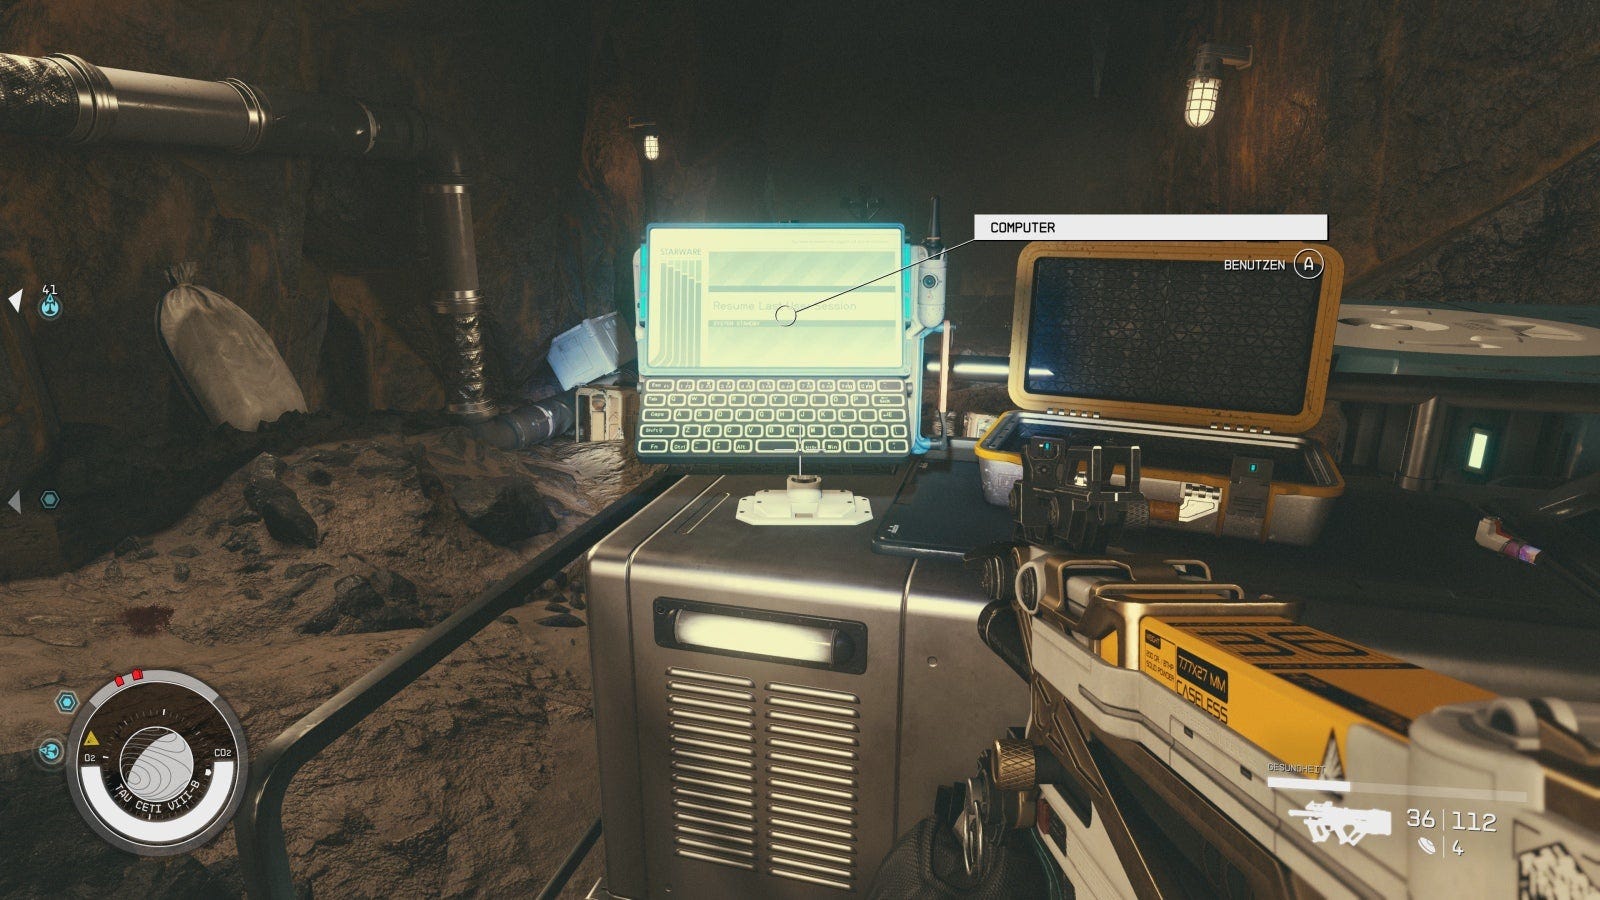
It is highly recommended as an accompaniment for the subsequent battles, during which you will face a lot of mercenaries.
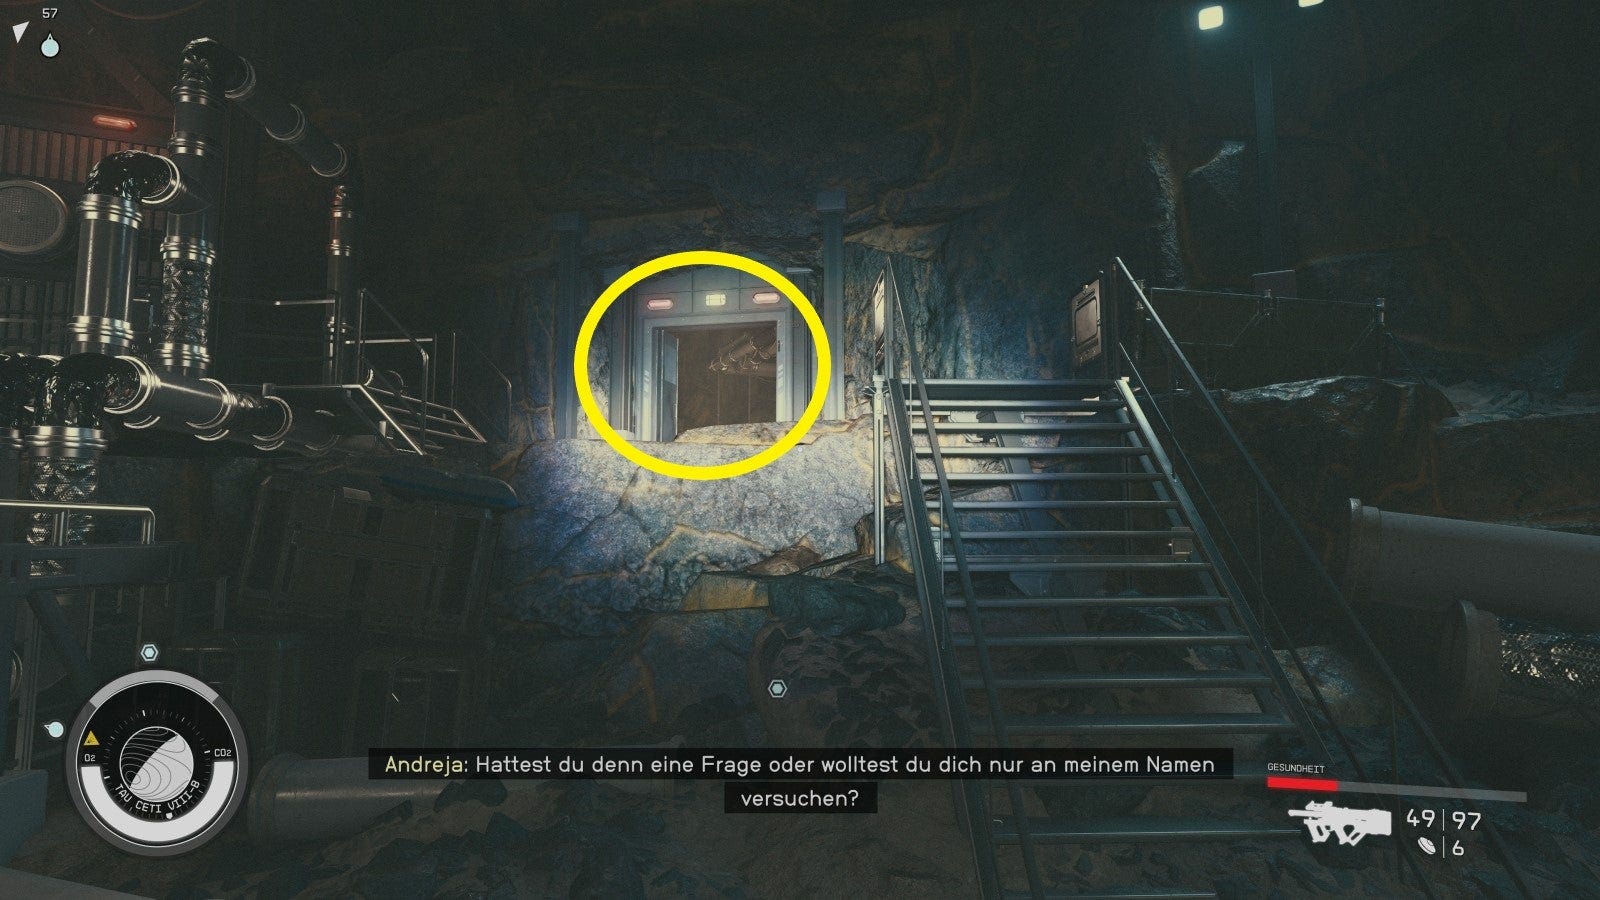
Clear their storage and then look out for this passage behind a small staircase, which you follow:
After the tunnel you will come to another room full of mercenaries. First do the ones at the top and then slowly work your way down.
The room is huge and confusing. You will be shot at everywhere from below. Advance carefully and watch out for the red enemy markers on the radar in the lower left.
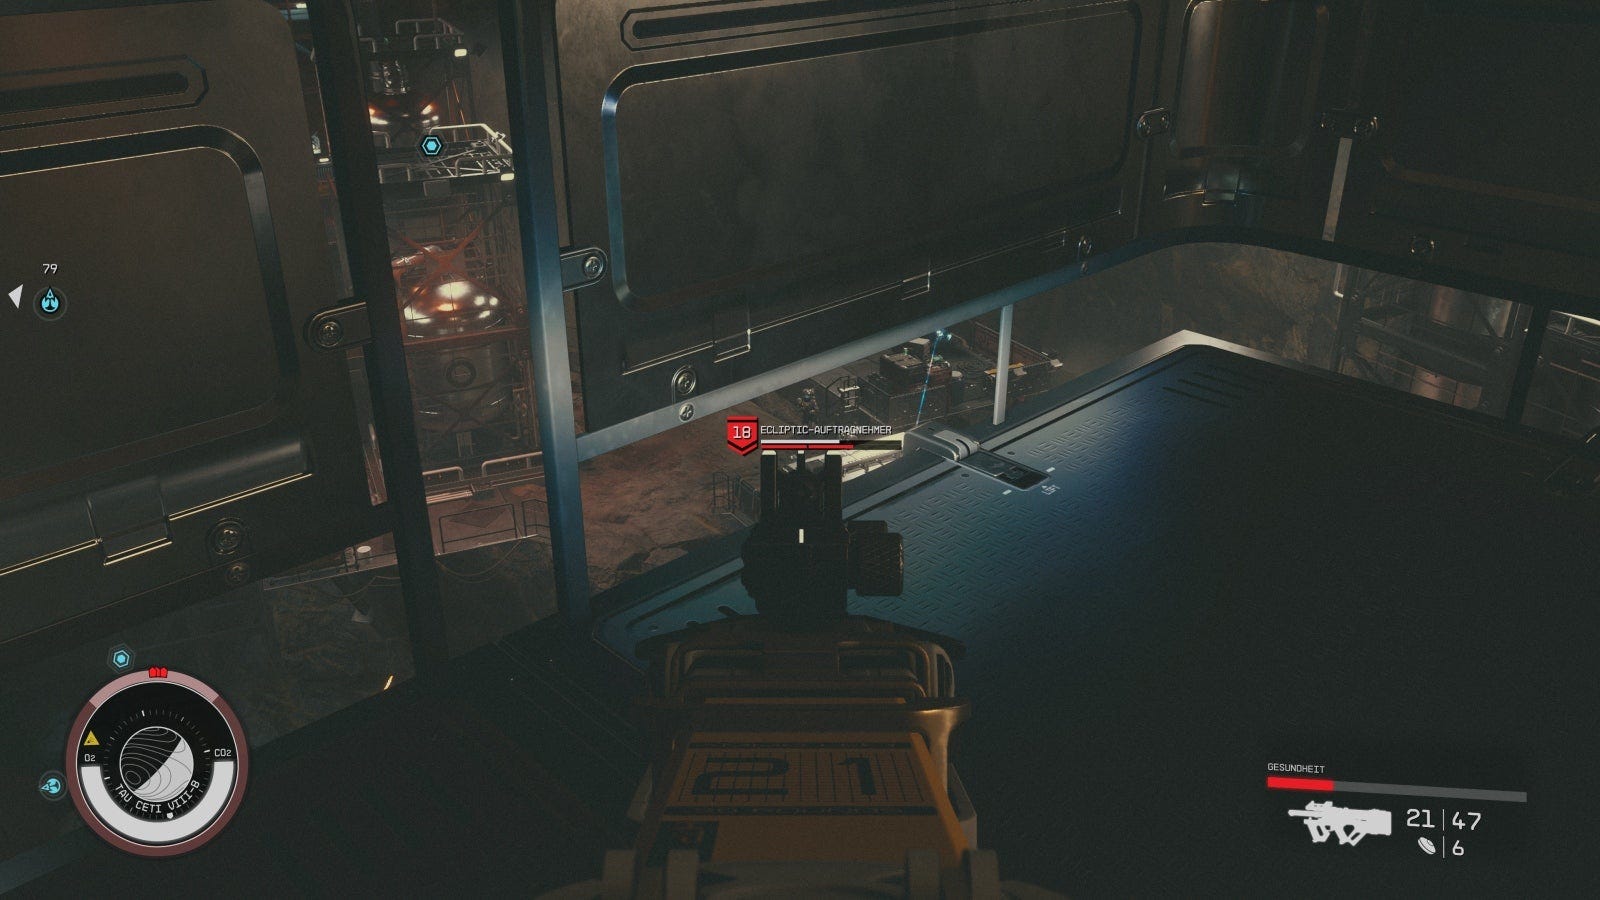
Among them is a level 18 enemy. It's particularly hard to crack and eats bullets like other people eat radishes, so use the cover and do your best.
On the lowest level look for a tunnel to the south and follow it:
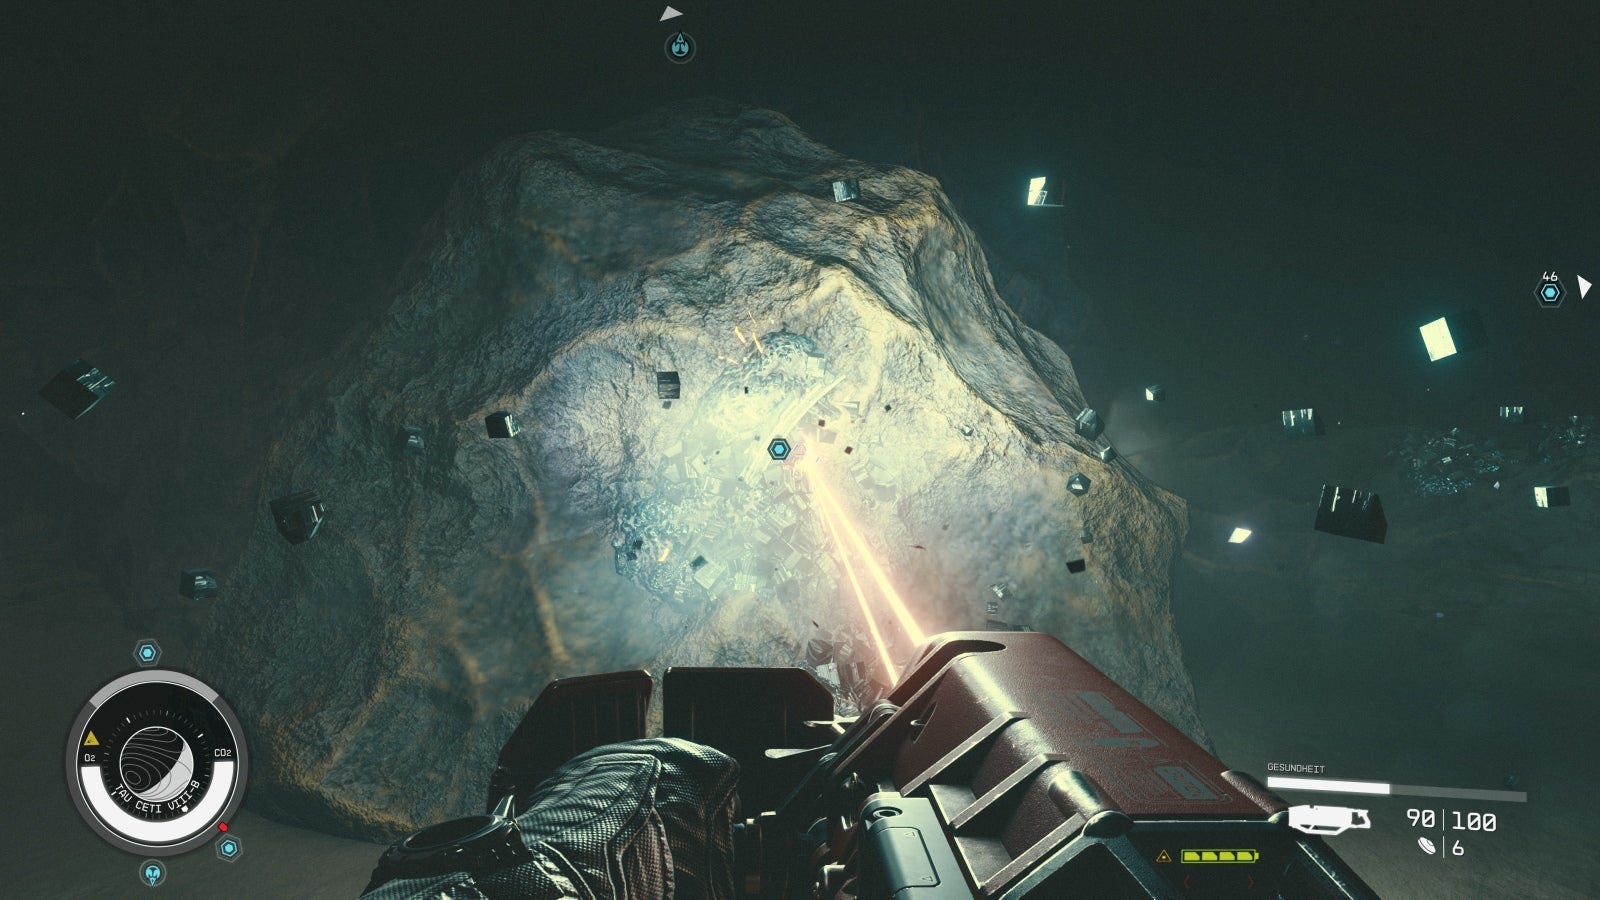
It actually leads to the Artifact Iota, which you can simply take possession of after clearing the caelumite deposits in order to store it safely in your inventory:
After the short vision you talk to Andreja and have successfully completed this section. But you can still explore the area further.
Go to the planet Tau Ceti II
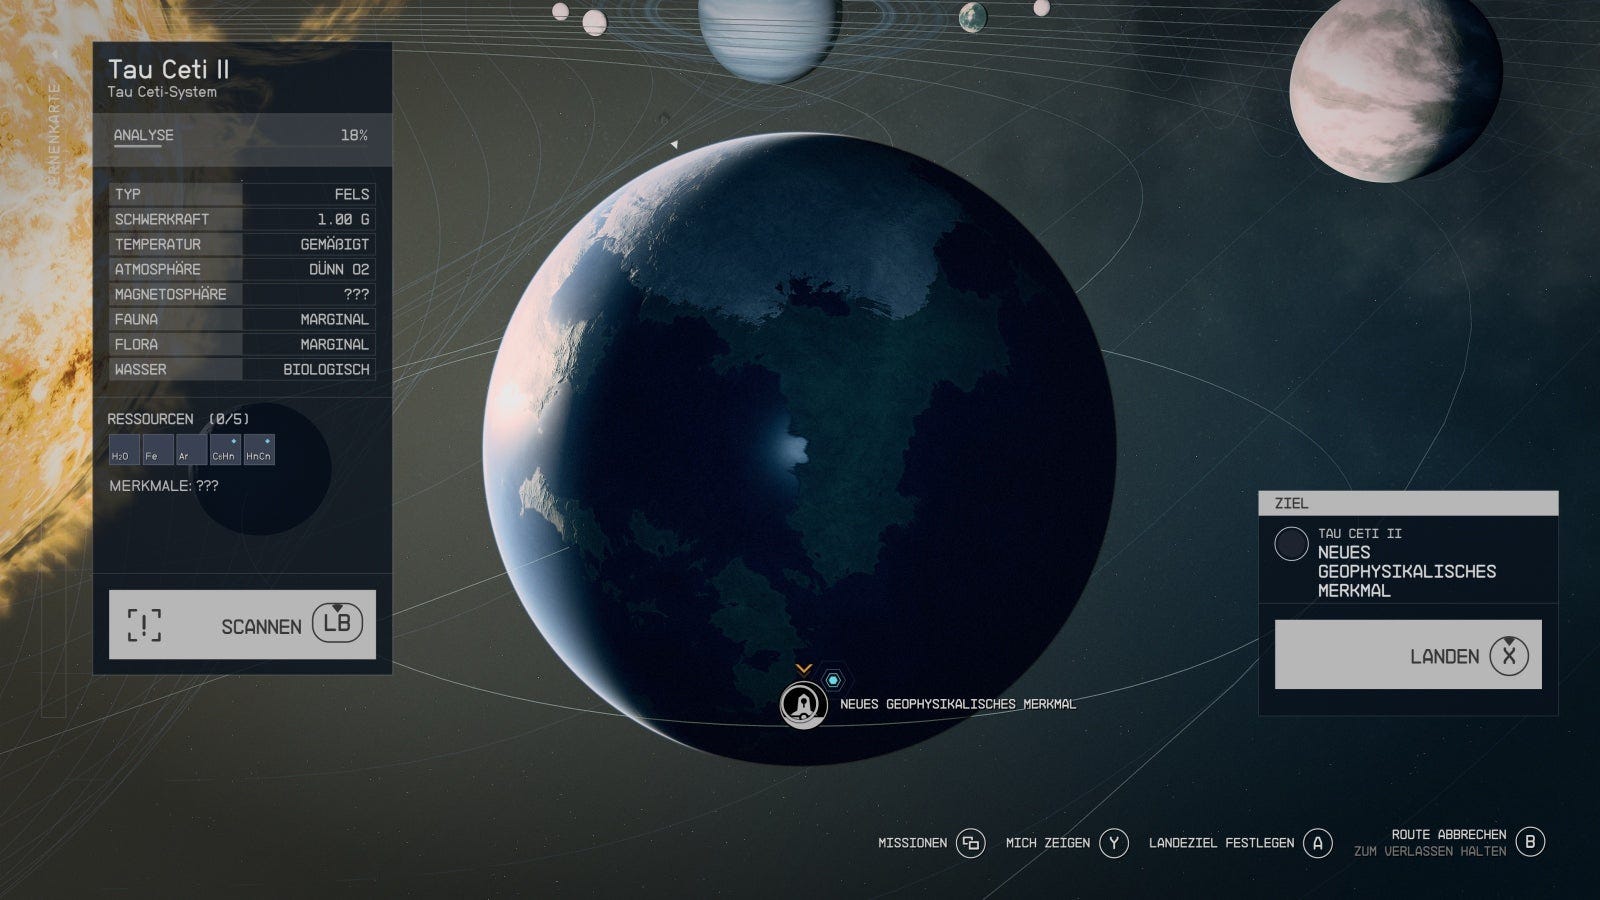
The quest continues with a visit to the other planet. While Andreja stays here, you can leave the mine and set off with the Frontier.
Use the mission journal and fly to Tau Ceti II. Upon arrival, open the quest list again and set course for the New Geophysical Feature point (or whatever the location is called for you) on the planet to land there:
Then run as far as necessary in the direction the marker is pointing. Nothing flashy, just a cave or research base that we can enter.
Find the artifact
Work your way down and (in the case of the cave) look out for a small passage that will allow you to advance further. The Artifact Zeta is not far away as we see:
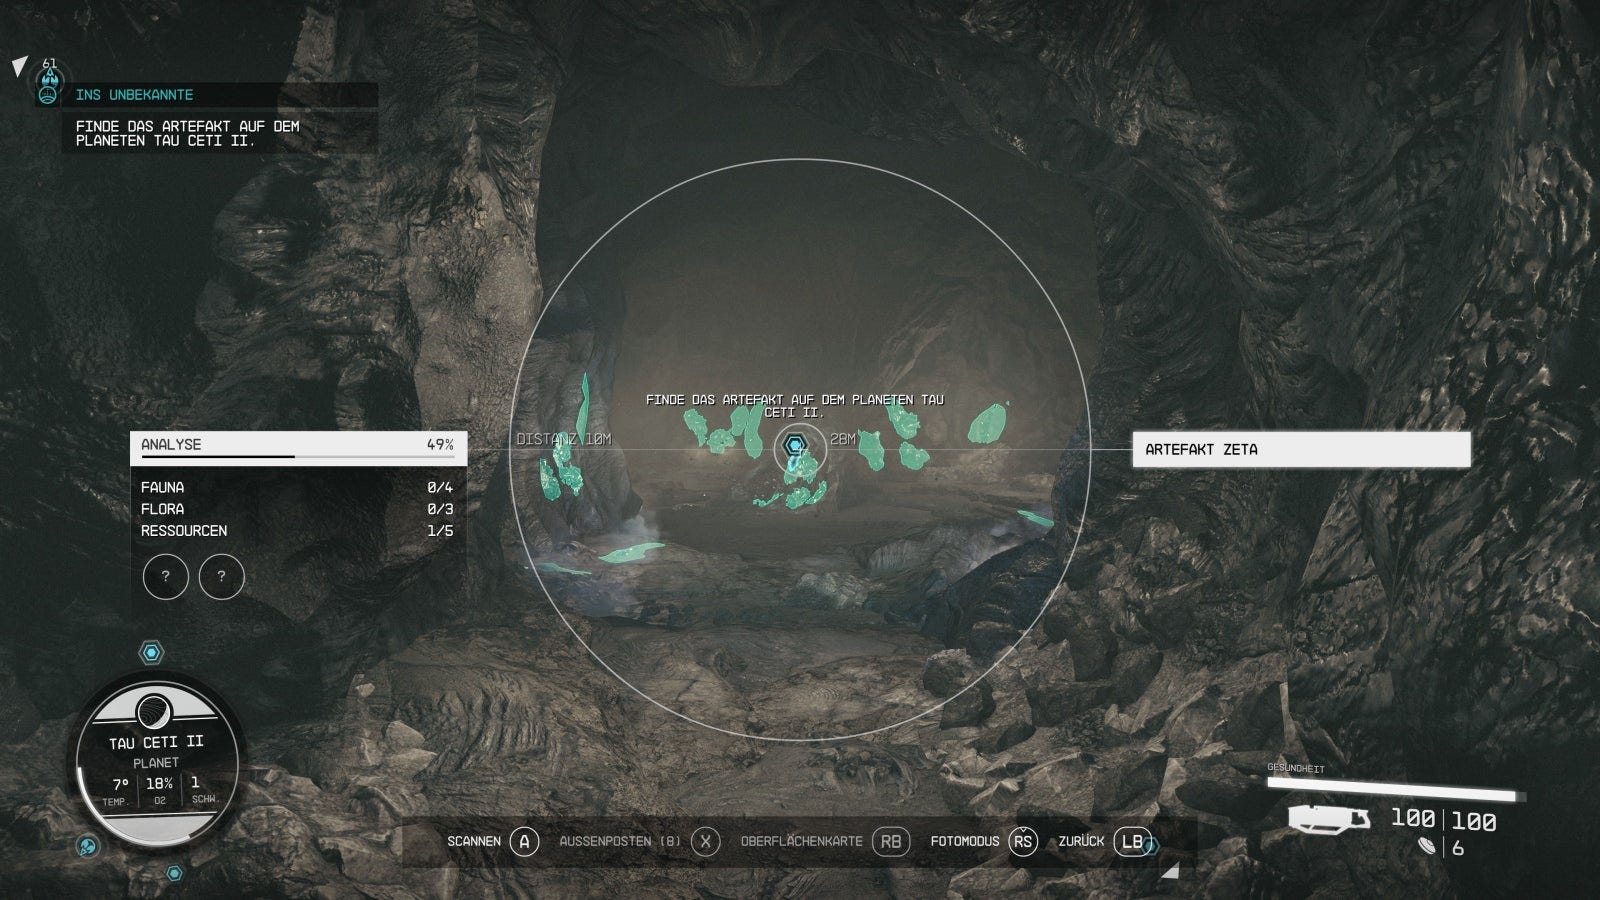
For the shortest stay in the cave, all you have to do is go there, swing the cutter and stow it safely in your luggage. That was it. No fights, no mercenaries.
Add the artifacts to the collection
Obtaining the first two artifacts was difficult enough. Let's get our wages. Exit the cave, onto the ship, and through orbit back to the Logge where the two artifacts will be placed.
As a first reward we receive Andreja as a companion and crew member, and Vladimir contacts us again. He asks for an interview.
Talk to Vladimir
The list of missions takes you back to the eye. Dock back and talk to him about his latest findings.
The quest continues with the coordinates for the planet Procyon III which we are to explore next.
Go to the planet Procyon III
You can initiate the grav jump via the quest directory and reach the Procyon-A system. Open the map and land at the Scanner Anomaly.
You enter an ice planet and should be able to identify several unknown locations based on the symbols in the distance. But which one is the right one?
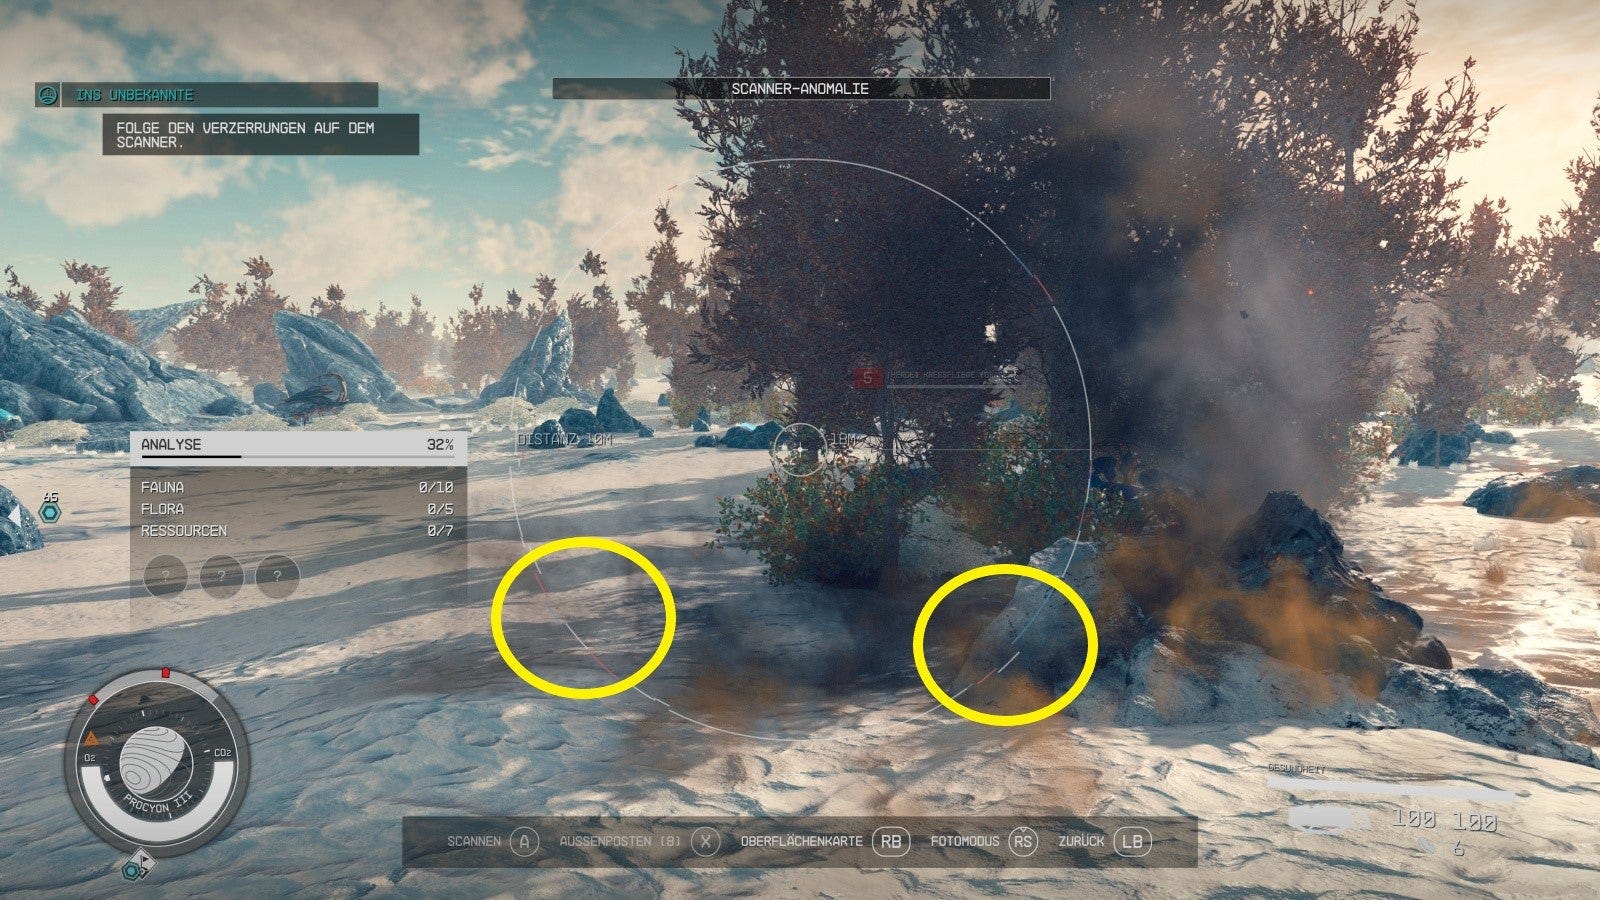
Follow the distortions on the scanner
Use the scanner with LB and pay attention when aiming at the points or when looking around when the edge of the scan circle is distorted. You are on the right track there.
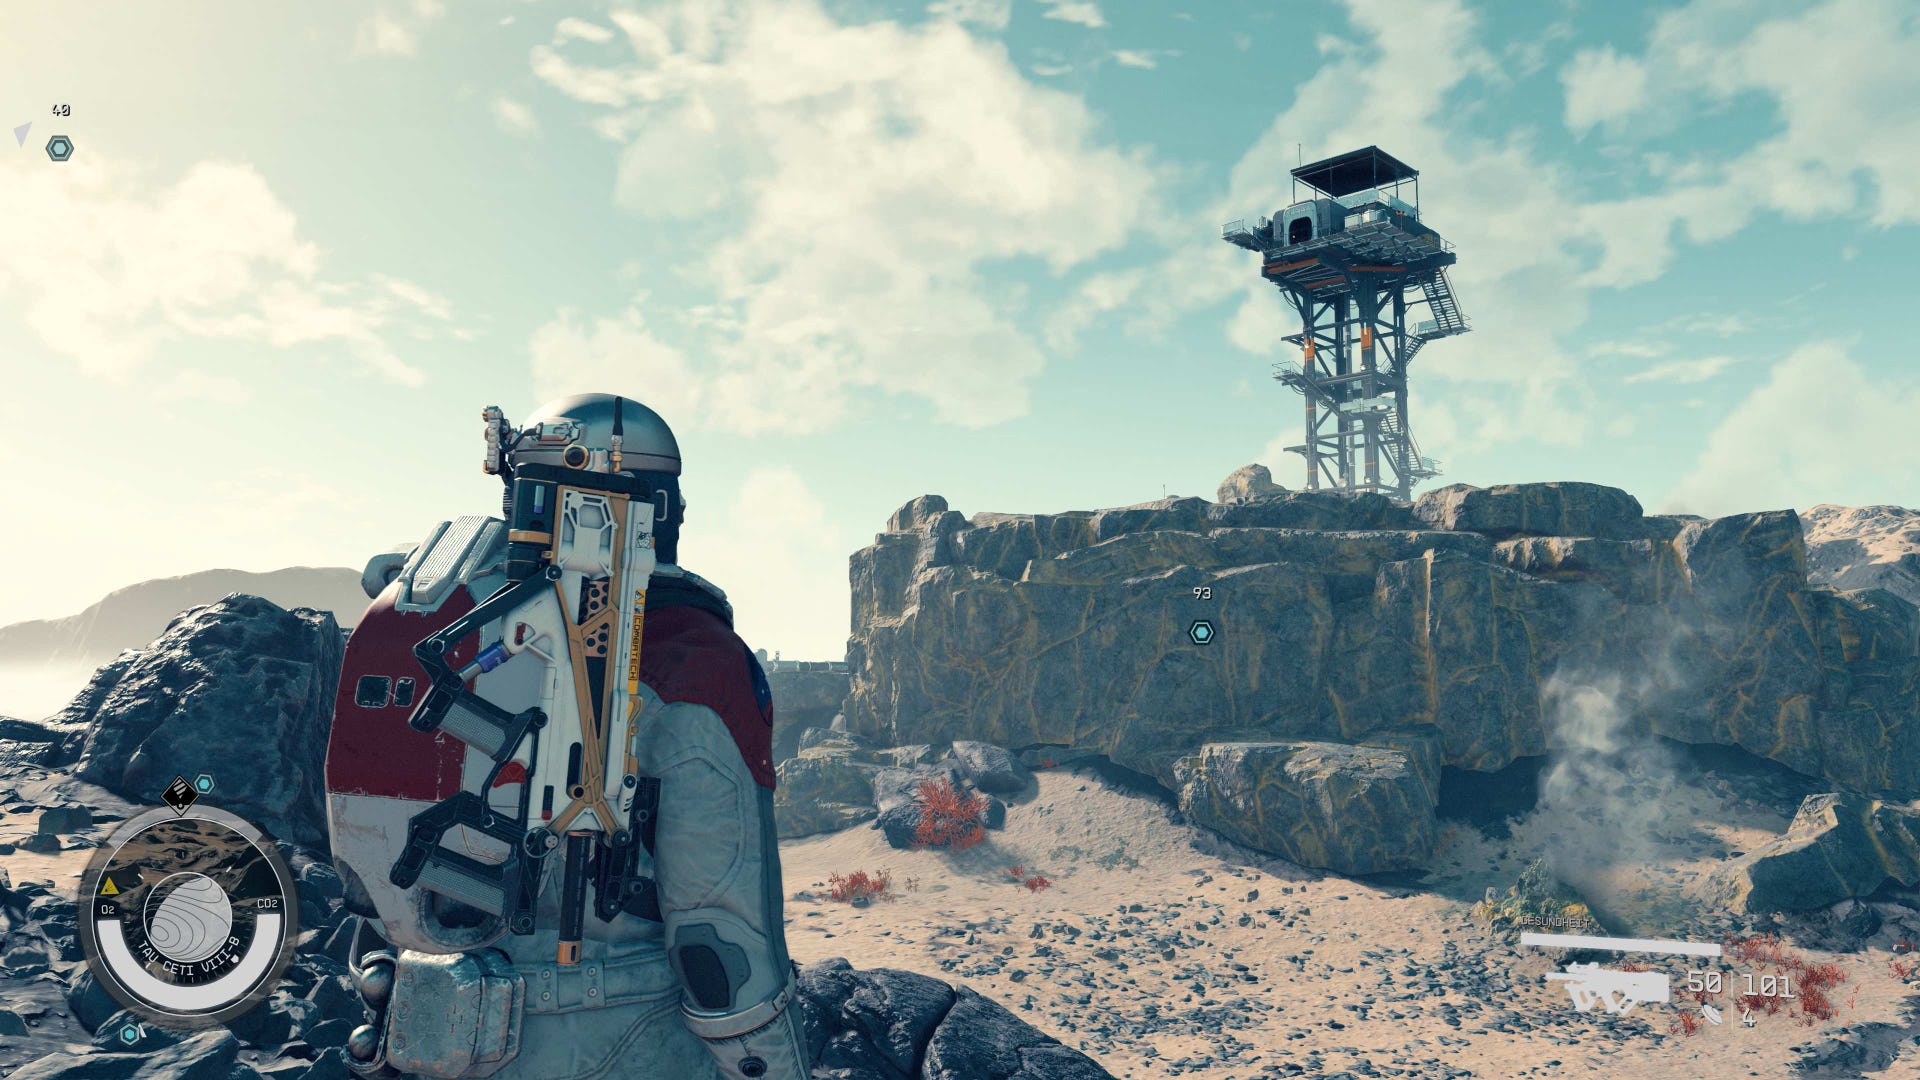
Look out for this conspicuous tower in the landscape (if you get close enough, it has its own marker, plus a new objective):
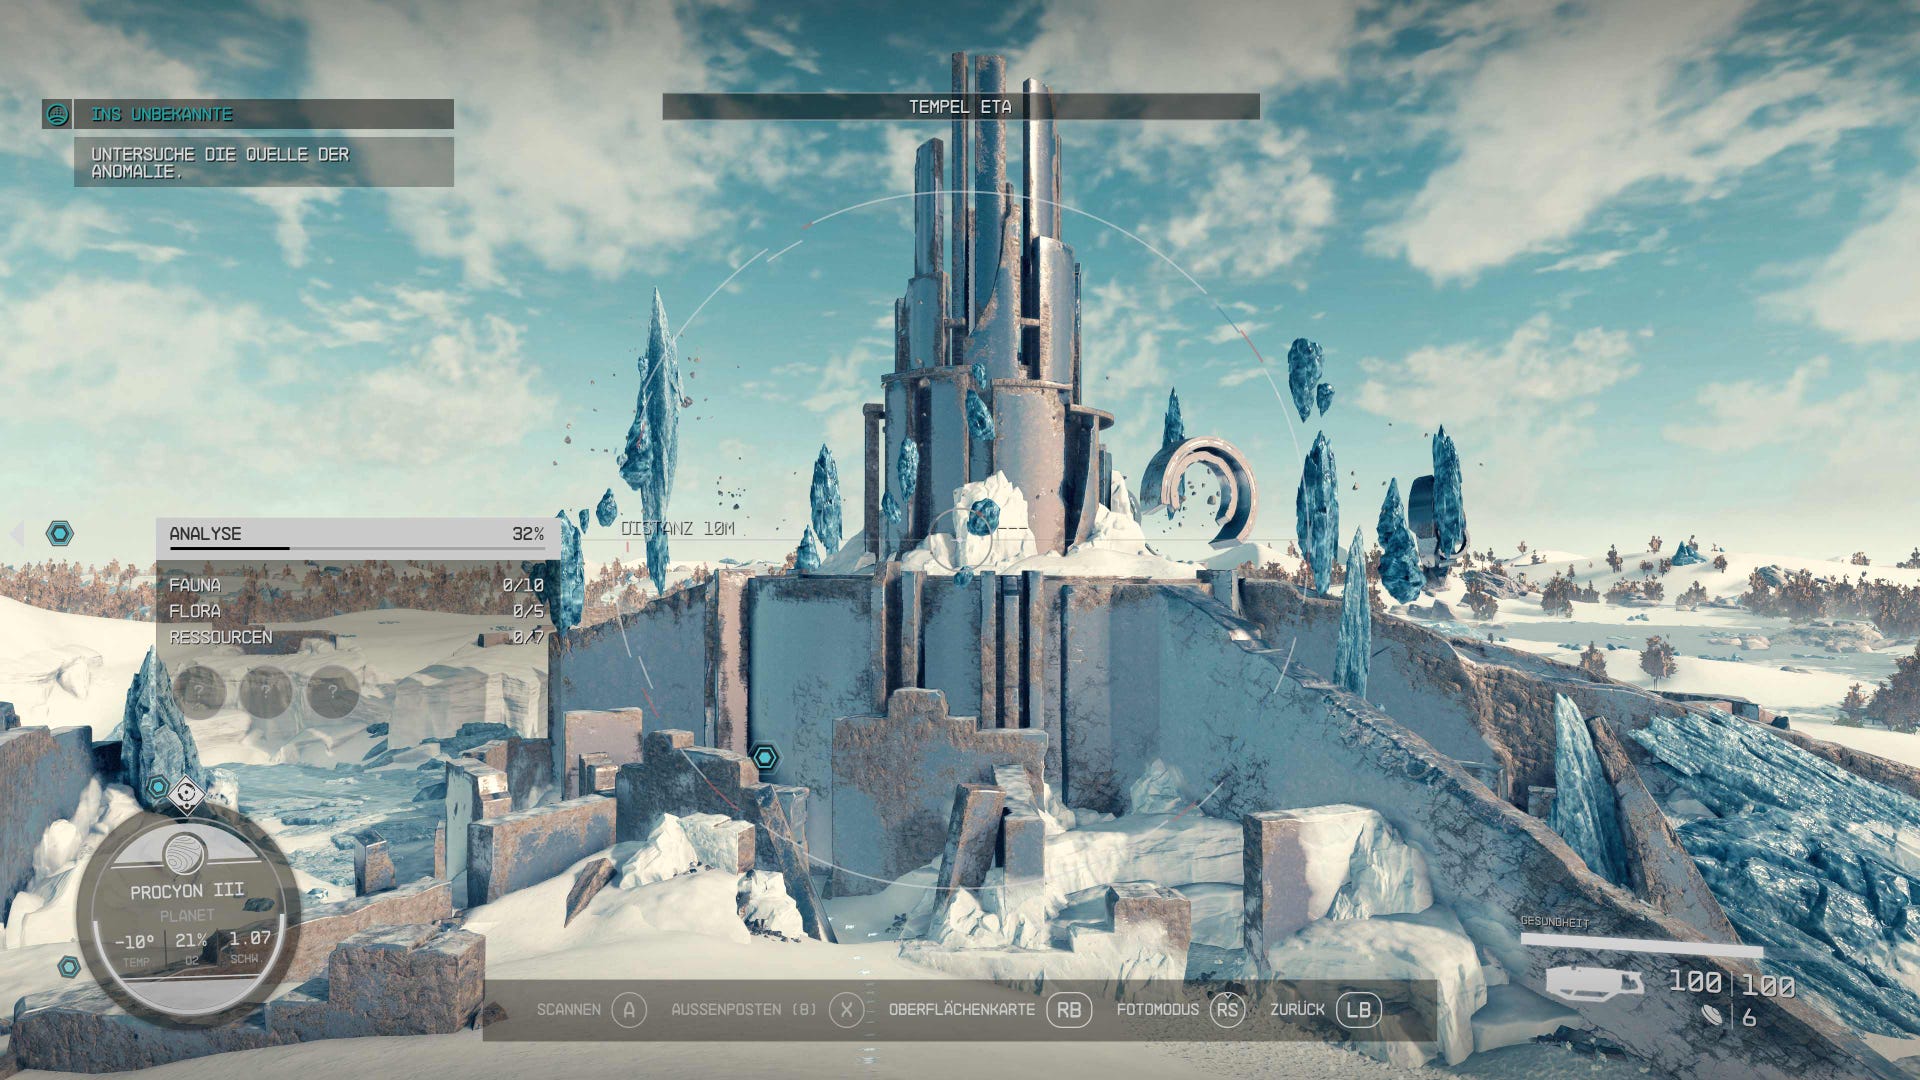
Investigate the source of the anomaly
The Eta Temple looks impressive. Dispose of the shield shells in front of it if necessary, and keep an eye out for this inconspicuous, very narrow entrance on the north side:
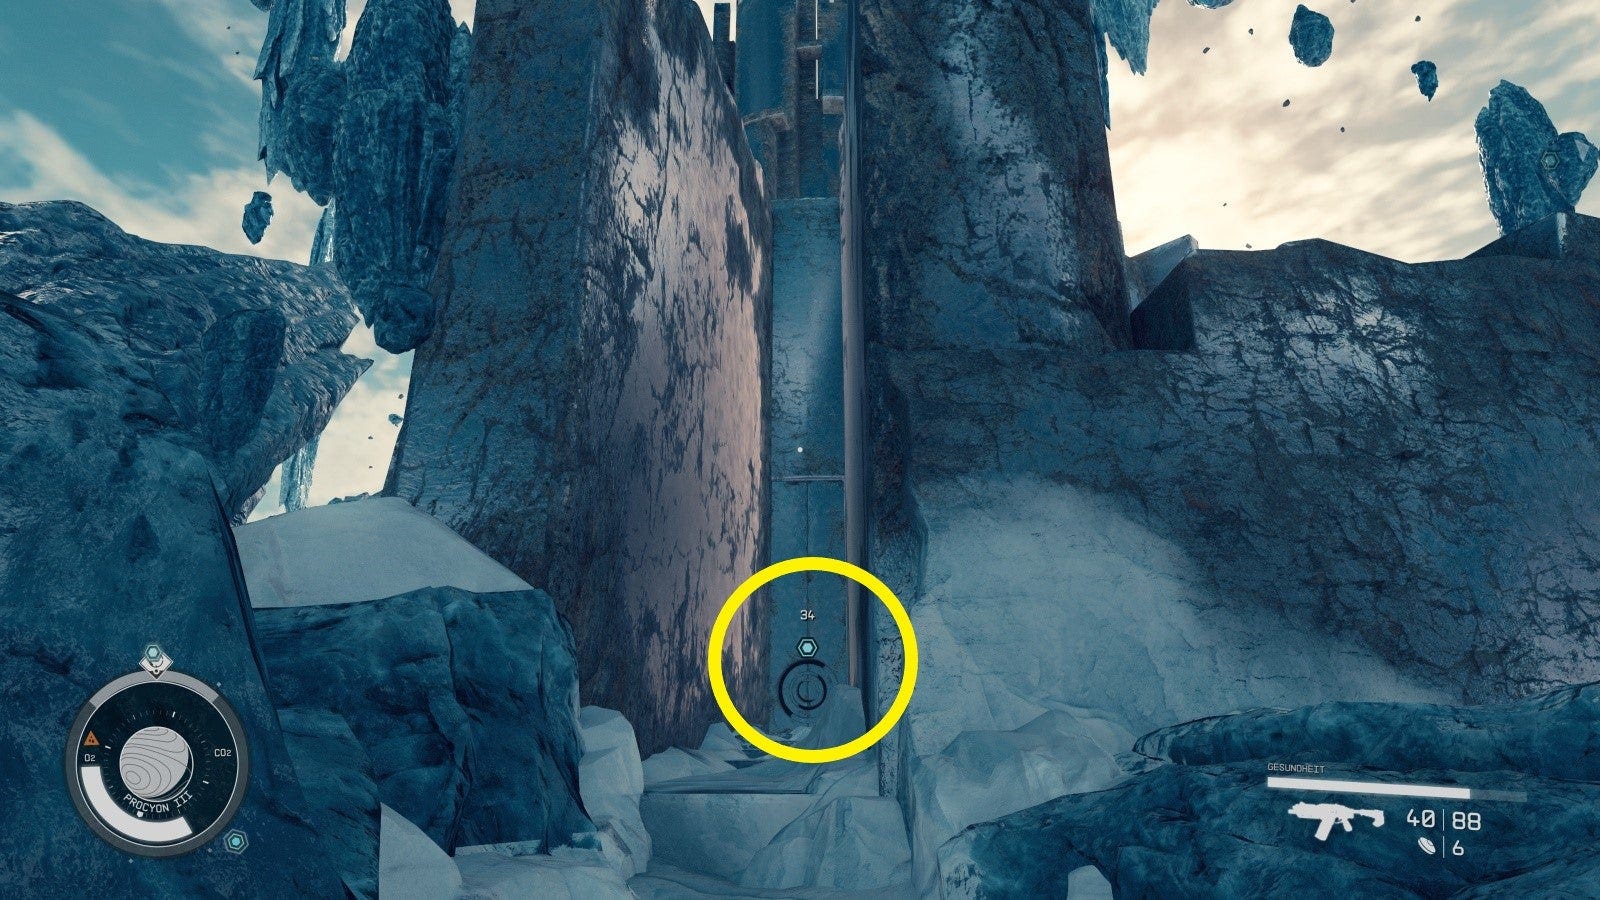
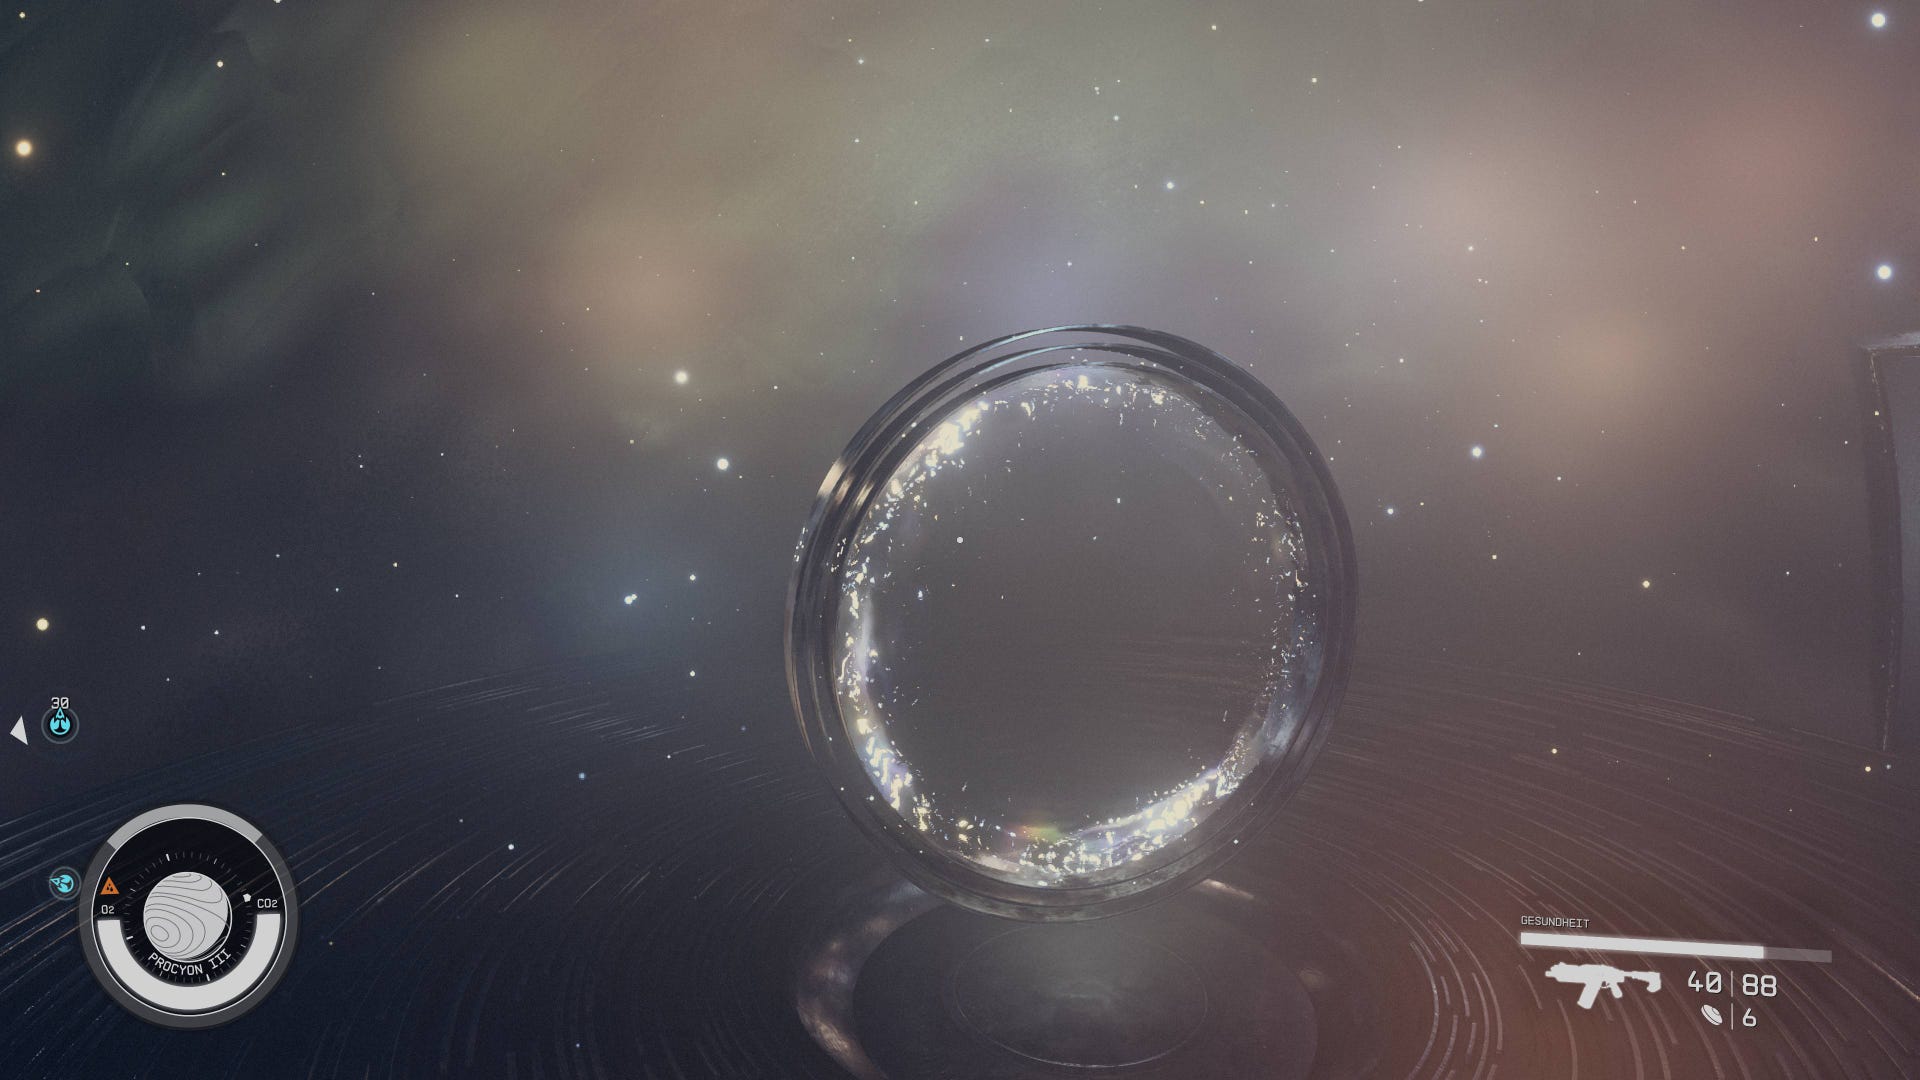
Not much happens in the temple itself. Ignore the spinning rings for now and float through the glimmers of light in space (Y to go up, B to go down, sprint to speed up):
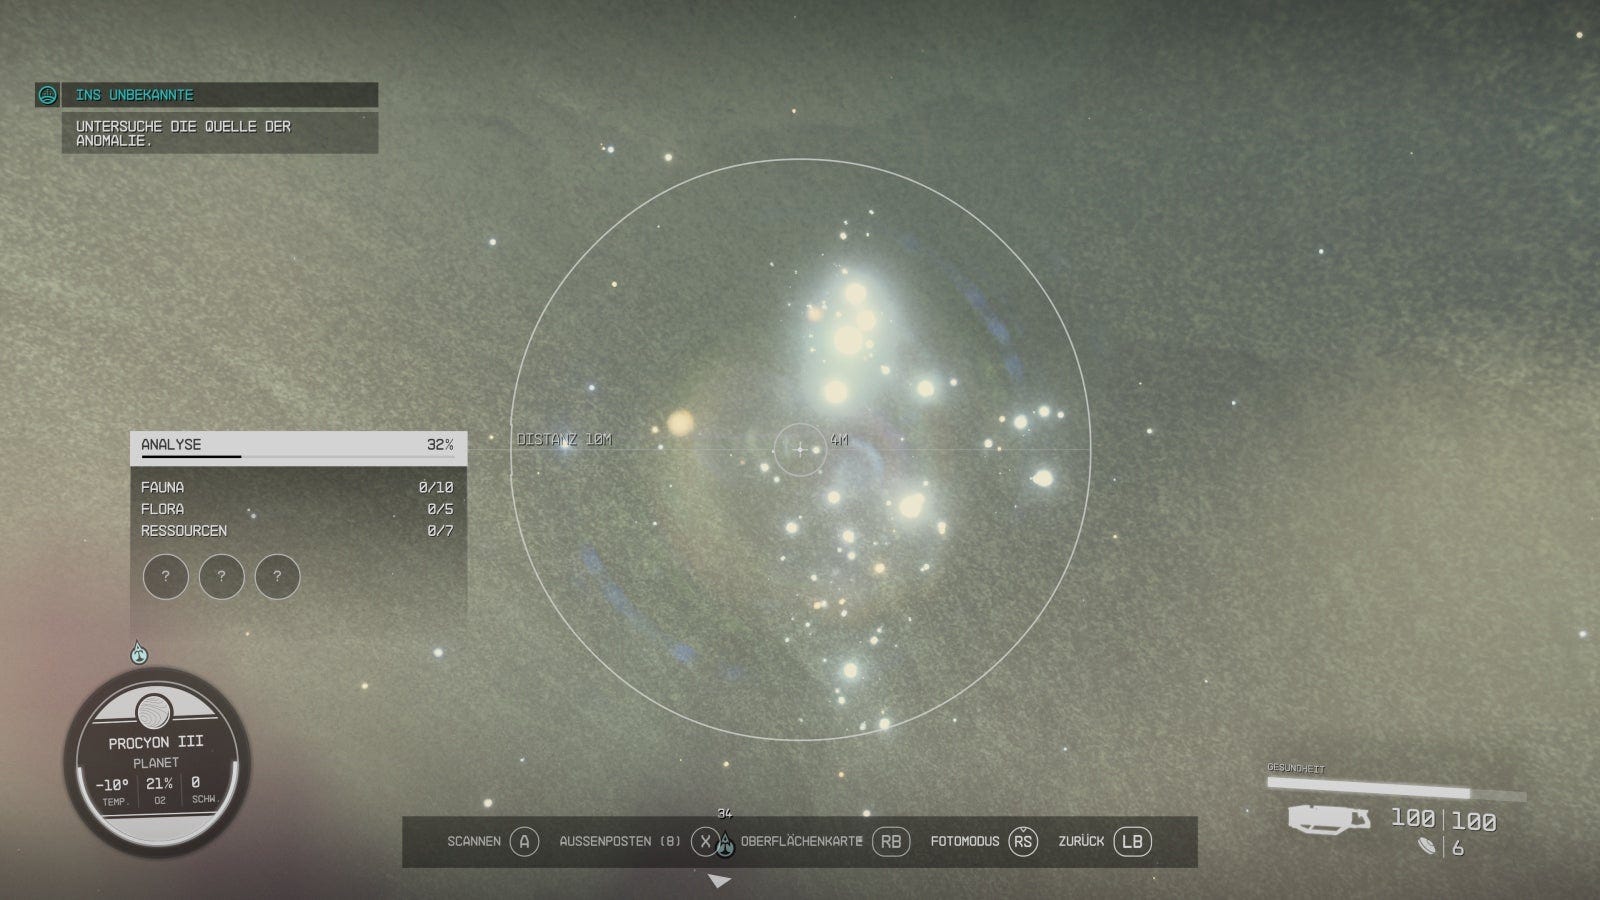
This causes the rings to spin faster and faster, eventually opening a kind of portal. Fly through. After the vision you are back outside and can use the power Anti-Gravity Field from now on. We have a Powers guide if you'd like to learn more about these special abilities.
Return to the Lodge
The long quest is coming to an end. Fast travel to the ship, into orbit, and off to the Lodge for our final reward.
Demonstrate the new antigravity field to those present (Menu -> Stick up at 12 o'clock -> Powers -> Equip -> LB+RB) and talk to Vladimir again.
As a reward for completing the quest, we get 9500 credits, 3x Addichron and 3x Medipack. Also starts the new quest: Power From Beyond.
Continue with: Power From Beyond
Back to the table of contents: Starfield walkthrough