Final Fantasy 7 Rebirth Jenova Lifeclinger final boss strategy
The beginning of the end.
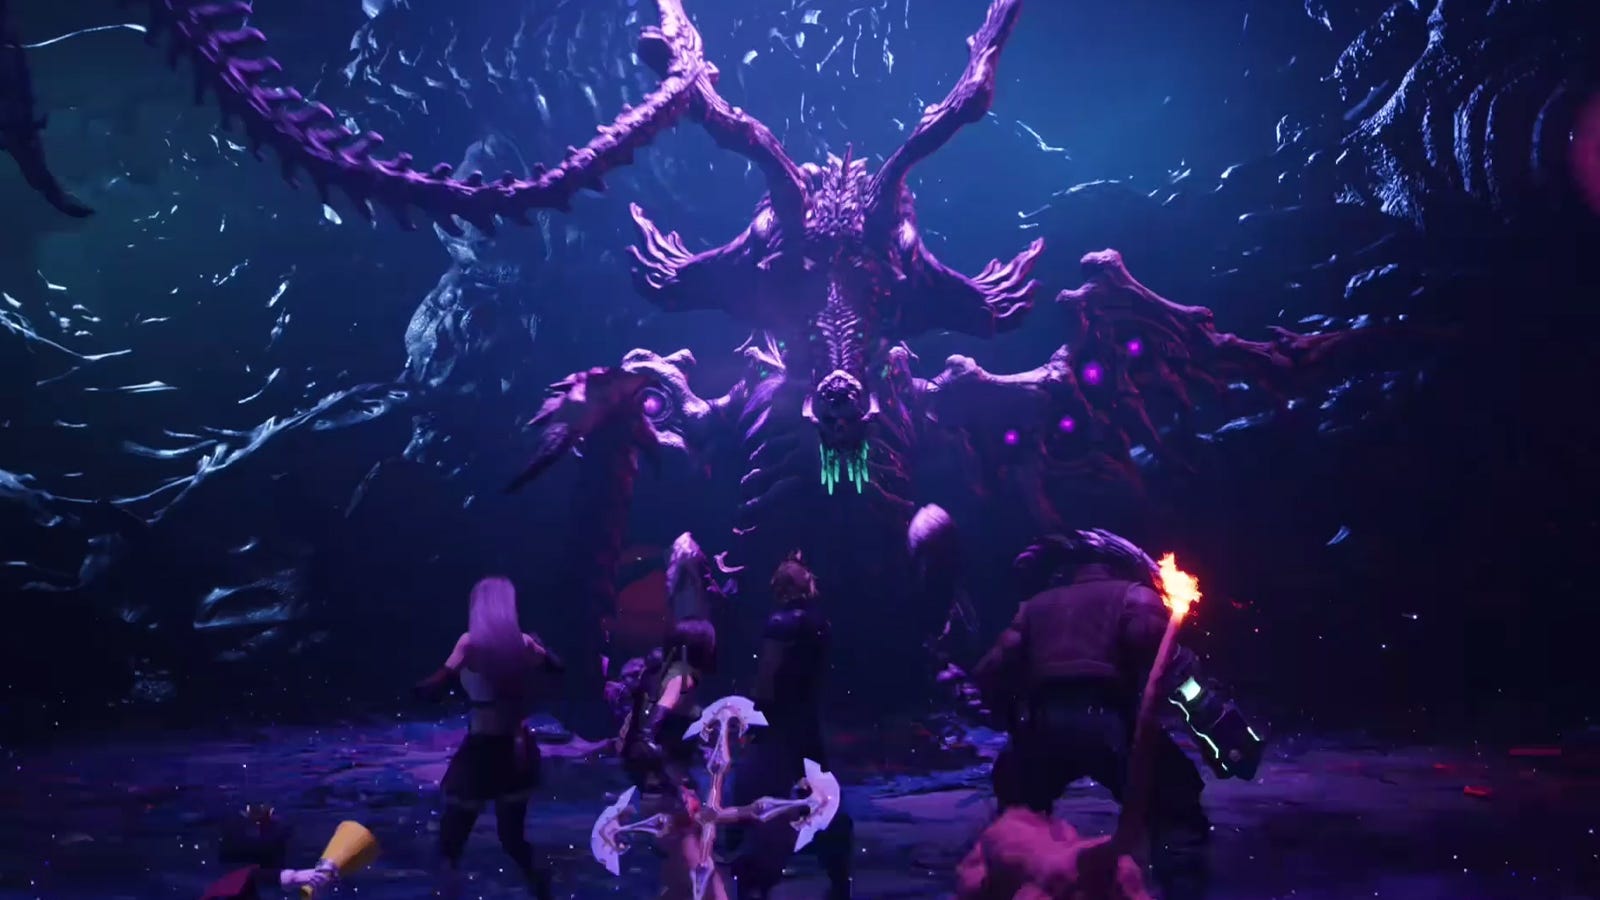

The fateful conclusion of Final Fantasy 7 Rebirth takes place at the Forgotten Capital - the same point as the end of disc one in the original game. There you fight a powerful variant of the extraterrestrial life-form known as Sephiroth's 'mother', this time given the extended name Jenova Lifeclinger.
This fight at the end of Chapter 14 is the first of a long series of battles in the epic finale of Final Fantasy 7 Rebirth. While there are checkpoints between certain bosses - and the party's HP and MP will refill - you need to be prepared for the long haul. You won't have opportunities to save or grab supplies once you commit to this boss fight.
Don't worry though, we'll explain how to beat Jenova Lifeclinger in Final Fantasy 7 Rebirth and get your party into shape to take on the full gauntlet. Beware of spoilers ahead!
On this page:
How to prepare for Jenova Lifeclinger in Final Fantasy 7 Rebirth
The point of no return in Final Fantasy 7 Rebirth is at the beginning of Chapter 13 once you embark at Northwood Port to reach the Temple of the Ancients. At this point you won't be able to further level up your party or unlock new Materia or gear for the final battle. As long as you begin Chapter 13 at the recommended level of 45 then you shouldn't find yourself under-levelled in Chapter 14.
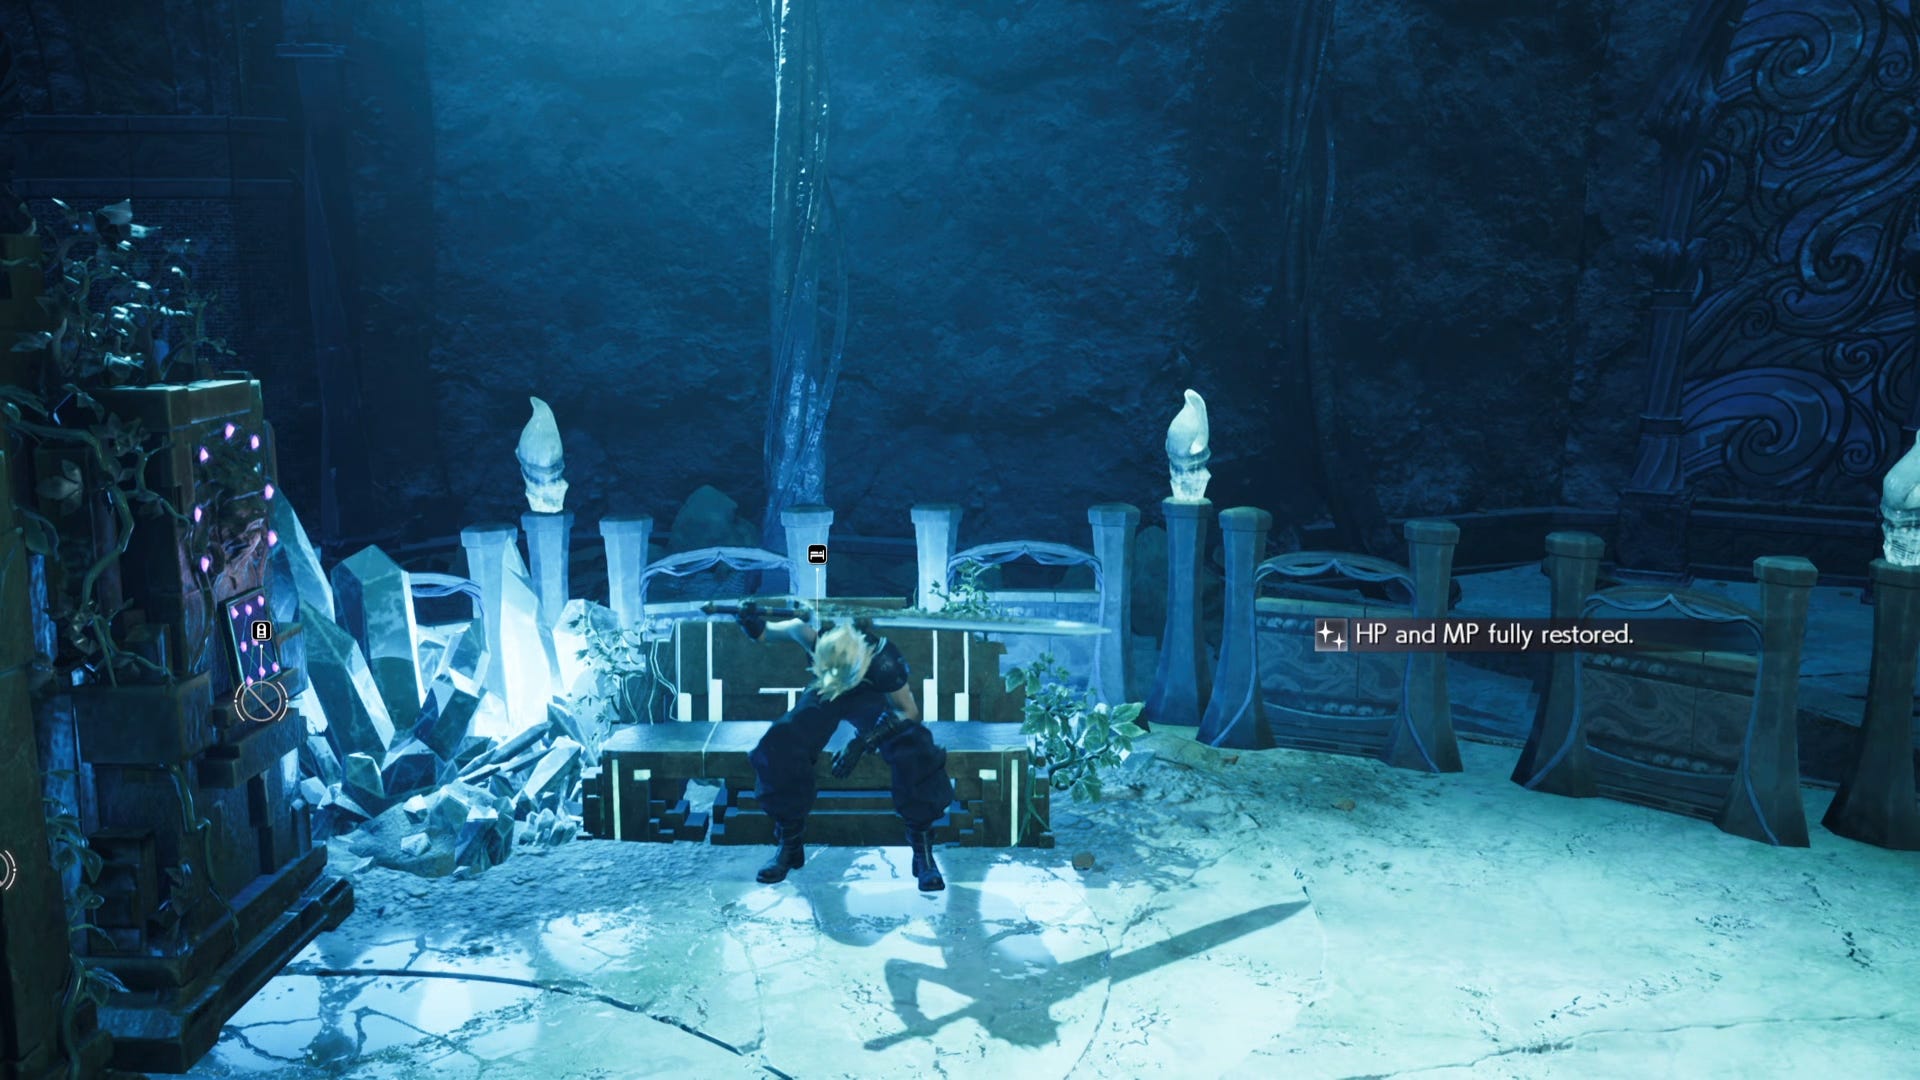
Once you're at the Forgotten Capital, you have one last chance to rest at a bench, buy supplies and upgrade your Folios. You should have a decent surplus of Gil from the battles in Chapter 13 so stock up on plenty of Giga-Potions and Phoenix Downs. If you haven't already, get the latest gear for all of your party members.
For Folios, you may have the ability to unlock each party member's Lv. 3 Limit Break but don't bother with this at the expense of more useful abilities. Ensure party members have elemental abilities, such as Wildfire, unlocked. As you have to prepare not just for Jenova but the fight that comes after it, you want Synergy Skills and Abilities unlocked that work between Cloud and Aerith, but also between Tifa, Barrett and Cait Sith, and between Barrett, Yuffie and Red XIII.
It's important to stress that every single party member (yes, that also includes Aerith!) should have Materia set before going into this fight. If you have been swapping Materia between active party members this whole time, this might leave you at a disadvantage.
Our advice is to spread your Materia out, so for instance do not set all Materia elemental spells to just one party member. You do have a chance to buy Materia at this last rest stop but they are all at a one-star rating and you will have no opportunity to upgrade them unless you pair them with Level-Boost Blue Materia. Status-inflicting spells like Poison and Petrify won't work on Jenova Lifeclinger so don't bother with these. Consider setting stat-buffing Purple Materia instead.
Aerith has the most effective magic power so you can set her with one-star Healing Materia and she'll still be able to help the party out with Cure. That means you can prioritise distributing Healing Materia to others. Cloud should have Barrier Materia paired with Magnify so you can cast defensive spells for both Jenova Lifeclinger and the fight afterwards. If you also set him with Item Economizer Materia then you'll also be able to use items without using ATB bars from time to time - very handy!
How to defeat Jenova Lifeclinger in Final Fantasy 7 Rebirth
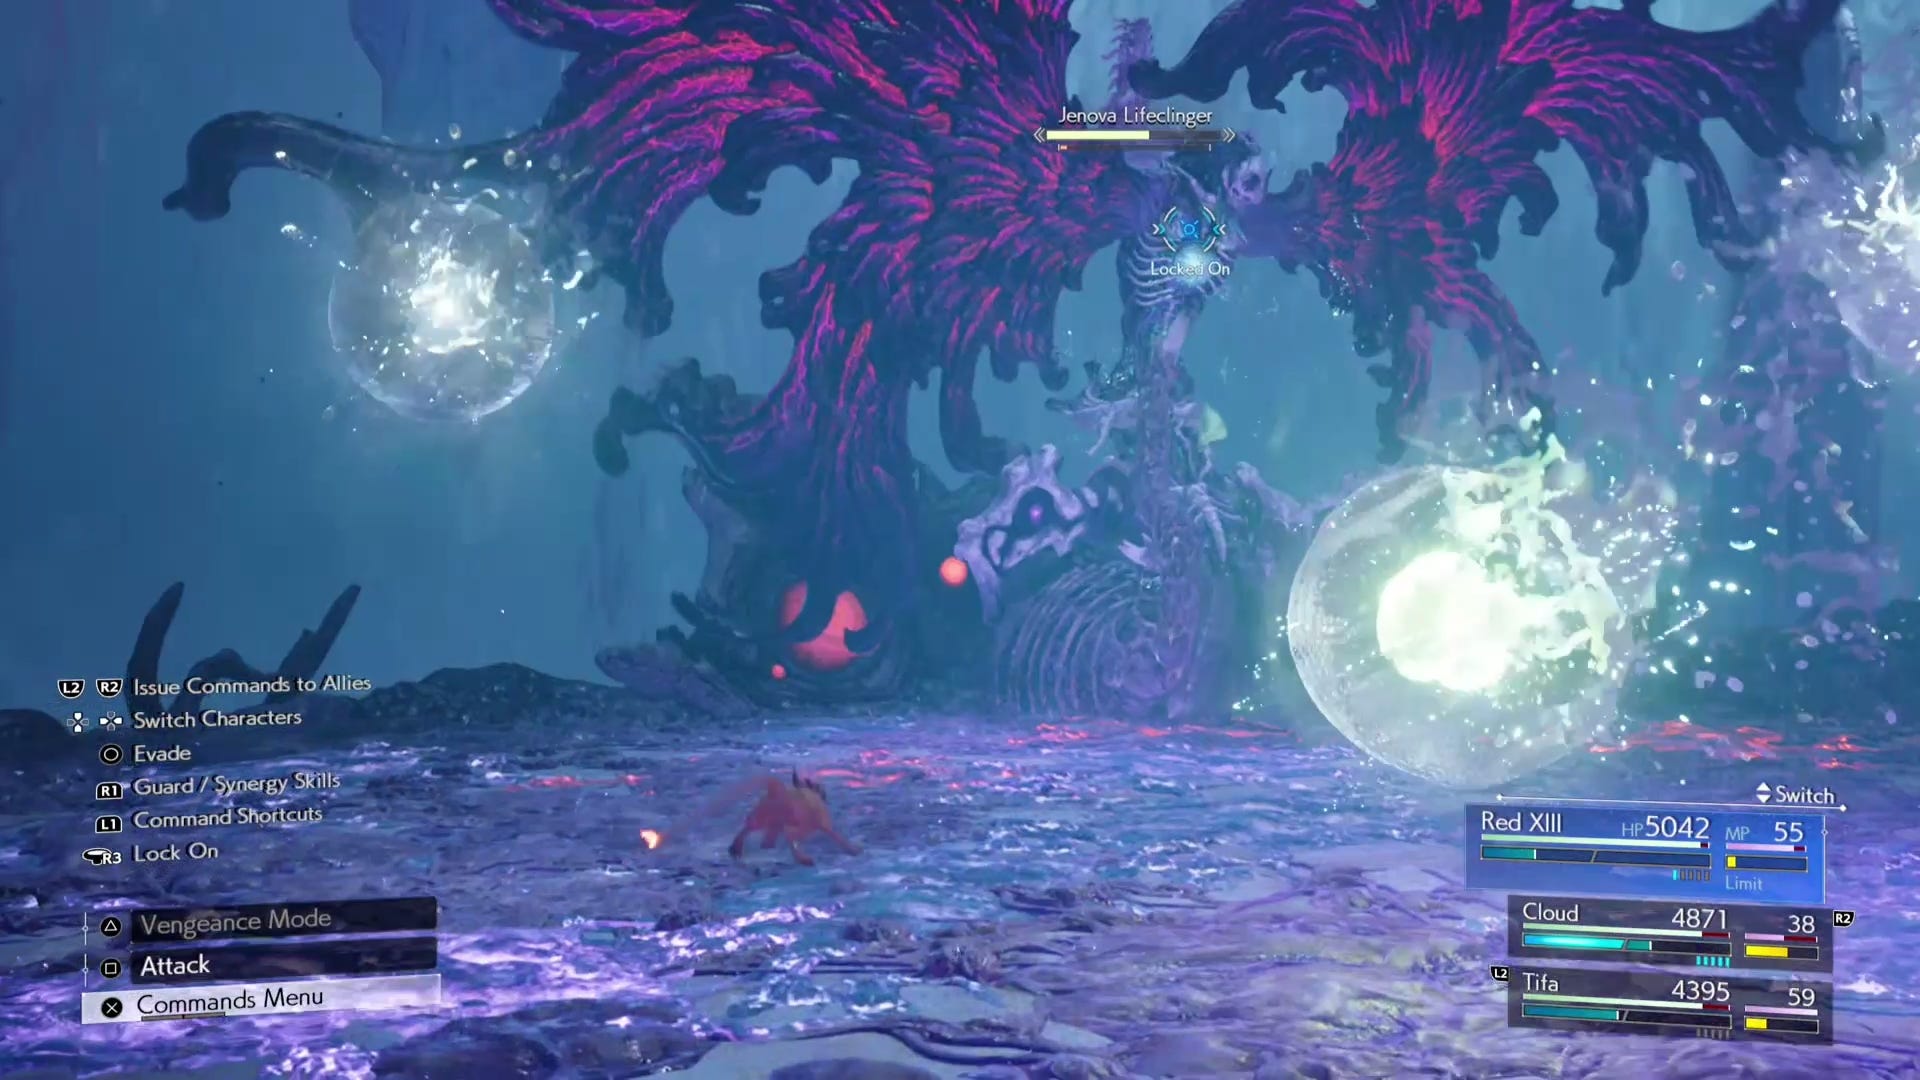
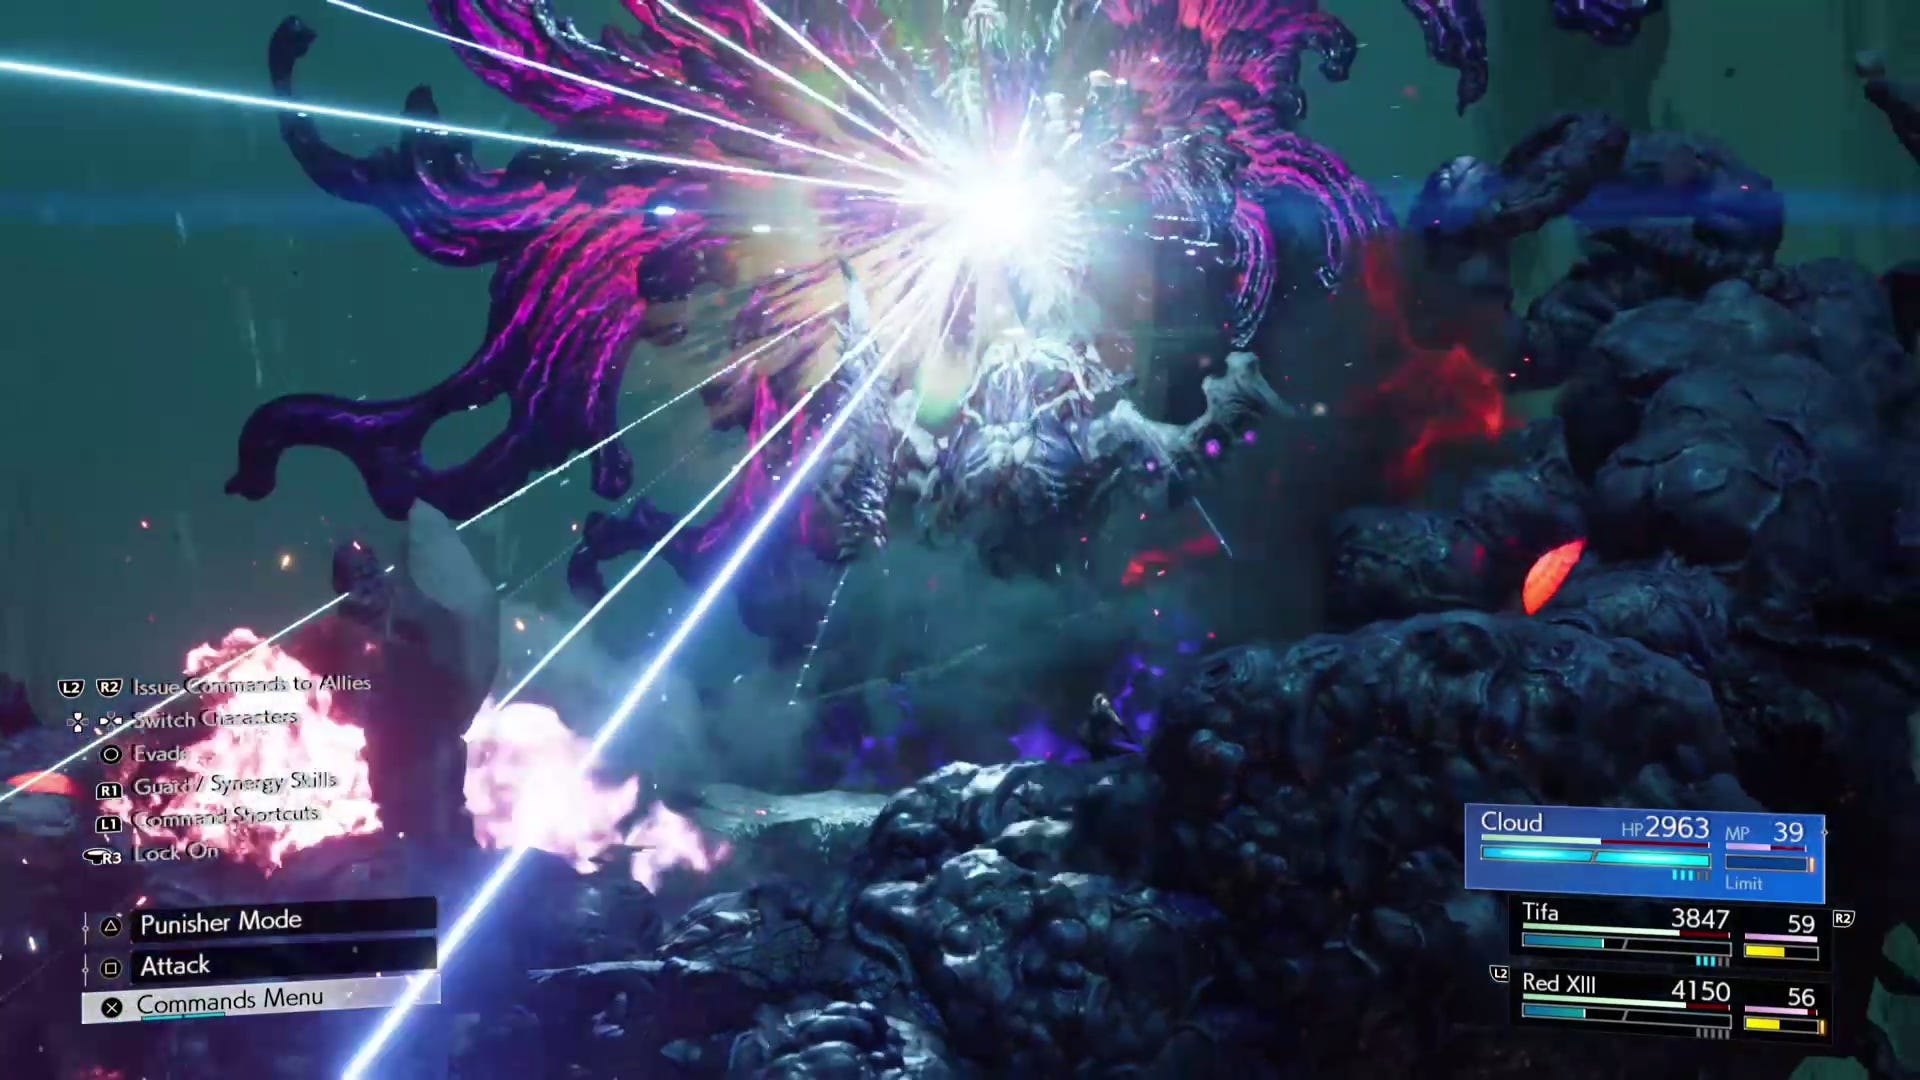
After the fateful cutscene has finished, you'll launch straight into the fight against Jenova Lifeclinger. It will immediately use Contaminant Expulsion to grab and remove half of your party members. Regardless of who you had set in your active party, you're left with Cloud, Tifa and Red XIII. To begin, go all-in with Cloud in Punisher Mode for physical damage. As Jenova has resistance to ice and wind magic, don't bother with any spells just yet.
Jenova has an AOE attack called Mourning Wail which creates a cyclone around it that chips HP away if you remain within its radius. Jenova follows this with Vengeance, which fires lasers indiscriminately. Avoid damage with agile dodging and be prepared to move back when Jenova uses Castigate, which launches a flurry of limb strikes in a front arc. Don't keep your distance too long, though, as it can also cast Blizzaga.
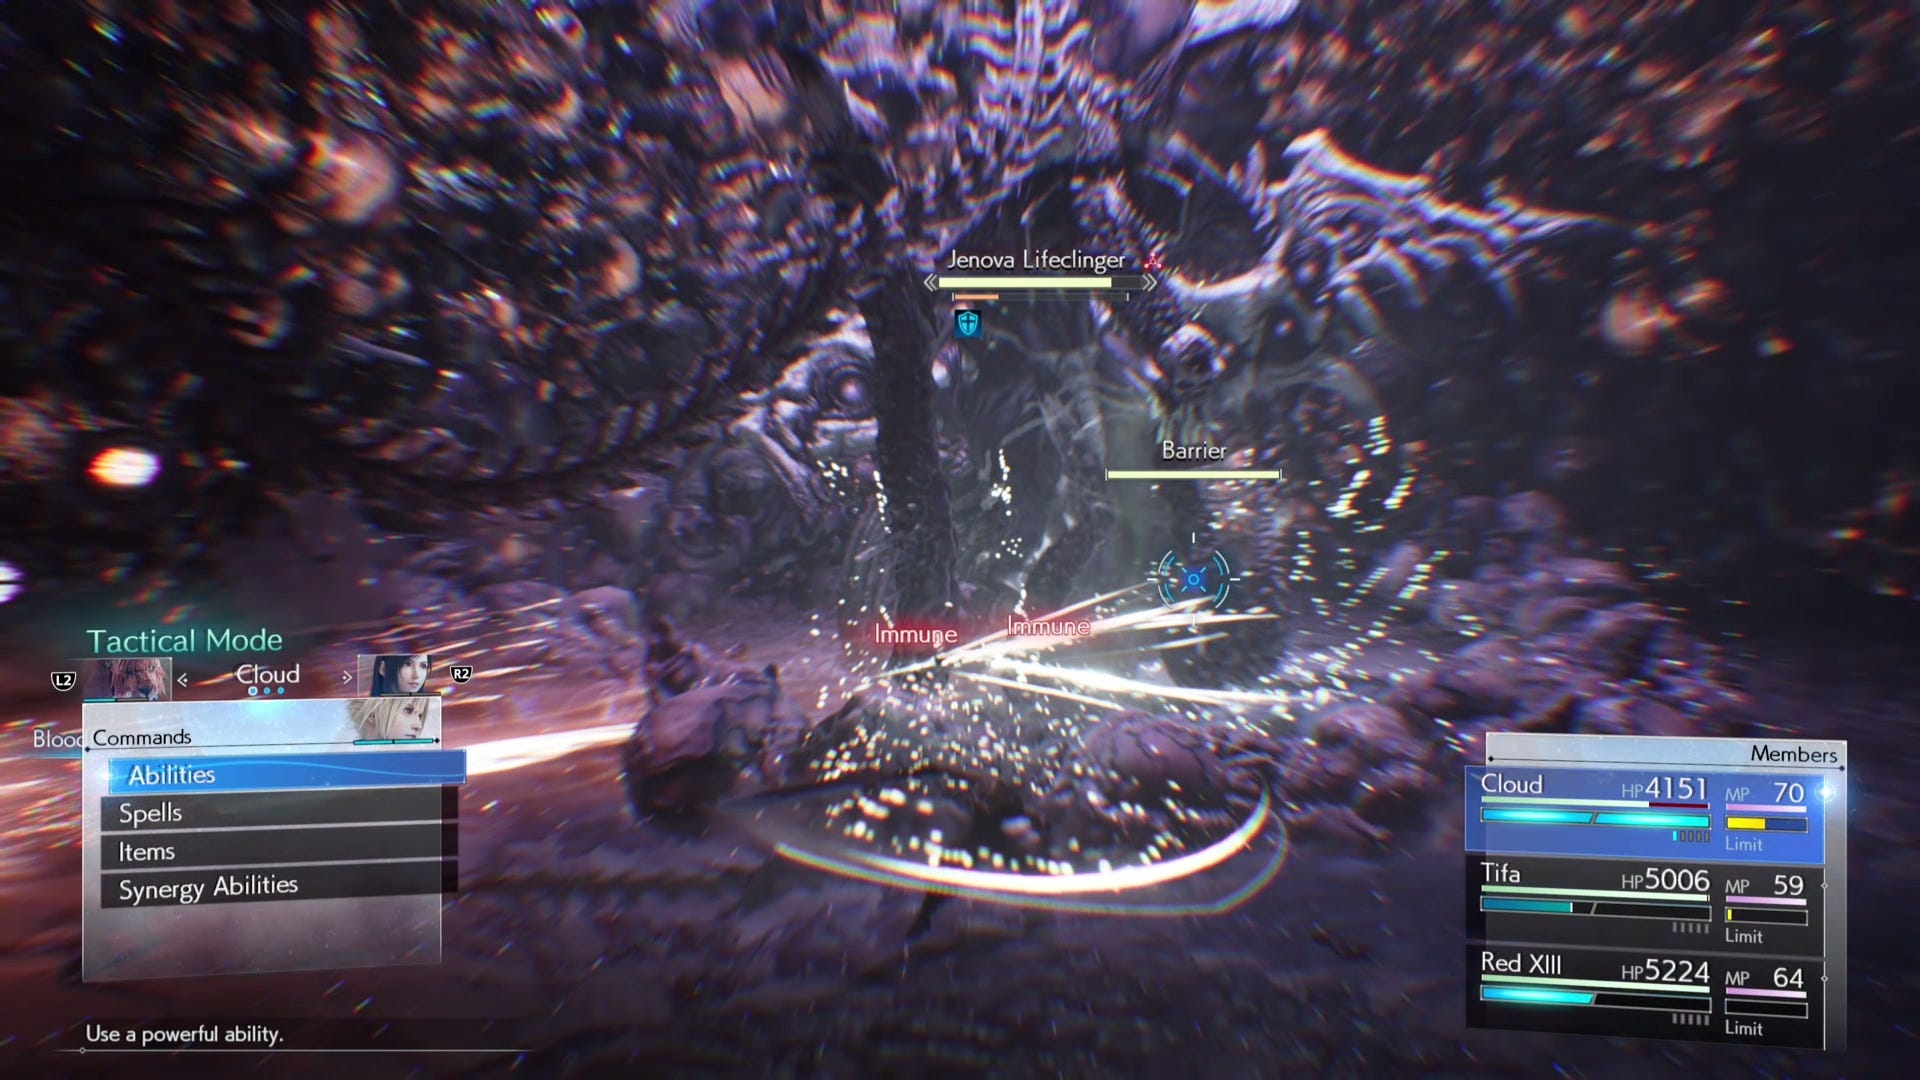
Shortly after, Jenova erects an organic-looking barrier around itself. This barrier is immune to physical attacks, so either cast spells or use elemental-based abilities. Take care as it will continue to attack with Castigate as well as Azure Resplendence. This sees tentacles shooting out from the ground in front of Jenova, so keep to the side. Taking the barrier down will put Jenova in a pressured state, which is a good time to use Cloud's Focused Thrust and Tifa's Focused Strike to increase the stagger gauge.
When you've taken down about 15 percent of its HP, Jenova uses Contaminant Expulsion again, this time disappearing Tifa and Red XIII. Cloud will have to fight by himself for a while so be careful to either have Item Economizer so you can freely use a Giga-potion to heal, or use a spare ATB bar.
Jenova will use the same attacks as above during this phase so stick with Punisher Mode to chip away at it to build up ATB, and only use ATB when it erects another barrier. Destroy the barrier with magic and then use Focused Thrust. You should be able to stagger Jenova then let rip strong attacks like Braver.
Once Jenova's HP is down to about two-thirds, a cutscene will play and your party members will return, though you'll again just have Cloud, Tifa and Red XIII in the active party. The environment has changed slightly but Jenova will use similar attacks like Mourning Wail. It also occasionally teleports around the arena to catch you off guard.
Jenova also has a few new attacks. Dreams of Sorcery sends out easily avoided orbs of elemental magic to follow you around. Jenova also has a ranged magic attack called Desecration that does considerably more damage, and you only have a quick moment to get out of its path.
Look out for Eye of Providence, which grabs a party member and blasts them with lasers. There's not much you can do about this so if you're grabbed immediately switch to another party member to land some attacks and heal your ally if need be.
Keep up the offensive until Jenova is down to a third of its health and another cutscene will trigger where it will essentially blow apart the arena you've been standing on into smaller platforms, splitting everyone up. Now you'll be taking turns with different party member pairings.
In this sequence you start with Tifa and Cait Sith. Target Jenova's right wing in this phase. Tifa's fast attacks will charge up her ATB quickly, giving you the chance to use more powerful abilities like Dive Kick, though don't neglect Cait Sith - he can at least call on his Moogle. Keep up the sustained offensive and you'll cripple the right wing.
Next, the action will switch to Barrett and Red XIII. This time you should target the right wing. Again, use both party members' abilities, although you'll get more mileage out of Barrett's gun arm for Overcharge, while using Point Blank will pack quite the wallop.
After the left wing has been crippled, the action will switch to Cloud and Yuffie, and the focus will be on Jenova's head. The head will move around frequently, so Yuffie is the more useful party member to control in this fight. Throw your shuriken and use retrieve to warp close and continue dealing melee damage.
Once the head has been crippled, the party unites for a pretty attack sequence. Yet while it claims to have dealt 9999 damage, actually still have about a quarter of Jenova's HP left to take down yourself. This is one tough space monster.
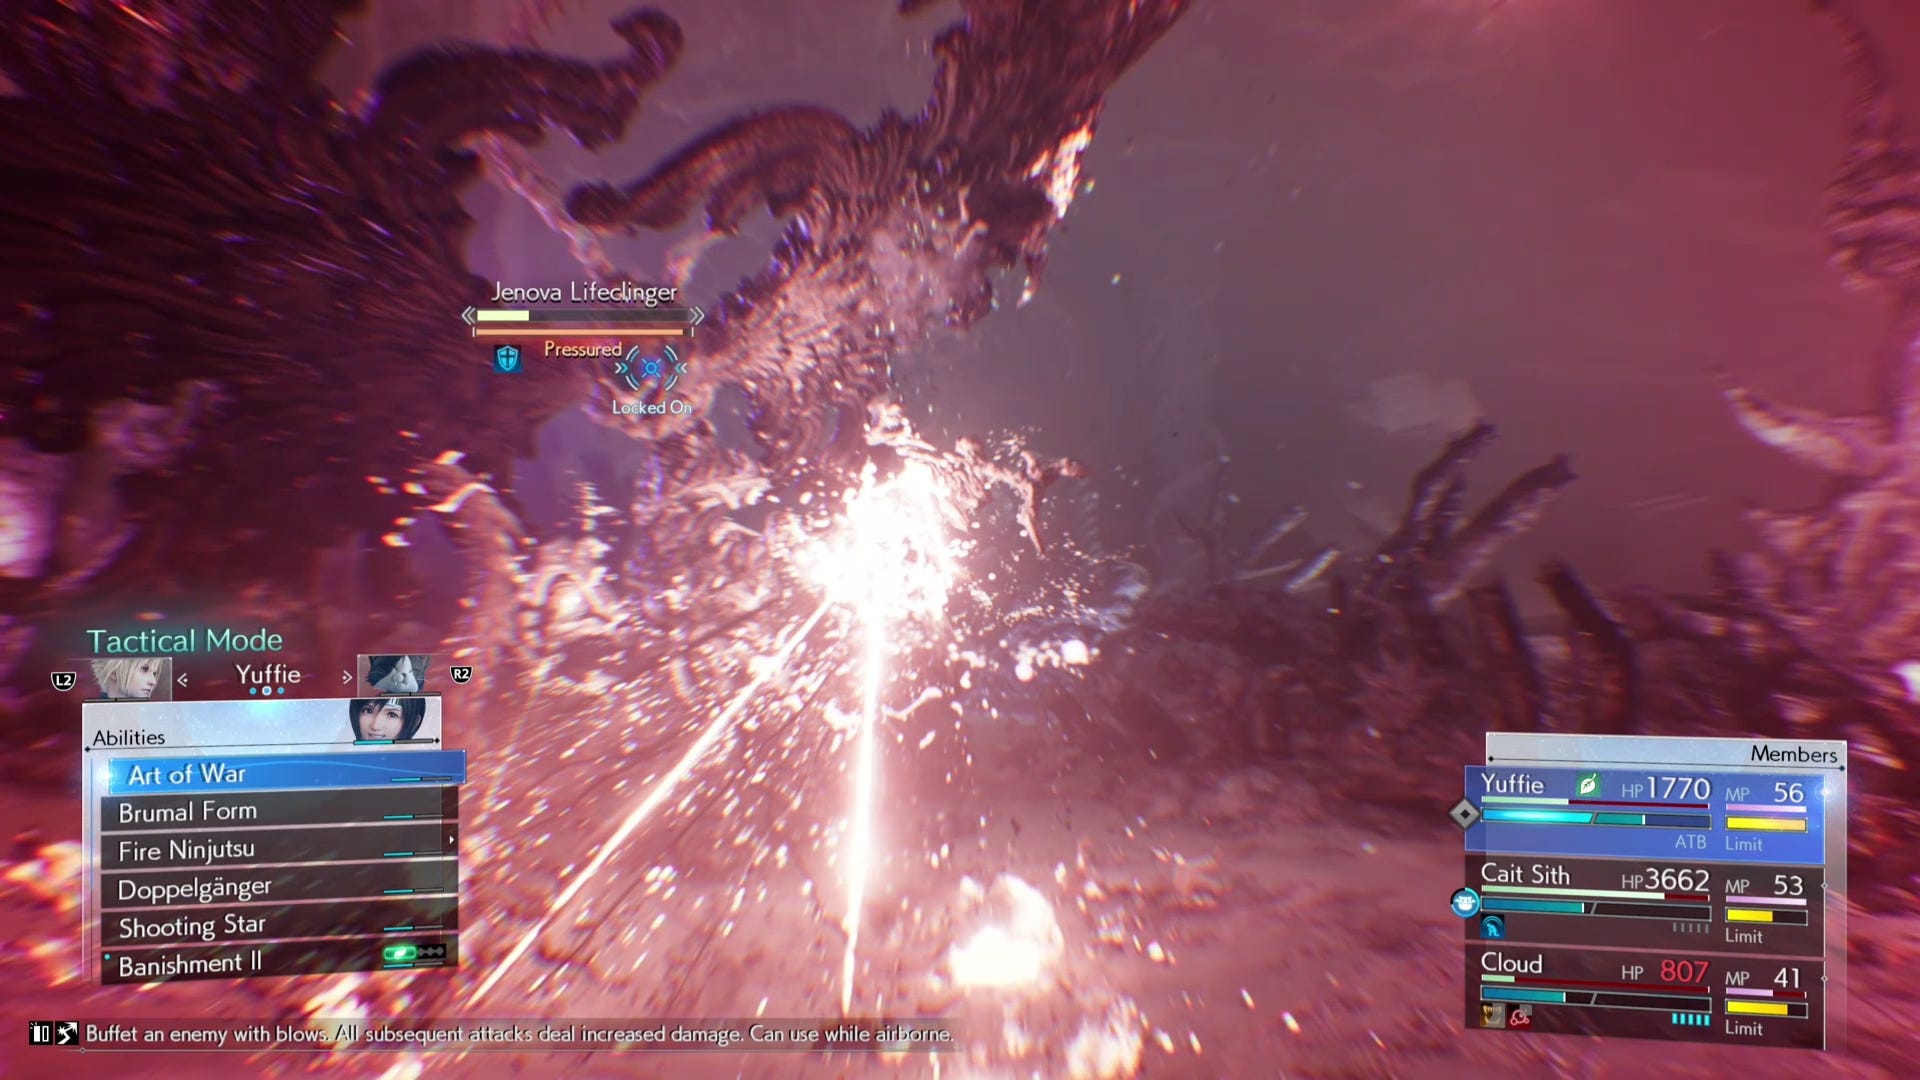
In this last phase, the active party members will be Cloud, Yuffie and Cait Sith. Again, Jenova will use its previous moves but also a couple more powerful variants like Sanguinary Flames, raining bolts of fire down on the party. It's also unfortunately immune to all physical attacks. On the bright side, any stagger you had built up in the previous phase will be retained, so it won't take too much more to take it down.
You still have to spend some time landing attacks that do no damage just to build up ATB for elemental attacks. Yuffie can however use her Elemental Ninjitsu ability so switching to her will let you chip away some damage. Hopefully you have a Limit Break saved up here. Even if it doesn't can't deal physical damage, it will still put Jenova into a pressured status, allowing Yuffie's elemental chips to build stagger. Once Jenova is staggered, you're free to unleash all your attacks to finish it off.
Jenova Lifeclinger reward in Final Fantasy 7 Rebirth
Defeating Jenova Lifeclinger will earn you 4400 EXP, 30 AP, and 2200 Gil. Money at this point might seem pointless, but actually once you finish the game you can replay chapters and carry over your progress, as well as opt for higher difficulty levels.
The game isn't finished yet, however. While in the original game, defeating Jenova marked the end of your time at the Forgotten Capital, Final Fantasy 7 Rebirth has more of a marathon ending in mind. On the bright side, the party's HP and MP will be automatically restored. You're going to need it too, as you're about to go up against another foe!