Zelda Tears of the Kingdom Mayachin Shrine solution
Embrace pinball and prevail.
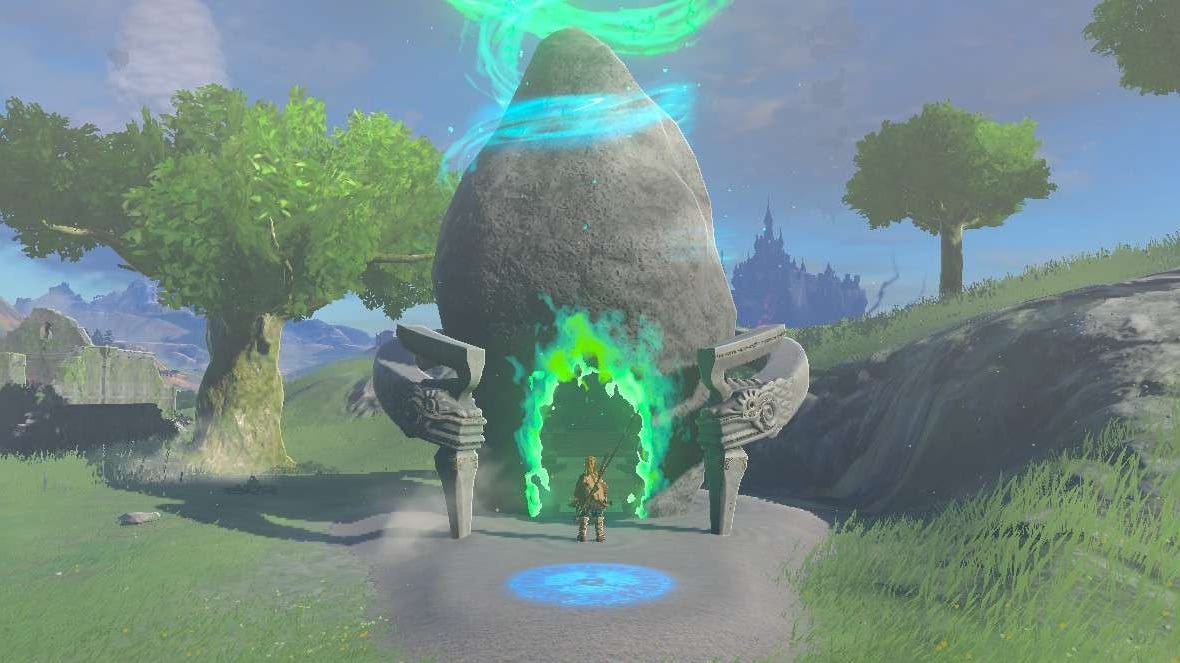

The Mayachin Shrine in Zelda: Tears of the Kingdom can be found in Hyrule Fields, at the lower end of Windwane Meadow.
As is usual with Shrines in Zelda: Tears of the Kingdom, the Mayachin Shrine presents a test that must be overcome using one or all of Link’s various abilities. Mayachin Shrine specifically revolves heavily around the use of the Ultrahand ability for the A Fixed Device puzzle – you’ll have unlocked this when completing the Ukouh Shrine at the beginning of the game.
With your Ultrahand ability at the ready, you’re able to jump right into the Shrine, and use this guide to learn how to complete the Mayachin Shrine in Zelda: Tears of the Kingdom.
On this page:
If you want to learn more about Link's quest, visit our walkthrough and tips guide for Zelda Tears of the Kingdom.
Mayachin Shrine location in Zelda Tears of the Kingdom
Mayachin Shrine is a relatively simple Shrine to find since it’s located just slightly northeast from the Hyrule Field Skyview Tower, next to a small area called Exchange Ruins close to the centre of Hyrule Field.
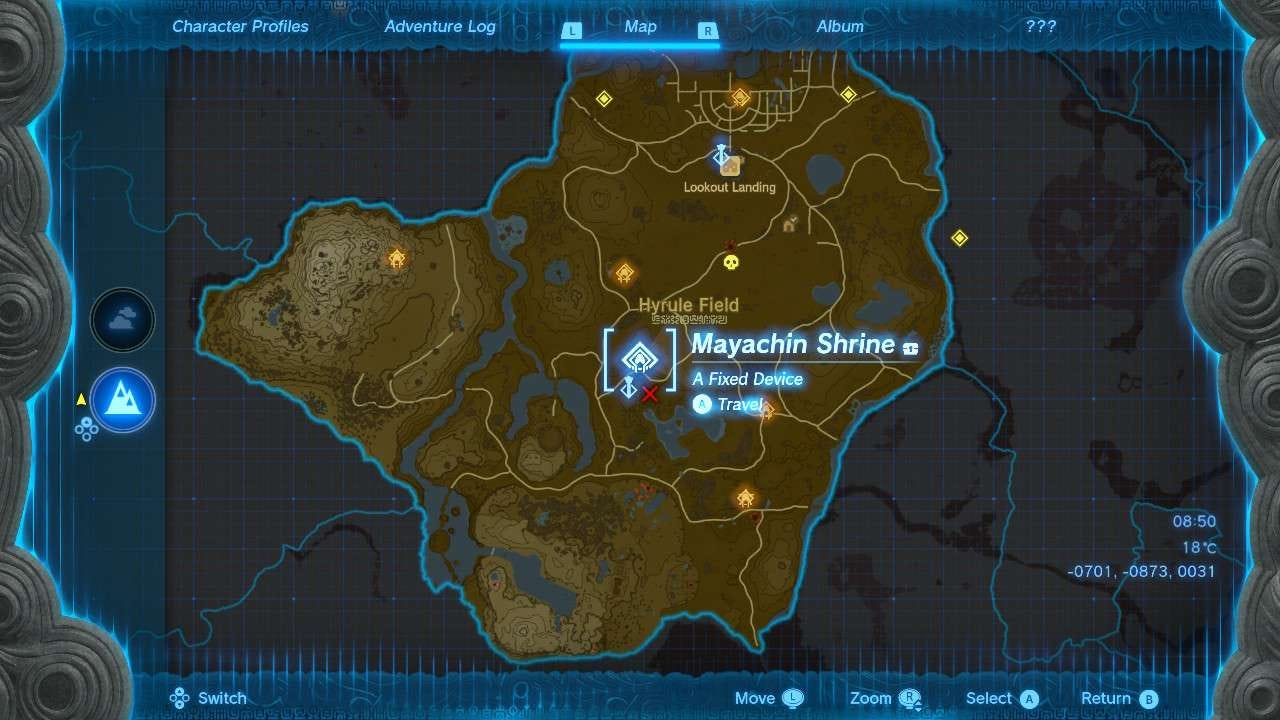
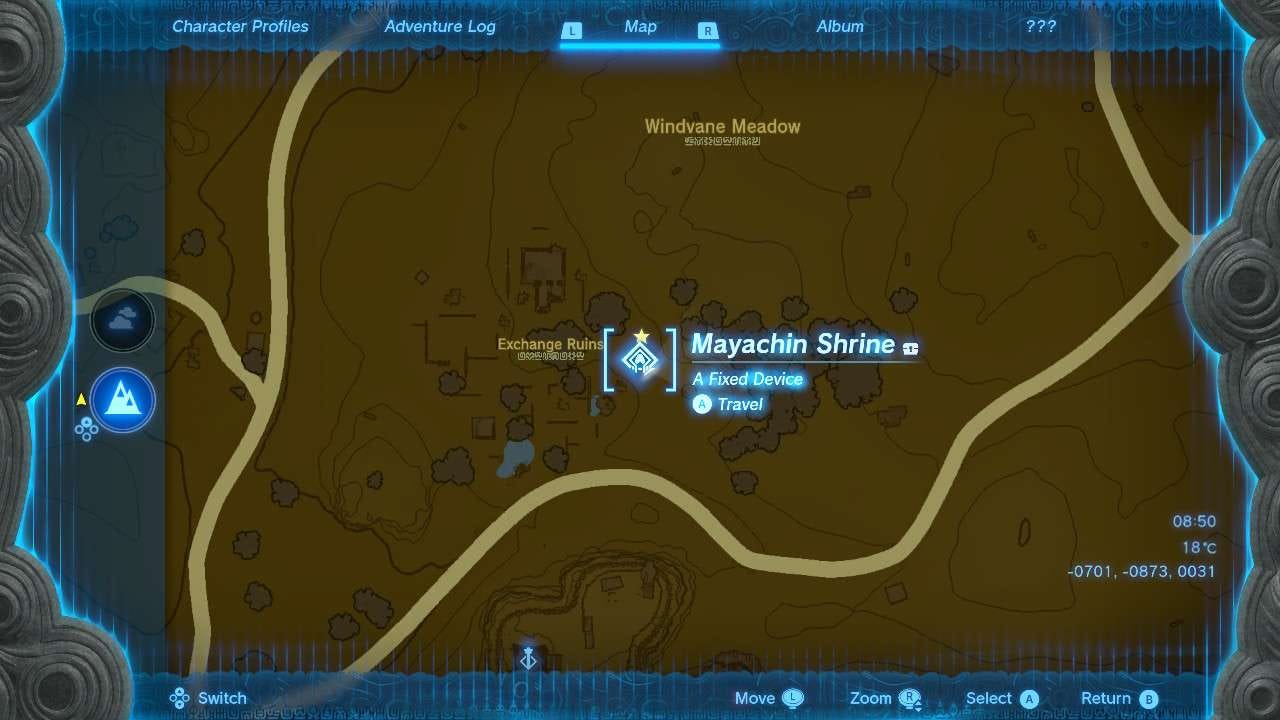
The image above shows its location specifically, but if you’d like to go by coordinates if you perhaps haven't yet revealed that area of the map, the exact location is -0705, -0866, 0031.
Mayachin Shrine solution in Zelda Tears of the Kingdom
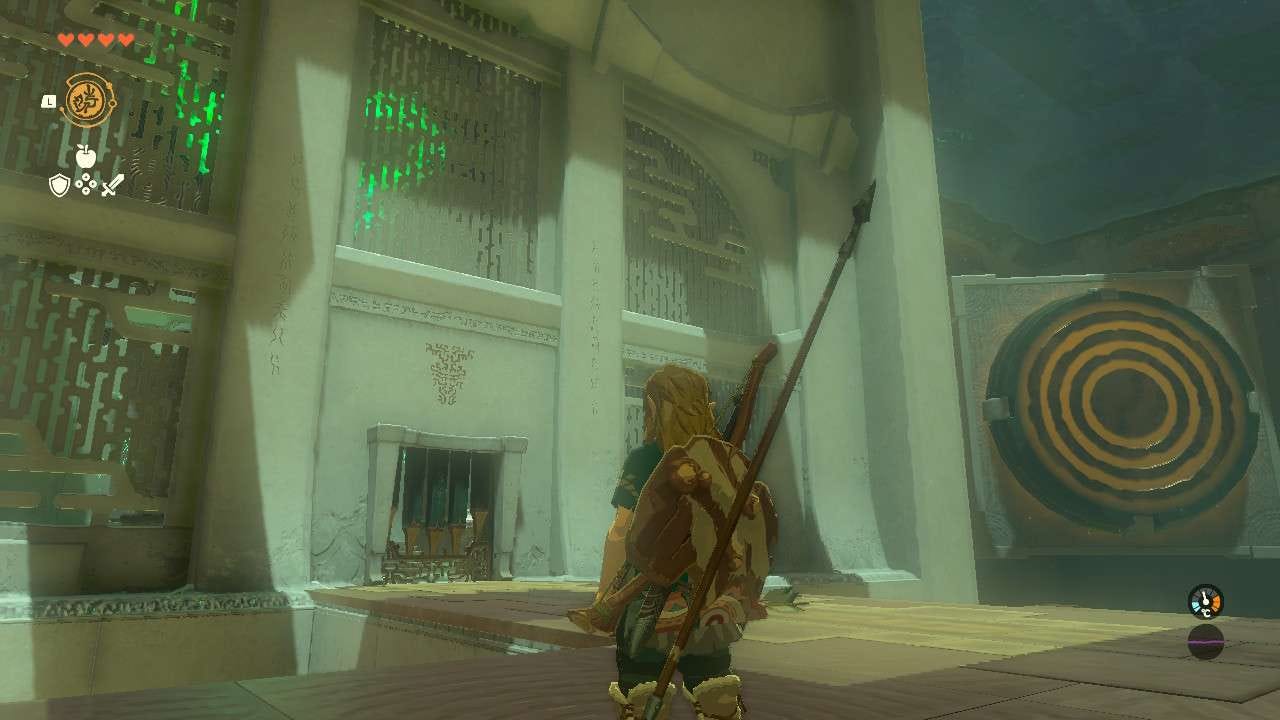
Once you're inside the Mayachin Shrine, you won’t have far to go to reach the hub from which you’ll be executing the A Fixed Device puzzle – simply jump onto the spinning platform, wait for it to spin you around to the other side, and you’ll be there.
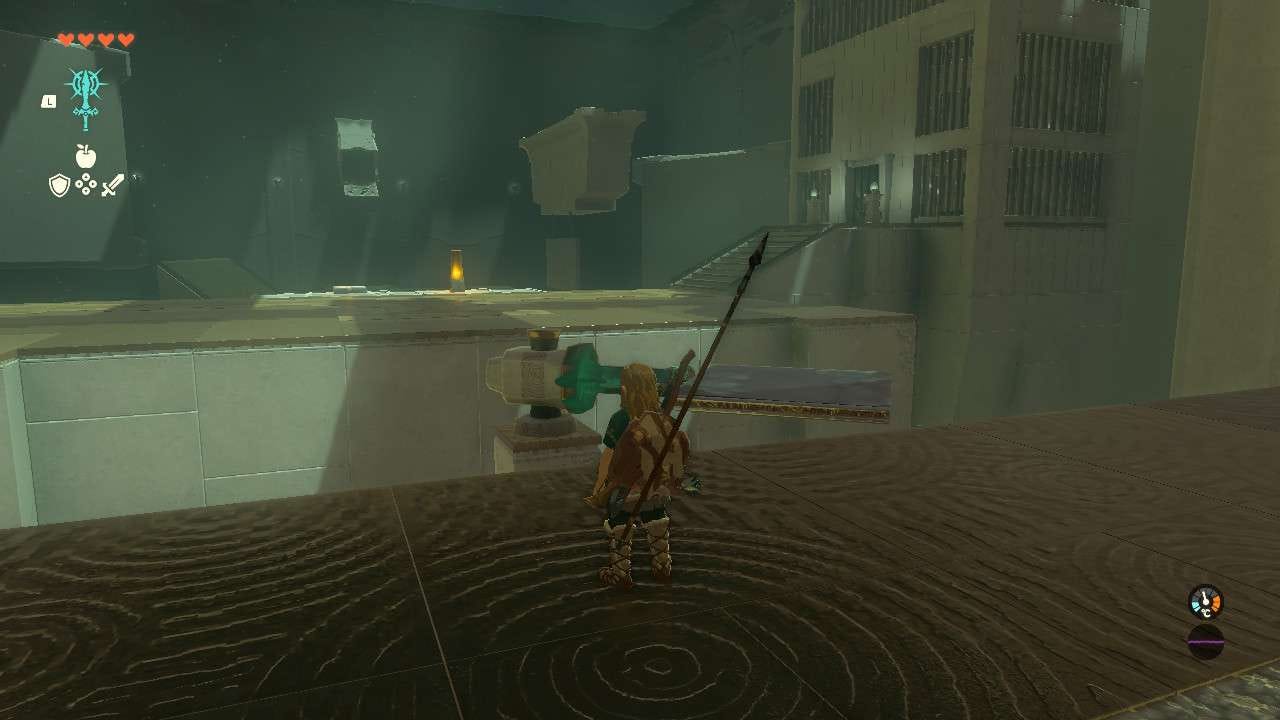
The main goal of this Shrine’s puzzle is to build a beam and use it to propel a ball and hit a target.
There’s a couple things to take care of before you reach that point however.
First, you’ll want to stand on a square pressure plate in front of you – this will cause the target we need to appear on the far left of the room.
Next to that pressure plate will also be a glowing crystal, and ahead on the other side of the room will be a dispenser producing a ball every few seconds, but we’ll get to those later.
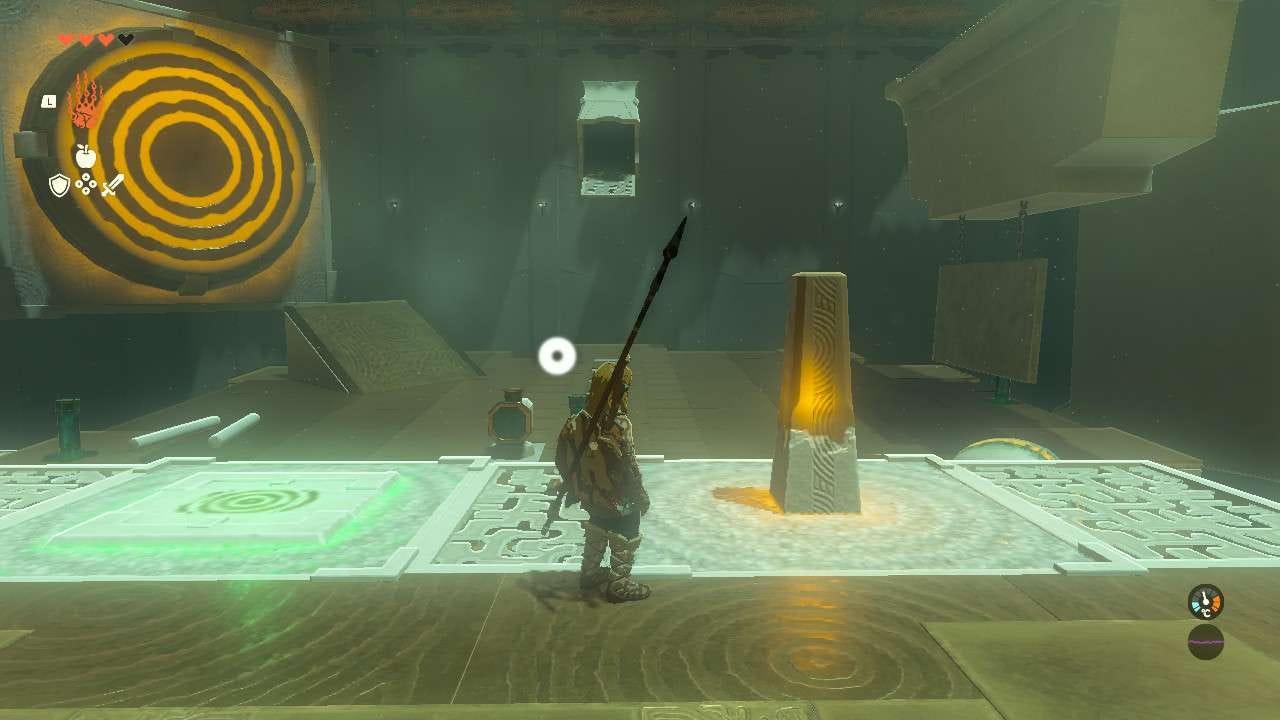
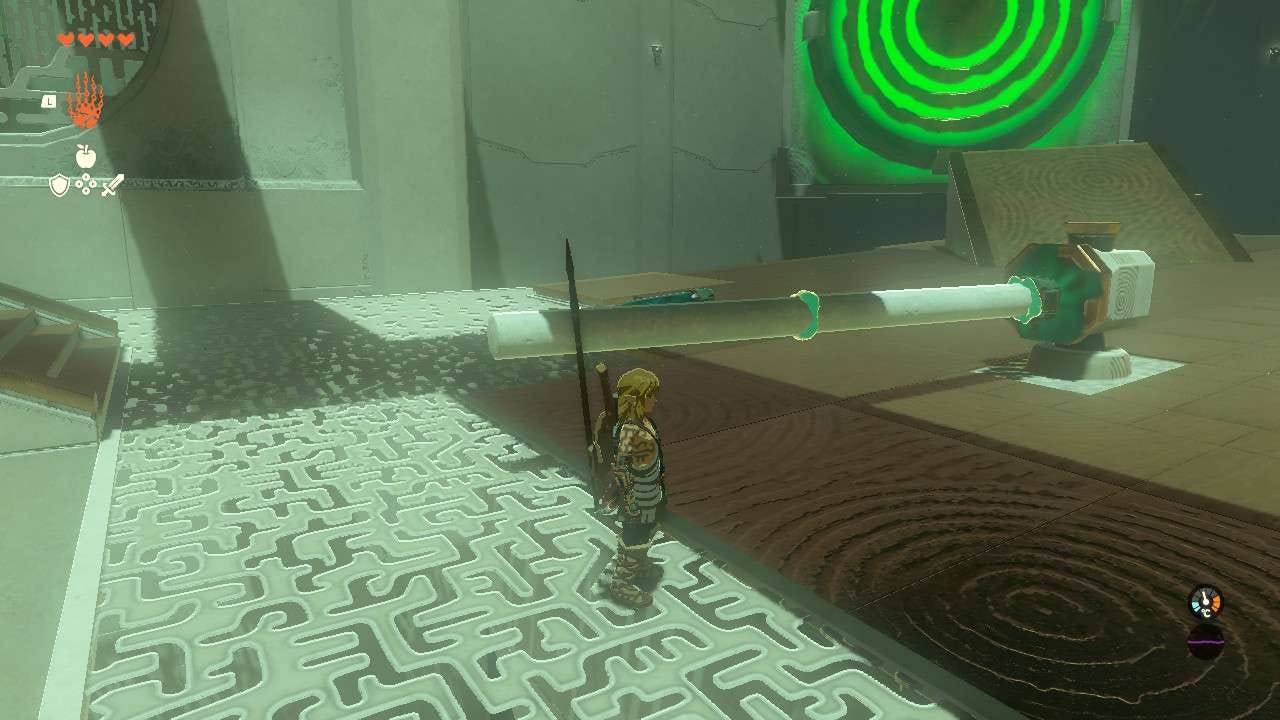
For now you’ll want to go down the set of stairs to the level below where you’ll notice a couple of white beams and a green stake laying on the left.
Using the Ultrahand ability, you’ll want to connect the two white beams together, and then that extended beam to the flat end of the stake.
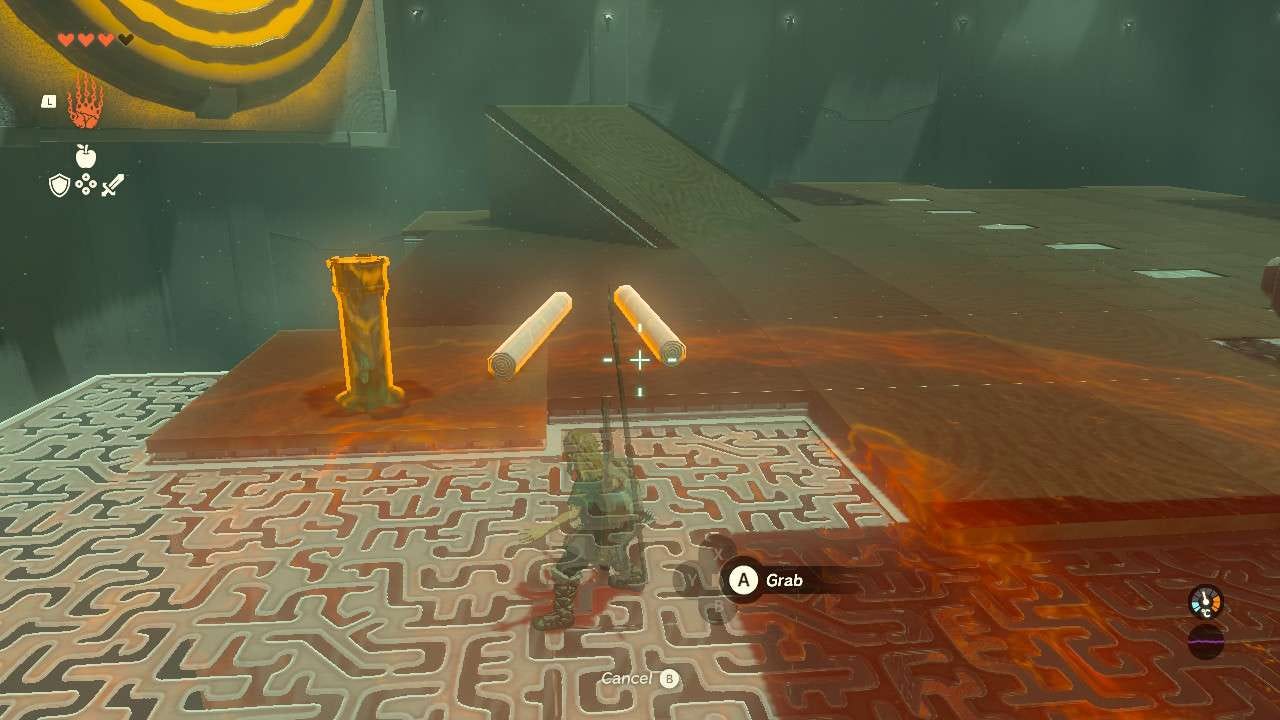

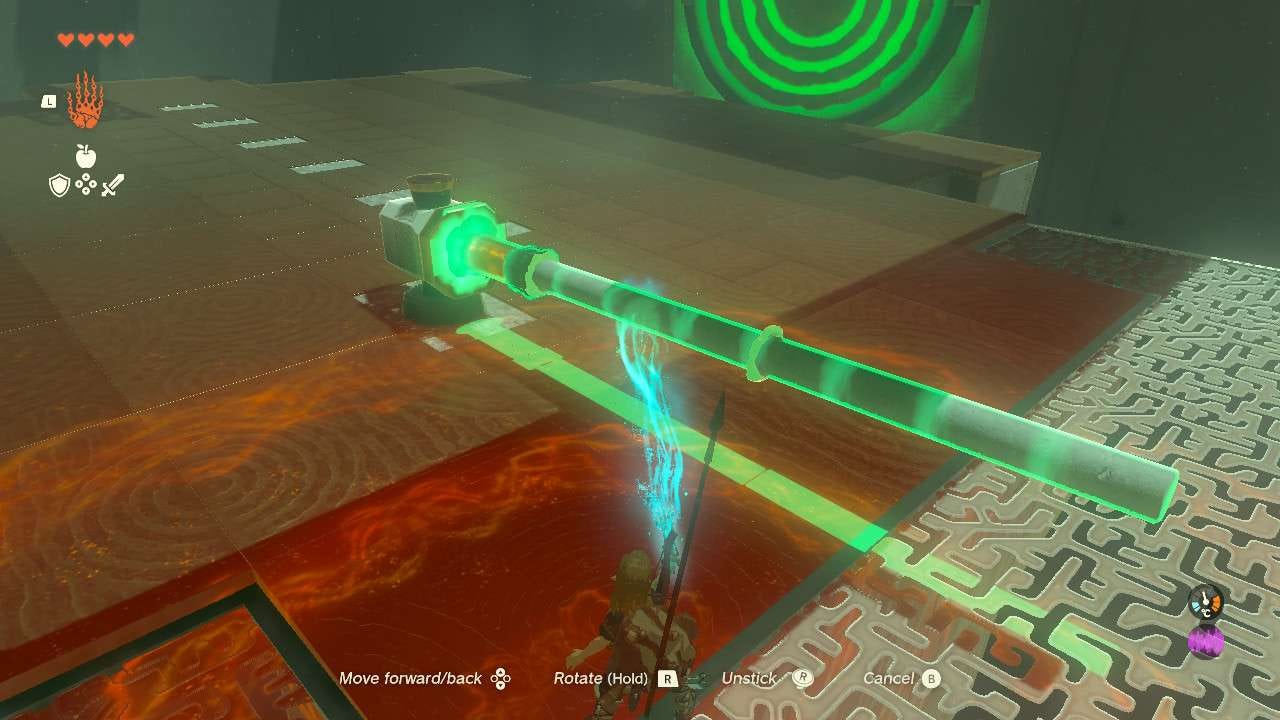
Once it’s all connected, using Ultrahand again, move the complete beam and – with the stake end first – slot it into the stone block in the centre of the room. This is an actuator, and once the beam is connected, this will form the complete mechanism that – when the aforementioned crystal is hit – spins, hitting anything in its path.
Before returning to the crystal, you'll want to move an unused stake located in the centre of the room – you may have noticed the ball from the overhead dispenser being blocked by it before rolling off the platform, and it’ll need to be moved for this puzzle to be complete.
Once the stake's out of the way, return to the crystal and – once a ball reaches the penultimate white tile on the ground – hit the crystal, causing it to turn green and the beam to swing into and hit the ball.
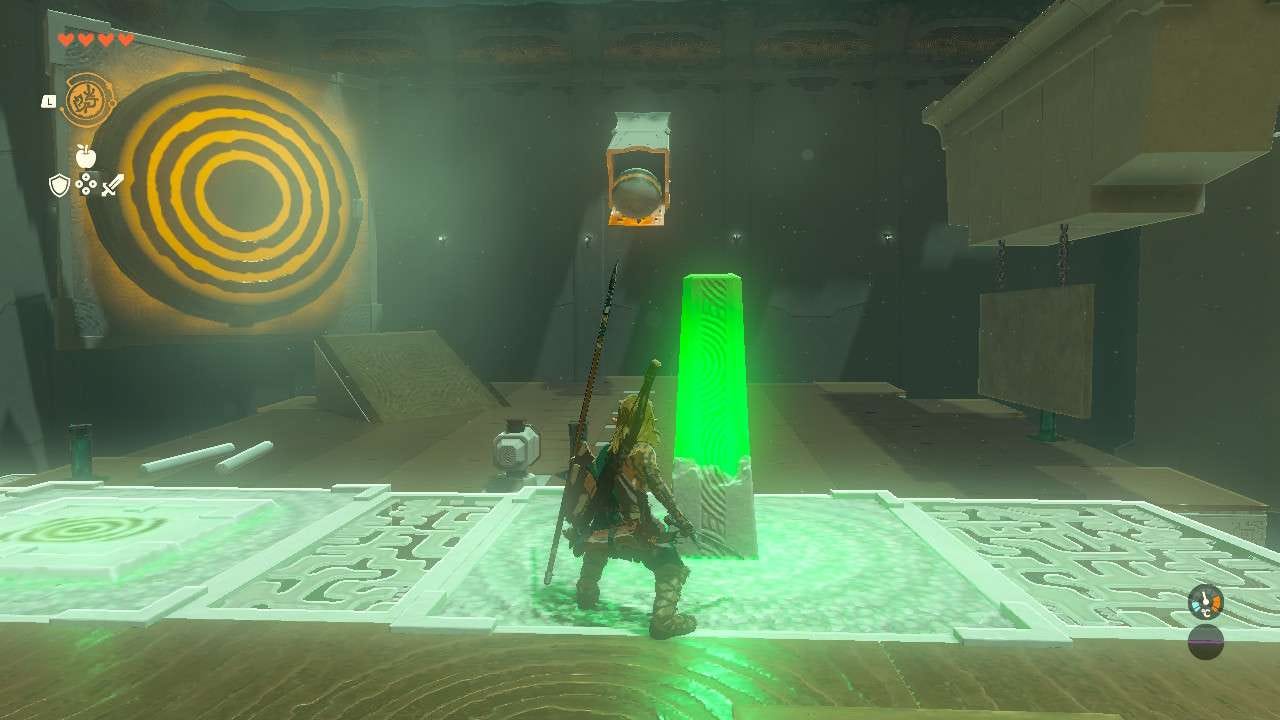
It might take a few attempts to get right, but the goal is to hit the ball up the ramp and across to the target on the far left.
Once you’ve successfully hit the target, it’ll turn from yellow to green and the door to complete the shrine will open.
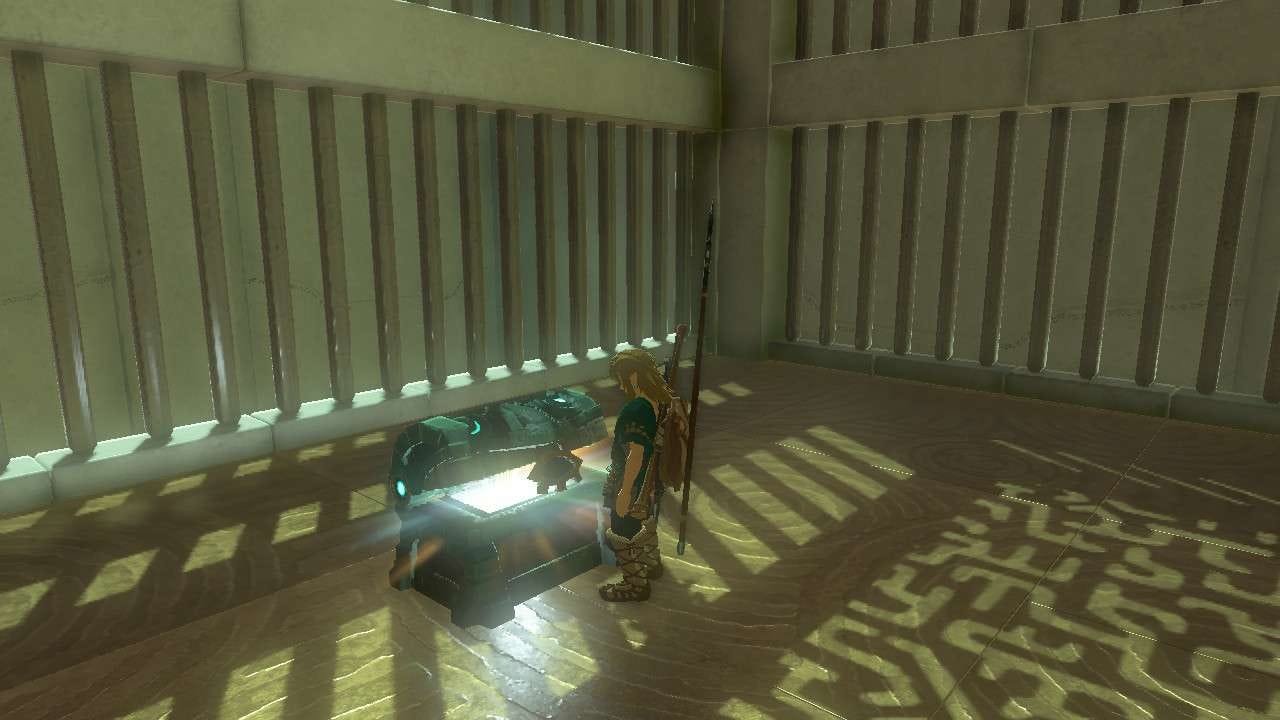
Before exiting though, you should pick up the hidden chest in the room opposite the newly-opened door.
To do this, you’ll want to repeat a similar process with the mechanism, but instead for a new target that’ll have just appeared following your success, on the far right of the room.
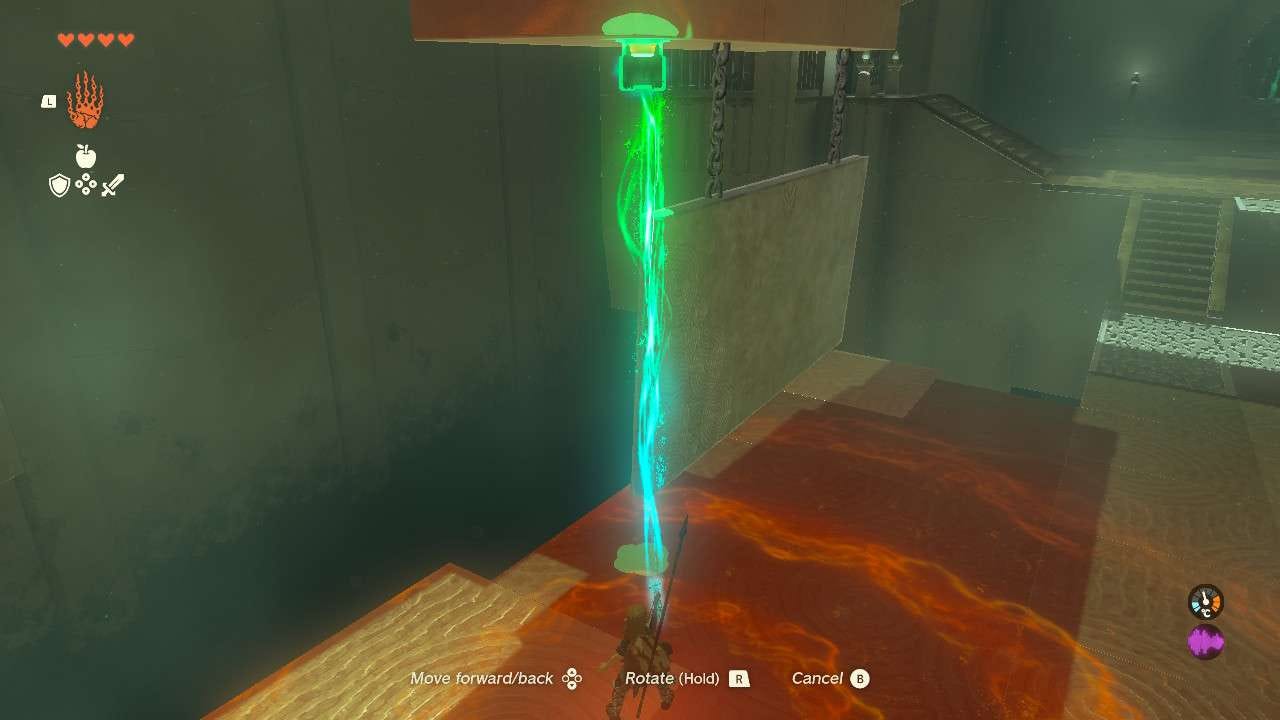
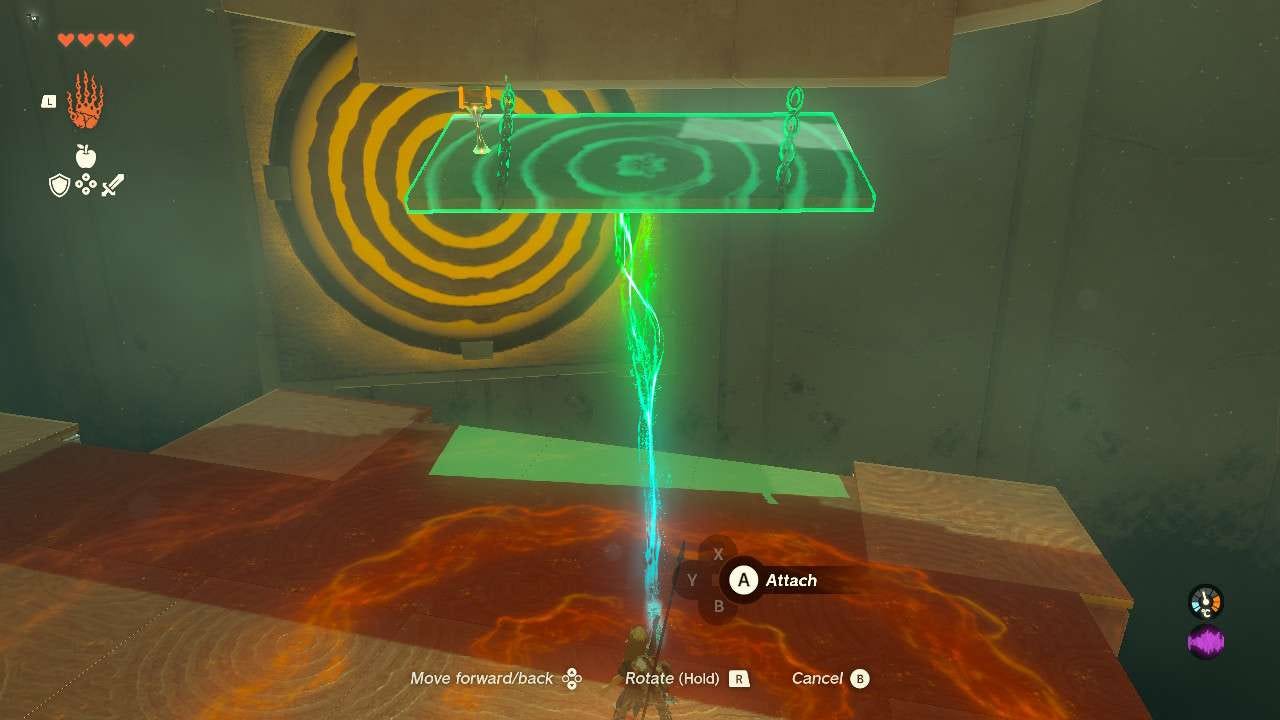
There’s a hanging wall obstructing the ball’s trajectory this time however, so you’ll need to sort that out before continuing.
To do this, using Ultrahand, take one of the other two stakes laying in the room and slot it into the underside of the block from which the wall is hanging by chains from – push it all the way in, and then lift the wall up and select 'attach' when prompted to hold the wall in place up against the stake.
Once this is done, return to the crystal, ensuring it's back to its original state – it should be glowing yellow – and hit it again to swing the beam as the ball being dispensed reaches the edge of the platform. You'll want the beam to swing and hit the ball just before it fully touches the metal grating to launch it across to the new target.
As with before, keep trying until you hit the target, turning it green and opening the door to the secret chest.
Once done, grab your reward from the chest, then head over to the other side of the room and interact with the statue to claim another Light of Blessing and complete the Shrine.
Congrats on your Shrine completion! If you want to learn more about Link's adventure, check out our walkthrough and tips guide for Zelda Tears of the Kingdom.