How to beat Sephiroth in Final Fantasy 7 Rebirth
Fight the One-Winged Angel across worlds.
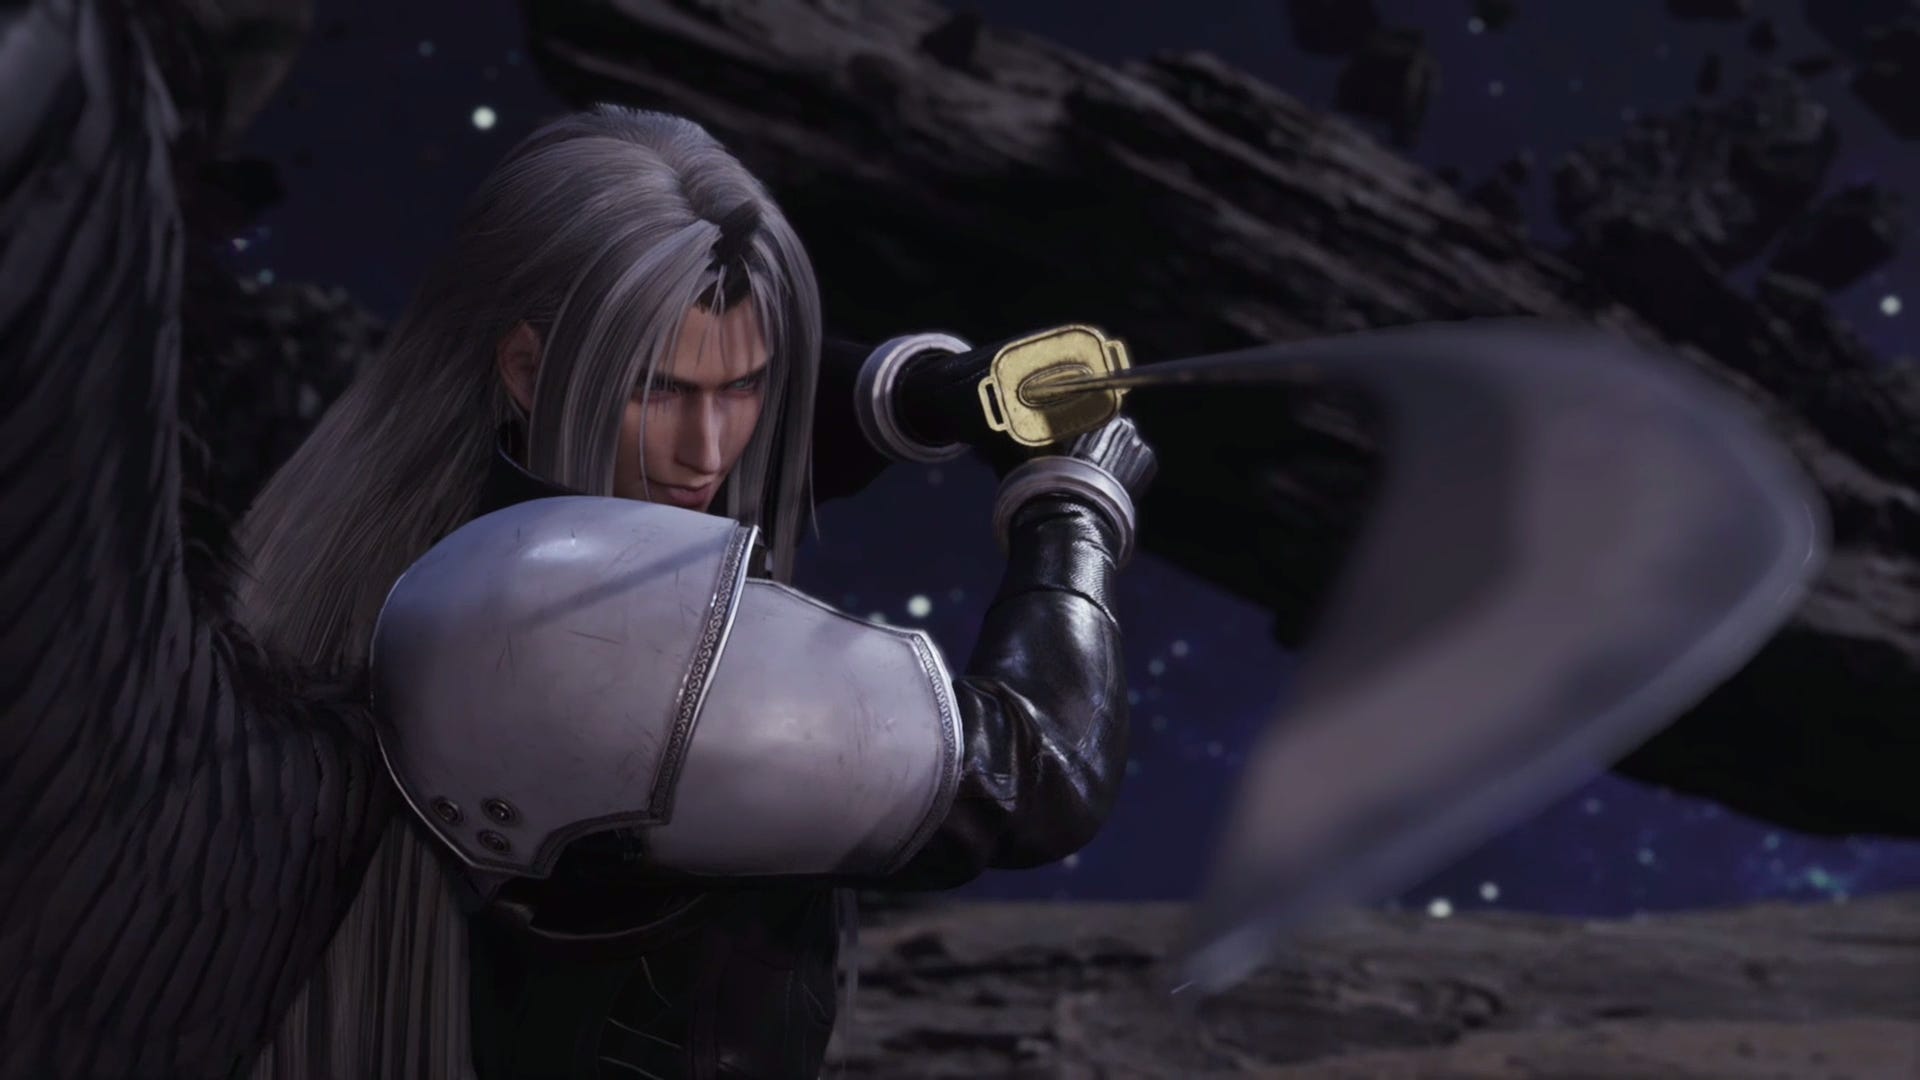

In a major deviation from the original game, you fought Sephiroth at the end of Final Fantasy 7 Remake, and now you fight him again at the end of Final Fantasy 7 Rebirth. It's a truly epic showdown that doesn't just span multiple phases but multiple worlds.
This fight is the second longer half of an extended sequence of final bosses, which began with Jenova Lifeclinger in Final Fantasy 7 Rebirth. Whereas Jenova was technically one boss with multiple phases, the Sephiroth fight features multiple bosses and phases. At the very least, your HP and MP will recover during a few checkpoints. That means you don't have to start all over again should you fall to the One-Winged Angel. Still, this will be a tricky battle if you're not prepared.
This guide will provide all the information you need to best Sephiroth and bring this epic second instalment of the Final Fantasy 7 Remake trilogy to its conclusion.
It goes without saying that this final boss features spoilers!
On this page:
Explainers:
Sephiroth phases:
How to prepare for Sephiroth in Final Fantasy 7 Rebirth
If you've been following our Jenova Lifeclinger guide then you should already be at the recommended level for this fight since you had already crossed the point of no return in Chapter 13. You should have also bought any supplies and unlocked any upgrades you need before fighting Jenova.
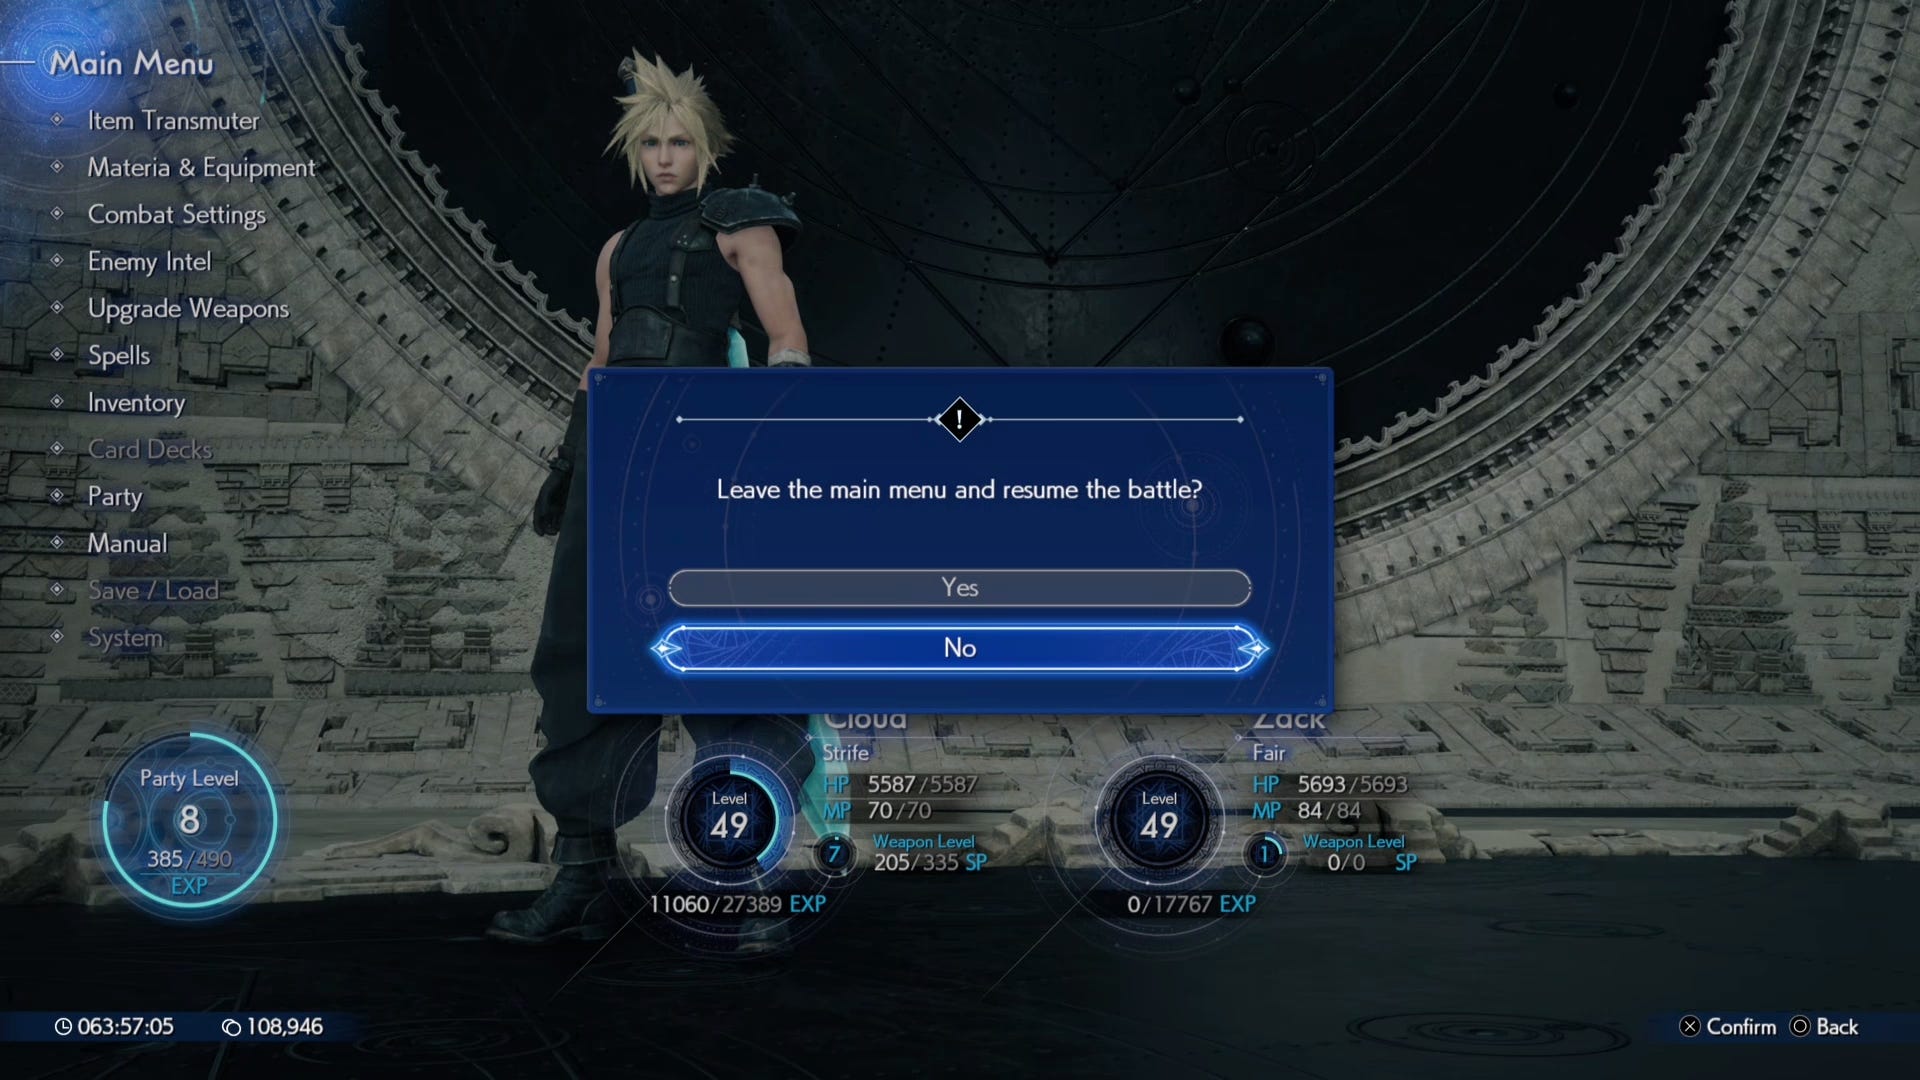
You do get one last chance before this final boss sequence to enter the menu screen to make any last-minute adjustments to part gear and Materia, although you won't have the option to buy or unlock anything else.
As a reminder, ensure that Aerith still has any useful Materia set to her equipment, such as healing or defensive spells. You should have also unlocked a number of magic-based abilities for her already, although her most useful abilities Sorcerous Storm and Prayer are available from the start of the game.
The party will be split across different fights so take into consideration that you only get one chance to change around equipment before the Sephiroth phases begins. If you didn't invest in multiple elemental magic Materia in your playthrough then try to ensure it's divided amongst your party members, especially Barrett, Yuffie and Red XIII.
When it comes to healing, Aerith's magic is powerful enough that the basic Cure spell will still almost fully heal allies. That means you can afford to give your highest-level Healing Materia to other party members. Cloud or Aerith should equip Barrier Materia as well as they will need to take the brunt of the most powerful attacks more often than your other party members.
How to defeat Sephiroth in Final Fantasy 7 Rebirth
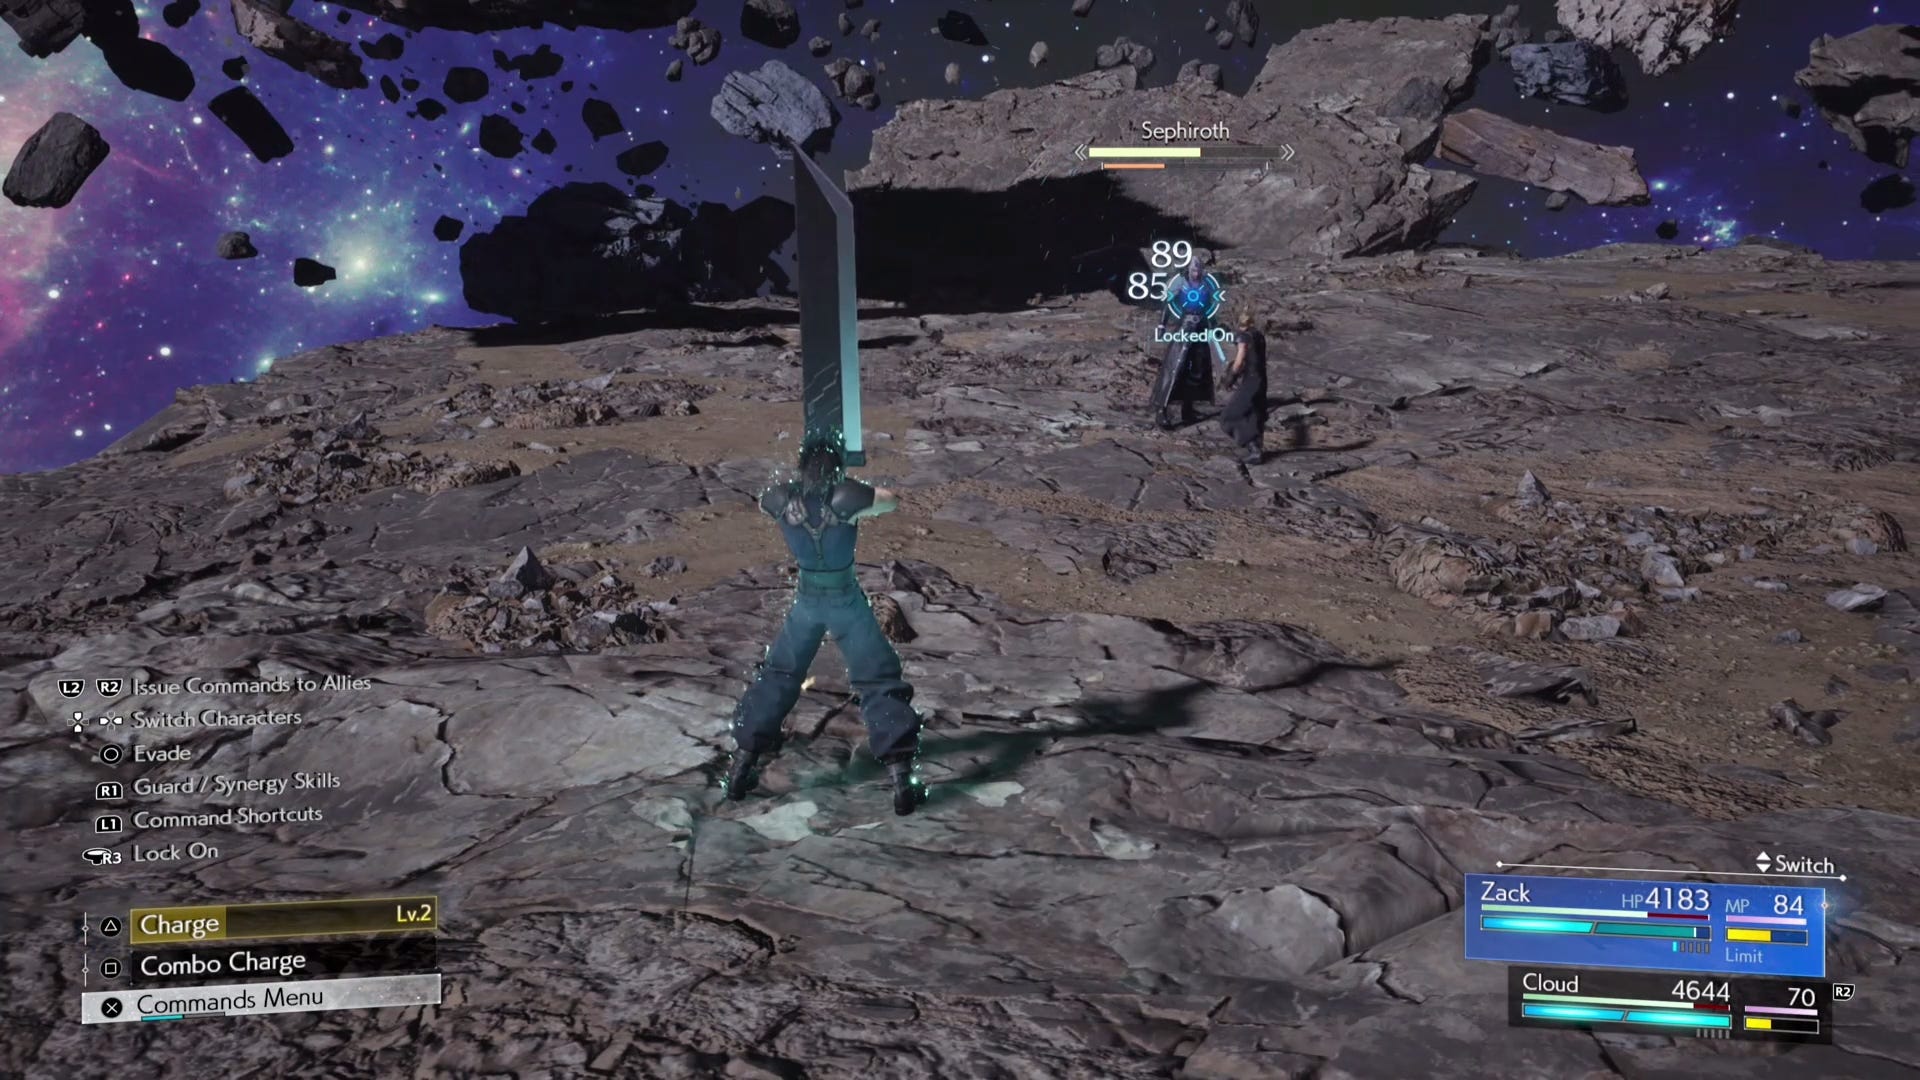
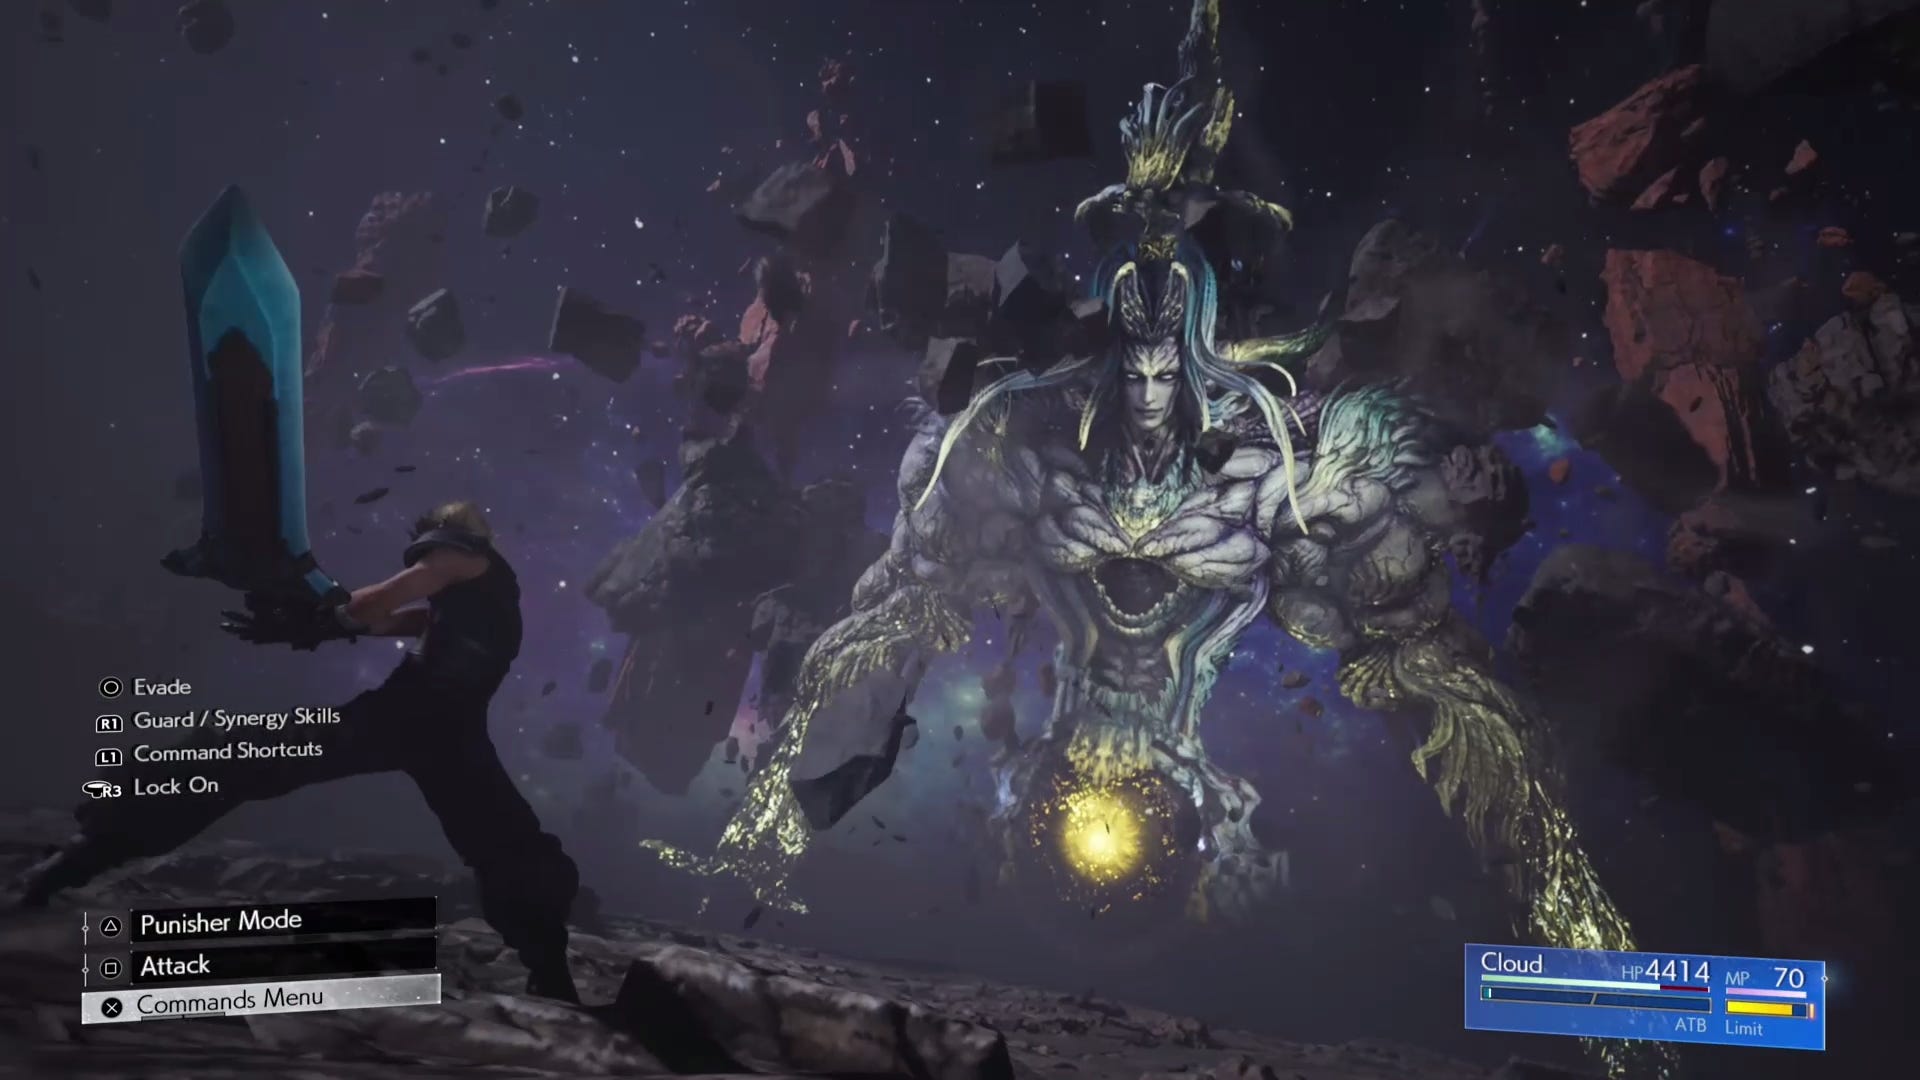
The first phase against Sephiroth is quite straightforward as it's more of an introduction (or re-introduction, if you will) to Zack as a playable character. That's right, through a convergence of worlds, Cloud and Zack will fight together!
As another Buster Sword-wielding SOLDIER, you might assume Zack fights very much like Cloud. However, he has a different special ability. By pressing Triangle, he'll hold his sword up and charge up a gauge. This can go from Level 1 to Level 3, each level unlocking new abilities. The trick is of course to charge up before you're targeted by Sephiroth, who's got some pretty fast attacks and can throw out slash projectiles with his blade.
In terms of specific attacks to watch out for, be aware of Sephiroth's version of Jump, where he disappears in the air and then drops back down with an attack from above. With Skewer, he'll quickly teleport up close to you then skewer you with his sword if you don't get out of the way in time. If you do get hit by this, immediately switch to the other party member.
Sephiroth can also unleash his most powerful attack, Octoslash, but will take some time to charge this up. Take the opportunity to pile in as many attacks as you can to put him into a pressured state.
You'll want to switch between Cloud and Zack regularly, ideally getting Cloud to draw aggro then immediately switching to Zack to start charging his Buster Sword. At Level 1, he can use Chain Slash, at Level 2 he can use Meteor Shots as well as a more powerful version of Chain Slash, while at Level 3, he can use High Braver or the most powerful versions of the previous two. High Braver is the ability you want as it gives you a few quicktime prompts during the attack. This extends the combo to deal even more damage.
As Cloud and Zack alternate attacks, they'll also have enough Synergy points to use Synergy Ability SOLDIER's Honor. Save this for when you've staggered Sephiroth and you should make quick work of him.
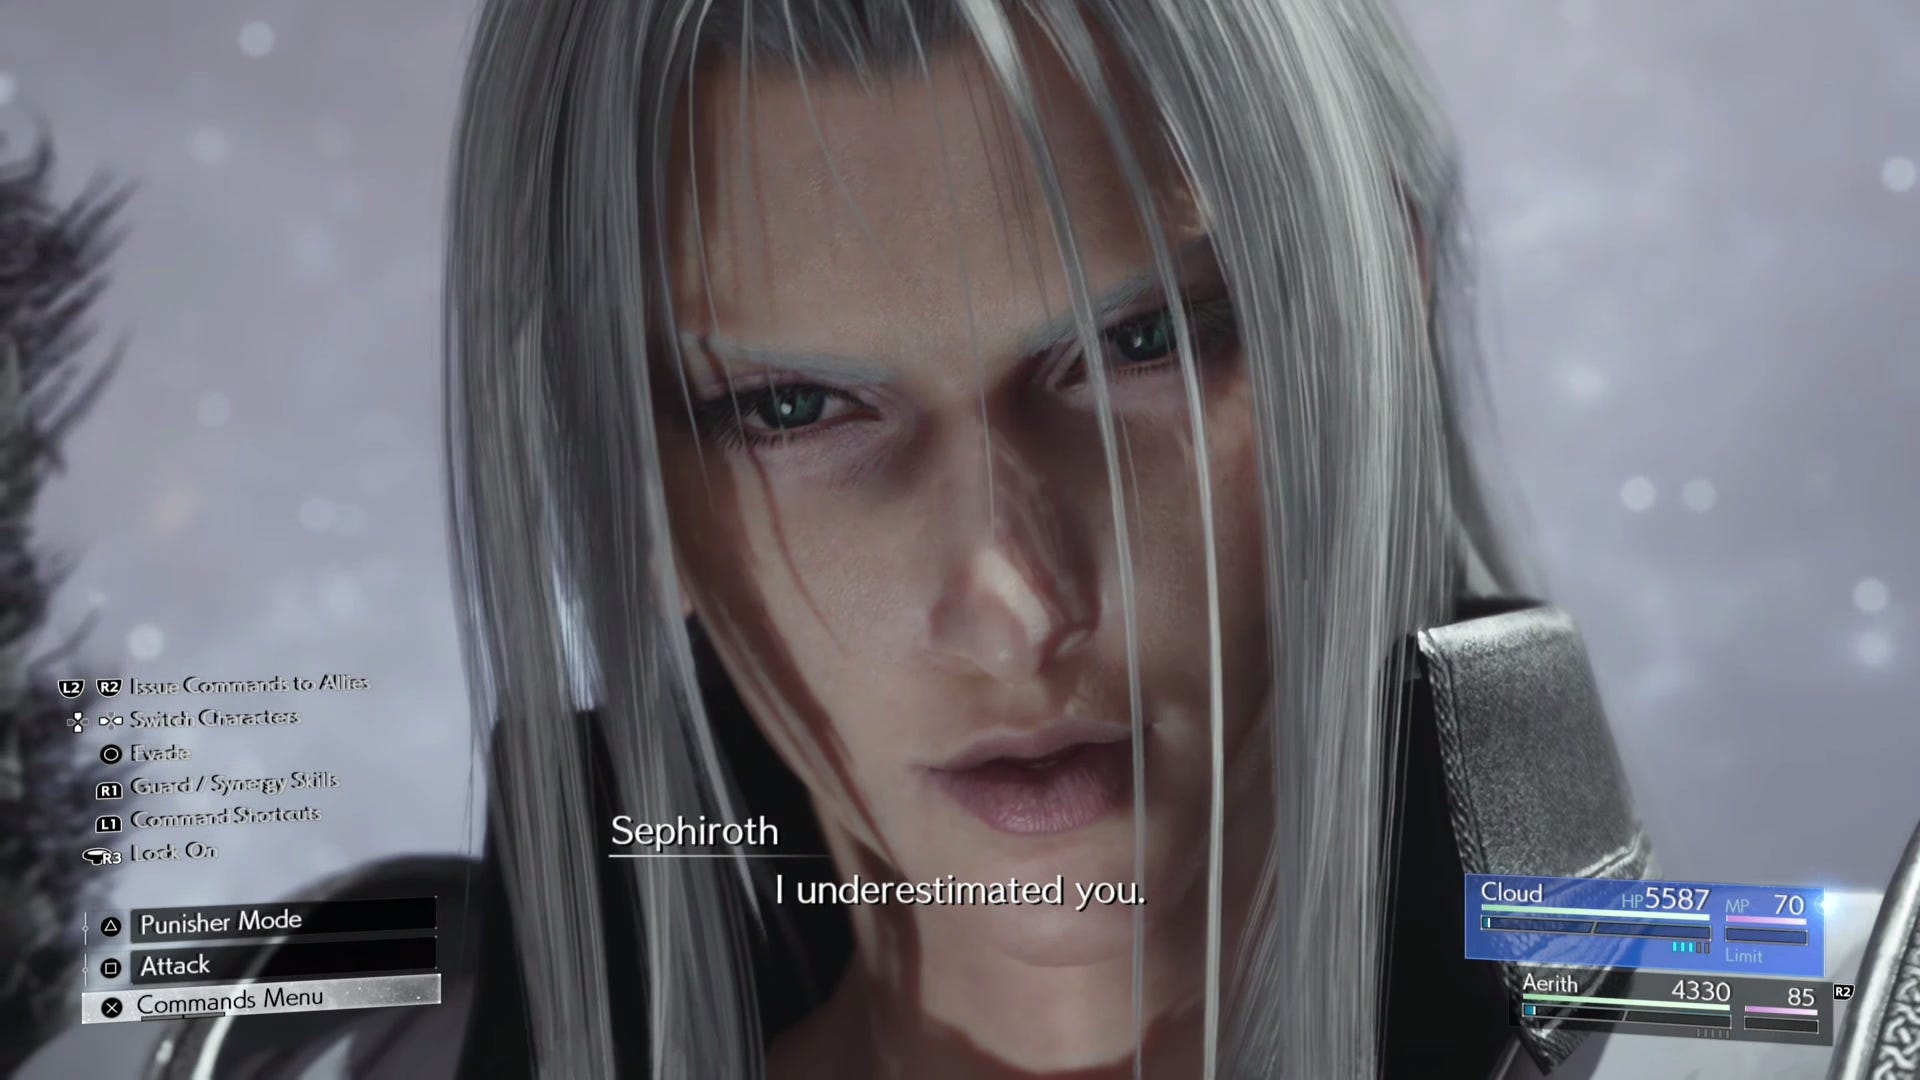
Of course, that's just the warm-up, and unfortunately Cloud and Zack's reunion is short-lived. For the next phase, Cloud will have to fight alone and our big bad's new form, Sephiroth Reborn.
How to beat Sephiroth Reborn with Cloud in Final Fantasy 7 Rebirth
Towering over you, he resembles one of the gigantic angelic bosses in Bayonetta - technically, he's riding on top of a giant statue of himself. He fortunately has a glaring weak spot at the bottom of his body so you just need to charge in and attack it. Sephiroth Reborn will use Maelstrom to blow you away with a gust from his angel wings, as well as Whisper Vortex, where he slams his arm down and creates cyclones.
He also has attacks that come at you from the ground. With Errant Whisper, he'll send a trail of whispers after you, shooting out like foggy geysers, so stay on the move. Interred Horror causes pockets of the ground surrounding you to glow with dark magic. You have just a few frames to get out of the way before they emit a blast. Avoid these before attempting to attack Sephiroth Reborn's body. If you've saved up ATB from the previous phase, spend these on Braver.
Once the body is crippled, a cutscene will play and the action suddenly changes to a linear climbing sequence as you scale the upper part of Sephiroth Reborn to reach his head. You regain control once you land on a higher platform, and now you're now facing his smaller body on top.

For this phase, you need to just keep attacking Sephiroth Reborn's torso at the edge of the platform, while avoiding his many attempts to keep you back. Interred Horror returns, and Sephiroth can also grab his blade and use Zanshin, which can be dodged with the correct timing. Apocalyptic Fire is your cue to get away as the attack triggers a smoke-filled blast in the area directly in front of him. Swarm targets you with single blasts that will interrupt you. It's futile trying to attack when this is happening.
It's really a case of evading these attacks first, then going in with Punisher Mode, and spending ATB on more powerful attack abilities. If you've managed to charge up a Limit Break, you'll get through this phase even quicker.
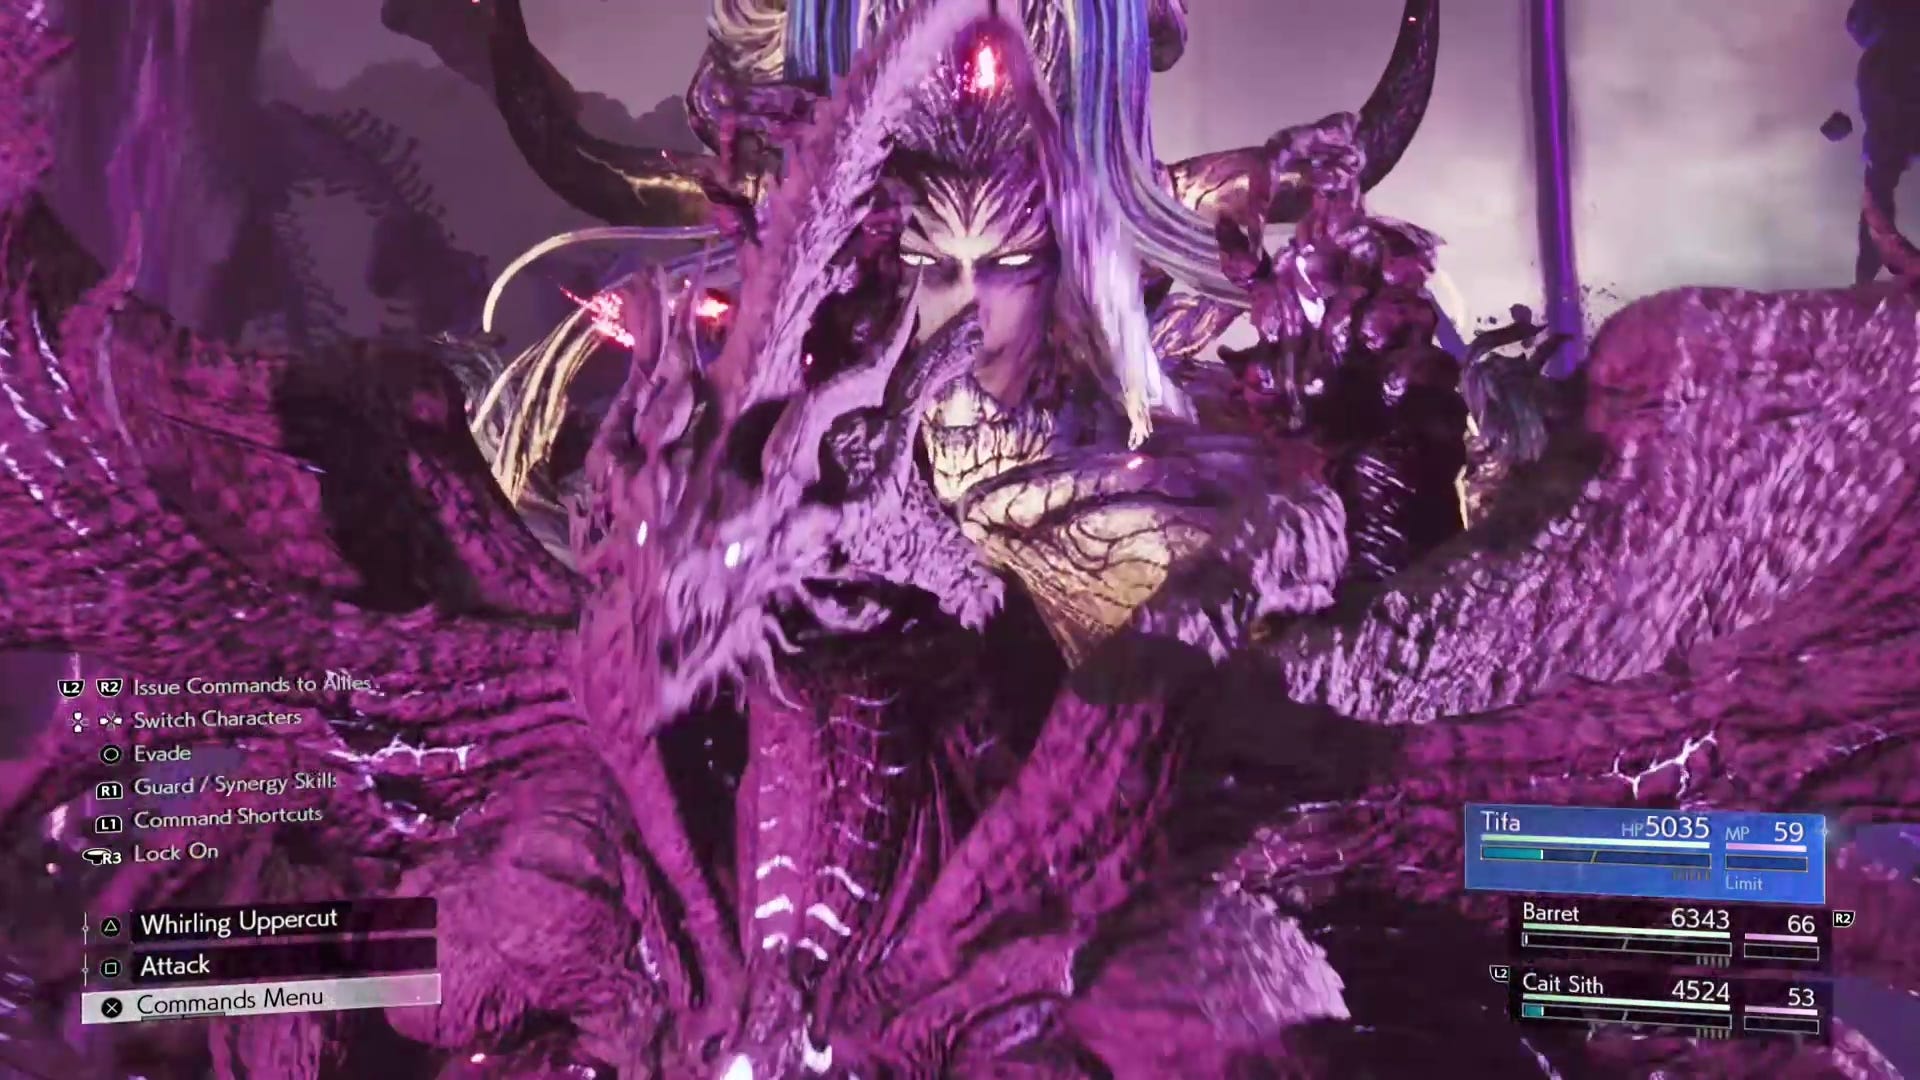
When Sephiroth Reborn is down to about 80 percent HP, the phase changes again, seemingly to another dimension. This time you'll have your other party members taking on this monstrosity, and the active party members will be Tifa, Barrett and Cait Sith. But when the fight begins, you'll have another enemy to worry about: Bahamut Arisen Whisper - the Whisper version of one of Final Fantasy 7 Rebirth's most powerful summons.
How to beat Bahamut Arisen Whisper in Final Fantasy 7 Rebirth
During this phase, Sephiroth Reborn will stay in the background so you can just focus on the dragon. He will keep you busy with attacks like the AOE Thruster Spin and Umbral Bombardment, which hurls great balls of fire from one arm followed by the other. Bahamut also has ranged attacks in the form of Vulcan Onslaught, where it targets you with a volley of laser blasts, while Nova Bomb sends a purple orb of fire after you. Its most powerful attack is the iconic Gigaflare, which will deal damage to everyone.
Bahamut Arisen Whisper can also transform into another form, giving it a new Homing Barrage attack as well as melee attack Grim Upheaval. If that connects, Bahamut follows up with Celestial Slash as a one-two combo. It also has charging attacks that can cover a lot of ground, including Galewind Slash and Luminous Dive.
Still, this Bahamut isn't quite as powerful as the real summon you can fight and unlock in the game. If you take control of Barrett, you can use Steelskin and withstand most of what it throws at you while using your gun arm to charge up more powerful attacks over time.
But before you manage to defeat Bahamut Arisen Whisper, it may tag in Sephiroth Reborn, giving you the opportunity to direct your firepower at your main target. Sephiroth will use Atonement, pounding the ground with his right wing to send your party members reeling. Barrett should be able to withstand this, especially with Steelskin, so use him to attack the right wing as it lies exposed on the ground.
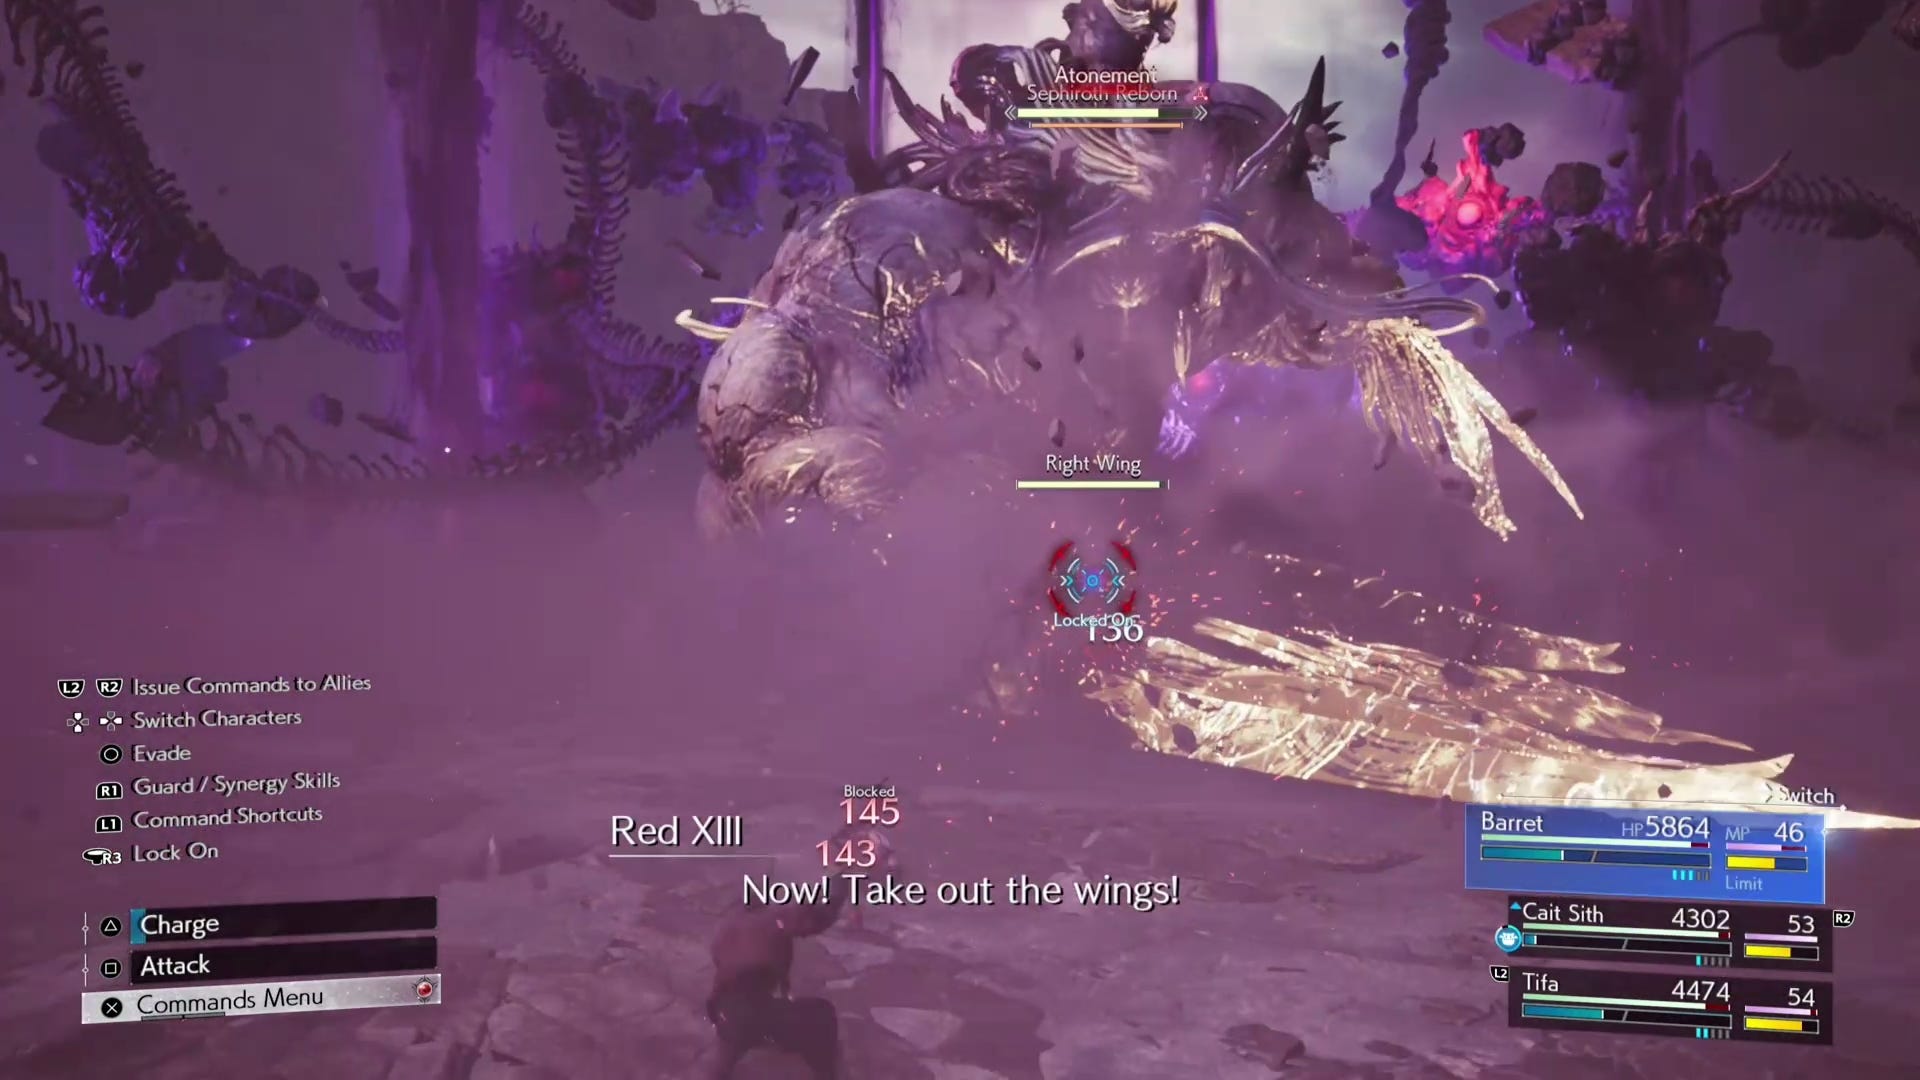
Don't get too greedy though because as soon as Sephiroth retracts his wing, Bahamut Arisen Whisper will reappear behind you. Fortunately, any stagger you inflicted on it will remain so you can keep up the pressure and hopefully stagger it, knocking it out of the air in the process, and it should give you enough time to focus everyone's damage on it to finish it off.
Annoyingly, Sephiroth Reborn will then use Blessing of Calamity to make another Bahamut Arisen Whisper. This is your chance! Sephiroth will take a while to do this and both of his wings will be left exposed to attack. Naturally, focus on crippling the wing that you dealt damage to previously before moving onto the next one. You'll probably have to contend with another Bahamut Arisen Whisper before you manage to cripple the other wing, in which case focus your efforts on getting rid of that whisper first.
Once both wings are crippled, the scene shifts again and we're now back with Zack in his world, dimension, or some version of it - does it matter? Anyway, guess who turns up as well: Sephiroth Reborn.
How to beat Sephiroth Reborn with Zack in Final Fantasy 7 Rebirth
This is another one-on-one battle, and fortunately Zack's HP and MP is also fully restored before the fight begins. The Sephiroth Reborn you're fighting is evidently the same one your other party had just fought as his HP is partially depleted and the stagger gauge is in the same state. That means you might be able to get a quick stagger early on to make this phase easier.

In this phase you have to deal with familiar attacks like Apocalyptic Fire and Zanshin. However, you also have what seems to be indirect support from Aerith. In the centre of the area is the flower bed from the church in Sector 5 slums. Occasionally you will see a faint dome glowing over it. If you stand inside the dome, it will act as a temporary barrier against Sephiroth Reborn's attacks, giving you just enough time to charge up Zack's Buster Sword. Ideally charge it up to Level 3 so that you can use High Braver and then target the chest.
How to beat Sephiroth Reborn with Barrett, Yuffie and Red XIII in Final Fantasy 7 Rebirth
Once the chest has been crippled, the action moves back to the main party, except this time you'll be in control of Barrett, Yuffie and Red XIII. Magic is going to be vital in this phase.
Sephiroth Reborn's weak spot is his core at the bottom, similar to the very first phase when you were controlling Cloud. The problem is it's protected by a very strong barrier, and the only way to break it is to destroy his wings. The wings are however immune to all physical attacks and only weak to the opposite of the elemental it has affinity with.
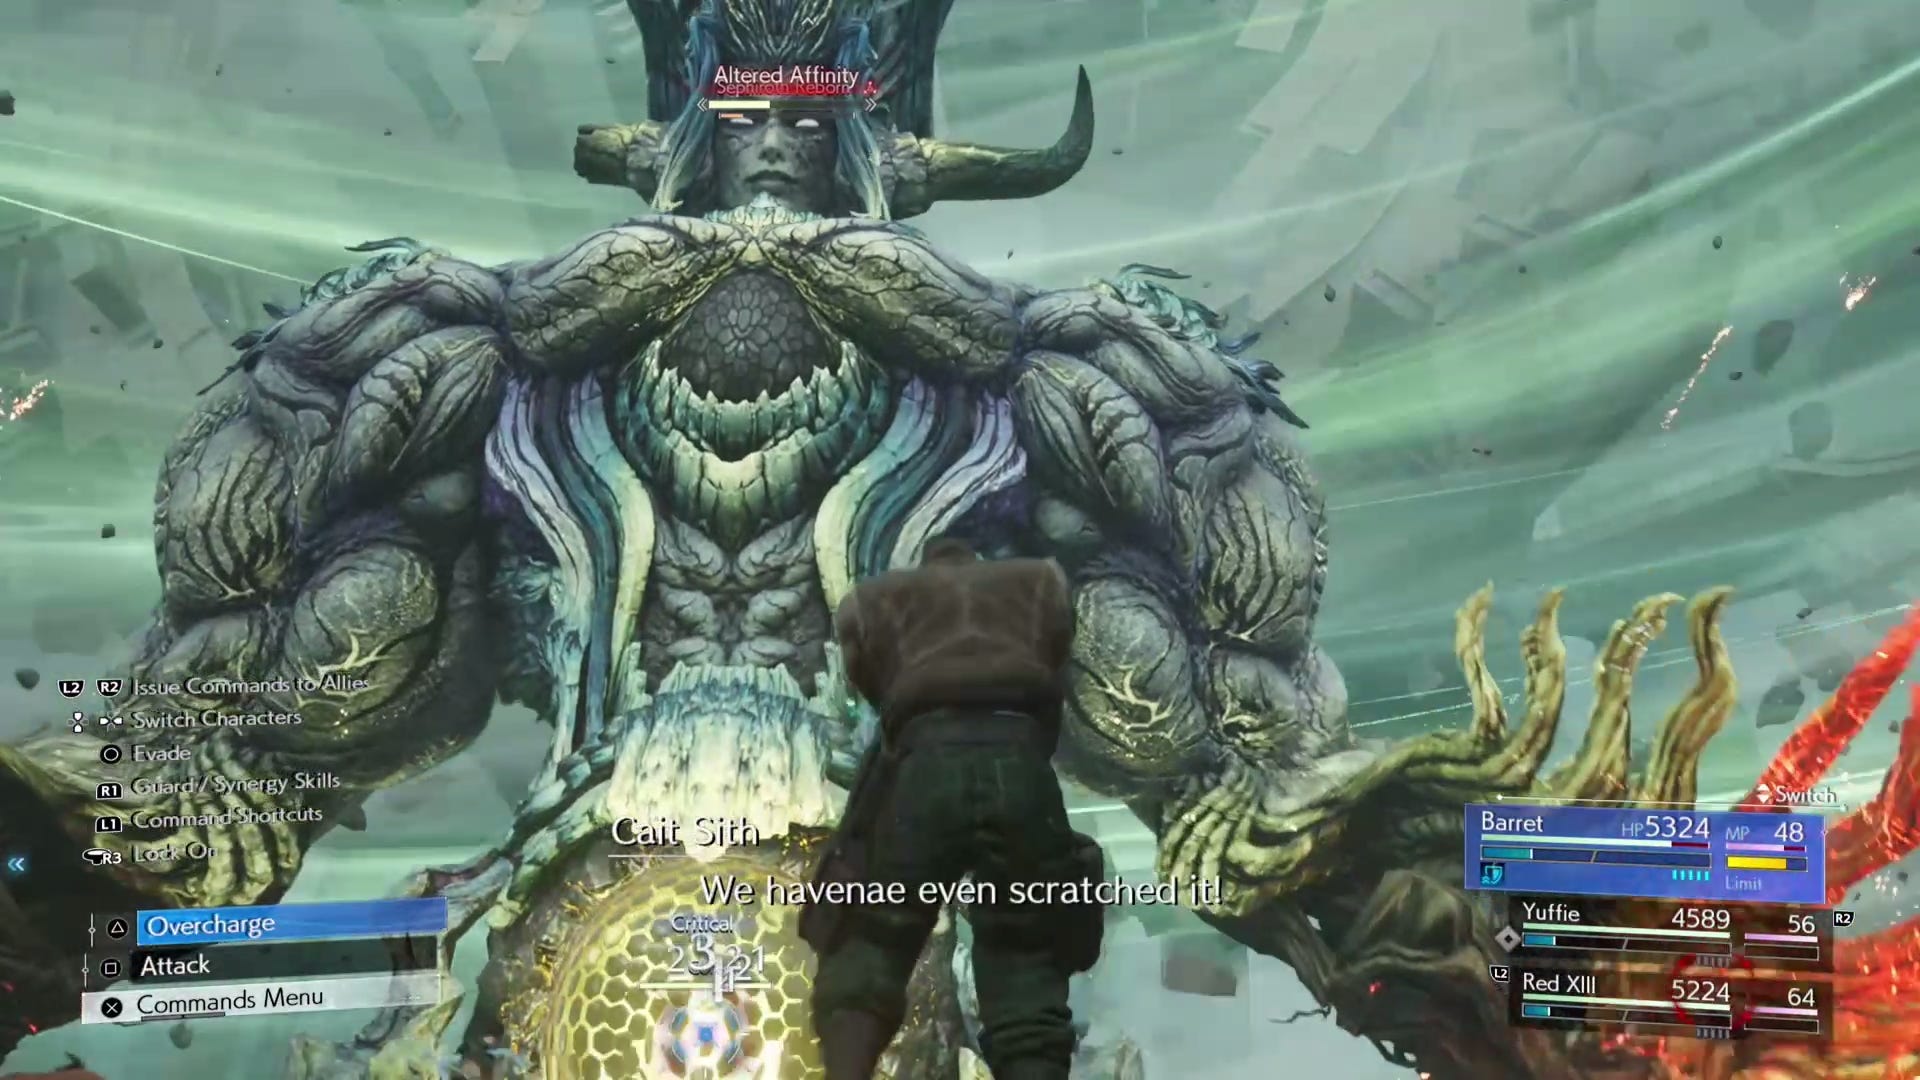
That, however, requires parsing what colour represents which element. Basically, red wings represent fire, meaning it's weak to ice magic, when it's white it represents ice, making it weak to fire magic, blue represents lightning, so it's weak to wind magic, while yellowish green represents wind, which is weak to lightning magic.
If you have elemental magic Materia evenly distributed among your party, then it's a case of ensuring everyone has ATB bars in reserve then switching to whoever has the relevant spell. Yuffie is also able to use elemental Ninjitsu to swap between elements, an option if you didn't equip any of these party members with elemental magic Materia. It's far from ideal however as just changing her element isn't as immediate as just casting a spell, and Sephiroth Reborn may end up changing affinities as the fight goes on.
Party members can also use elemental-based abilities, though for better results, Level 2 or Level 3 magic gets the best damage against the wings, and they also have better range. All the while, you also need to avoid the elemental-based attacks those wings will unleash on you.
Again, focus on one wing at a time and when both have been crippled, the barrier will be broken, leaving the core open to your attacks. Throw everything you have at it but also watch out as Sephiroth Reborn may use Profane, covering the surrounding area in a toxic mist that will drain your HP. Barrett will be able to keep his distance with his gun arm, and by the time the mist clears you'll have fully charged up your ATB so you can run in and unleash your powerful abilities.
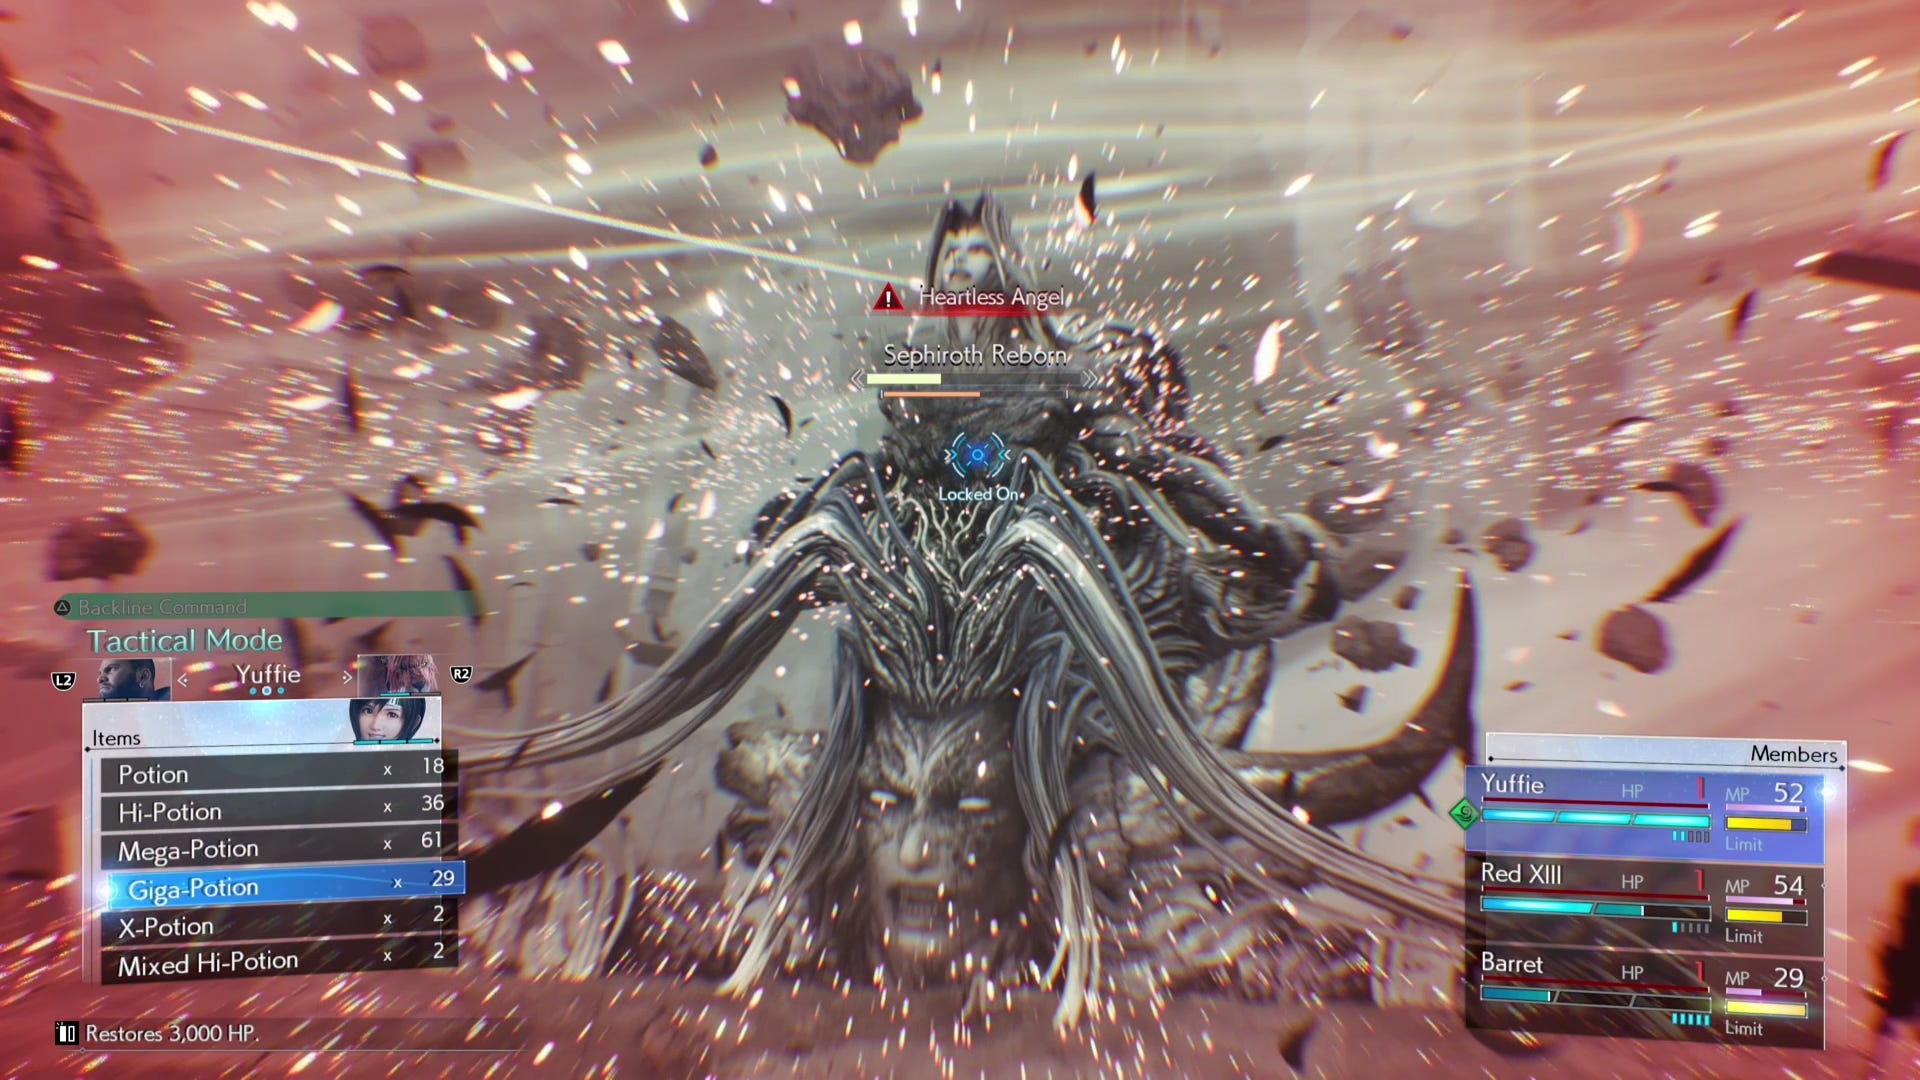
Once the core has been crippled, Sephiroth Reborn's body will descend so that his chest (that is, his larger head) is at the environment's level. His attacks are similar to Cloud and Zack's solo fight phases. Don't throw everything at him yet though as he has one nasty trick, Heartless Angel, which reduces everyone's to just 1 HP. If you have ATB in reserve, then have everyone immediately heal with magic or a Giga-Potion.
When he's down to about 10 percent HP, he'll start charging up his most powerful attack: Octoslash. This is your cue to just throw everything at him. If you've got Limit Breaks and Synergy Abilities banked, use them now and finish him off before he can unleash this attack.
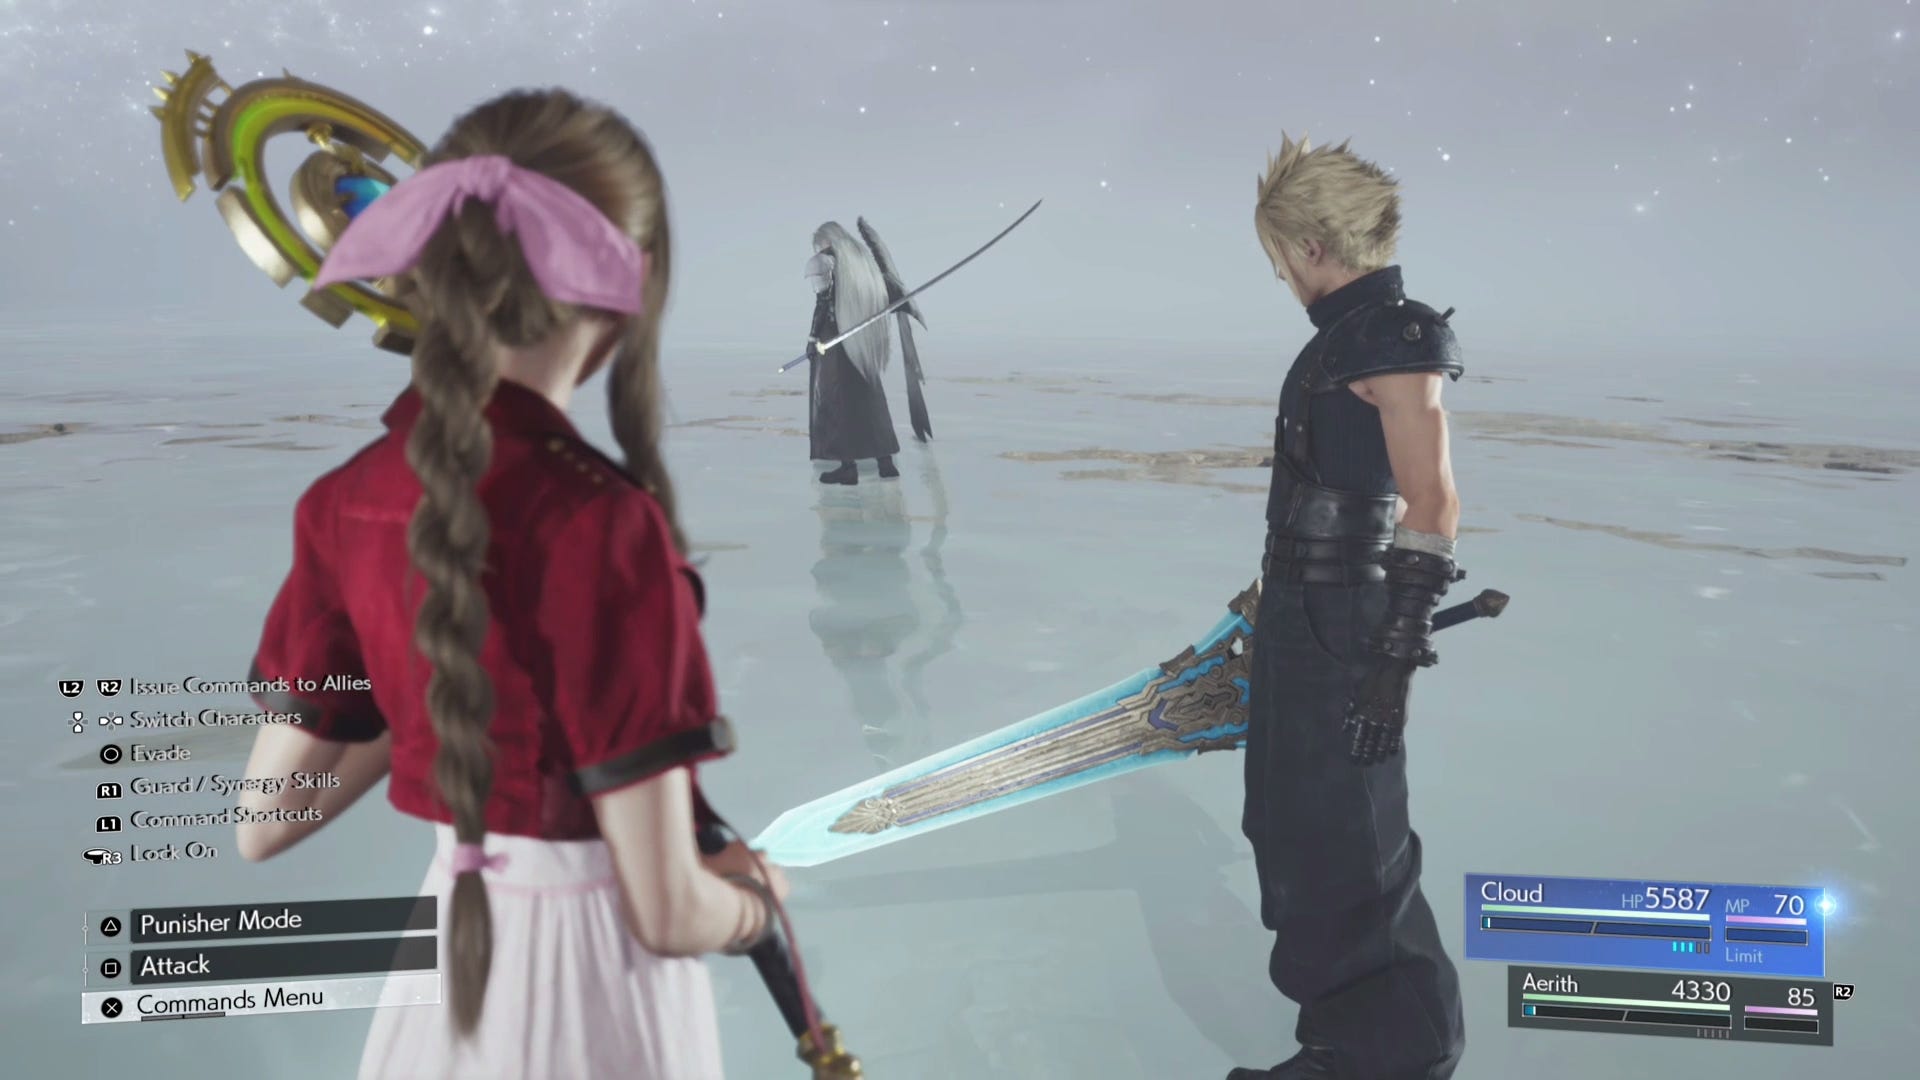
Once defeated Sephiroth Reborn will become Sephioth once more, this time in Cloud's dimension. This time you won't fight alone because who reappears at your side but Aerith! Your HP and MP will also be fully restored before this battle, the actual final battle of Final Fantasy 7 Rebirth, so get ready!
How to beat Sephiroth's final form in Final Fantasy 7 Rebirth
Even as two against one, this fight is tough because Sephiroth's attacks hit hard, so the first thing you should do is get Cloud's ATB bar up so he can cast Manawall. His fast attacks in Punisher Mode mean he can charge ATB faster than Aerith, and hopefully you have Level 3 Barrier Materia paired with Magnify Materia.
You nonetheless need to try and get Aerith's ATB up as you need to switch between the two. Ideally, use Cloud for physical attacks and have Aerith focus on healing and magic attacks. Sephiroth has a number of attacks including Skewer and Grip of Fate that can take control away from you temporarily. They can be dodged but if you're caught, immediately switch characters to dish out attacks to get their ATB gauges up. You'll probably need to heal your partner as well.
Sephiroth also uses Errant Whispers to target you like in the previous phase. Switch characters when this happens as your AI-controlled ally will continue moving to avoid getting hit. In the meantime keep attacking with the other party member to get your ATB up.
One of Sephiroth's new attacks is Whisper Cannon, where he will fire a jet of fog while slowly spinning around. While you can easily get behind him, he's immune to all physical damage during this attack. Target his wing and cast a spell to destroy it. This has to either be an elemental spell or one of Aerith's magic abilities. If you manage to destroy the wing, it will stop the attack and also leave Sephiroth in a pressured state, a good time to bring his stagger gauge up with Focused Thrust.
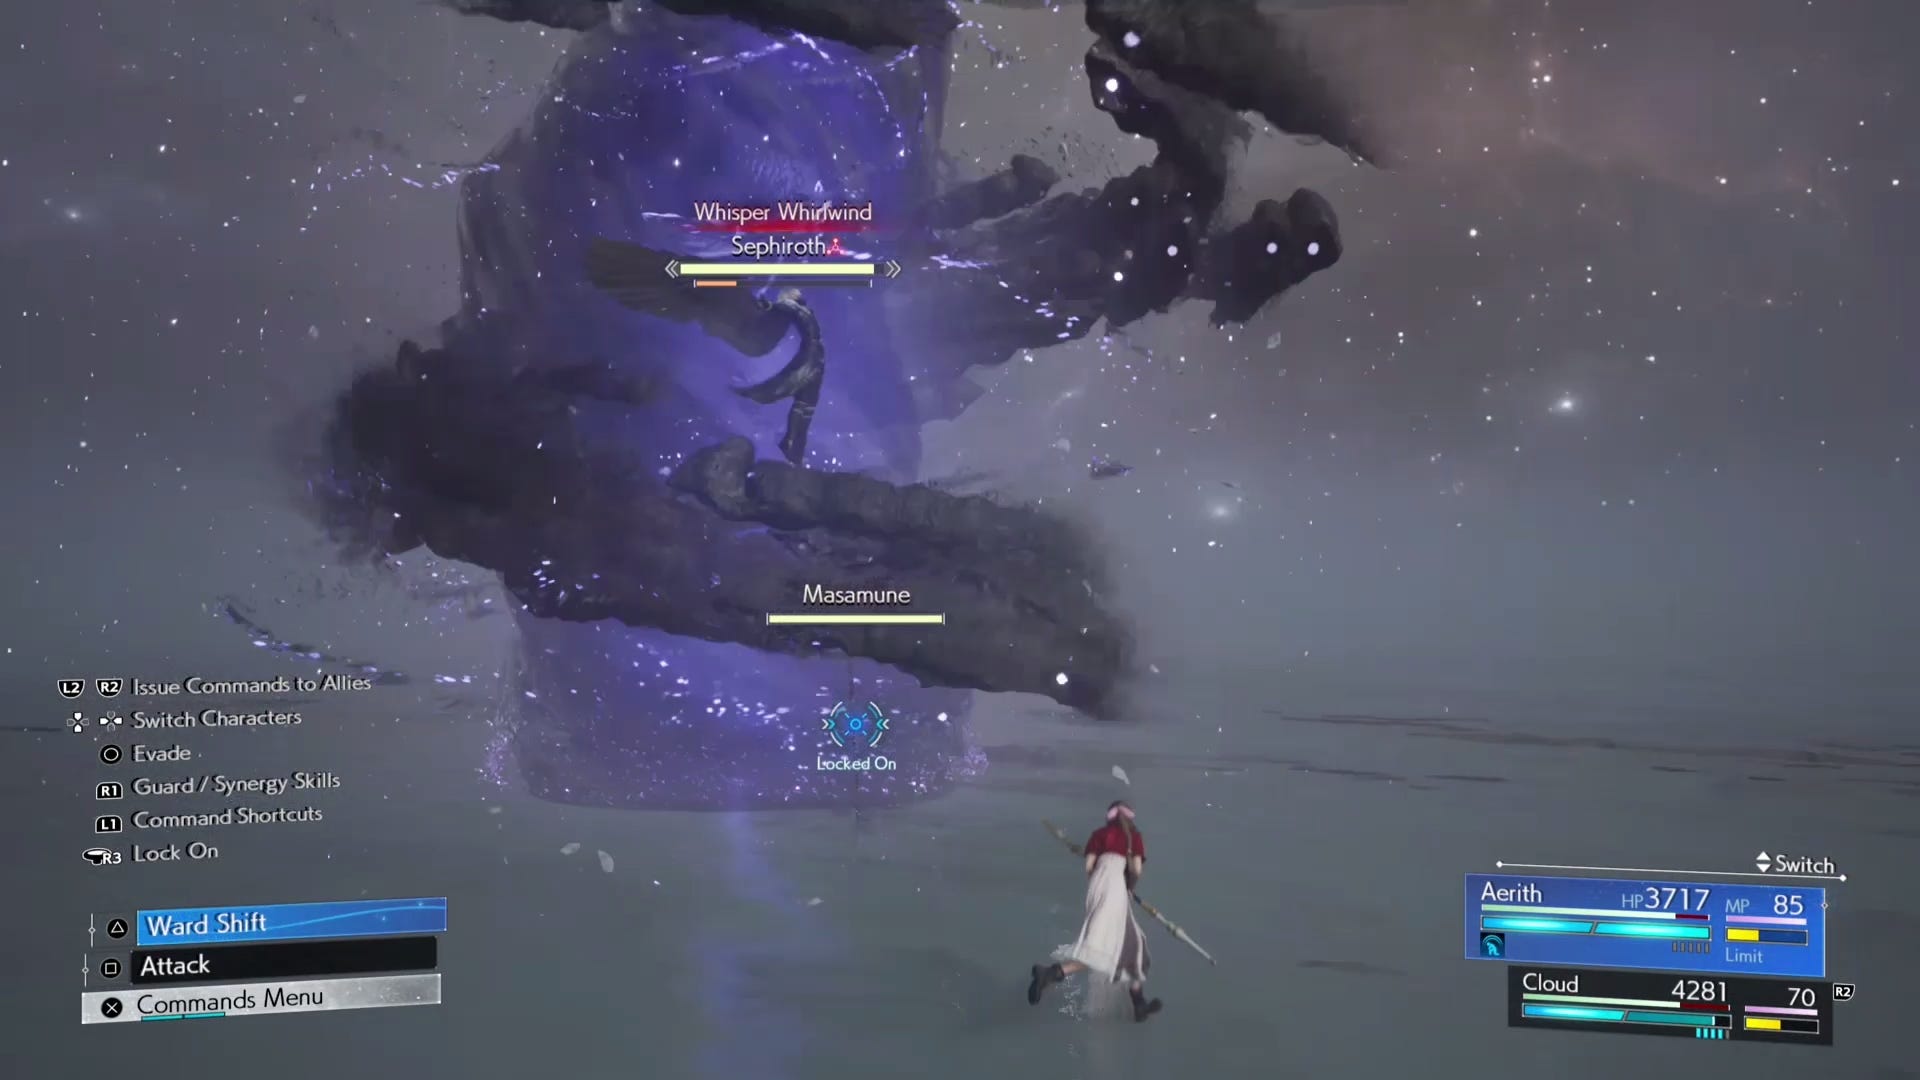
Another attack you can counter with magic is when Sephiroth takes to the air and uses Whisper Whirlwind. During this, he sticks his sword Masamune into the ground, which is only weak to magic. Switch to Aerith and avoid the whirlwind, then approach the sword and use Sorcerous Storm, which will deal enough damage to destroy it (albeit not permanently). This will cause the whirlwind to fade out while Sephiroth comes back down to the ground in a pressured state. Take the chance to get in a few free hits to build up stagger.
When he recovers from being pressured, Sephiroth activates Wicked Argument, and he suddenly attacks much more aggressively. Watch out again for Skewer and Jump attacks. The latter causes whispers to burst from the ground nearby.
Only when you've staggered Sephiroth should you spend your ATB on powerful attacks, as otherwise they should be in reserve either to cast Manawall, heal, revive or deal magic damage during Sephiroth's Whisper Cannon or Whisper Whirlwind attacks. If you've accumulated enough Synergy, feel free to use United Refocus to temporarily give you three ATB bars so you've got more resources to play around with.
When you've got him down to about 40% HP, Sephiroth will take to the air and use Heartless Angel, which is your cue to heal immediately. If you've kept it in reserve, Aerith's Healing Wind Limit Break is the obvious solution, but be warned that the spell takes several seconds to work. While Aerith will be immune to damage in this window, Cloud won't, so make sure you switch back to him as soon as the Limit Break is activated - you might as well top him up with another heal to be on the safe side.

In this late phase, Sephiroth will also charge up his deadliest attack: Octoslash. Again, he'll take a while to charge and his wing will be sticking out, so target the wing with Aerith's Sorcerous Storm to put a stop to it, otherwise the attack is going to be pretty devastating, even with Manwall cast. Strike him down though and he's once again open to pressure and stagger.
When Sephiroth is down to his last 10 percent, he will trigger a state called The End is Nigh. He will have two attacks, the first being Tempus Finis, which is basically like Whisper Cannon, except jets of whispers shoot from both ends of his hands as he slowly spins around. You just have to throw everything at him at this point, while moving around to avoid the whisper beams. There's a bit of a tug of war here as his stagger gauge is glowing white and going down like a countdown, while your attacks bring it back up slightly.
If his HP hasn't been depleted but the stagger gauge has, he will then have whispers grab the both of you and perform the ultimate version of Octoslash. No matter what, this attack will kill both of you. Ideally, save your powerful Synergy Abilities or Limit Breaks for this occasion, and avoid using them earlier. Note that the game will annoyingly cancel out any damage dealt to Sephiroth that might take him below 10 percent before he triggers The End is Nigh.
Sephiroth rewards in Final Fantasy 7 Rebirth
Sephiroth is down! For now. There's still part three of this remake trilogy to go, after all. Finishing the fight will earn you 5625 EXP, 30 AP, and 2250 Gil. You can then sit back and enjoy the ending to Final Fantasy 7 Rebirth. You'll also unlock the ability to replay past chapters while carrying over your current progress, and even the option to play at a higher difficulty level.
Congratulations on completing the game!