Destiny 2 Spire of the Watcher walkthrough, all secret chests and collectable locations guide
How to complete and find all of this dungeon's secrets.
The Spire of the Watcher dungeon in Destiny 2 was introduced alongside Year 5's Season of the Seraph in December 2022.
This dungeon takes place on Mars, and has you working with Osiris to stop a Vex incursion deep within a Warmind bunker.
Alongside a suite of unique weapons and armour, the big reward many players will no doubt be chasing is the dungeon Exotic - the Hierarchy of Needs Solar bow, which debuted during Destiny 2's Season of the Seraph.
In our Spire of the Watcher walkthrough for Destiny 2, we cover all of the secret chest locations as well how to defeat Akelous, the Siren's Current boss, and Persys, the Primordial Ruin boss.
On this page:
- How to prepare for the Spire of the Watcher dungeon
- How to unlock Spire of the Watcher dungeon with the 'Ares Desperado' quest
- How the Arc node and circuit mechanic works in the Spire of the Watcher dungeon
- How to start Spire Ascent encounter and secret chest 1 location
- Spire Ascent encounter
- Akelous, the Siren's Current boss fight encounter
- How red wire circuits work in Spire of the Watcher and secret chest 2 location
- Persys, Primordial Ruin boss fight encounter
- Spire of the Watcher secret chest locations
- Spire of the Watcher collectable locations and how to complete Devil in the Details triumph
How to prepare for the Spire of the Watcher dungeon
As with other rotating dungeons, the recommened power level is 1790. That number increases with each encounter, so if you can get as high as the soft level cap of 1810 you will have a much easier time.
Of course, if you're playing with a fireteam this dungeon will be much smoother to take on since your entire group can fan out to thin out enemy numbers and complete mechanics, alleviating the pressure faced on solo runs.
That said, the option of solo-ing the dungeon is there - with bonus rewards too such as an emblem if you beat it without dying - but particularly if it's your first time, we recommend running it with a group of two or three.

When it comes to the best class, whilst you're free to take your pick of whatever build works for you, we're recommending the Solar Titan thanks to its plentiful and strong healing potential when throwing and picking up hammers - a ranged attack with more or less infinite charges that guarantees health back on pick-up so long as it made contact with an enemy.
Pair that with the Sol Invictus and Roaring Flames Sunbreaker Aspects, as well as the Lorely Splendor Helm, you'll have empowered abilities and plenty of healing sources, prioritising survivability whilst still having high damage.
The threadlings that can be created with Strand builds are exceptionally strong right now, and present another good option, especially if you pair it with a Stand-based weapon to synergize with.
Personally, I completed most of the dungeon - both solo and with a group - playing as an Arc Hunter using the Wormhusk Crown Exotic helmet, with the Flow State and Lethal Current Aspects. Paired with the Combination Blow melee, I was able to stack melee damage and improve survivability constantly whilst in close-quarters combat. That said, with Supplicants in the last encounter, it did lose its viability somewhat when playing solo.

When it comes to weapons, I stuck with the Exotic Witherhoard grenade launcher in the Kinetic slot, an SMG - such as the Calus Mini-Tool - in the Energy slot, and the Taipan-4FR linear fusion rifle in the Power slot for most of the run.
Ultimately, it all depends on what you feel most comfortable with, but these are the builds I used and saw gaining traction among the community.
How to unlock Spire of the Watcher dungeon with the 'Ares Desperado' quest
To access this dungeon via its unlock quest, you'll need to first purchase either the Witch Queen Deluxe Edition - or upgrade from the standard edition if you already own the base expansion - or the Witch Queen dungeon key, available within the in-game store for 2000 Silver.
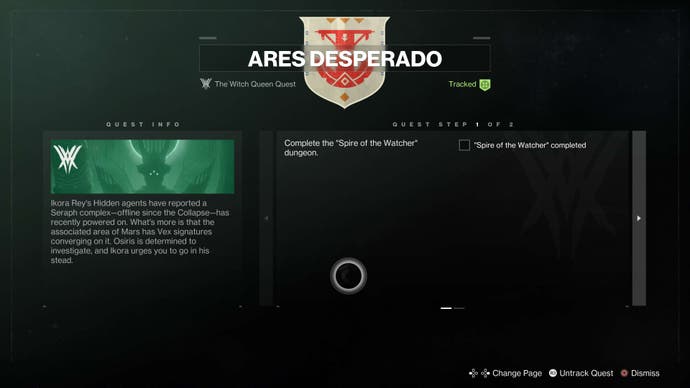
After that, to access the dungeon itself, as was the same with Duality, you'll need to acquire the 'Ares Desperado' quest, available to collect from Ikora Rey in the Bazaar in the Tower.
This quest will unlock both the Normal and Master versions of the dungeon - the latter is what you'll want to play when hunting for the Hierarchy of Needs' Catalyst.
How the Arc node and circuit mechanic works in the Spire of the Watcher dungeon
After loading into the dungeon and following the rocky path forward and around to the left, you'll reach the first area with a lone Vex Goblin patrolling.
As you move forward, enemies will begin to spawn in with several Cyclops' blasting you from the upper rockface edges of the area, and many Goblins and Harpies on the ground and rooftops. These are the main enemies you'll fight here.
At the opposite end of the area, you'll notice a small power grid with four nodes around it, each of which has a yellow wire running from it.
What you need to do is follow each of these wires until it stops where a yellow-bordered node will be - you'll notice several along the way, but you need to keep going until the wire stops, where you'll reach that wire's origin node, usually signified by a metal box with a flashing blue arrow on it.
Before you can activate it, you'll need to acquire the 'Arctrician' buff from 'Conduit Minotaurs'.
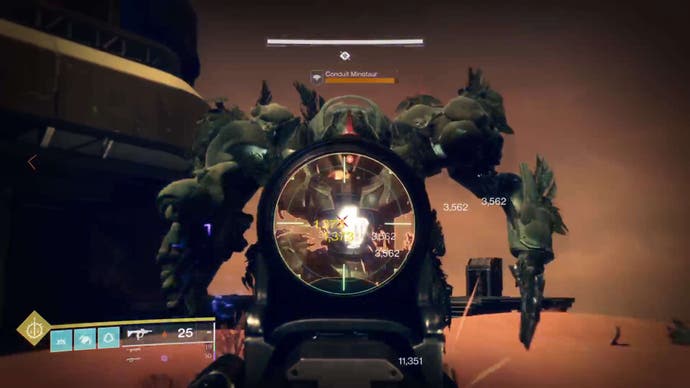
Two of these will be roaming around amongst the other enemies in the area - head outside, locate and defeat one of them, standing in the Arc pool it drops, then head back to the wire's origin point and shoot the node you found.
After doing so, follow the wire back to the grid outside, shooting each of the nodes connected to it via the same yellow wire.
Once outside, shoot the node next to the grid - the one connected to the wire you've just been following.
Once active, you'll see the message 'Arc node circuit completed' on the lower left of the screen. You'll then need to do that three more times for the other nodes on the grid.
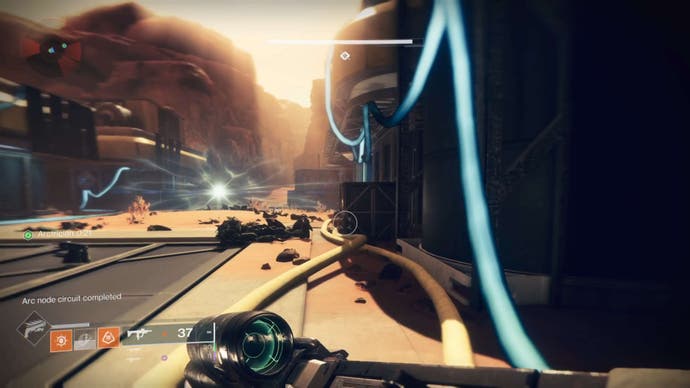
When you've correctly linked two nodes, the segment of the wire connecting the two nodes you've shot will glow blue too.
You don't need to worry about any timers on these specific circuits - so long as a wire has turned blue, it'll stay that way.
However if it's the wrong set of nodes, the wire won't turn blue, and the node will power off after a short while.
There is a timer of 30 seconds with the Arctrician buff however, but with each correct node activation, you'll gain an extra 5 seconds, and if the buff's timer runs out, there's no punishment - just eliminate another Conduit Minotaur to regain the buff.
This opening encounter - and subsequently the whole dungeon - features this mechanic, so this opener gives you a good chance to familiarise yourself with what's to come.
Once all four nodes are powered up on the grid, a door will open on the ground, allowing you to descend and enter the next area and begin your way to the first proper encounter - the Spire Ascent.
How to start Spire Ascent encounter and secret chest 1 location
After dropping and sliding down into the underground area, you'll want to jump up to the balcony above to your left - or on the right side for one of the six collectables you'll want for a triumph that'll increase your chance of earning the dungeon's Exotic, Hierarchy of Needs - it'll be on a screen with a blue Fallen sigil.
Following the main path, there'll be a small alcove you can squeeze through - go through here, following the vents around until you drop down to a room with multiple openings in the floor - some are lit up white, others red.
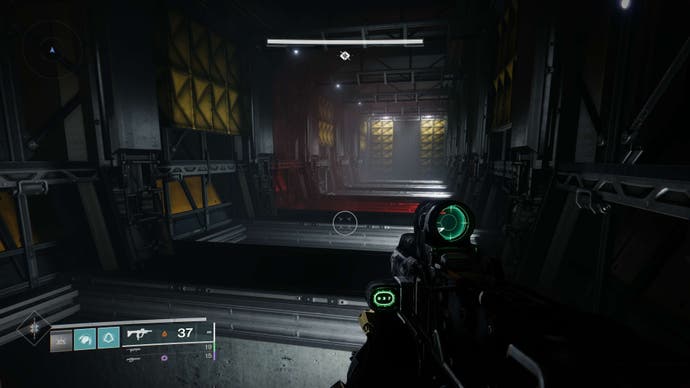
Go to the halfway point - to a red-lit opening - drop down.
There's a green glow emanating from another area you can drop into - you'll find the second collectable here.
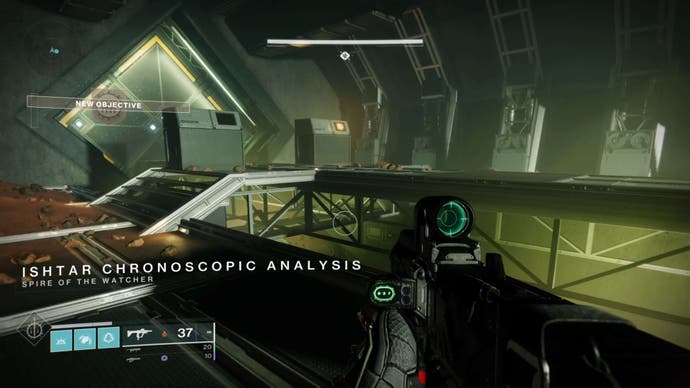
Enter the room to your right with a window overlooking the huge underground complex - this is the area you'll be platforming through.
Turn left and climb up to the platform glowing red above that'll lead you out onto a platform extending out into the massive complex.
You'll need to platform through here, and the path is relatively clear, involving jumping between various hanging platforms, but we've included a few screenshots below which show the path more specifically.
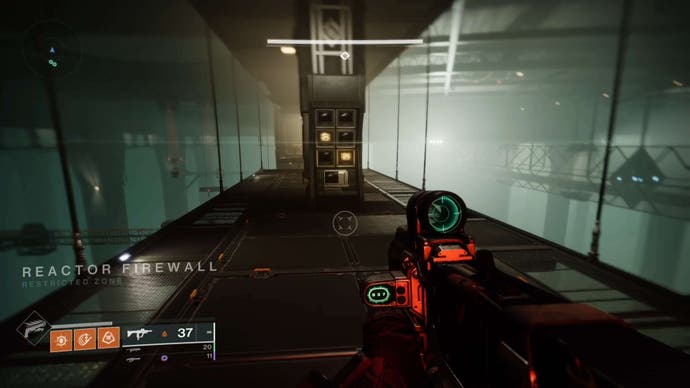
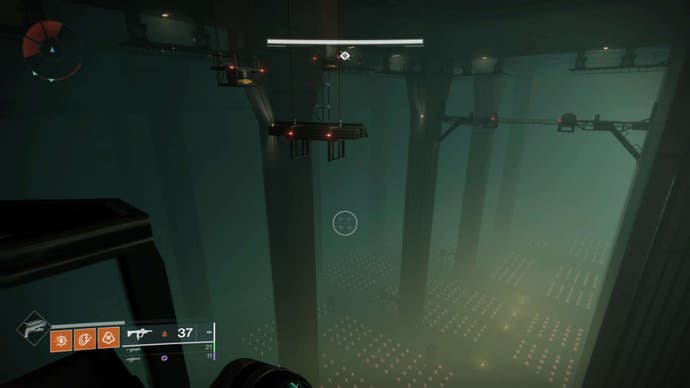
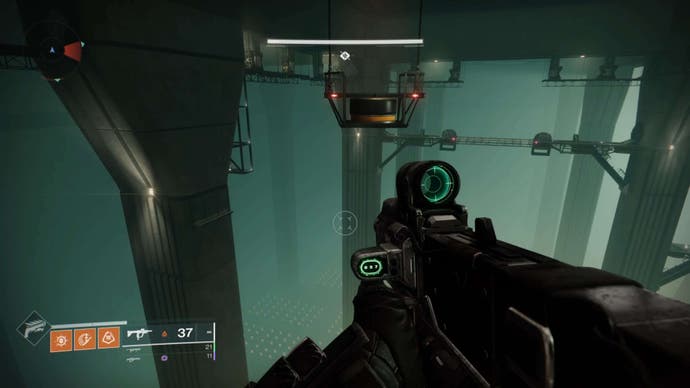
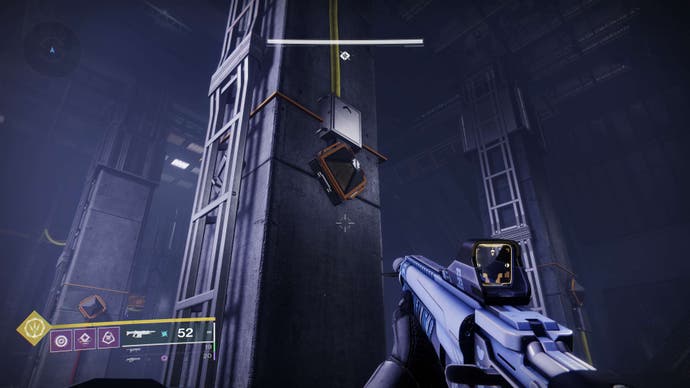
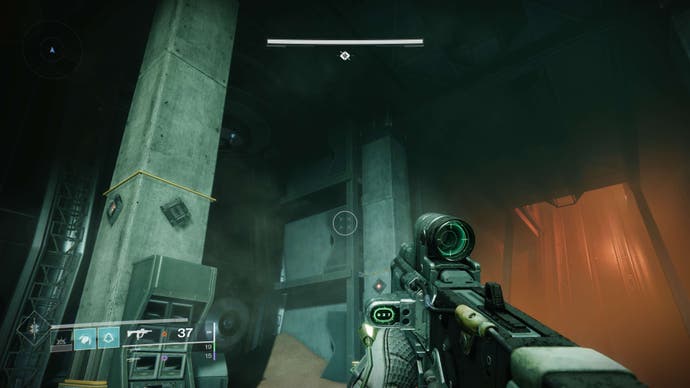
Once you've dropped down to the scaffolding attached to the large pillar (pictured above) and climbed upwards, continue onwards or - if you're on the hunt for collectables and the secret chest, spin around and jump round the pillar you've just climbed to see a platform hidden in the dark.
Follow that round to see a screen with a blue sigil on it for your third collectable, and continue beyond it for another platform in the dark off to the side of another nearby pillar with the first of two secret chests.
If this is your first run through, the chest is worth leaving as it only rewards gear you've earned and the dungeon doesn't grant its first reward until the encounter following this.
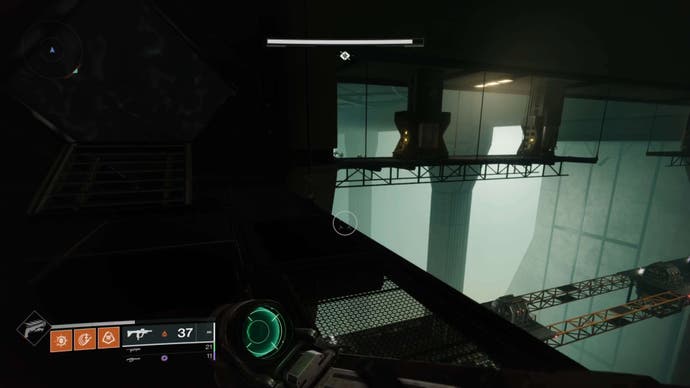
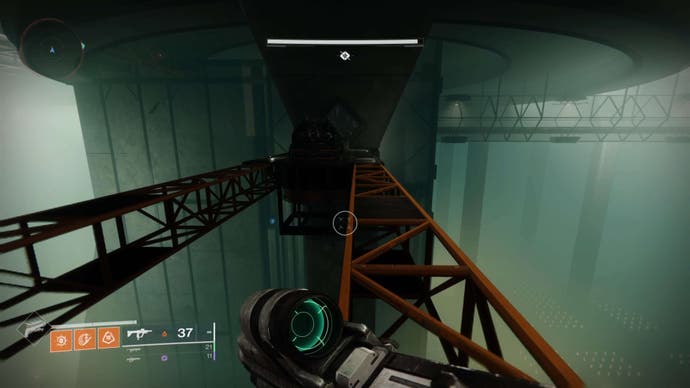
Return to the main path, jumping between and down to various platforms - pictured above - eliminating or dodging enemies as you go and after a jump around a large pillar you'll reach a lift.
Go up here to continue, with a little bit more platforming to reach the first encounter, or jump across to a small platform to the wall's left corner to find collectable four before going up the lift to continue.
Spire Ascent encounter
Before jumping out and upwards to begin the first encounter, you can find the fifth collectable on a computer screen behind the Rally Banner placement ring, near the sand-blocked doorway.
When ready to start, jump out and climb up.
This first encounter takes the Arc node and circuit mechanic, and requires it to be used in more of a high-stakes setup with required platforming and evasion from strong enemies such as Hydras that'll attack you from afar.
The concept remains the same, except you'll be looping around and connecting two sets of wires and nodes across three differing levels as you power lifts to summit the spire.
It'll once again involve starting a chain of nodes - for the first level, these two start on the direct opposite side to the lift you'll be powering - around the corner from when you first jump up - on the wall next to a platform sticking out of the building where a Conduit Minotaur can be found.
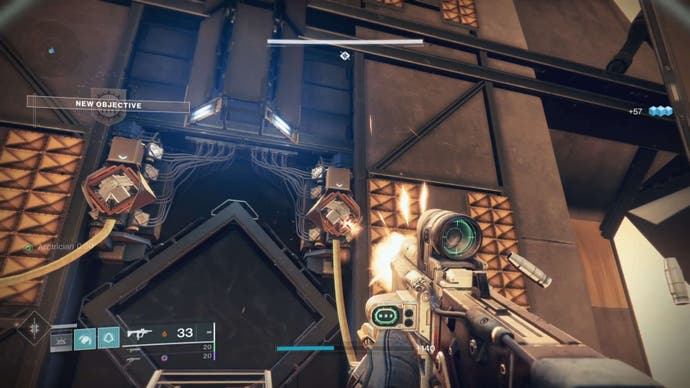
Their wires connect around the entire width of one side of the building to their respective generators.
Following the same process, you'll want to get the Arctrician buff and begin shooting these nodes as they connect around the building.
As with the opener, the only timer you have to worry about is the Arctrician buff which can be extended by hitting correct Arc nodes, and replenished anytime by killing another Conduit Minotaur - these spawn in various locations, typically on each side of the building.
Once you've completed the first two circuits, the lift will activate and allow you to go up to the next floor - once you exit, be mindful of some Vex Goblins that spawn directly around you.
After clearing them out, get your Arctrician buff if you need it, then head around to the floor's left side - facing away from the lift - and begin the chain from a node either side behind an electrical fence.
It's worth noting you don't have to go through these electrical fences if you'd prefer not to, thanks to some handy platforms you can use on the outer edges that'll help you get around shock-free.
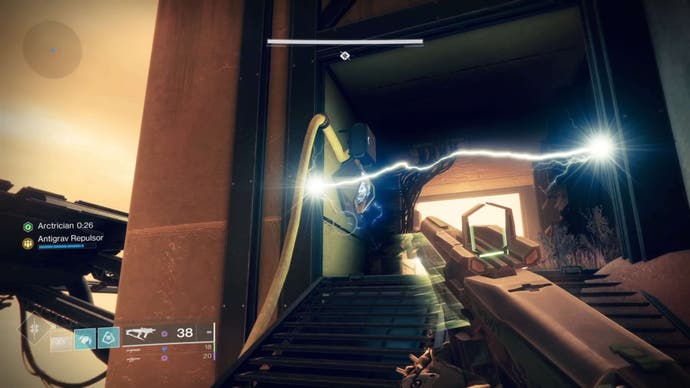
Once the circuit is complete on floor two, the lift will open up between the two end points of the circuit - hop in and ascend, eliminating a Conduit Minotaur as you arrive at the third level.
Just like the previous two floors, you'll need to connect all the nodes, but there are two starting points for this floor - one is found immediately as you exit the lift, and the other is on the opposite side of the building.

Start from the one closest as you exit the lift and work your way around, connecting all the nodes and starting and completing the other Arc circuit to conclude the encounter and net yourself the first of three encounter rewards.
Following this, jump up above the chest to enter a square room overlooking the area of the previous encounter - on one side of this room, you'll find a monitor lit up once again with the blue icon, completing your collectable hunt.
To reach the next encounter, turn around and jump up to a catwalk leading to a large window and a switch that'll allow you to reach the square summit of the spire where the second encounter starts.
Akelous, the Siren's Current boss fight encounter
As with the previous encounters, the mechanic used here is the exact same, except wires are spread out across, under and all around four catwalks extending from the central square platform you initially jump up to.
This encounter takes the mechanic and platforming you've been doing up to this point and uses it in a boss fight setting, one that might be familiar to those who have played the Garden of Salvation raid.
Essentially - starting from the central grid - you need to once again obtain the Arctrician buff and shoot all the nodes that connect to fuel rods at each end of the four platforms.

Once the fourth fuel rod has been activated - you'll know when as the message 'All fuel rods activated' will appear in the lower left of your screen - you must stay in position as the boss will move to the location of that fuel rod and you can begin the damage phase.
Don't worry though, as the boss won't attack you during this phase.

Before the damage phase truly begins however, you'll need to shoot all its glowing red eyes within a short time - after doing so, the boss will begin to float backwards towards the spire's central platform, and you'll be able to deal damage - this is where linear fusion rifles come in especially handy!
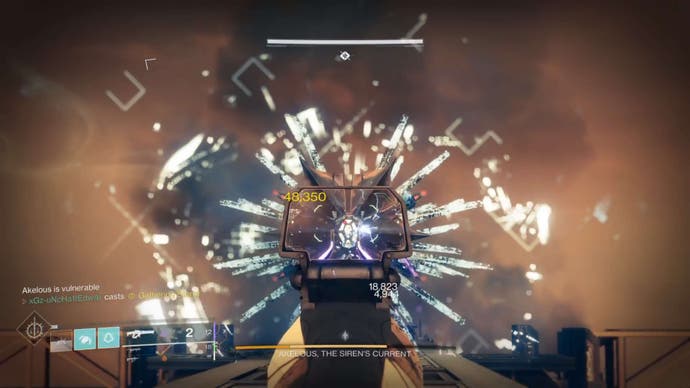
Be careful though, as once the timer is up the boss will detonate with a shockwave that disorients and pushes you back, with the possibility of being killed by it if standing too close to the boss.
You can tell this is about to happen by keeping an eye on when energy begins to swirl around the boss - you'll have a few seconds to notice before the shockwave goes off.
If the shockwave does hit you however, so long as you have some control over your momentum, you might be able to stay grounded or land on a lower platform connected to the catwalk behind the fuel rod.
After the damage phase, the process remains the same and you'll need to re-activate all the fuel rods before reaching the damage phase once more.
Throughout this encounter, you'll face the standard enemies of Goblins and Conduit Minotaurs, with Harpies spawning far out away from the platform - these can be the most dangerous if left alive during damage phases, so it's worth eliminating all of these before you activate the final fuel rod.
Once you've worked your way through enough damage phases and taken down the boss, you'll be able to head back to the central platform, claim your rewards and drop down to slip through a small vent and make your way to the final encounter.
How red wire circuits work in Spire of the Watcher and secret chest 2 location
After dropping down a few openings and crouch-walking through a vent, you'll land in a blue-tinted room with plenty of enemies - eliminate them to spawn a Conduit Minotaur from which you'll need to acquire the Arctrician buff from to continue.
From here on out, the dungeon introduces a variation of the yellow wire circuit mechanic, instead using red wires and nodes that are activated differently.
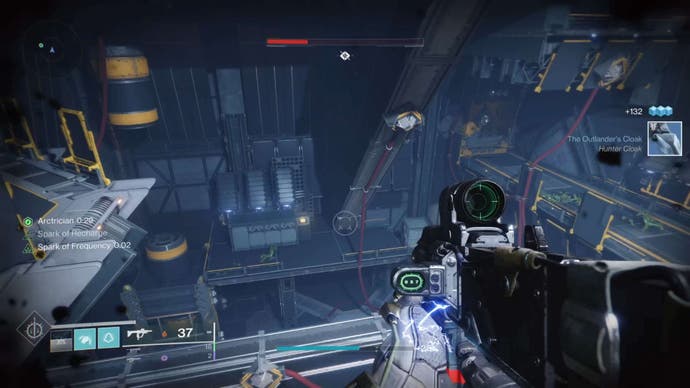
Rather than hit consecutive nodes in a particular order with unlimited time like with yellow wires, red wire circuits each have one node per red wire that all need to be hit within a short time to power up the connecting mechanism.
If you fail to hit all the connecting nodes in the allotted time, the message 'Lockdown override failed, Arc nodes reset' will appear, and you'll have to try again.
In the following couple of areas - broken up by some platforming around fans and through vents and ducts - this is the mechanic you'll need to employ.
In this first area, the origin point for the red wires are from a glass door on the ground floor within the room of enemies - grab the buff and hit all the red-wire-connected nodes to open the floor and continue.
Through a red-glowing alcove, you'll exit out into an area with spinning fans - some fans might remember these from Season of the Drifter's Zero Hour Exotic mission.
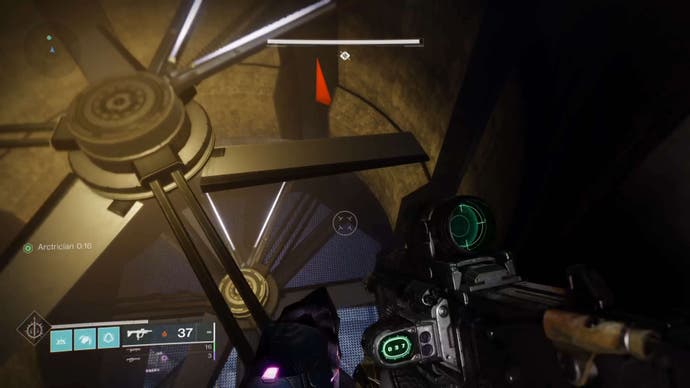
The idea here is to time your falls between the fans and land on the below platform - you'll have to do this twice before you reach the bottom and enter another small vent.
As long as you don't drop into the fans at the lower end of the area, you'll be good - the first two sets of blades only damage you slightly, whereas the third set will immediately kill you.
Continue through into the next blue-tinted room, following the same idea as the previous room, activating all the red wire nodes, dropping through the alcove and slipping past the fans.
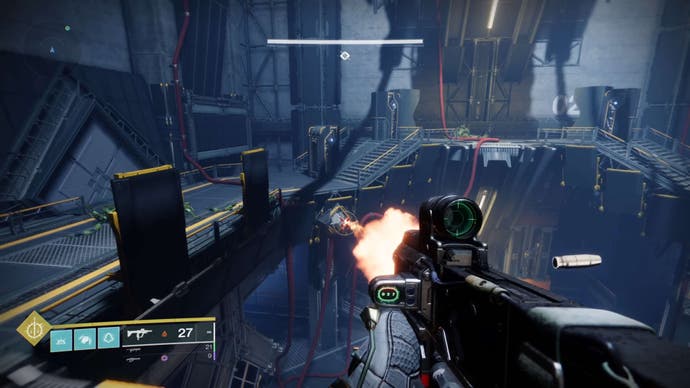
Following this, you'll drop down onto a diamond-shaped platform with electrical fences - move quickly to avoid the Hydra spawning on top of you, and eliminate the enemies around the room.
The mechanic here is the same as the previous two - get the Arctrician buff and shoot all connecting red-wire nodes - there's one on each side of the square room, with another hidden on the inside of a pillar near the centre of the room.
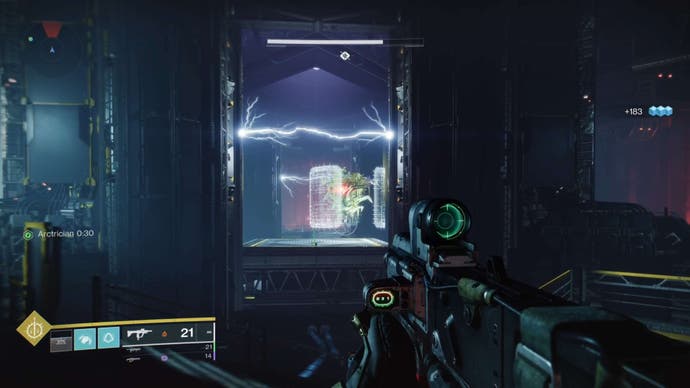
Once you've activated all of them, you can continue, but don't forget the second secret chest before you leave, hidden through a breakable vent - each corner's set of stairs has one, but only one of the four lets you drop into a hidden compartment.
Again, only grab this if you're happy with receiving the gear you've connected from the dungeon thus far - if not, you can always collect it on a repeat run.
Exit out the vent back into the square room, and drop down one of its open corners into the following room, continuing down until you reach the final encounter.
Persys, Primordial Ruin boss fight encounter
This final encounter in the Spire of the Watcher dungeon is a boss fight against Persys, Primordial Ruin, a Vex Wyvern that yes, follows you around and can jump-slam you just like all the other Vex Wyverns in the game - fun times!
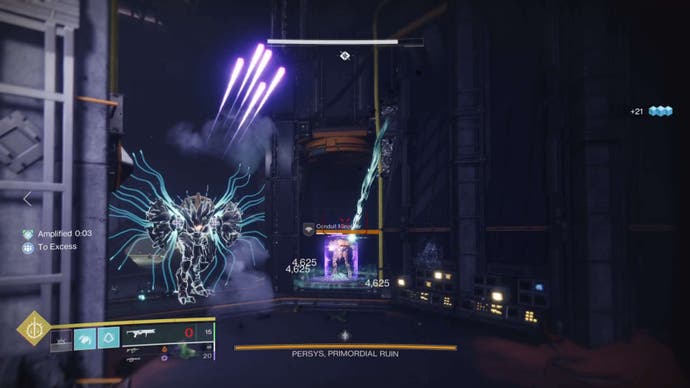
Thankfully, despite it following you around most of the room, it's not as directly aggressive nor sneaky as standard Wyverns, though it's still most definitely a present danger and one you'll want to keep your eye on!
For this final fight, you'll be employing a mix of all the mechanics learned up to this point, featuring both red and yellow wire circuits.
When this fight begins, you'll be greeted with a Vex Hydra on either side of the room and a continuously-spawning array of Goblins and Supplicants - however you handle this fight, these will keep spawning at all times outside of the boss' damage phase, so you'll just need to stay on your toes, jumping, dodging and evading as you go.
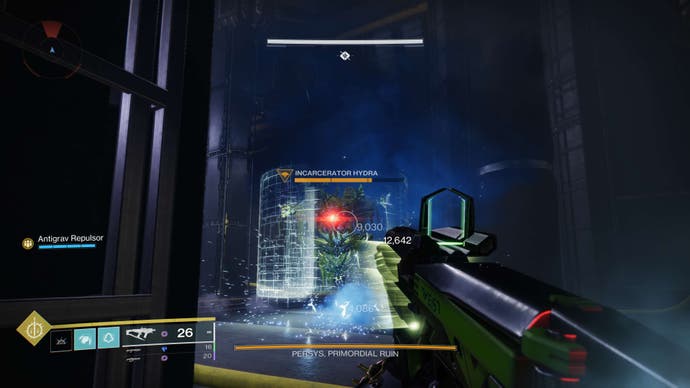
Once both Hydras are eliminated, a Conduit Minotaur will spawn on both sides of the room. You know the drill - kill the minotaur and grab the Arctrician buff.
First, you'll want to hit five red wire nodes - these are visible when standing in the middle of the room, with one on each pillar, and the fifth above the door from which the boss entered the room.
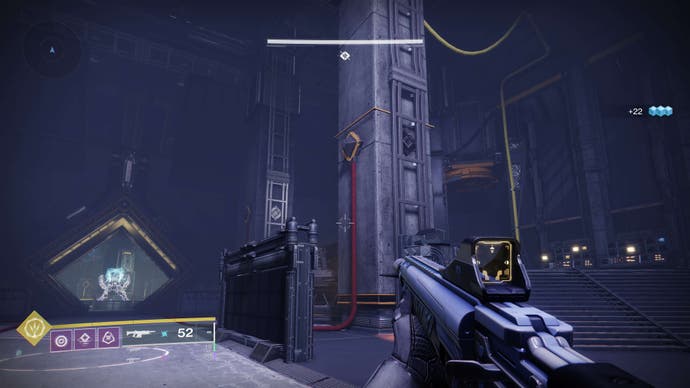
Doing so will re-open the door - this closed when the boss entered the room - and allow the first of two yellow wire nodes to be shot, kicking off their respective chains.
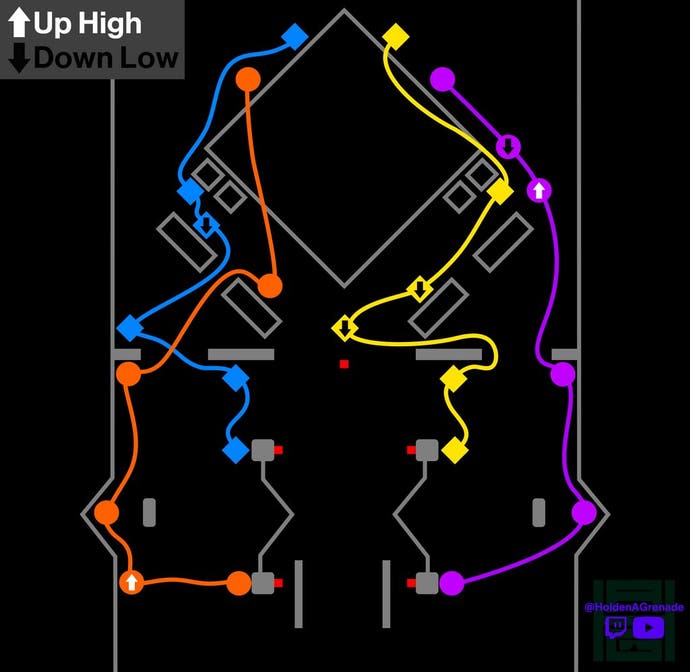
There are four points from which a yellow wire circuit can begin, and these are found on each of the four pillars, on the side opposite their red wire node counterparts.
The two nodes that open up are random each time - e.g. there could be one on the front left pillar, and another on the back right pillar - but you'll need to once again hit all their connecting nodes that lead into the rear room, where the boss was at the start of the encounter.
These all lead to a reactor core, which is what you'll be activating in this encounter.
Thanks to this handy map provided by Reddit user HoldenAGrenade, you can see where the four square pillars are, along with each of the nodes connected to them.
Each colour represents a different set of yellow wire nodes, with the small red squares being the red wire switches controlling the large door.
Once both circuits are complete, the text 'Reactor core purge - Armed' and 'Reactor Isolation Chamber Active... Take Cover' will show up in the lower left of the screen, and you'll need to retreat back to the first room, though make sure the boss is in the reactor core room first before you activate the cores and leave.
After returning to the first room, ensuring you have the Arctrician buff, shoot the five red wire nodes once again to shut the door - you'll see the message 'Isolation Complete' confirm when you've done this correctly.
Following that message, an explosion will go off and the messages 'Reactor core purged' and 'Persys is vulnerable' will appear - this means it's time to do damage.
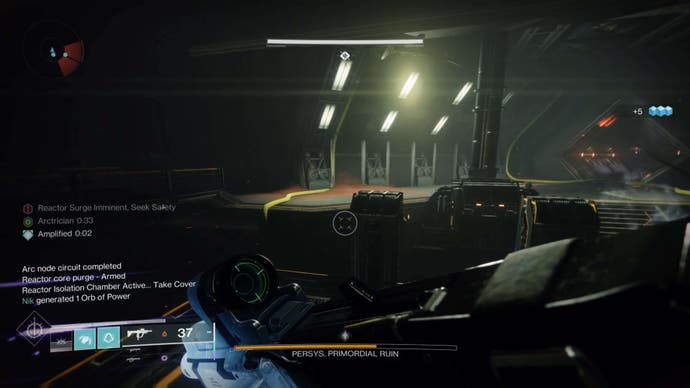
The boss will attack and close in on you during the damage phase, so be careful during this process, but you won't have any other enemies to worry about, so just use the nearby cover and keep moving as and when you need to.
Linear fusion rifles once again seem to work the best here, though with its sometimes easy-to-miss crit-spot, rocket launchers may prove the more effective - and safer - option.
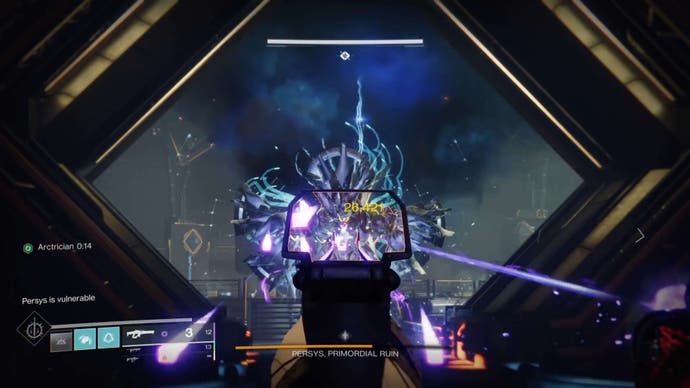
Once the damage phase is over, the message 'Persys overcharges its shields' will show up, and it'll be time to repeat that whole mechanic to reach the damage phase once again.
Keep this up until the boss has no health left, and you'll have successfully completed the Spire of the Watcher dungeon - congratulations!
Claim your spoils - perhaps netting yourself the Hierarchy of Needs Exotic bow - and rest assured knowing you've thwarted yet another threat to humanity.

Spire of the Watcher secret chest locations
There are two secret chests to be found in Spire of the Watcher.
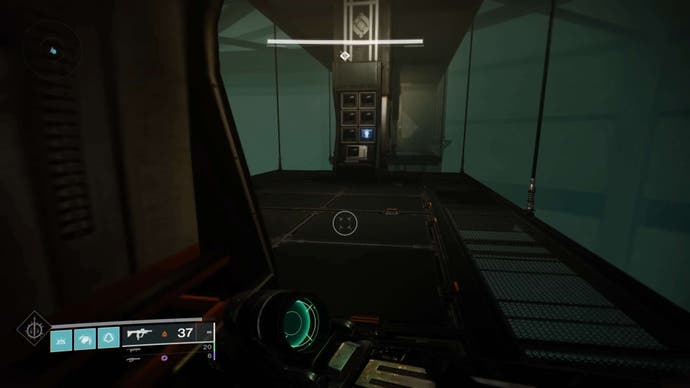
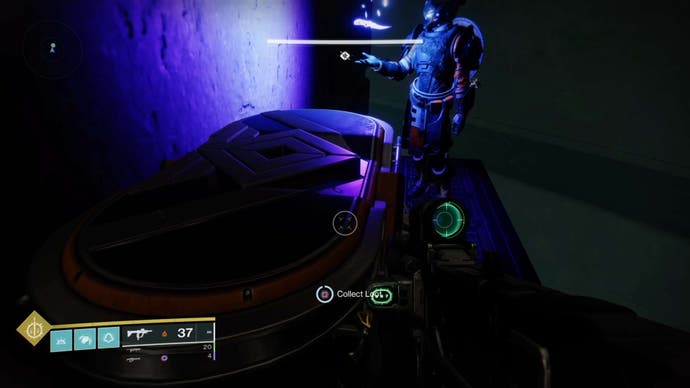
The first secret chest is found before the first encounter - best picked up after acquiring at least one piece of gear:
- Once jumping up from the small bit of scaffolding in the wide-open underground complex, turn around and jump around the pillar to another platform - jump across the gap and around to the right on a ledge is the chest.
- The third collectable is also found on one of the terminals nearby here too.
The second secret chest is found after the second encounter:
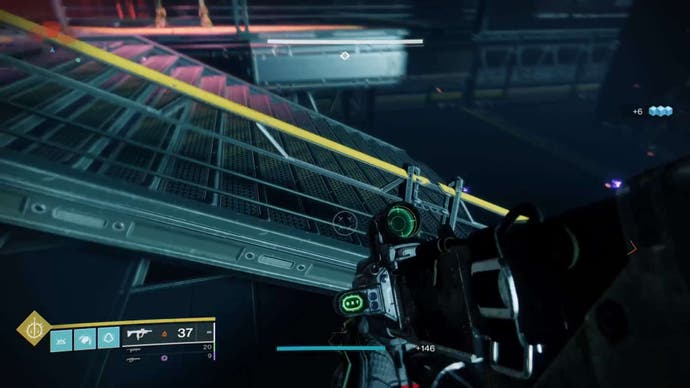
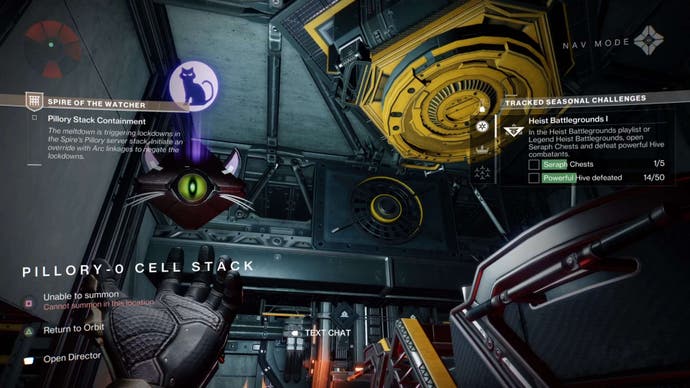
- After getting past the two sets of fans and entering the room with the four electric fences and Hydra in the middle, look under sets of stairs in each corner of the room, destroying their associated vents to find the opening - once you've found the vent with the opening, drop down and squeeze through to reach the second secret chest.
Spire of the Watcher collectable locations and how to complete Devil in the Details triumph
There are six collectables to find in the Spire of the Watcher, required for completing the Devil in the Details triumph which will boost your chances of receiving the Hierarchy of Needs Exotic when beating the dungeon.
The first collectable is found after the dungeon's opening:
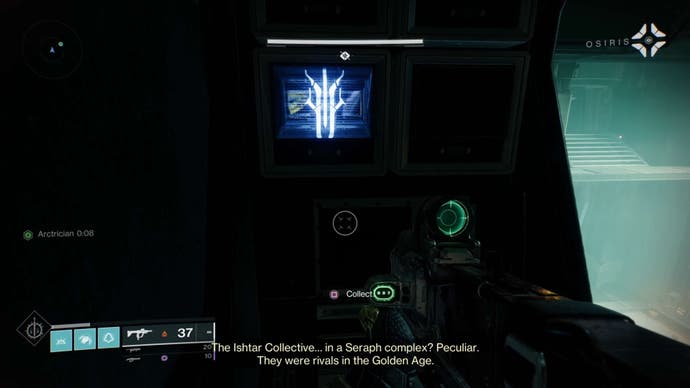
The second collectable is found before the room overlooking the underground complex.

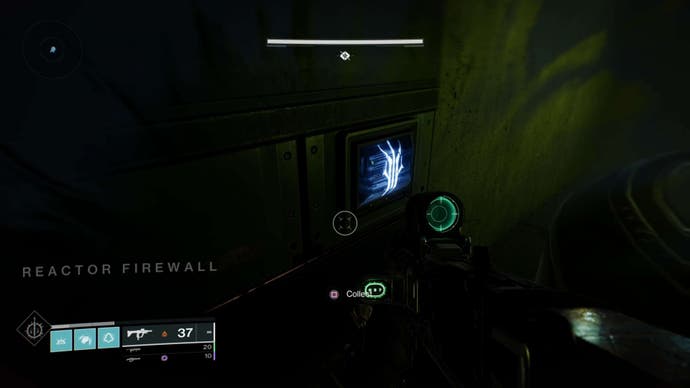
The third collectable is off the beaten path through the complex:

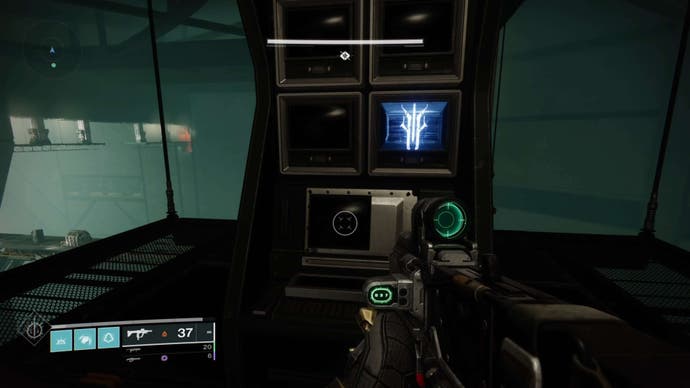
The fourth collectable is on the corner by a nearby lift:
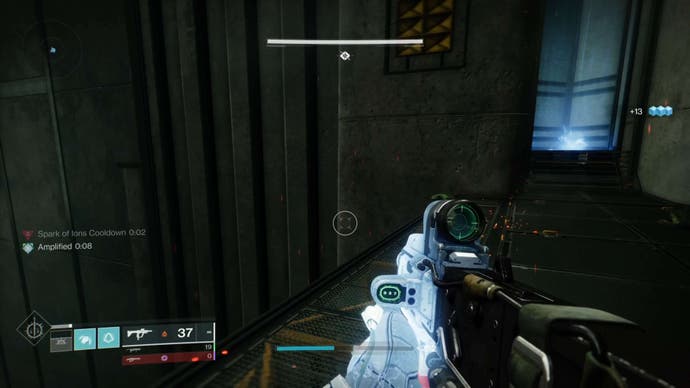
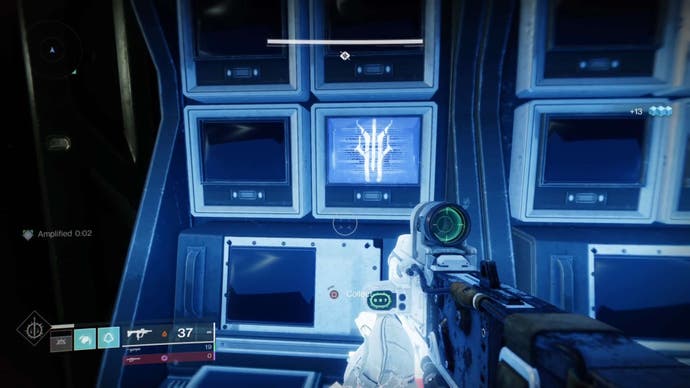
The fifth collectable is just before the first encounter:
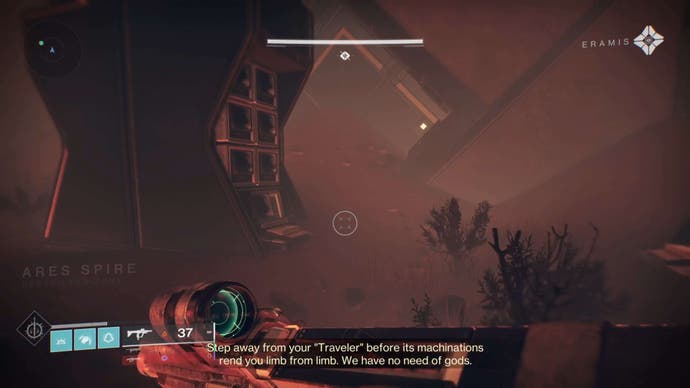
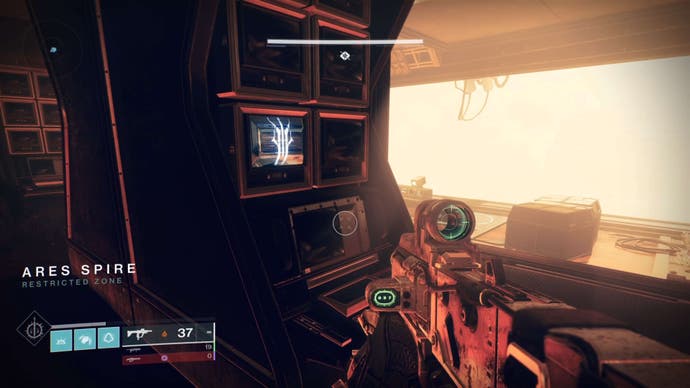
The sixth collectable is directly between the first and second encounters:
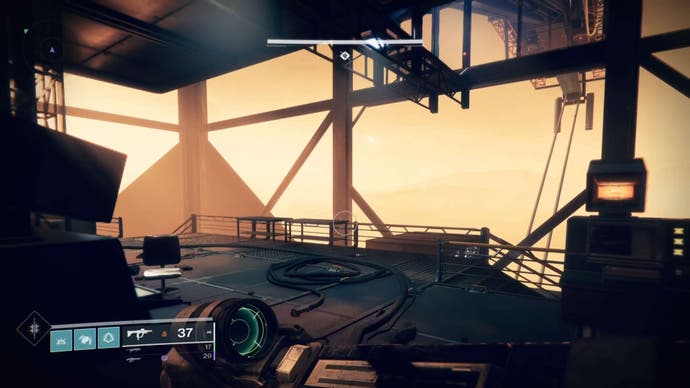
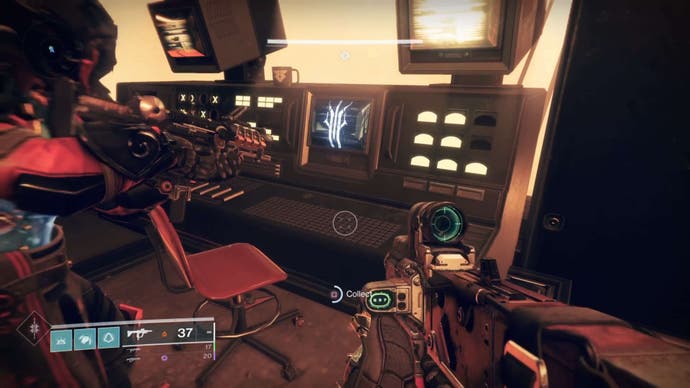
After collecting these, you'll have completed the 'Devil in the Details' Triumph, which will increase your chances of acquiring the Hierarchy of Needs Exotic bow.
Good luck on your dungeon runs!


.png?width=291&height=164&fit=crop&quality=80&format=jpg&auto=webp)