All Corel Cache locations in Final Fantasy 7 Rebirth
How to find all chests at each Corel Cache.

There are plenty of Corel Cache locations in Final Fantasy 7 Rebirth for you to seek out. Each one has valuable loot hidden in chests that can boost your inventory with anything from Moogle Medals to new gear.
Unlike other points of interest in Final Fantasy 7 Rebirth, Caches don't show up once you activate a Remnawave Tower, so it's your job to explore every inch of the landscape to find them - or you can use our guide instead!
Without further ado, we're here to show you all the Corel Cache locations in Final Fantasy 7 Rebirth and how to get the chests at each location.
On this page:
- All Corel Cache locations in Final Fantasy 7 Rebirth
- All Cape del Amor chests
- All Twilight Hill chests
- All Sunrise Plateau chests
- All Seabreeze Storehouse chests
- All Rustladen Reservoir chests
- All Desert Watermain chests
- All Drainwater Drift chests
Locations
Corel Part One
Corel Part Two
All Corel Cache locations in Final Fantasy 7 Rebirth
Unlike earlier regions, you'll need to complete a large chunk of the story to gain access to the entire region of Corel. This is why we've split all of the Corel Cache locations in Final Fantasy 7 Rebirth into two halves:
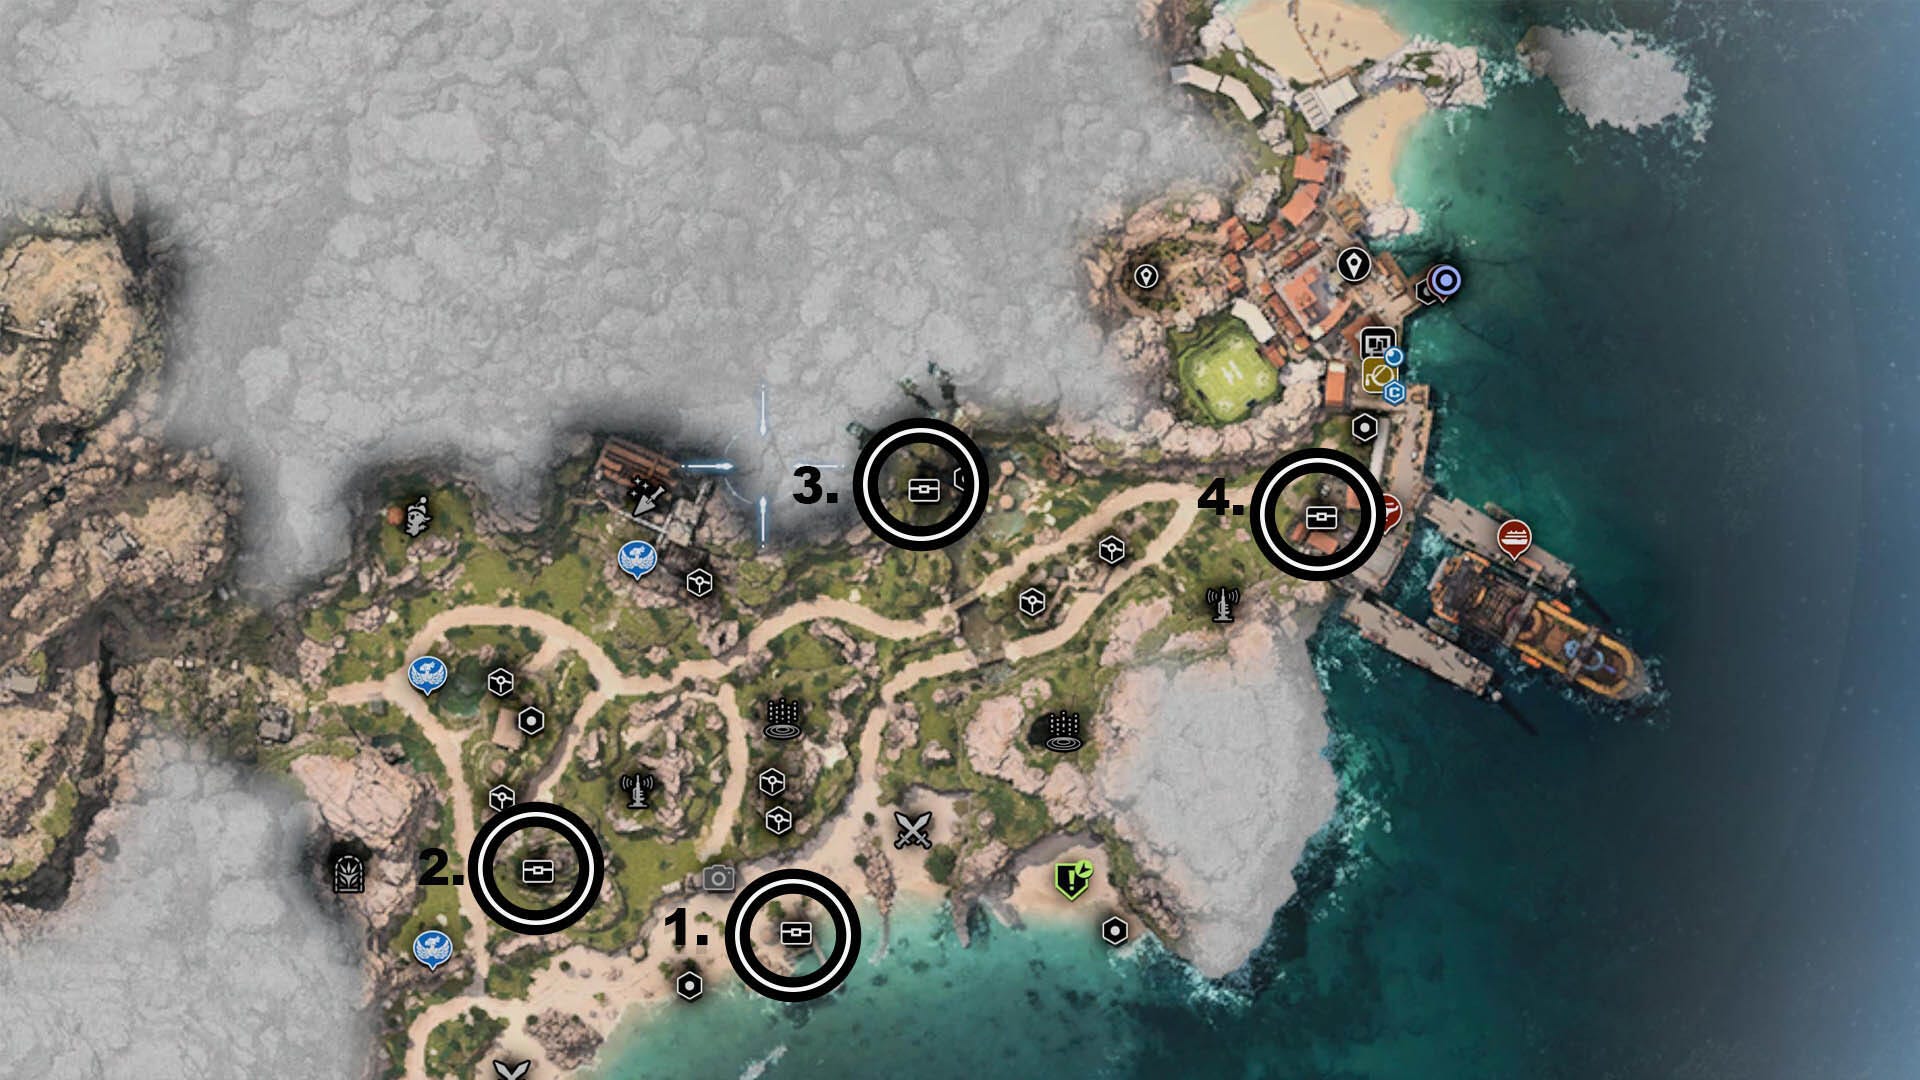
- Cape del Amor Cache
- Twilight Hill Cache
- Sunrise Plateau Cache
- Seabreeze Storehouse Cache
All of these Cache locations can be located and completed during the first half of your time in Corel after leaving Costa del Sol and before climbing Mt. Corel to complete the story section here.
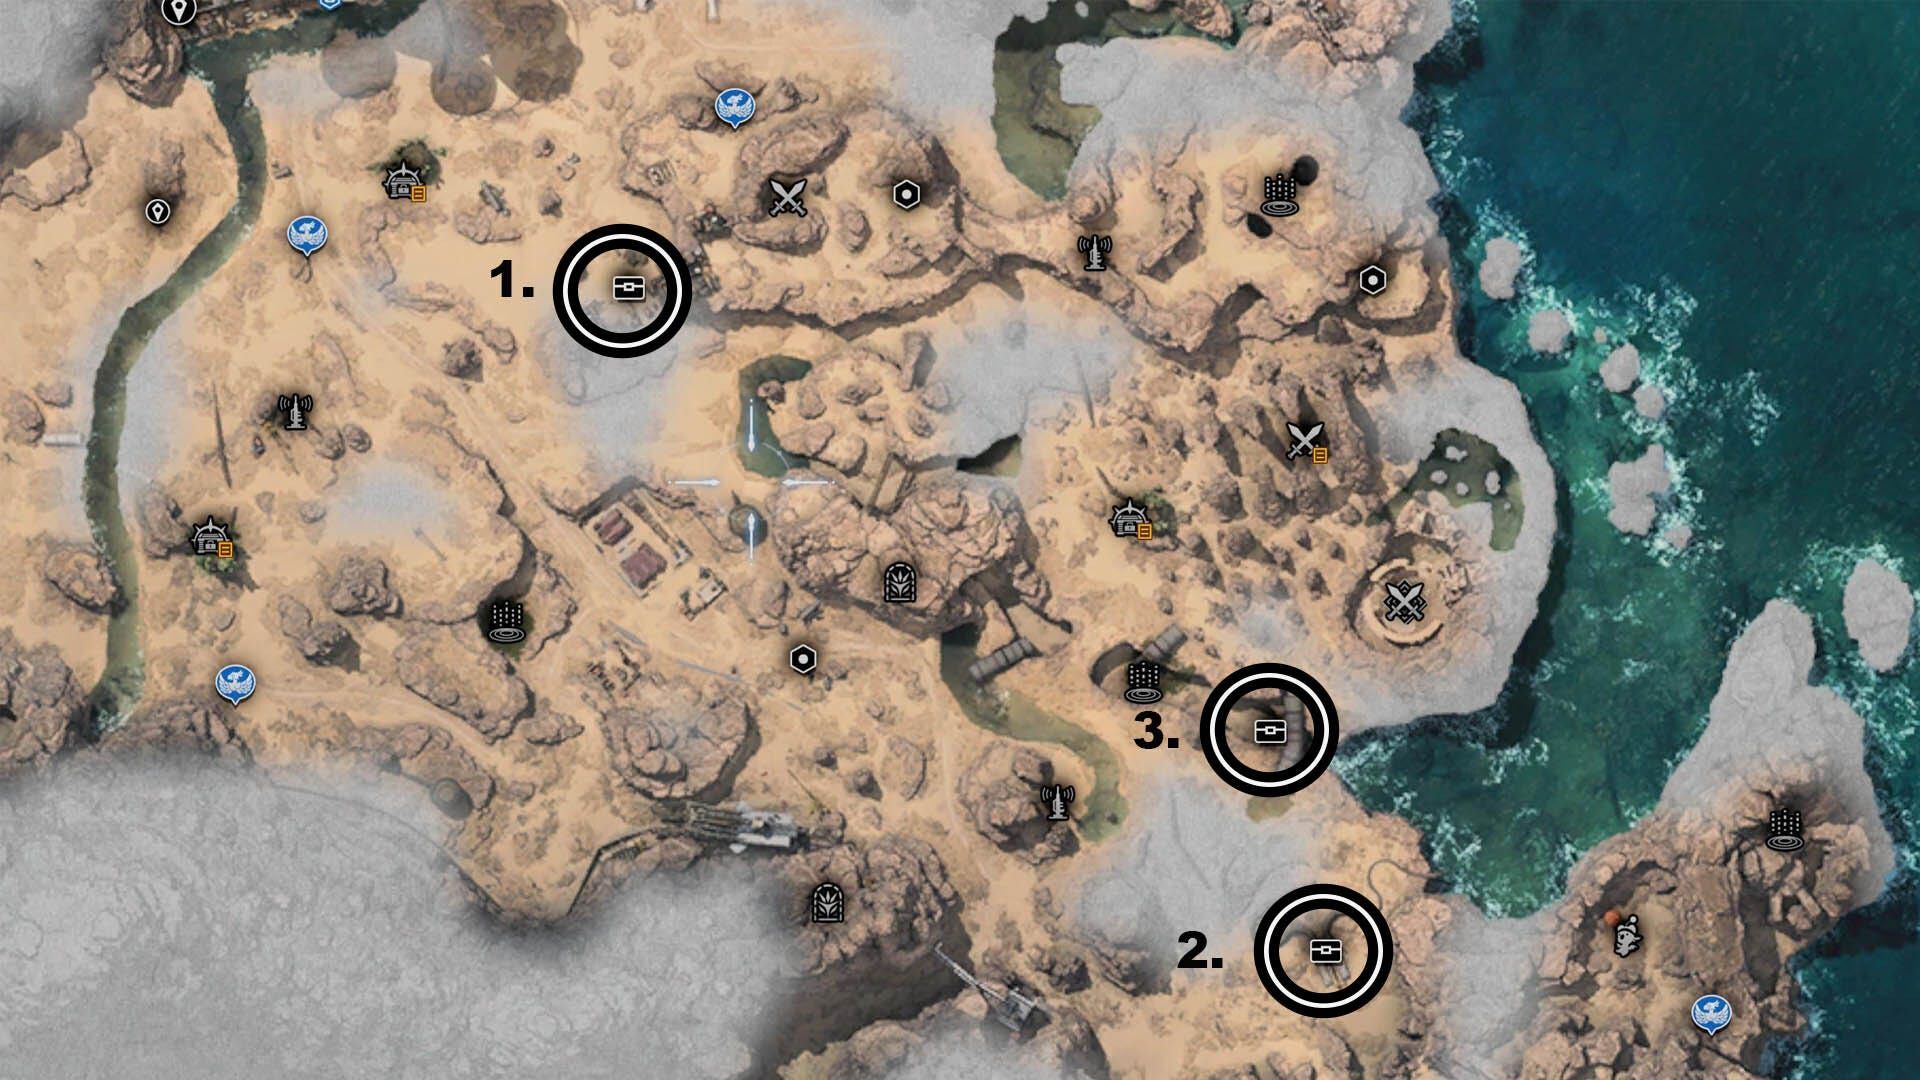
- Rustladen Reservoir Cache
- Desert Watermain Cache
- Drainwater Drift Cache
For these three Cache locations you will need to complete Chapter 7: All that Glitters to gain access to the desert portion of the region.
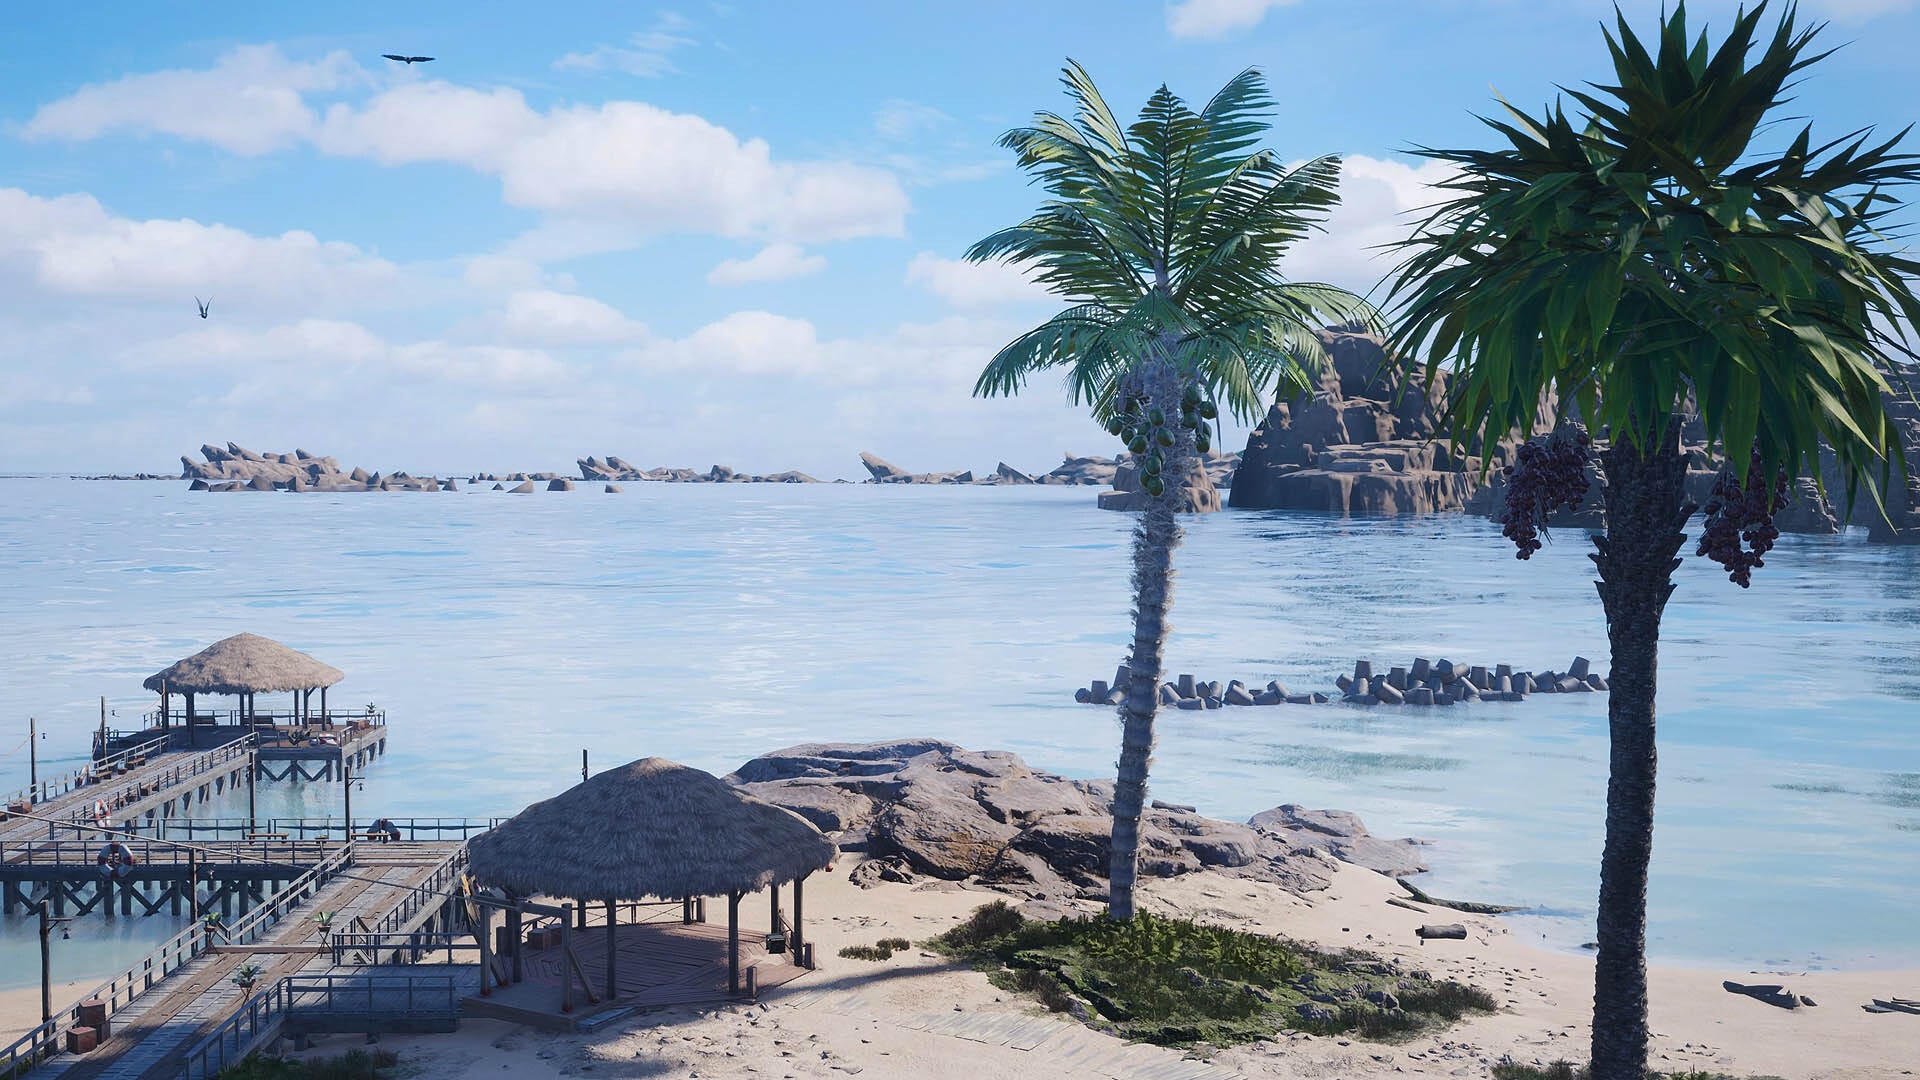
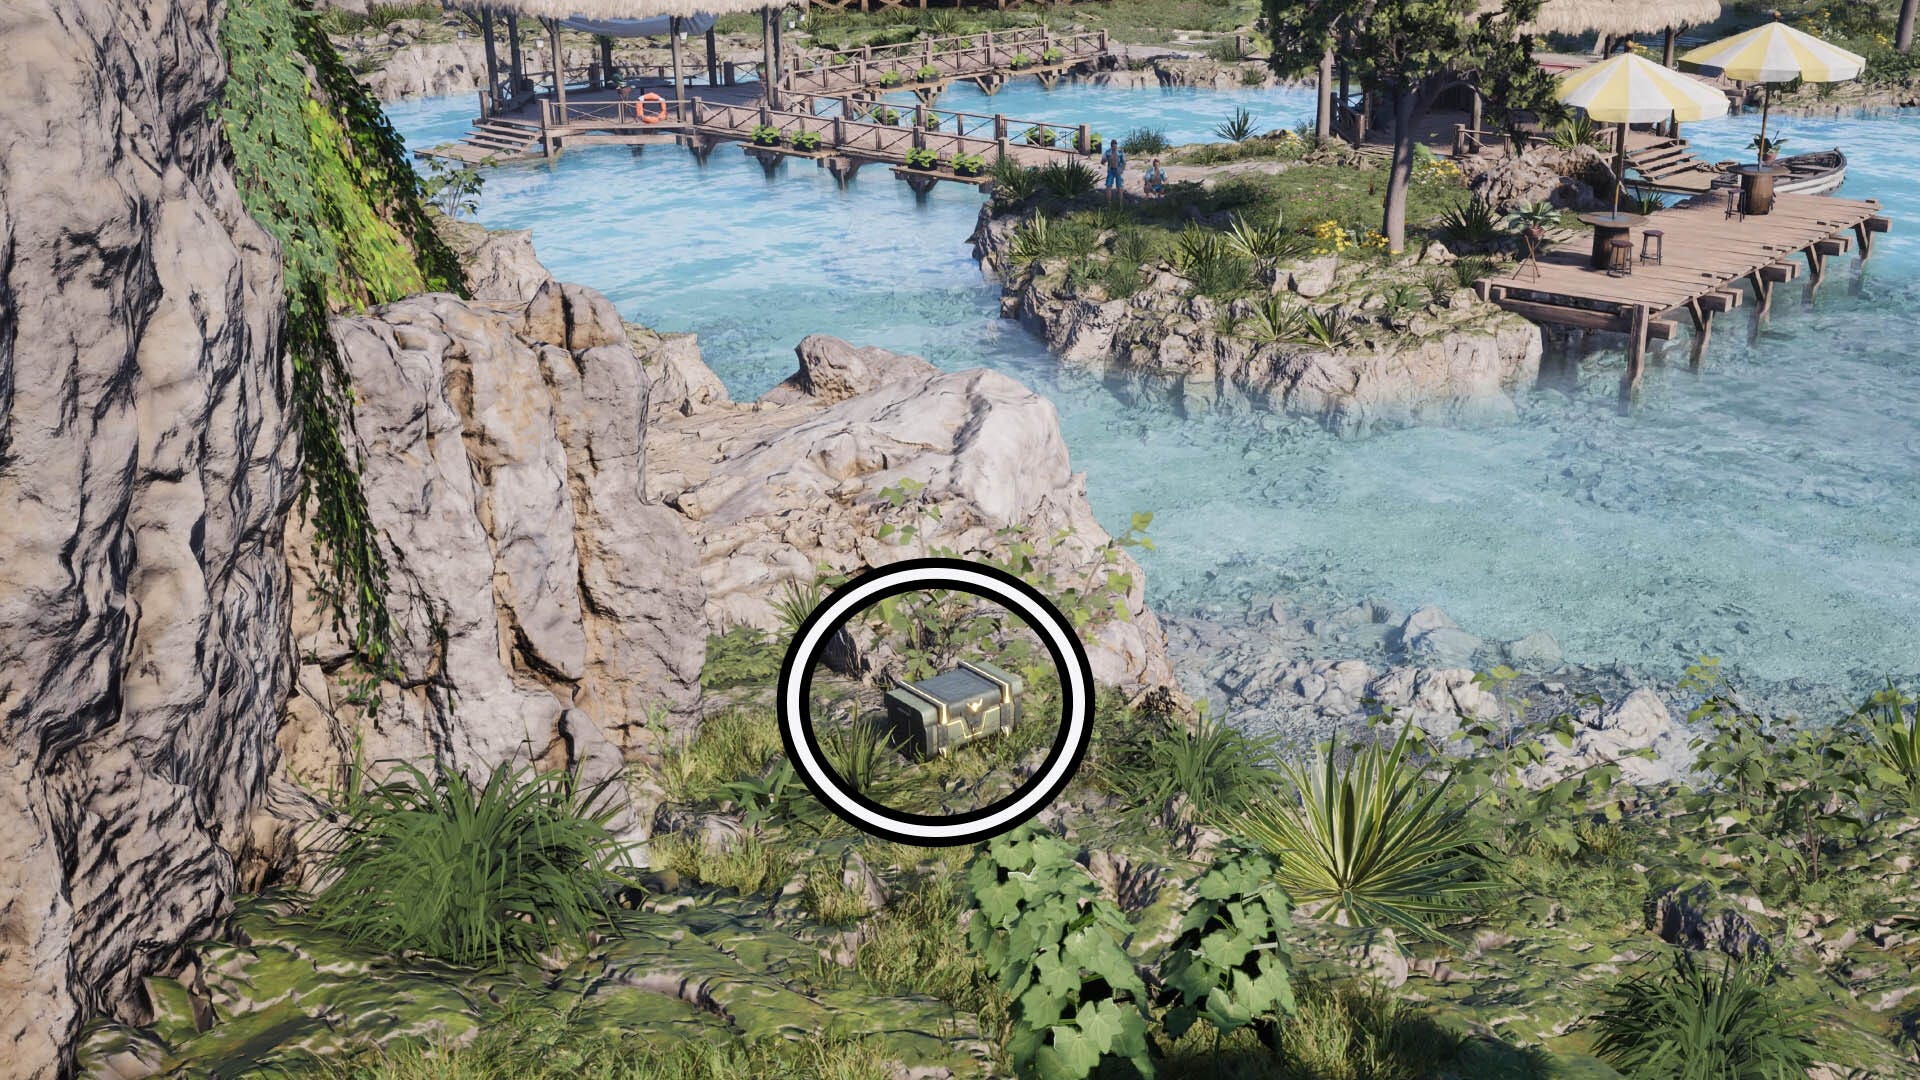
How to get all Cape del Amor chests in Final Fantasy 7 Rebirth
There are three chests in Cape del Amor. The first chest can be found at the bottoom of the zipline that leads into a hut. If you stand facing the ocean at Cape del Amor, it will be on your right.
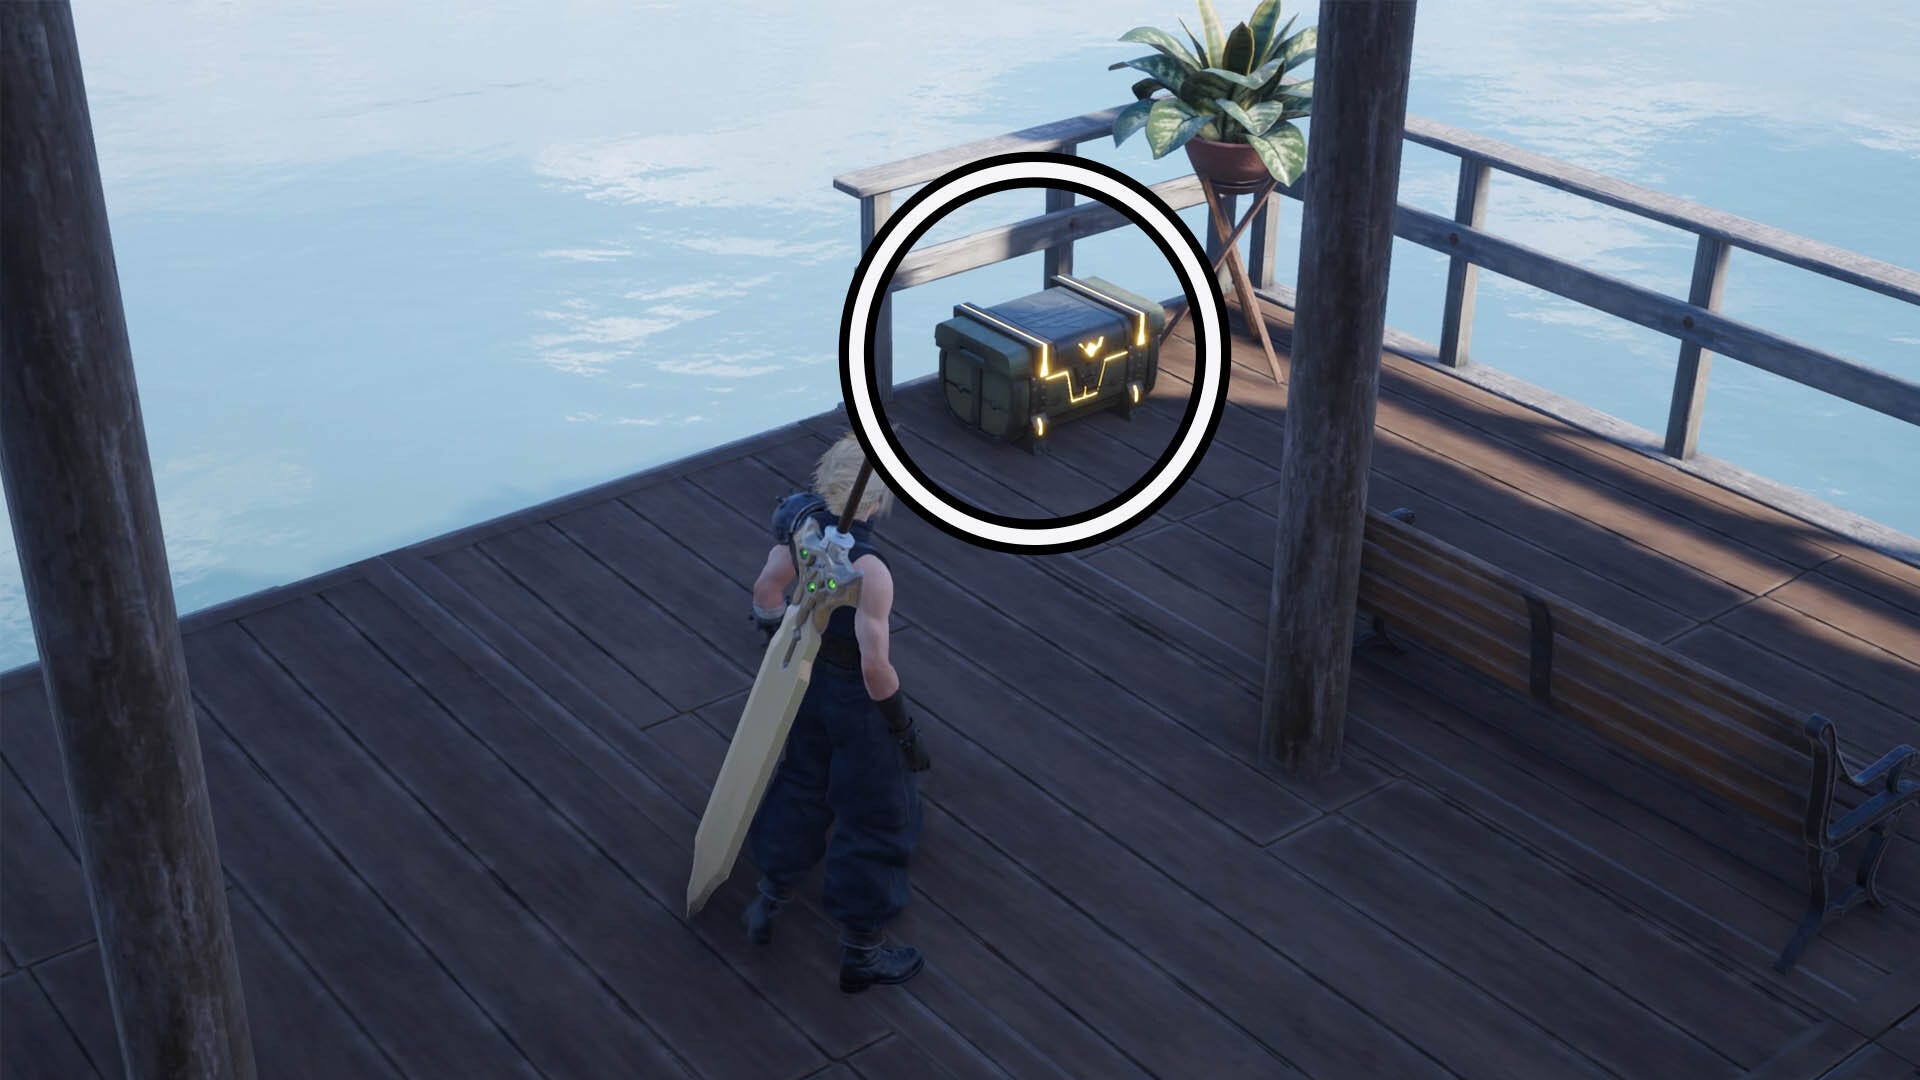
The second chest can be found at the end of the pier that goes out the furthest into the ocean.
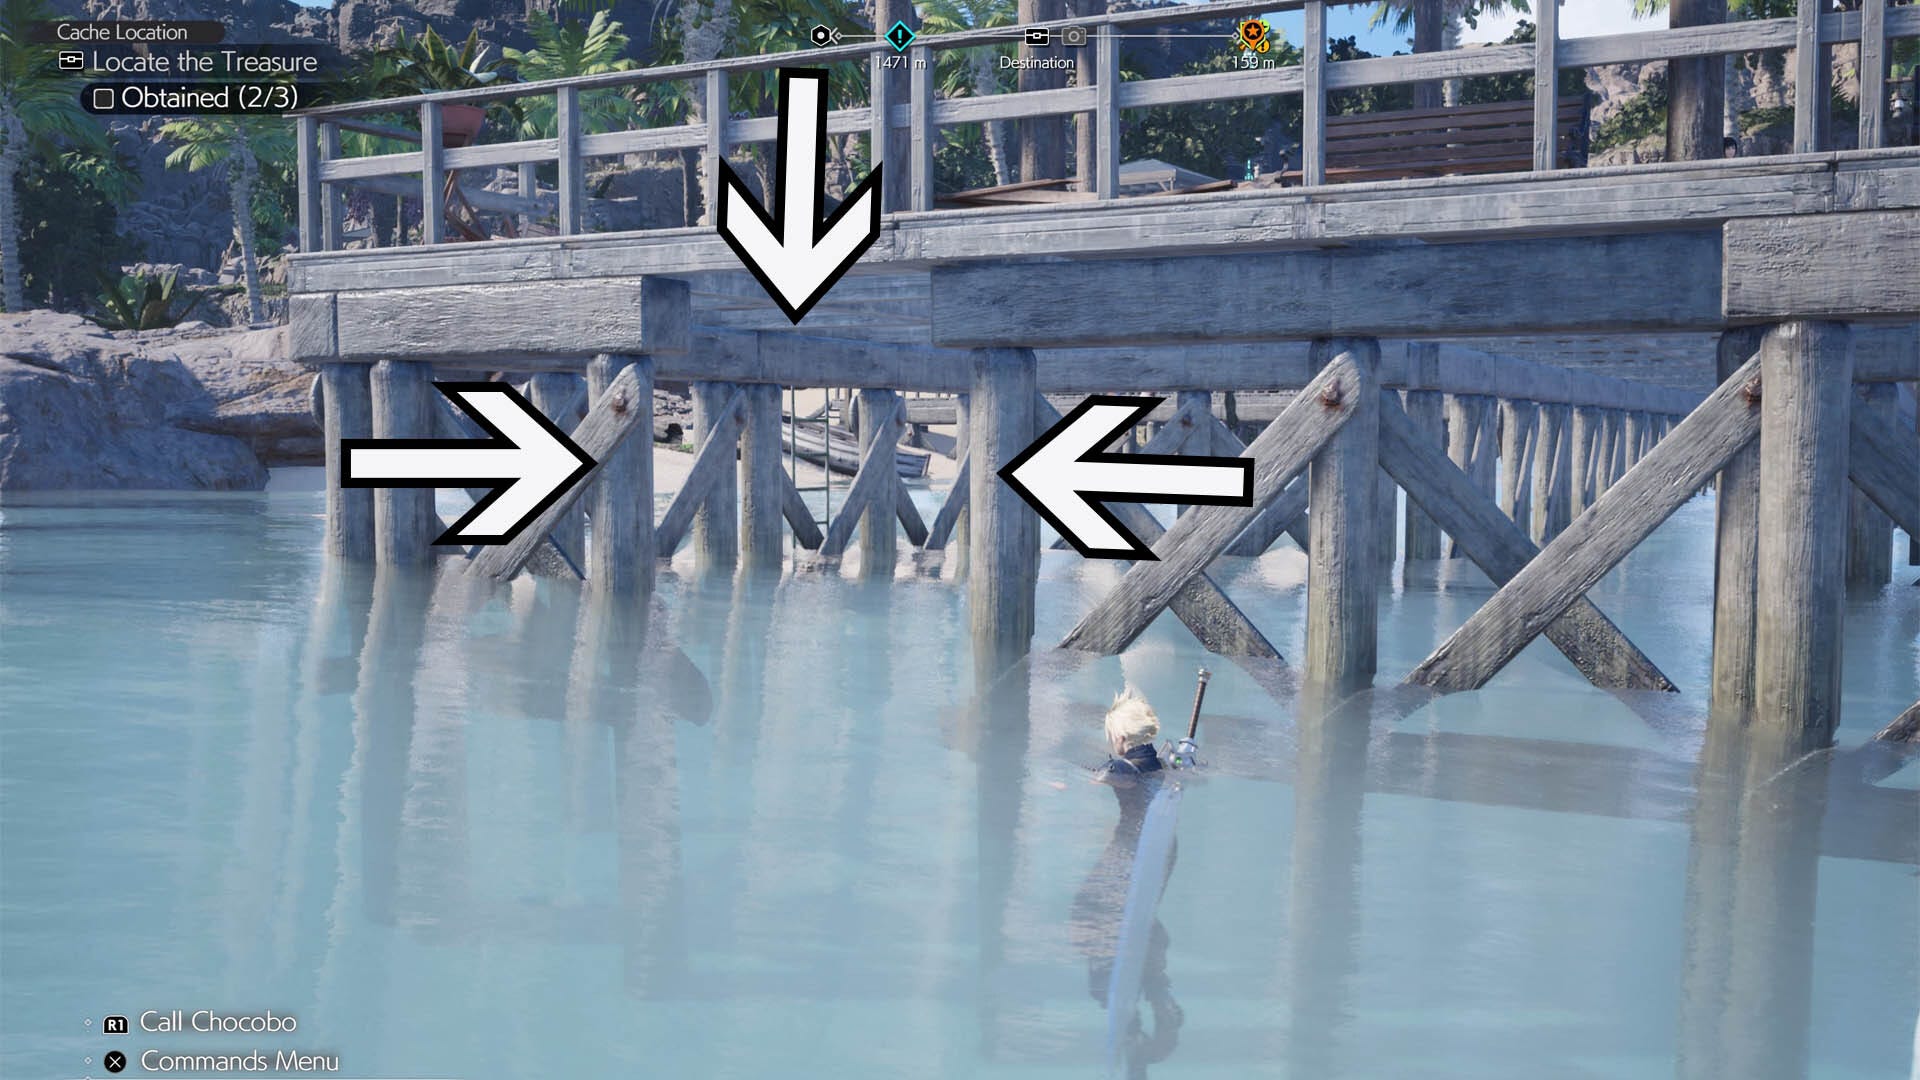
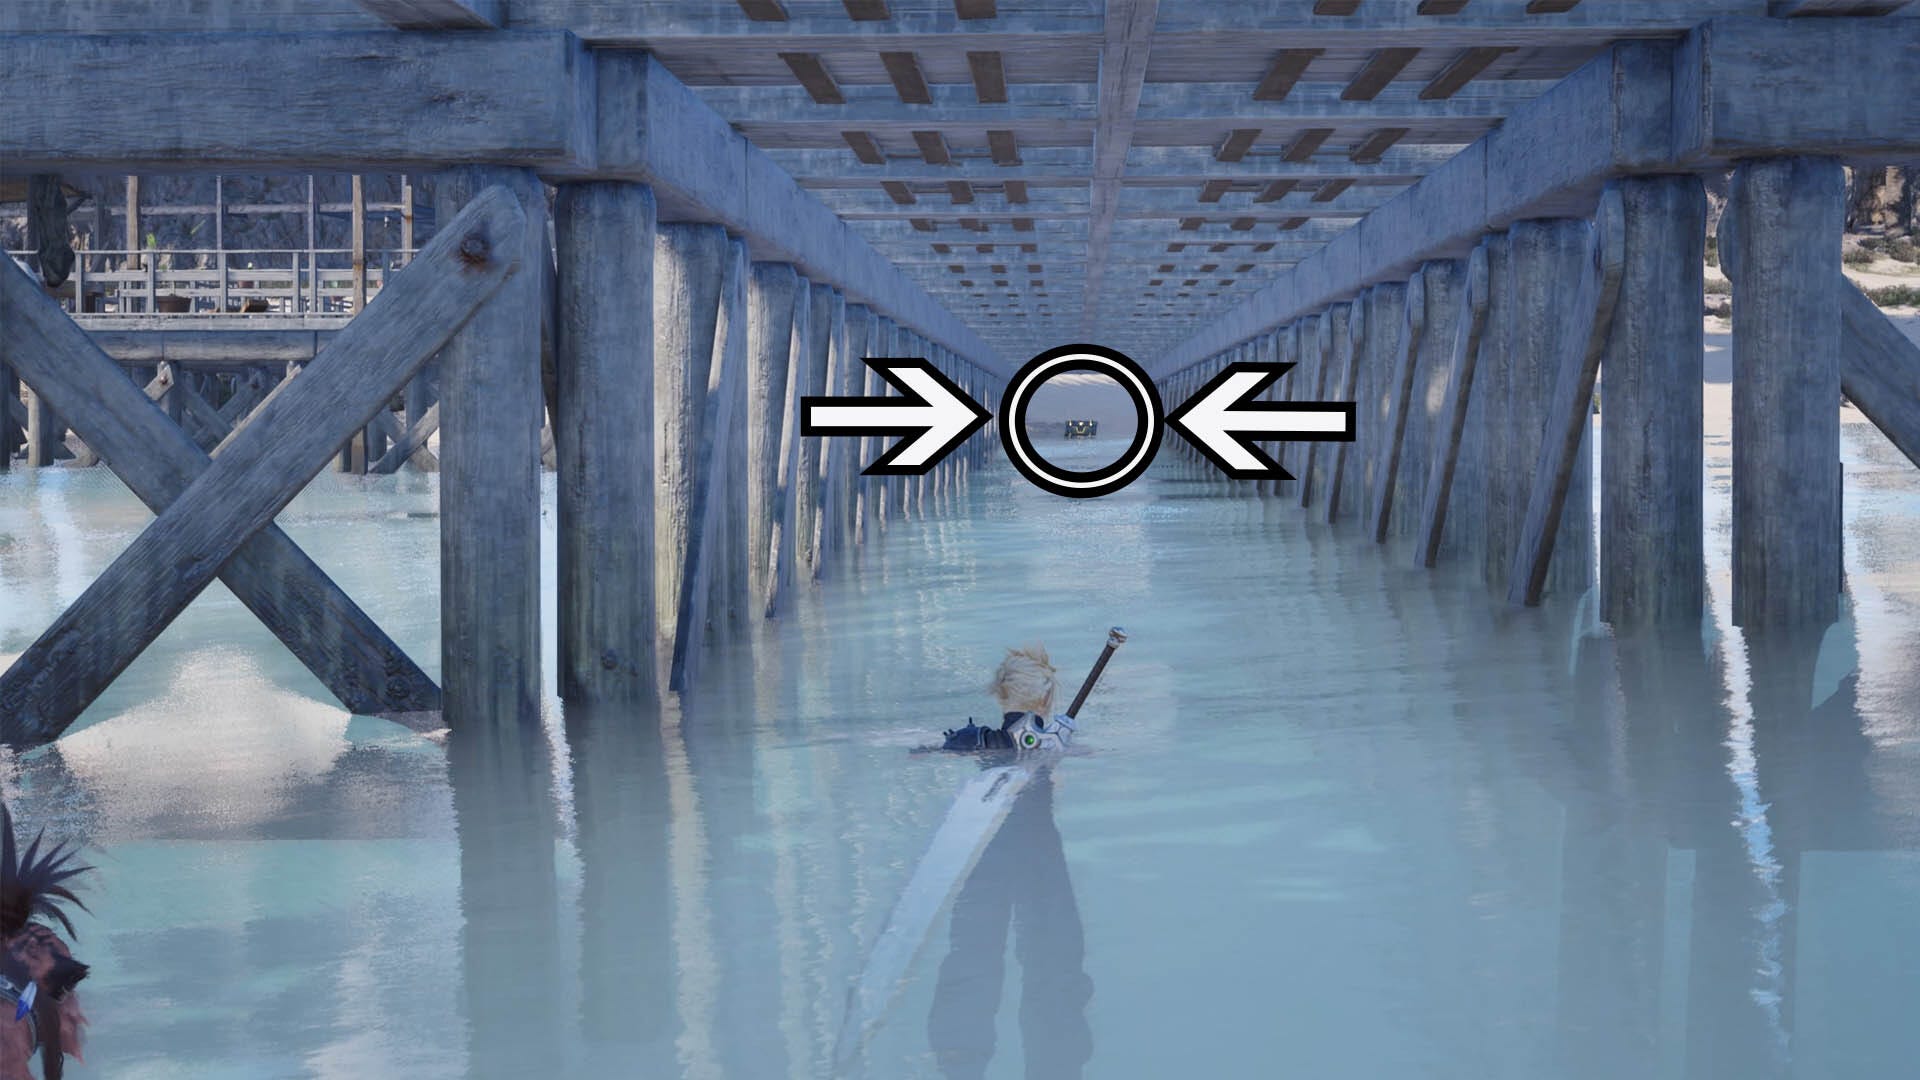
To find the third chest, jump into the water from the point you found the second chest. There's a ladder here if you want to use it. Then, swim around to the very end of the pier structure to the side that's facing the open ocean and you'll find an opening here.
Swim through the opening and underneath the walkway. The chest is on the shore at the far end of this section.
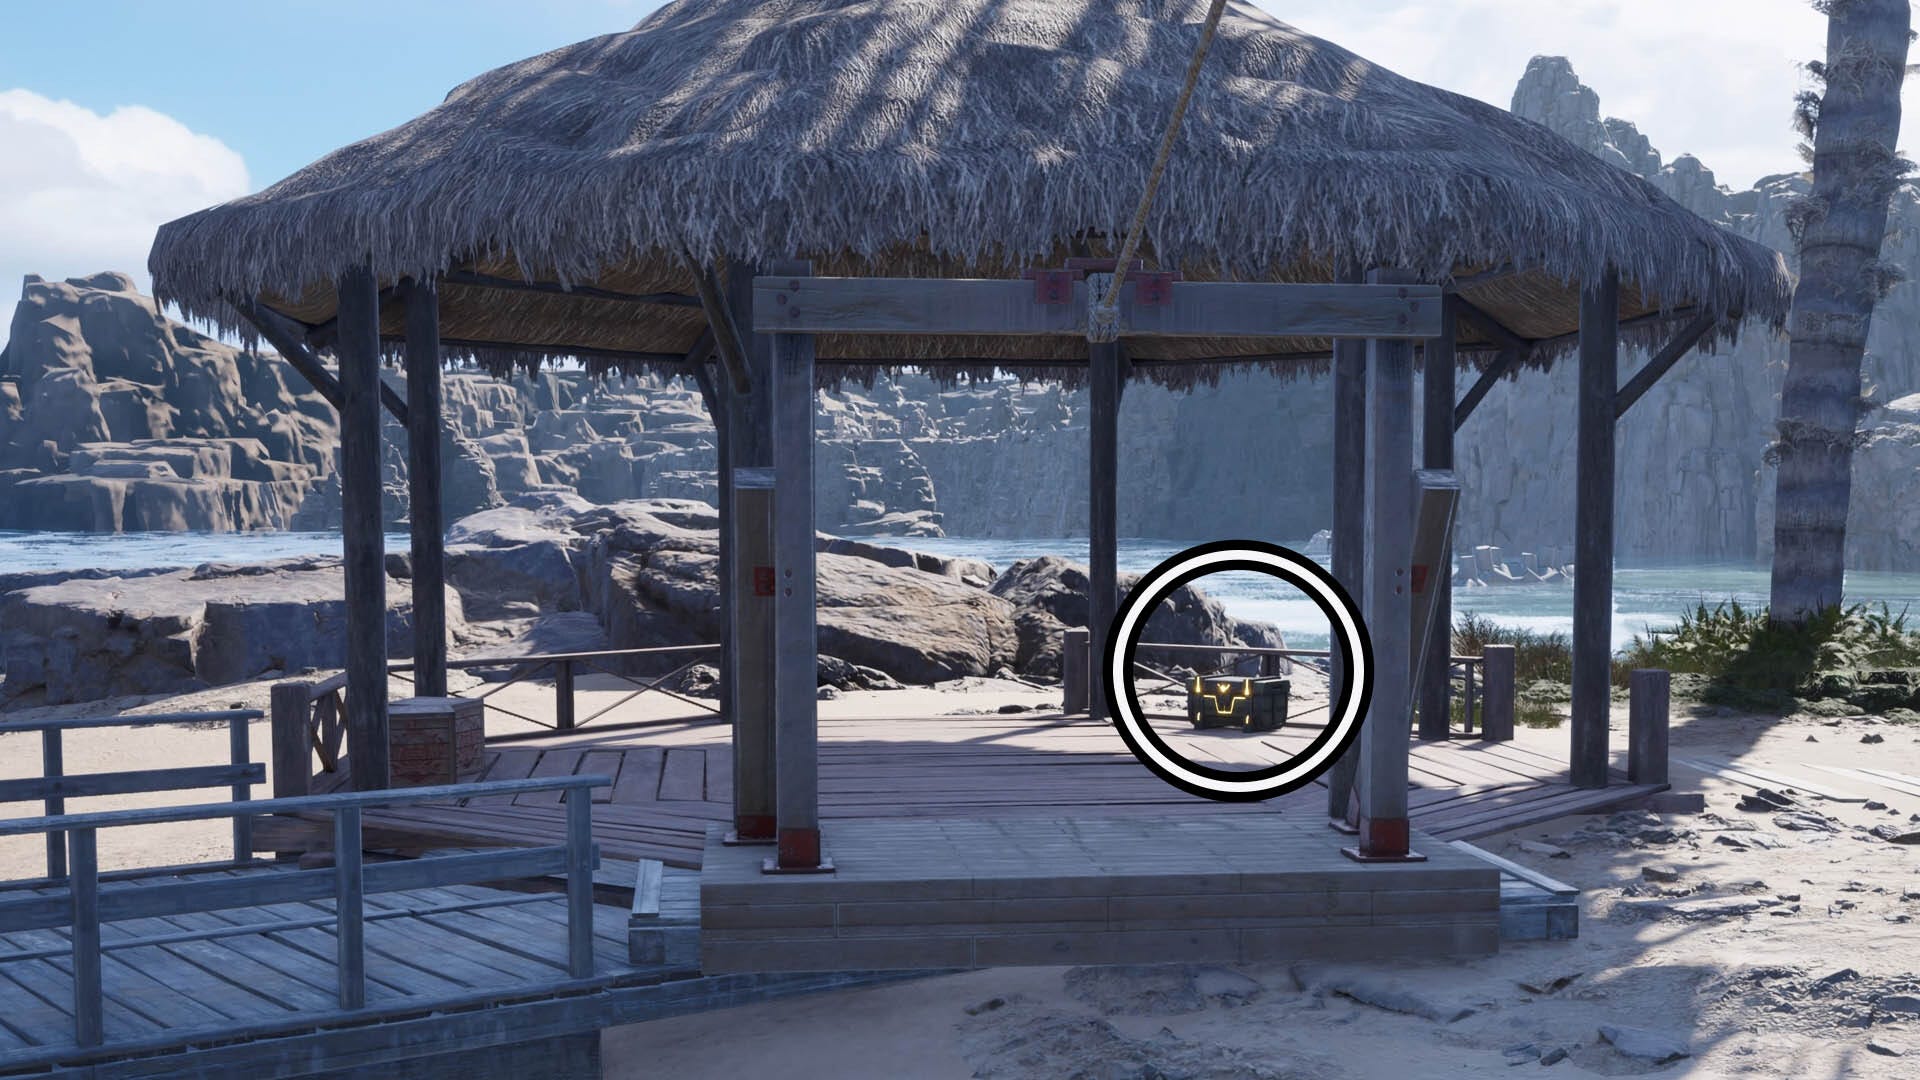
How to get all Twilight Hill chests in Final Fantasy 7 Rebirth
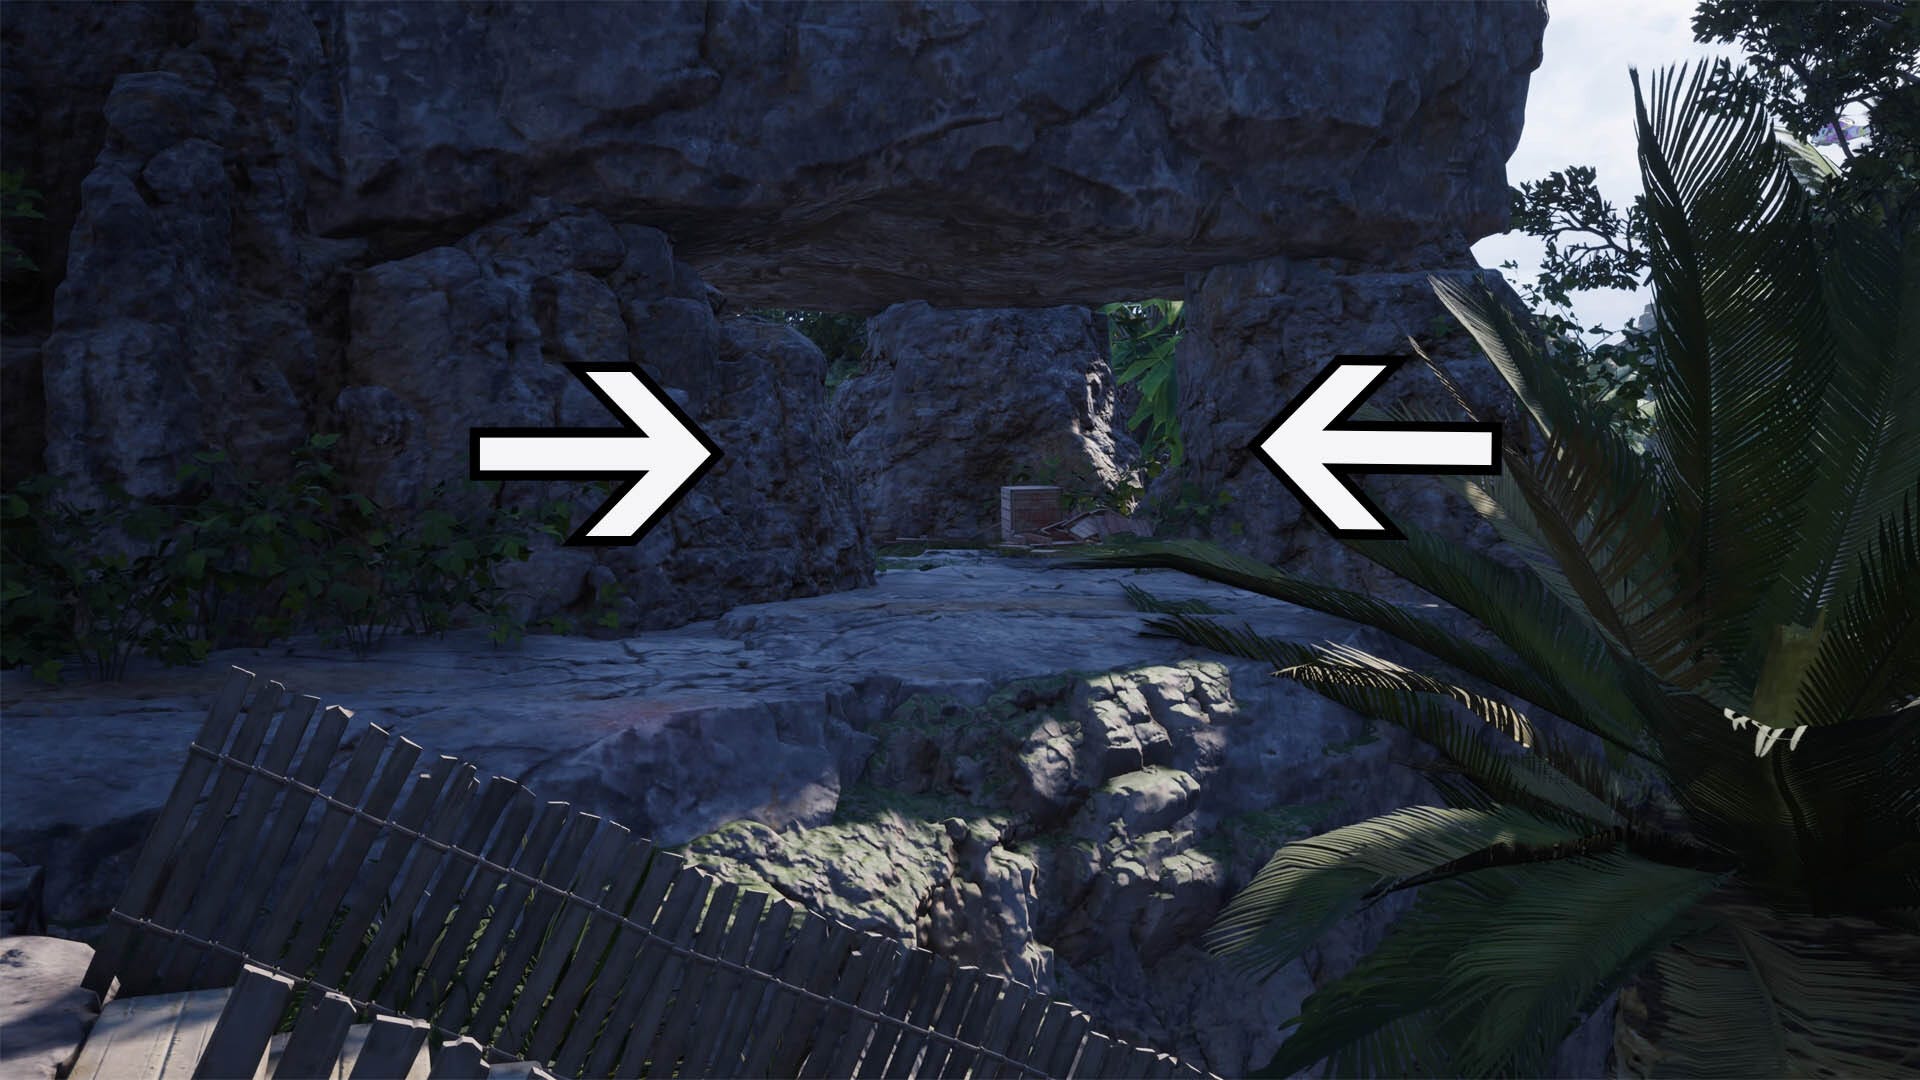
There are two chests at Twilight Hill. To find the first chest, go down the zipwire that leads to the rock formation the cache area is on. Then, from the end of this zipline, head slowly up the stairs on your left while looking to your right. You should eventually see an opening in some rocks here that conveniently look like a doorway.
Head through this opening and look left to find the chest.

To find the second chest, continue following the stair pathway upwards. You'll eventually reach the top of another zipwire, don't go down it. When you see this point, continue to follow the path to the right and you'll find the next chest.
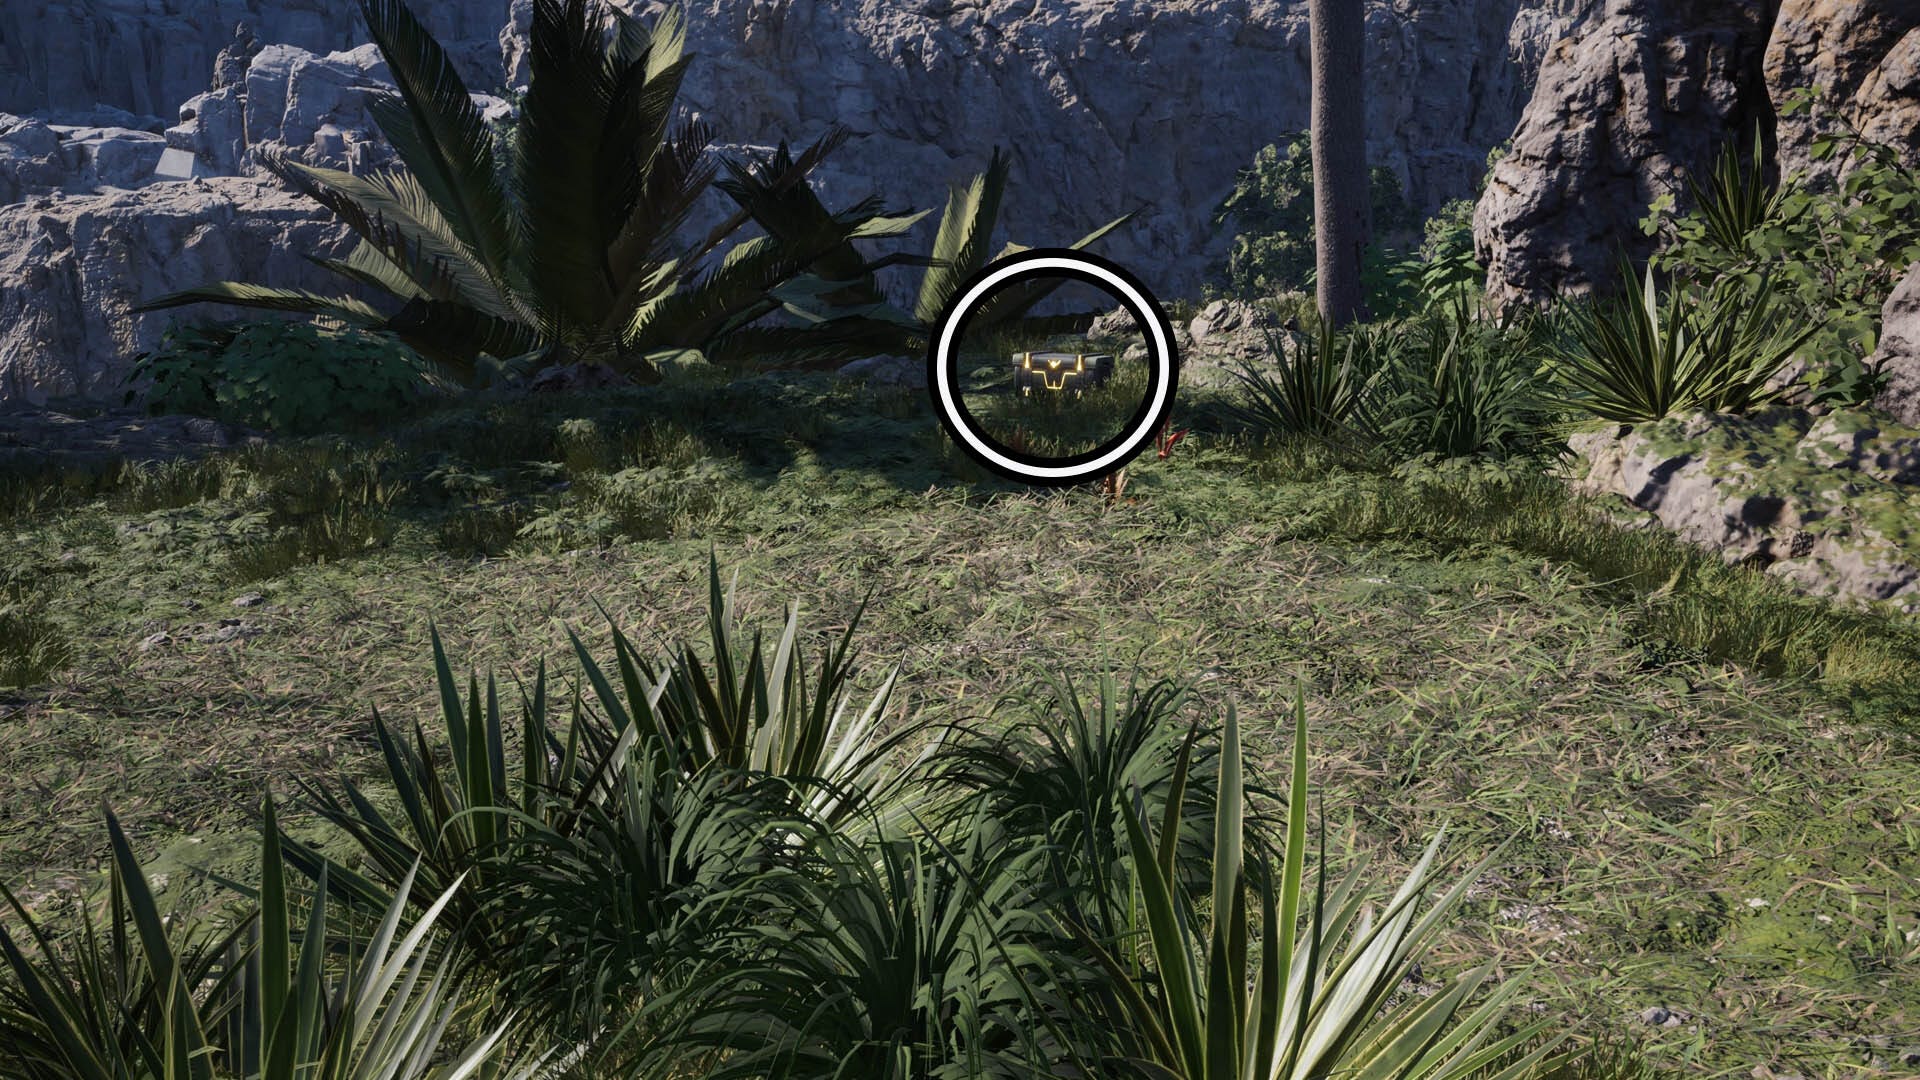
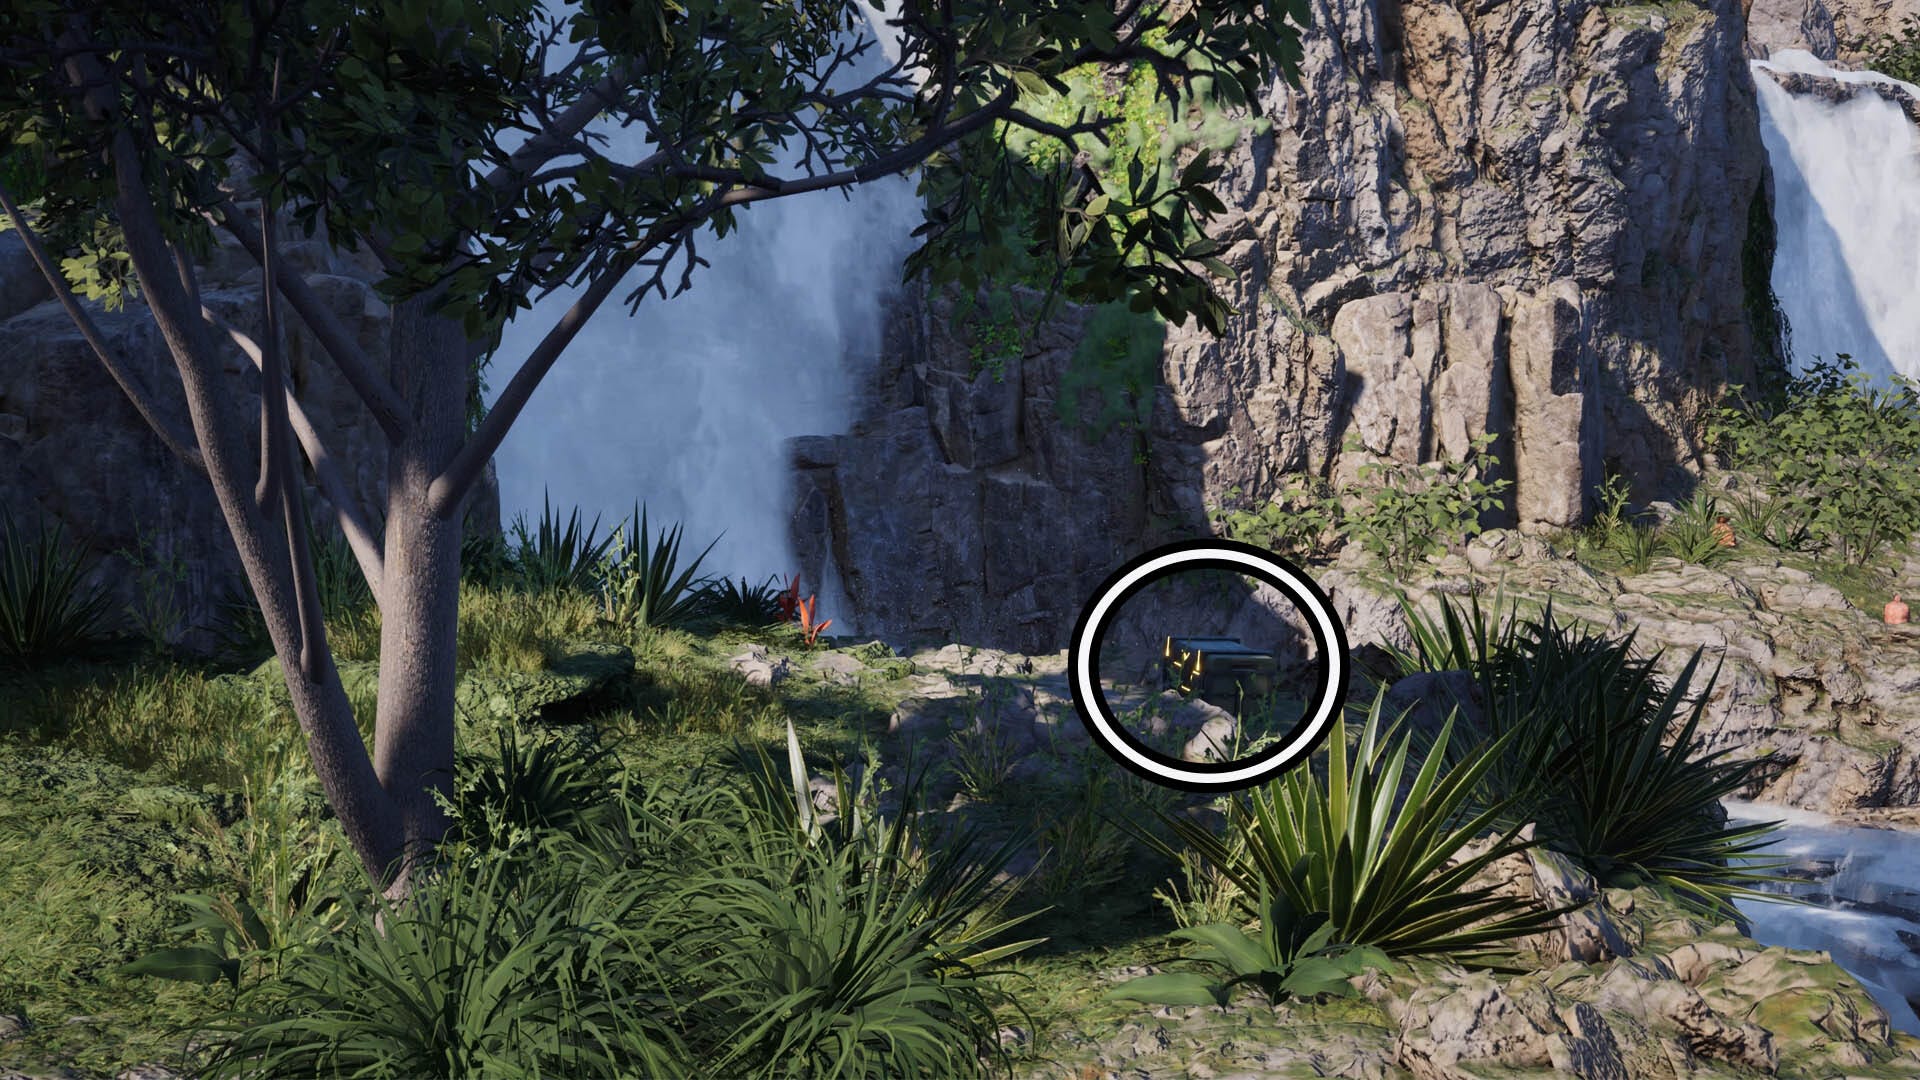
How to get all Sunrise Plateau chests in Final Fantasy 7 Rebirth
There are three chests at Sunrise Plataeu. When you get to the location, look for the area that's only accessible by climbing down some climb holds. There should be more climb holds leading upwards on the other side of this small section.
In this area, face the water of Costa Falls. One chest will be on the left side of the section you're standing on and the second chest will be to the right side of this area.
To find the third chest, climb up the climb holds that will lead you closer to the waterfall. The chest is on the edge of the section up here that's near the waterfall.
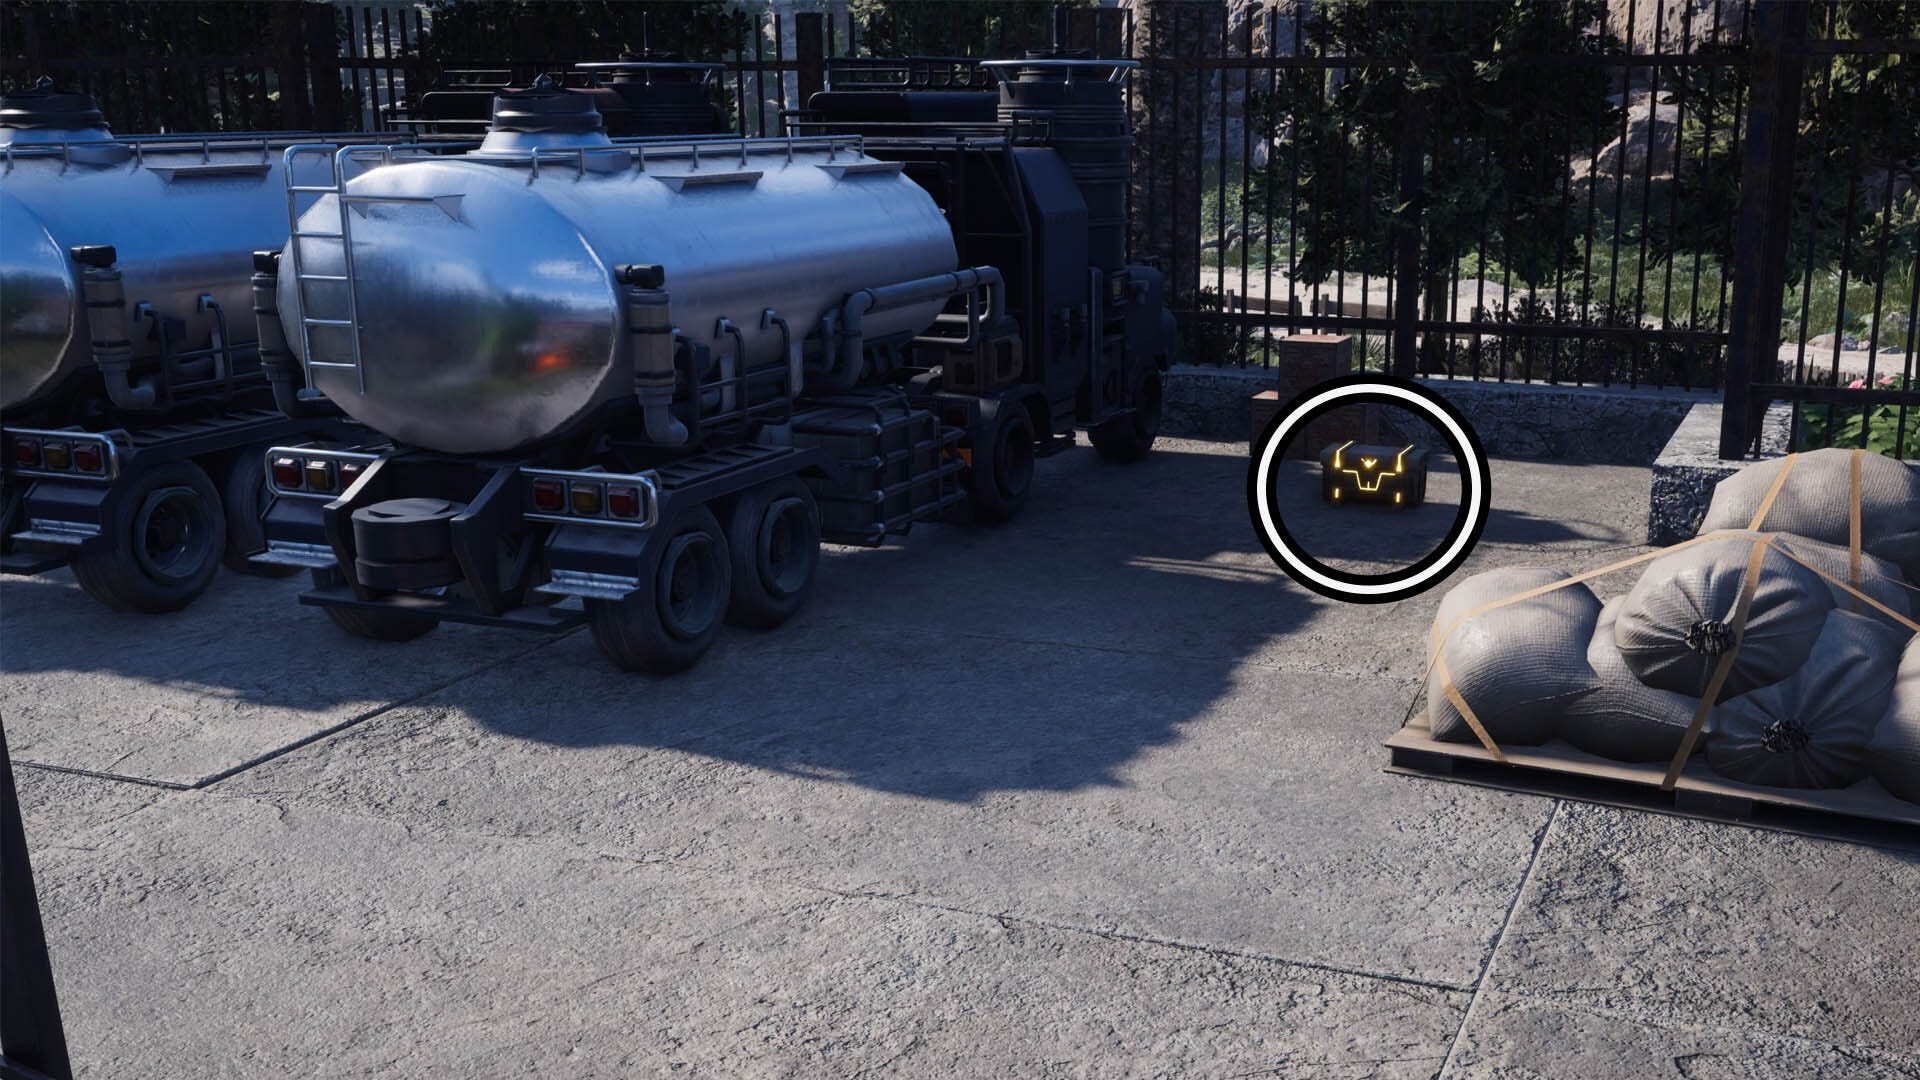
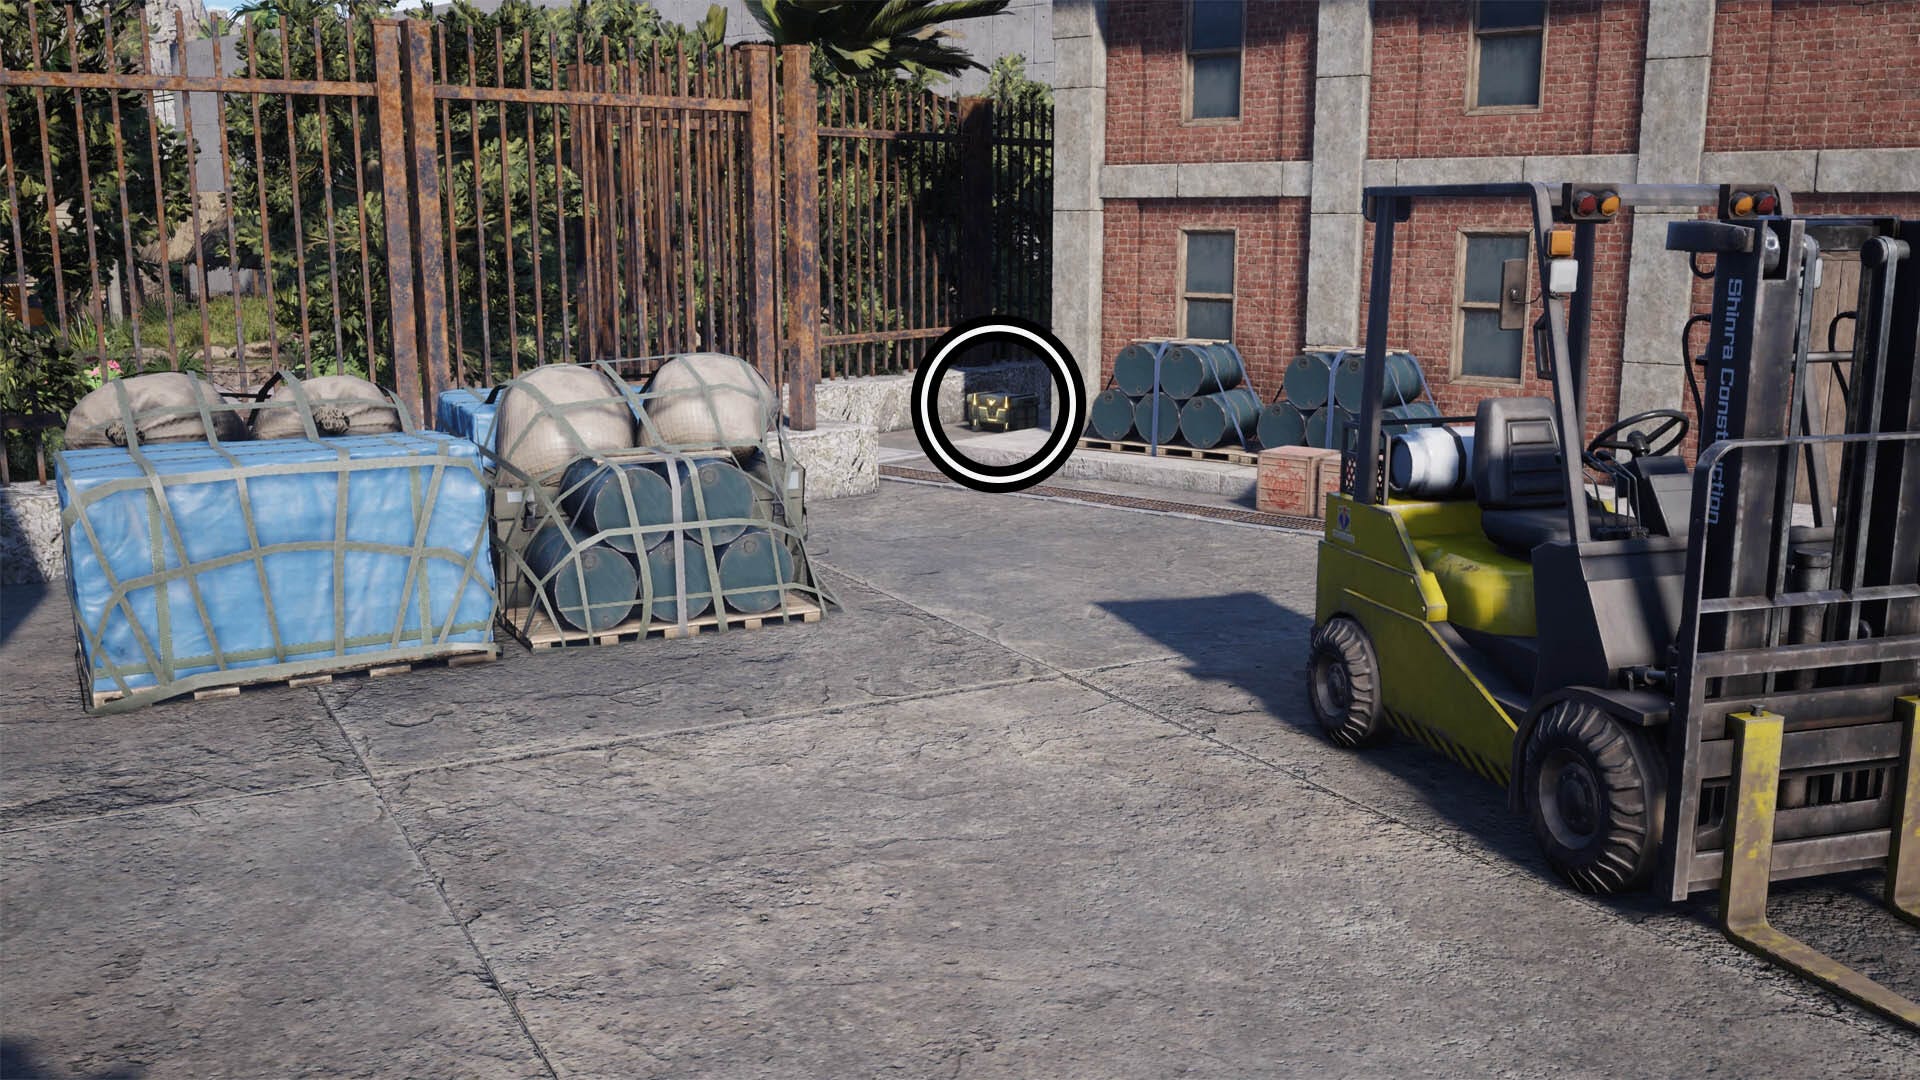
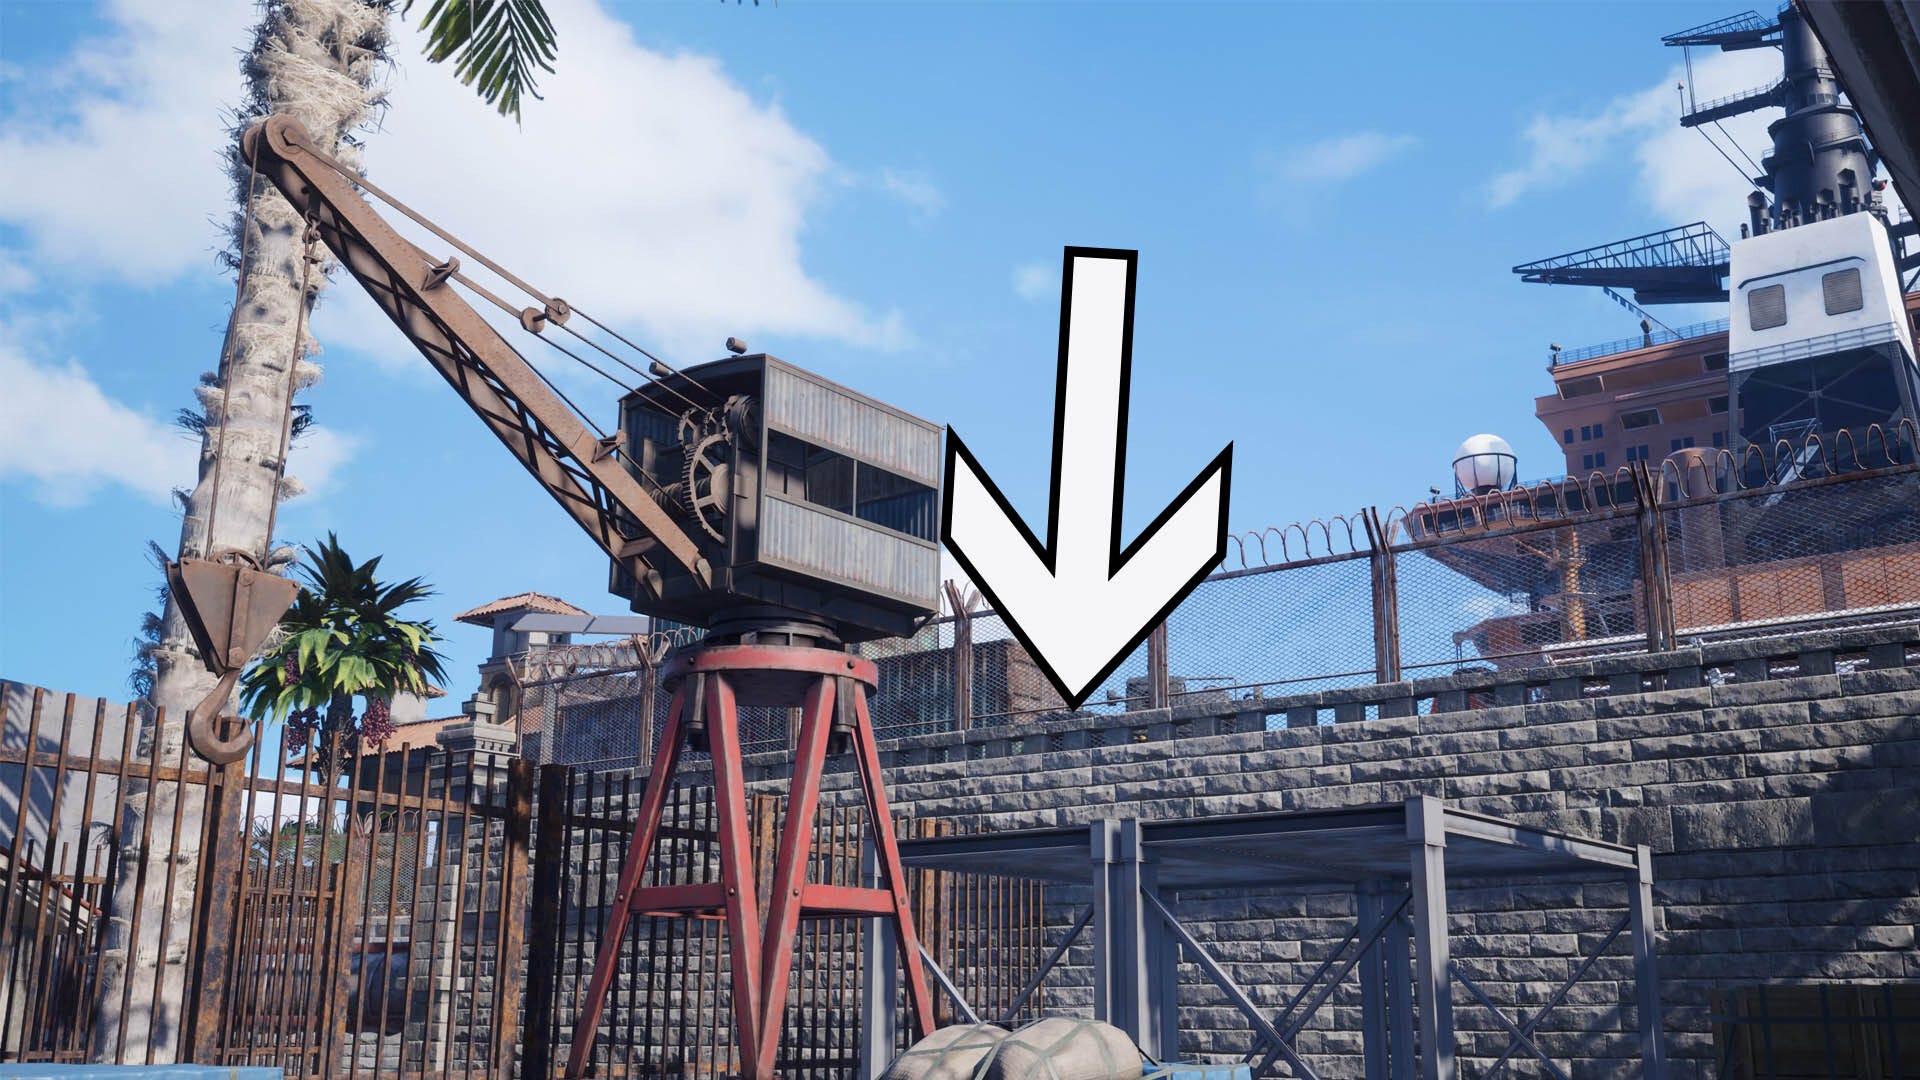
How to get all Seabreeze Storehouse chests in Final Fantasy 7 Rebirth
There are three chests at Seabreeze Storehouse. To find the first chest, head in through the main entrance to this area and go to your left. Keep walking past the tanker trucks here and look left, the chest is on the ground beside the last truck.
To find the second chest, turn around from where you found the first one and look for the forklift. Stand at the forklift and look north east, you should be able to see that the next chest is tucked beside the main building.
Head back to the main entrance and look straight ahead of you, you should see a small red crane opposite you. The final chest can be found on top of the grey shelter behind this crane.
How to get all Rustladen Reservoir chests in Final Fantasy 7 Rebirth
There are, again, three chests at Rustladen Reservoir. The first chest can be found beside the boarded up hut with the small antennae tower on top of it.
The second chest can be found beside the boarded up hut with the satellite dish on top of it, opposite a tall cylindrical container.
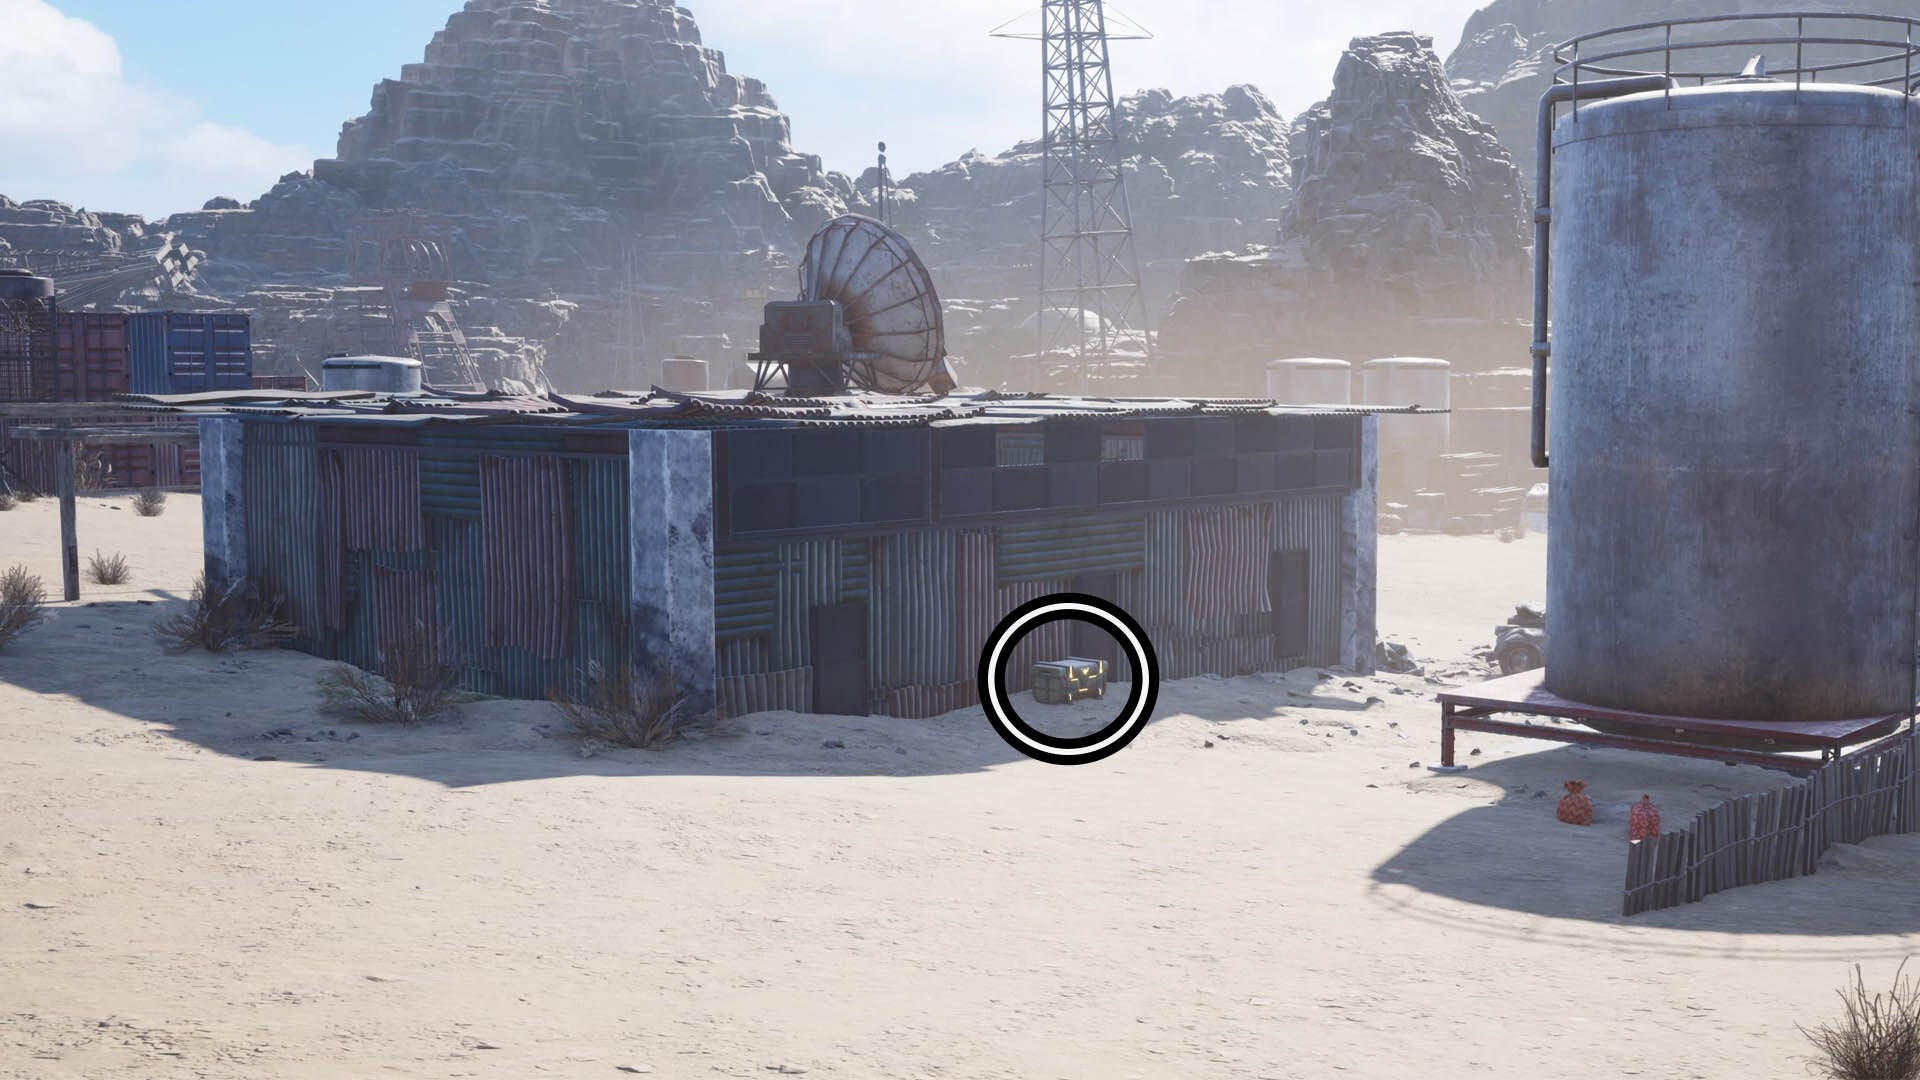
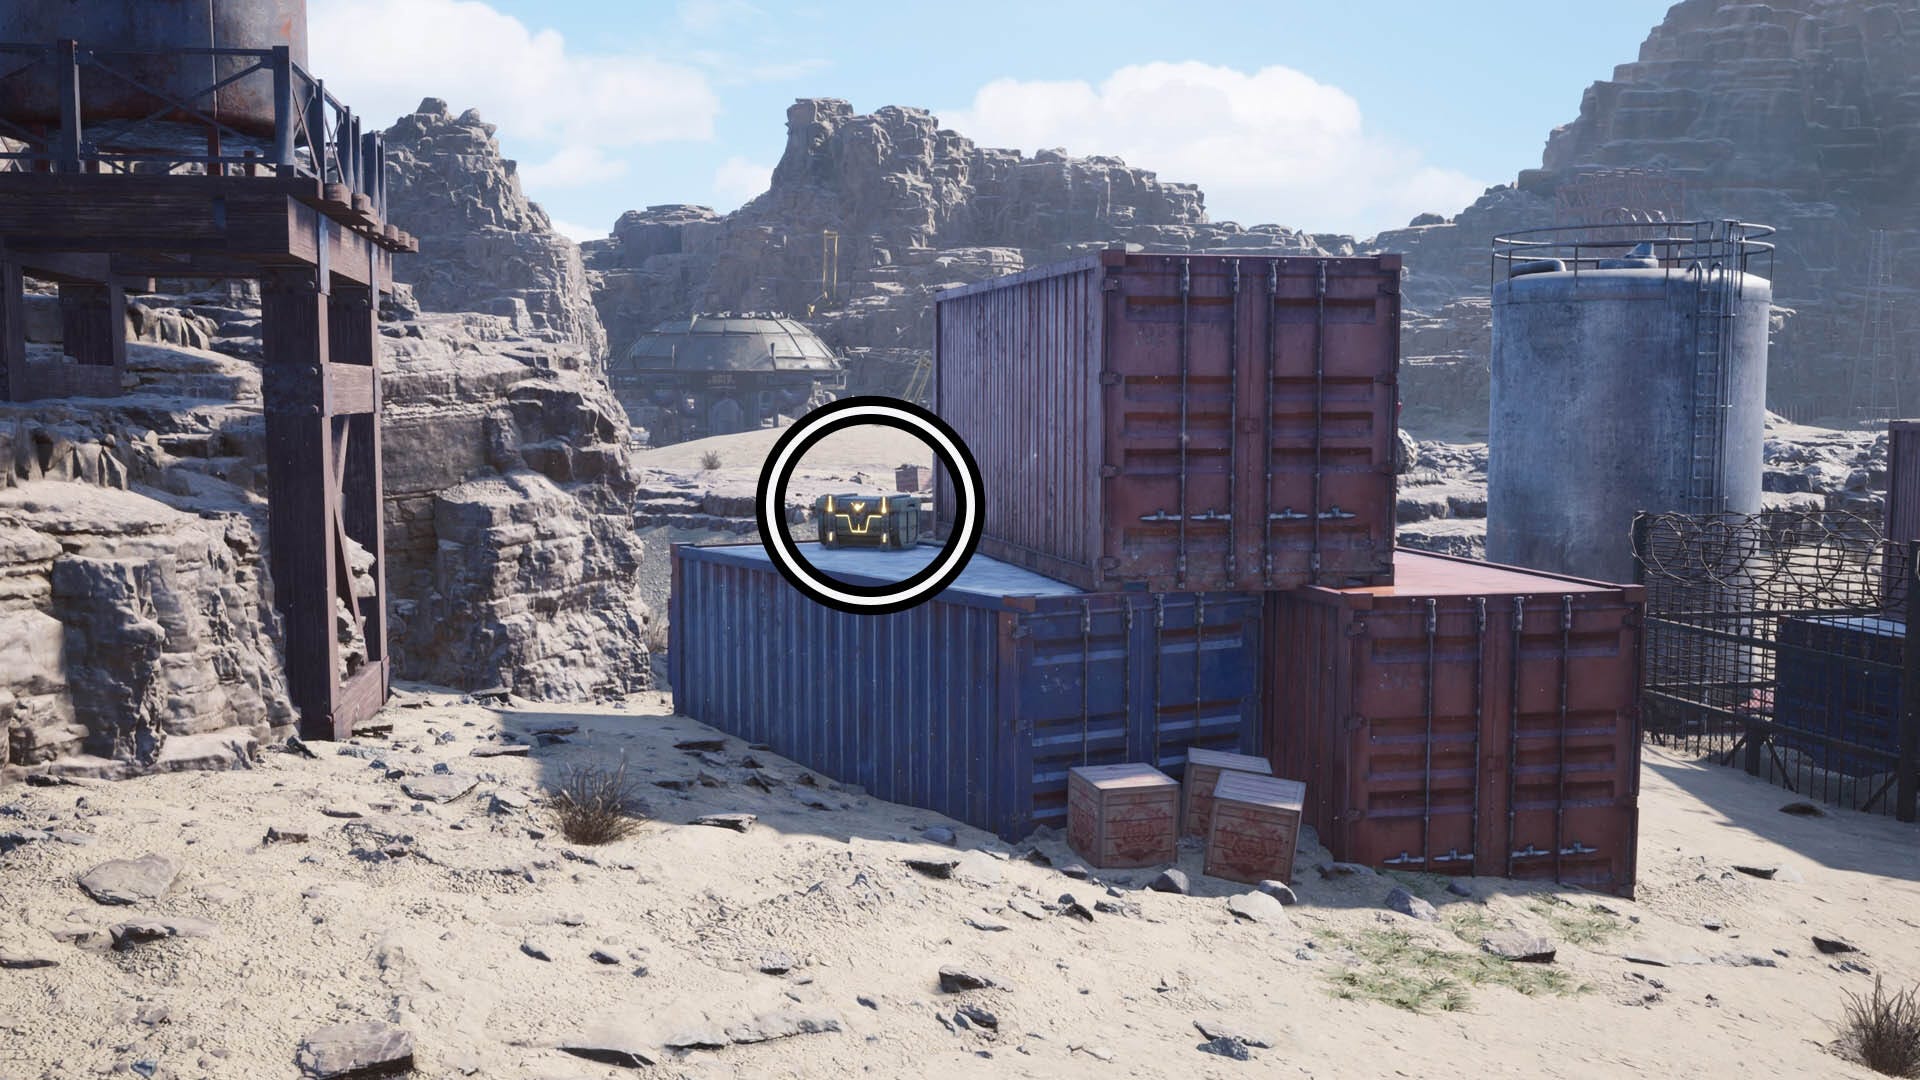
The third chest can be found on top of a blue shipping container on the stack of shipping containers. There are two red ones stacked on top of eachother that can hide the third blue one from certain angles.
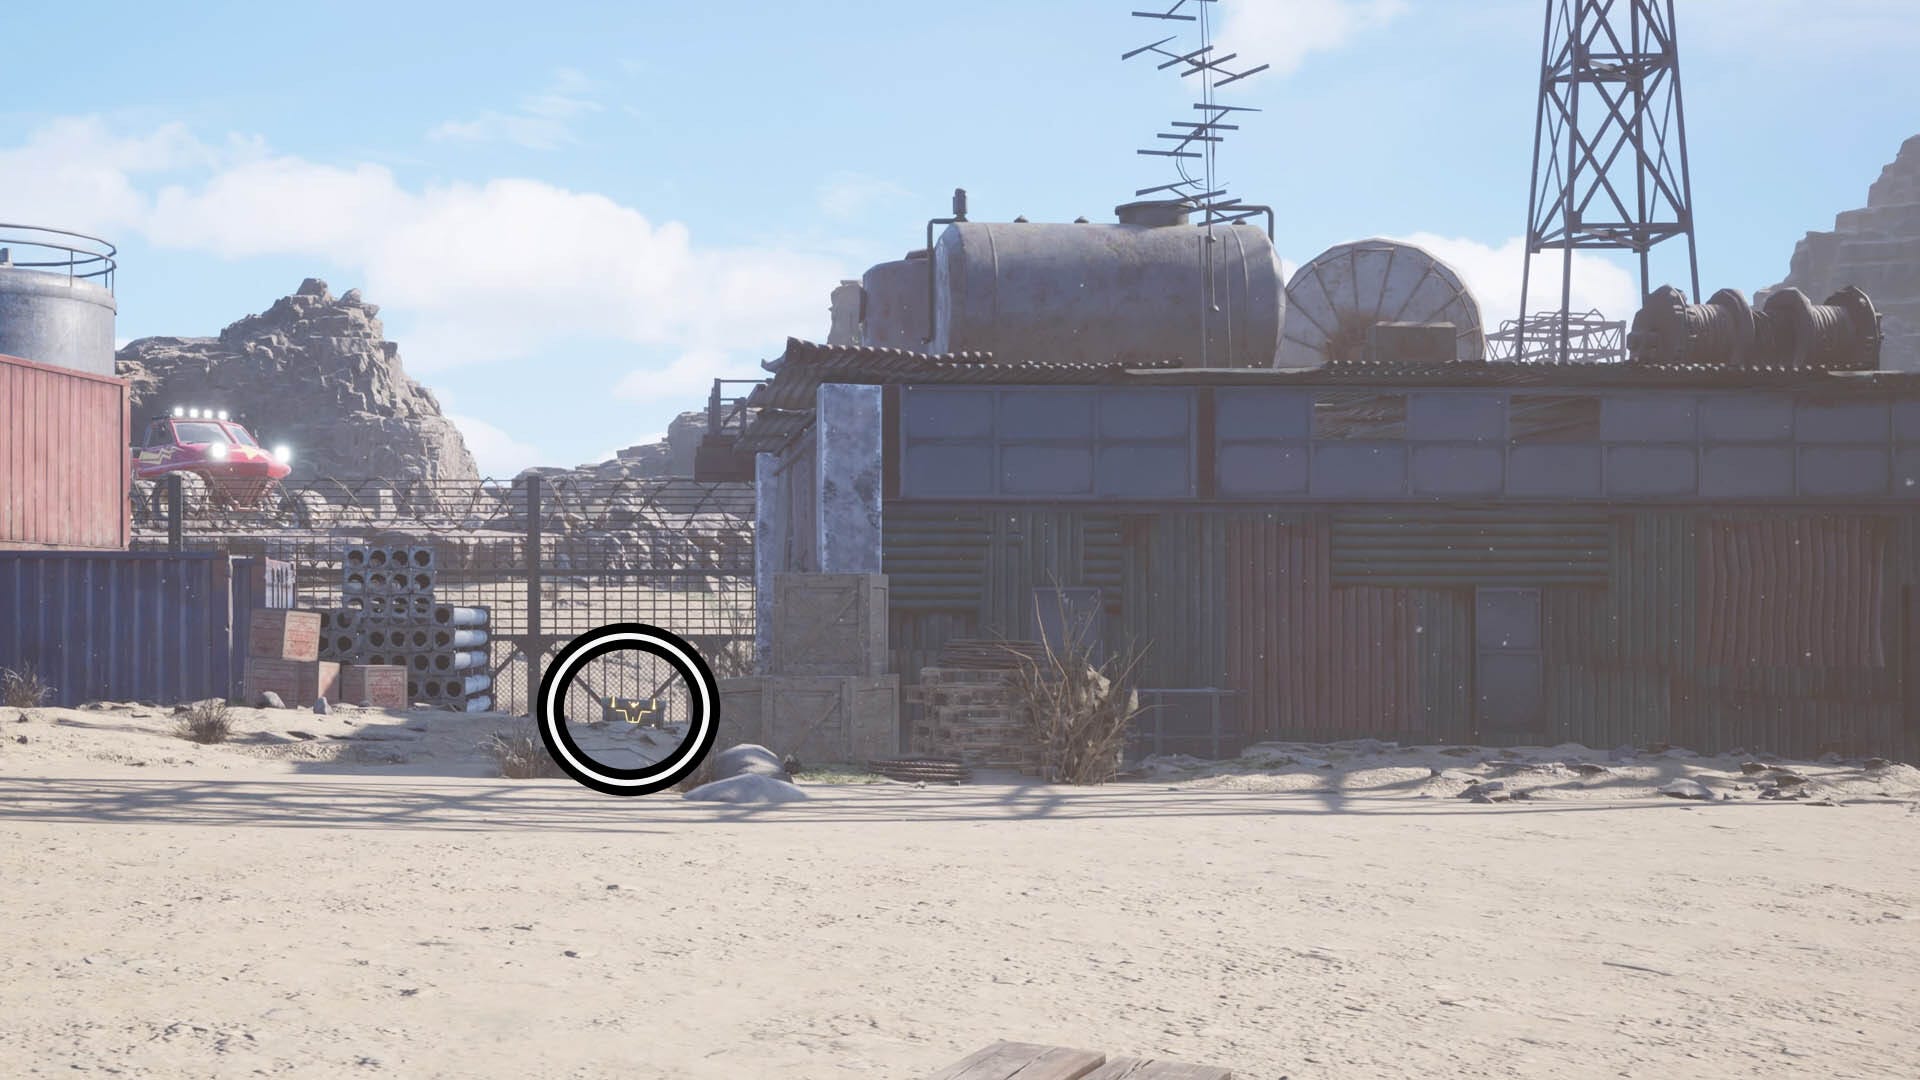
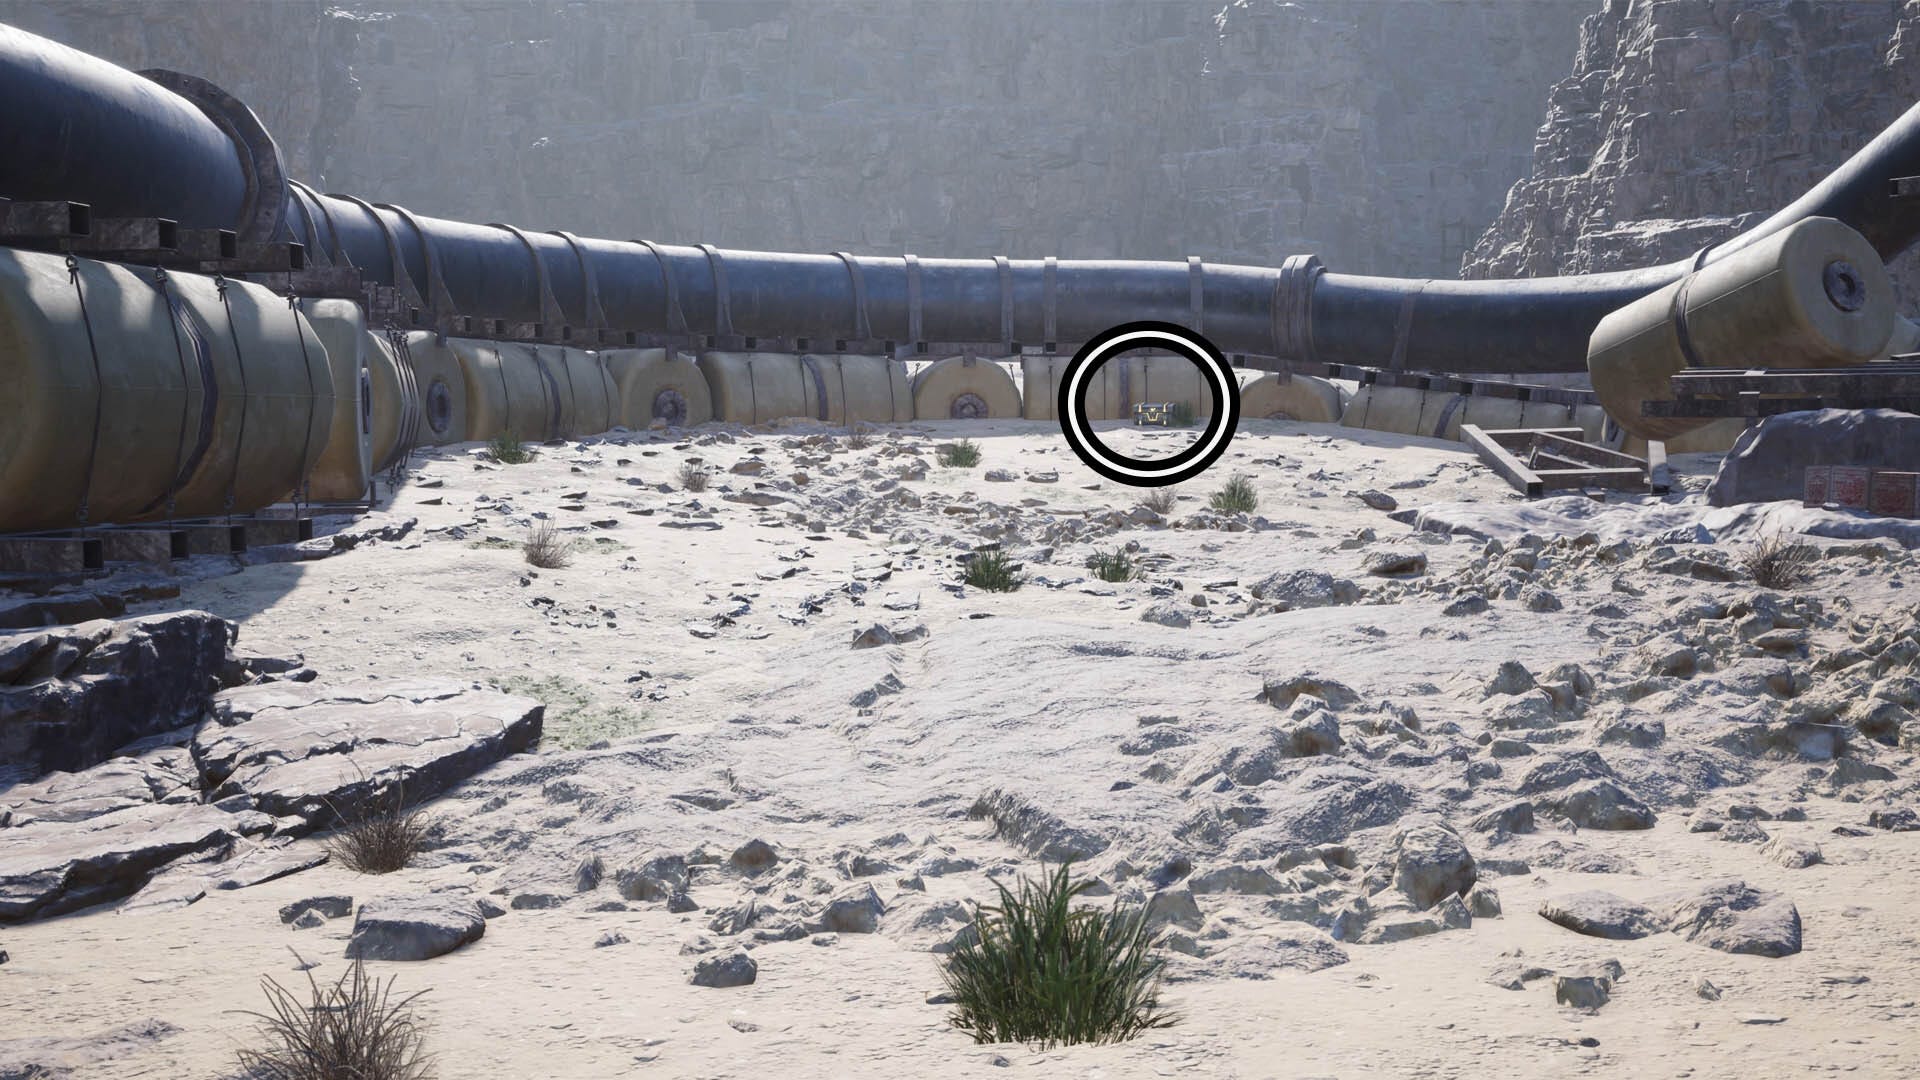
How to get all Desert Watermain chests in Final Fantasy 7 Rebirth
There are three chests at Desert Watermain. The first chest can be found beside the control unit on the main mechanism of the Watermain.
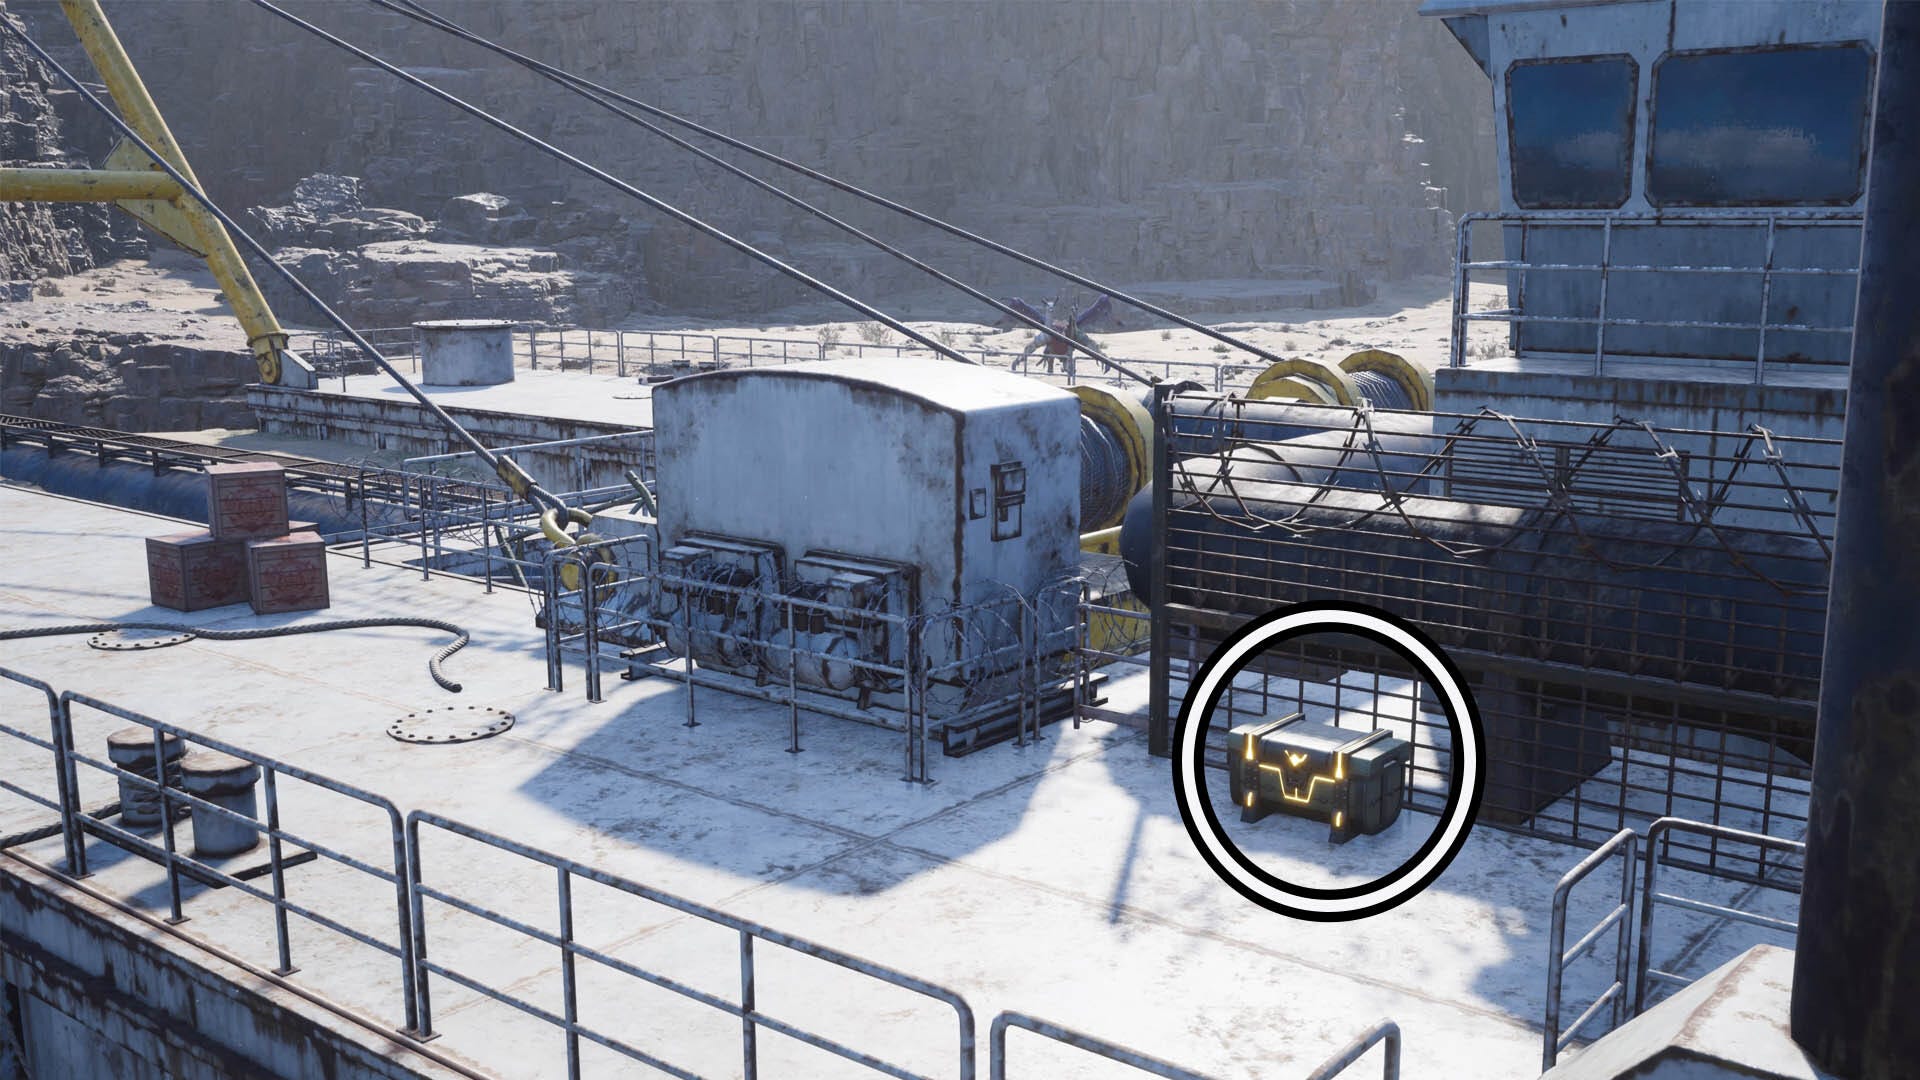
To find the second and third chests, follow the large pipes leading away from the control unit and look for either a gap to walk through or simply find a point where you can climb over them. If you're looking for a gap, like we did, there's one against the control unit where the pipes enter it.

For the second chest, head through the gap mentioned above and look left.
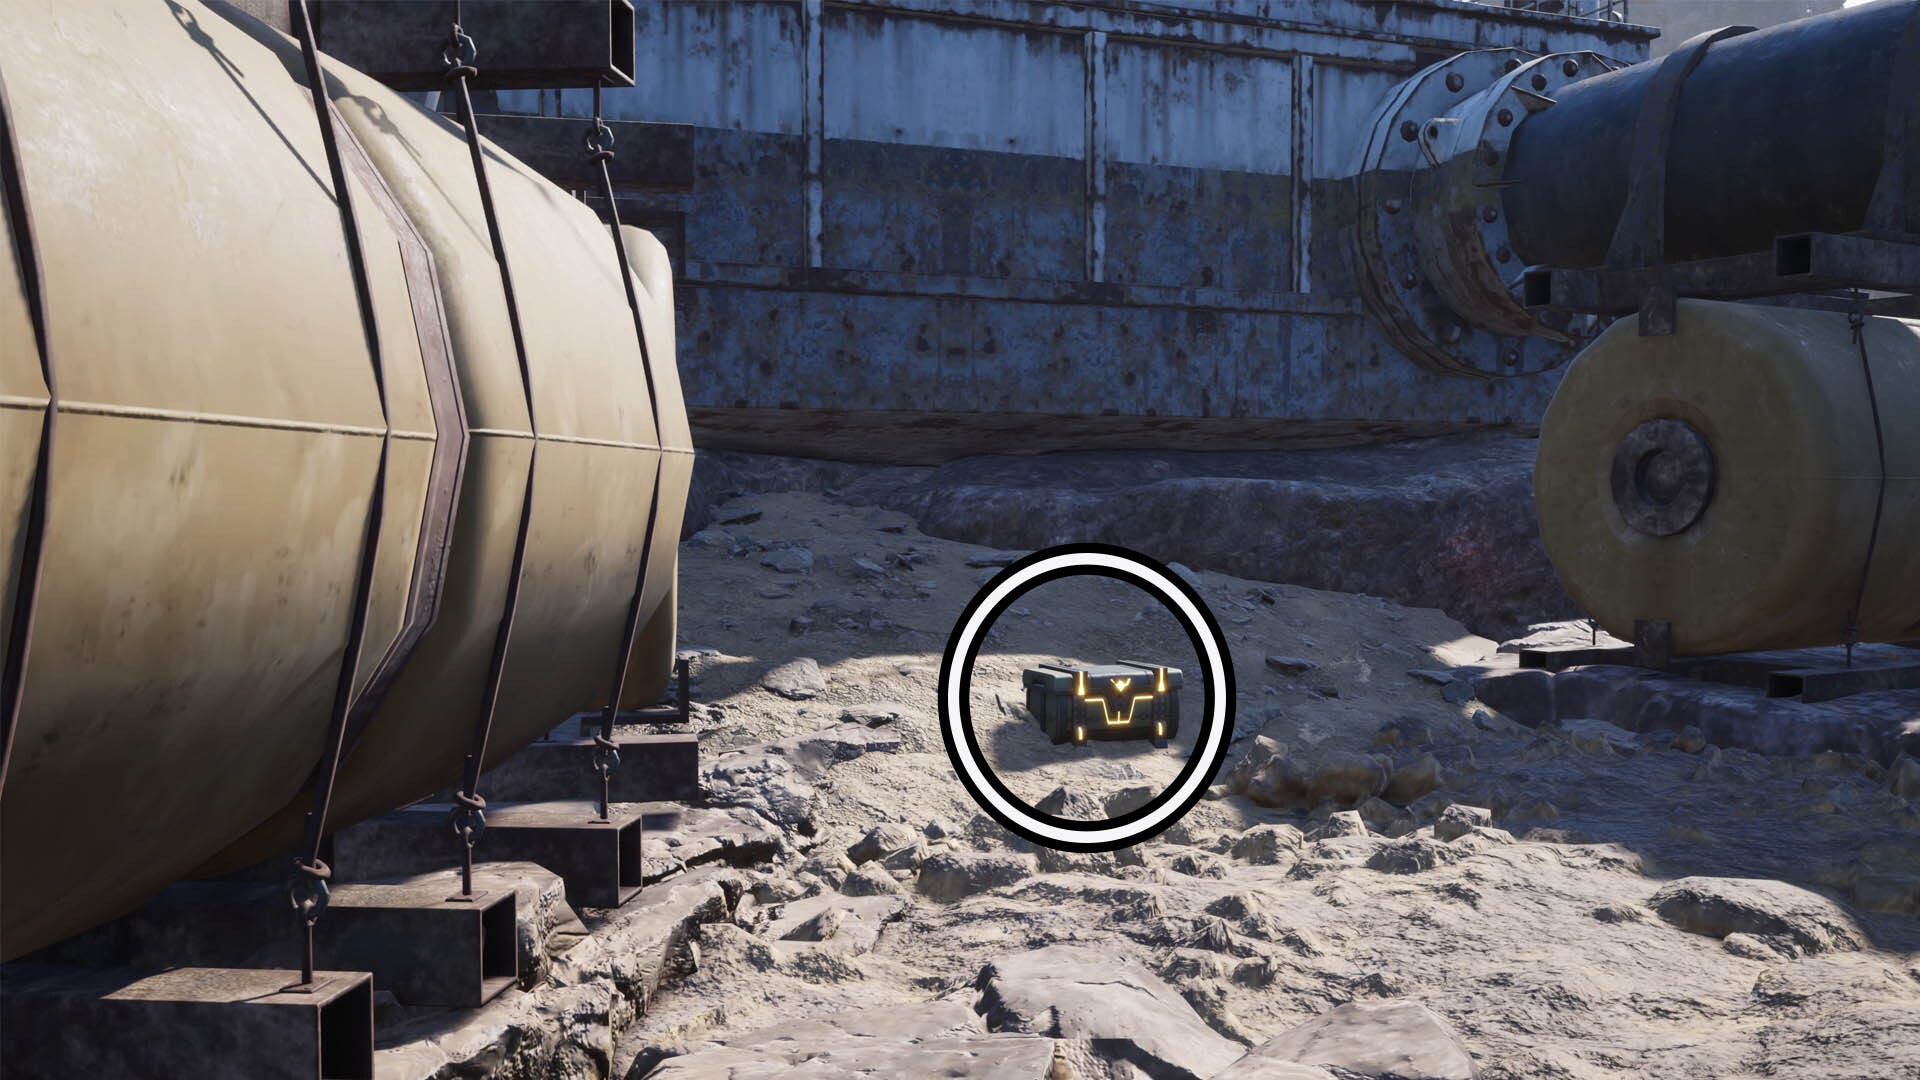
Then, from the second chest, follow the pipe on the right until it leads you to the next chest that rests against that pipe.
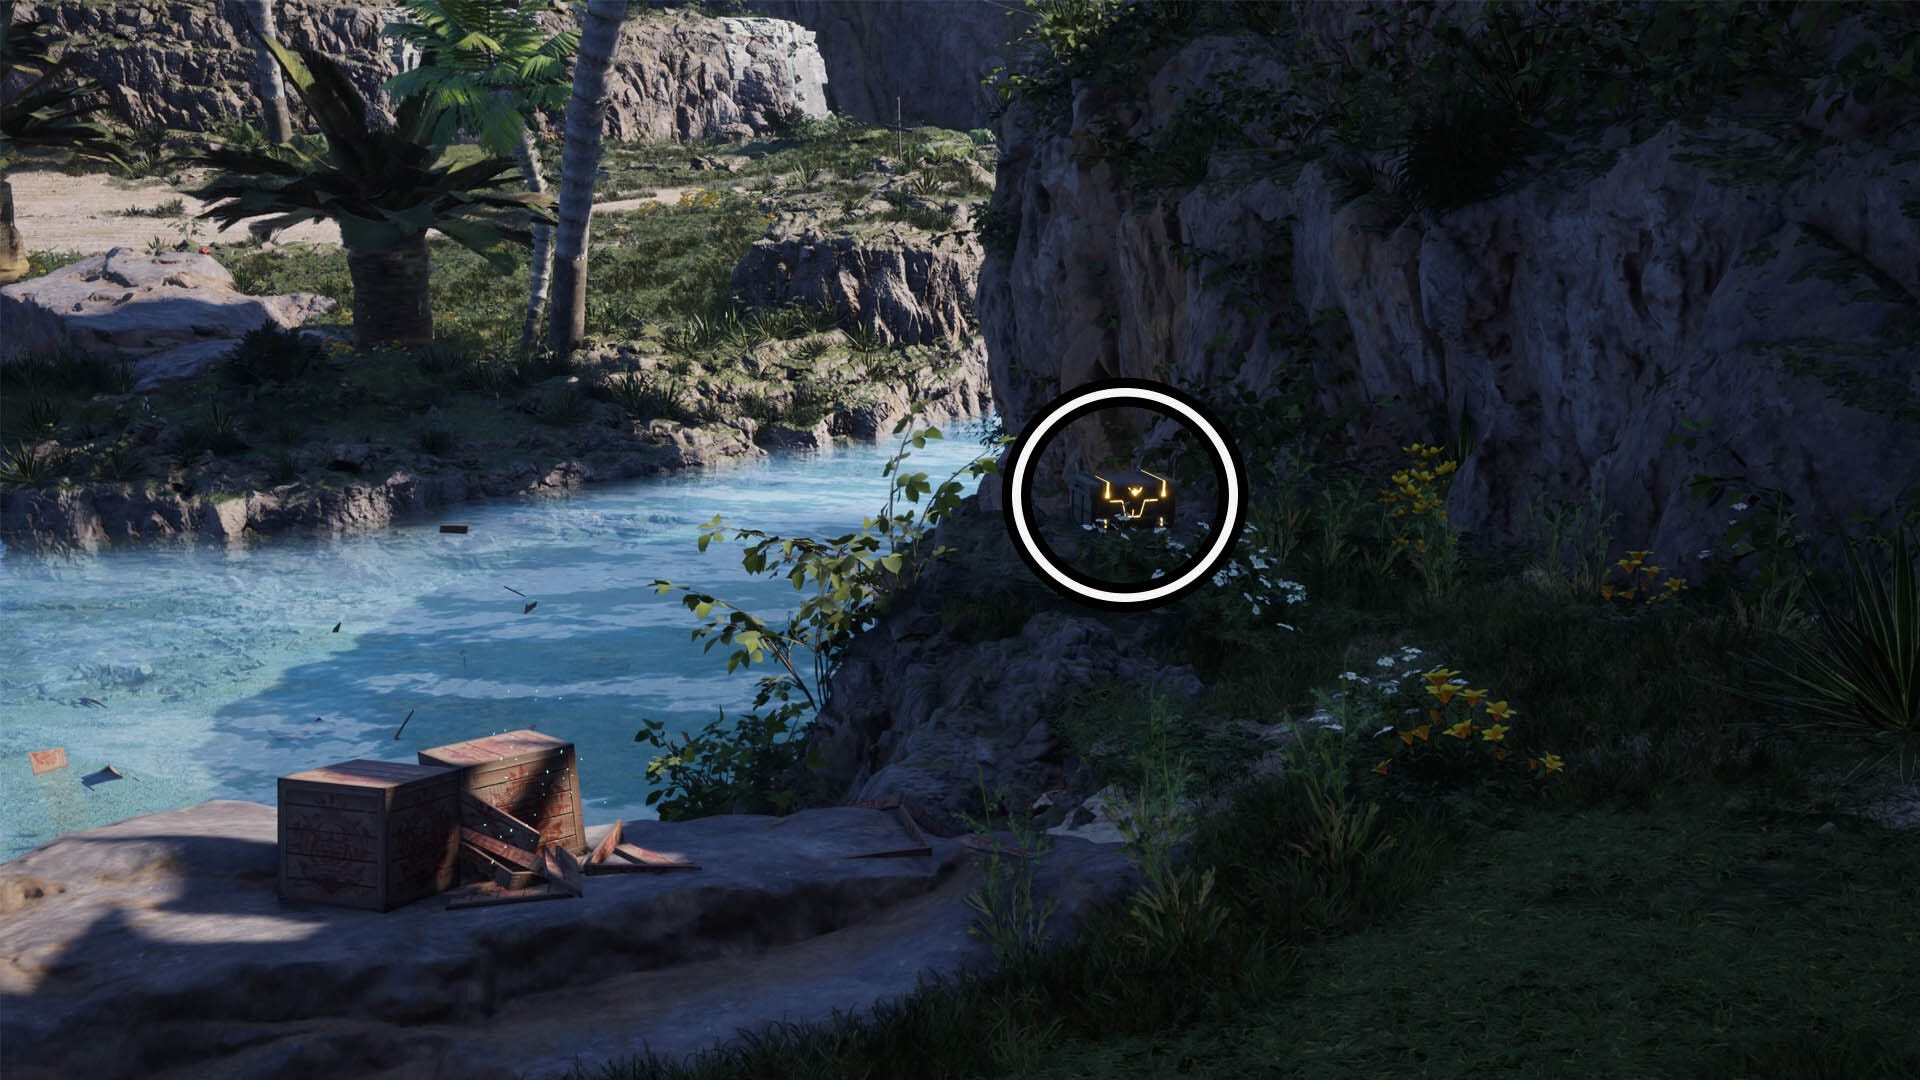
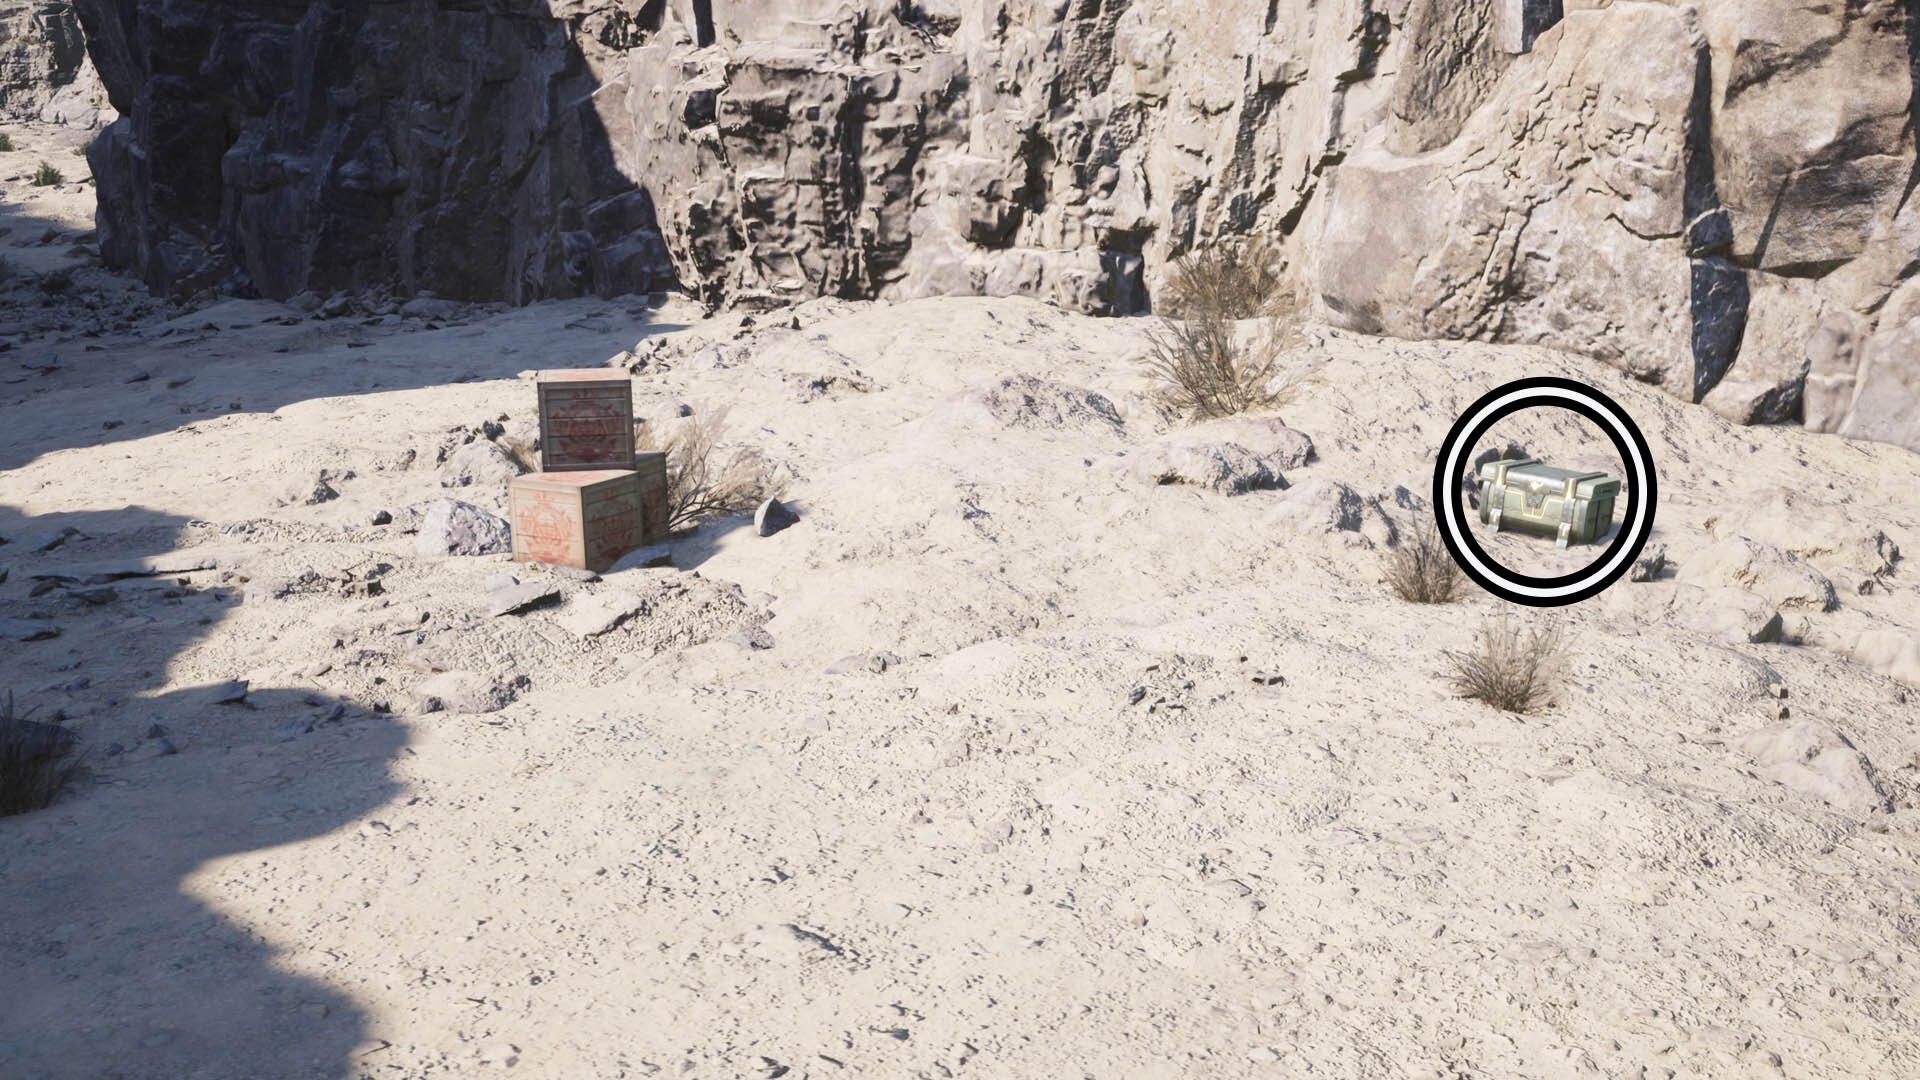
How to get all Drainwater Drift chests in Final Fantasy 7 Rebirth
There are two chests to find at Drainwater Drift. When you get to the area, head straight through the metal gate facing the water and then look to the right to find the first chest.
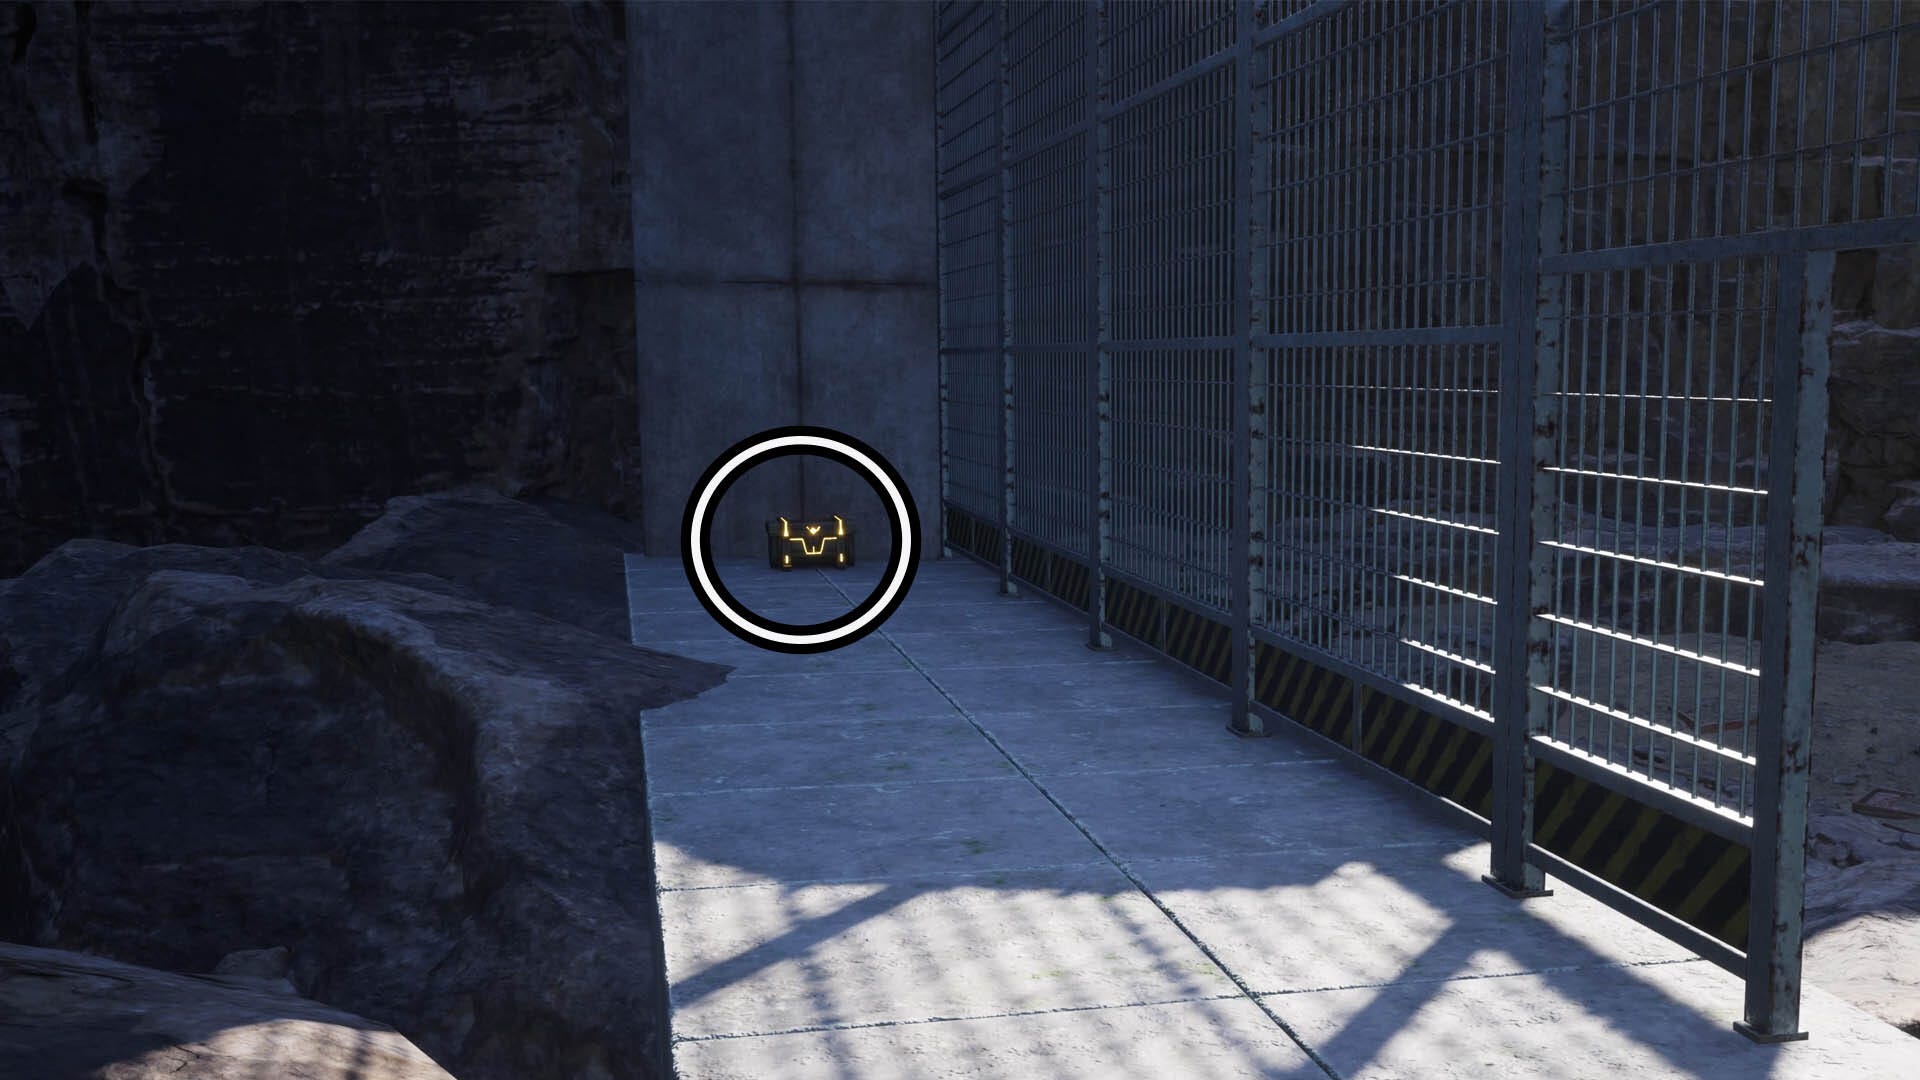
Then, go back through the metal gate so you're facing the desert landscape again and look to your right. The next chest should be near the cliff wall by some Shinra boxes.
That's it for now! If you're looking to find more hidden goodies, check out our guides listing all of the Grassland Cache locations and all of the Junon Cache locations. Also, if it's upgrades you're in the mood for, take a look at our Folios explainer.