Stellar Blade Altess Levoire Laser Puzzle solution
How to solve the Laser Puzzle to get the second Hyper Cell.

The Altess Levoire Laser Puzzle in Stellar Blade stands between you and the second Hyper Cell location in the main story.
Inside this Stellar Blade location you cannot use your blade or drone scan abilities, so all you've got is a weaponised drone and your own instincts for solving the problems standing in your way.
Without further ado, we're here to show you how to solve the Altess Levoire Laser Puzzle solution in Stellar Blade.
On this page:
How to turn the Laser on in Altess Levoire in Stellar Blade
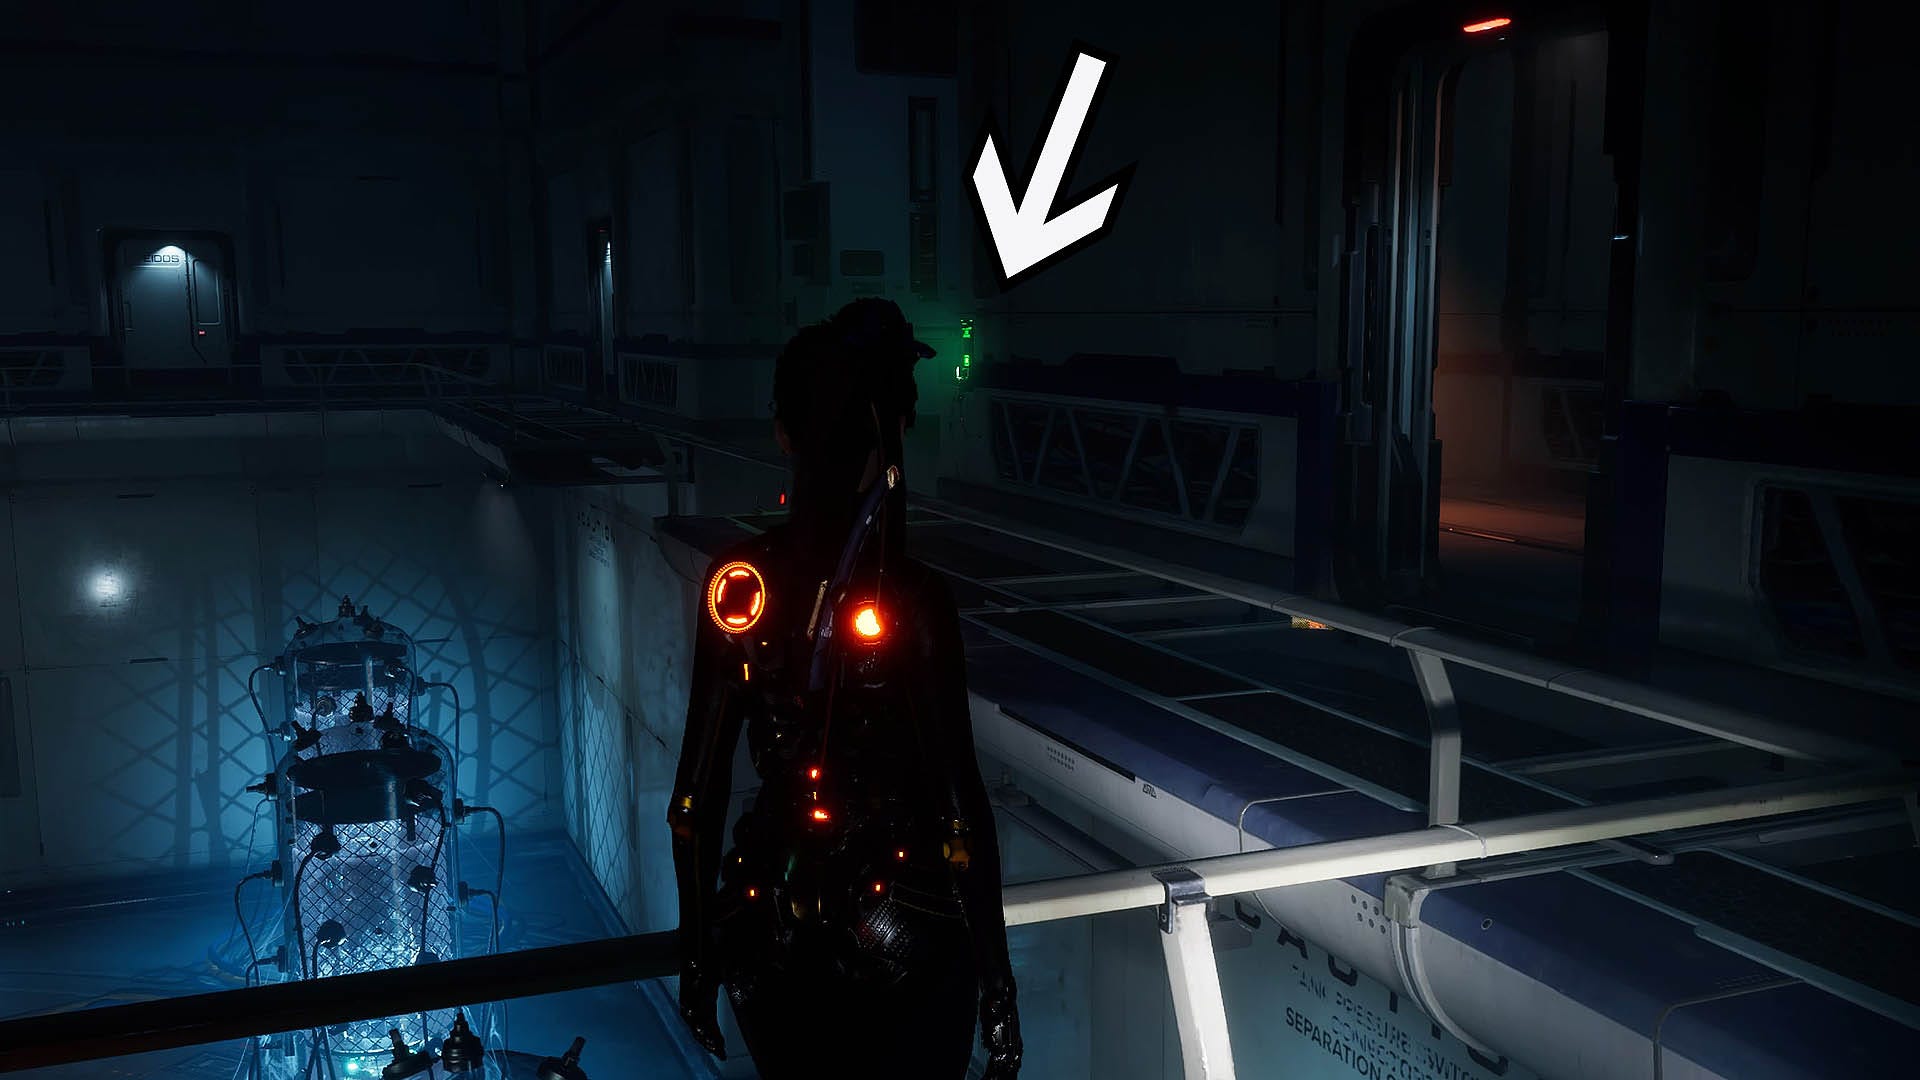
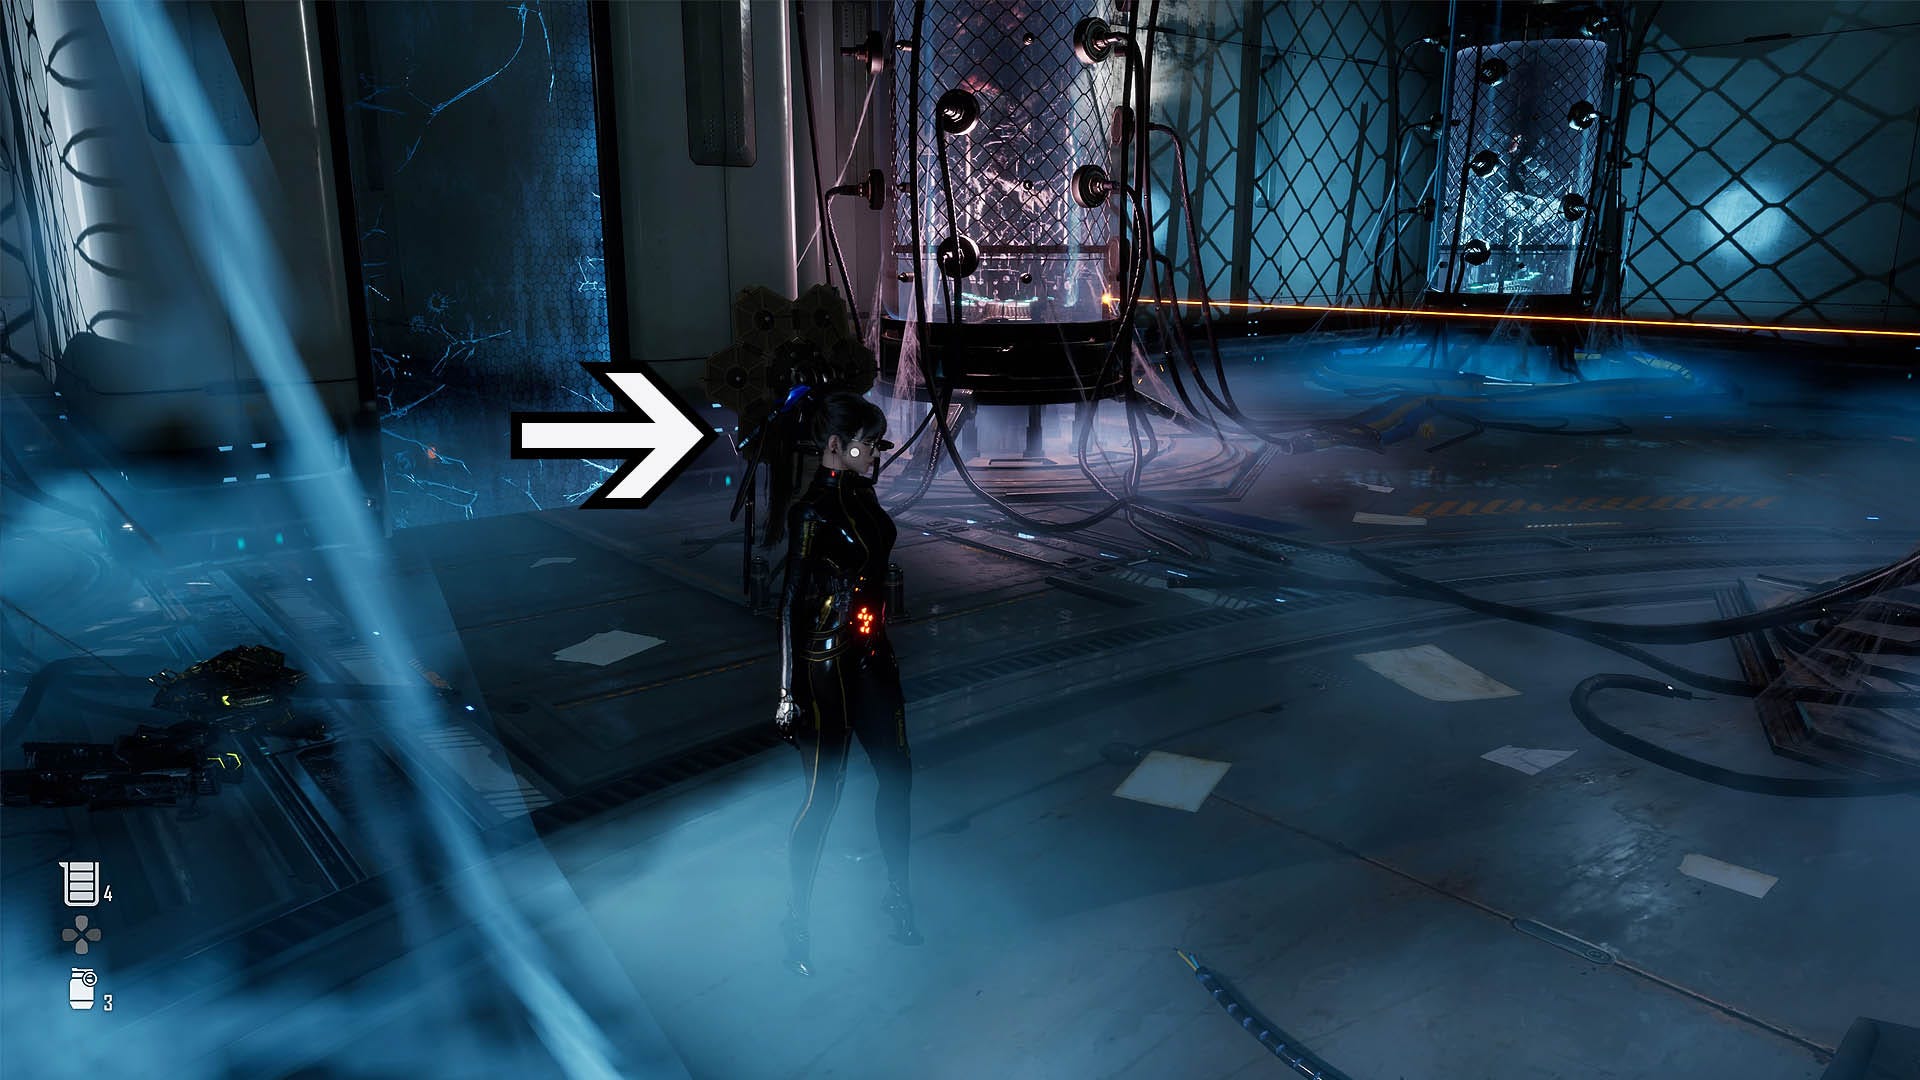
To turn the Laser on in Altess Levoire for the Stellar Blade puzzle to get to the second Hyper Cell you need to find the activation switches on the second floor of this room.
To find the two activation switches you need to stand at the entrance to the area and look to your right. You should see a ladder here.
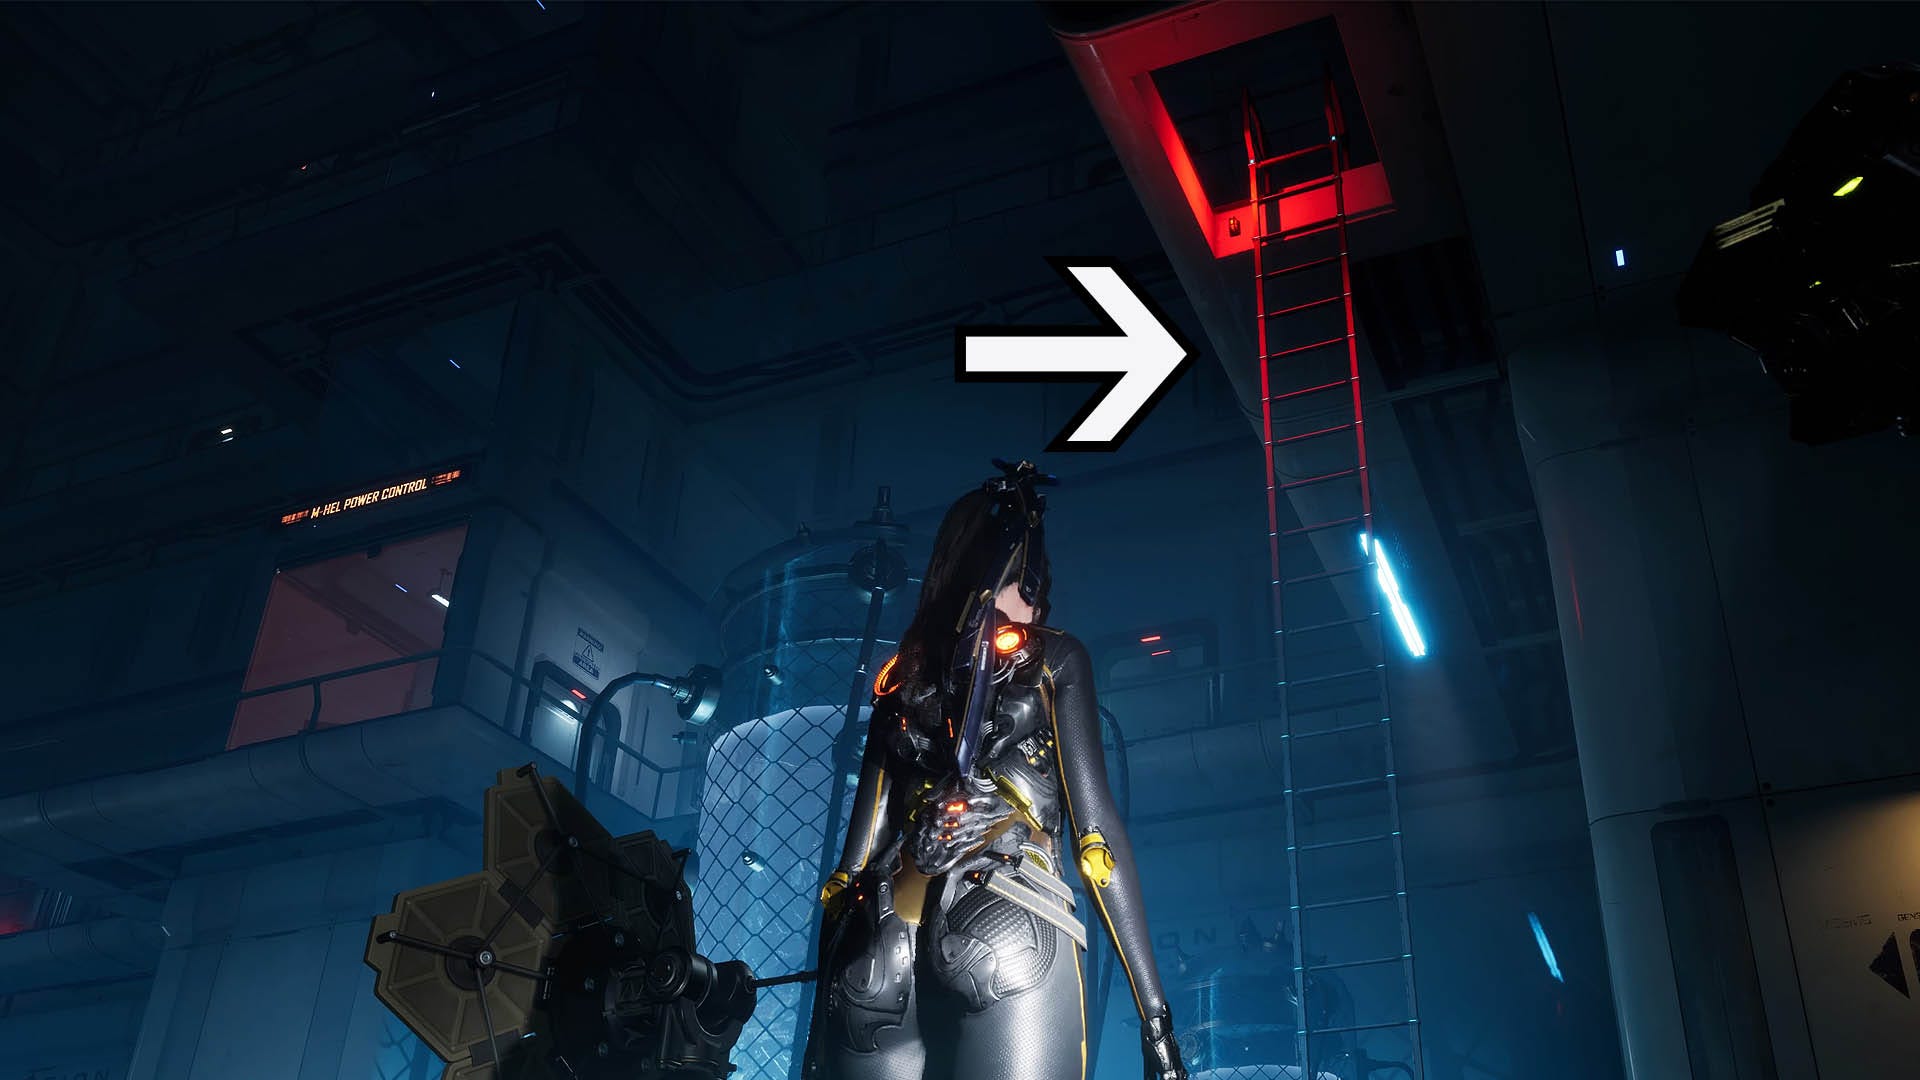
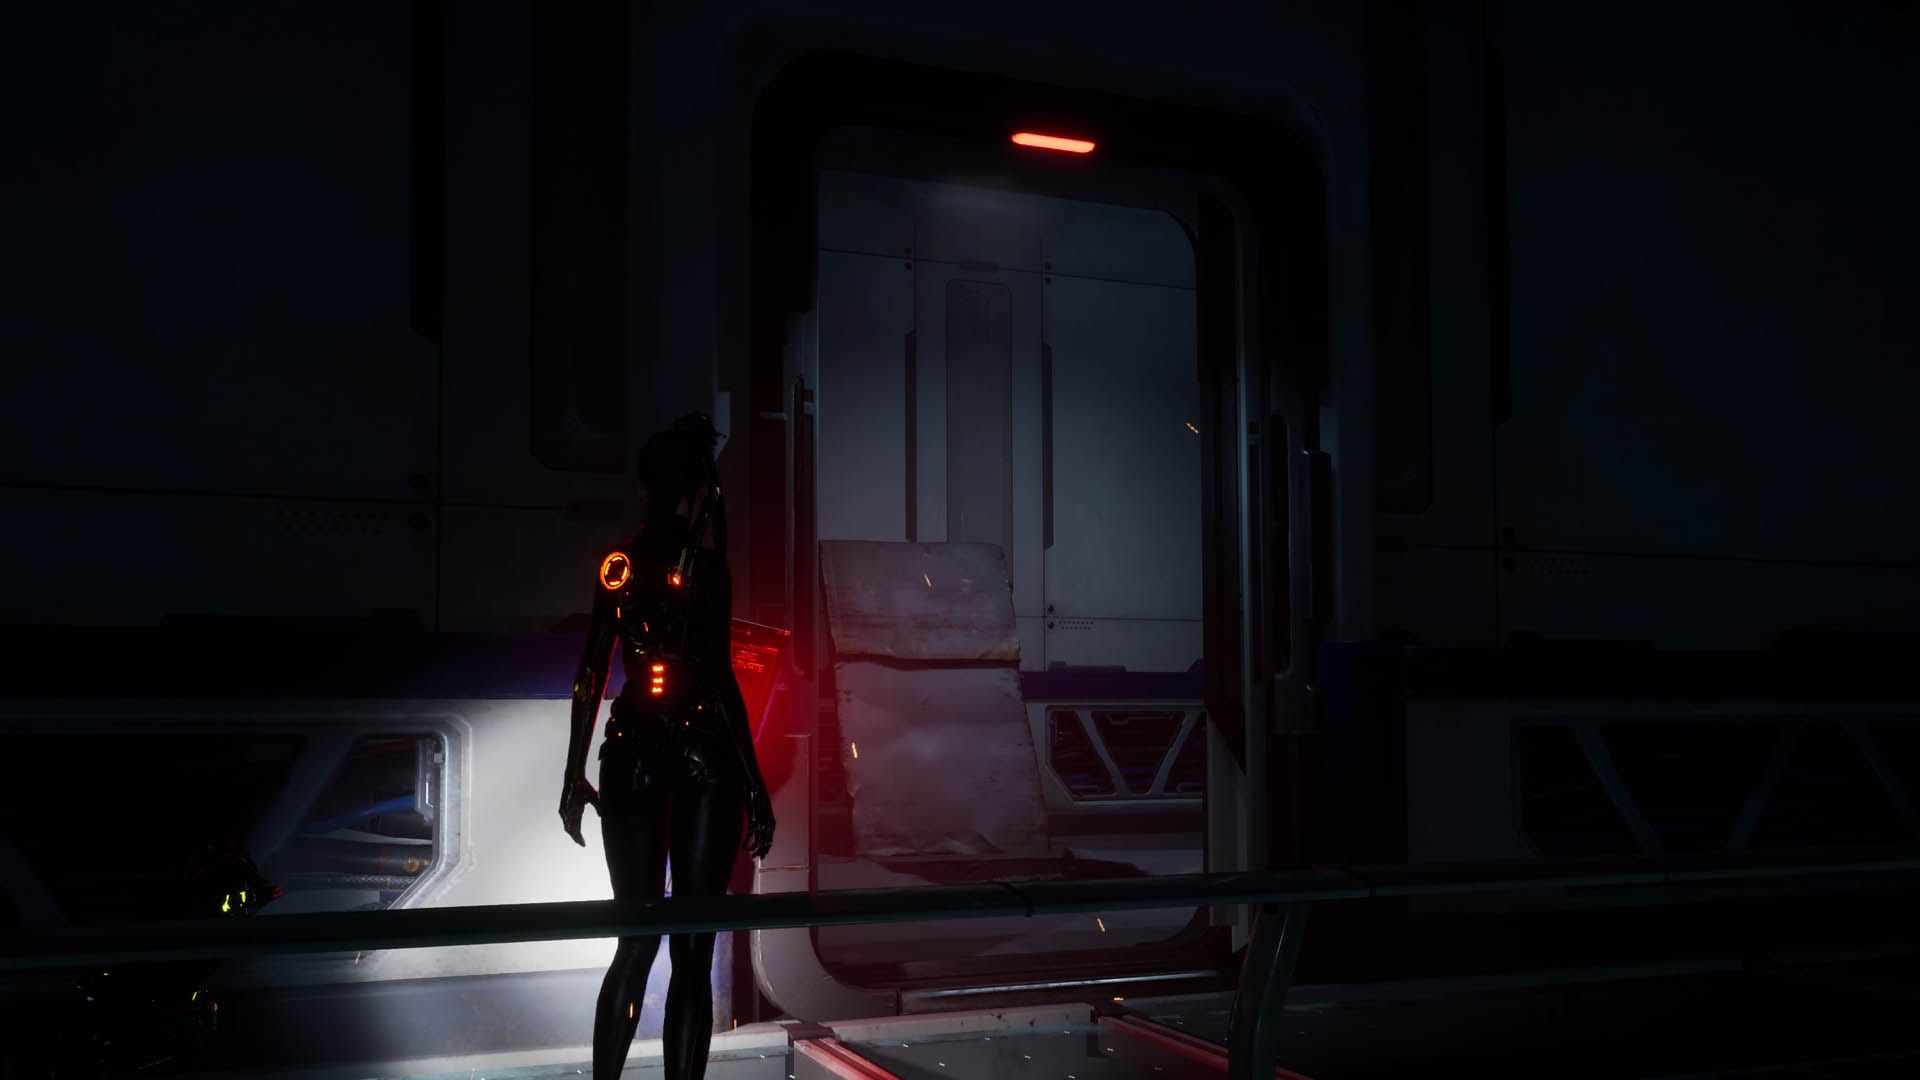
Climb up this to the walkway then follow the pathway around to the left until you come to a broken and open door on your right. There are Naytiba in here so get your Drone equipped and ready to fight when you enter this room.
Enter the room through the broken door, defeat the Naytiba and follow the path around to the right until you find a green switch. Activate this with R2 and a door opposite you will open.
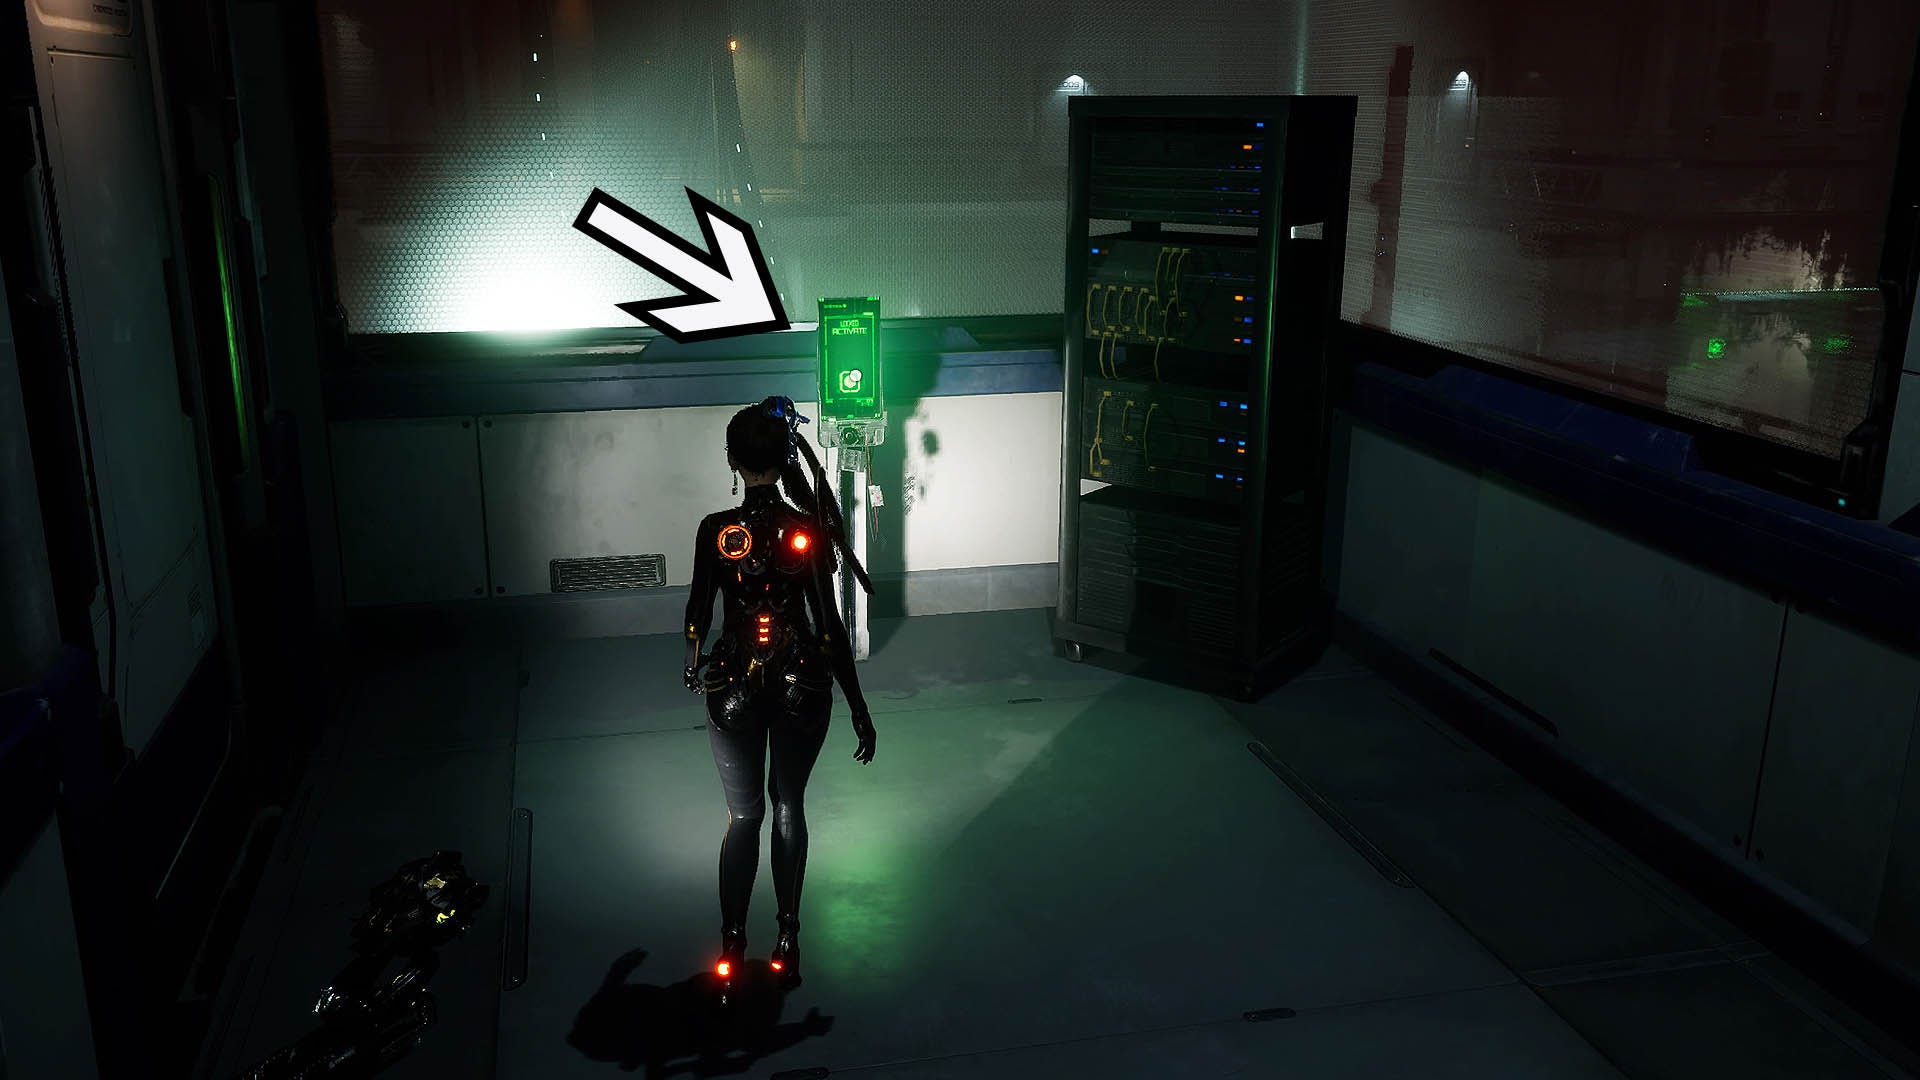
Now, head out of the door to this area and follow the walkway around to the right. Be careful here as you will be ambushed by Naytiba. Deal with them and then press the green button at the end of the pathway with R2.
This will bring up a platform that you can use to jump across to the next section of the walkway. Continue to follow the path here to another open doorway.
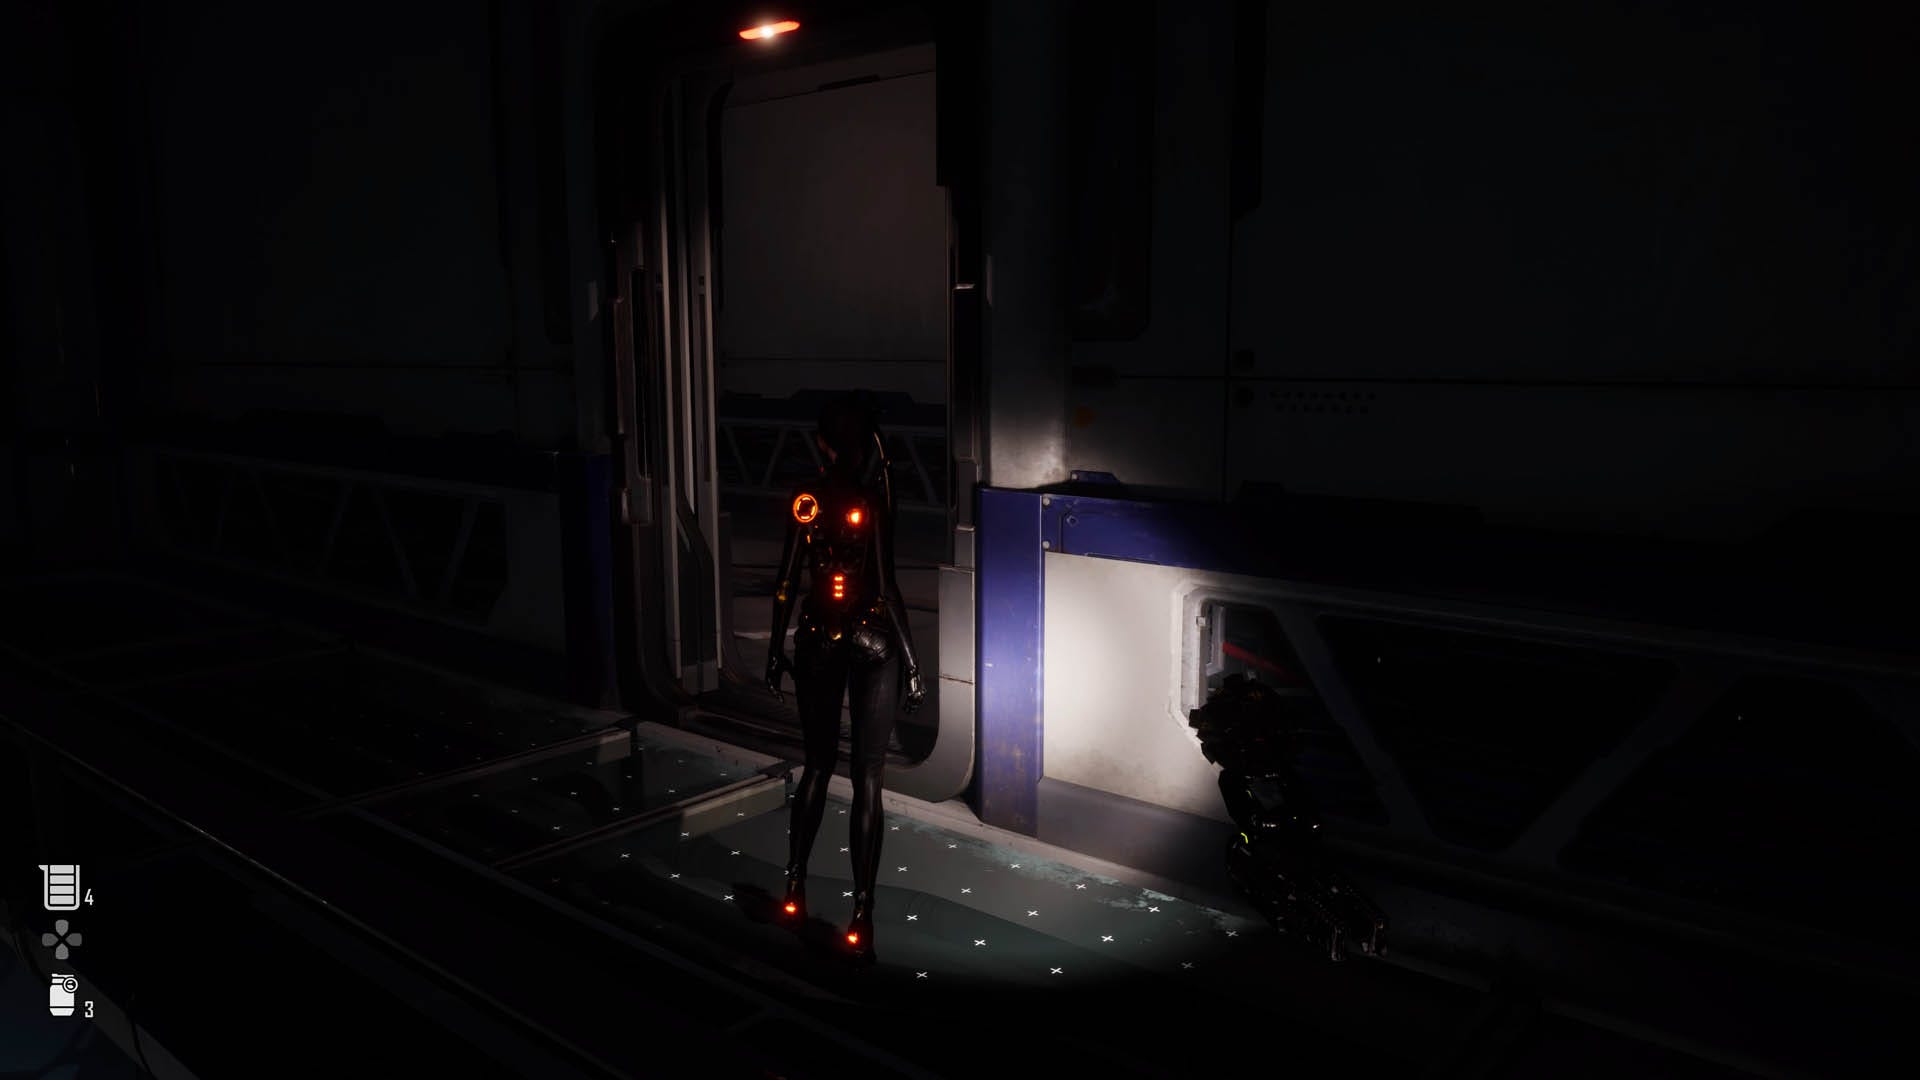
Head into this room and follow the path around to the right to the green button. Interact with it with R2 to activate the Laser downstairs.
Stellar Blade Altess Levoire Laser Puzzle solution
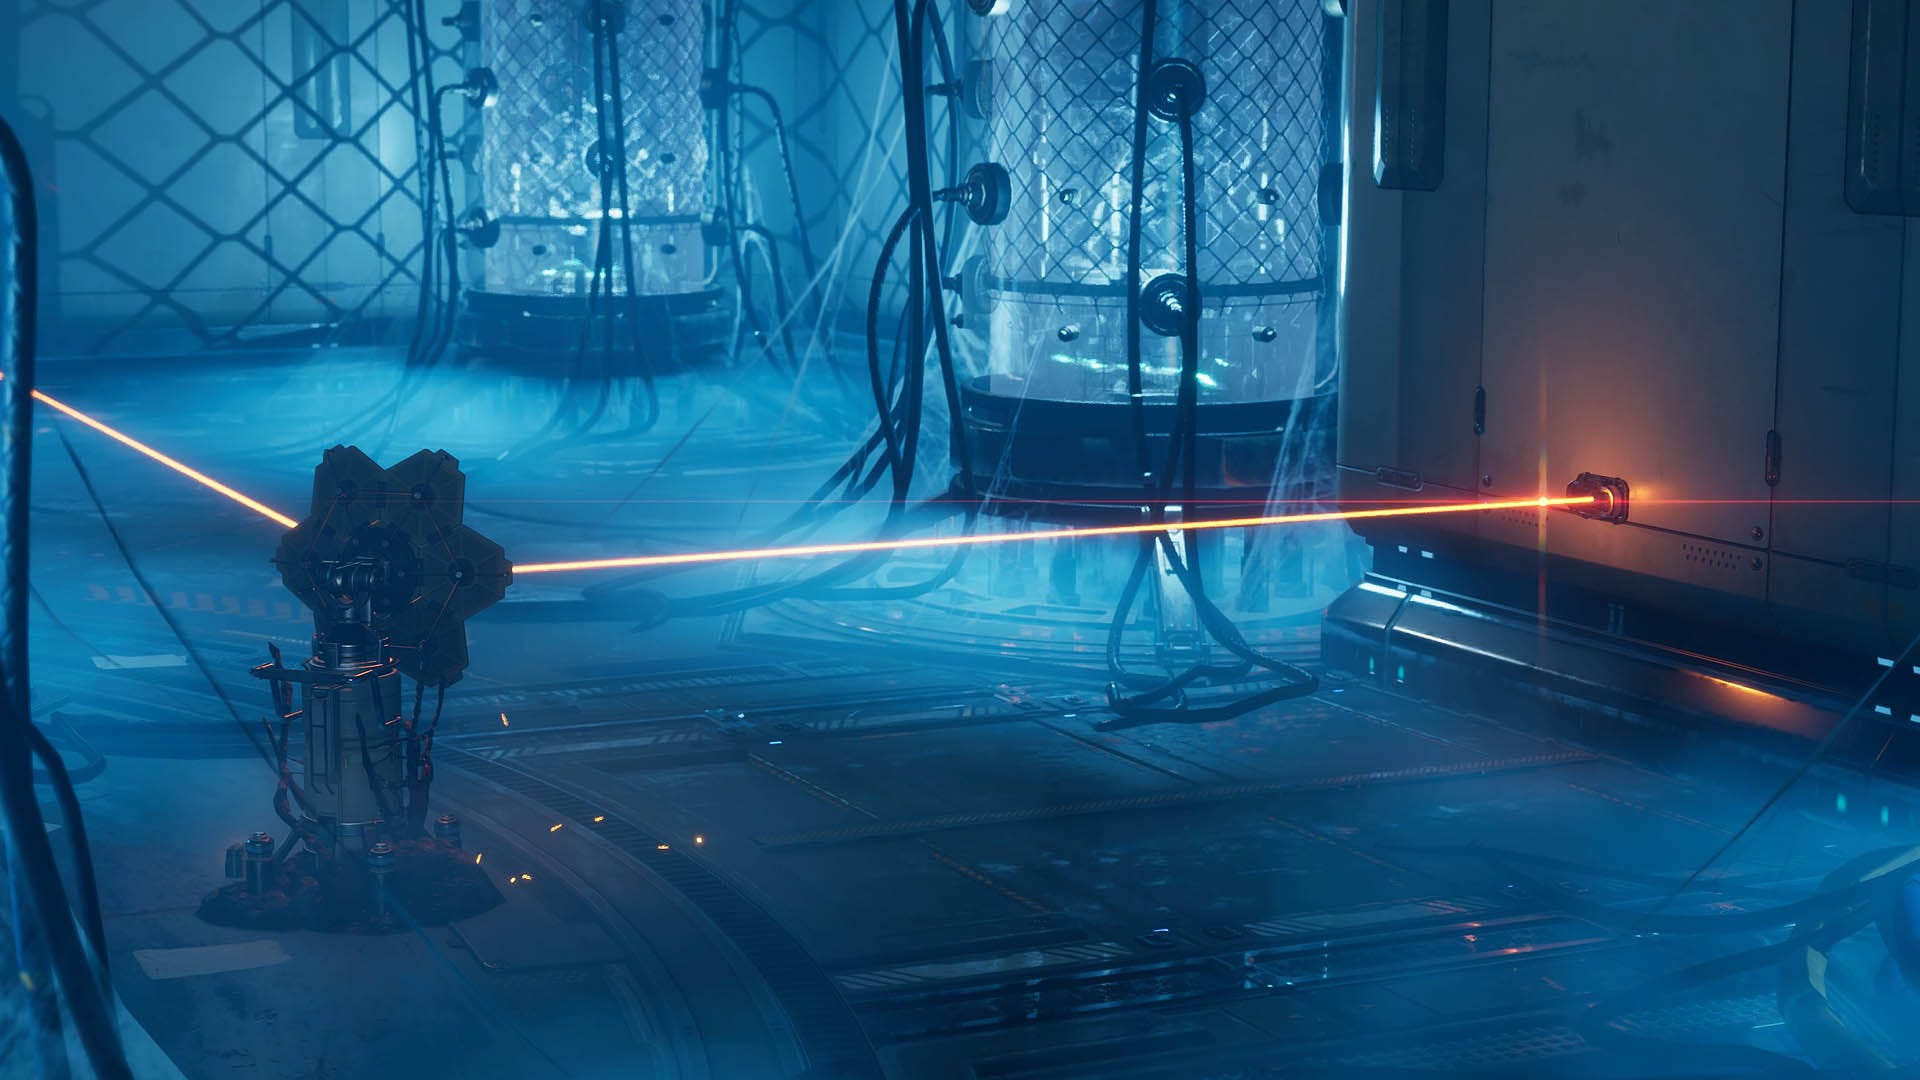
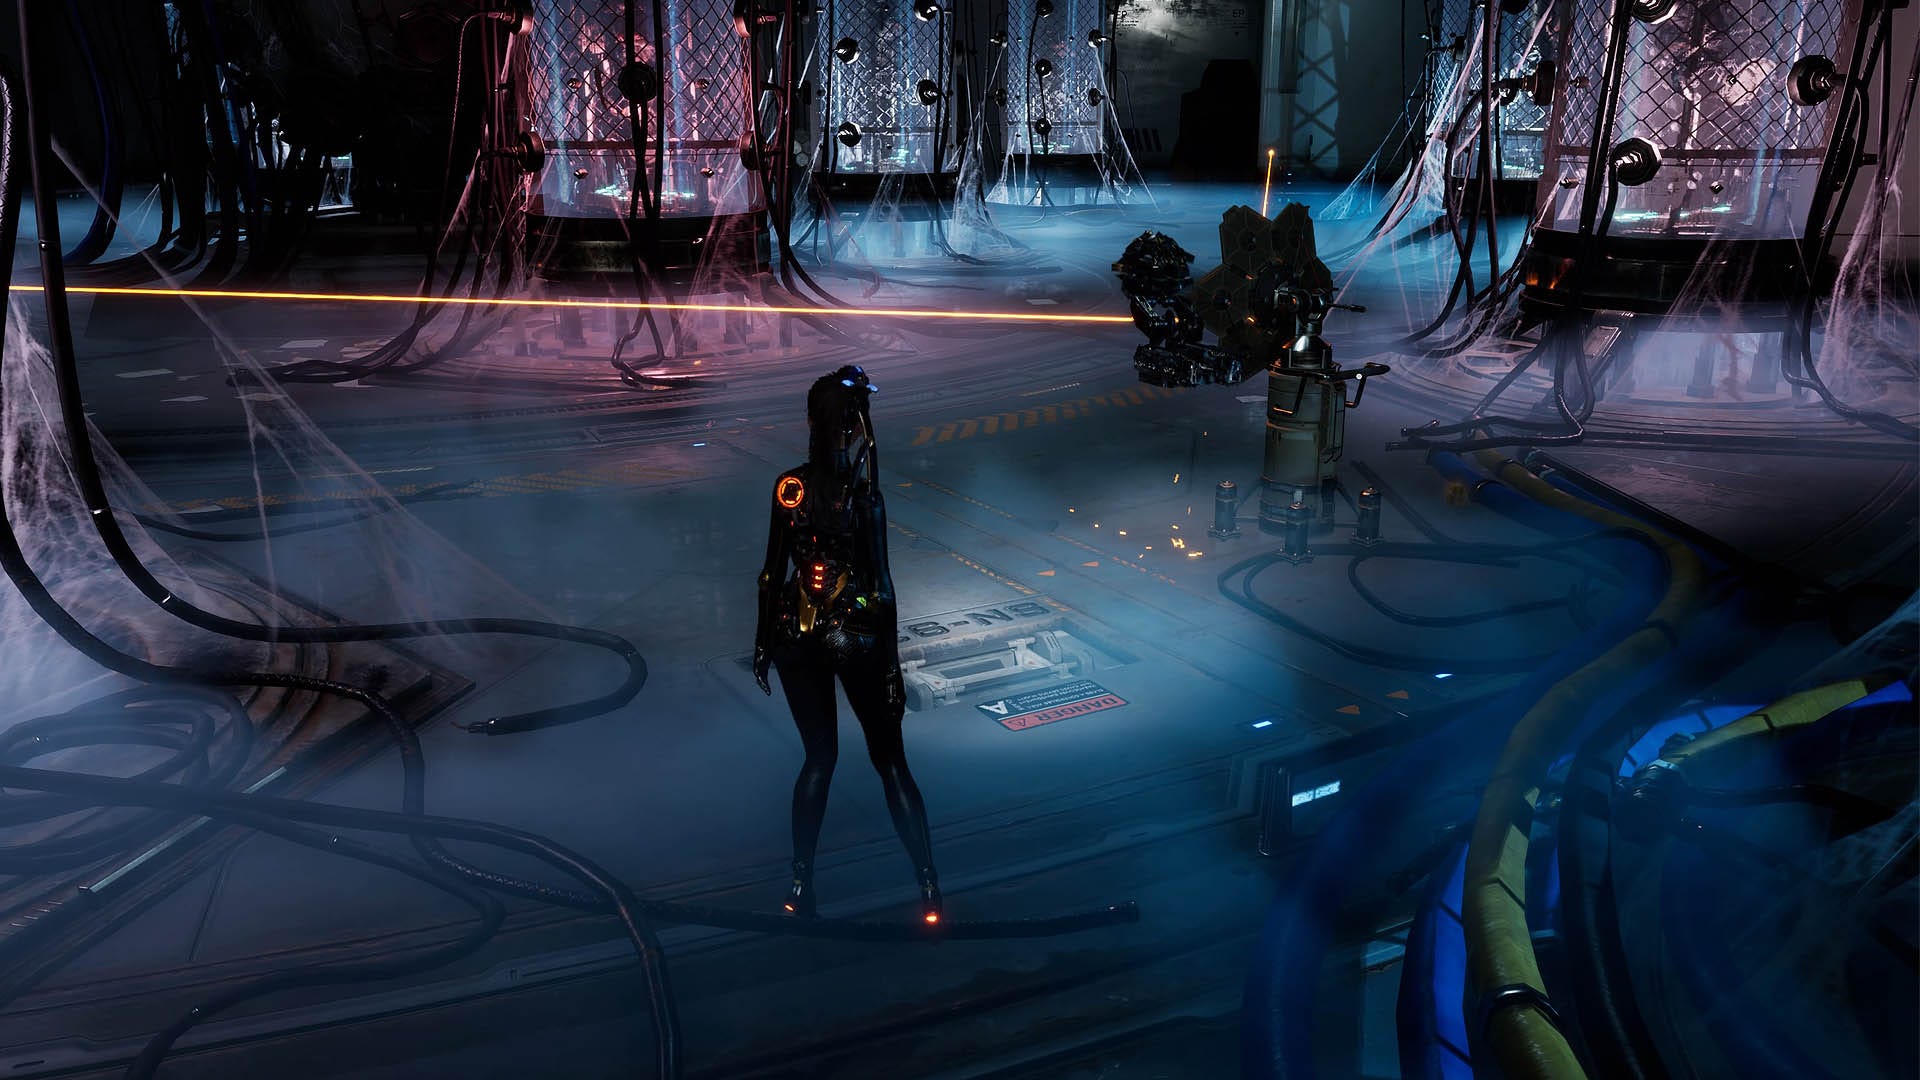
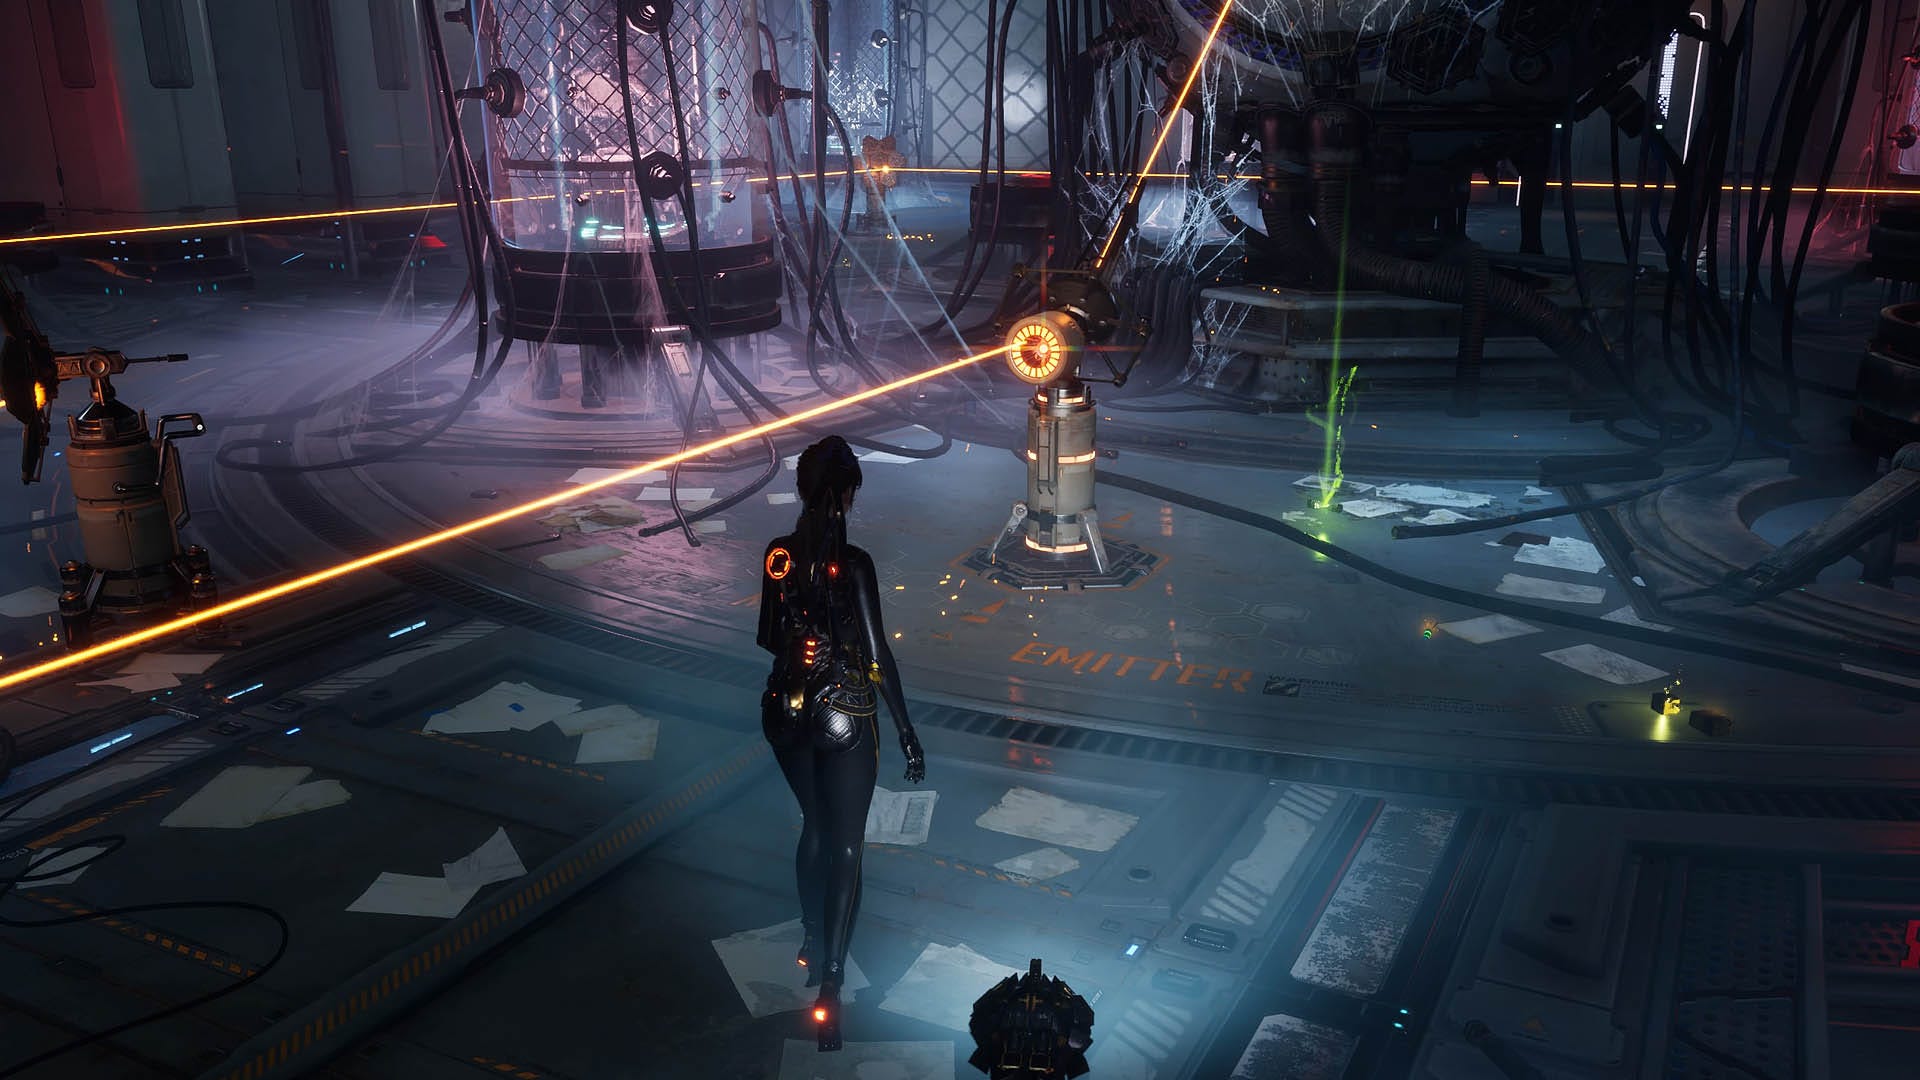
After activating the Laser head downstairs and find the start of the Laser beam. With your back to the main entrance to the area, it will be on the right side.
Do not let Eve touch the Laser or she'll lose health and don't aim the beam at the tubes for too long or there will be trouble.
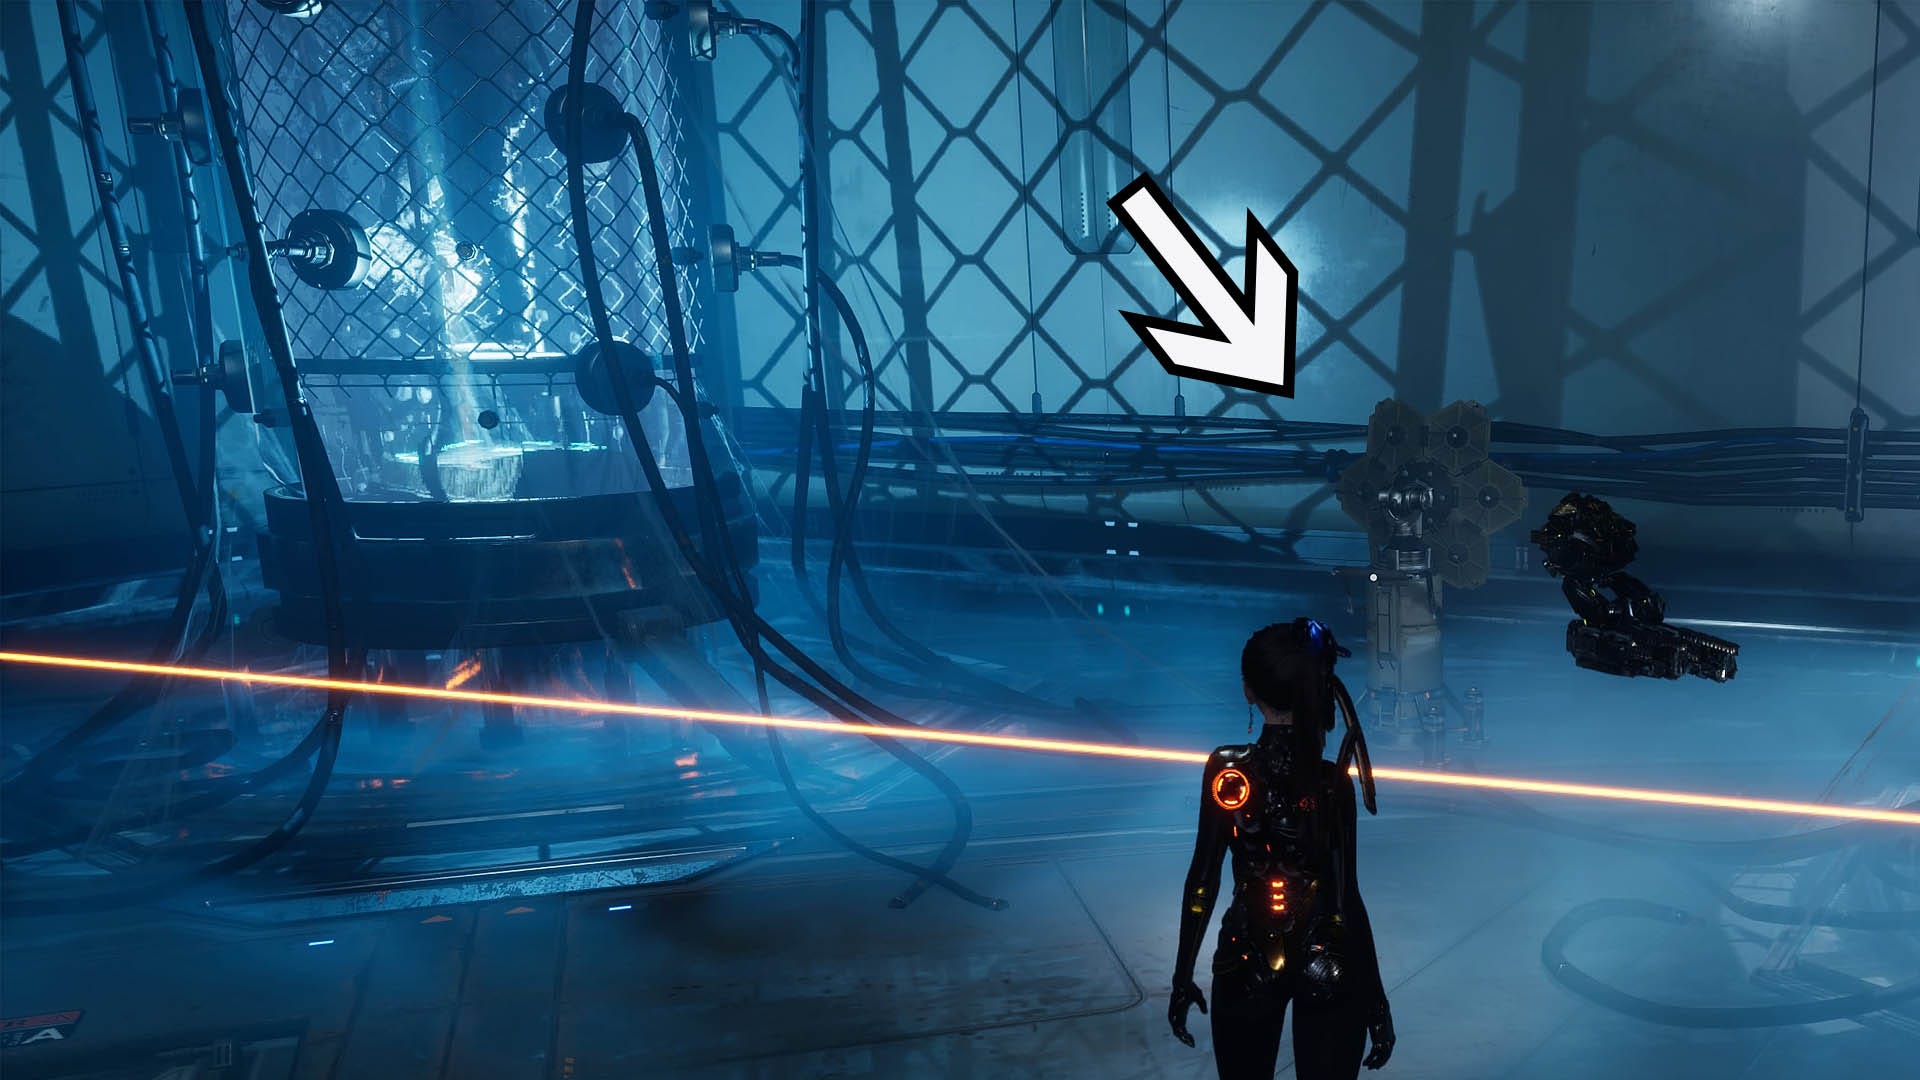
Here, it will be bouncing off a reflector you cannot move. Instead, look to the left of the laser beam a bit further ahead and you'll see another reflector. Move over to this and interact with it with R2 to start moving it, just like you would a box.
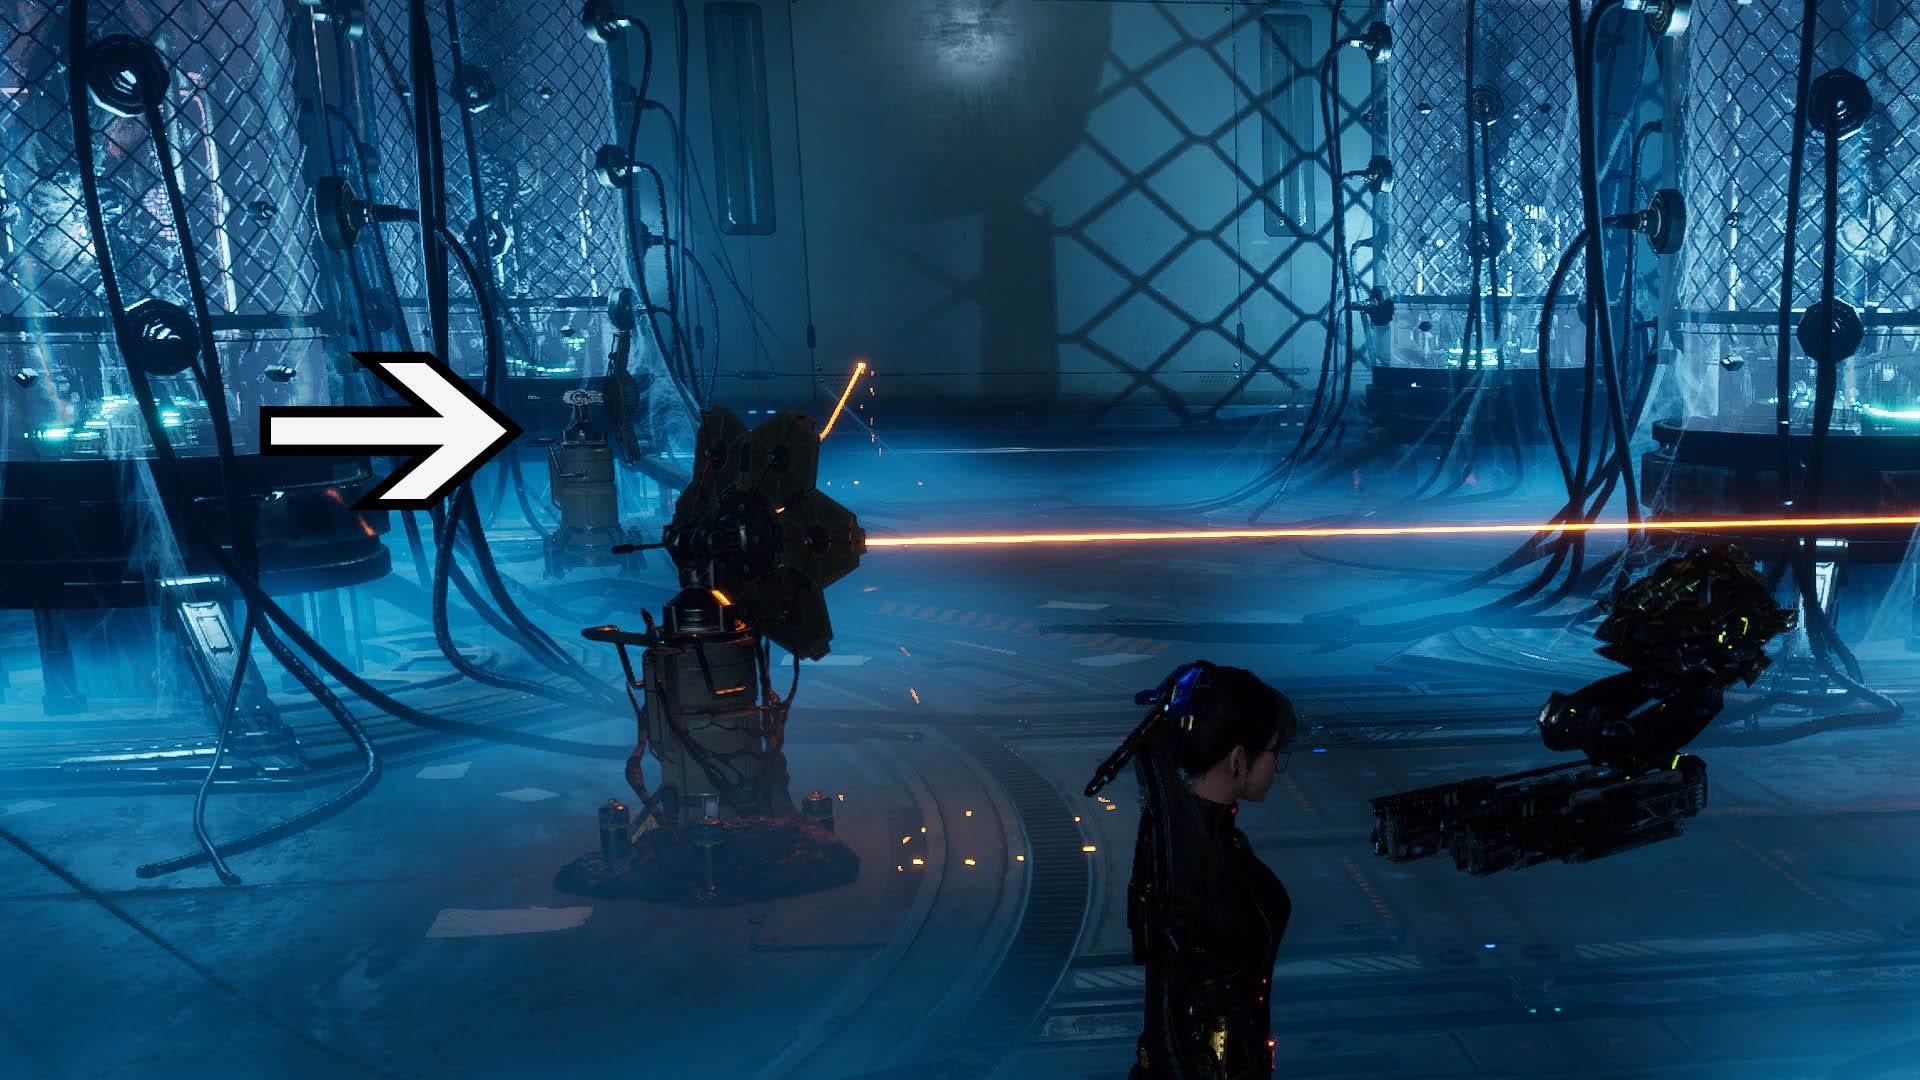
Push this first reflector in line with the Laser then use L and R2 to rotate it so that the beam is reflected to the right side of the area as shown on the image below.
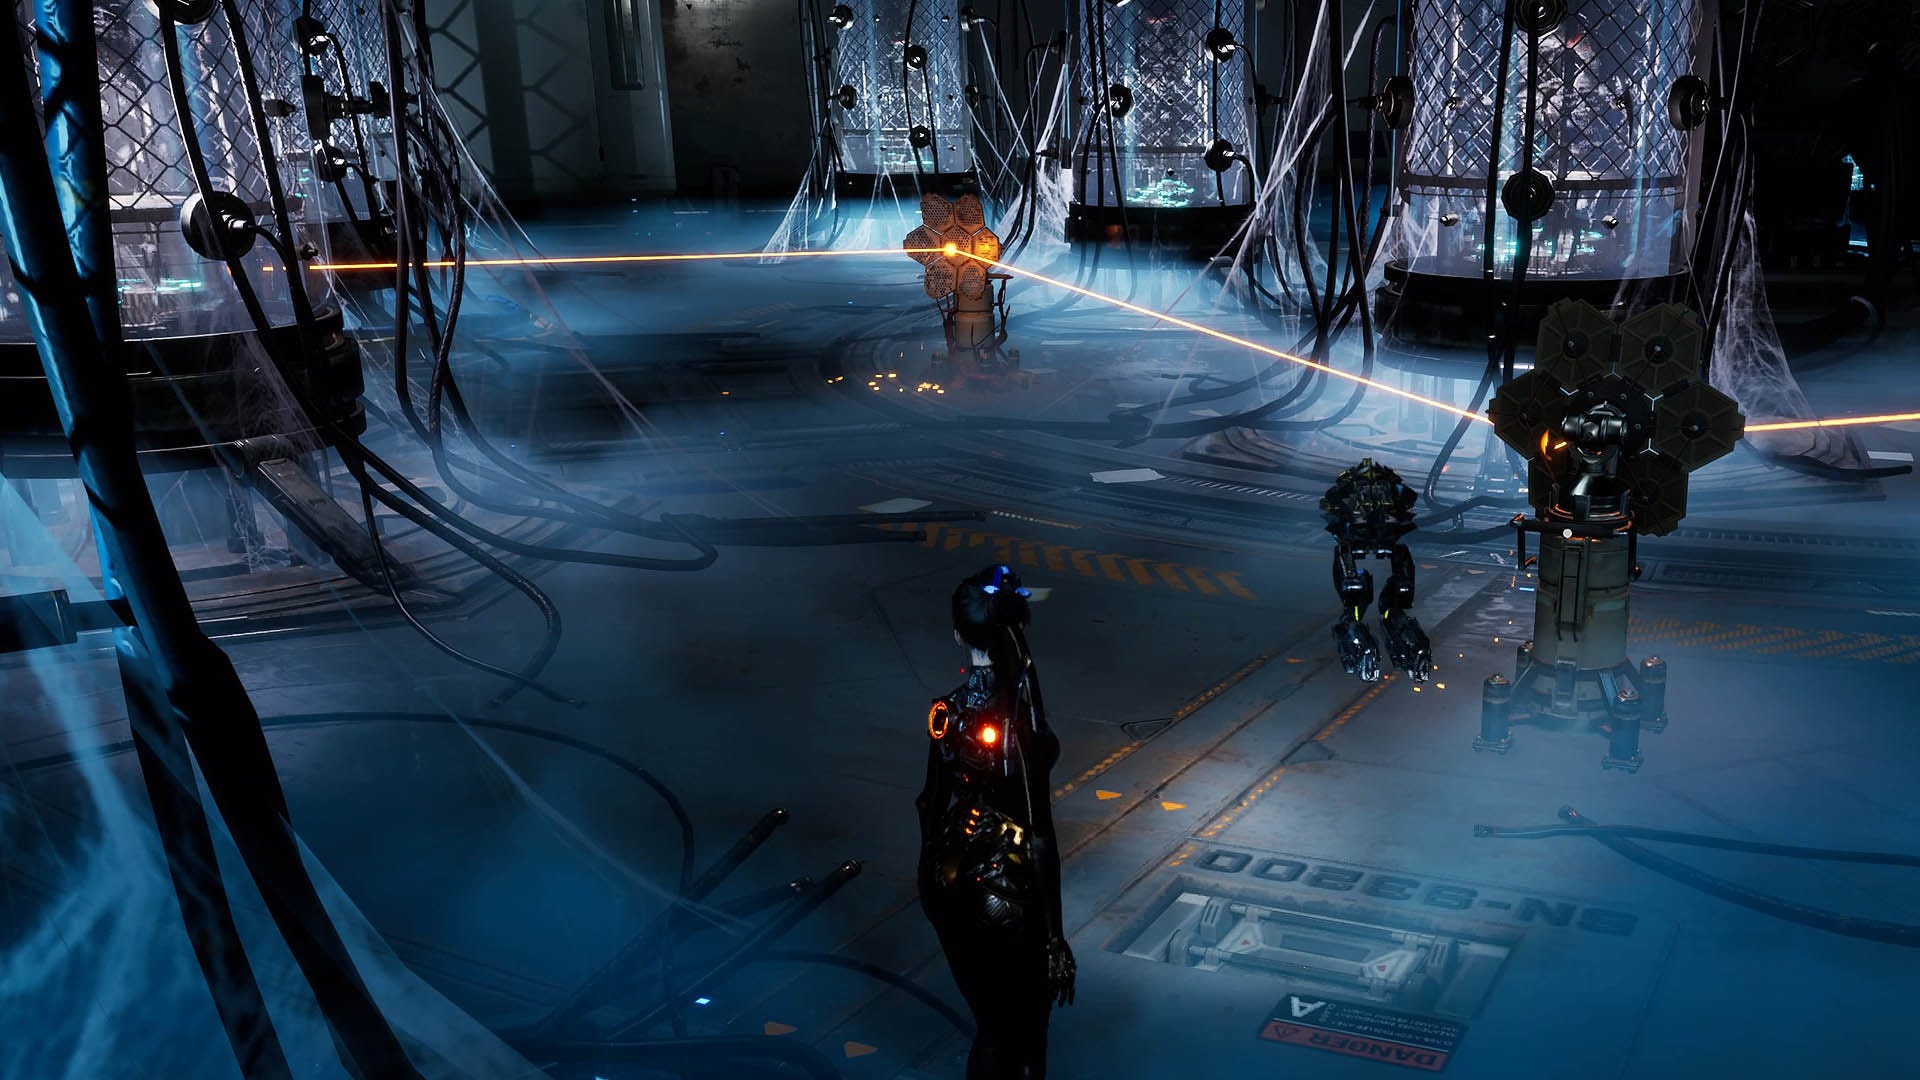
Then, follow the beam until it hits the wall. At this point, head to the left of it and you should find another reflector pushed up against a glass wall on your right.
Use R2 to move this reflector so that the beam is reflected to the left (the direction you found the reflector in) as shown in the image below.
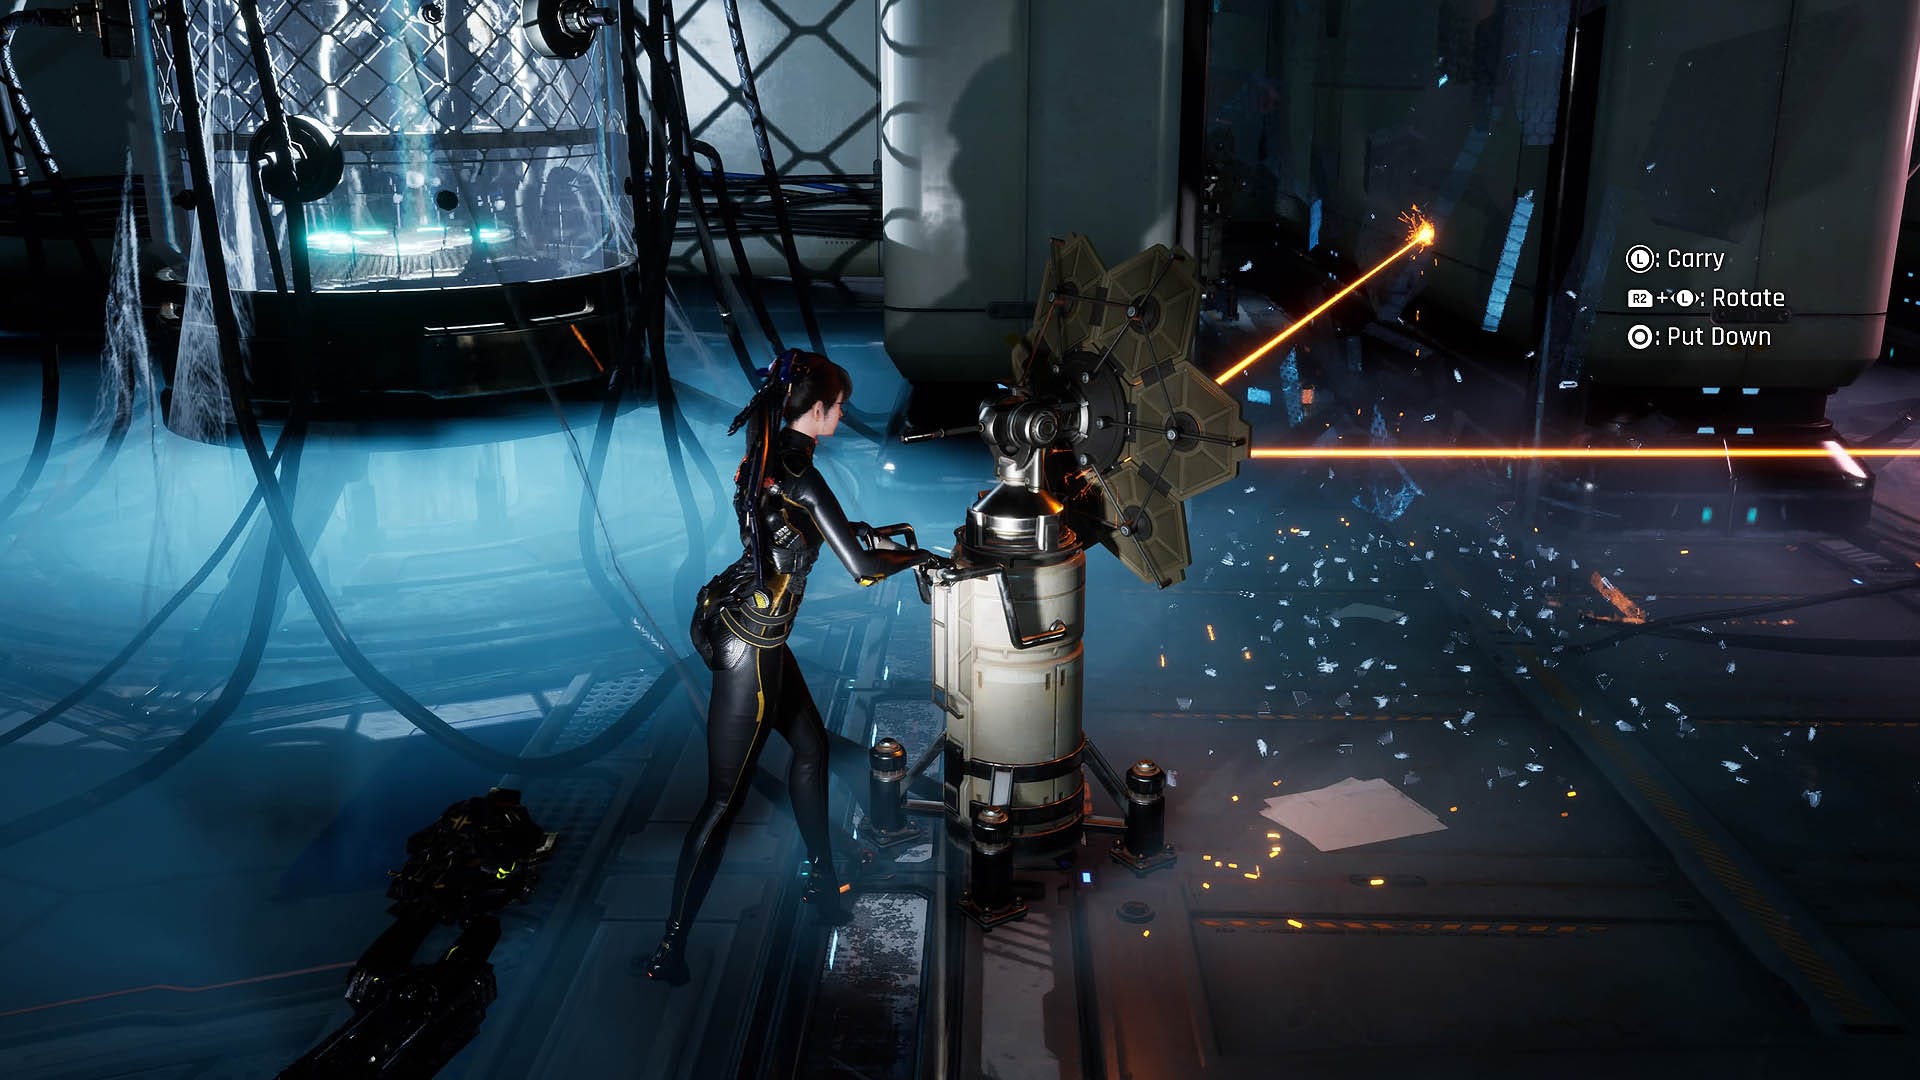
Follow the beam again and keep an eye on your right for another reflector. Use R2 to pull this reflector out but this time you'll want to move it so that it bounces the beam back the way it came for the moment.
Once it's being reflected in this way, use L and R2 to angle the beam so that it's aiming at the glass panel on the wall on the left where you found the reflector earlier. The Laser will shatter this wall which will be useful later on.
At this point grab the same reflector you used to shatter the glass and move it back to an angle where it's bouncing the beam towards the entrance to the area.
At this point, go back to the glass panel-covered room you just opened and use R2 to pull the reflector dish out of here. Take it back towards the entrance area and angle it so that the Laser is being bounced towards the main door.

Then, grab the final reflector near the main area entrance and position it so that it reflects the laser to the point just in front of the core.
Once you line it up properly, the Laser will damage the core and the Fusion Cell will be released. You can then place it in the door to exit this area and continue through Altess Levoire to get the second Hyper Cell.
That's it for now! If you're looking for more Stellar Blade content then check out our Plan to Clean the Earth walkthrough and our Lost Ark walkthrough.