Destiny 2 - Defend the Confluxes and destroy the Oracles encounters explained
You're not even at the first boss of the raid yet. Keep going!
Defending the Confluxes and destroying the Oracles follow on from opening the Vault.
Essentially three encounters one after another - with the Templar boss being the final part before moving on further into the Vault - you'll see escalating levels of coordination between the six players on your fireteam in order to make progress.
It may take a while to get your head around everything, and you will probably get wiped out a few times before it becomes second nature. With a bit of practice, though, you will wonder how you ever found it so difficult.
For help with other encounters, see our main Vault of Glass guide.
Defending the Confluxes in Destiny 2
This is one of the few encounters in the Vault of Glass revamp that hasn't seen much work done to it. If you remember this from the initial raid, this should be fairly familiar.
To start the encounter, you will need to drop down from the ledge you are on. The objective here is very simple. In fact, it is the same as the Conflux Vex Public Event. Defend the conflux from Vex who will try to sacrifice themselves on it.
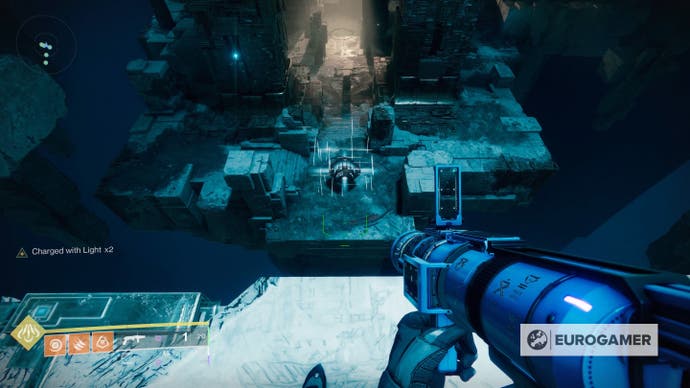
You'll see the Templar boss in the middle who will shoot at you, but we won't be killing it this encounter. Mostly, just try to ignore it and stay out of its line of sight to not get shot.
To begin there will be one Conflux in the middle of the room. Most enemies will spawn down in the pit below you and try to make their way up. Just dispatch them as they come up the stairs. There is one thing to note here and it will be present in the next two encounters.
The Fanatic enemies that you kill will drop a pool. It glows bright blue and looks quite similar to a Witherhoard pool (so, if you are using Witherhoard, be extra vigilant).
If you step in this pool, you will receive a debuff called Marked for Negation. Periodically, the Templar will send out a blast called the Ritual of Negation. If you have the debuff when it does this, you will die. To clear yourself of this debuff, you will need to enter the glowing circle in the middle of the pit to remove it.
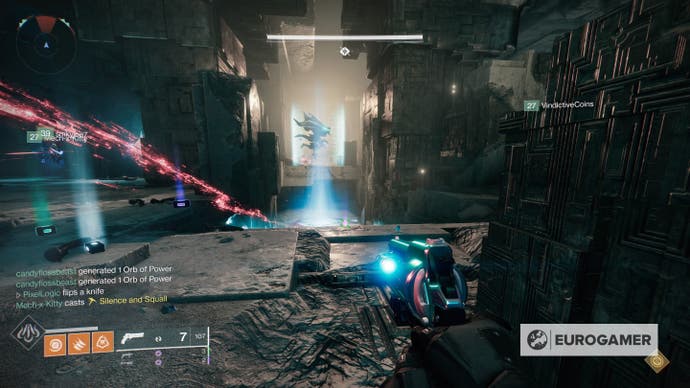
After defending the Conflux for a little bit, a Wyvern will spawn down in the pit. Kill it and then clear up any remaining enemies. Things will calm for a moment and the Conflux will disappear. Then two will spawn, one on the left and one on the right.
Split your team in half, with three players looking after each Conflux. Same rules apply. Kill enemies trying to sacrafice, only there are two waves this time, each denounced by a Wyvern. There will also be an Overload Champion so dispatch of them.
Eventually, things will calm once more, but a third conflux will spawn back at the original position. Send a player from each side back to the start to defend it, so you have two players at each conflux.
Do the process again and stop any sacrifices. There will be three waves this time, with three rotations of Wyverns. Once you've dispatched them without any sacrifices, you are done. That's it. You've completed your first honest to goodness encounter in the raid.
The Season of the Deep is here alongside the Into the Depths quest. You can know go fishing too! Don't forget to keep an eye on the Lost Sector and King's Fall challenge rotation schedule!
Destroy the Oracles in Destiny 2
And here is where things will begin to diverge from what you know if you've done the raid before. The objective here is to kill all the oracles in waves. Sounds easy, yeah? Well, hold on.
There are seven oracle positions. You have to destroy them before they explode or the entire team will be Marked for Negation. The wrinkle now is that there is an order. You now must kill the oracles in the sequence they chime. Think of it as a six-person Simon Says.
To do this, it is smart to have two main oracle readers with a third to help out in a pinch. One reader will be on the left, and one will be on the right. There is a position on the left, up the ramp but below the stairs where Vex spawn where you can see all three oracles. Here is what that should look like.
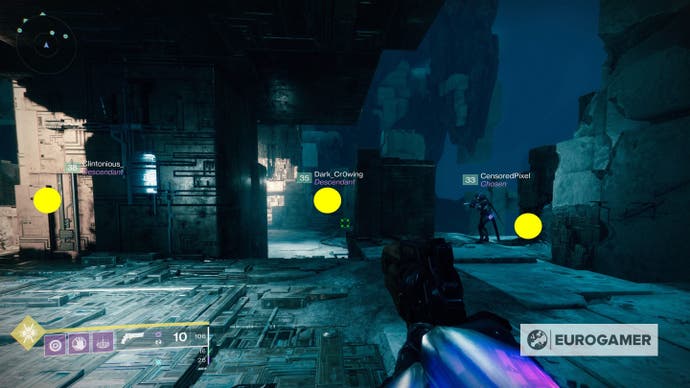
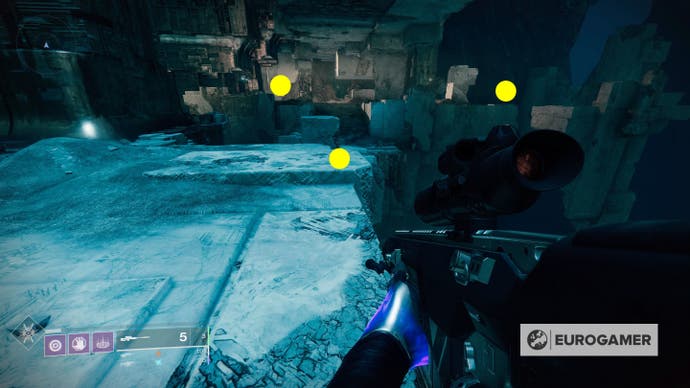
For the right person, there is a spot towards the back where they can see all of theirs.
Keep in mind, there will be a seventh oracle in the middle, right before the pit stairs that may be hard for the readers to see. For this, either get a third person to look out for this one, or if an oracle is missing for the reader team, by process of elimination, it will be the missing oracle.
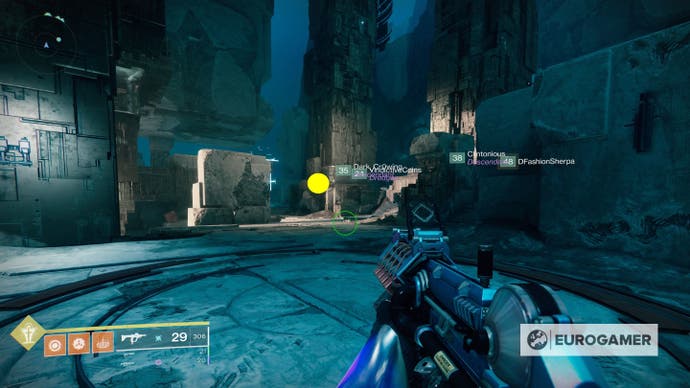
As the sequence plays out, get the Oracle readers to count up with the oracles they see. They must be shot in the order that they appeared.
For example, if the player on the left see's an oracle first, the second player sees the second on the right and then the player on the left see's the third, the player on the left would shoot their oracle, call out it is done.
The player on the right would then shoot theirs, call it out, and then the first player would then get the third spawn.
Everyone else should be equally spread from left to right to cover enemy spawn points and focused on clearing as many enemies as possible. The readers will need to be almost entirely focused on Oracles and the order they arrive in, so it's up to the rest of the team to make that as easy as possible.
Hobgoblins will spawn around the arena and cause major issues, so have players on the lookout trying to keep them as under control as possible.
Be aware, there are still Fanatics running around dropping pools that can Mark you for Negation. The same rule applies here as it did in the previous encounter. Cleanse yourself in the middle if you are marked.
The encounter requires the team to clear five waves of Oracles. The first wave will have three, and each round, an extra oracle will be added. This will go up until all seven Oracles spawn.
After you manage all seven, your encounter is over. A chest will spawn, collect your loot, and get ready to take on the Templar.


