Destiny 2 Golgoroth boss strategy, navigating Golgoroth's cellar and how to direct Golgorth's gaze
How to find the secret chest in Golgoroth's cellar, then kill Golgoroth himself nice and easily in Destiny 2.
Golgoroth is the second boss in King's Fall, and is a chaotic encounter that requires consistency above anything else.
Before you can face Golgoroth in Destiny 2, however, you need to navigate Golgoroth's Cellar - a labyrinth which hides a secret chest.
If you've already defeated Golgoroth in Destiny 2, then visit our King's Fall walkthrough hub to learn more about this raid.
On this page:

How to navigate Golgoroth's Cellar
The only thing you need to know is that all members of the fireteam must be present at the exit door in order for it to open.
To exit Golgoroth's cellar, take the first right, then left, left again, turn right and proceed straight ahead toward the chandelier. Watch for random pits in the floor along the way, and the occasional exploding Thrall.
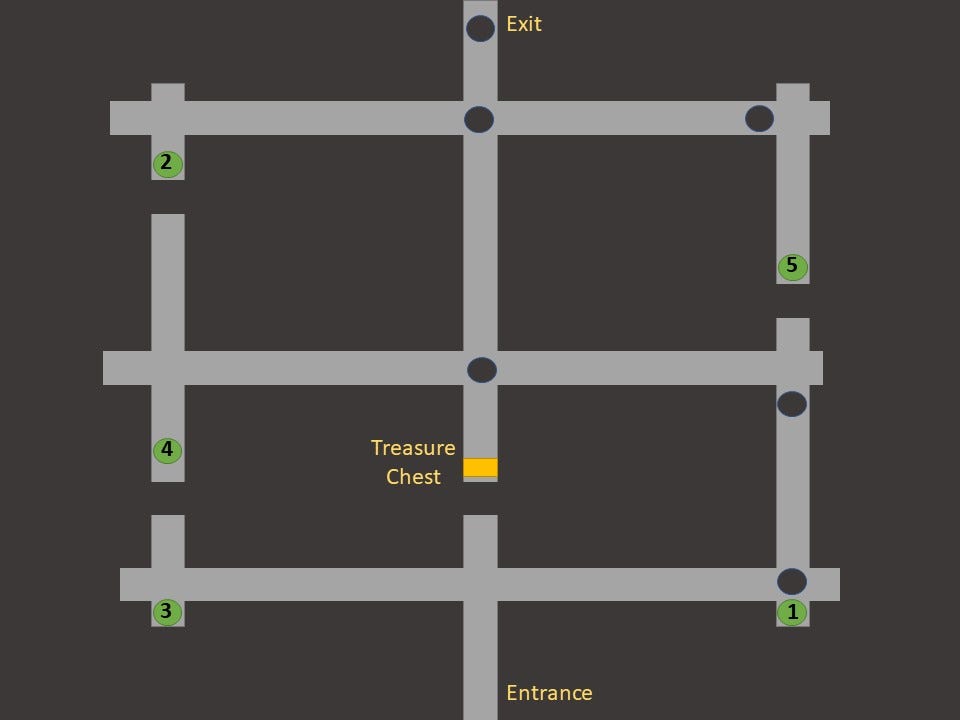
To bag the secret chest, one player takes the first left from the entrance corridor and waits beside a pressure plate. Another heads right from the starting corridor to wait by a second plate. The third plate is found by heading right, then left, left again and then all the way to the end of the corridor. That person also needs to jump into a hole over the door from a nearby pillar to a space behind it where the plate is situated, and then stand next to the plate.
The chest door is halfway along this same corridor, so have one player wait here as your waypoint.
When the last person is in position, the way to open the chest door is to step on plates in a specific sequence. That sequence based on location relative to the start of the maze is:
- Close Right
- Far Left
- Close Left
- Middle Left
- Far Right
The way to know that you're doing it right is to have one person at a time step on their plate. If it's the correct one, everyone will hear a mechanism click into place. If it’s the wrong one, the plate will glow red. Make sure to step off of it immediately if you see the glow.
Have your person standing beside the chest door confirm that the sequence worked and grab your loot. Once everyone arrives at the exit door, it will open and you get to face Golgoroth.
The Season of the Deep is here alongside the Into the Depths quest. You can know go fishing too! Don't forget to keep an eye on the Lost Sector and King's Fall challenge rotation schedule!
Golgoroth boss strategy in Destiny 2 King's Fall raid
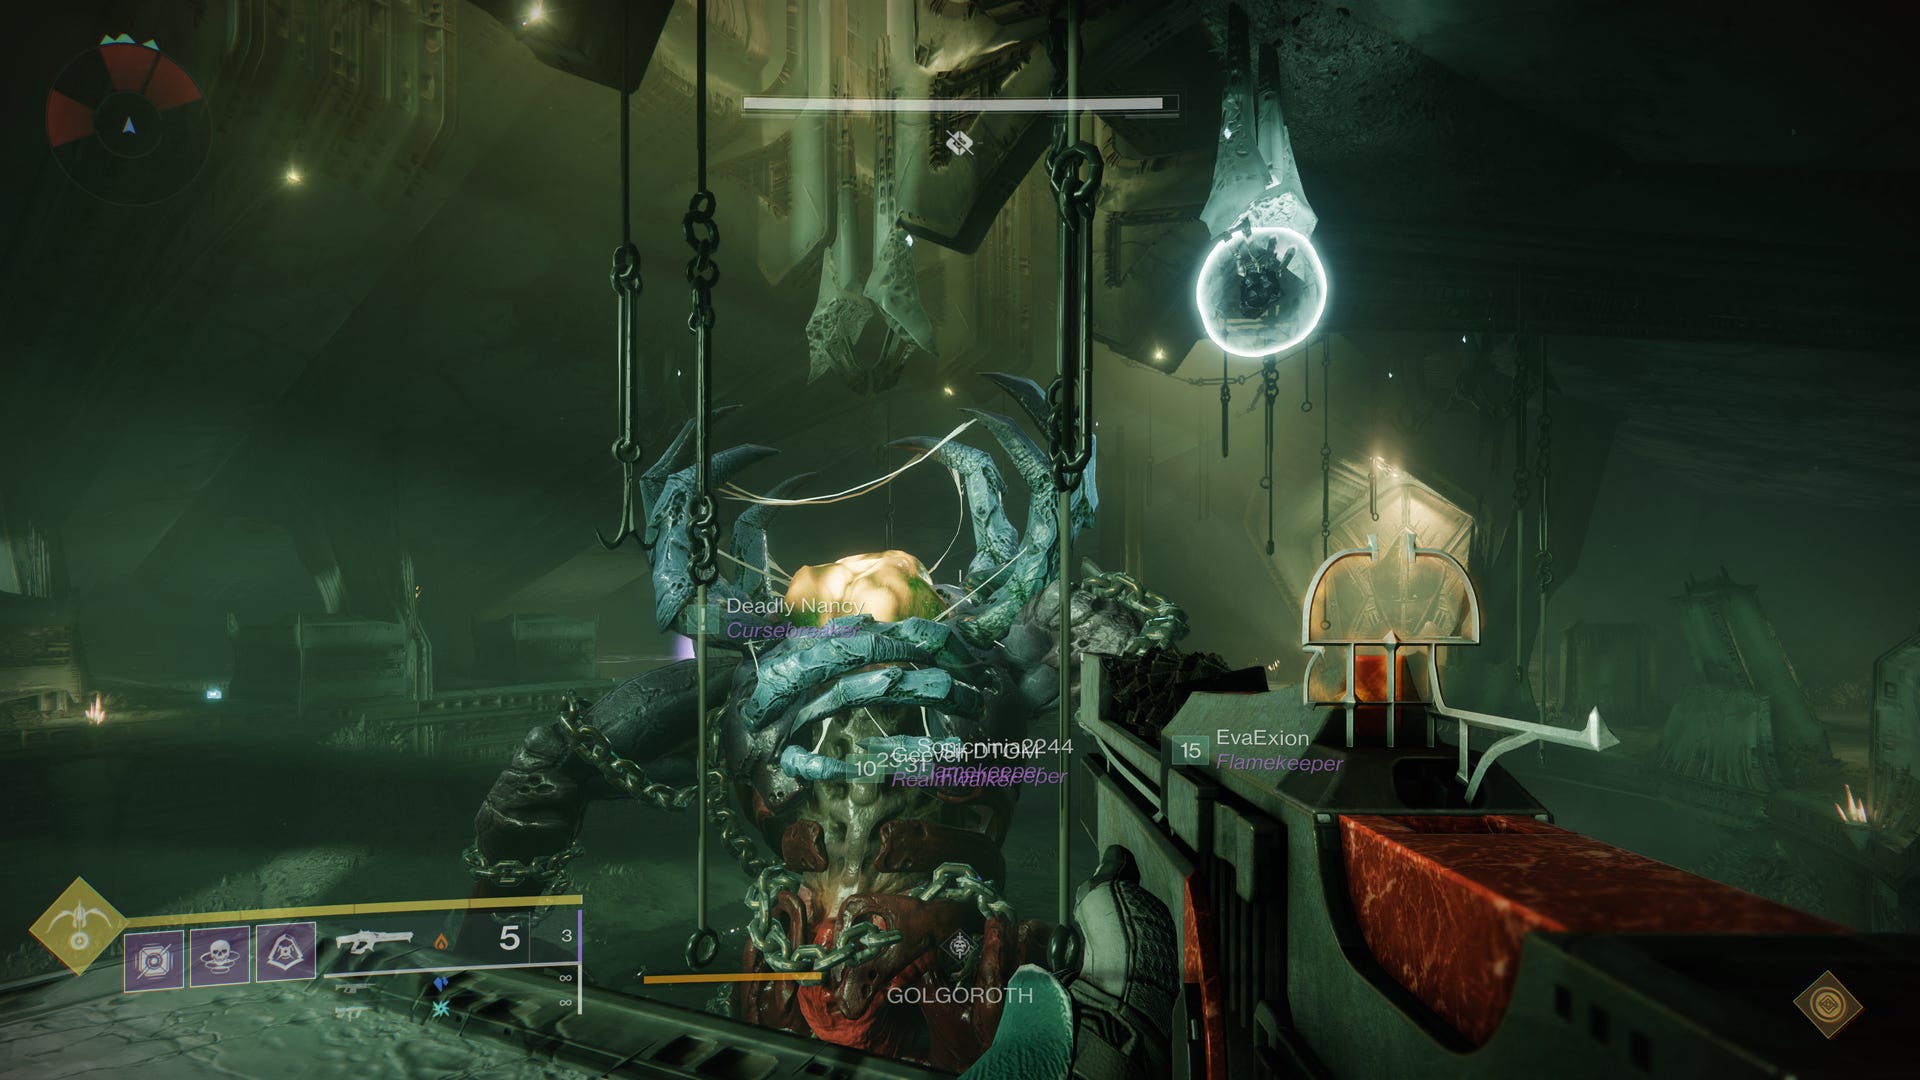
Golgoroth is a giant, angry Hive Ogre, in a long, roughly rectangular arena with a pit in the middle. There is an add clear phase, a DPS phase, and two primary roles: DPS and Taunting.
To start, divide into a team of 4 damage - or DPS - specialists, and 2 Taunters. Start the encounter by shooting the orb attached to the ceiling. Golgoroth will emerge, and waves of enemies will spawn. Concentrate on clearing out the weaker adds while avoiding blasts from Gorgoroth. Eventually some wizard with yellow health bars will appear. Kill them, and prepare to start the damage phase.
Holding Golgoroth's Gaze in Destiny 2 King's Fall raid explained
To damage Golgoroth, you must shoot another orb that has appeared stuck to the ceiling. Once it breaks it will drop a pool of light into the pit. The 4 DPS specialists will stand in this pool and shoot at the large crit spot on Golgoroth’s chest.
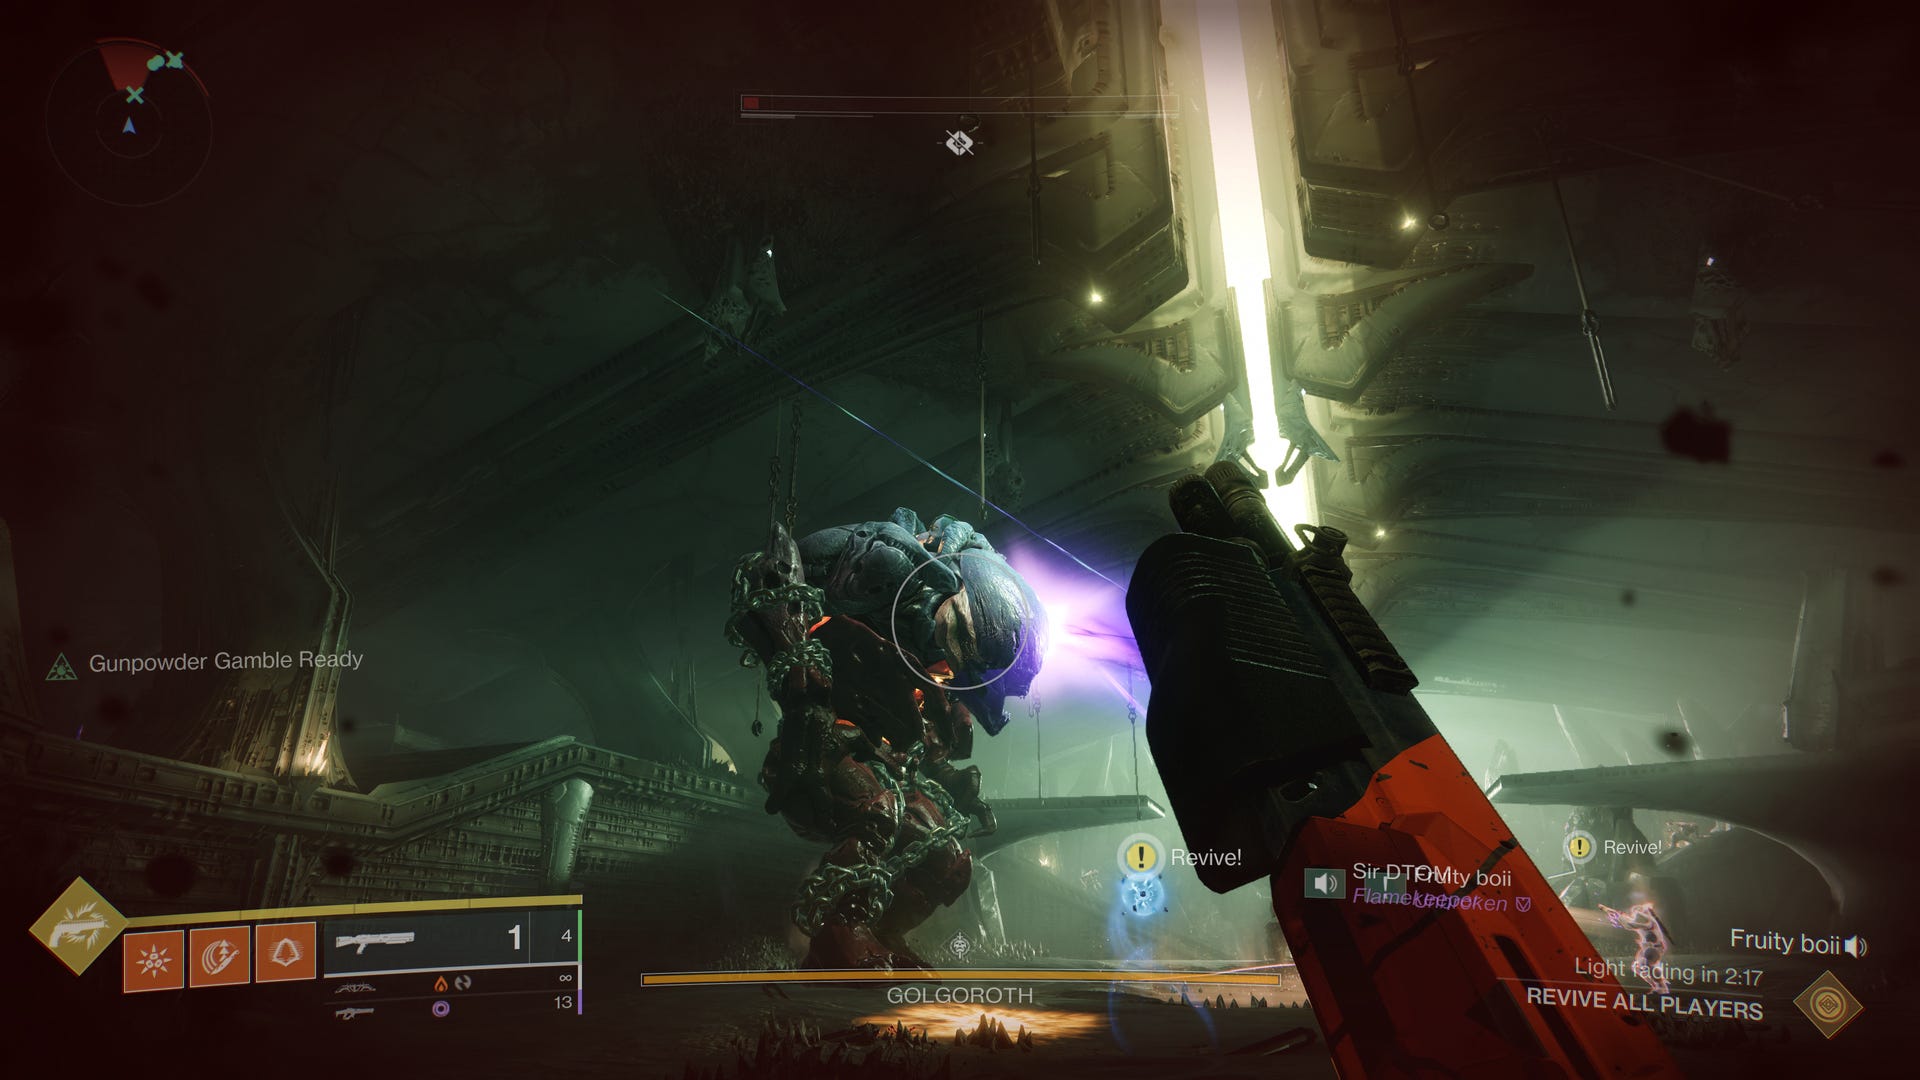
The two Taunters will be in charge of keeping Golgoroth’s attention focused on them so that the DPS team can focus on damage. There is a large glowing opening on Golgoroth's back. Shooting this a high powered weapon that does precision damage creates the Golgoroth’s Gaze status. Now Golgoroth will exclusively aim at this target for twenty seconds.
The Taunter will now run around the perimeter of the room and position themselves so that Golgoroth is facing towards the DPS team while firing at the Taunter. Once the Golgoroth’s Gaze timer nears zero, the second Taunter will fire into his back, and hold his attention.
The Taunters will trade Golgoroth’s Gaze until the DPS phase ends. Golgoroth will be firing orbs that track around terrain at the Taunter. You can’t hide from them, but they fall easily to rapid firing weapons like auto rifles.
Damage on Golgoroth explained
A large swarm of Thralls, Knights, and eventually Taken Phalanx will assault your DPS team. Wells of Radiance from Warlocks, and AOE attacks like Withehoard are key to keep the team alive and shooting at Golgoroth.
You only have around fifteen seconds in the pool of light before it runs out. Another Orb will form on the ceiling. Shoot it, and gain another pool. There are a total of six orbs that will appear, one after the other for your DPS phase.
At random intervals one of the DPS specialists will be afflicted with Unstable Light. A countdown timer towards the bottom left of their screen will appear. Once it reaches zero they will explode. It won’t hurt them, but it will kill other guardians nearby. Run away from your team if you have Unstable Light, and return once you’ve detonated.
Once all six pools of light are used or the Taunters fail to capture Golgoroth’s attention, everyone will return to the upper area of the Arena to clear adds, and set up another damage phase.
Missing knocking pools of light to the ground is a costly mistake. Not only does this rob you of potential DPS, but each missed orb feeds the Tablet of Ruin in the middle of the arena. If enough orbs are missed, the Tablet will explode and wipe the party.
The next part of our King's Fall guide explains how to beat the Daughters of Oryx encounter. Return to the walkthrough hub for more sections of our King's Fall raid guide.