Destiny 2 Cryptic Quatrains quest solutions, including how to solve pirate riddles
How to solve all three riddles and acquire the Crude Cipher for the final puzzle.

Destiny 2’s Cryptic Quatrains are a set of three quests containing riddles that lead to buried treasure on different destinations.
Each of these quests have multiple steps, culminating in the discovery of various rewards, including unlocking the Crude Cipher for the Captain’s Atlas in the third and final quest.
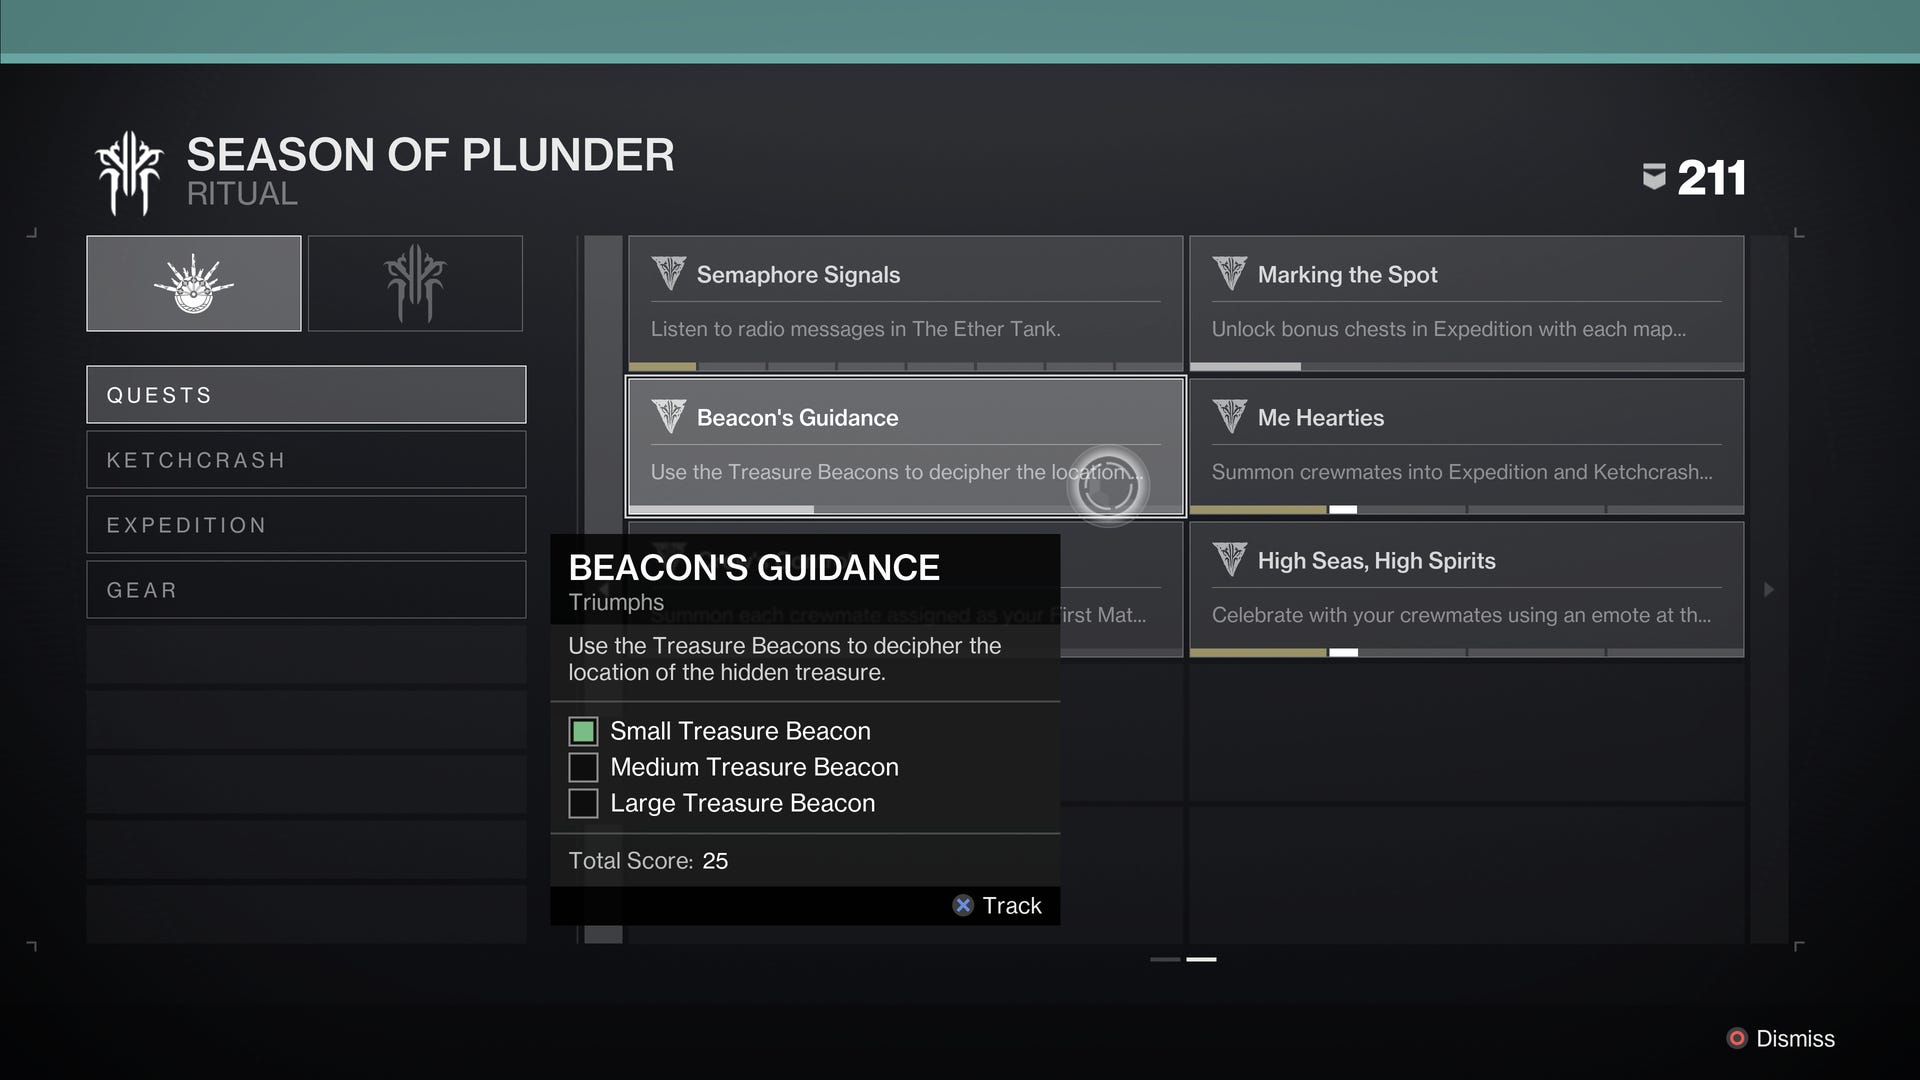
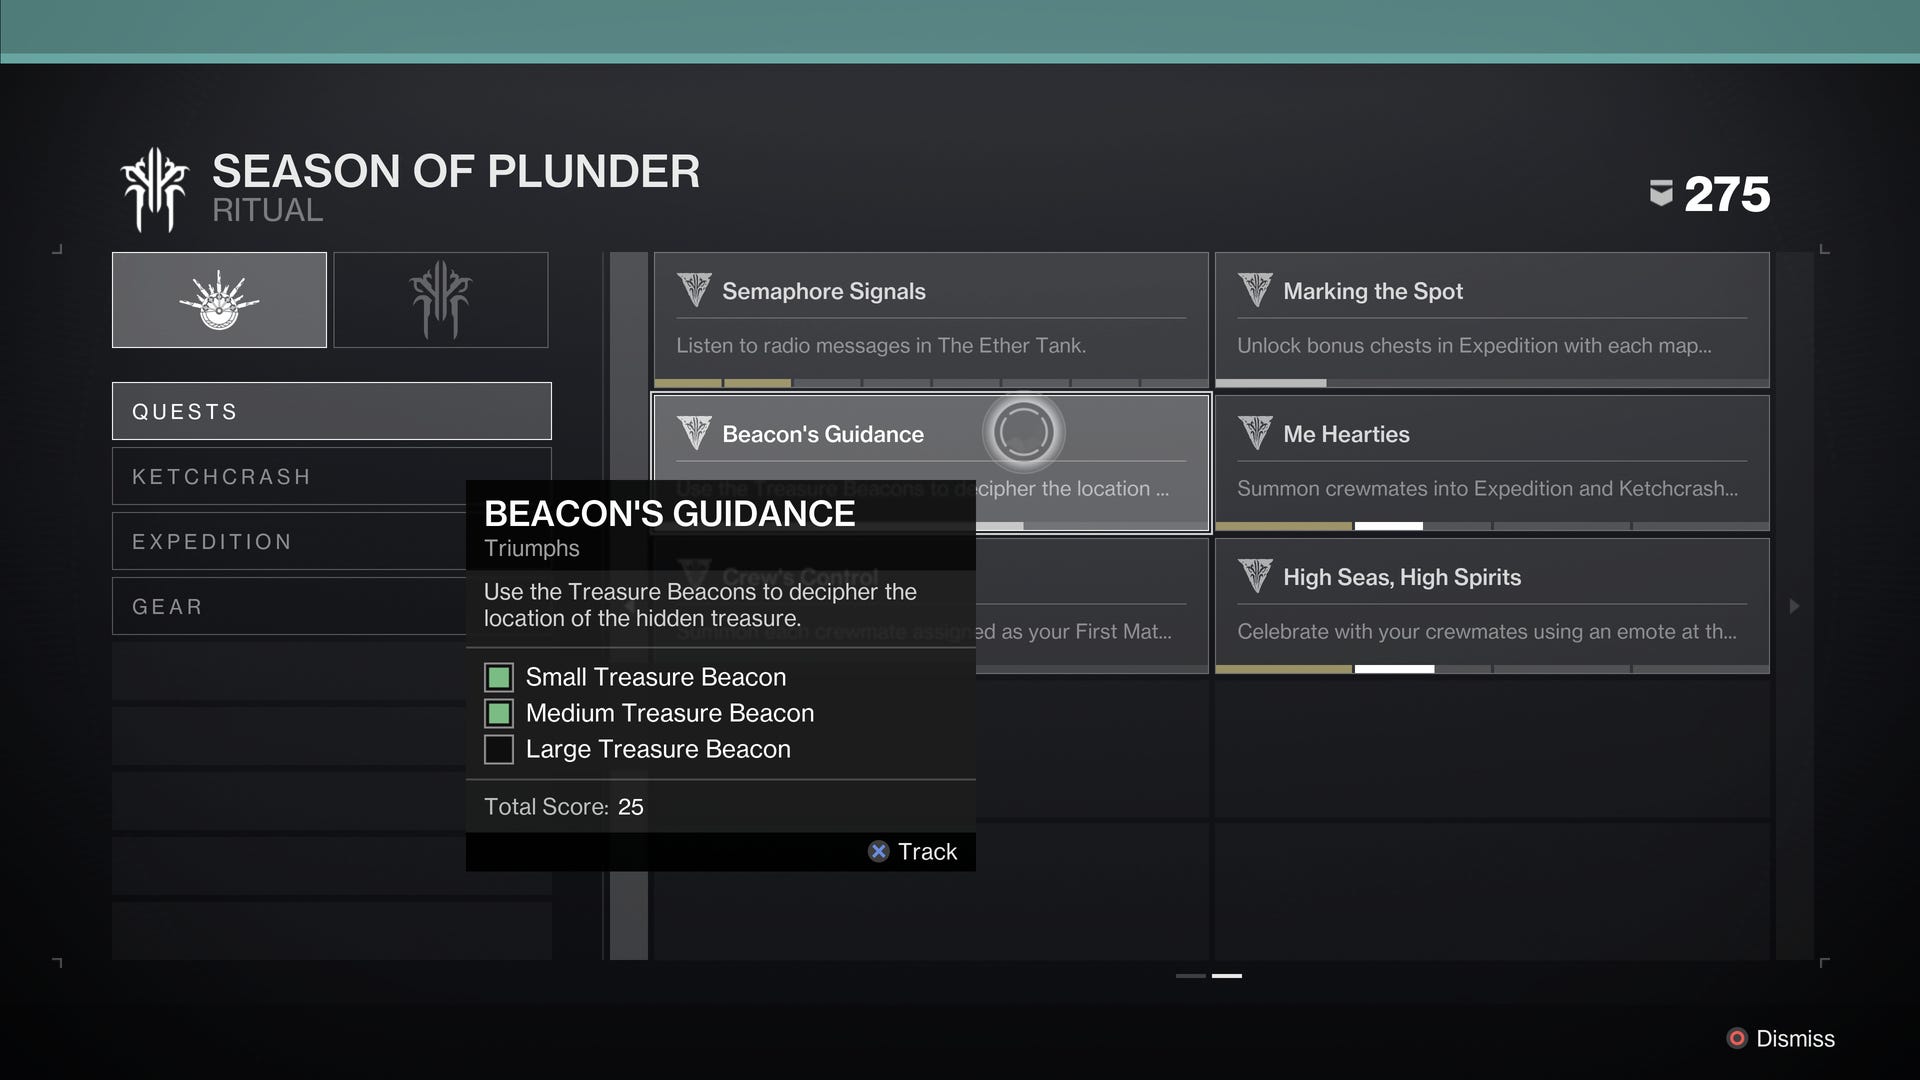
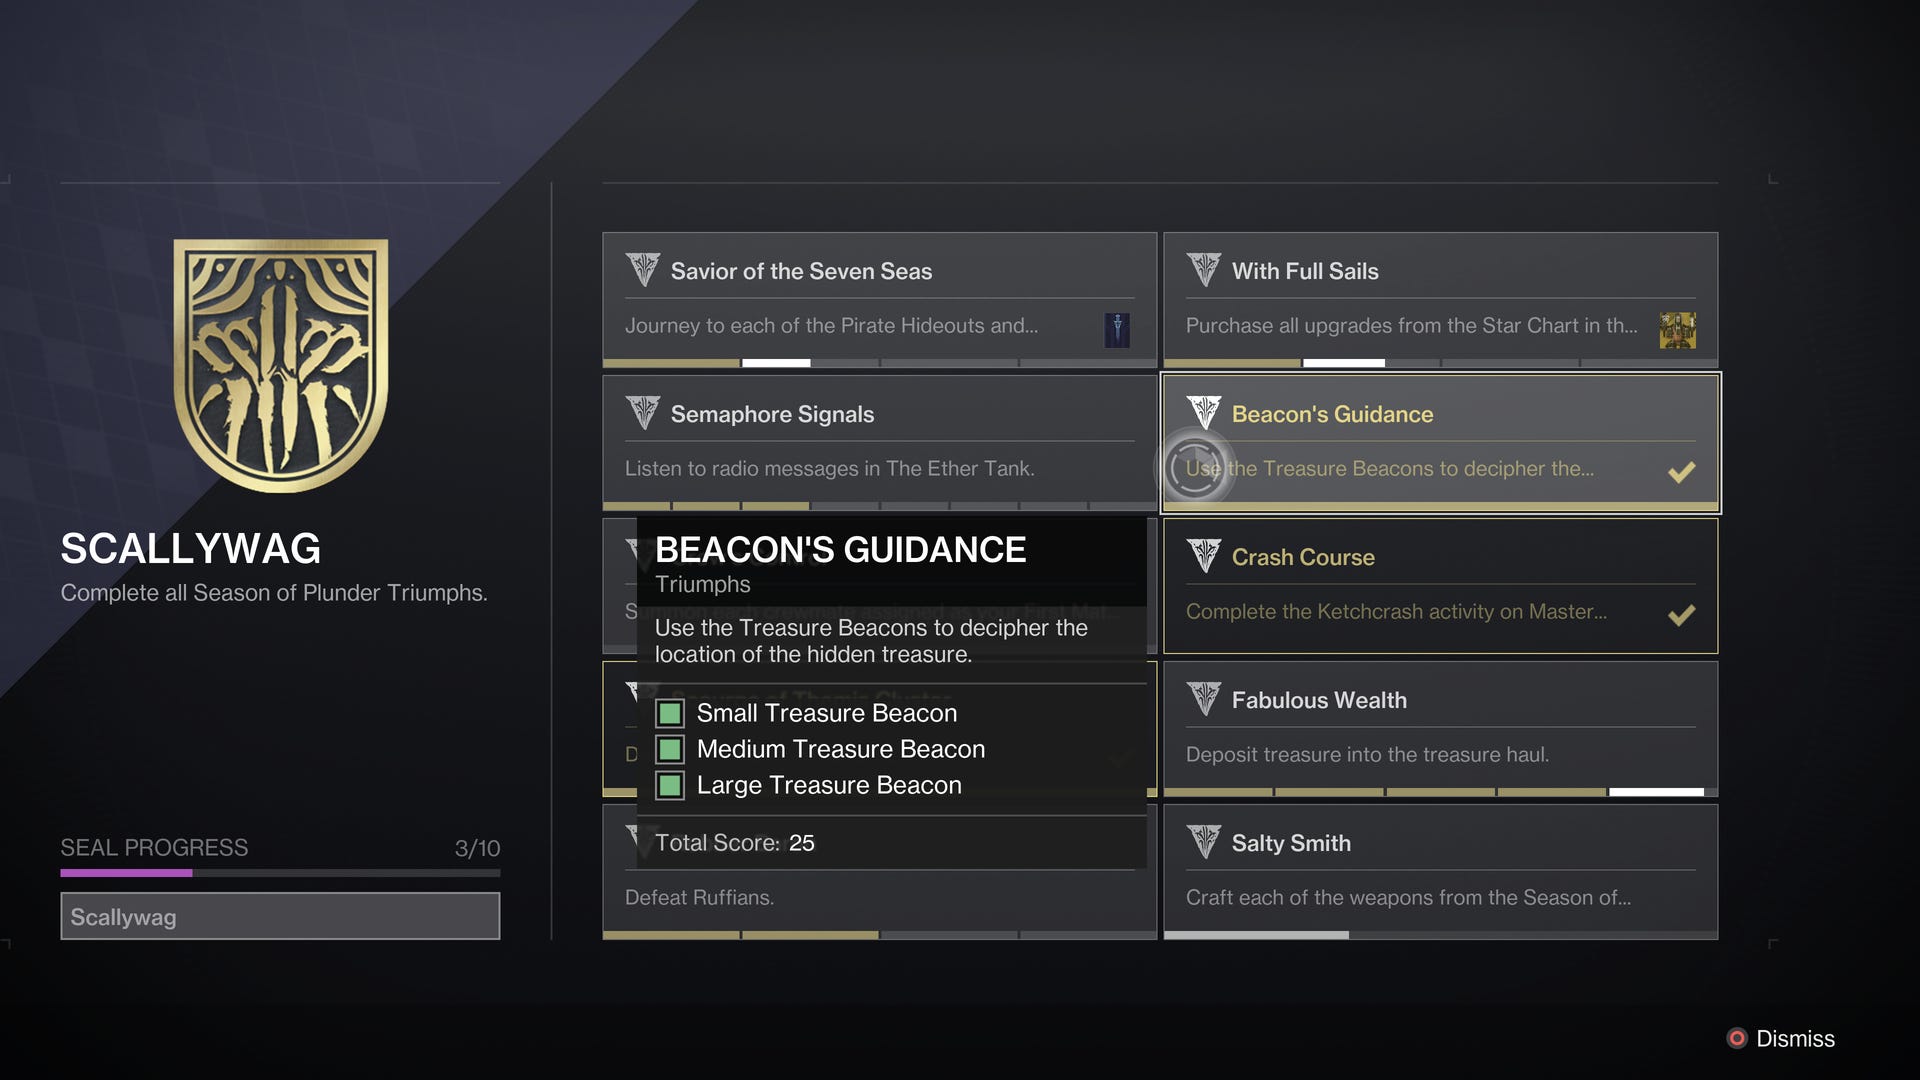
Completing these also unlocks progress for Destiny 2 seasonal challenges and the Beacon’s Guidance triumph, required for the Scallywag title.
This page details each Cryptic Quatrains quest, explaining how to solve each riddle, puzzle and - the most important part - plunder ye treasure!
On this page:

How to unlock Cryptic Quatrain quests in Destiny 2
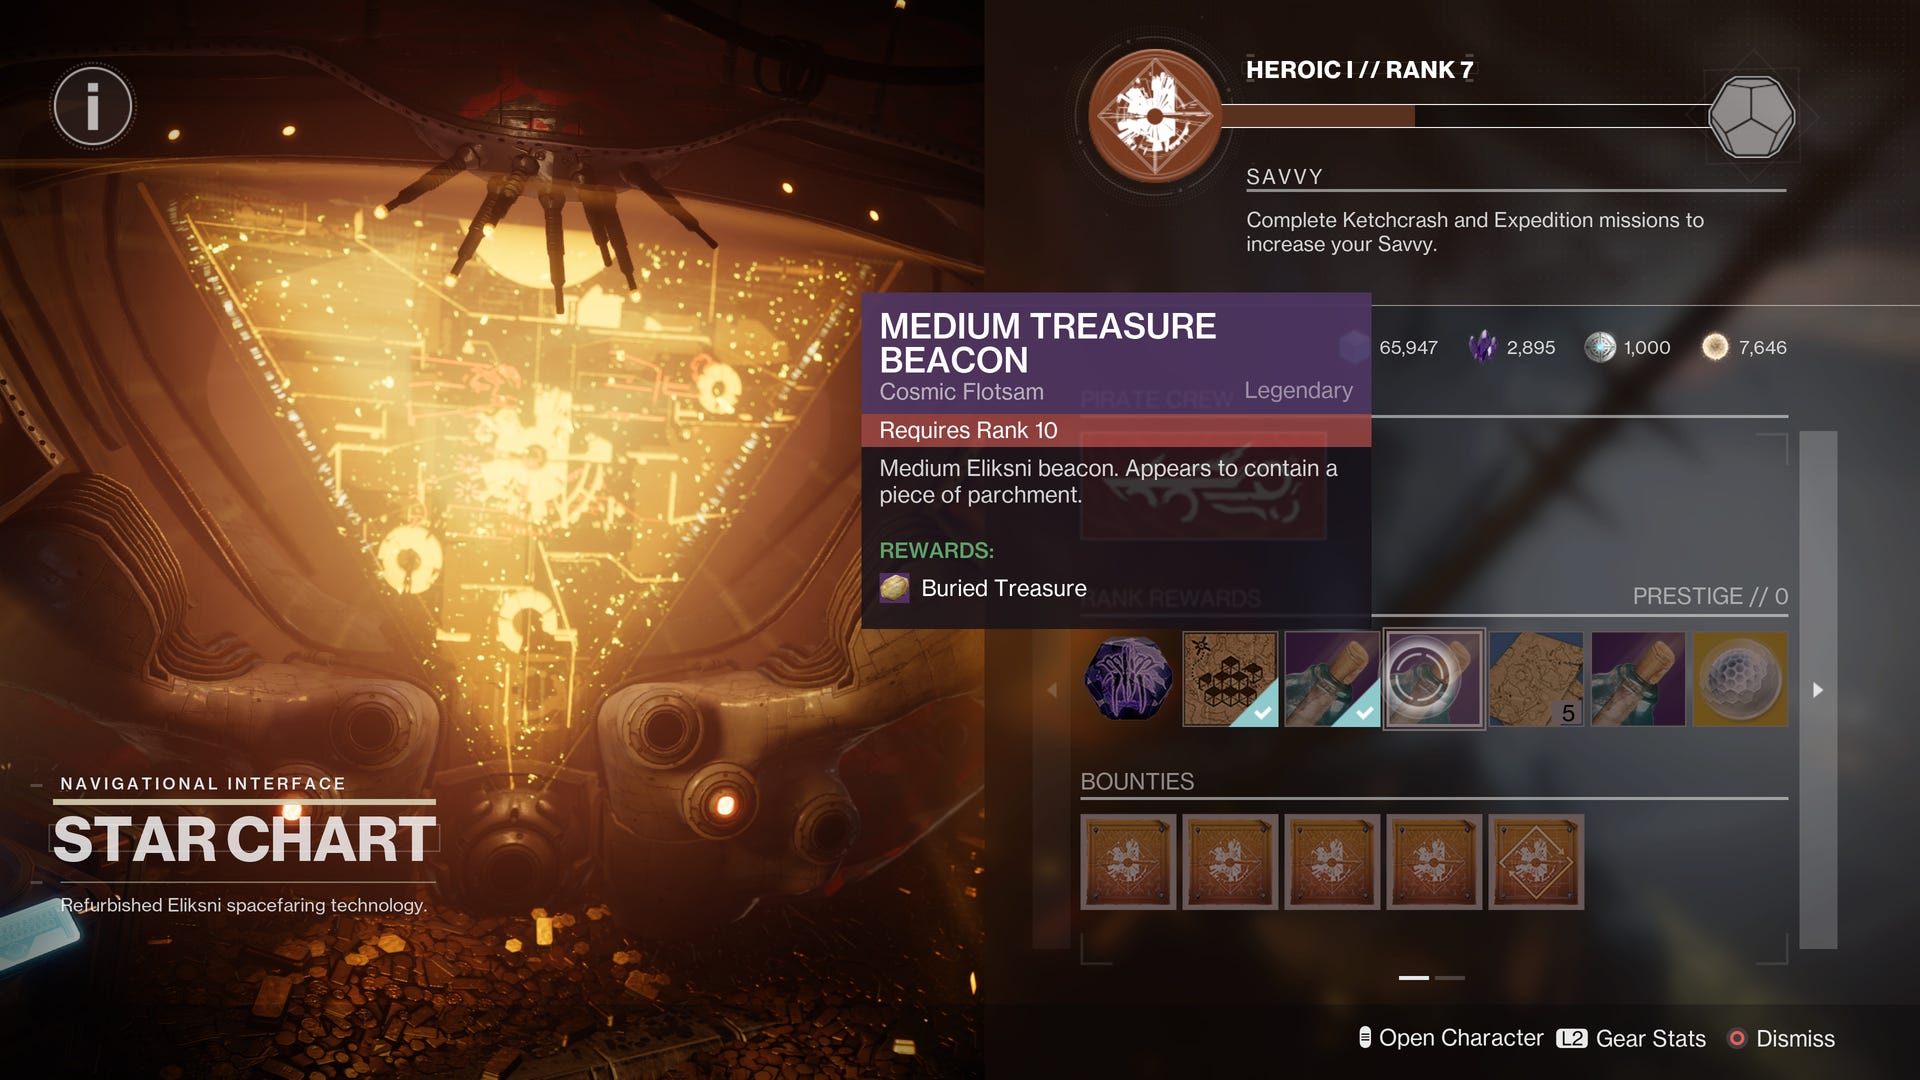
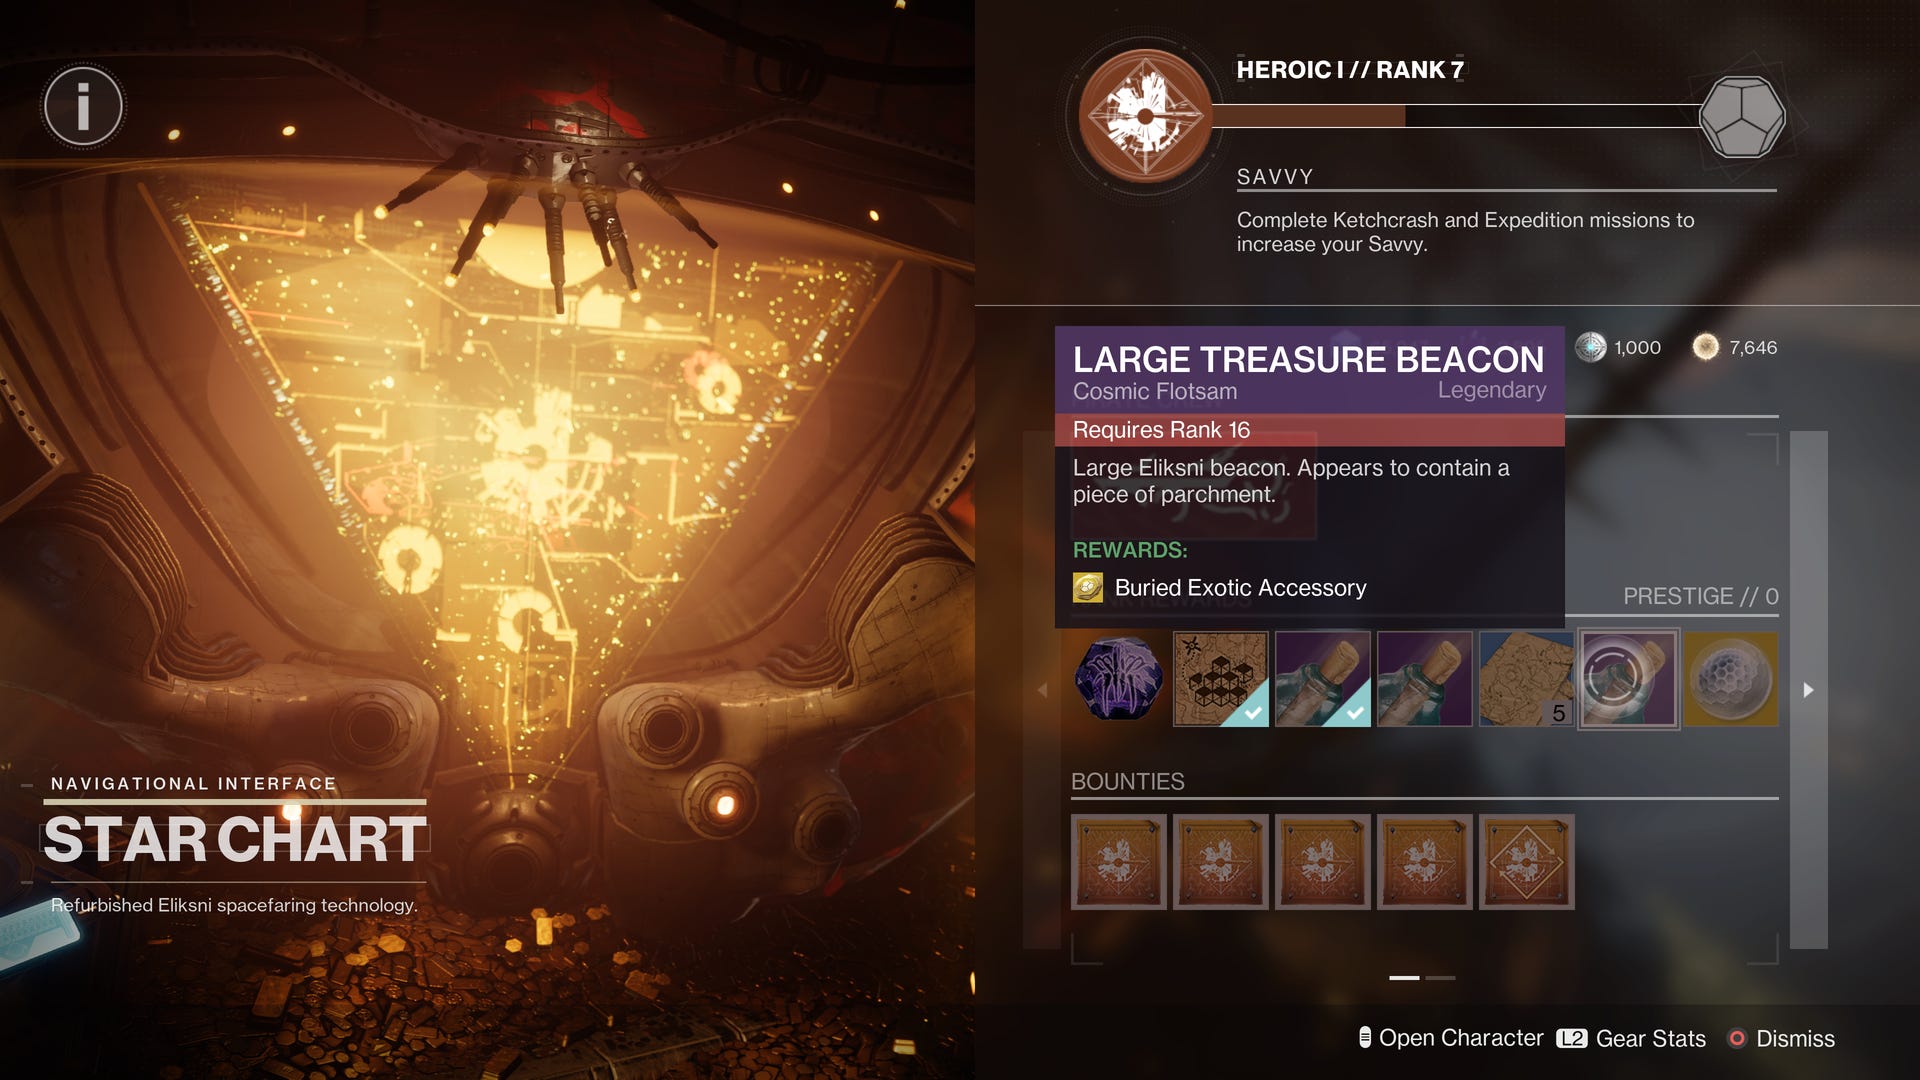
The Cryptic Quatrain quests are acquired by reaching rank milestones with the Star Chart in the HELM. Reaching ranks 7, 10 and 16 each reward you with a treasure beacon that opens up treasure hunt quests.
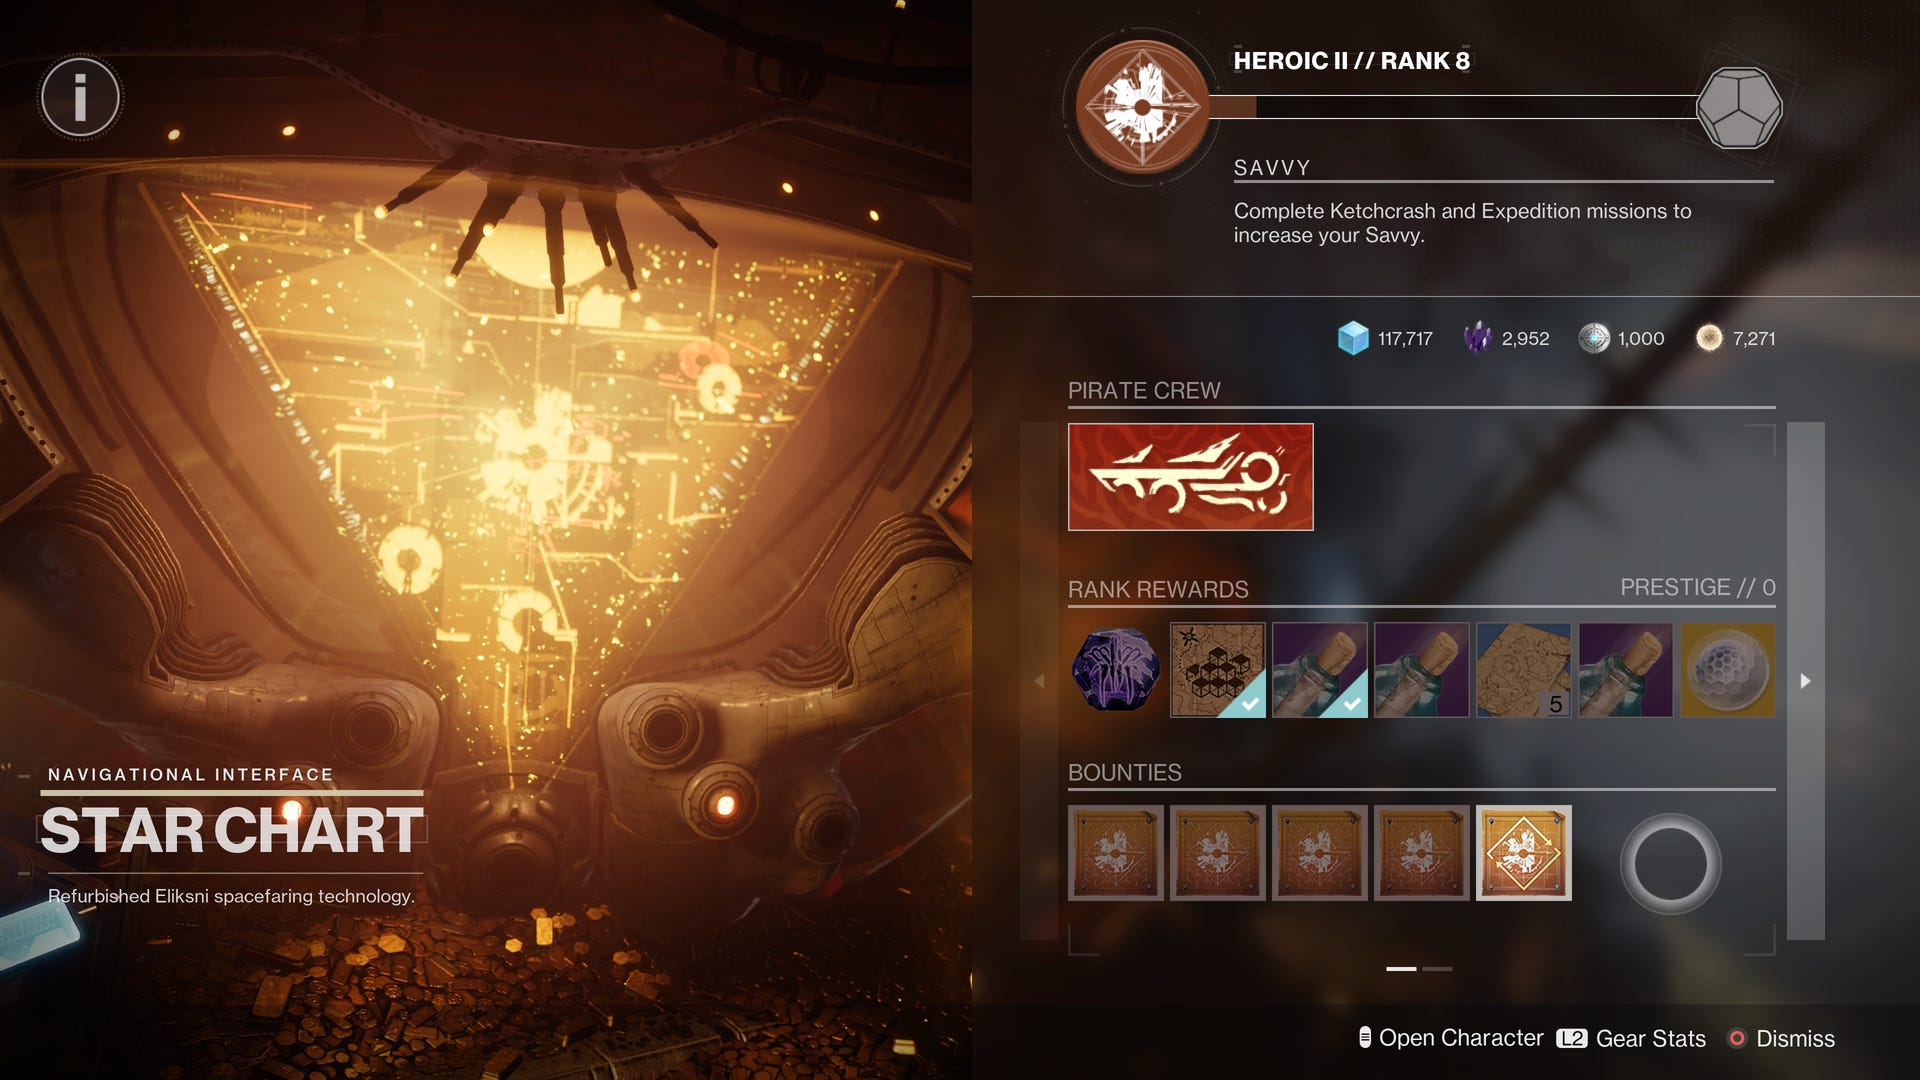
Reputation to rank up the Star Chart vendor is earned by completing Ketchcrash and Expedition activities, accessed on the left side of the HELM destination screen.
Learning how to earn Treasure Coordinates and Map Fragments will help you get additional loot as you go.

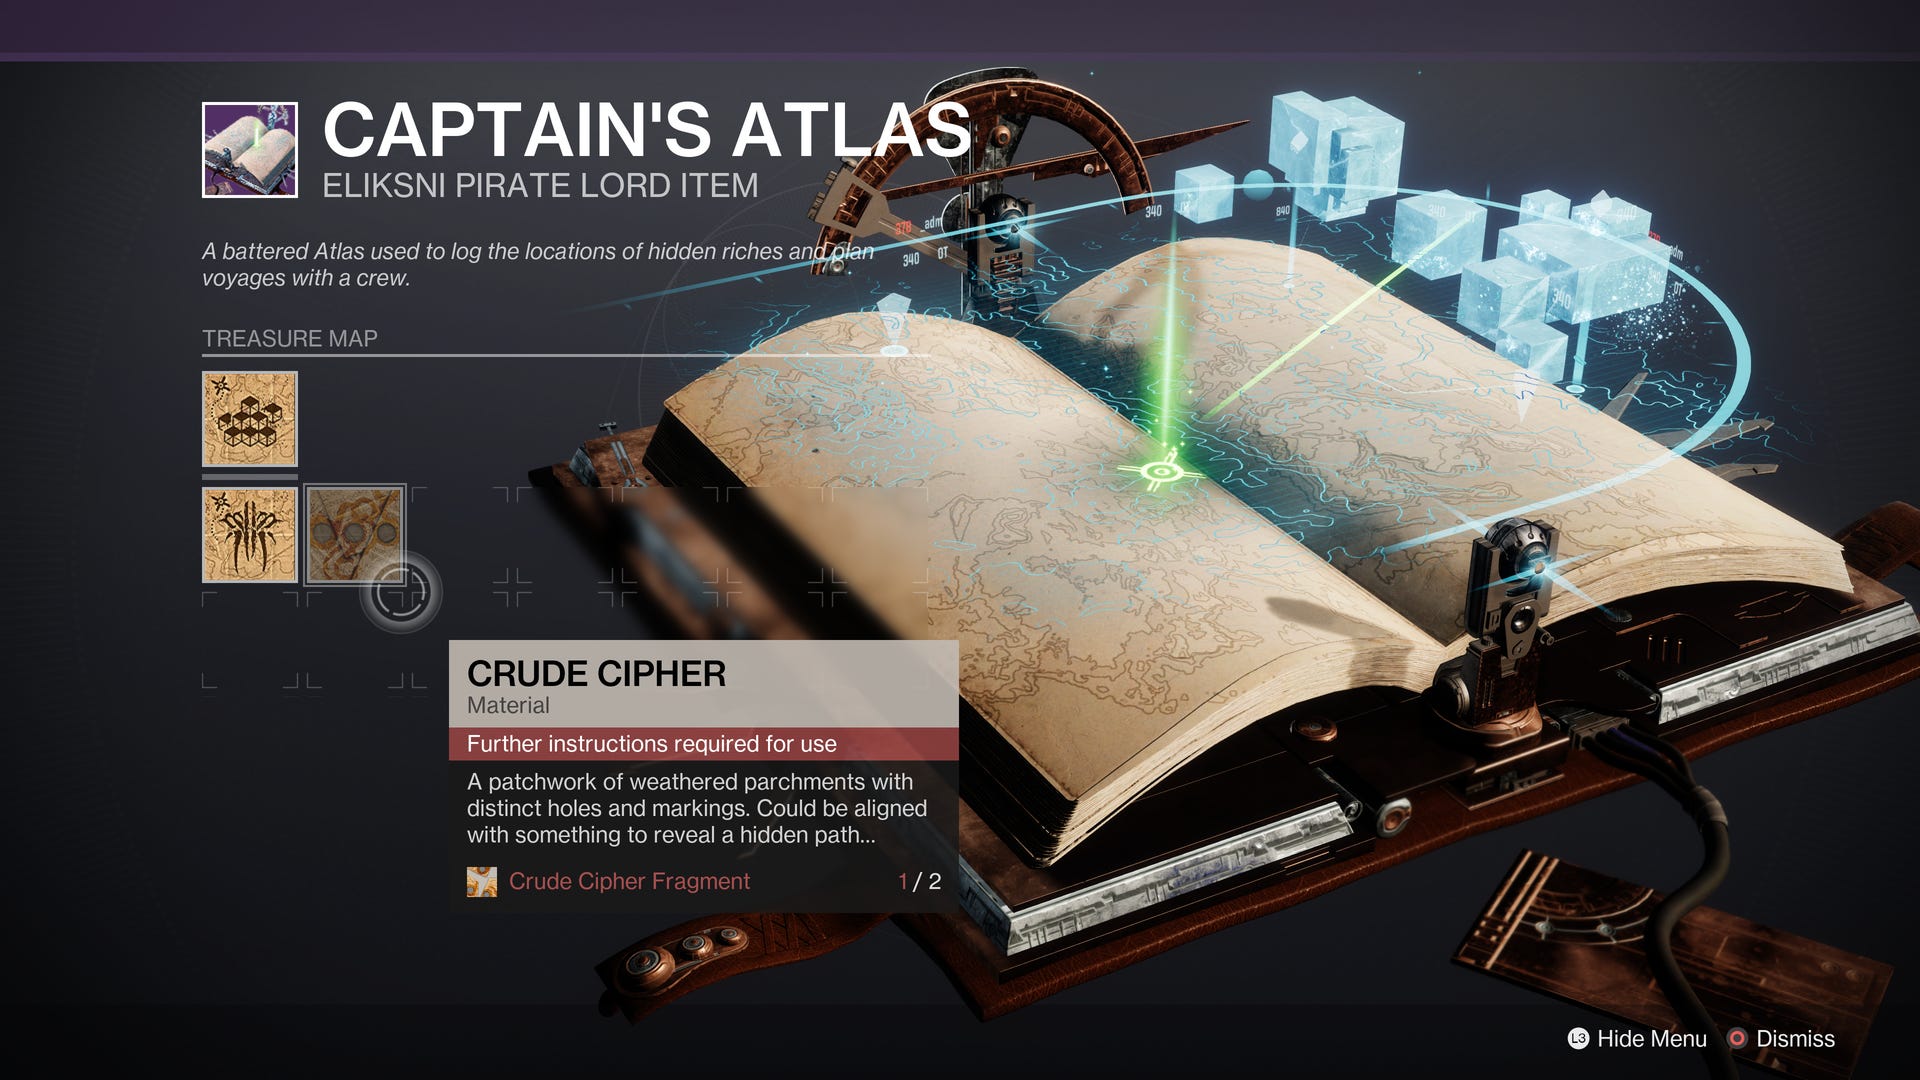
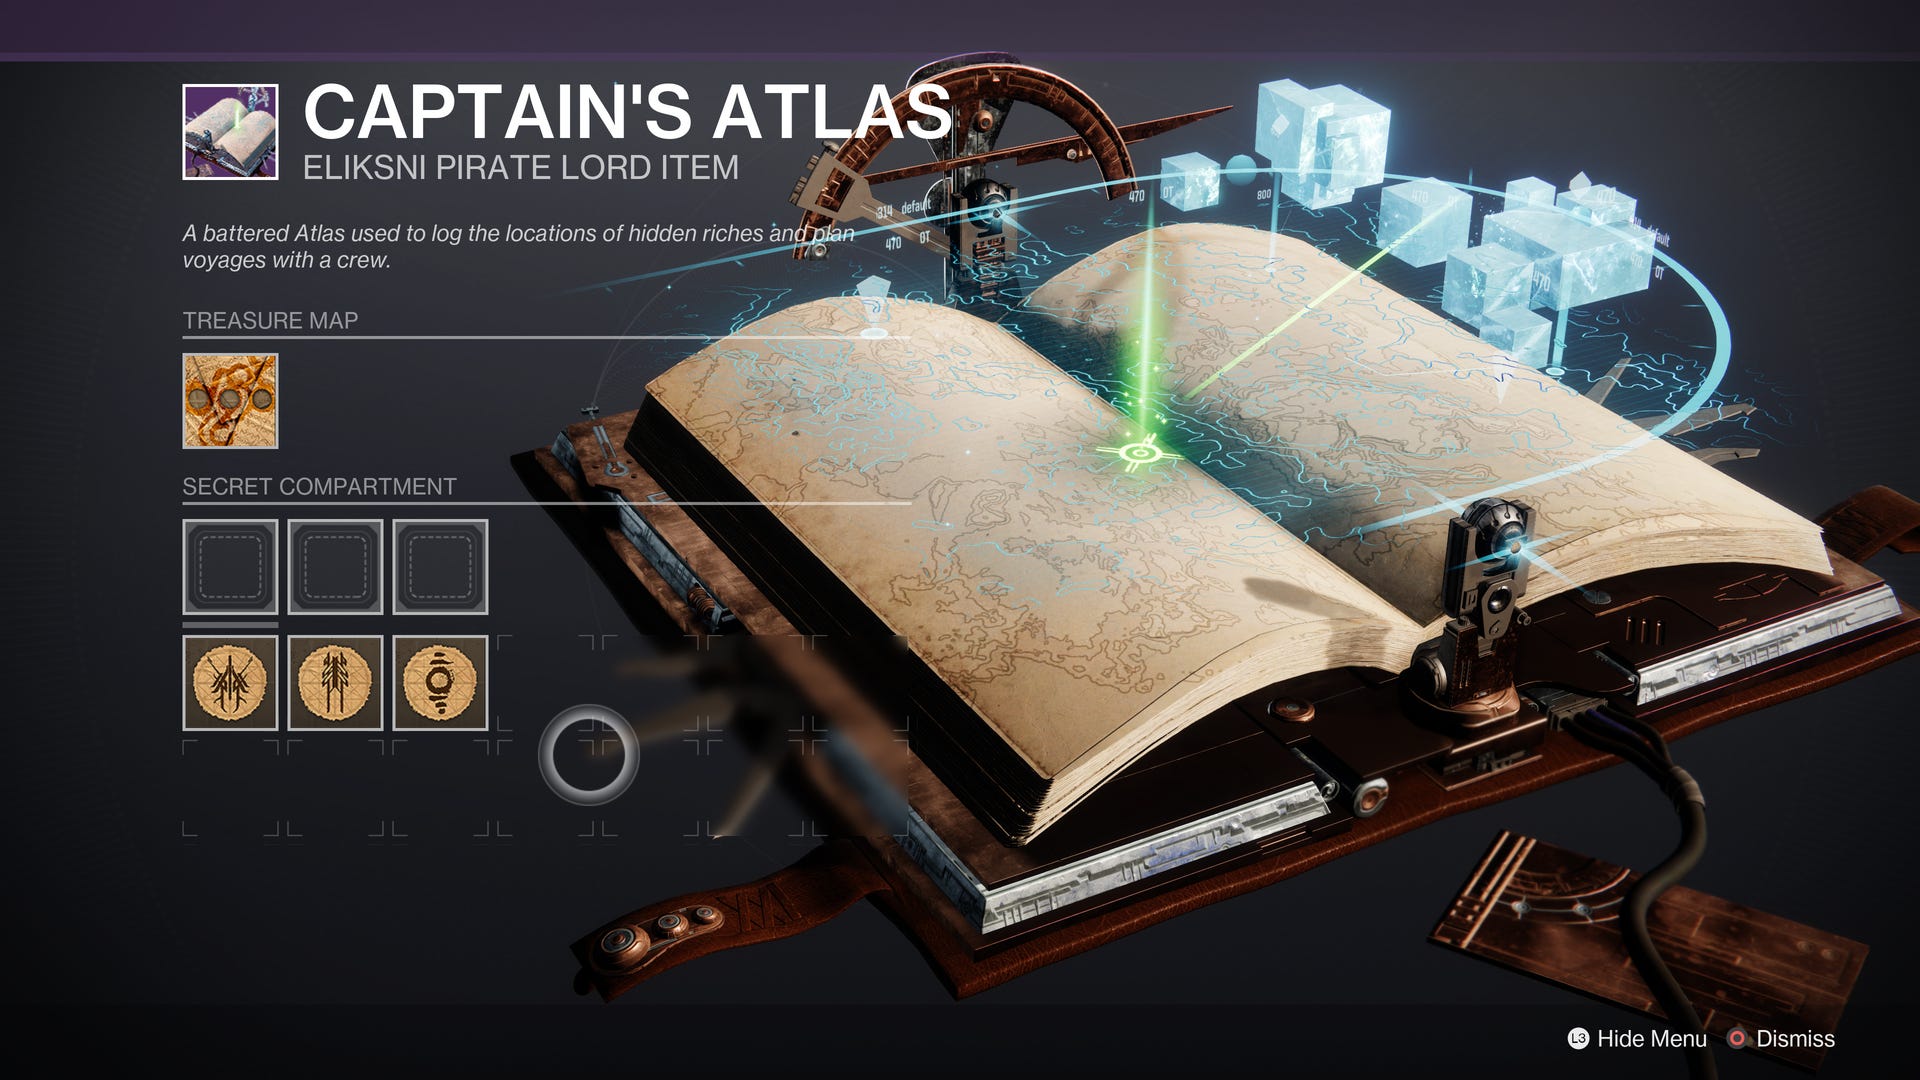
Additionally, you can unlock the Crude Cipher by completing all three of the Cryptic Quatrains quests. Once the first part is complete, a new option will show in the Captain’s Atlas alongside existing treasure maps, showing the first of two fragments have been acquired.
Destiny 2 Cryptic Quatrain 1 quest steps, riddles and location
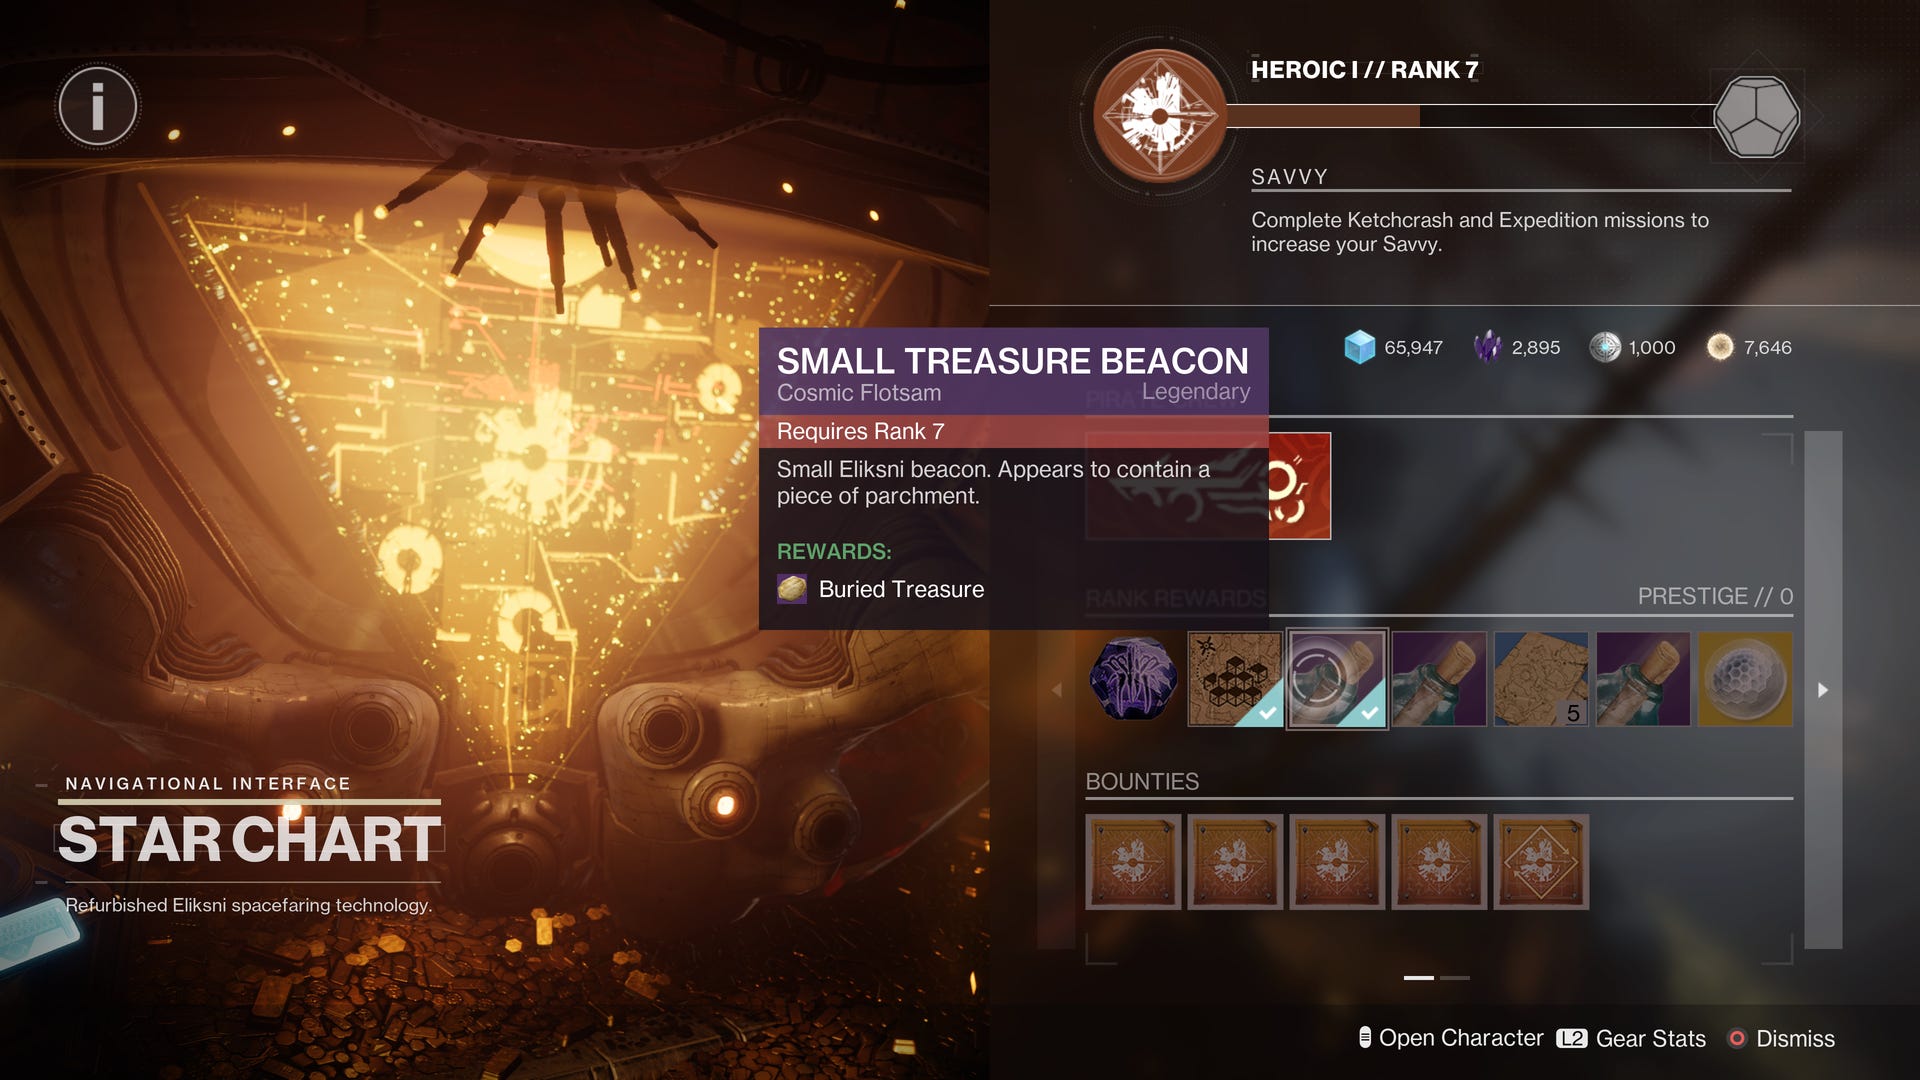
Acquire the first Cryptic Quatrain quest by reaching Rank 7 with the Star Chart vendor in the HELM, and collecting the ‘Small Treasure Beacon’.
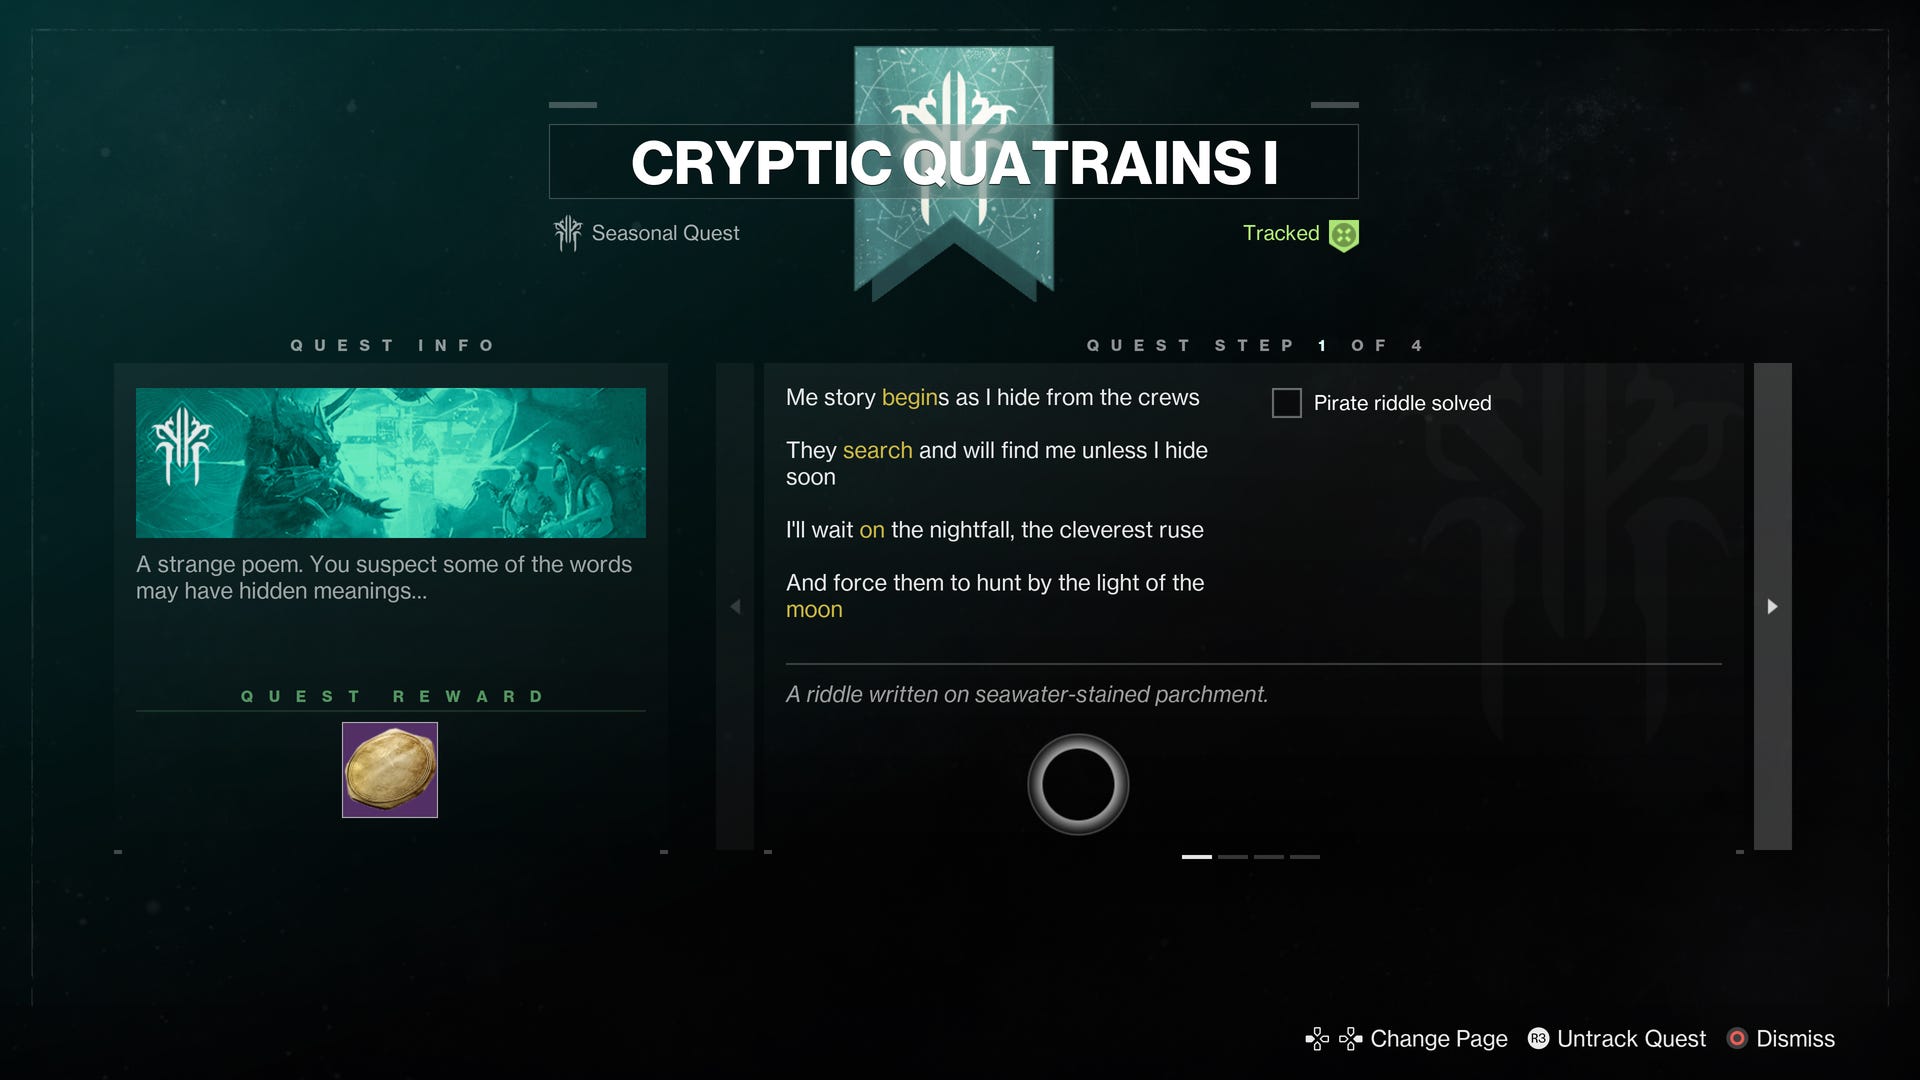
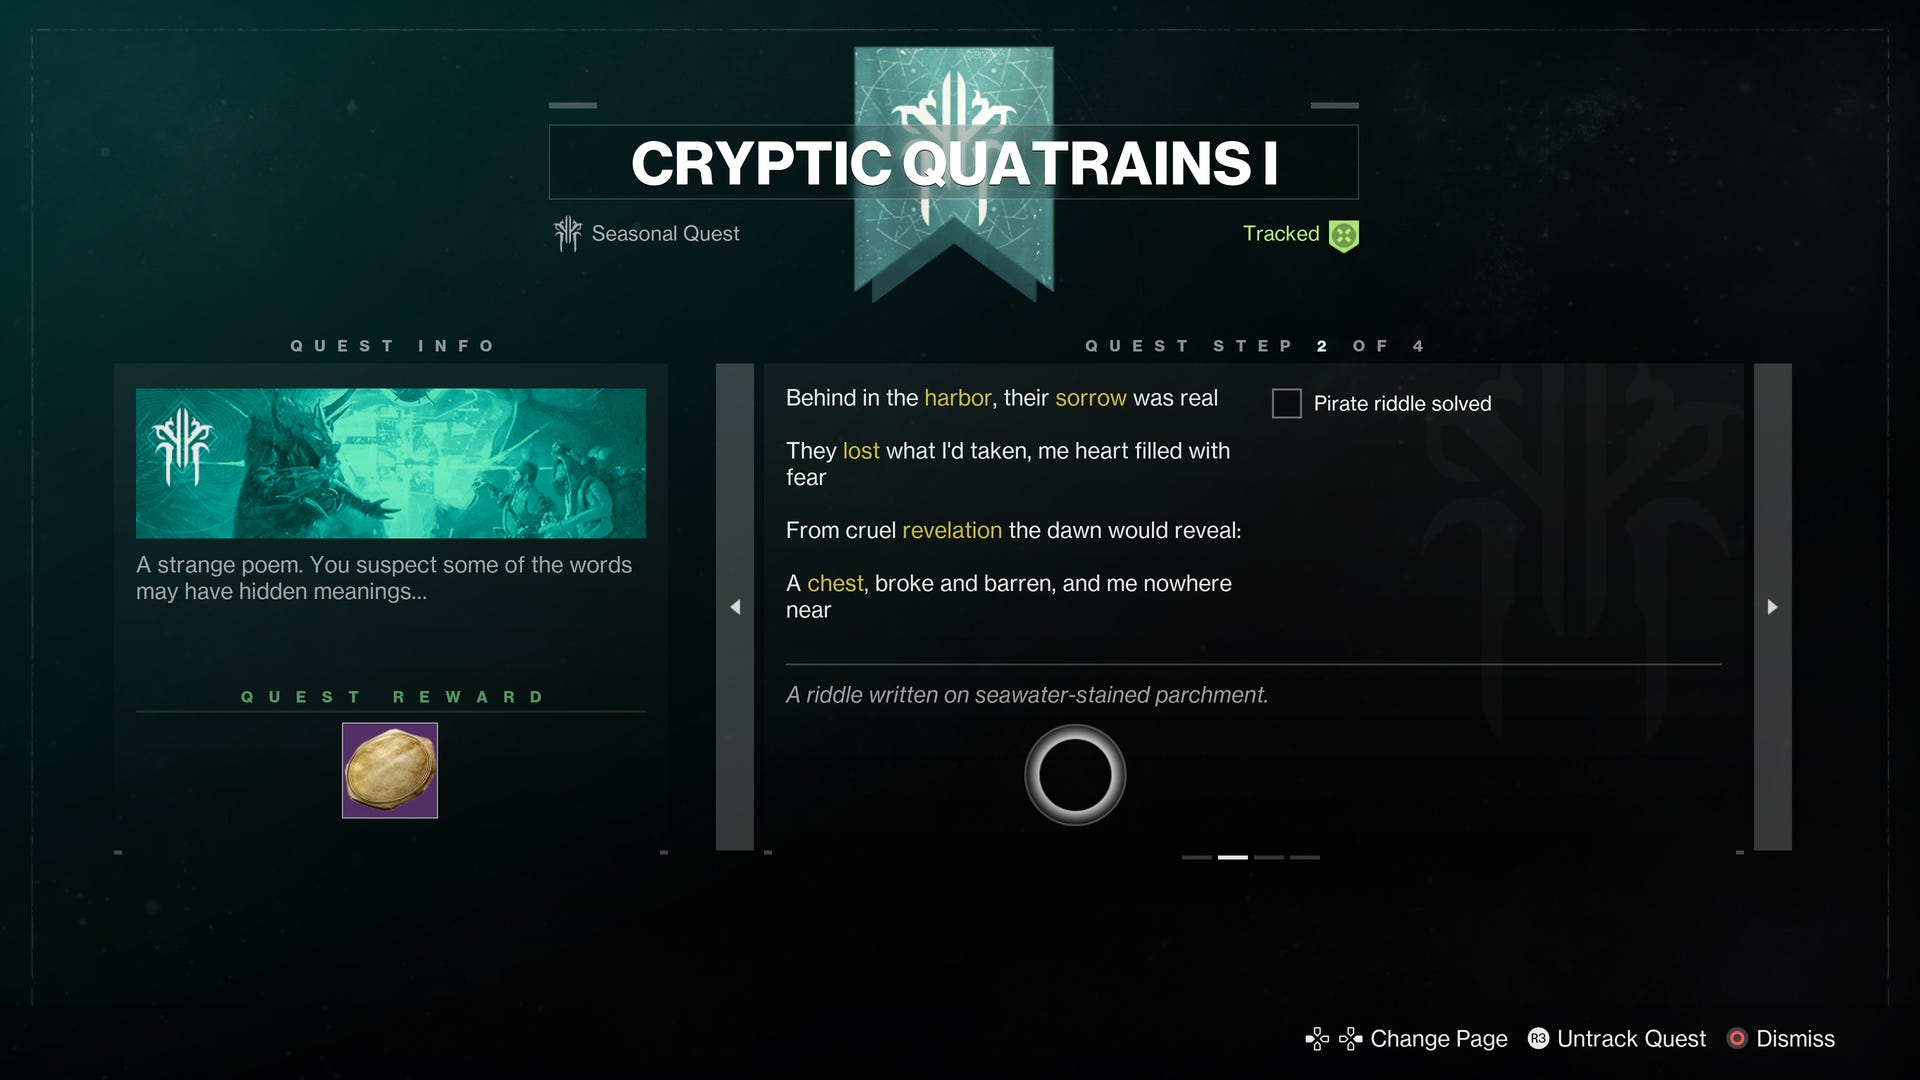
This first quest begins with a riddle; where, highlighted in yellow, are words that spell out: 'begin search on moon' - as such, head to the Moon.
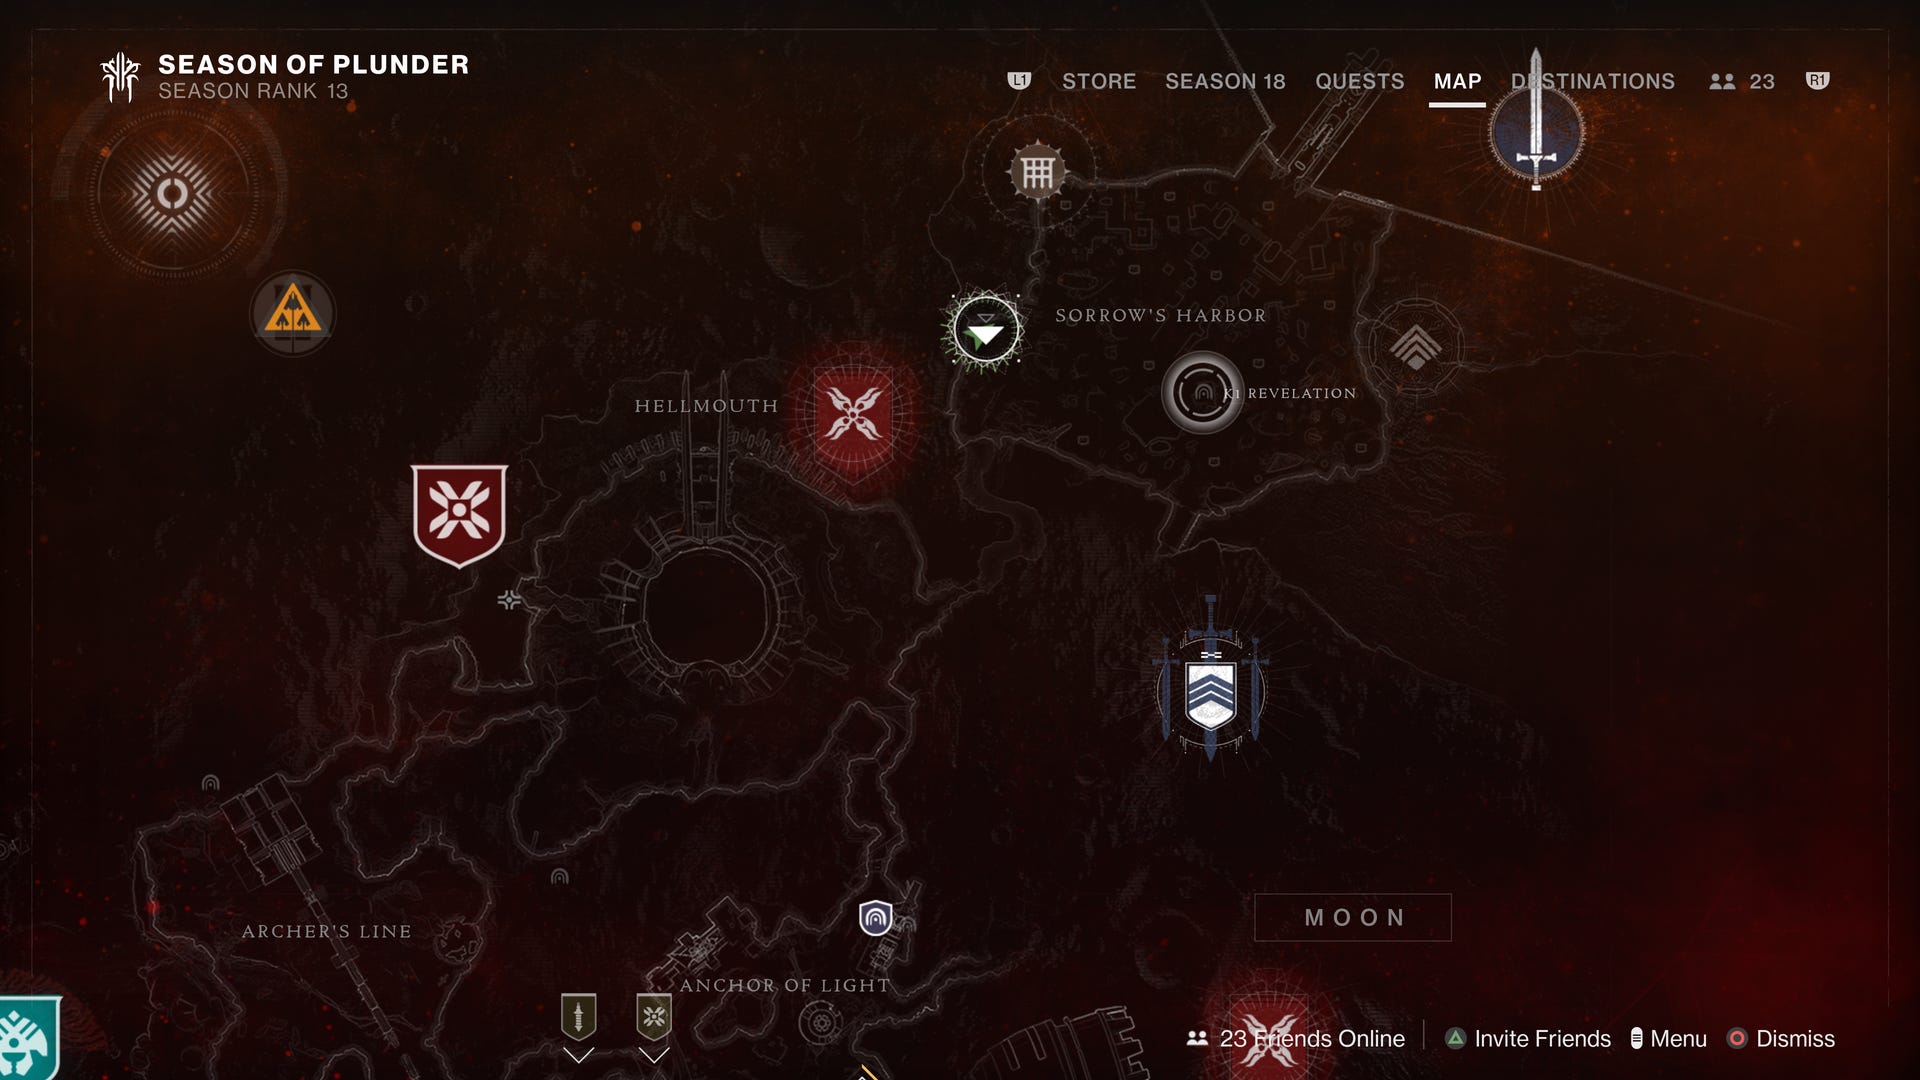
To save time, select Sorrow’s Harbour as the landing zone.
Once you land, the quest will update with a new riddle, shown below.
This next step directs you to the K1 Revelation Lost Sector, located in Sorrow’s Harbour, pictured below - head there.
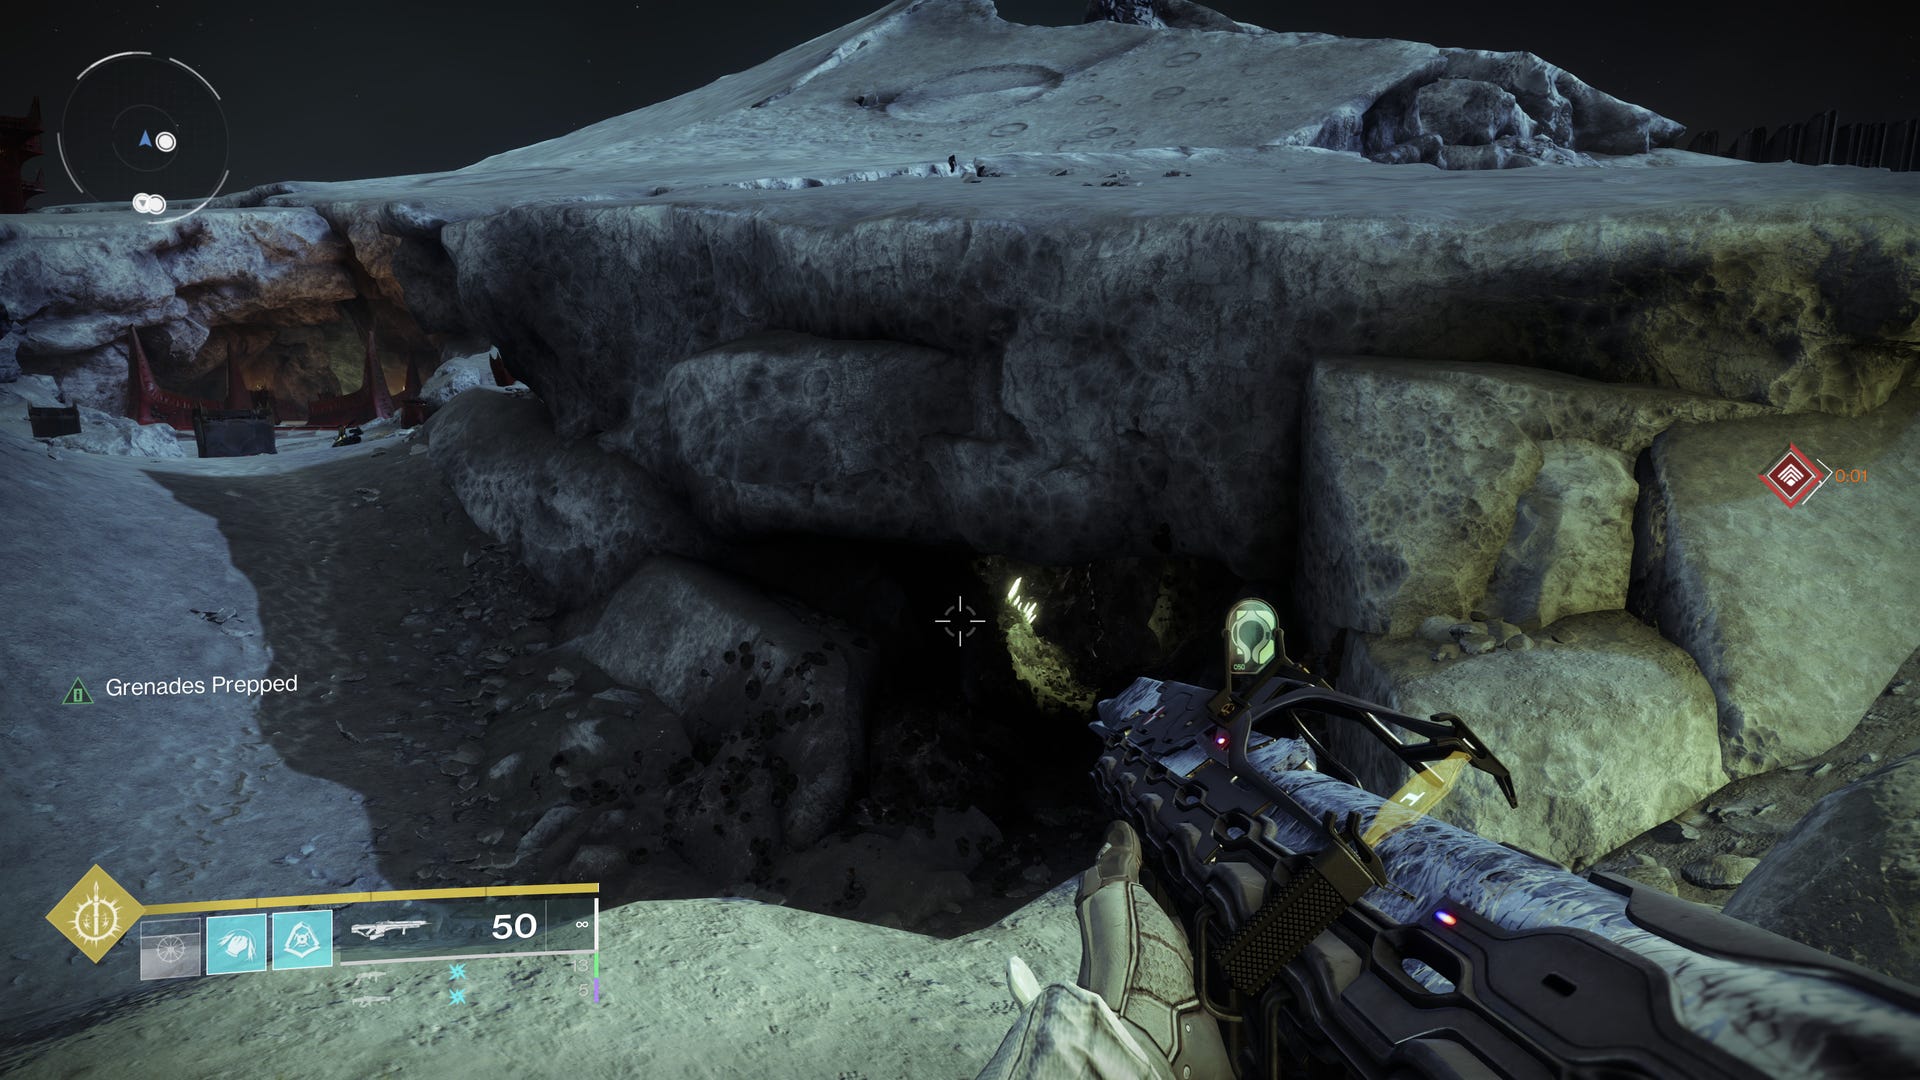
Once you’ve reached the entrance of the Lost Sector, head inside and follow the path until you encounter enemies.
Once inside, eliminate all the enemies, destroying the three floating crystals as you go.
After that’s done, destroy a fourth crystal to spawn the Nightmare of Arguth boss.
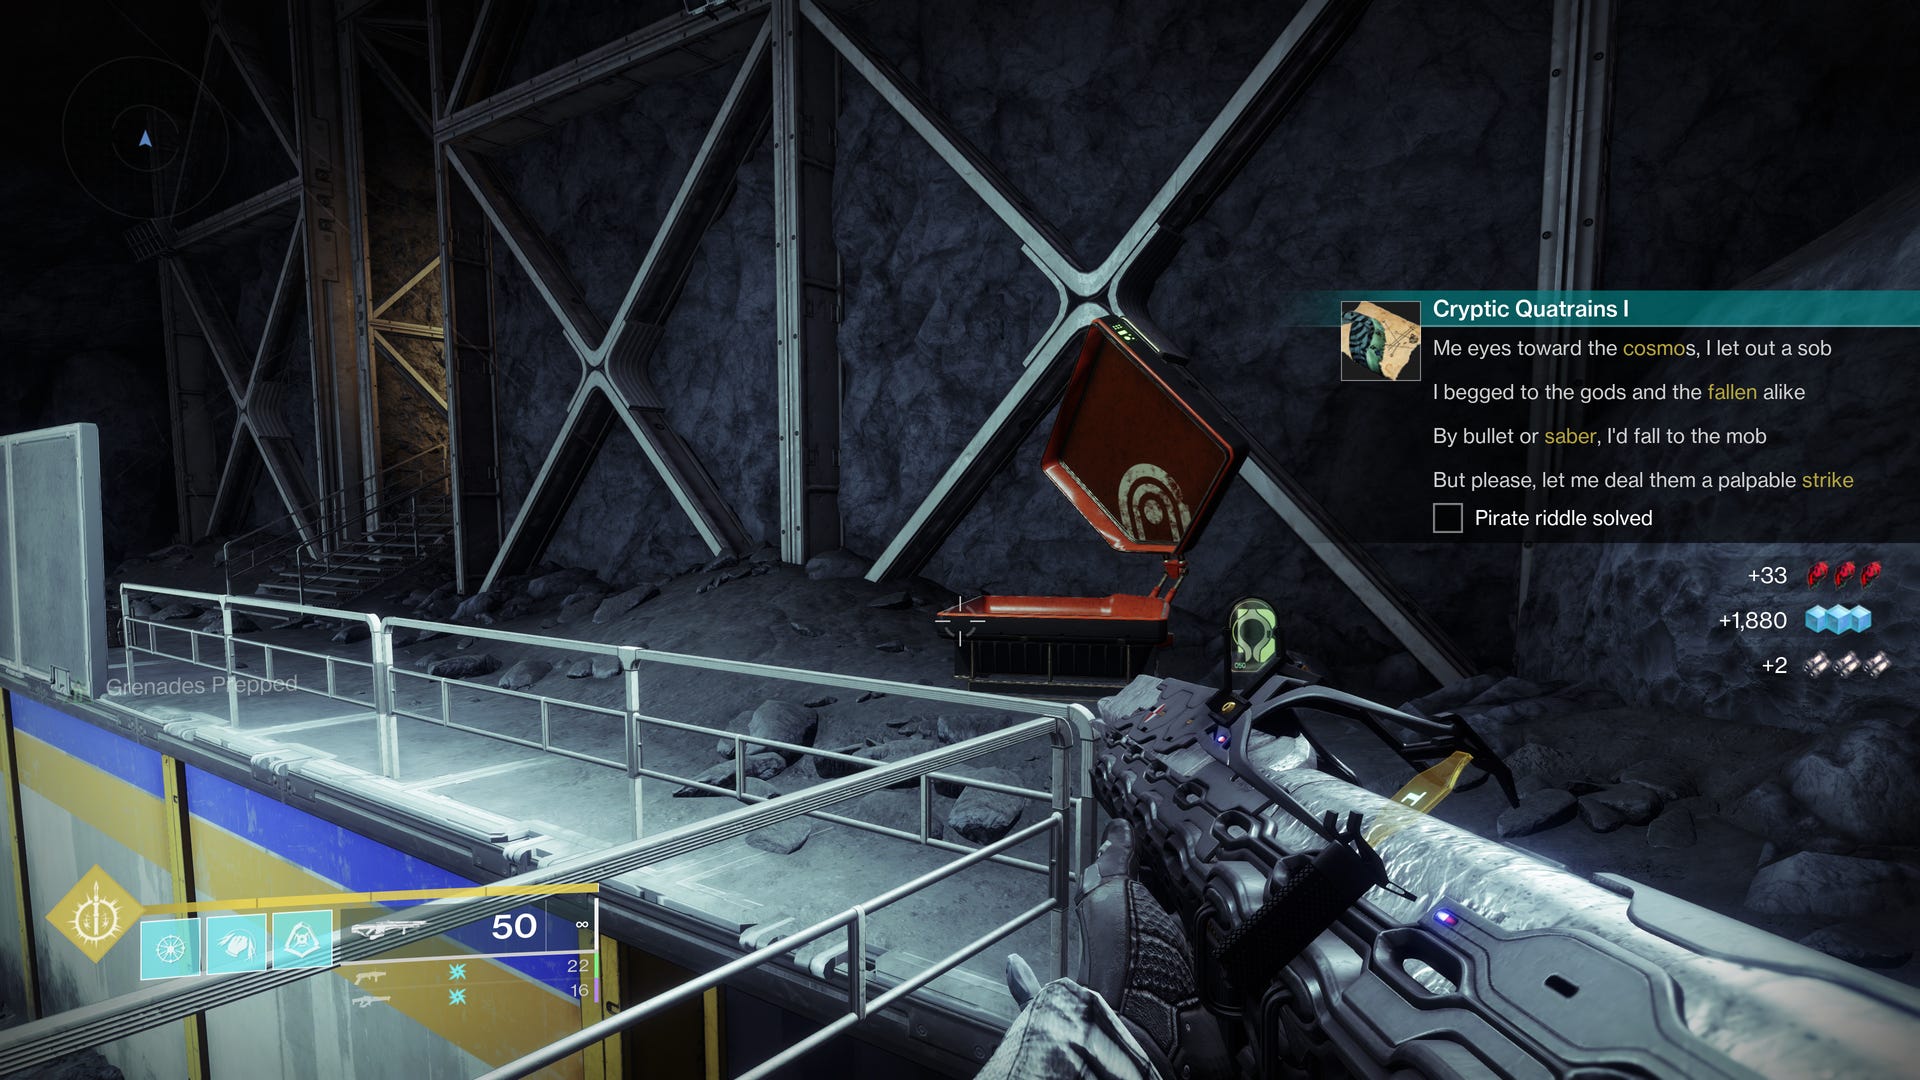
Defeat it, then make your way to the balcony behind where the final boss spawned and open the orange and black chest - before it’s opened, it’ll be glowing with a blue-ish white light.
Once opened, the quest will update once again with a new riddle.
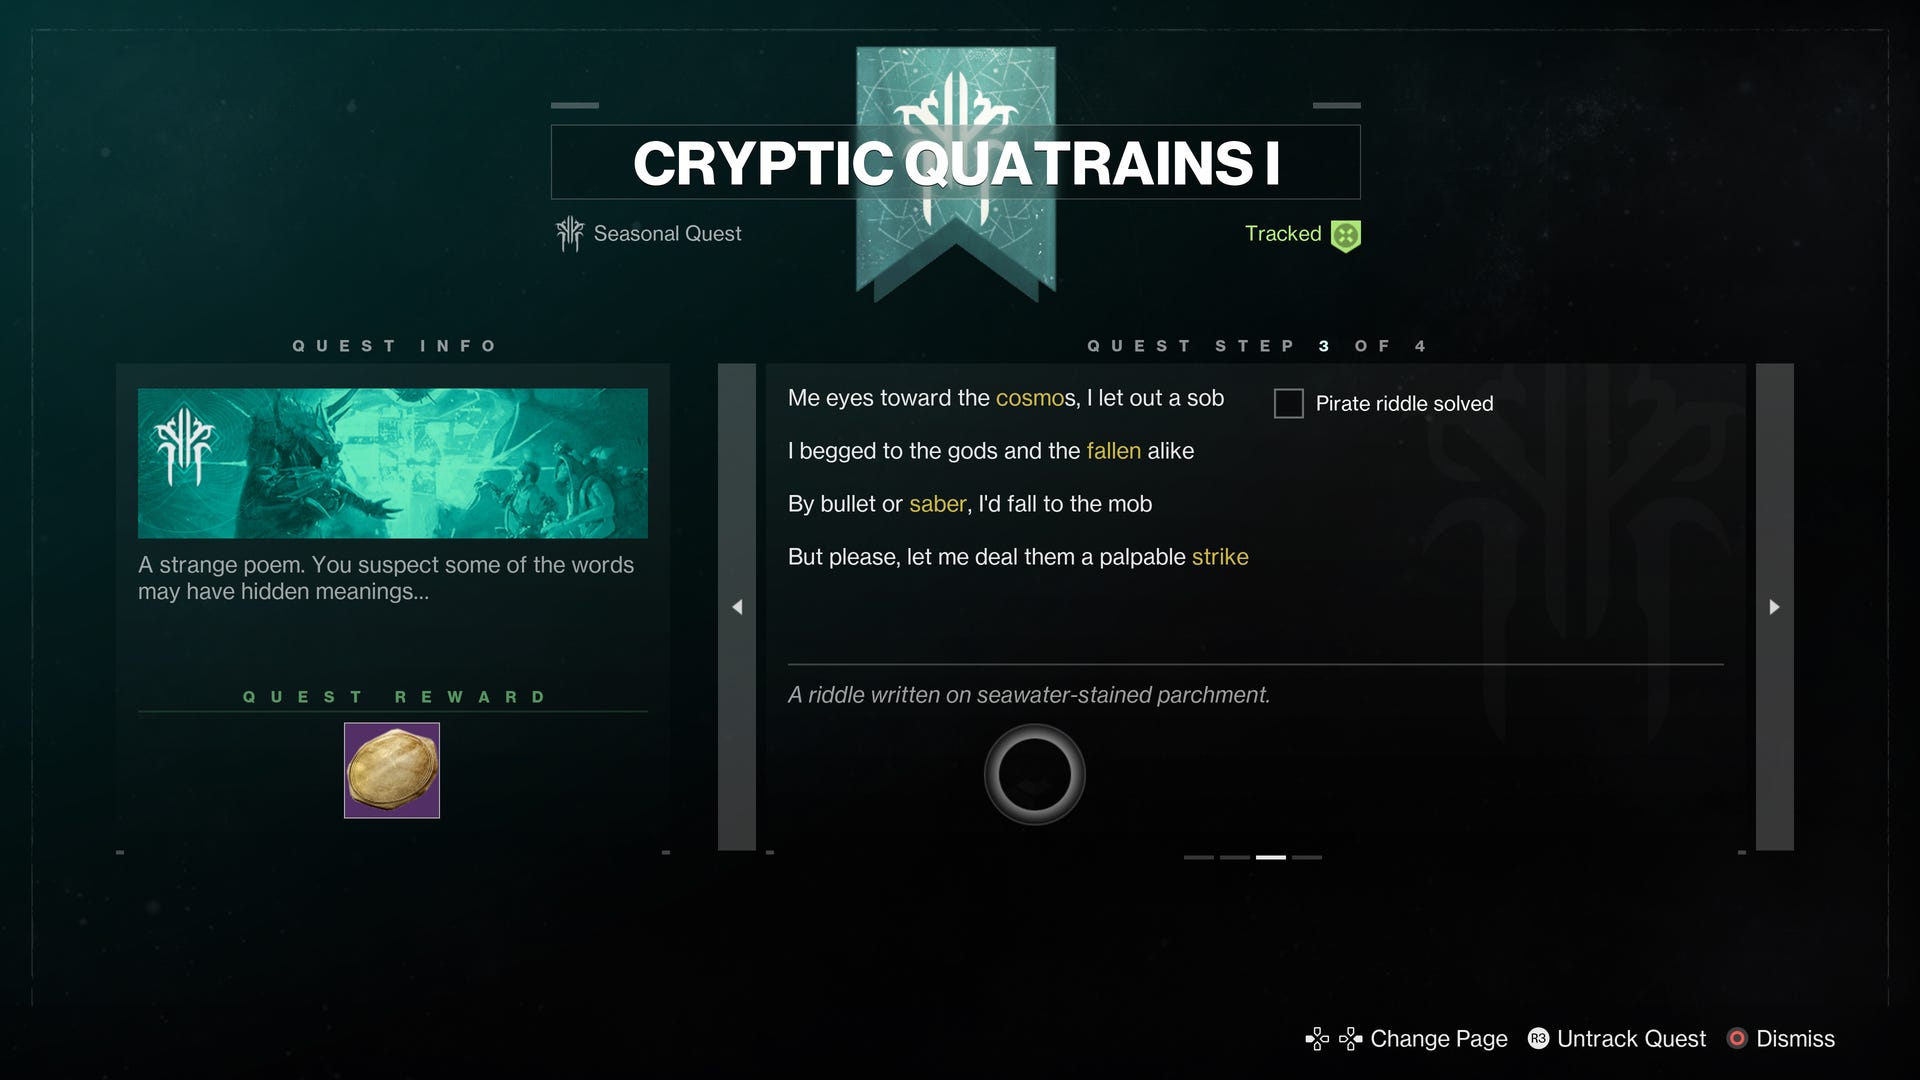
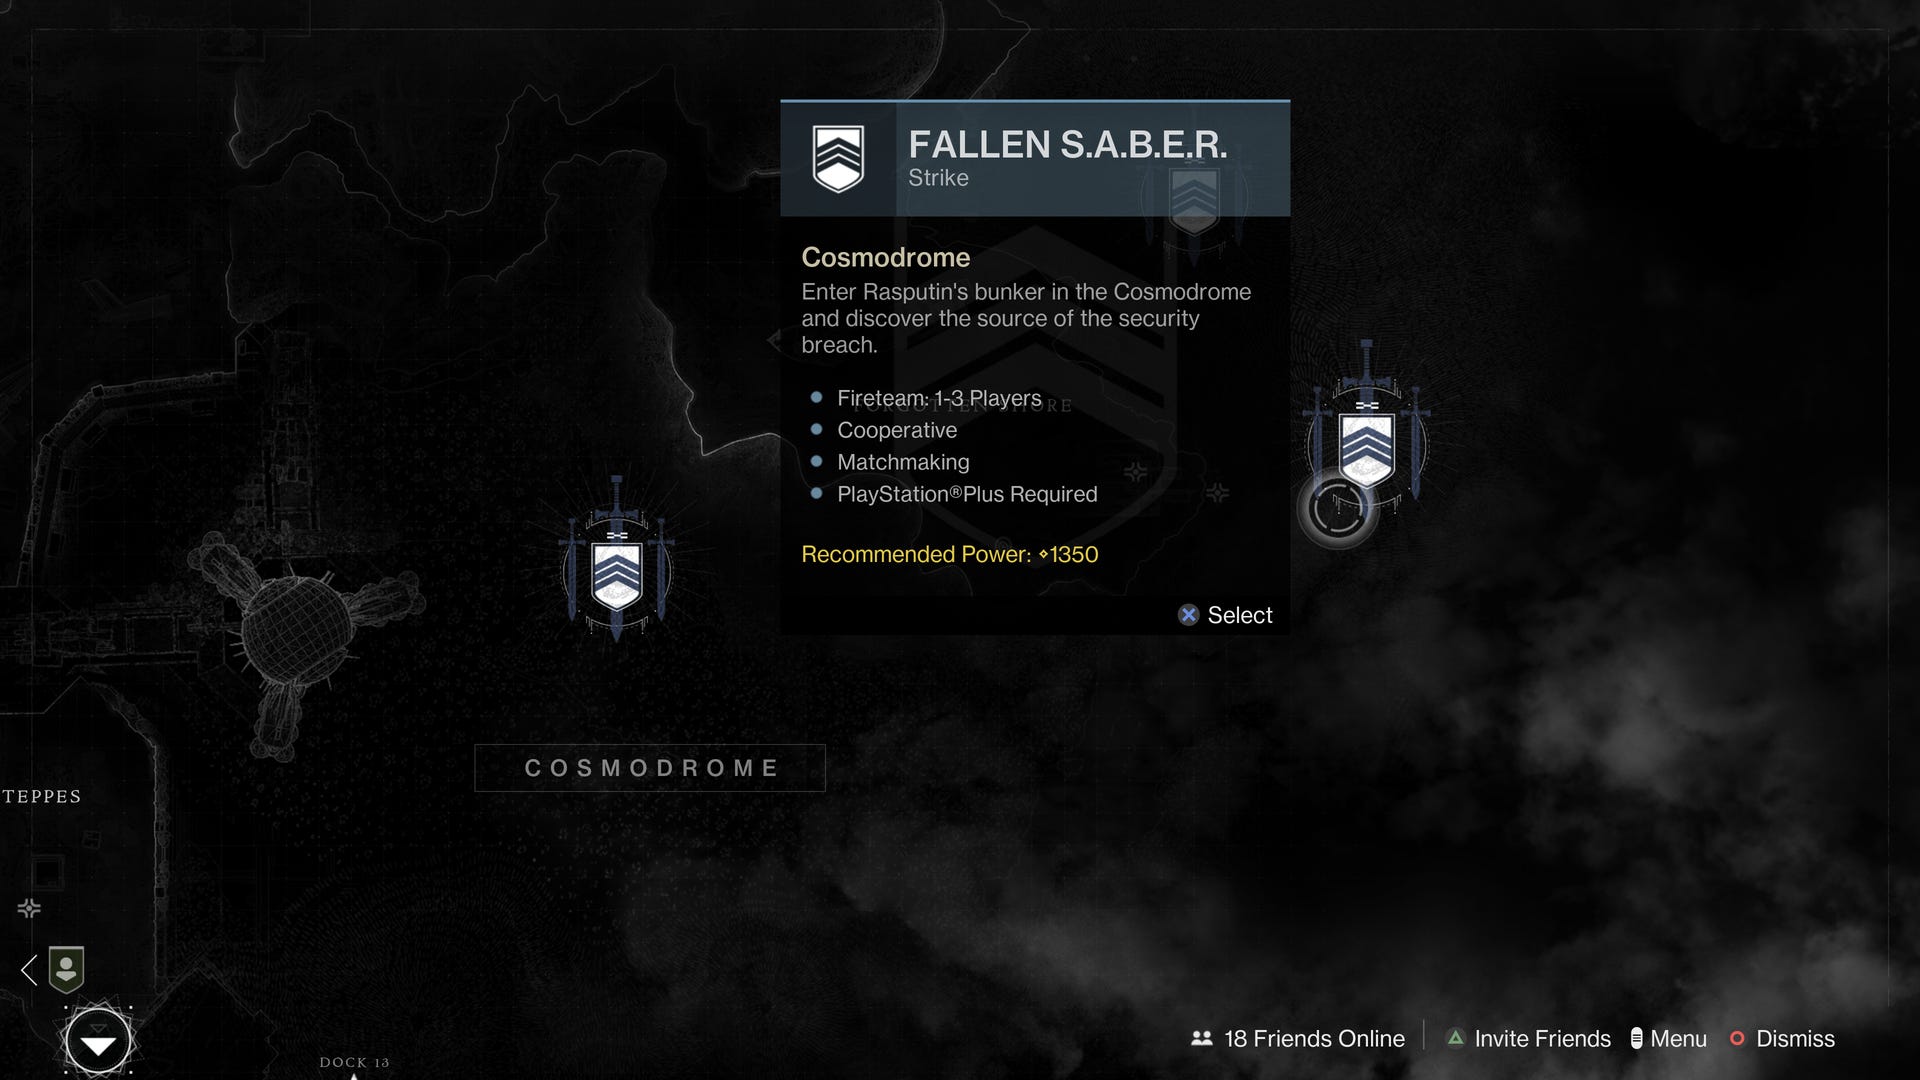
This new riddle requires you to complete the Fallen SABER Strike on the Cosmodrome - open the director and launch into the Strike via its activity node on the right side of the Cosmodrome map.
At the conclusion of the Strike, the quest will update a fourth and final time.
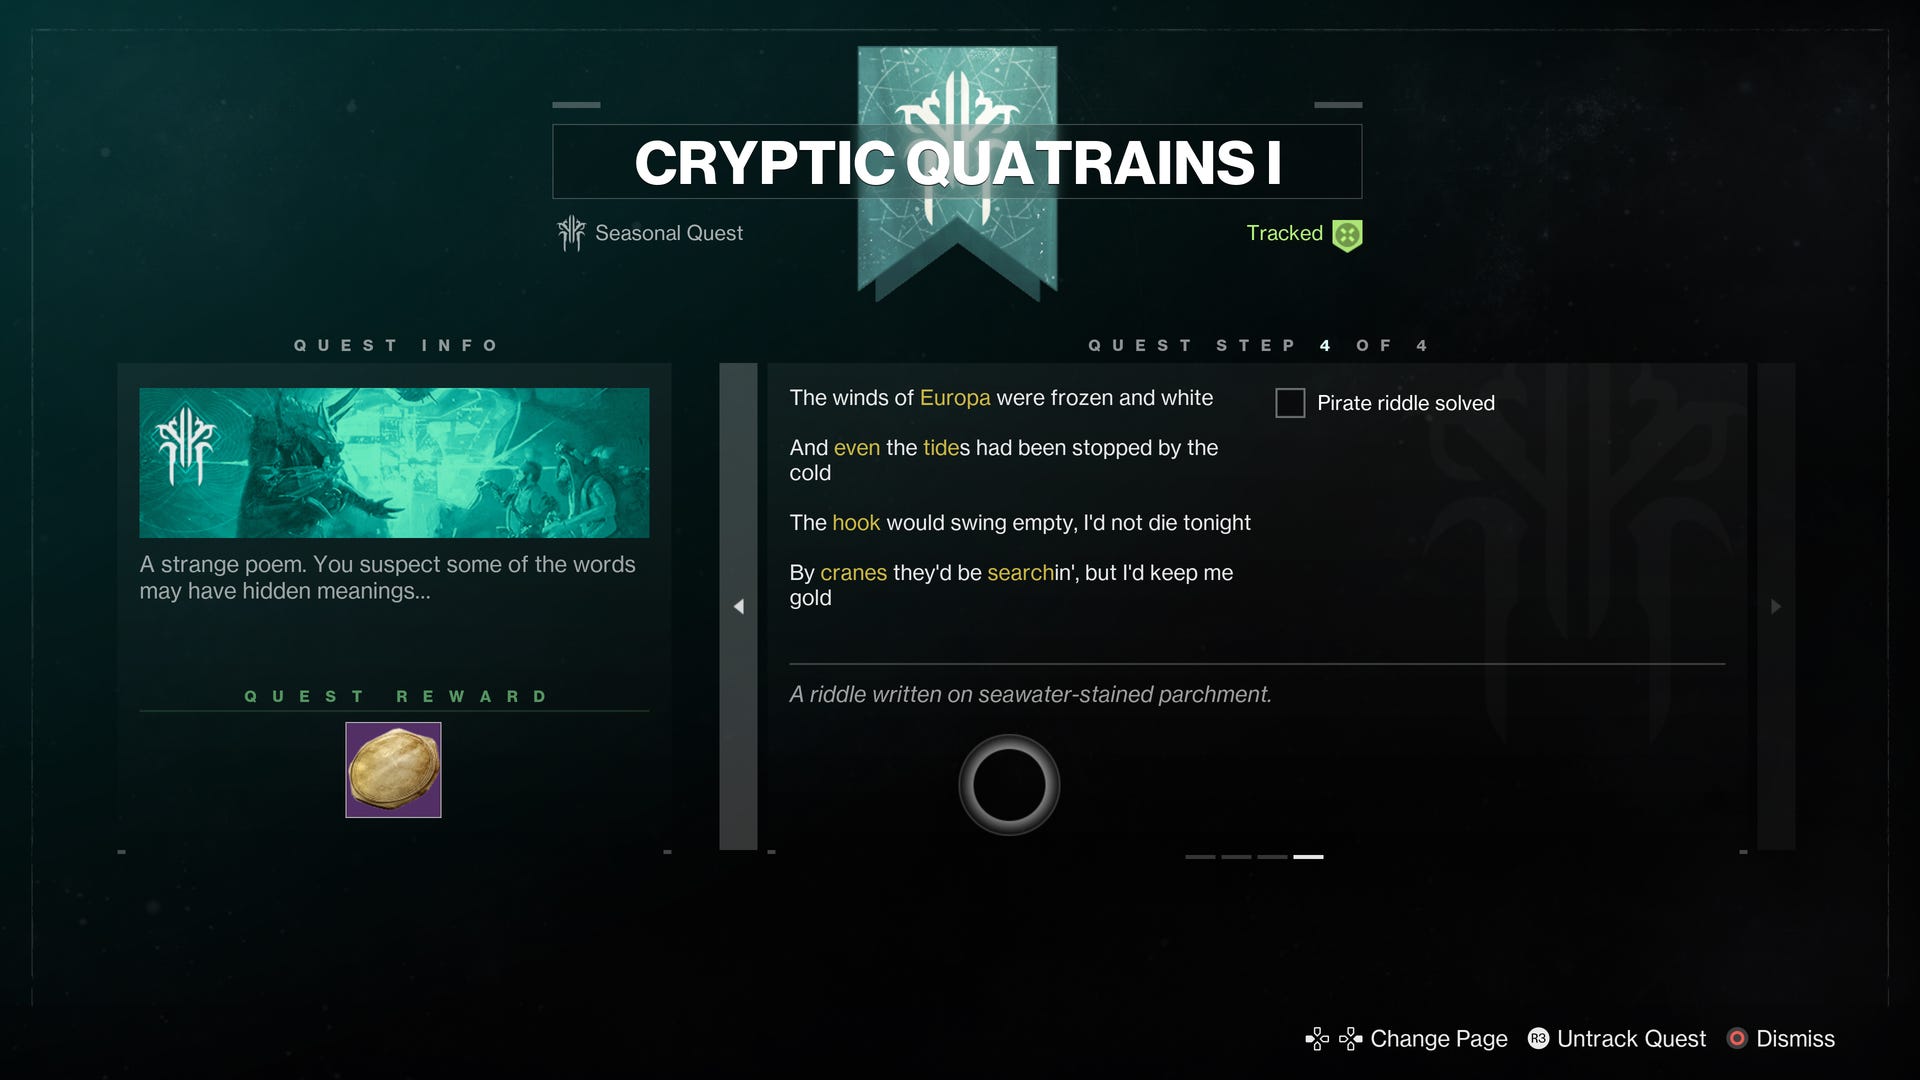
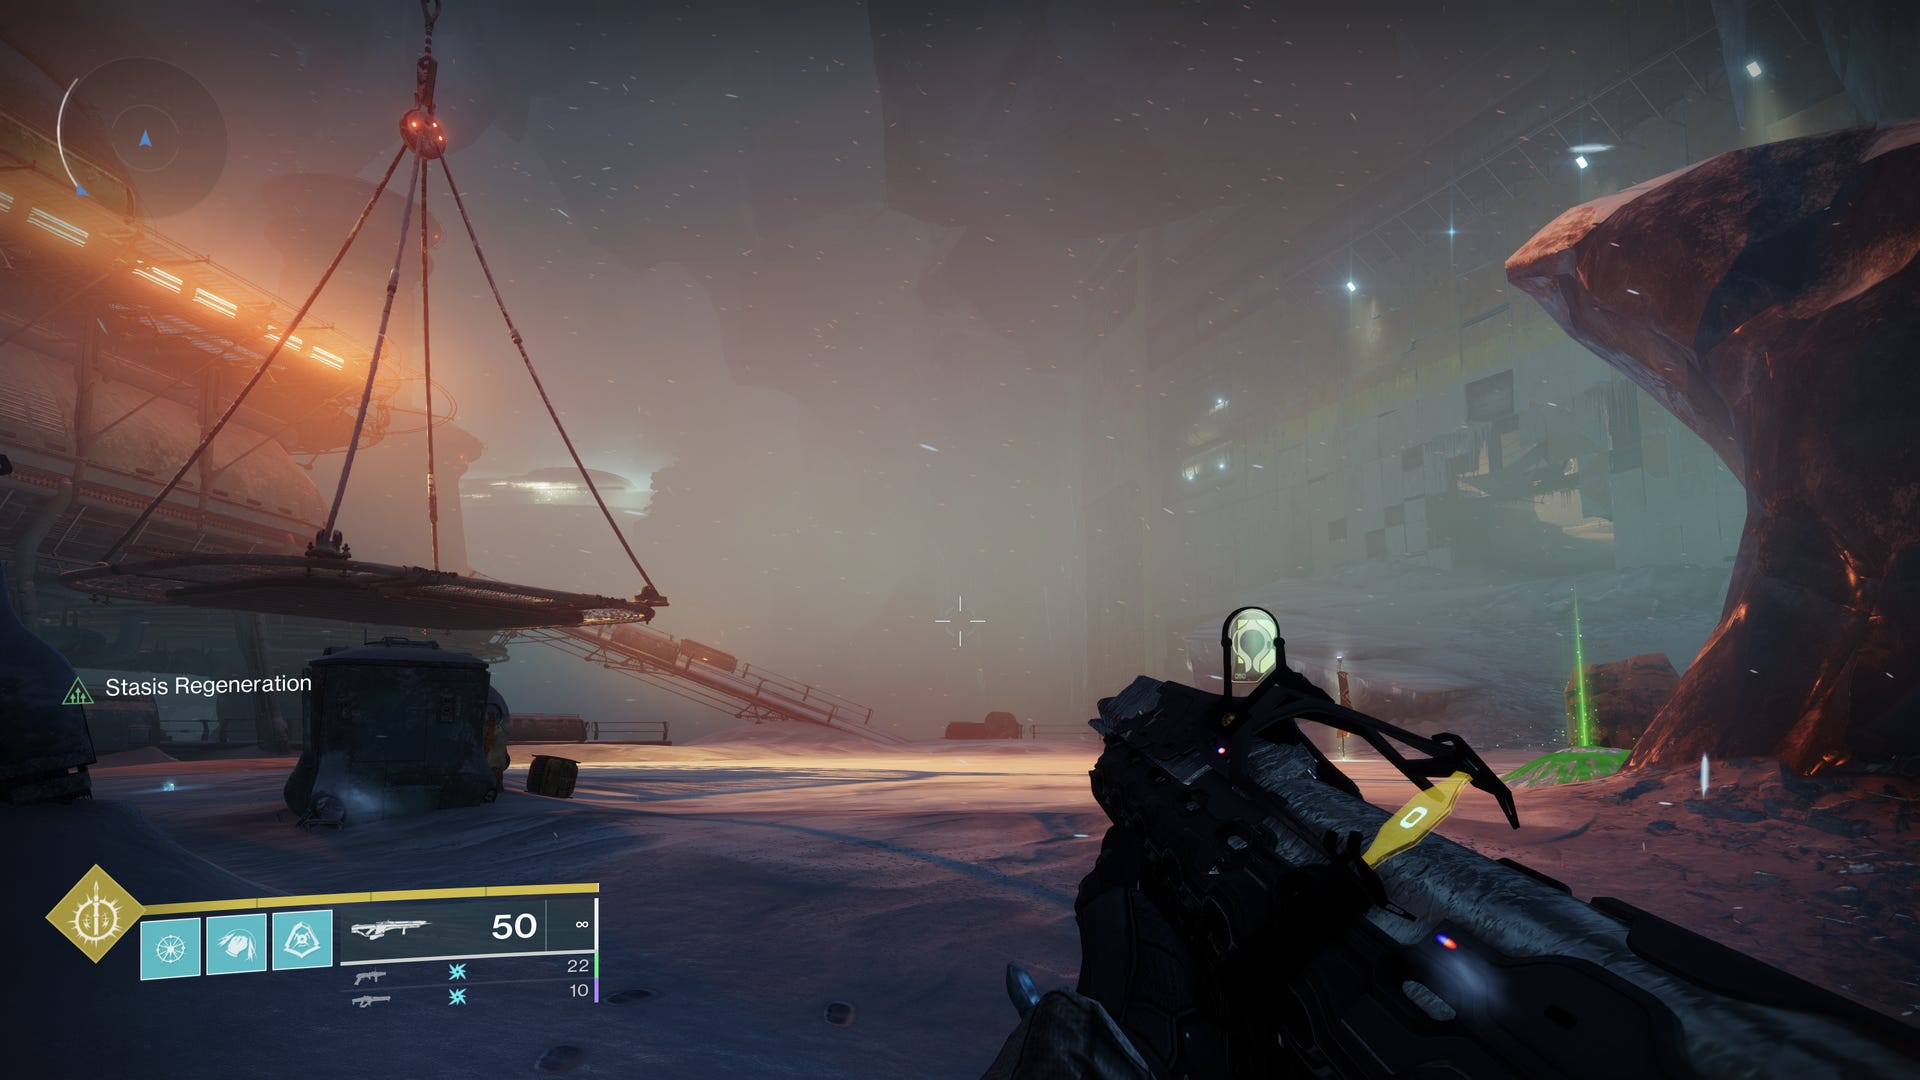
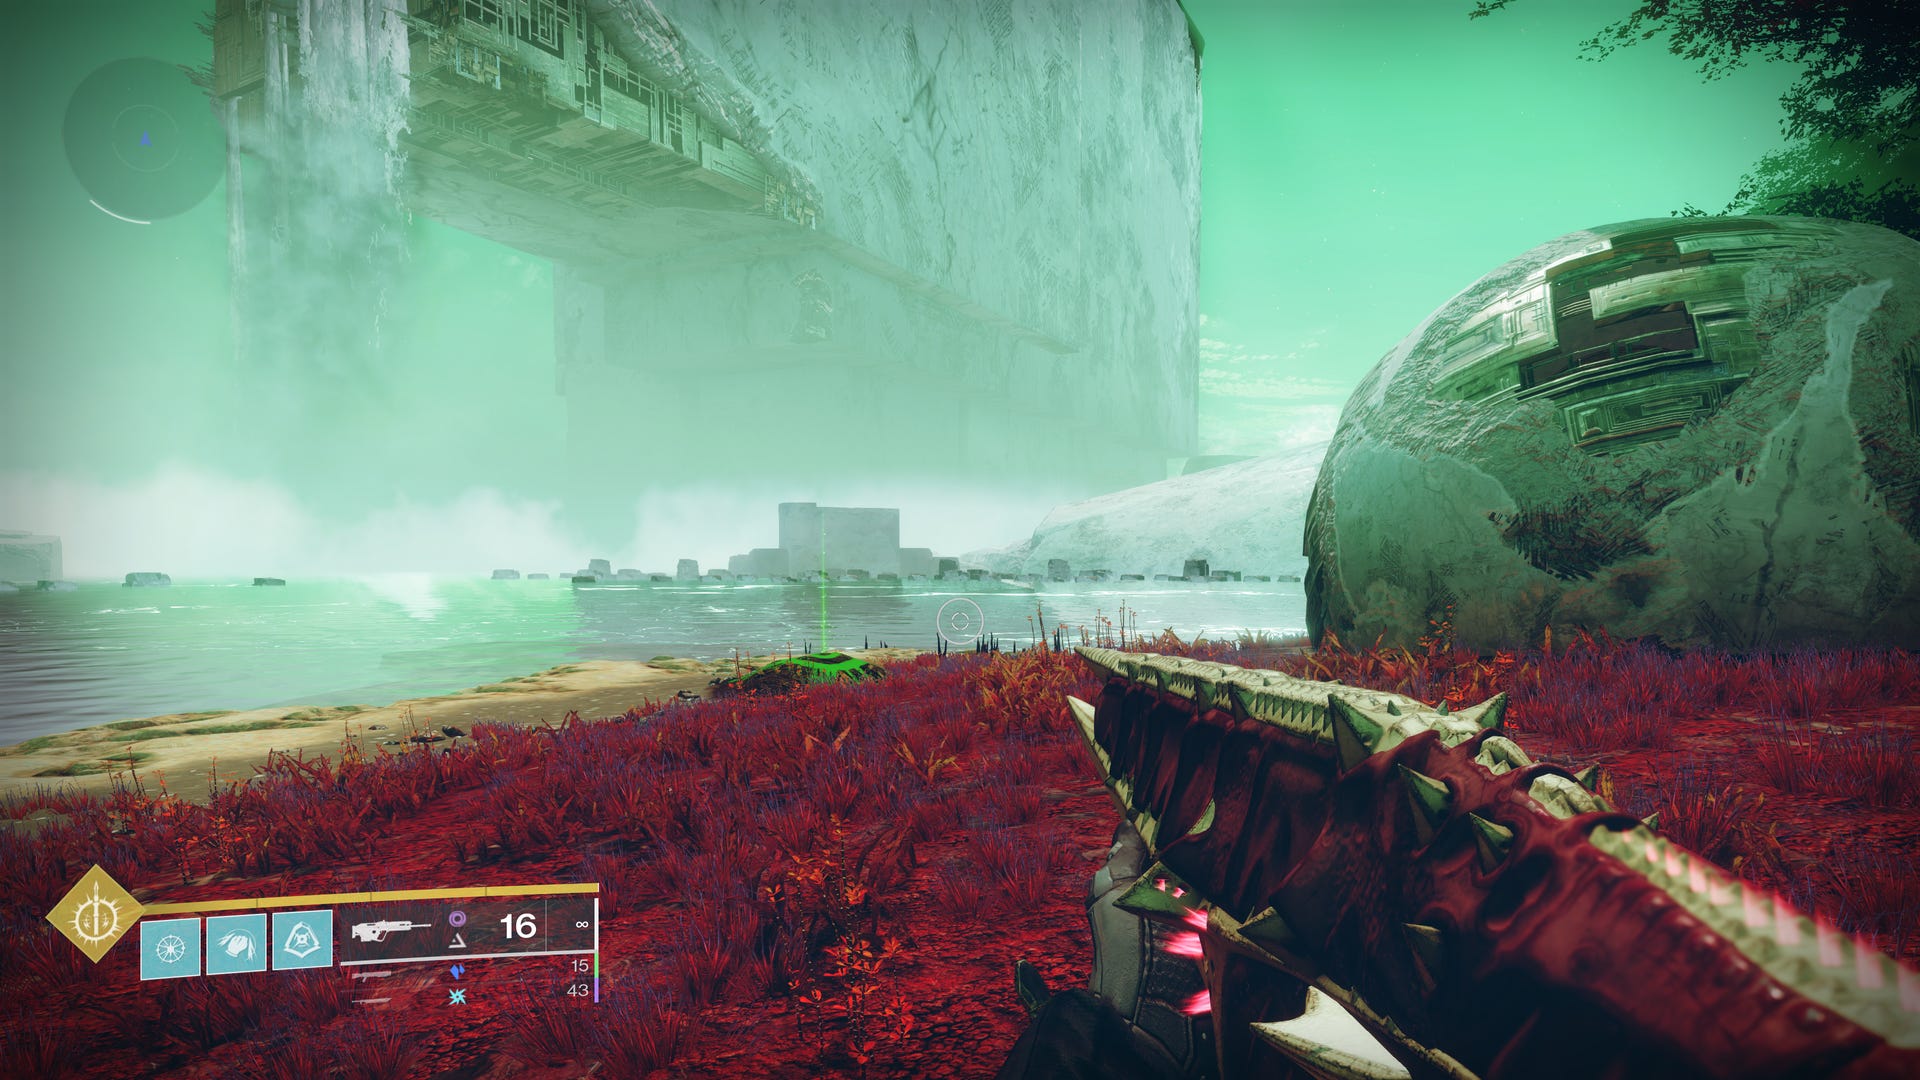
This directs you to Europa, specifically a location within Eventide Ruins - head to the Eventide Ruins landing zone to begin the search for the buried treasure.
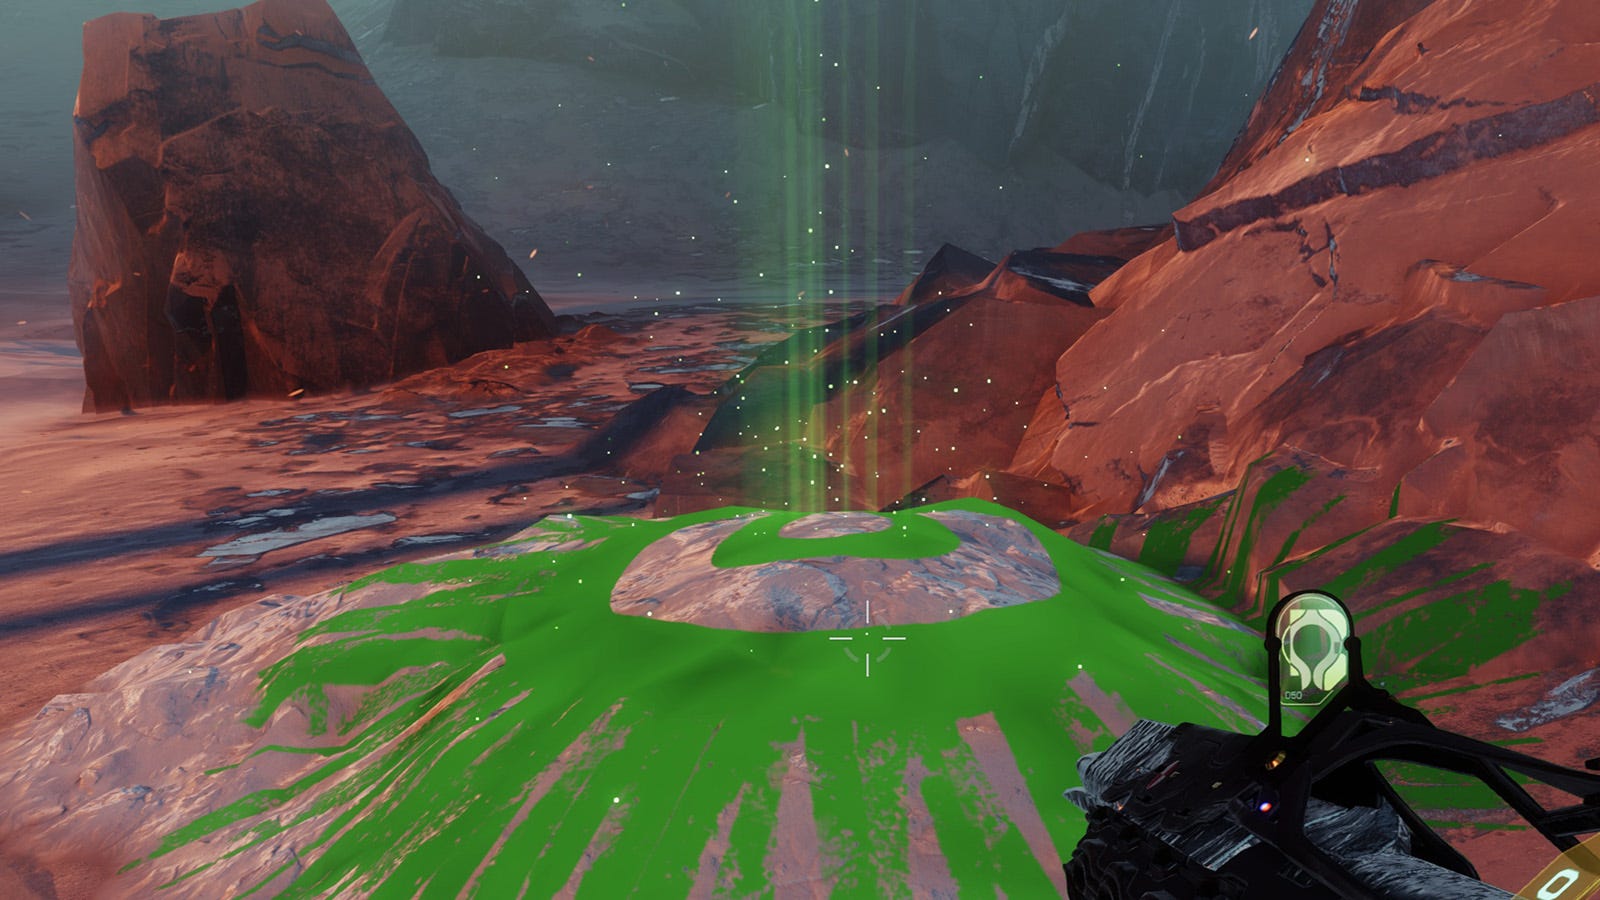
Once you land, head toward the crane visible near the middle of the below image - it’s in the hazy, orange area.
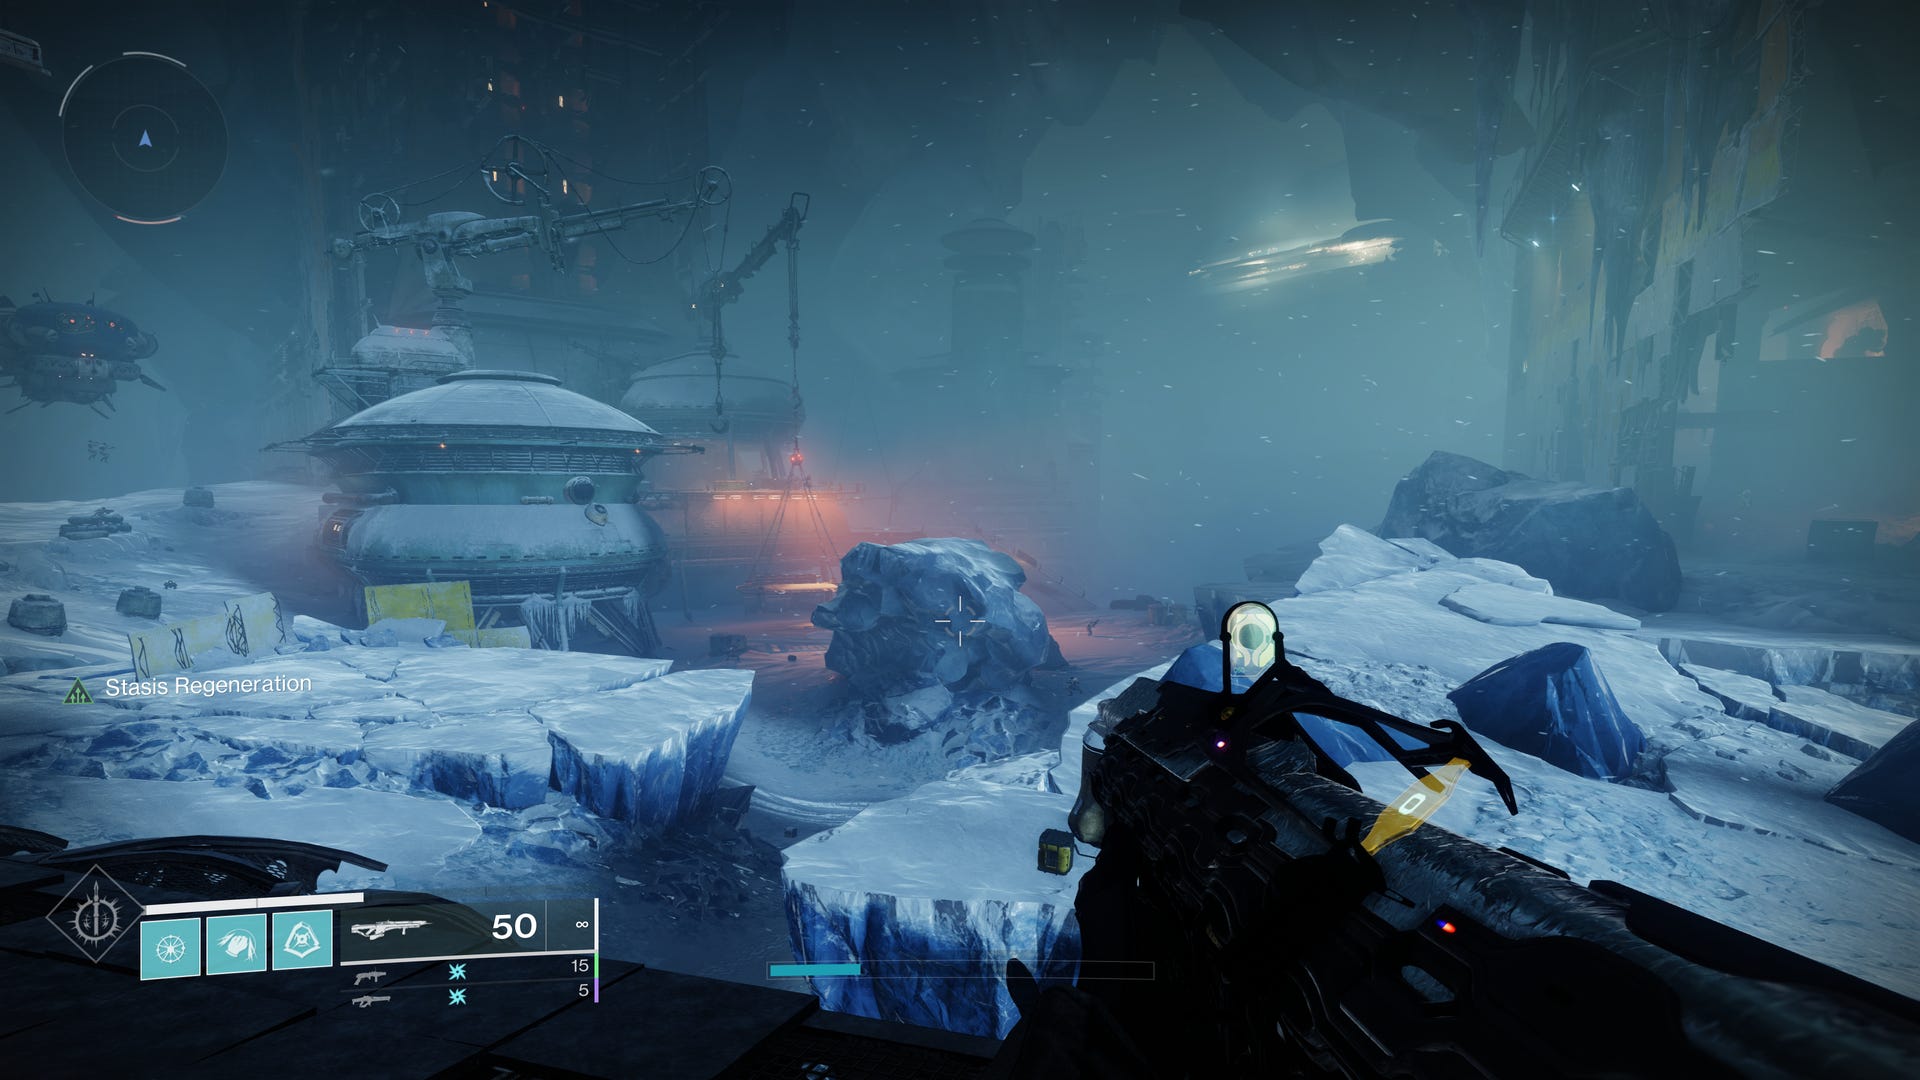
After reaching the crane, look to the right of it where you’ll see the buried treasure, glowing green from the ground.
Walk up to the glowing green light and dig up ye treasure!

Congratulations - you’ve completed the first of three Cryptic Quatrain quests, making progress on a seasonal challenge and triumph, and acquiring a mysterious Crude Cipher fragment, the first of two needed to unlock the completed Crude Cipher. Progress can be tracked on this within the Captain’s Atlas.
Read on to learn how to complete the second and third Cryptic Quatrain quests, and how to acquire the Crude Cipher.
The Season of the Deep is here alongside the Into the Depths quest. You can know go fishing too! Don't forget to keep an eye on the Lost Sector and King's Fall challenge rotation schedule!
Destiny 2 Cryptic Quatrain 2 quest steps, riddle and location
To unlock this second quest, you have to reach rank 10 with the Star Chart vendor in the HELM. Once you’ve done that, pick up the ‘Medium Treasure Beacon’ to begin the quest.
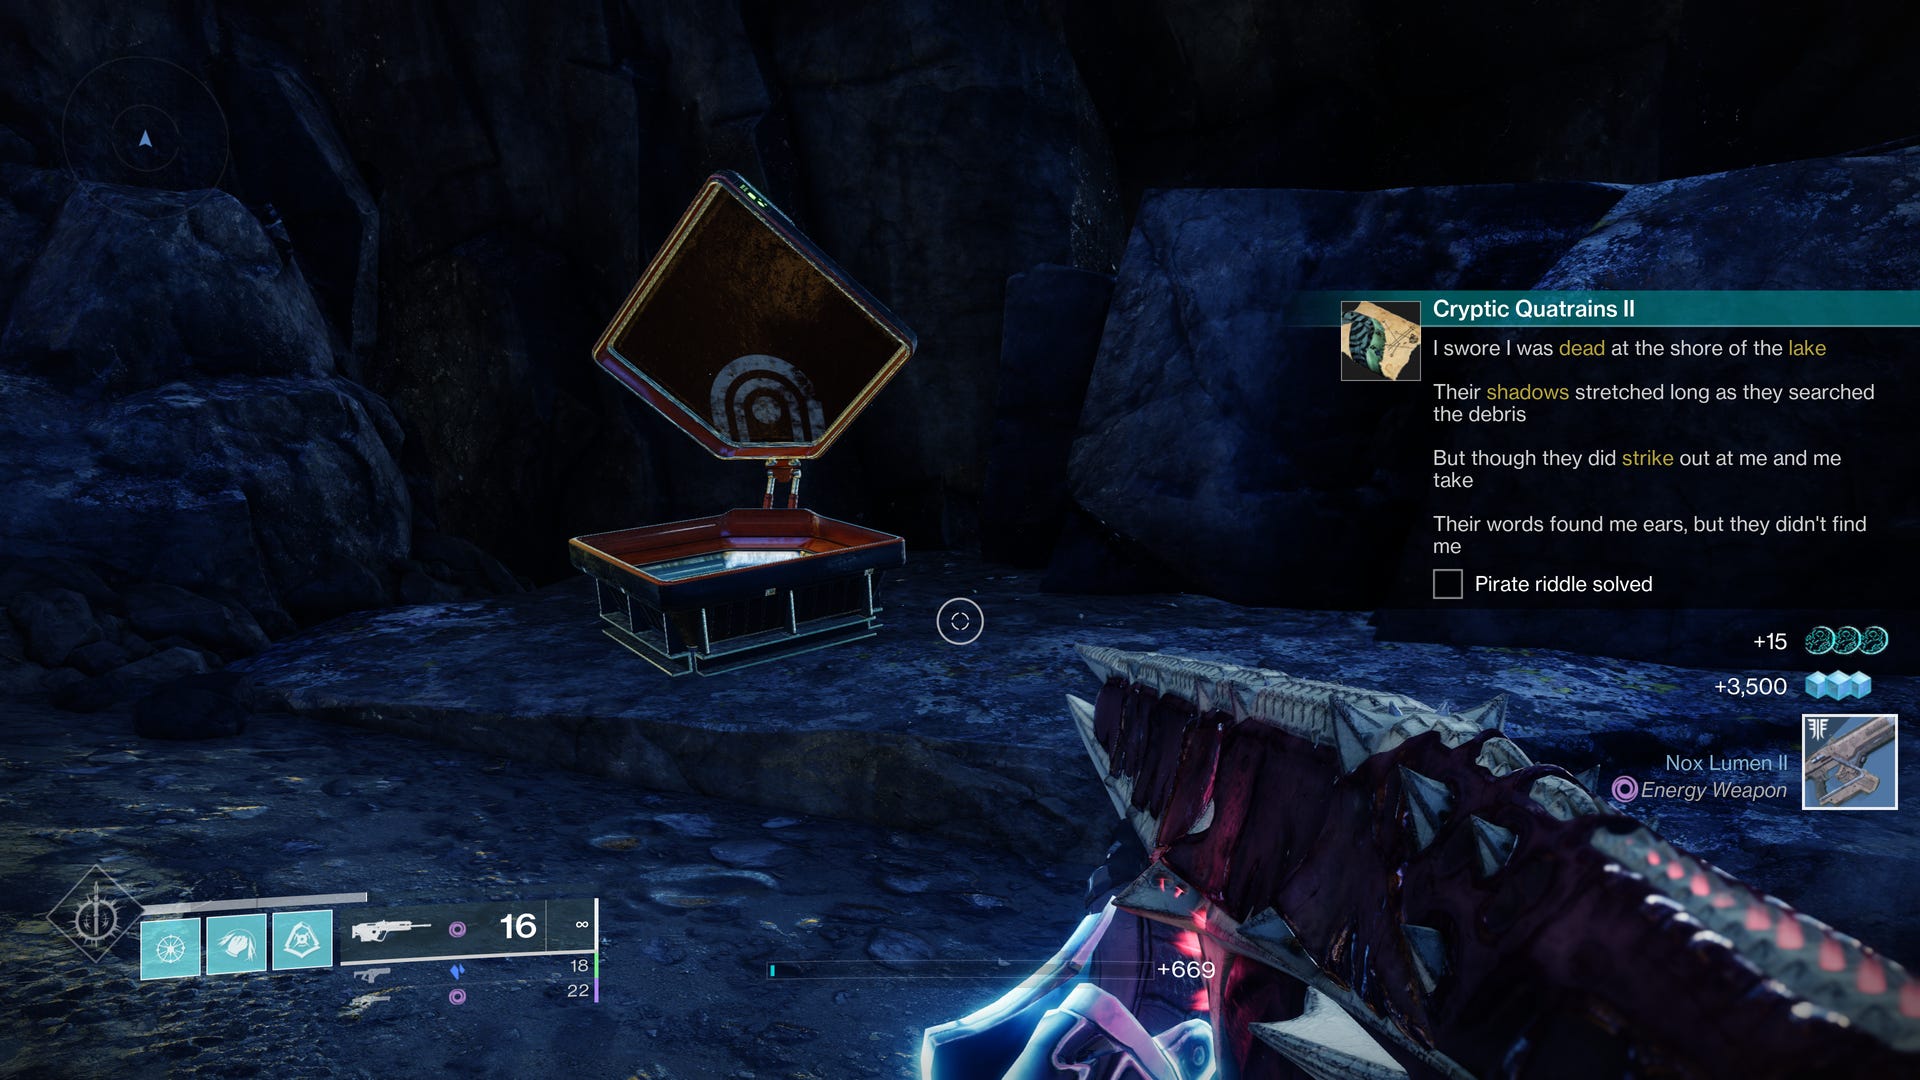
Much like the first quest, it begins with a riddle.
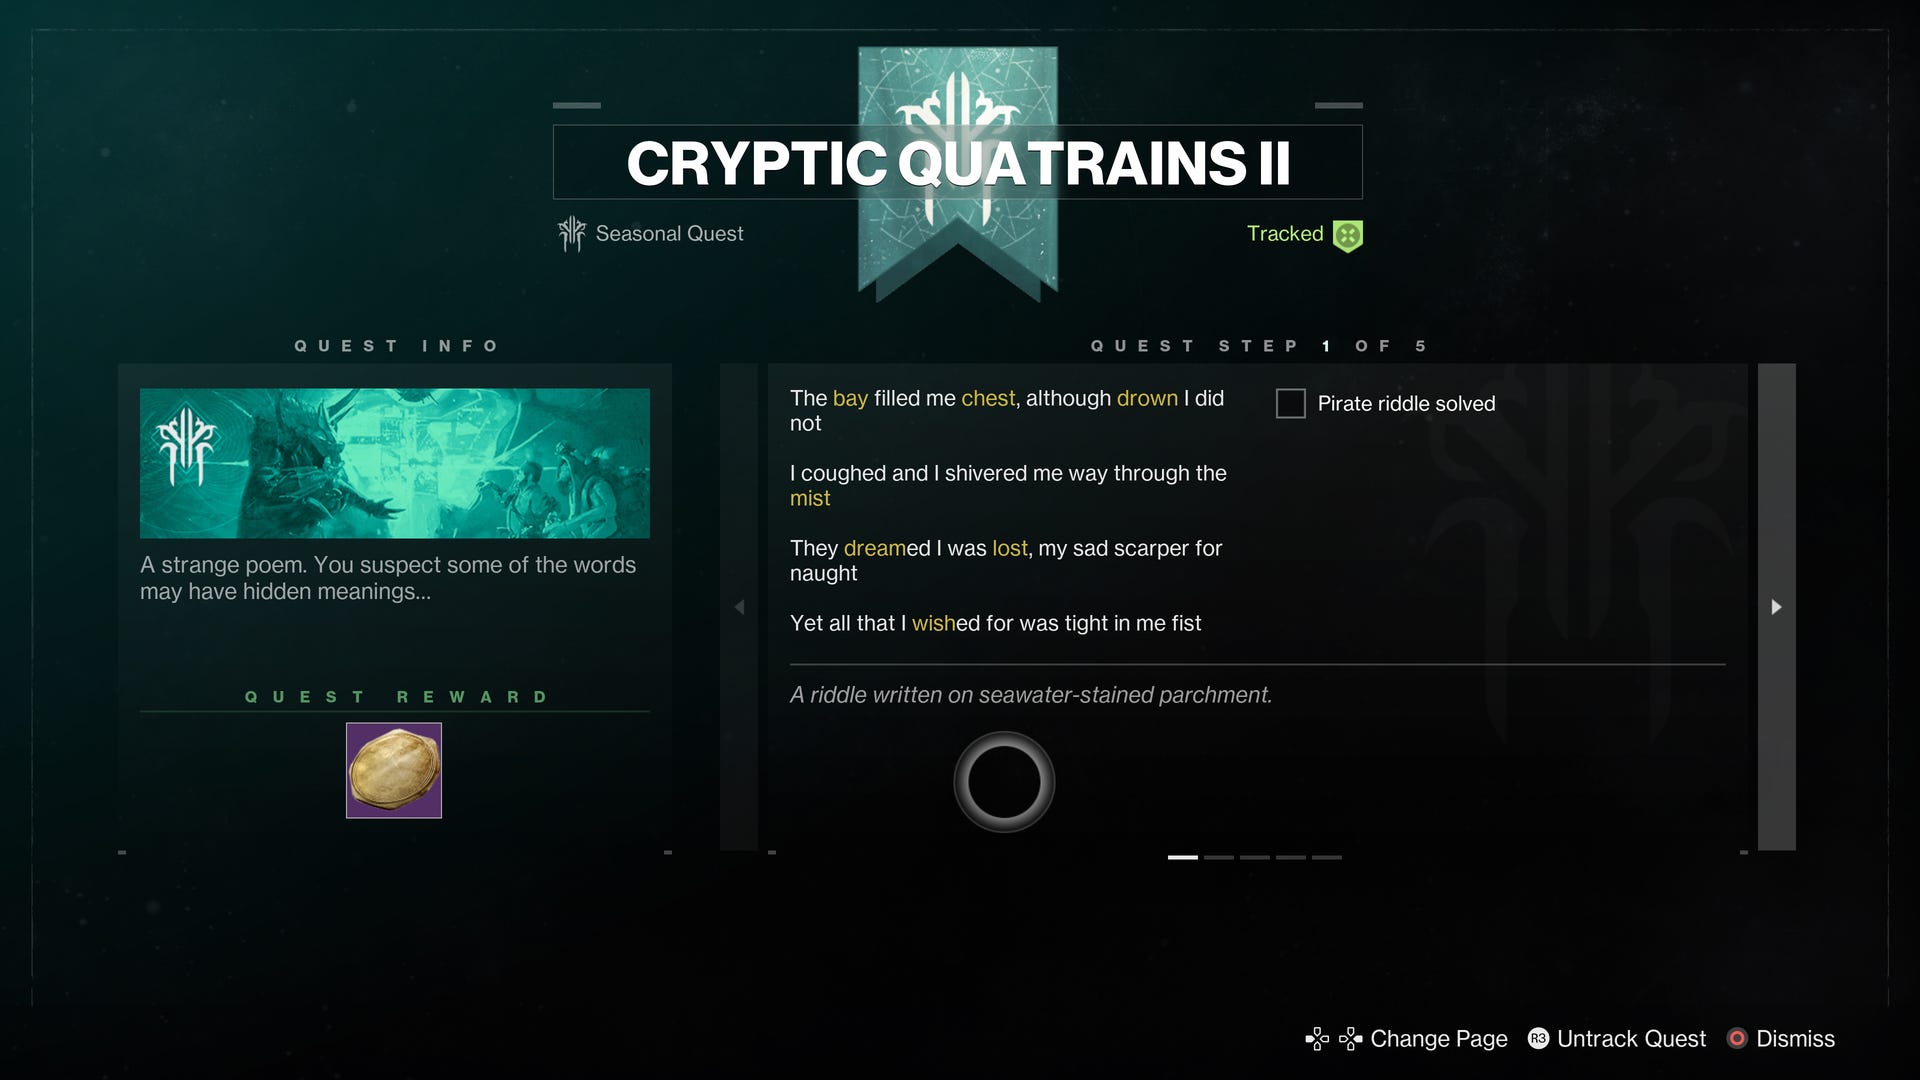
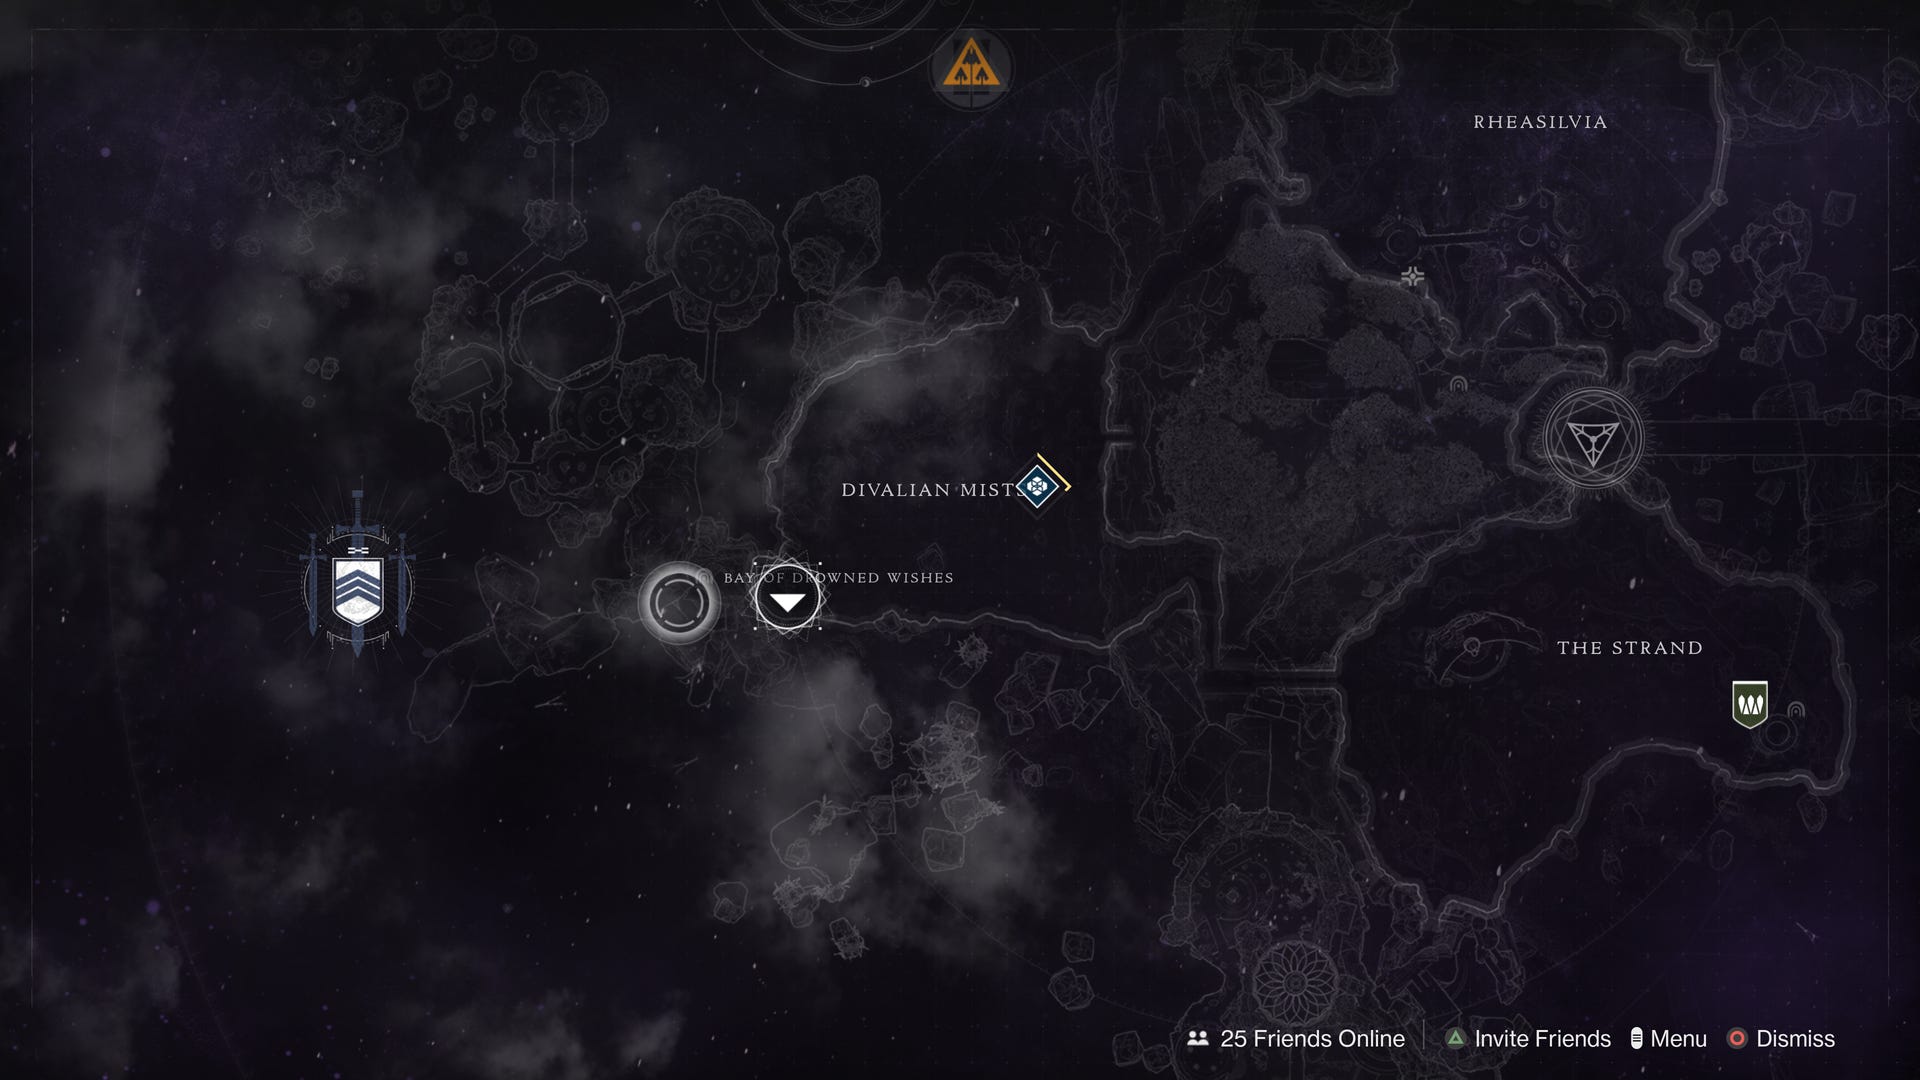
This one points you to the Dreaming City, more specifically the Bay of Drowned Wishes Lost Sector, accessed from the Divalian Mists - load in through its associated landing zone.
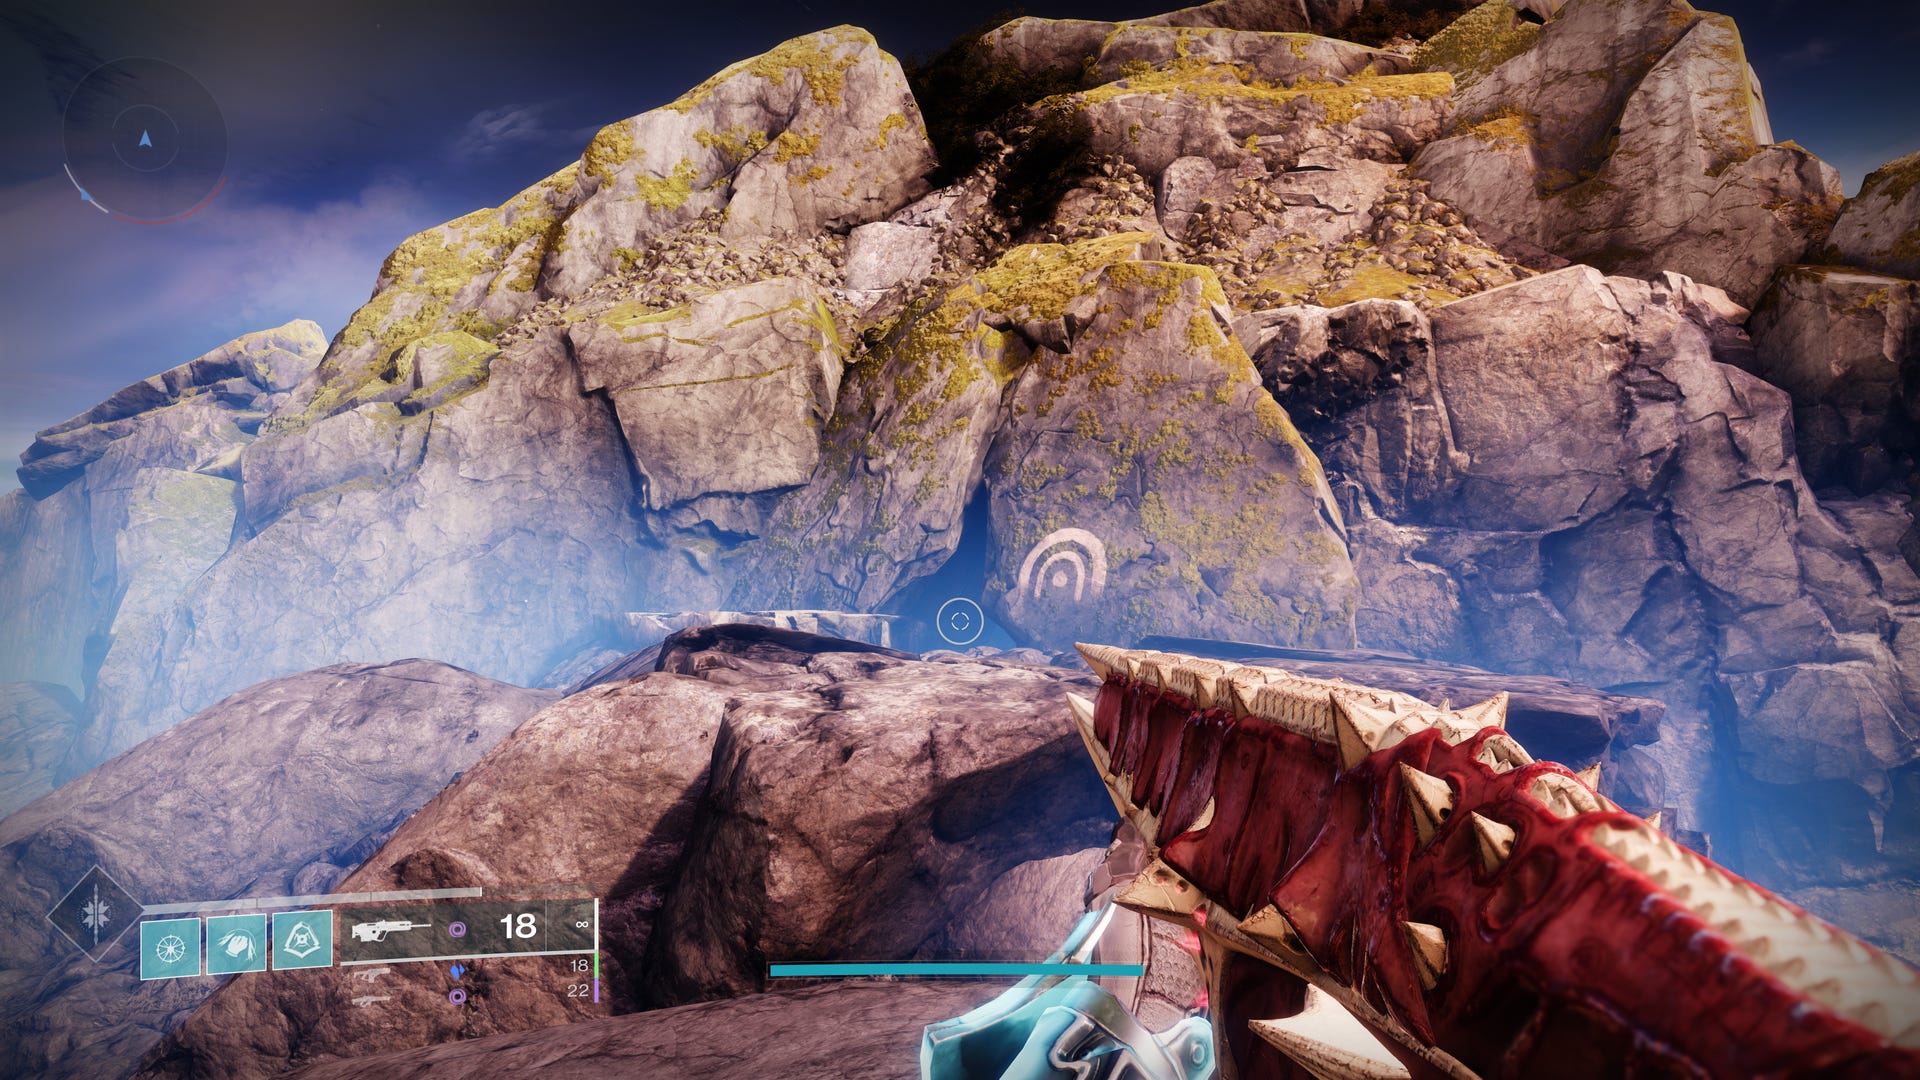
Once you’ve loaded in, turn around, climb up the rocks and enter the cave pictured below.
After a bit of running, you’ll be in the Lost Sector - clear out all the enemies and final boss, then open the chest waiting at the end of the area.
Opening this chest will update the quest - next, you’re off to the EDZ to complete the Lake of Shadows Strike, accessible from the director.

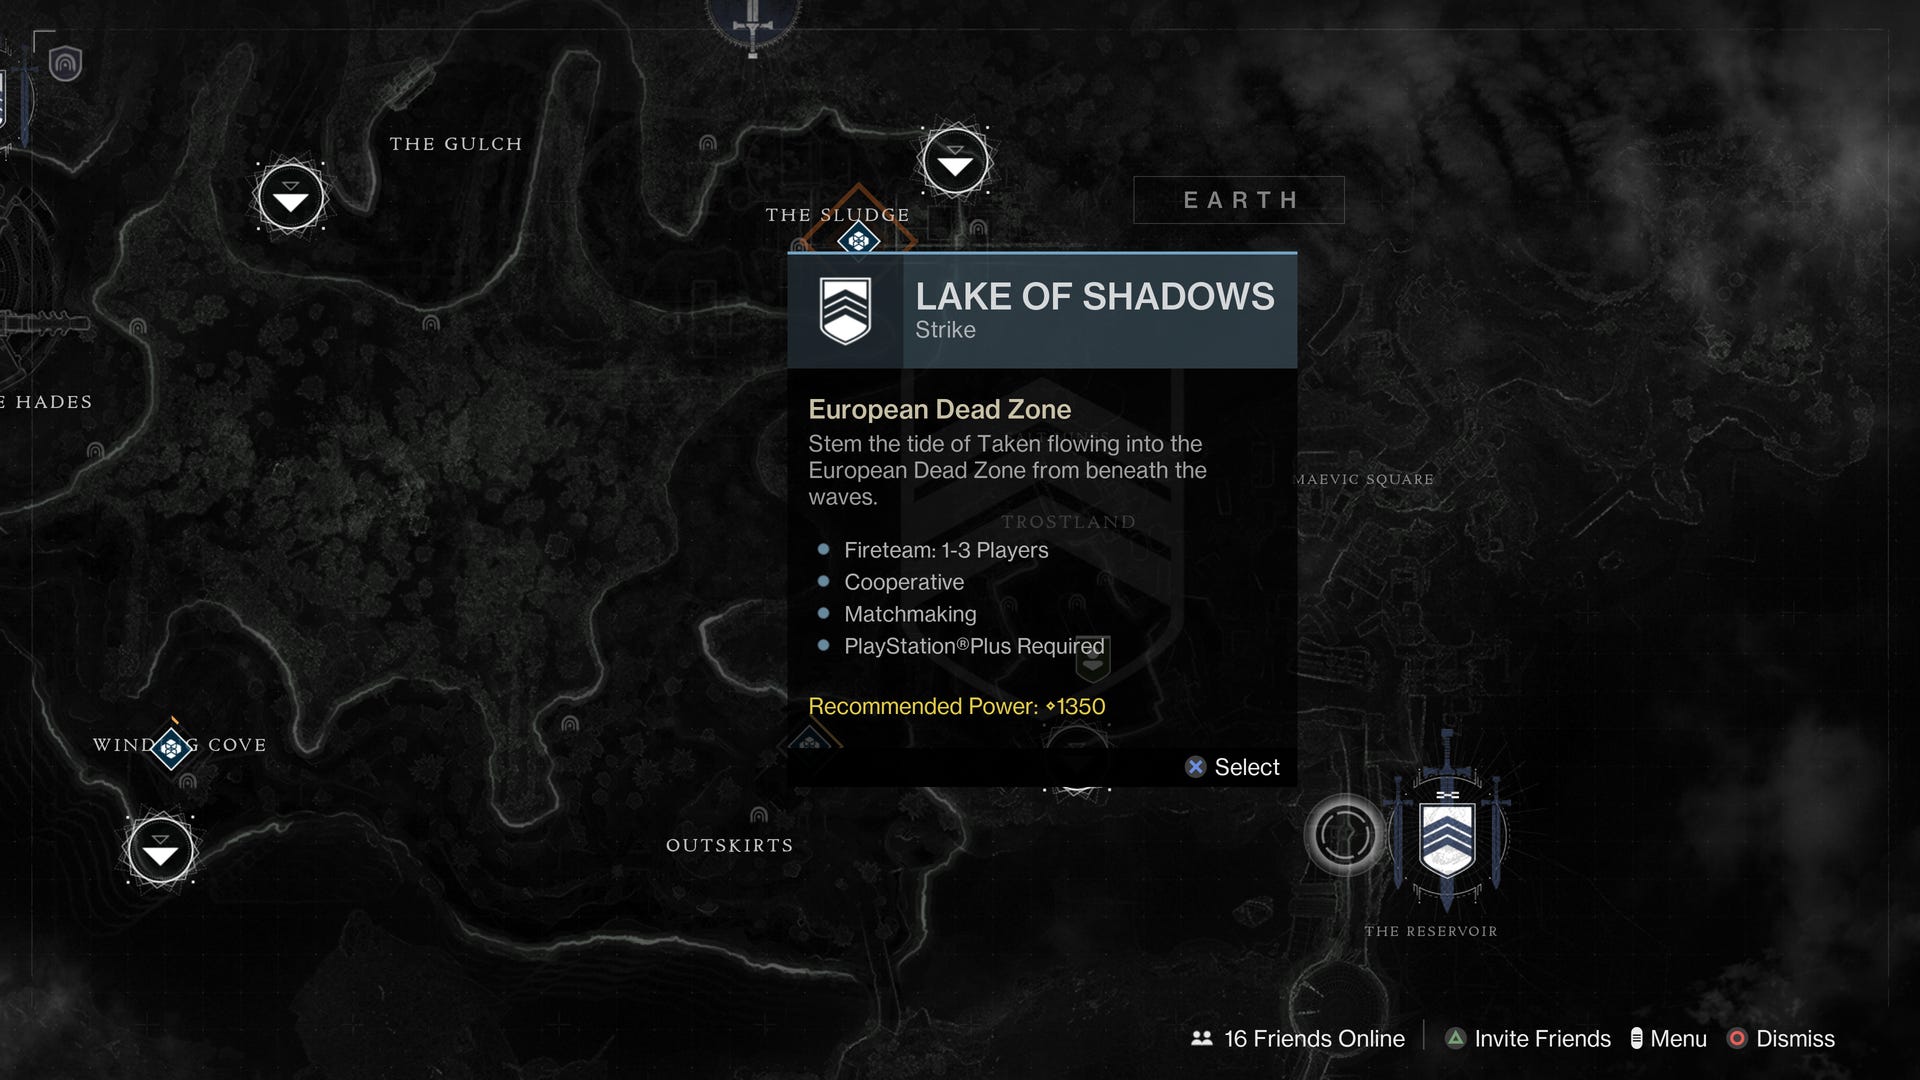
On completion of this Strike, the quest will update again.

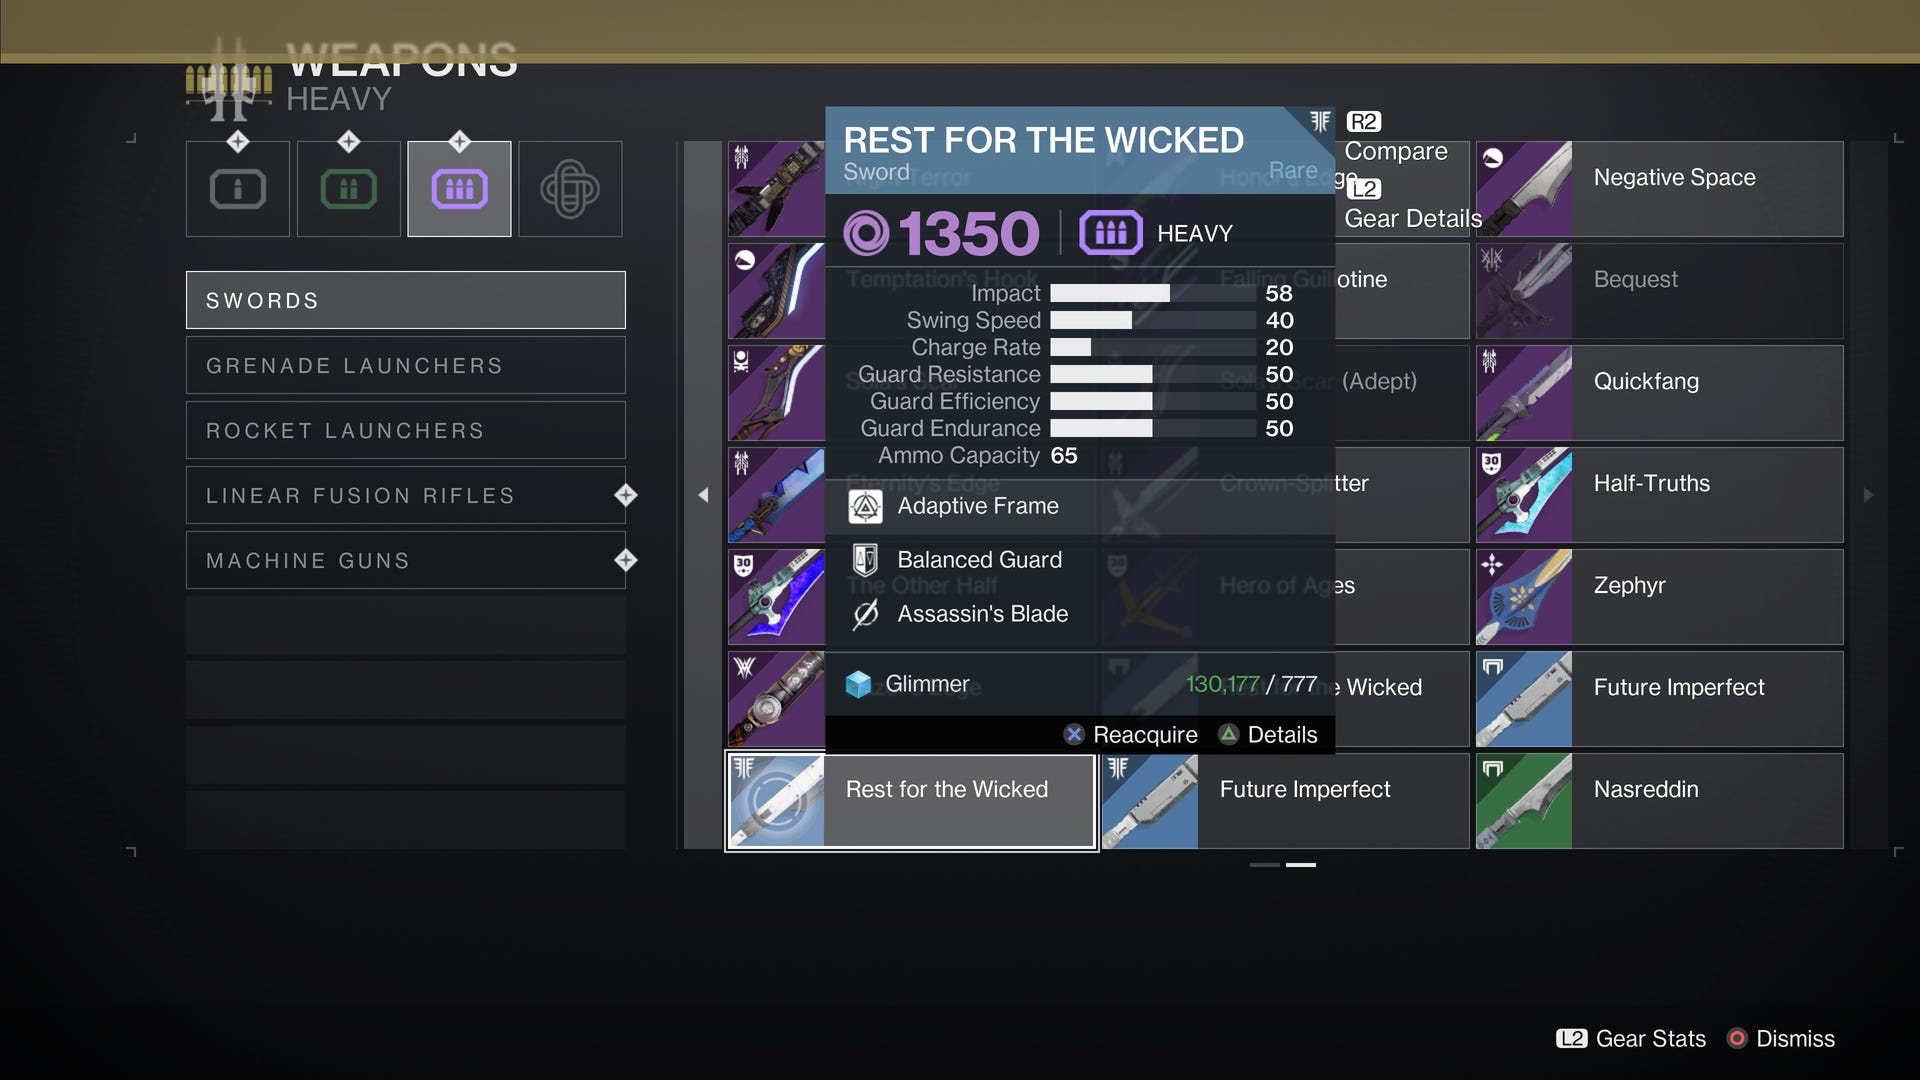
Next you need to complete an Expedition with a sword equipped - Expeditions are launched from within the HELM’s map (pictured below).
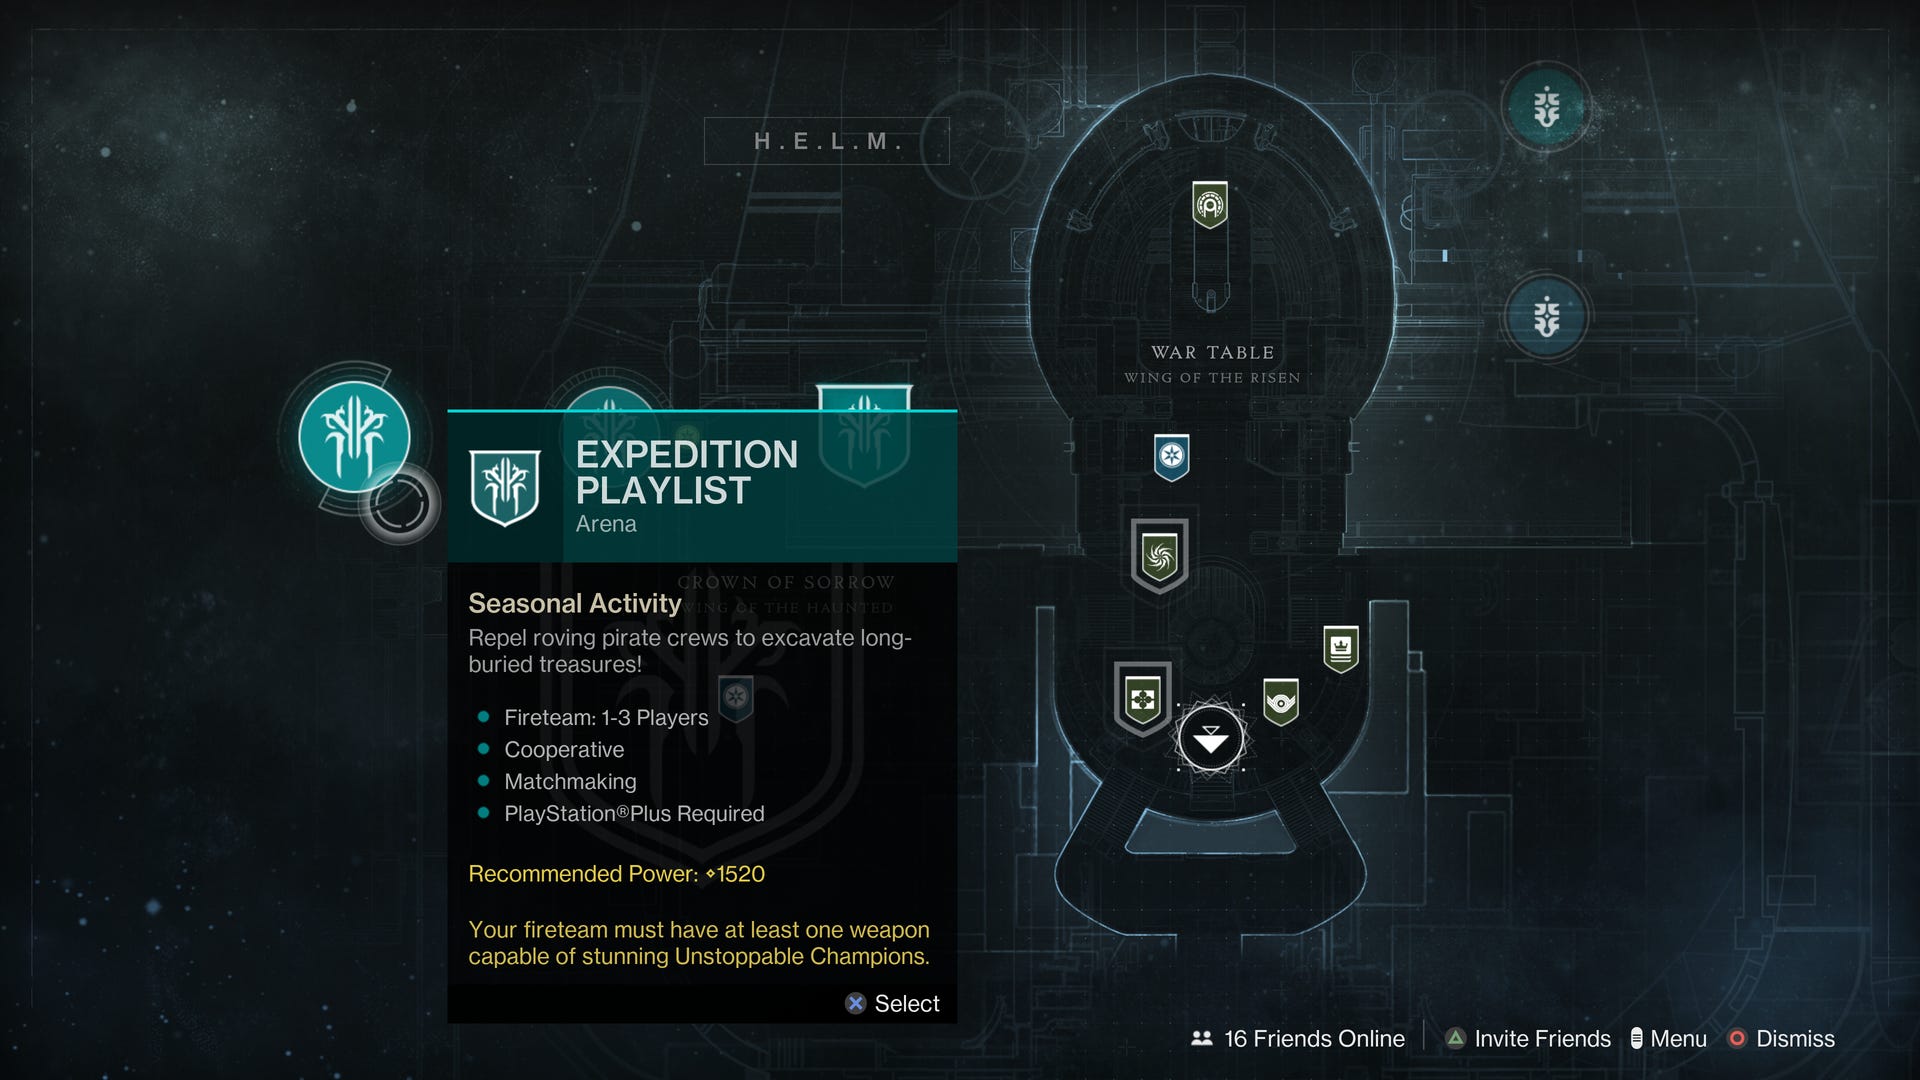
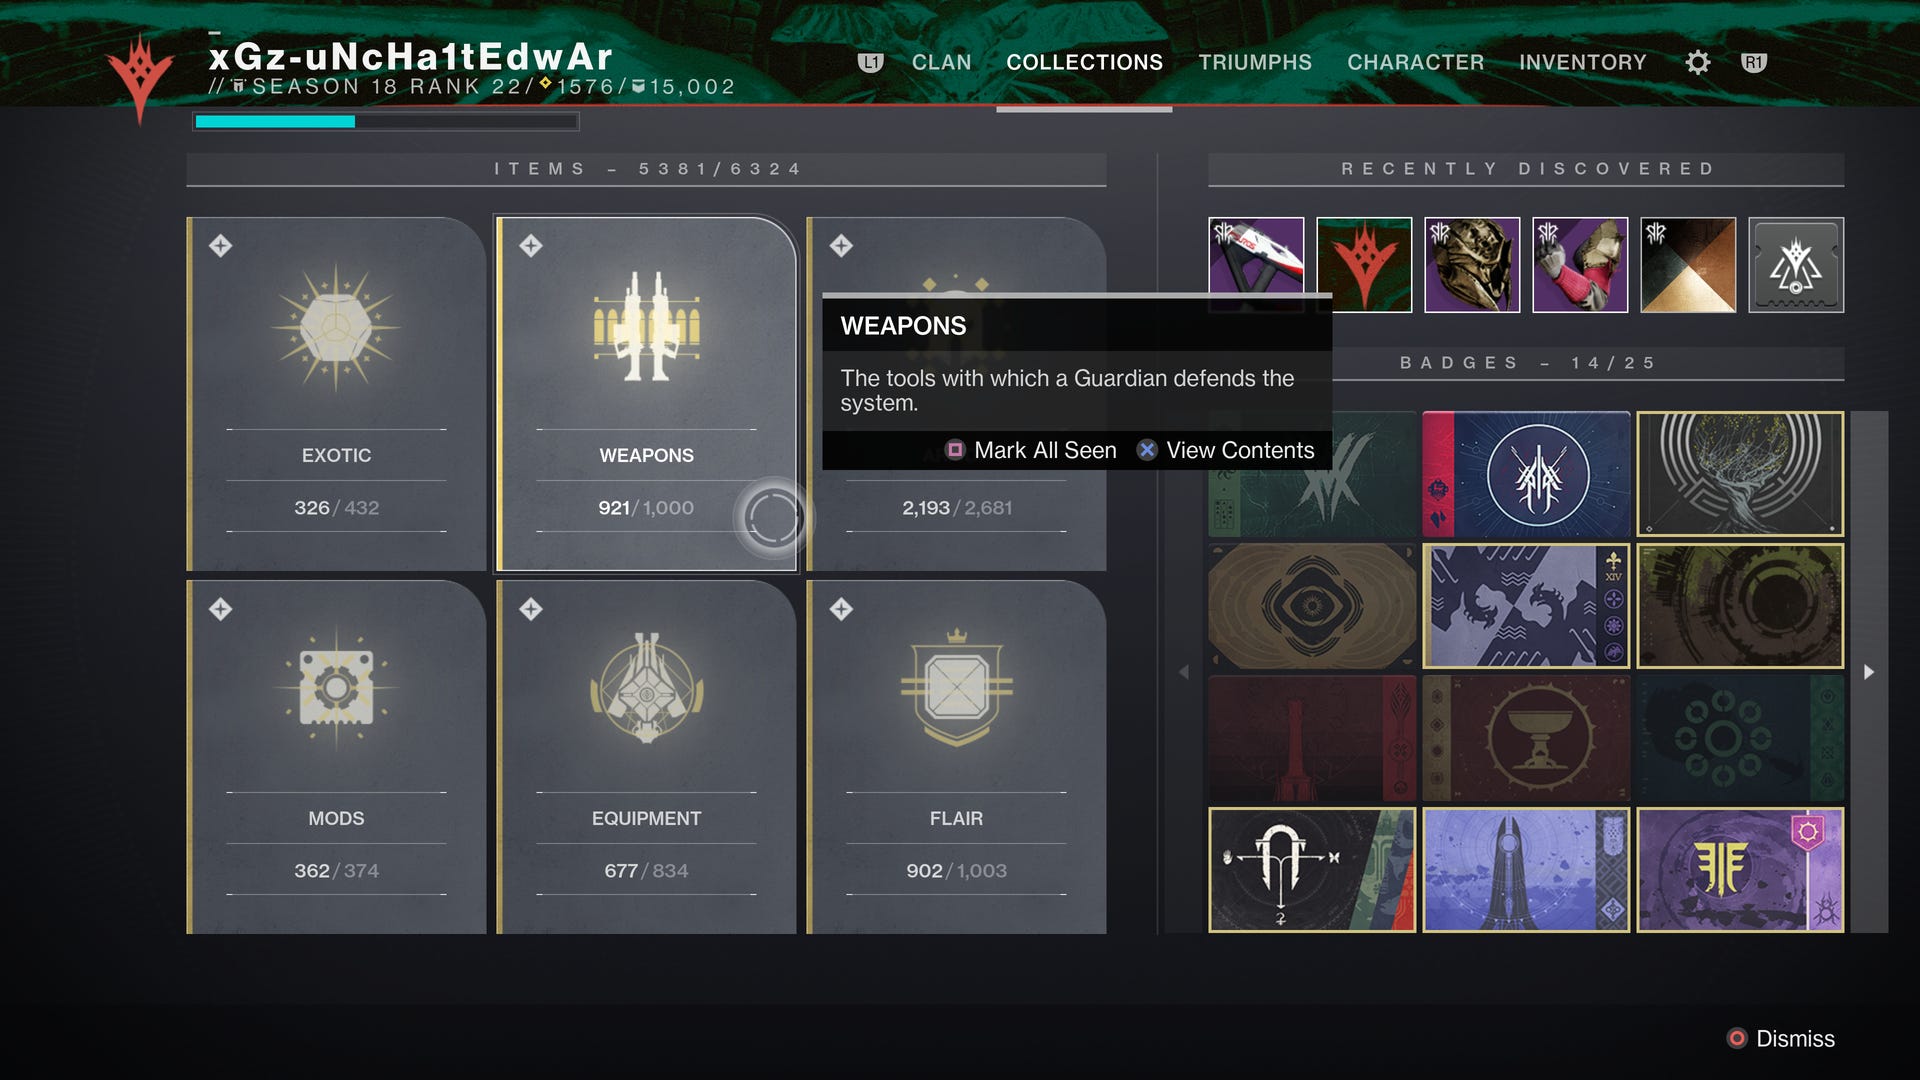
If you’re a newcomer and don’t have any legendary swords on hand, any rare swords you’ve collected from world drops or activity rewards can be reacquired via the Collections screen (shown below), albeit at a lower level.
To prevent lowering your level during the Expedition run, play the activity as normal, then equip the sword before it ends to count progress for this step.
Once the expedition is complete, the fourth step will be revealed.

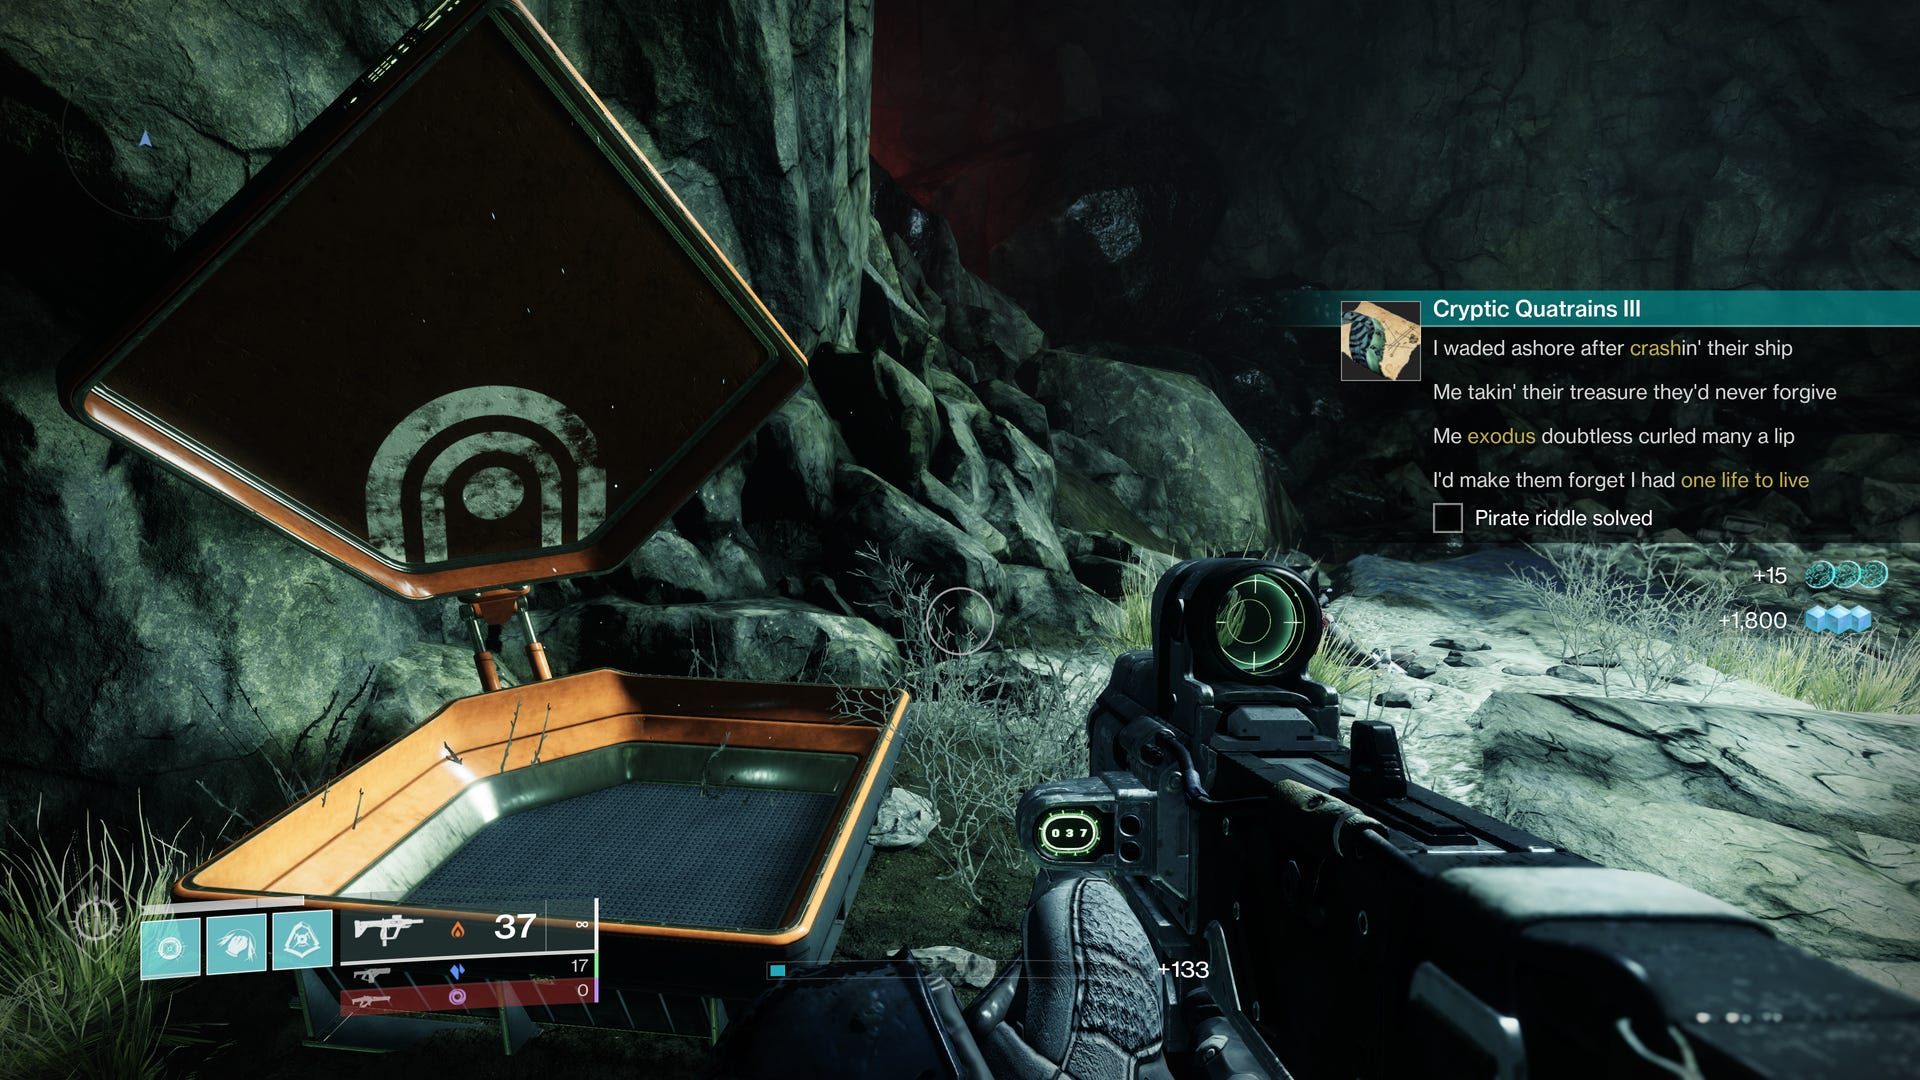
For this next step, you’ll be heading to the Cistern on Nessus, over to the cylindrical structure visible on the left side of the screen from where you land.

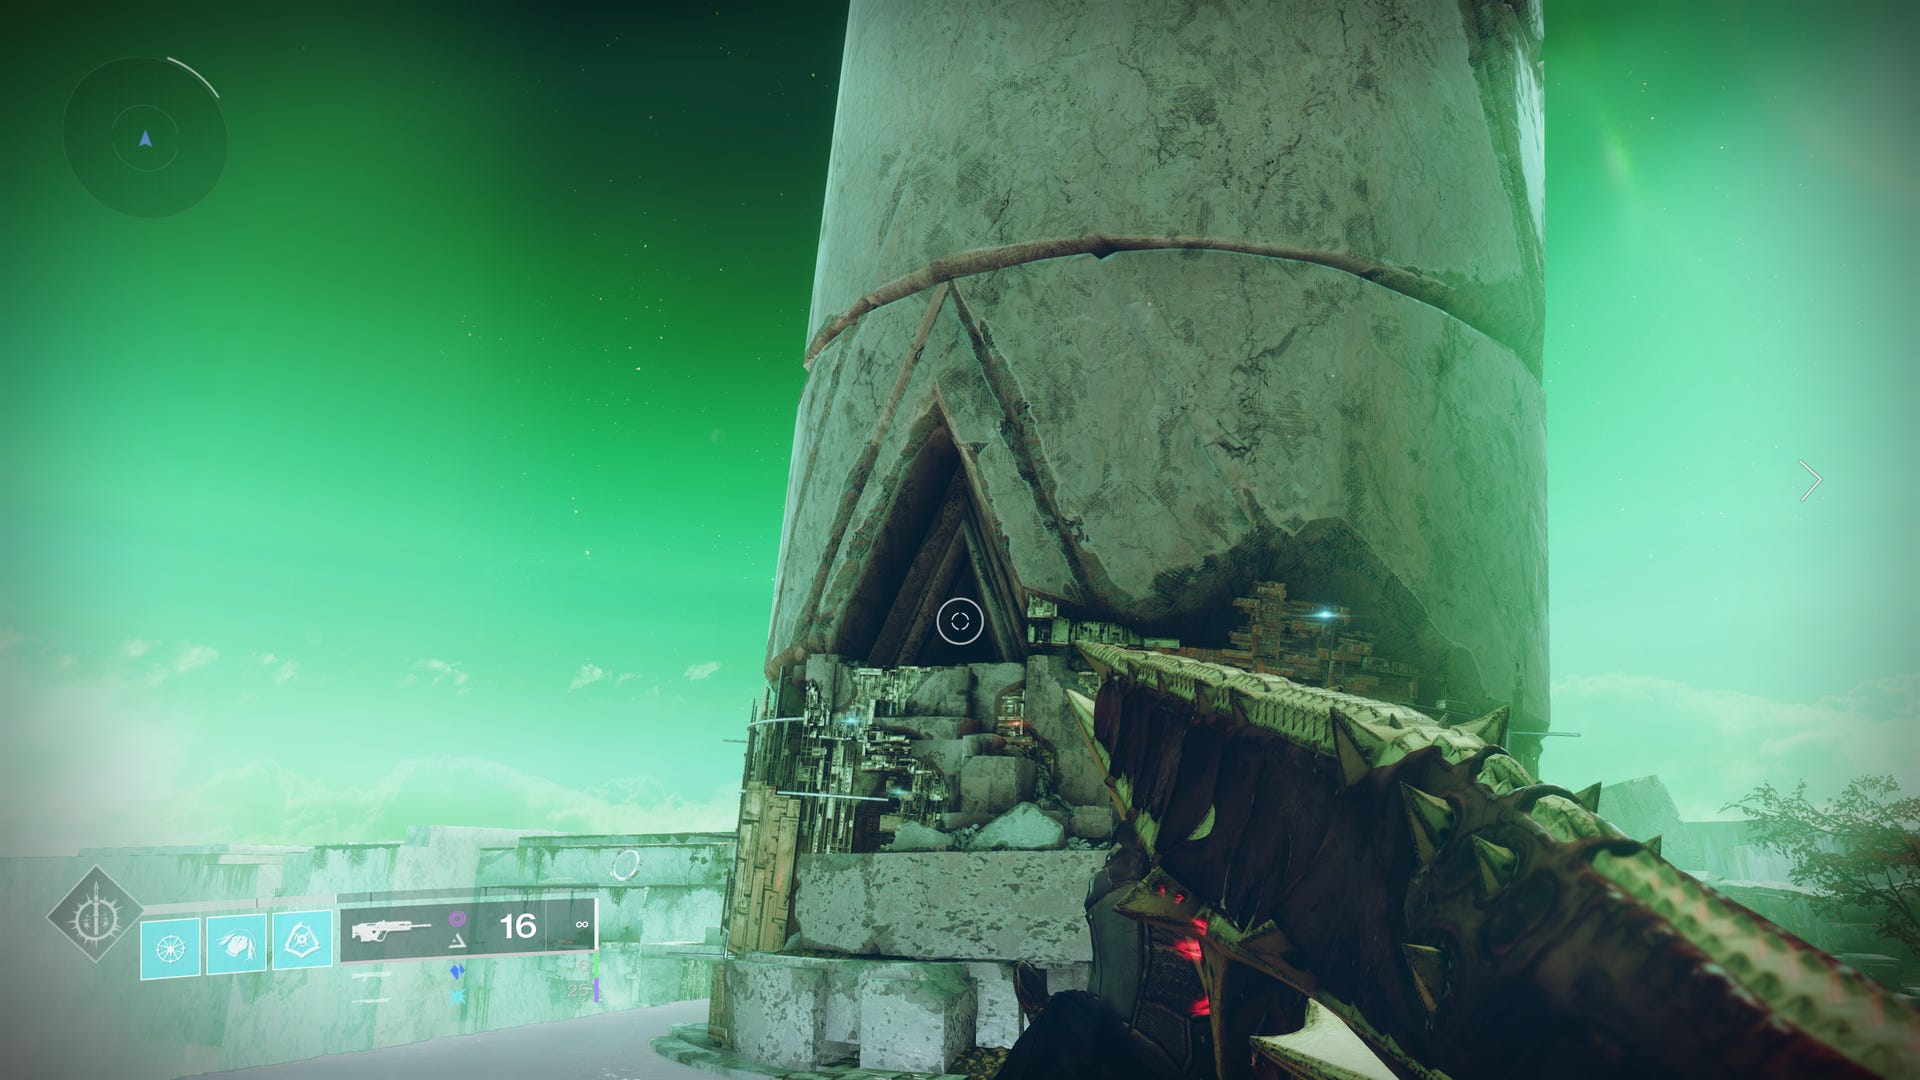
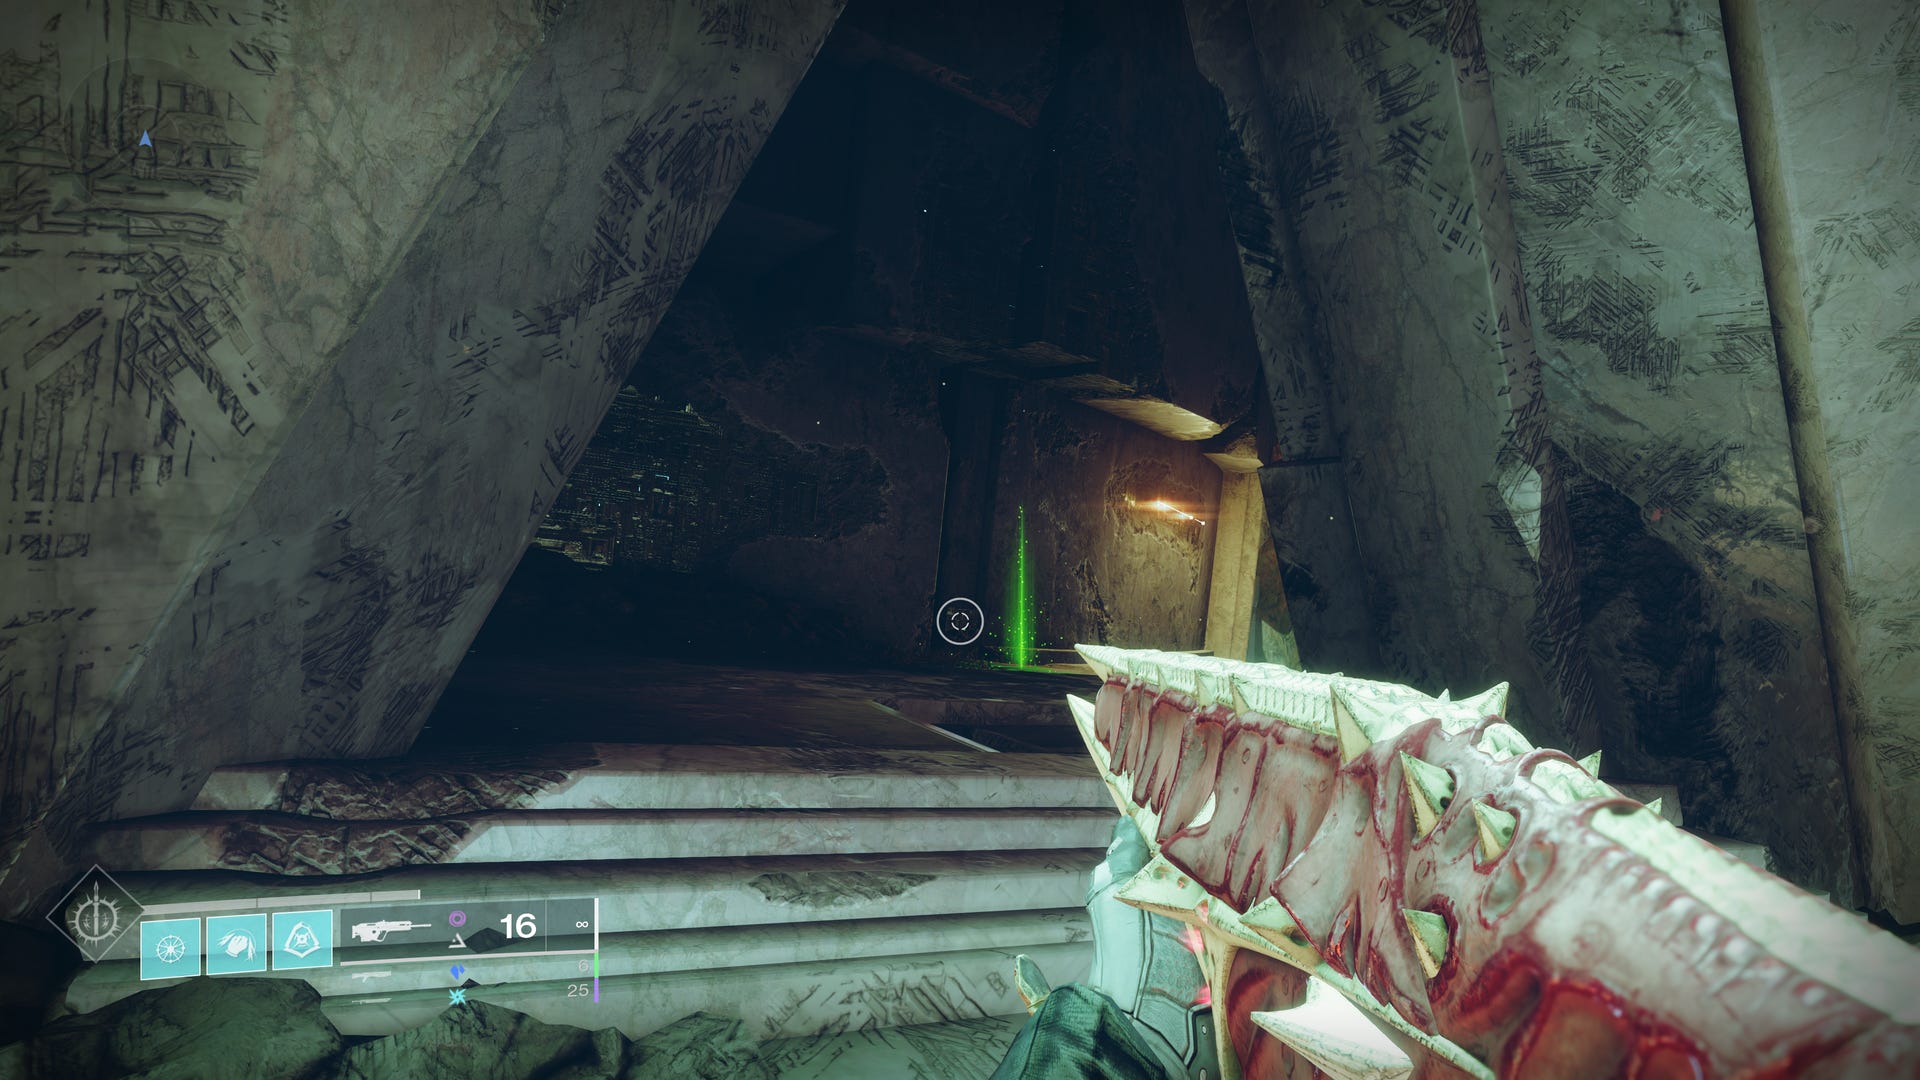
Once you’re there, climb up to the pyramid-shaped doorway.
Inside is a green glow emanating from the ground - investigate it to unlock the fifth and final step.

This next step doesn’t require any more destination-hopping as it also takes place on Nessus.
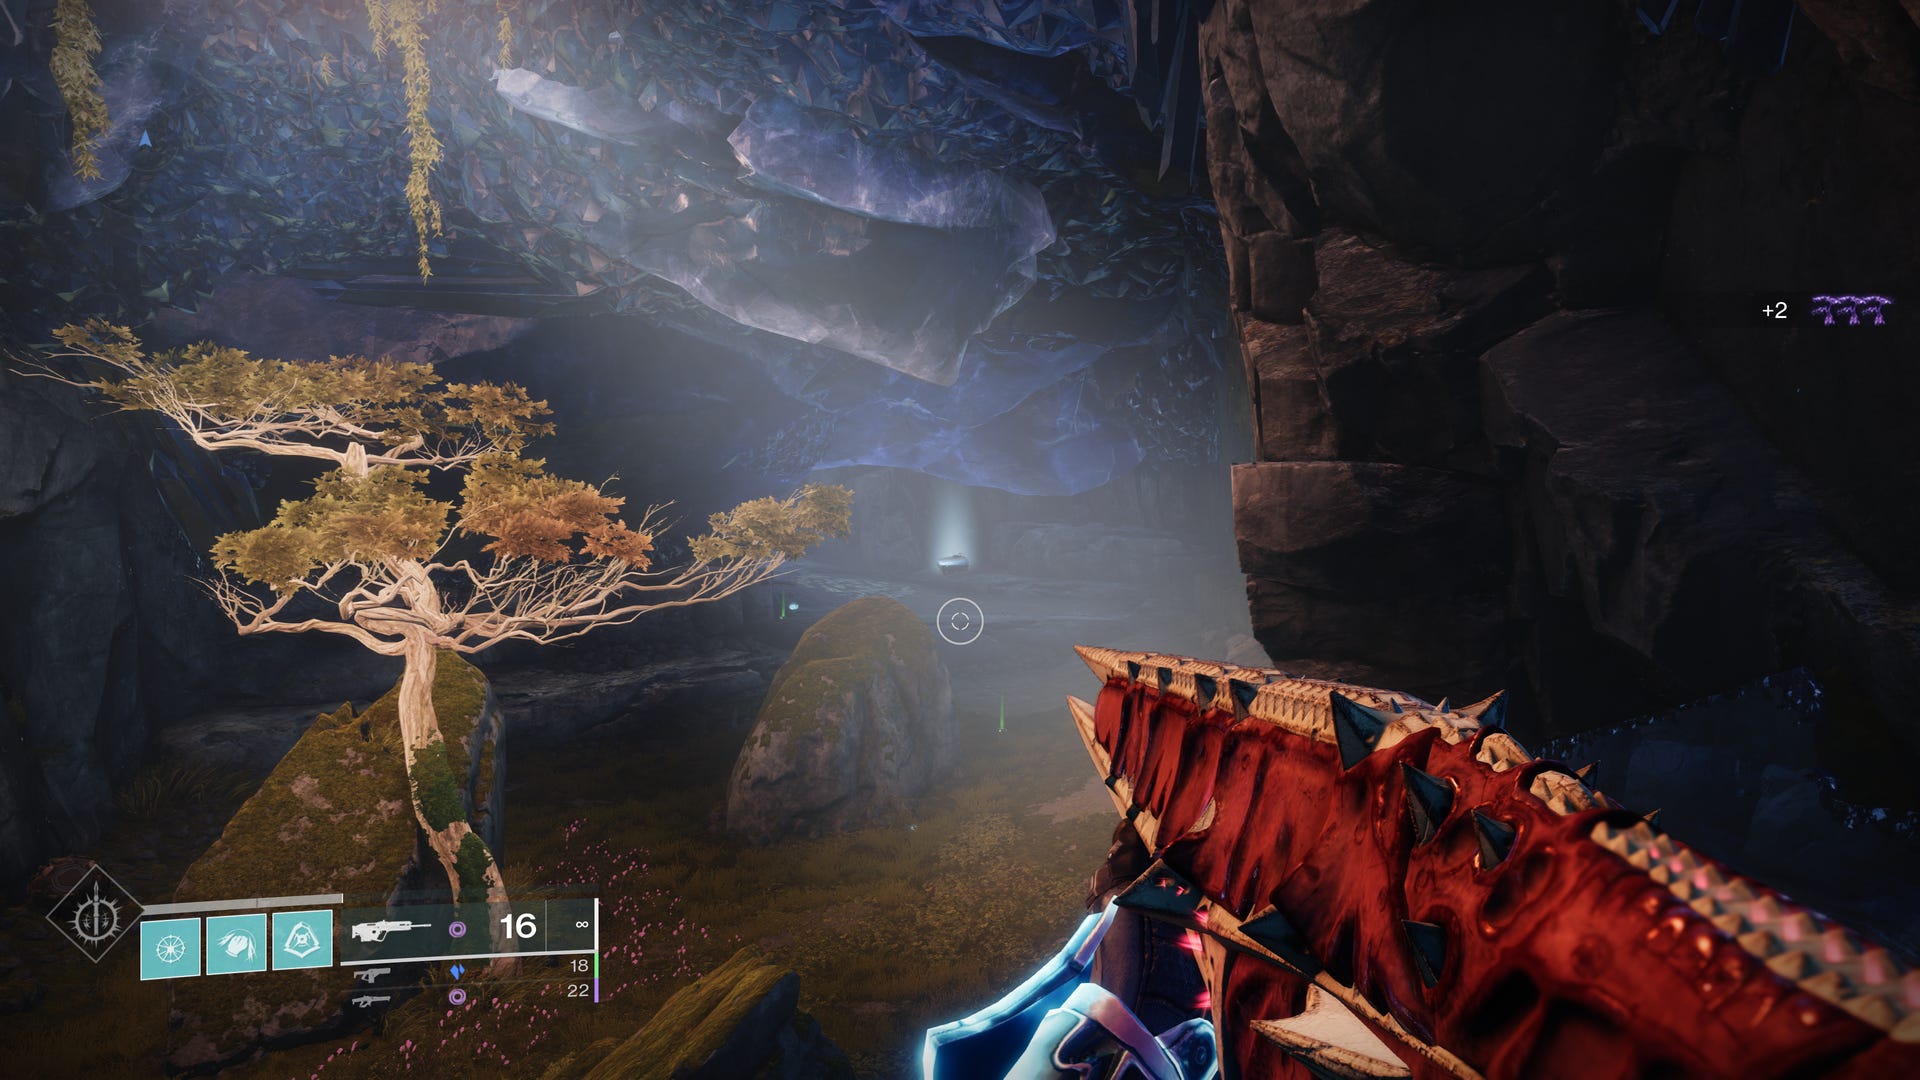
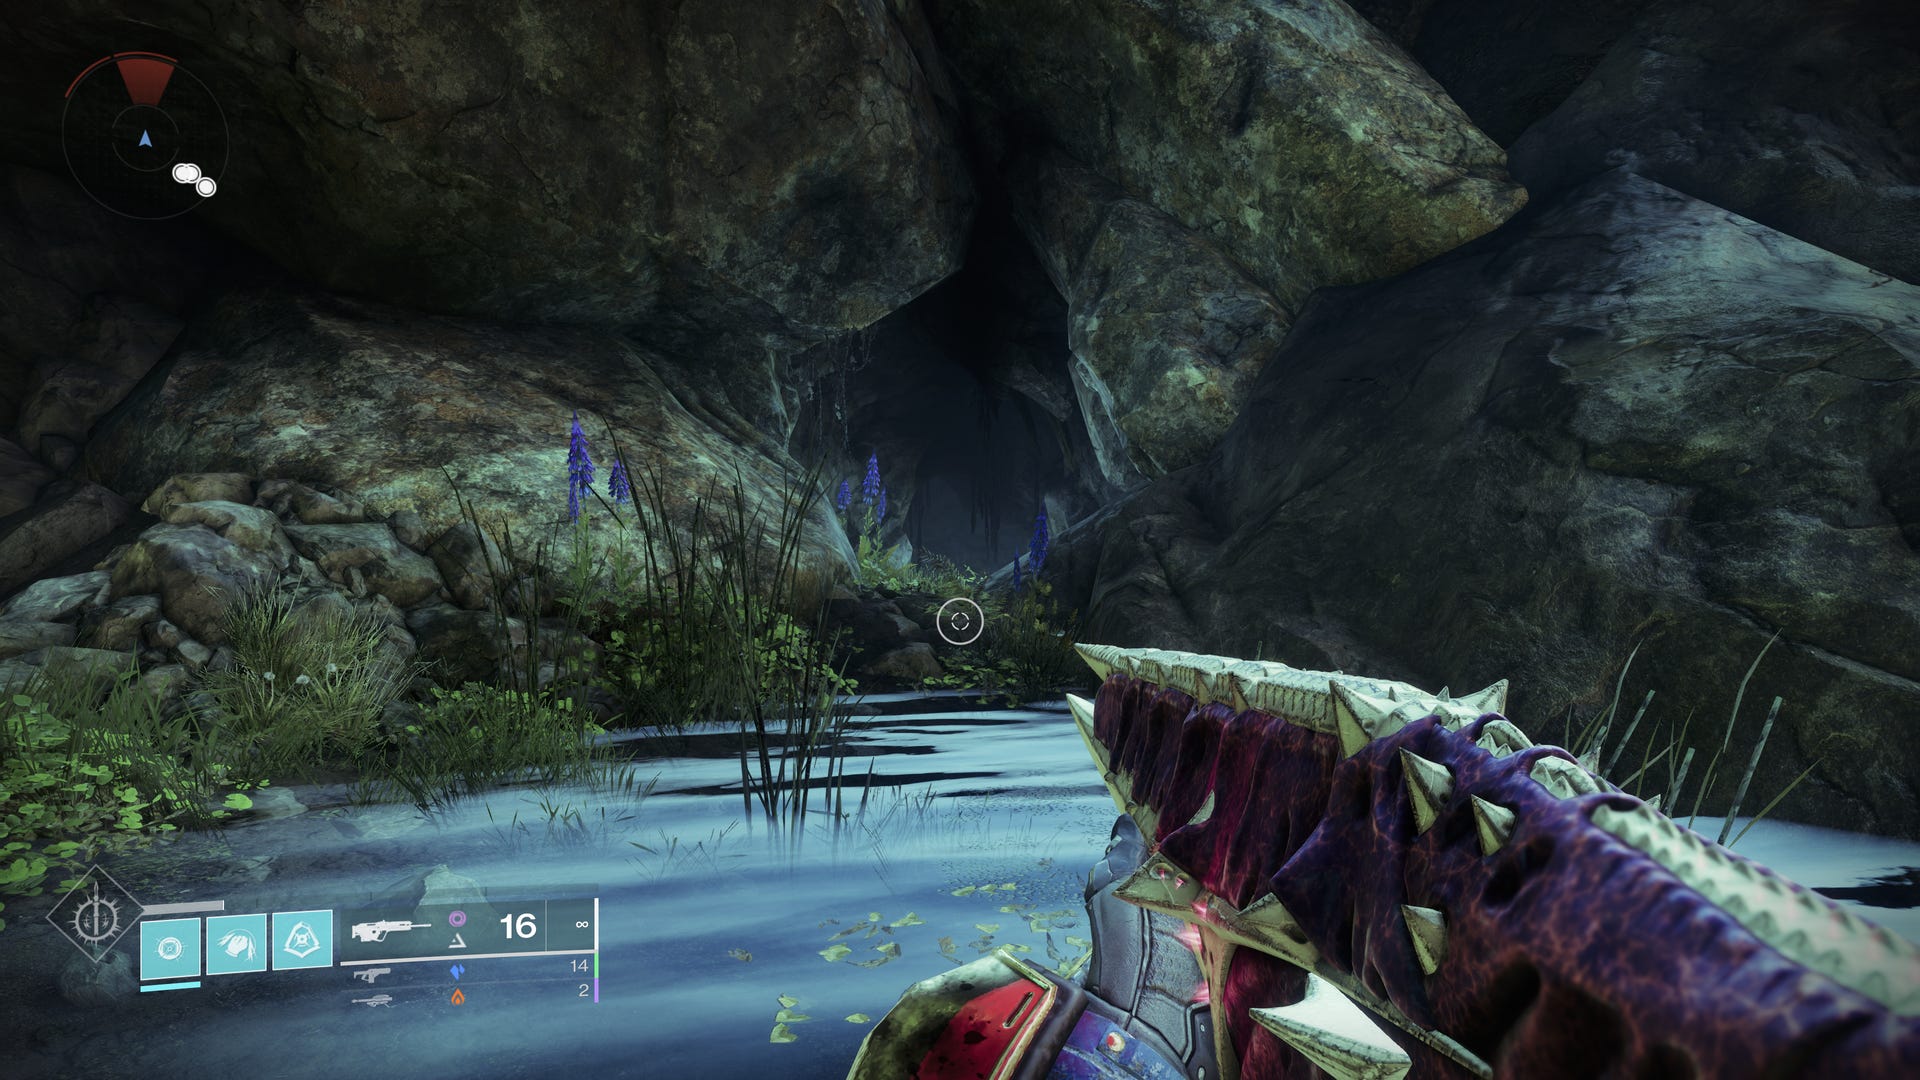
Exit the structure, over the large debris sat outside and past the big red tree (pictured below).

Beyond the tree seen are a set of Vex structures - climb over them to face an open pool of Radiolaria on the other side; the cylindrical structure you previously visited should be behind you.
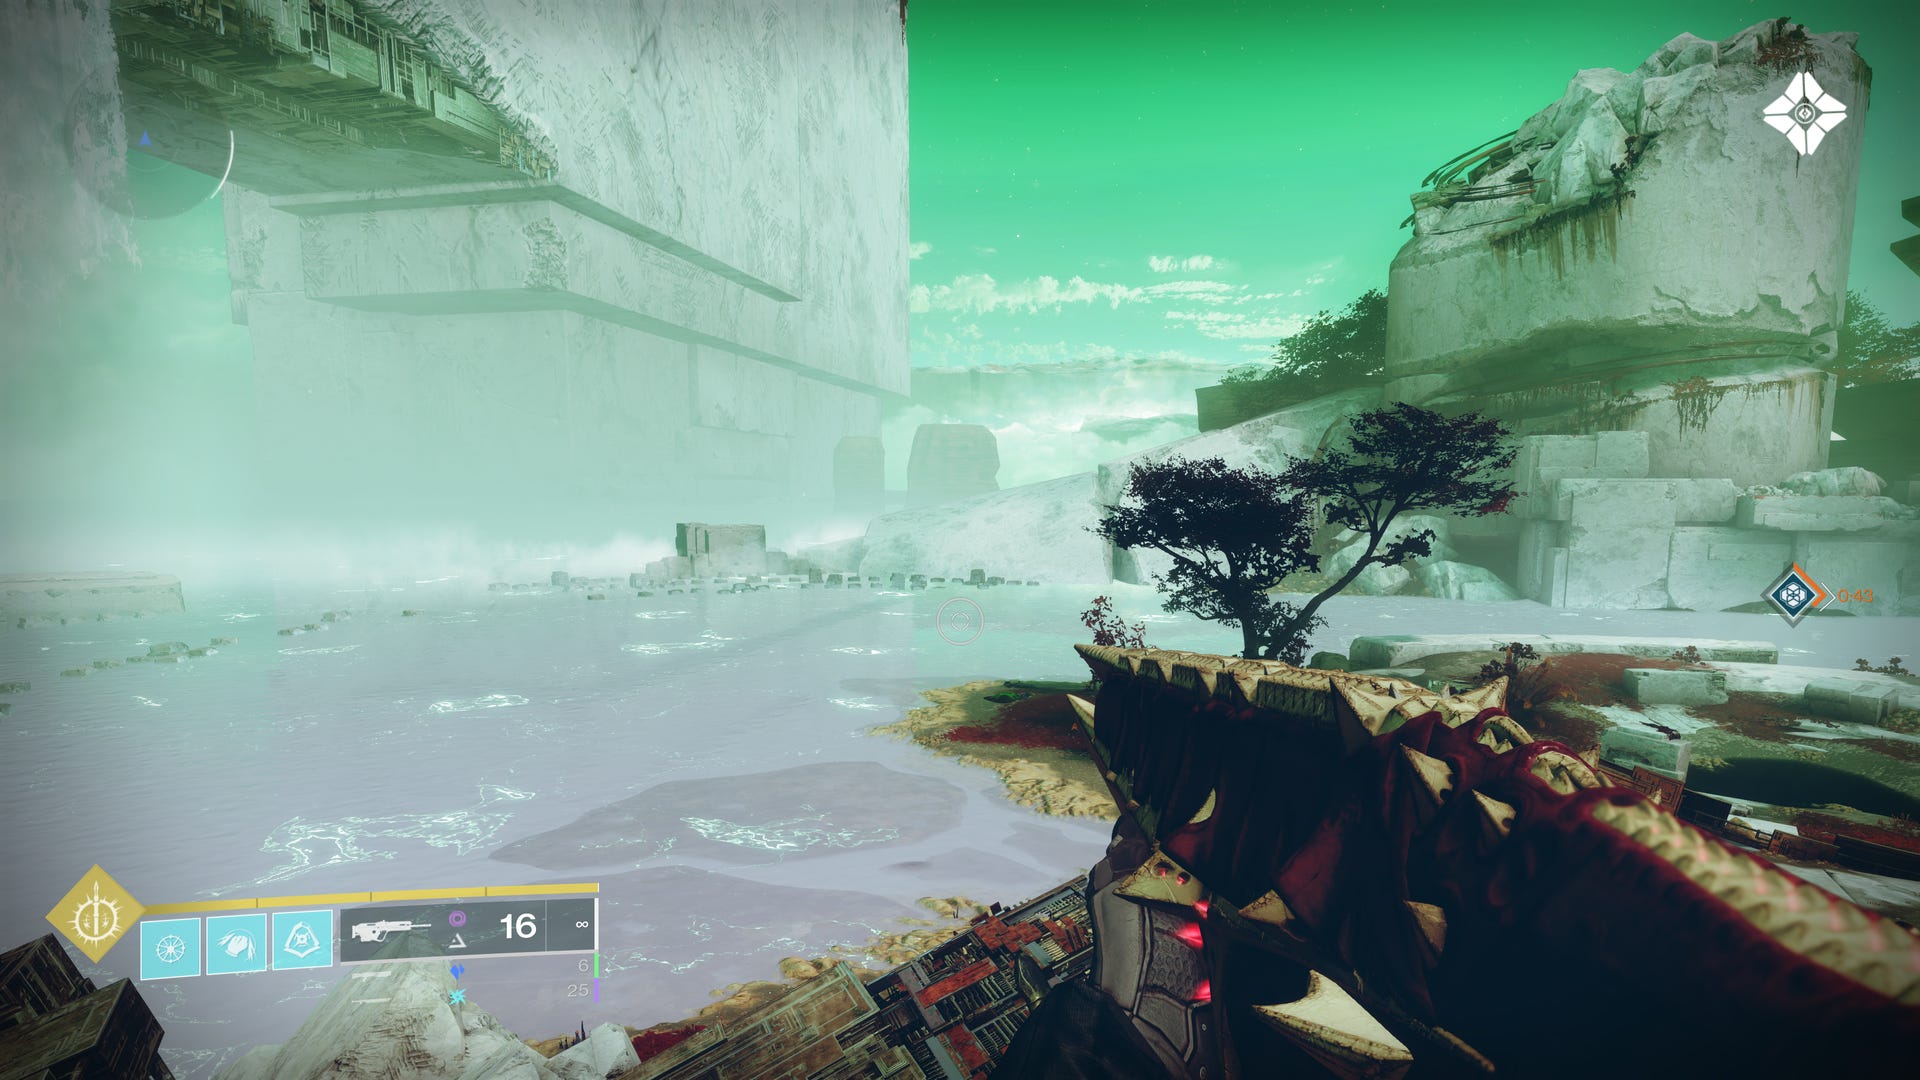
Head over to the shore near the Radiolaria, and next to a spherical structure will be your dig site - get digging and plunder your treasure!
Upon completion, you will receive progress for the Beacon’s Guidance Triumph, as well as a second Crude Cipher fragment, but there’s still more to do to.

Destiny 2 Cryptic Quatrain 3 quest steps, riddle and location
Unlocking the third and final Cryptic Quatrain quest requires you to reach rank 16 with the Star Chart vendor in the HELM. Afterwards, you’ll be able to pick up the ‘Large Treasure Beacon’ to begin the quest.
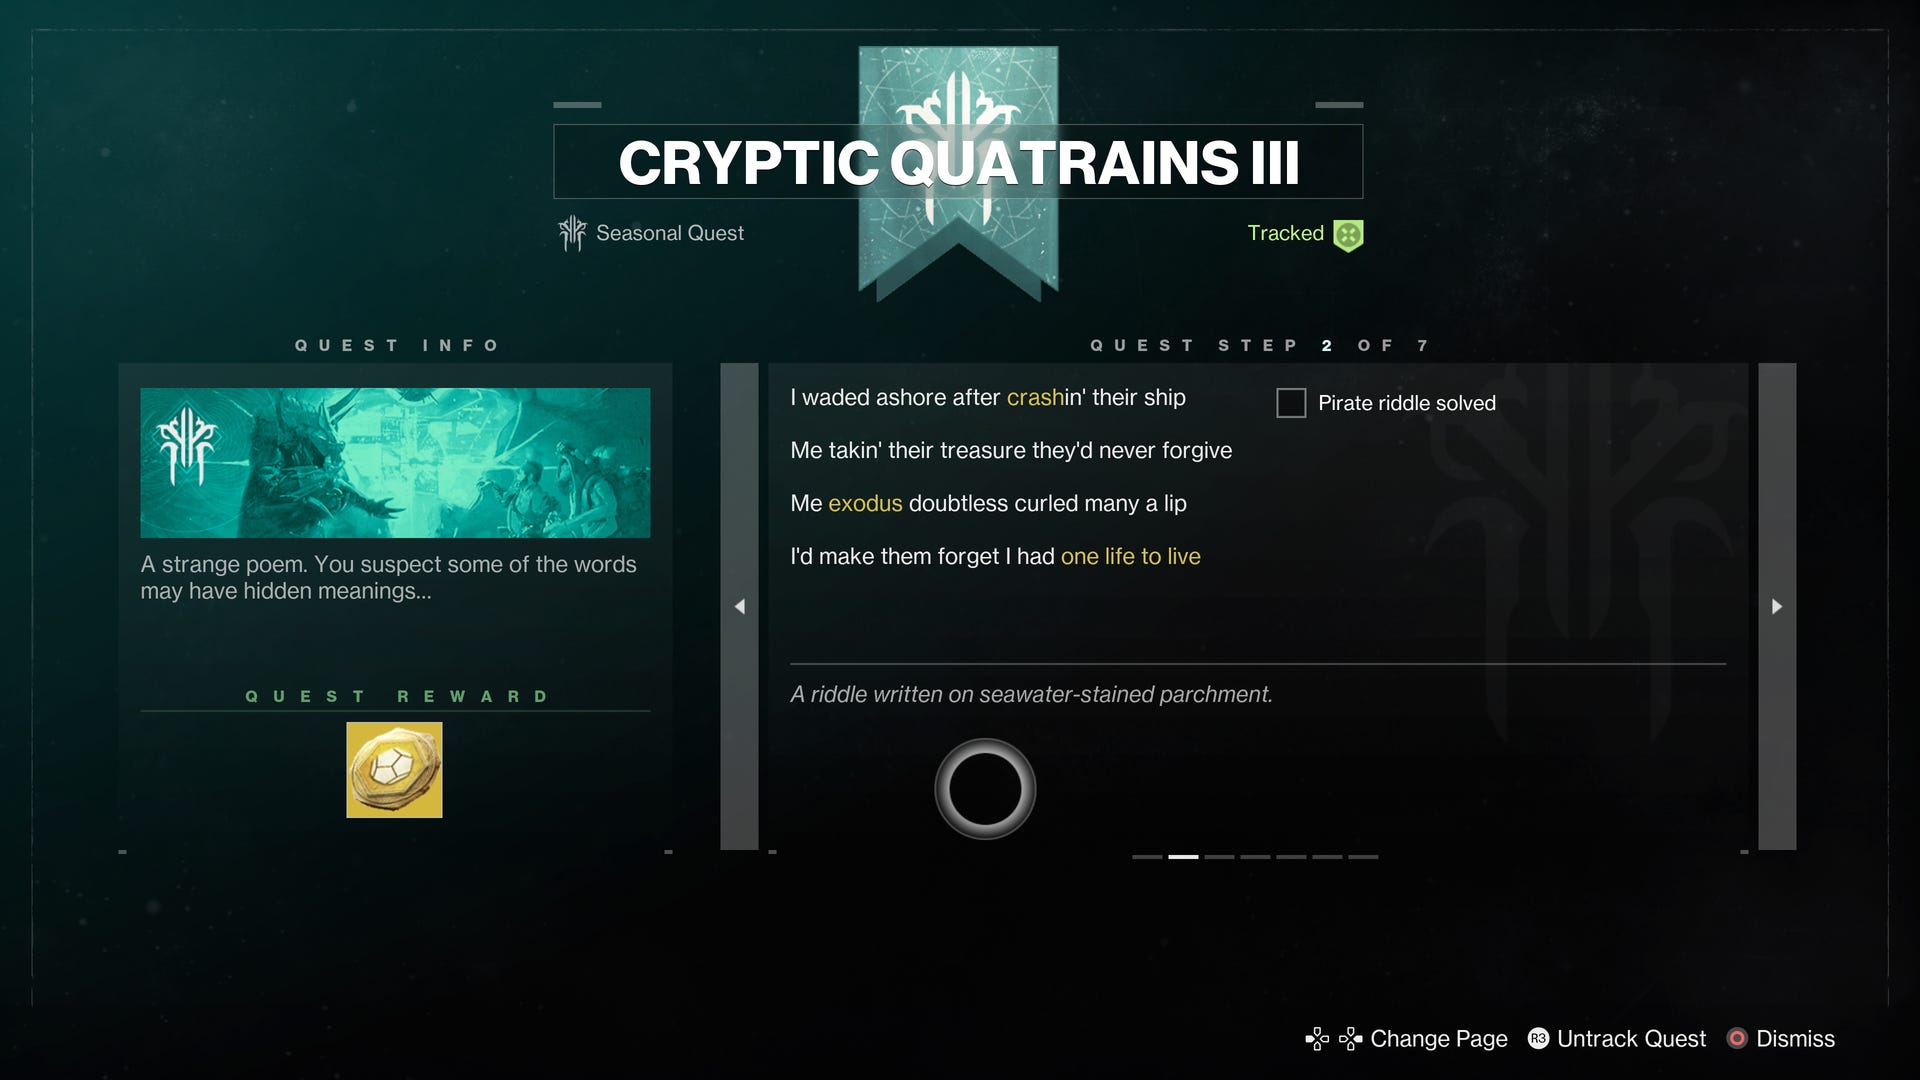
As with the other two quests, it starts with a riddle.

The first step points you toward The Quarry Lost Sector in the EDZ.
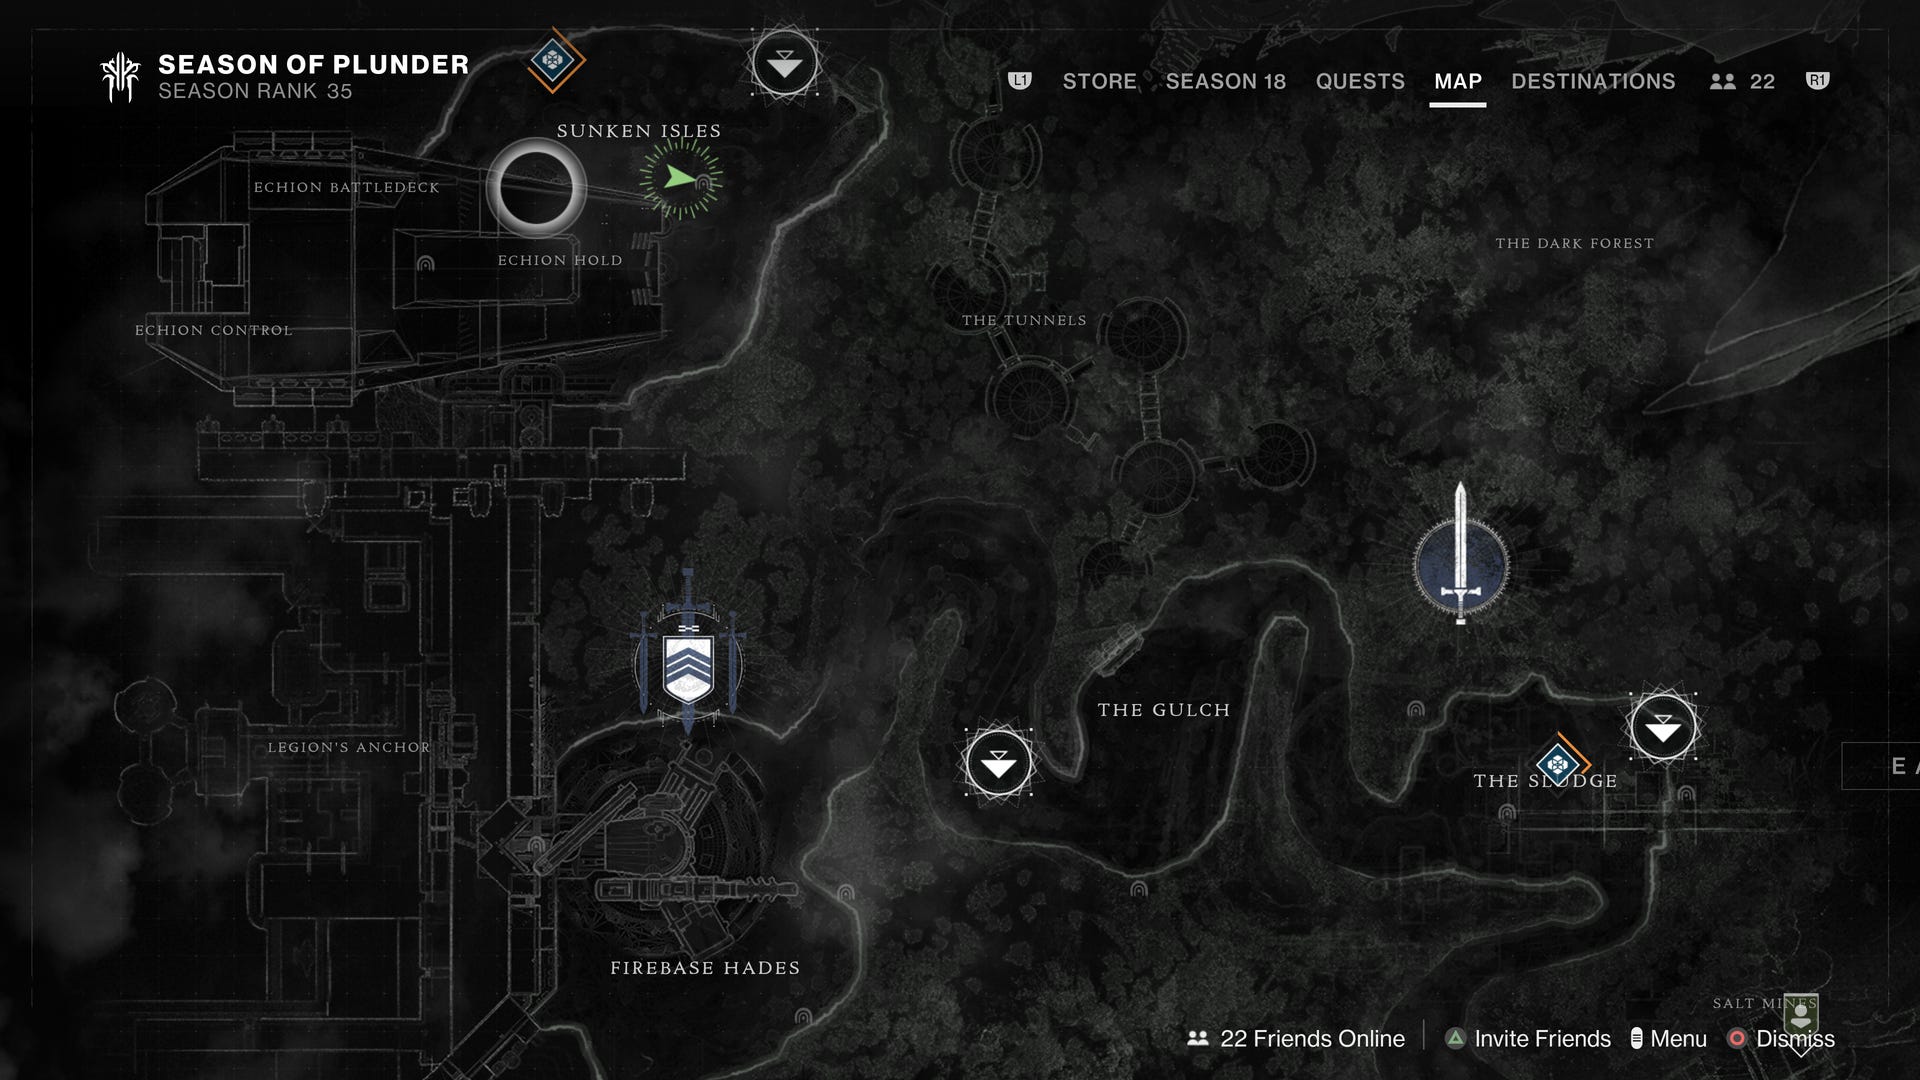
Use the Sunken Isles landing zone in the top left of the EDZ map and head to the Lost Sector closest to that landing zone - it’s next to the green arrow on the image below.
Once you’ve reached the entrance, head inside the cave.
Once inside, complete the Lost Sector by eliminating all enemies and the boss as normal, then open the chest at the end of the area.
After the chest is opened, the second quest step will be revealed.
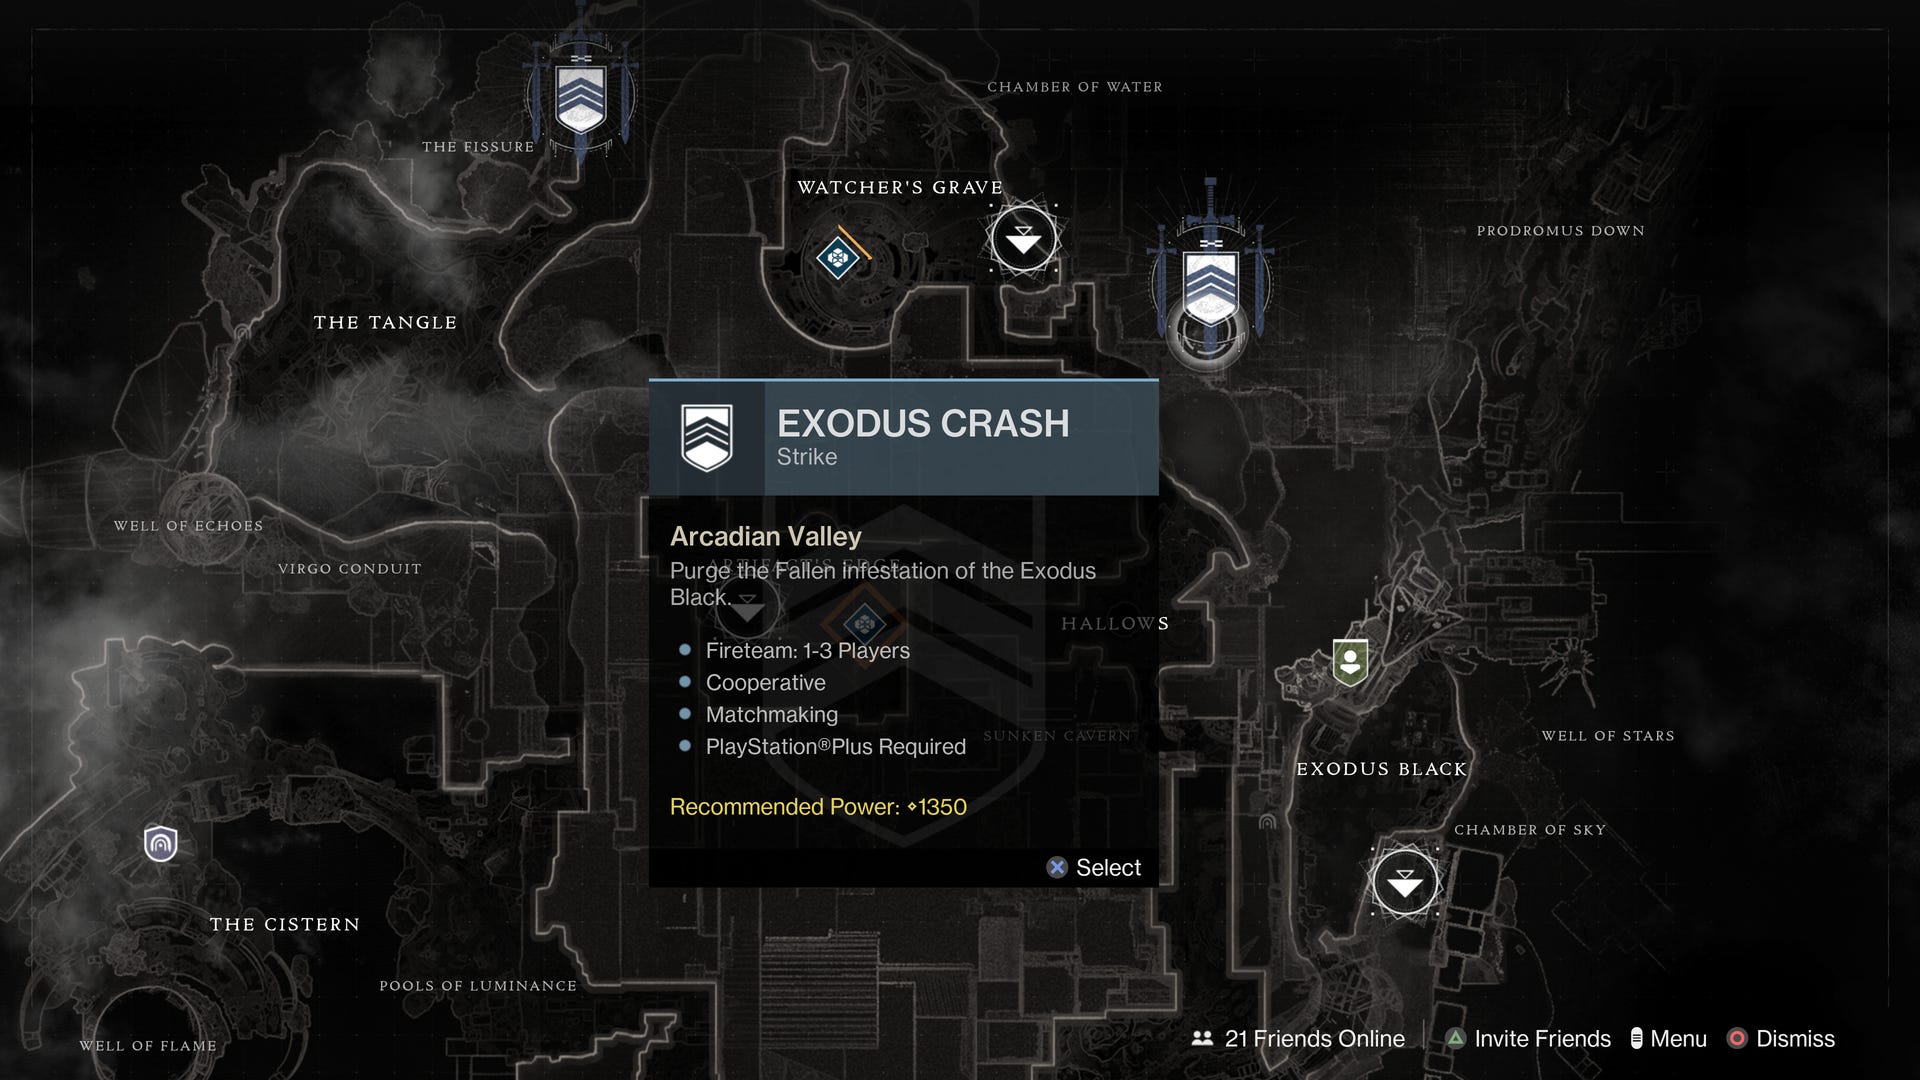
The next step requires you to complete the Exodus Crash Strike without dying. This Strike can be accessed from a node in the top right of Nessus’ map.
Once the Strike is complete, so long as you weren’t killed at any point, the third step will unlock.

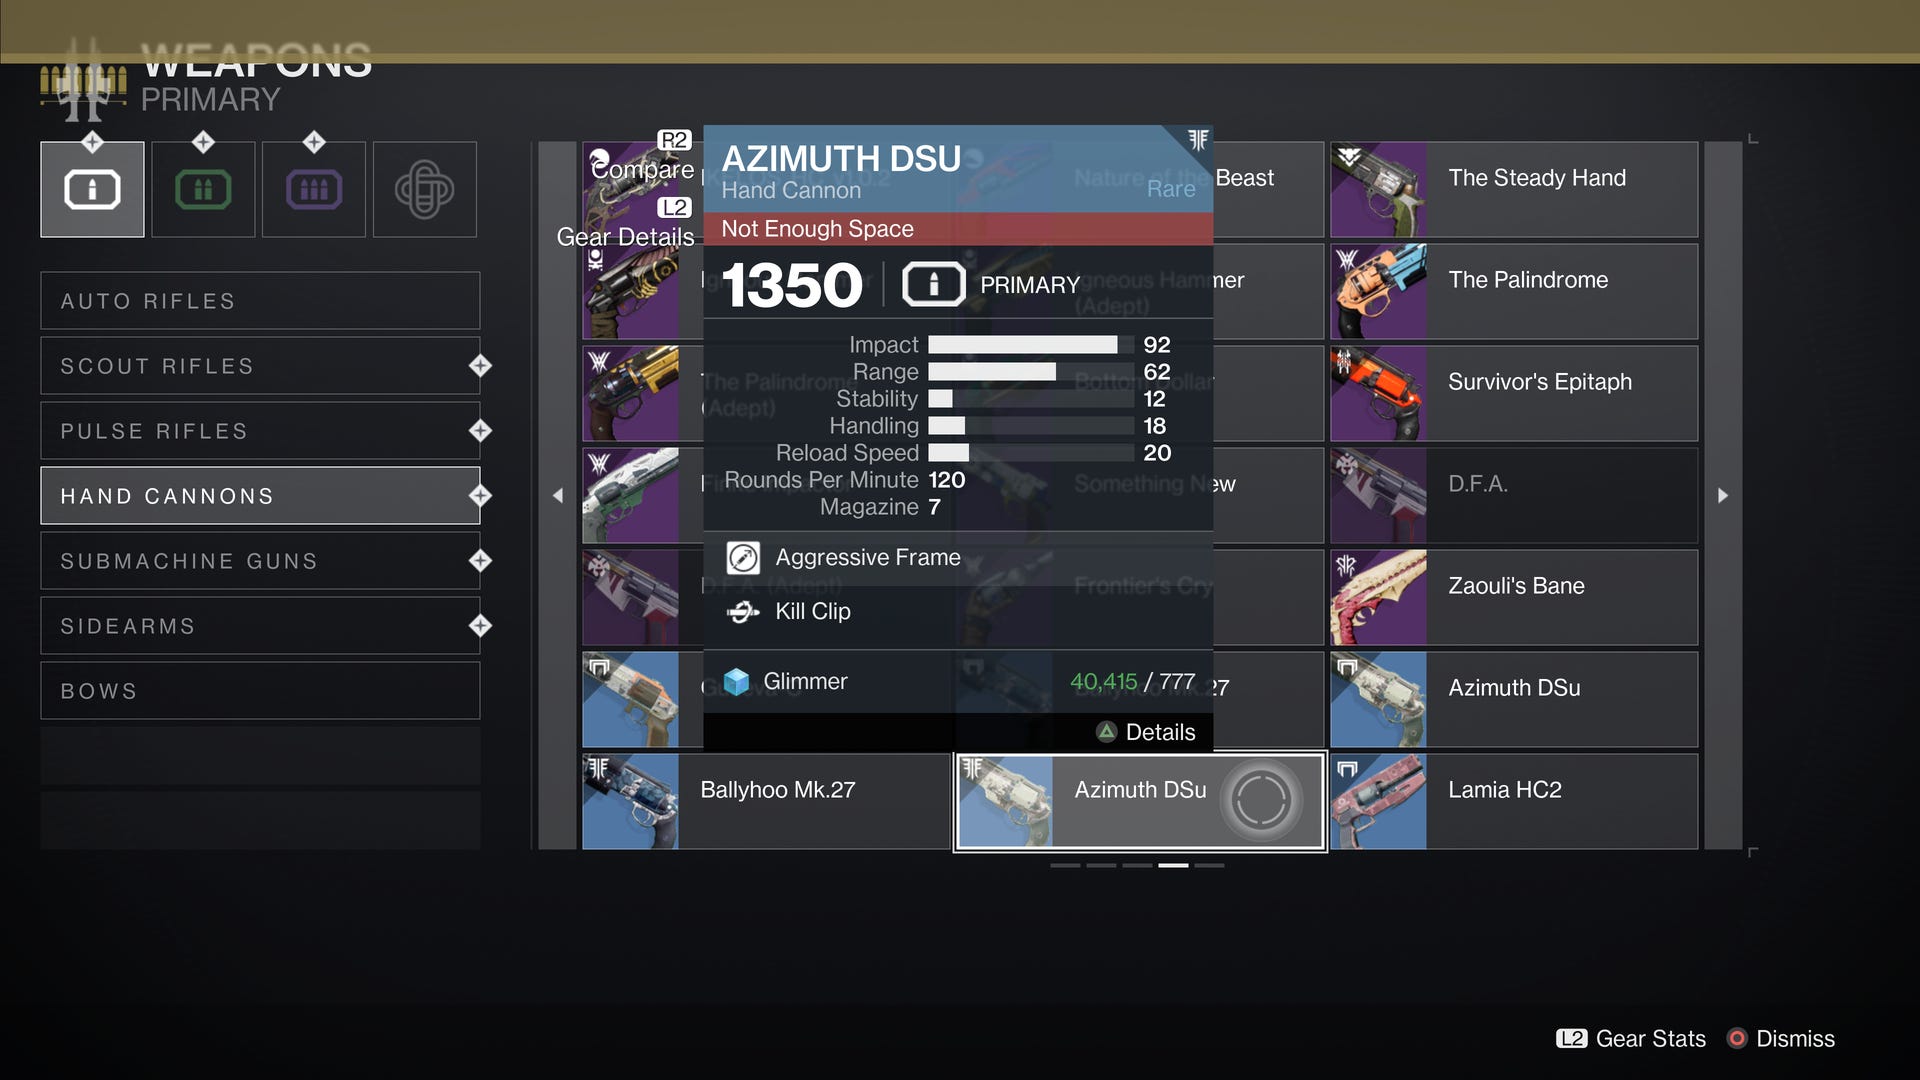
The third step asks you to complete a run of Ketchcrash with an Arc subclass and hand cannon equipped.
If you haven't a hand cannon available, a quick trip to the Collections menu (as referenced earlier for the 2nd Cryptic Quatrain quest) will allow you to reacquire previously collected rare hand cannons for Glimmer.
As with before, if your level drops too low as a result, equip the hand cannon near the end of the activity, and it'll still count.
Once the Ketchcrash has been completed with an Arc subclass and hand cannon equipped, the fourth step will unlock.

How to solve the Crude Cipher puzzle in Destiny 2
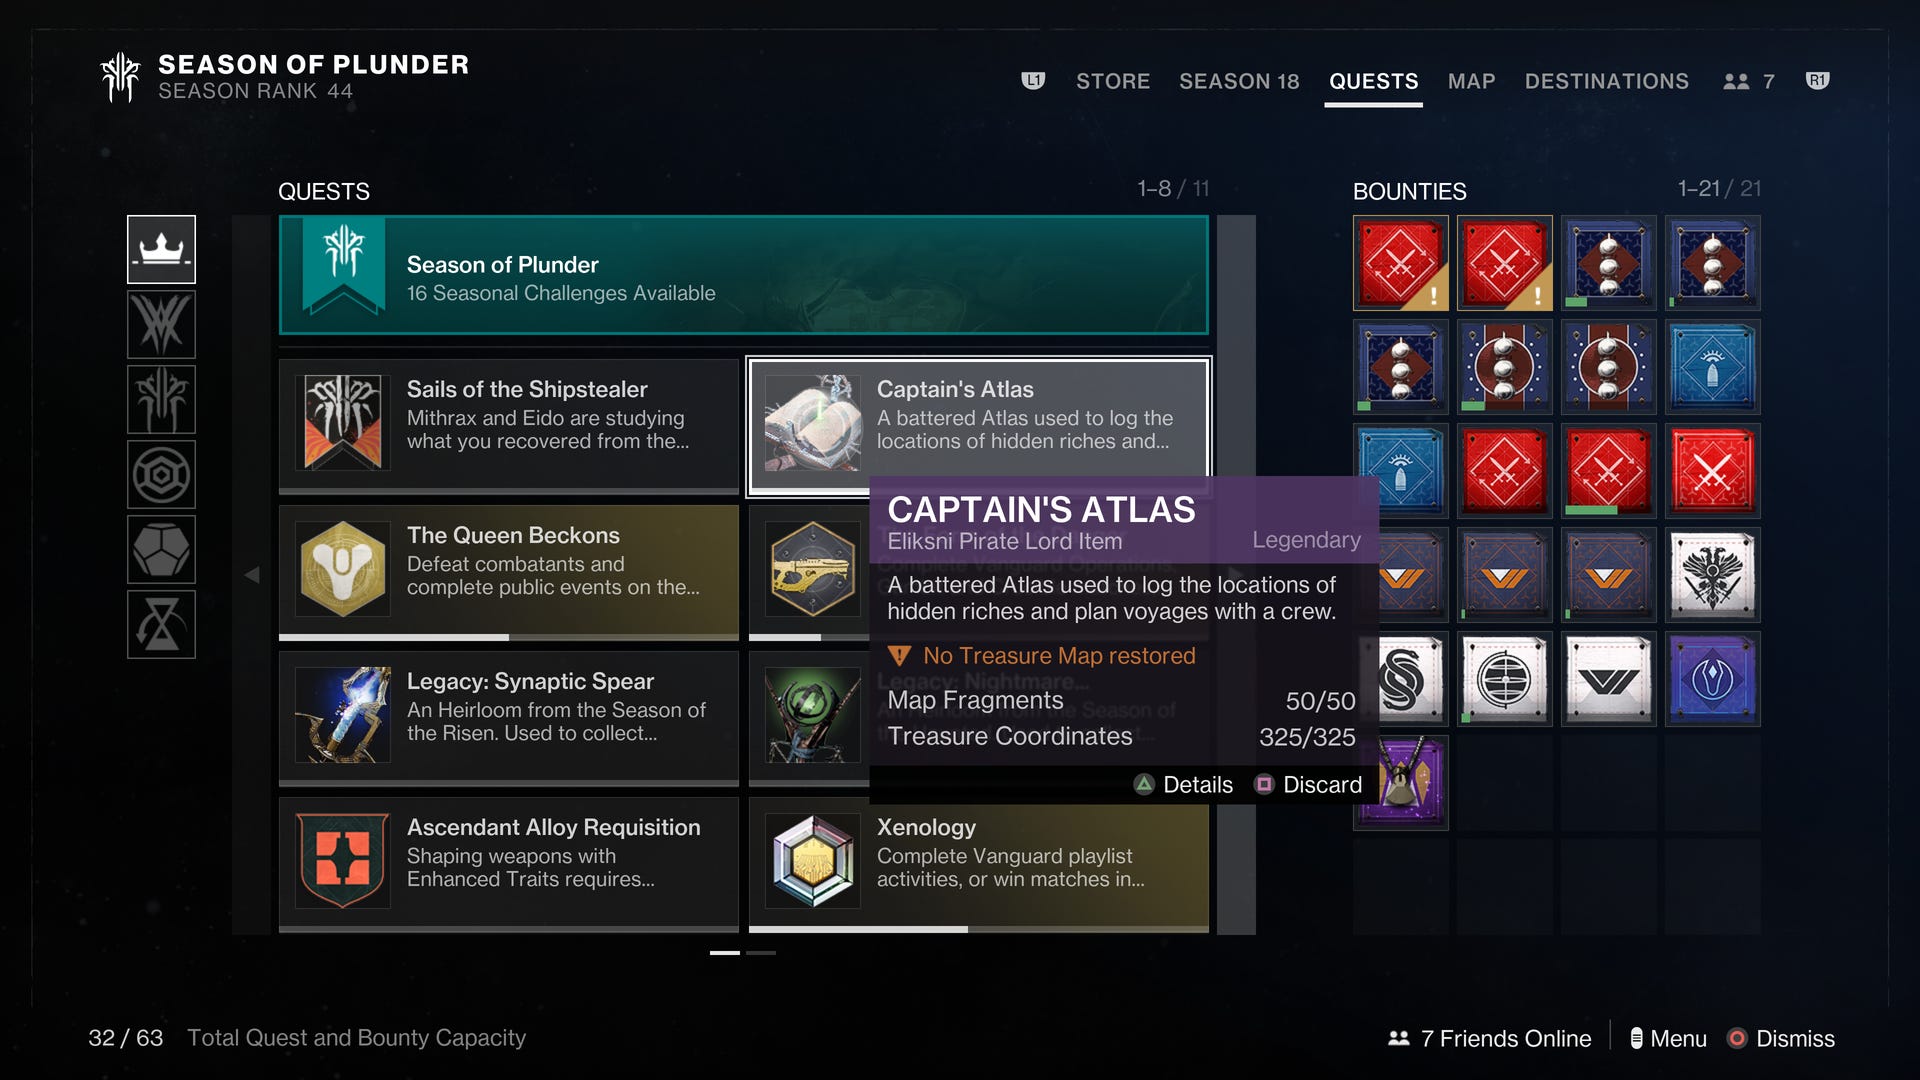
This next step requires you to open the Captain’s Atlas from the quests page and slot a ‘Crude Cipher’ in the treasure map slot - by completing the previous two Cryptic Quatrain quests, you should have the two required Crude Cipher Fragments to do this.
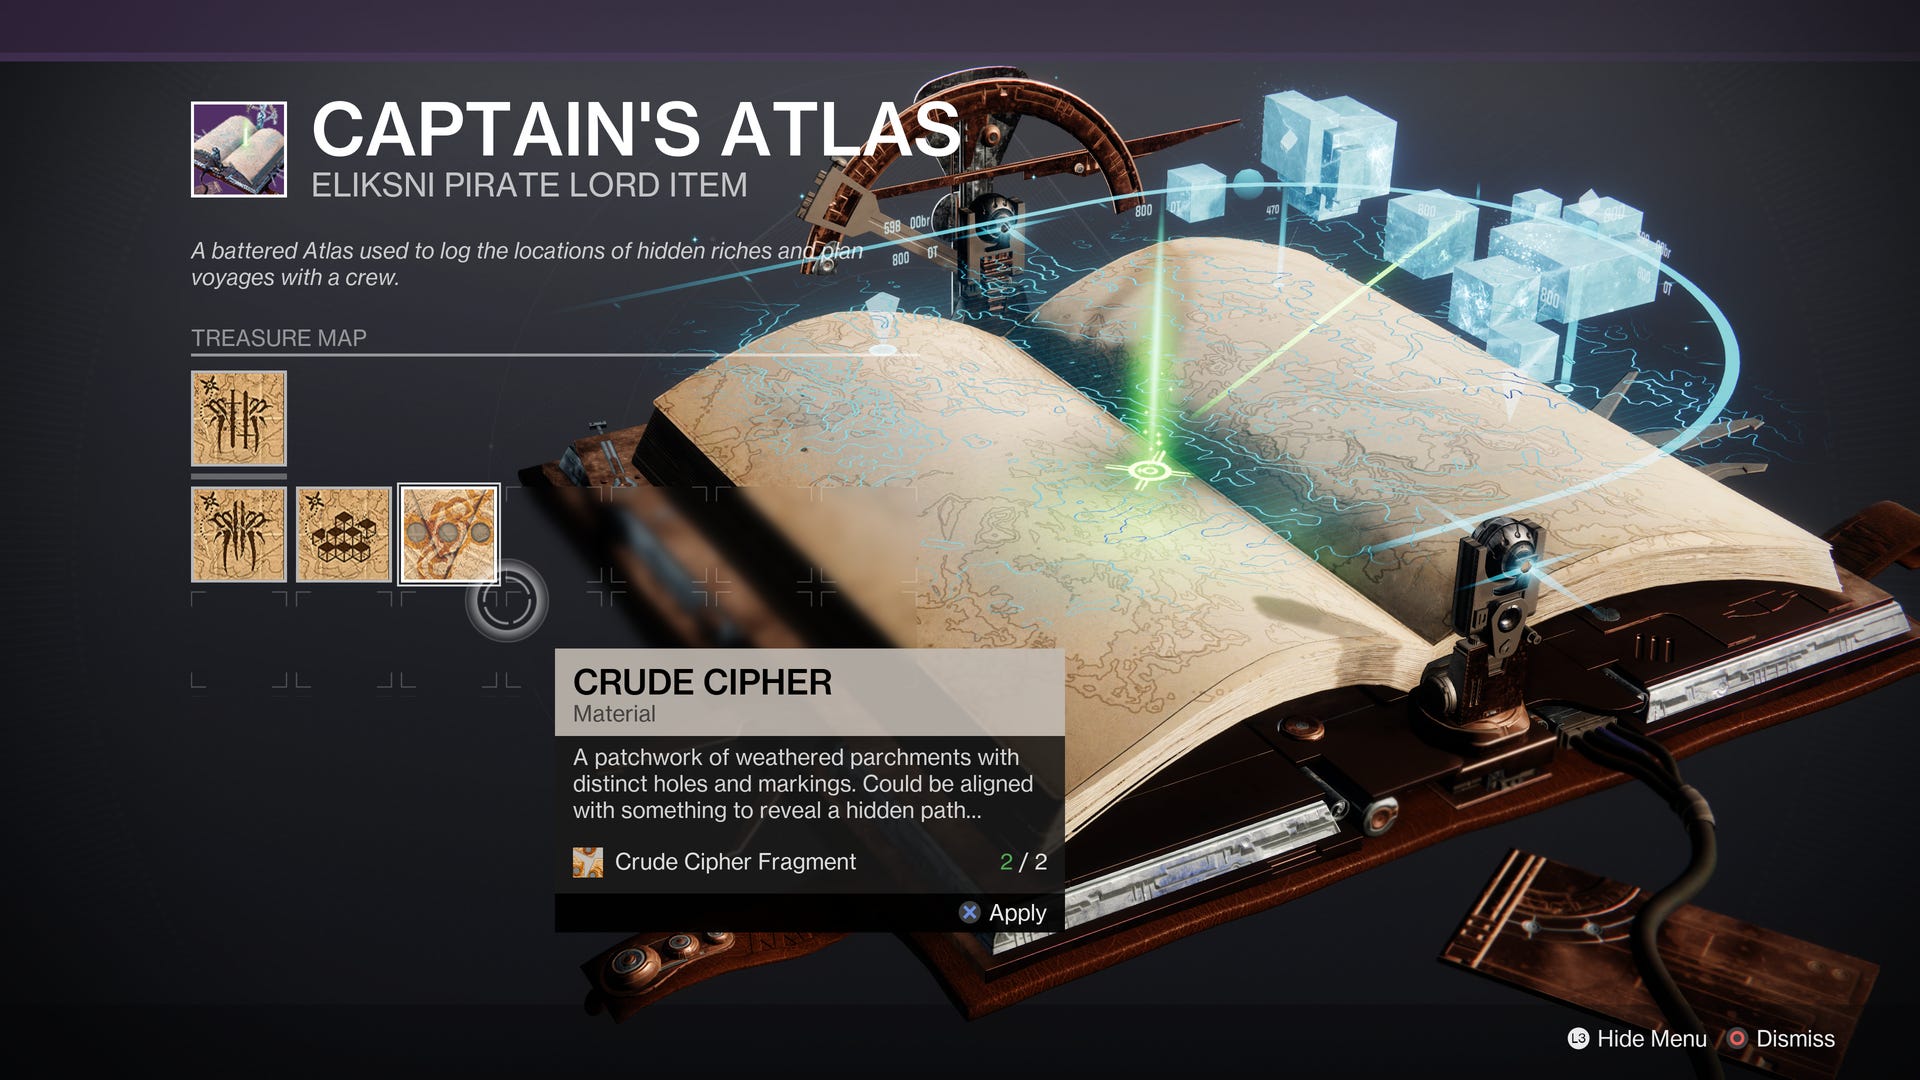
After slotting the Crude Cipher into the Captain’s Atlas, the fifth step will be revealed, alongside a new 'Secret Compartment' menu within the Atlas.
A puzzle involving three sigils must now be solved within the Captain’s Atlas menu.
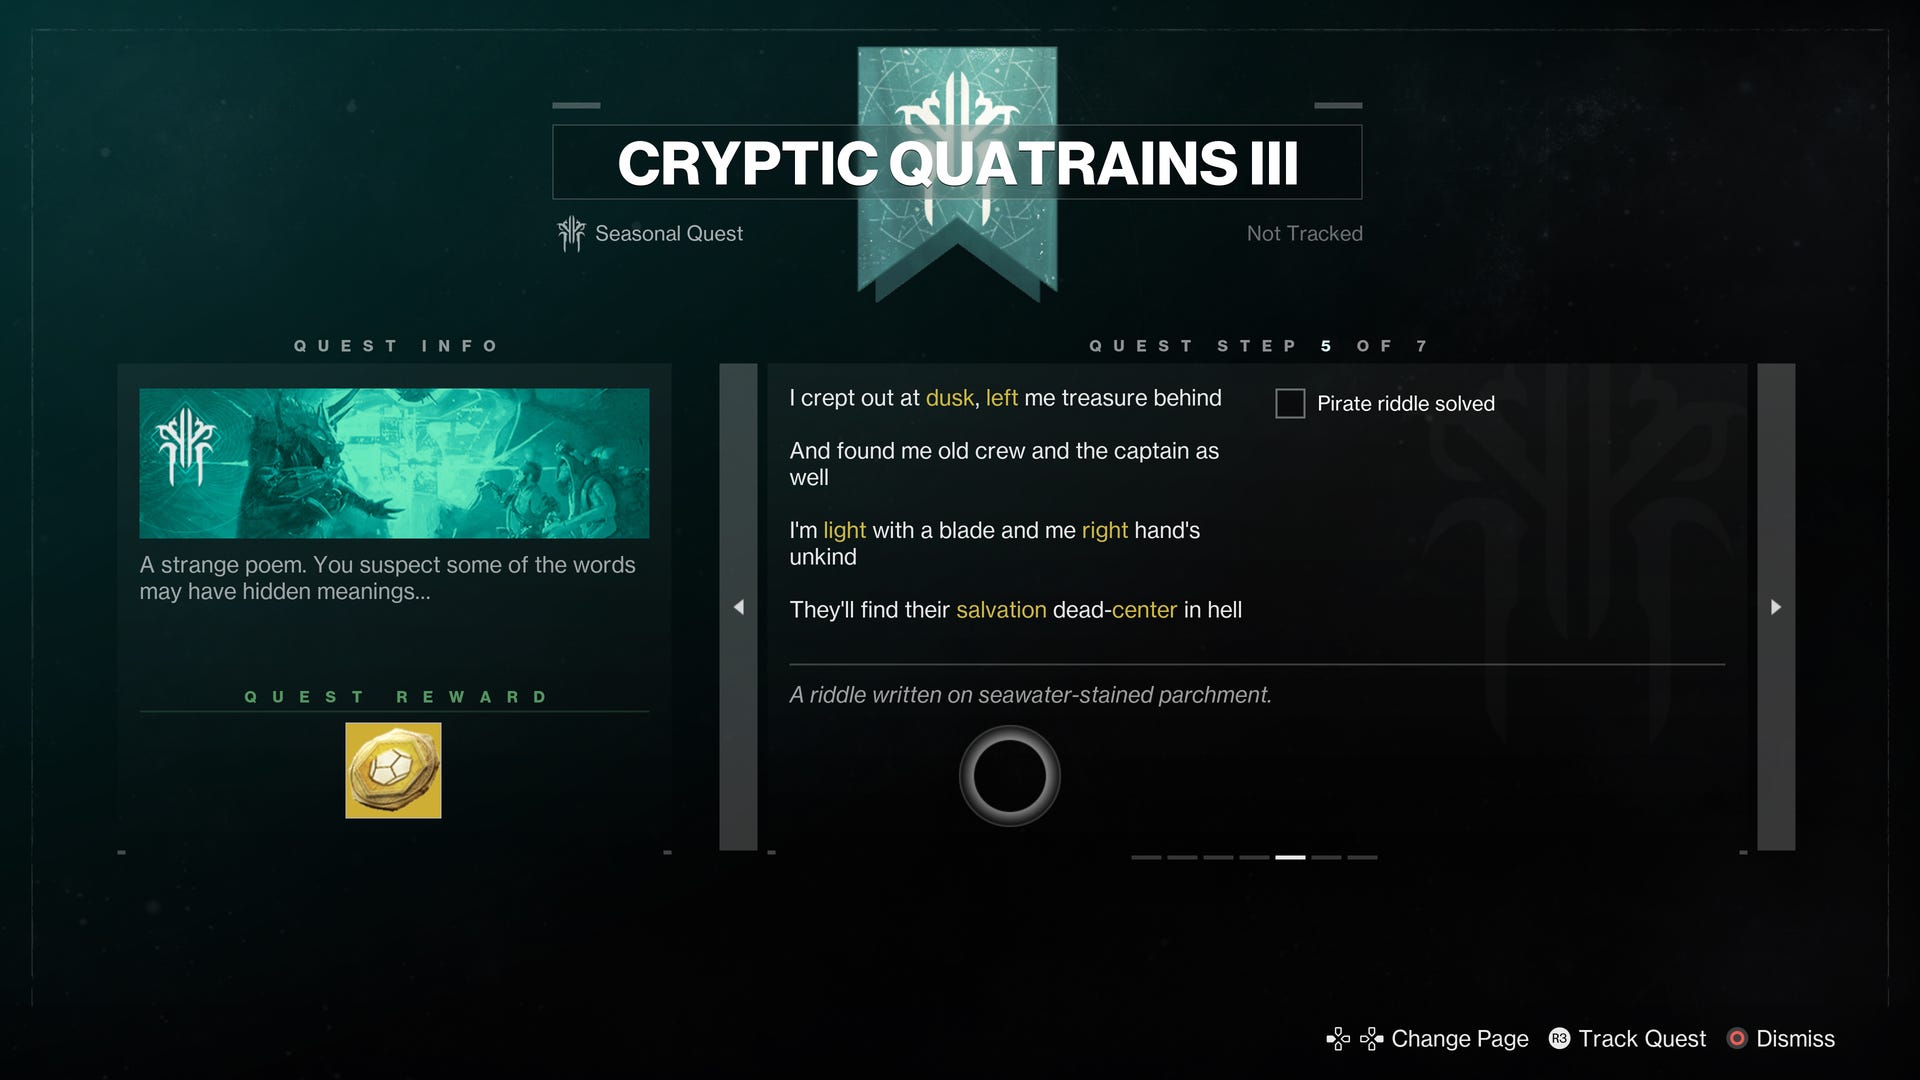
Following the hints from the quest step, the order these Secret Compartment sigils need to be slotted in is as follows:
- Left: House of Dusk
- Middle: House of Salvation
- Right: House of Light
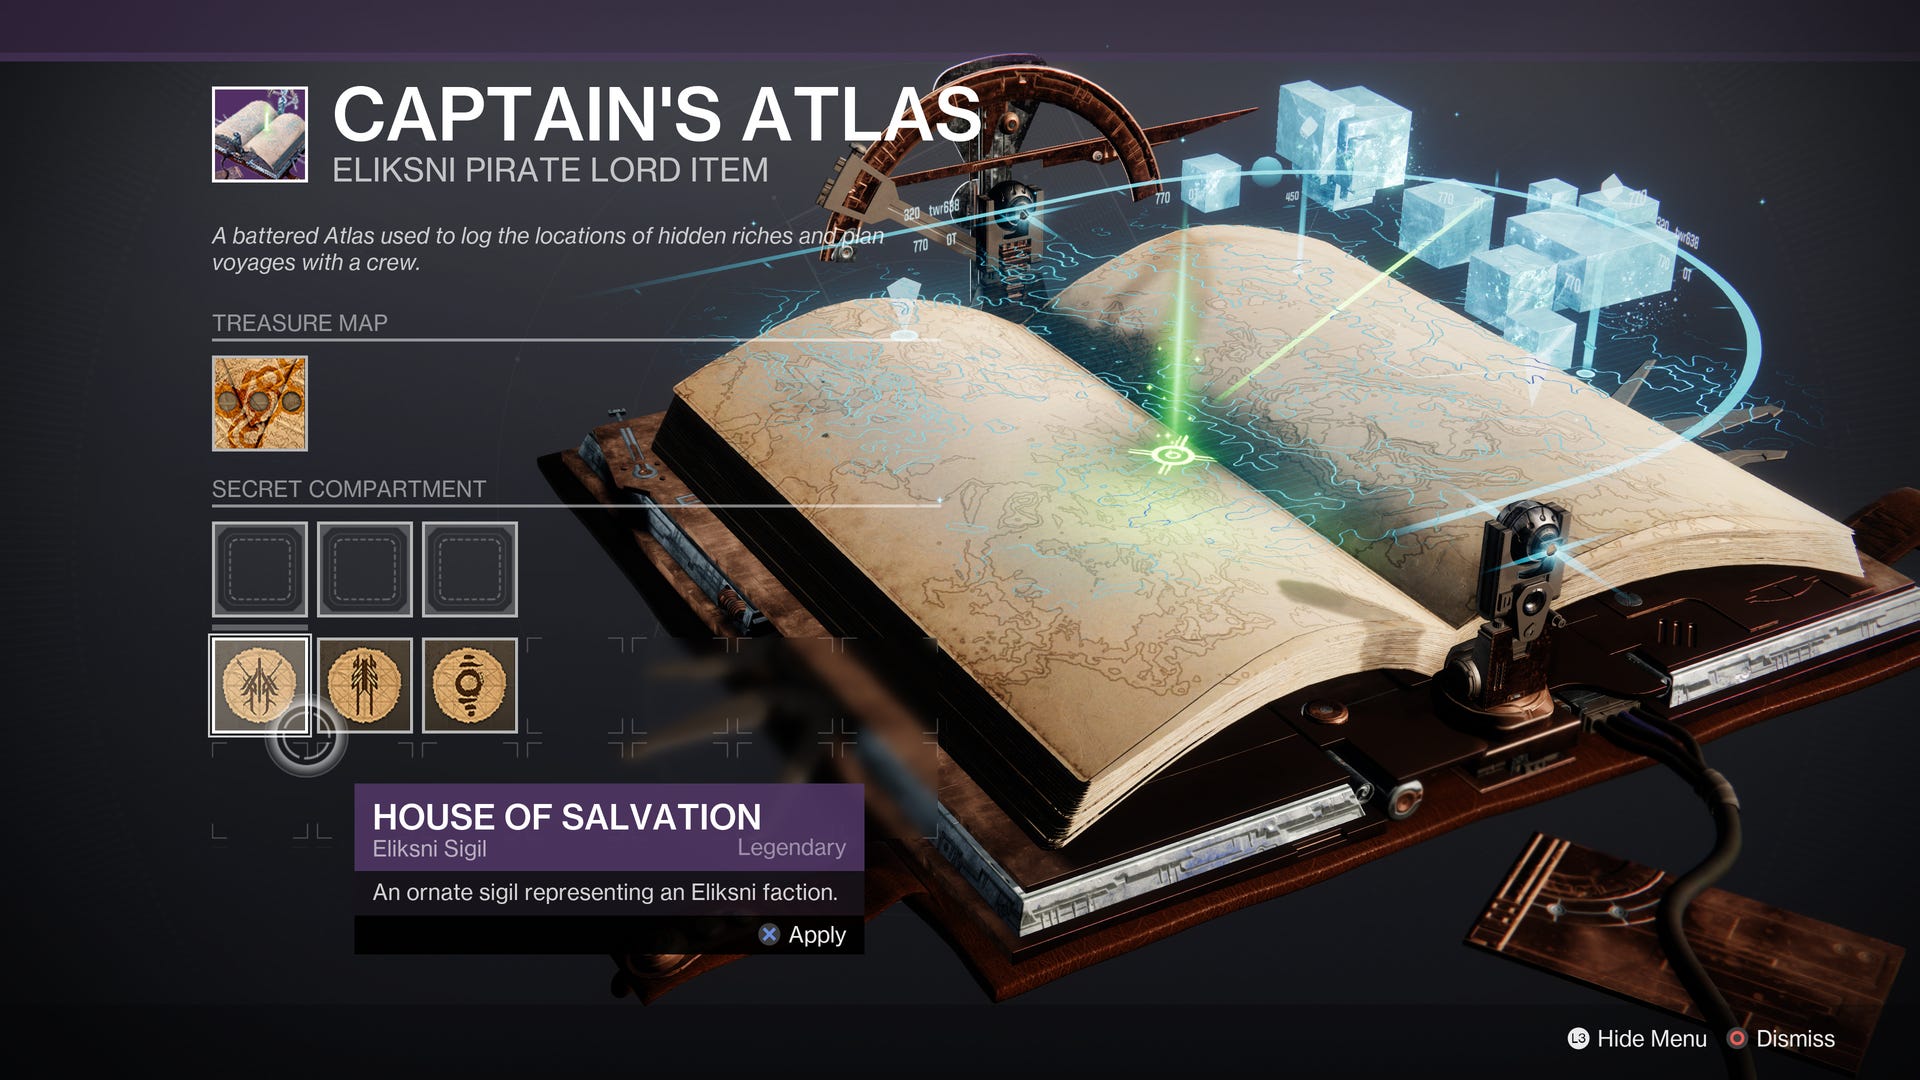
Once these have been slotted in correctly, the sixth quest step will be revealed.
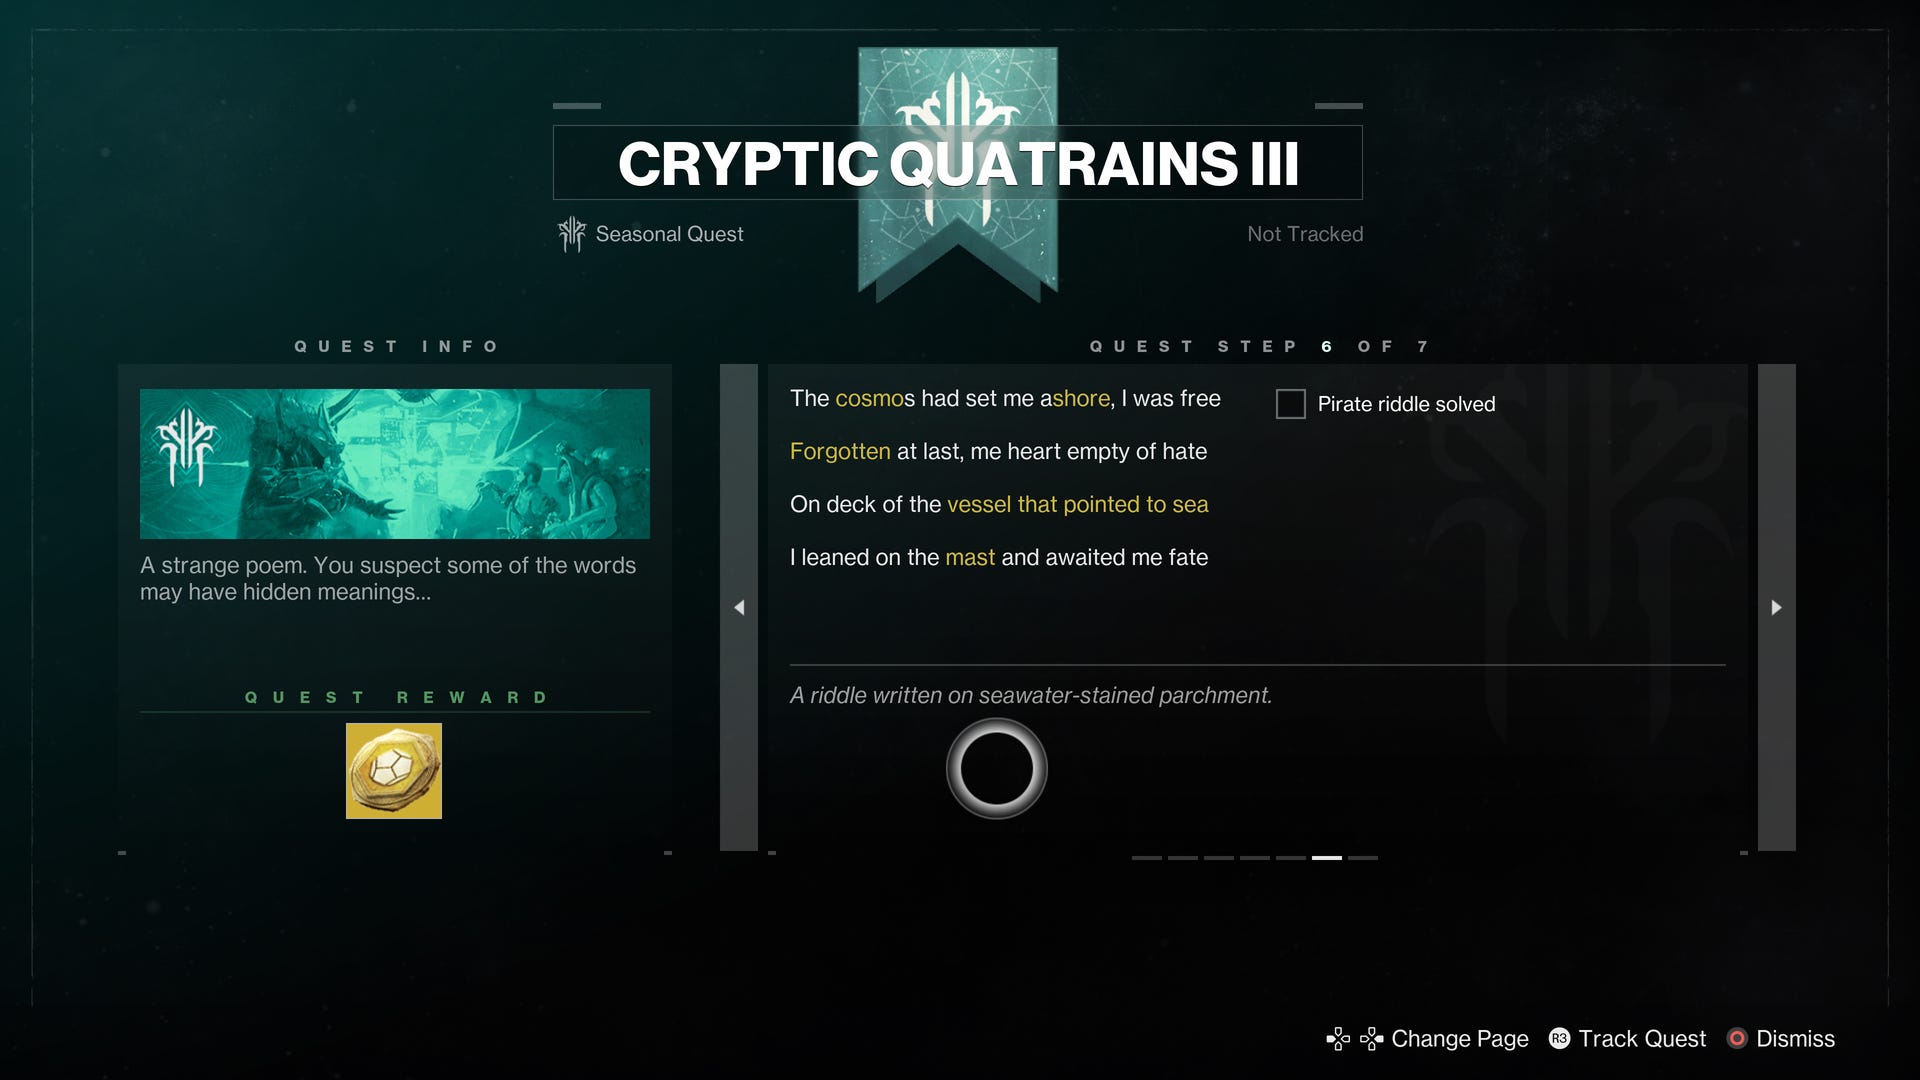
The second-to-last step of this quest points you to the Forgotten Shore in the Cosmodrome, specifically to the bottom of a mast on a washed up ship.
Load into the Cosmodrome through the director - we recommend using the Steppes landing zone since it’s a quicker route as you can use a vehicle.

Once you’ve touched down, hop on your sparrow and, using the map, make your way to the Mothyards zone, located directly above the Steppes on the map.
In the Mothyards, head to the winding road (next to the green arrow in the below image), and follow it around until you reach the Forgotten Shore.


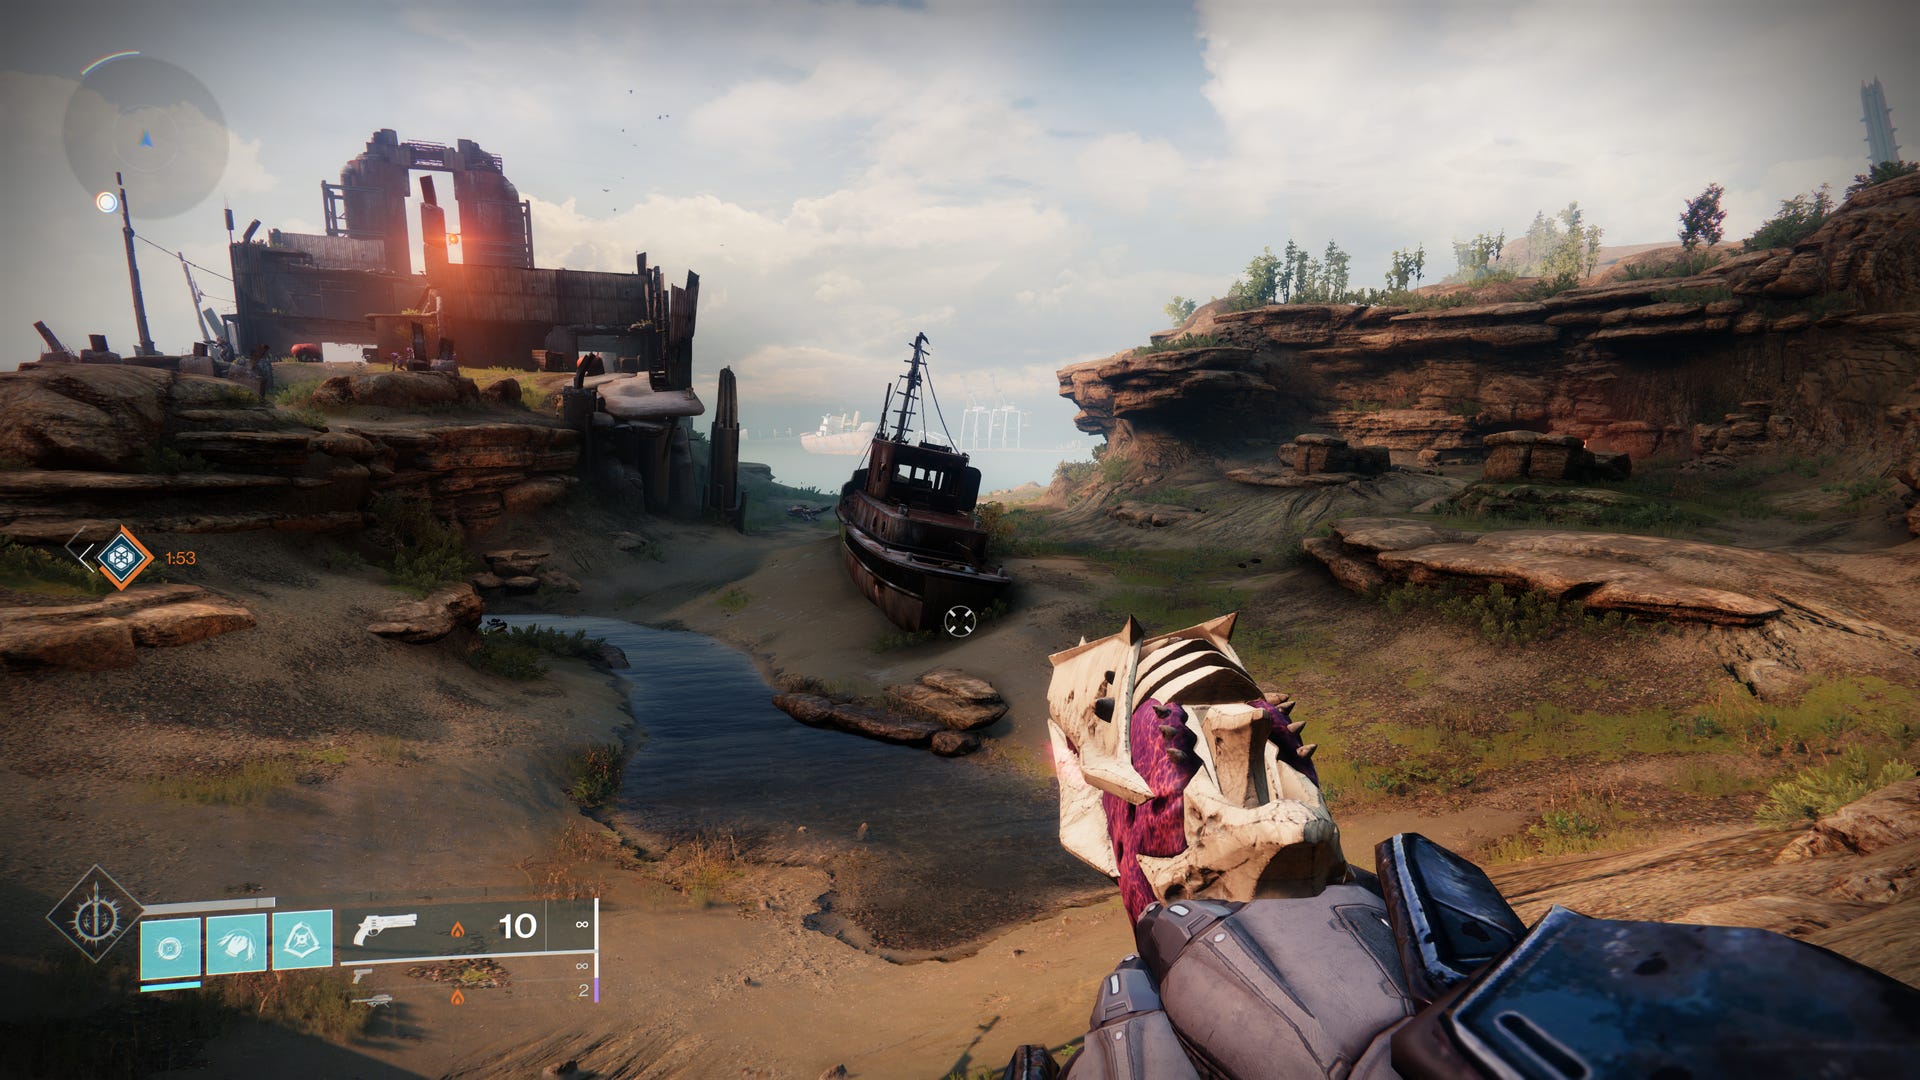
Once you enter the Forgotten Shore, you’ll be able to see a big washed up ship (pictured above). Sticking to the right side of the area, drive past this ship.
Around the corner you’ll see a couple more ships and eventually a derelict building with another ship washed up in front of it (as seen below). Keep going past these too.
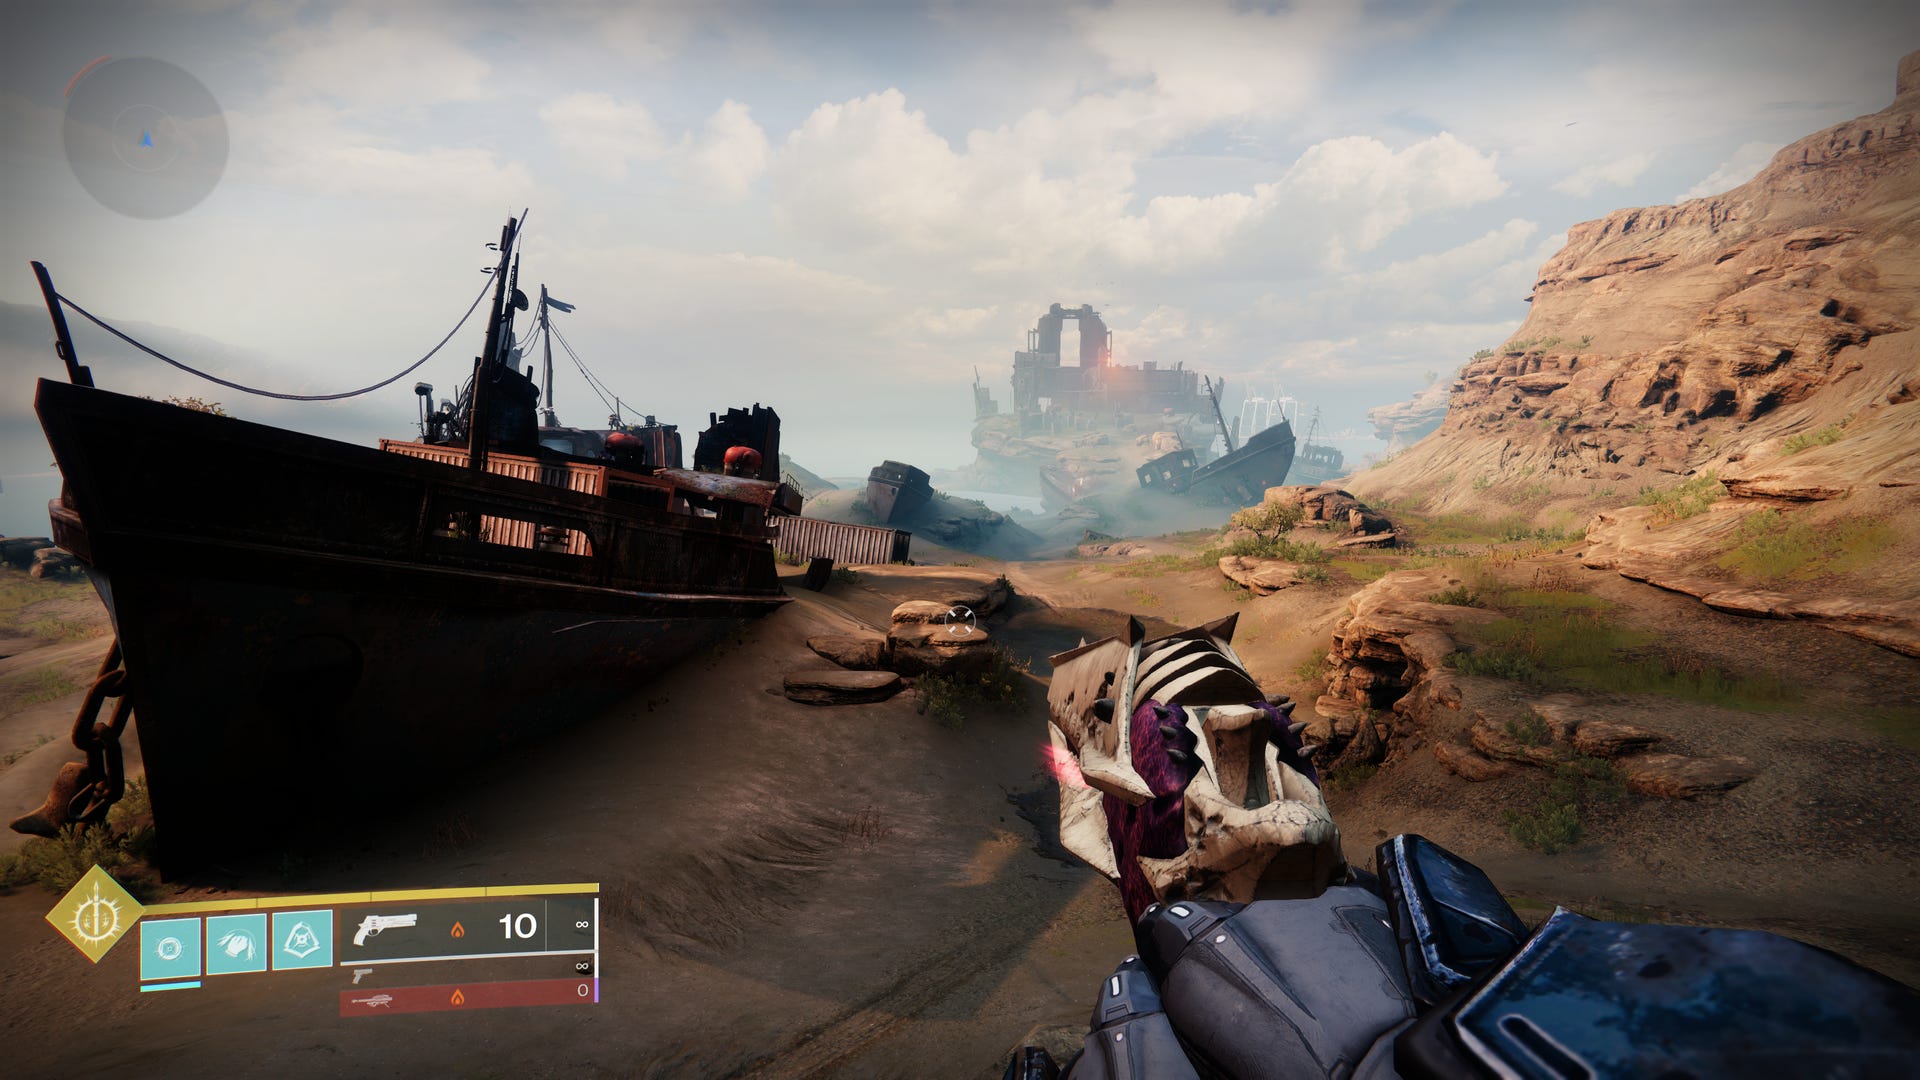
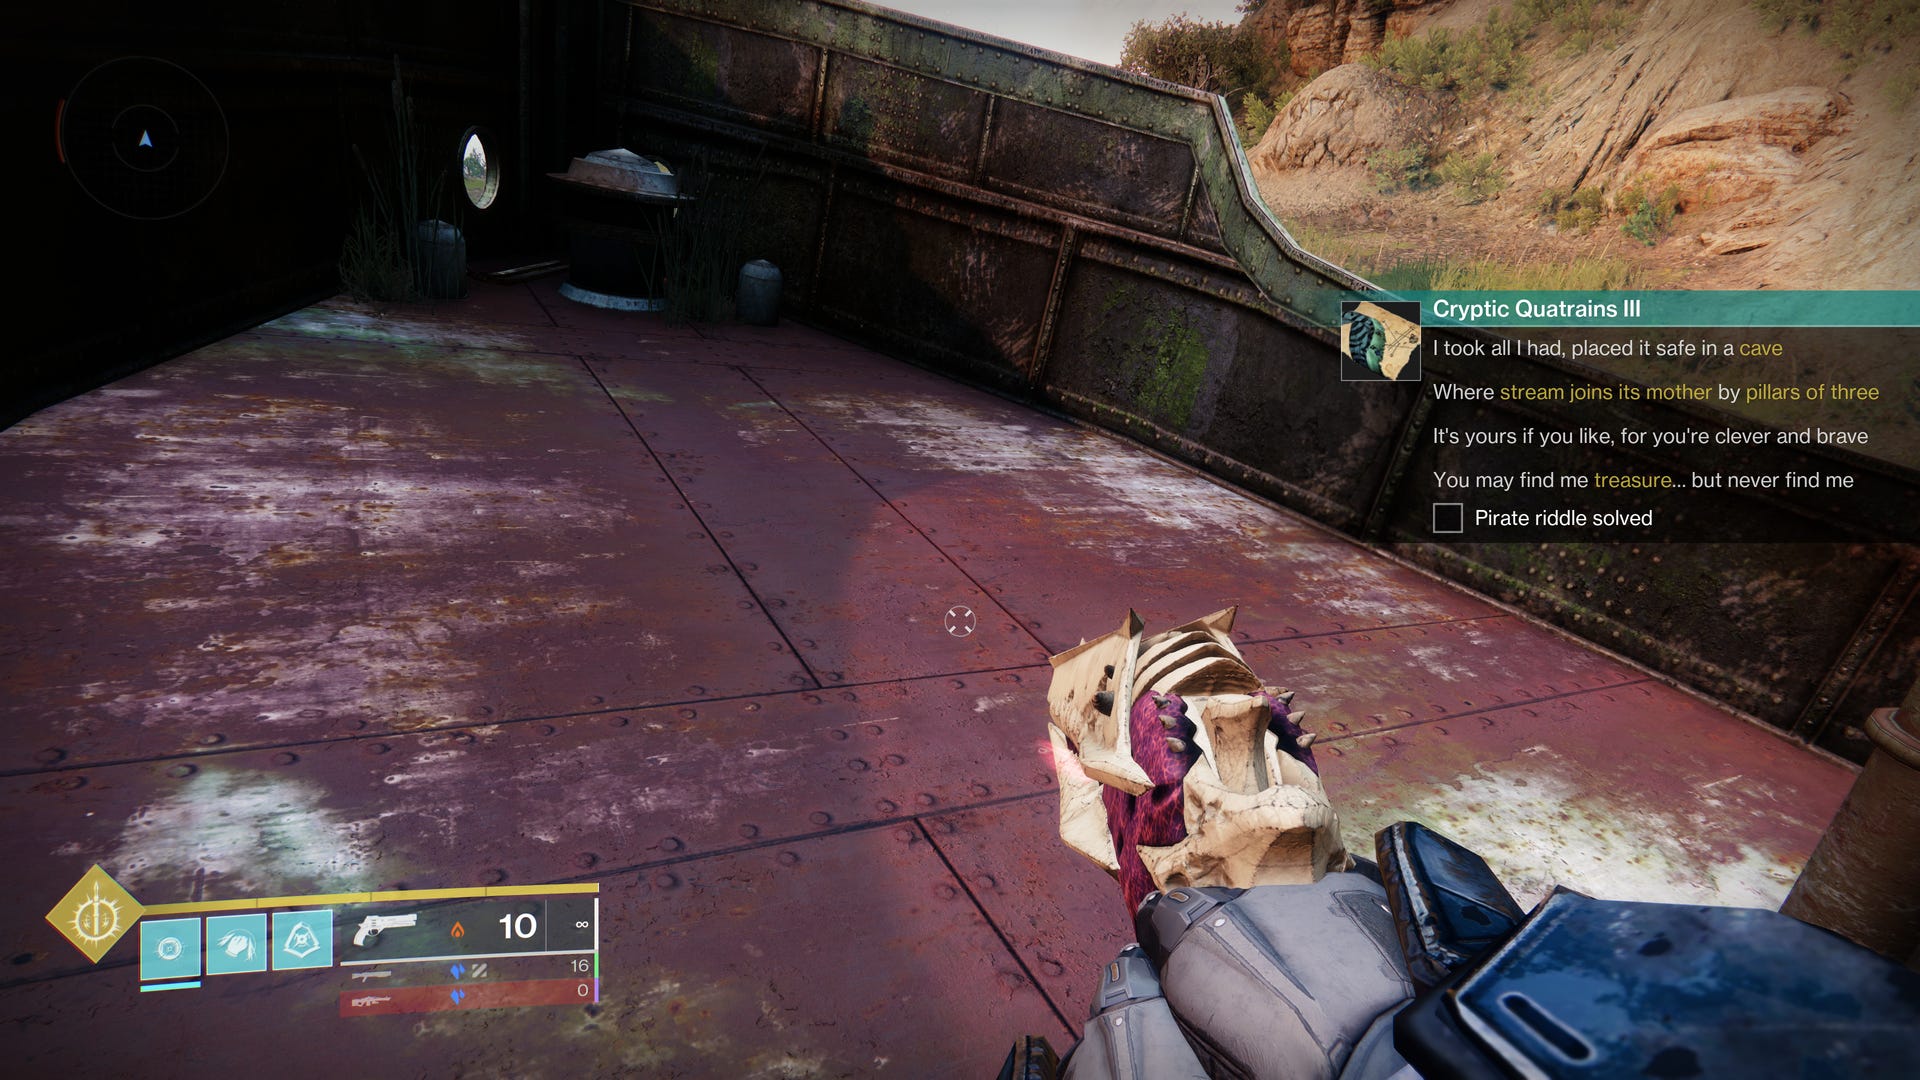
Around the right side of the ship and derelict building is yet another washed up ship - this is the one you want, so climb aboard!
Once on-deck, head to the front of the ship; next to the mast, there should be a green glow coming from the ground - investigate it to progress the quest.
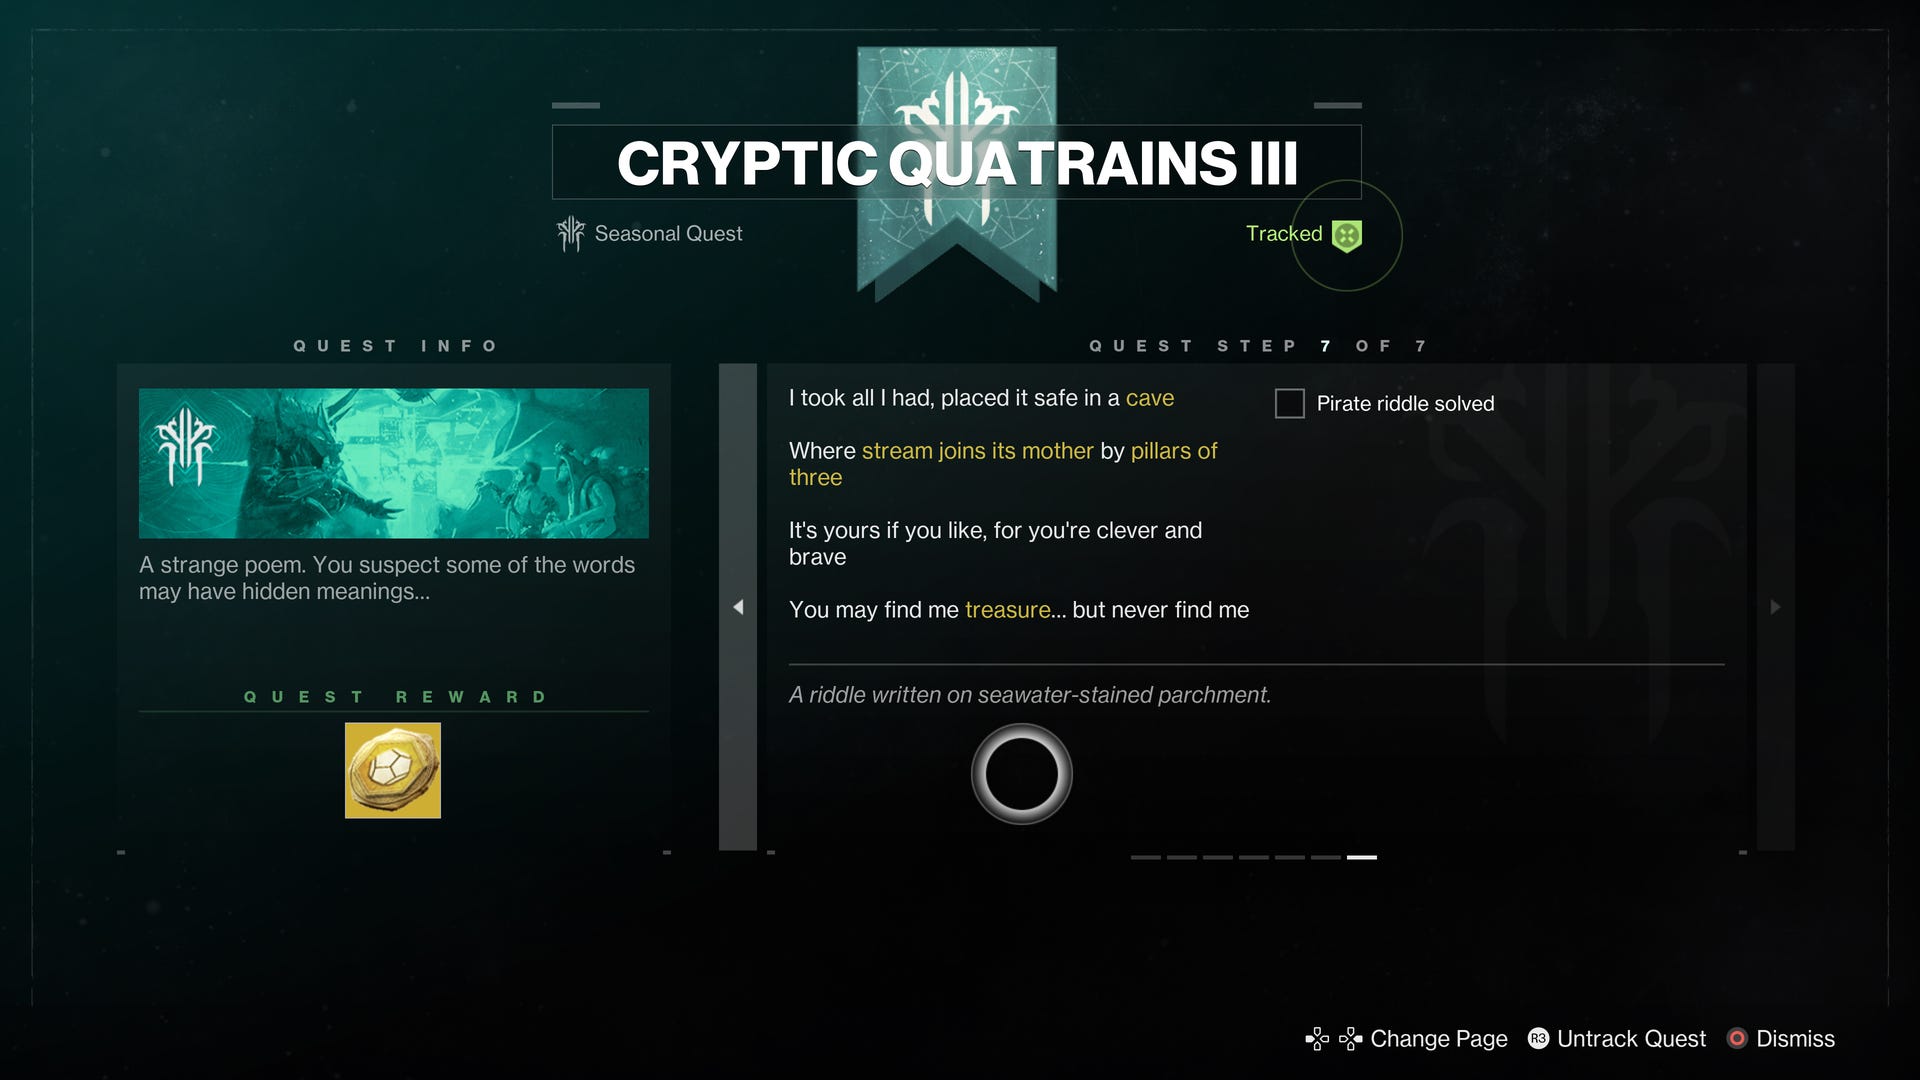
The final step of this cryptic journey requires you to search inside a cave, also in the Forgotten Shore.
To reach this cave, head back to nearby the entrance of the area, as if you’re returning to the Mothyards, but before going back round the winding road, look to the right of it to see a cave near a set of three pillars.
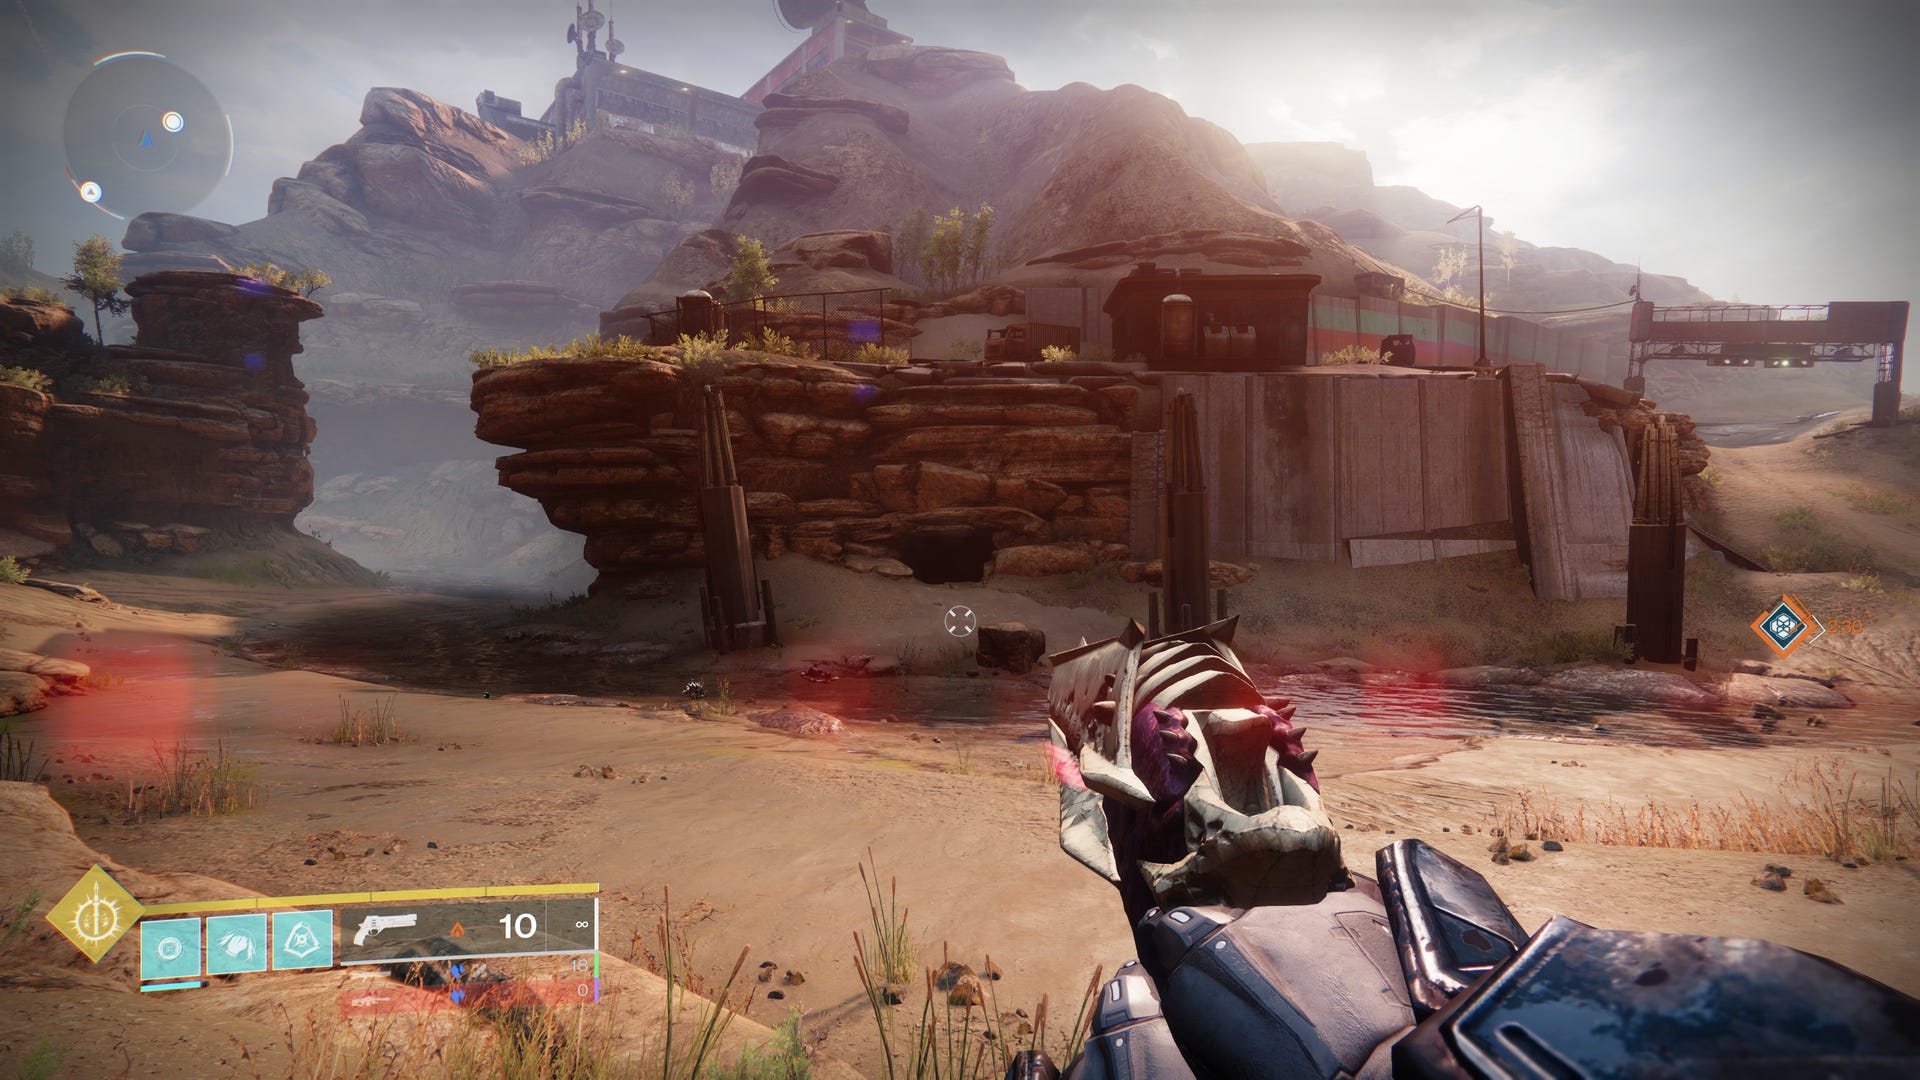
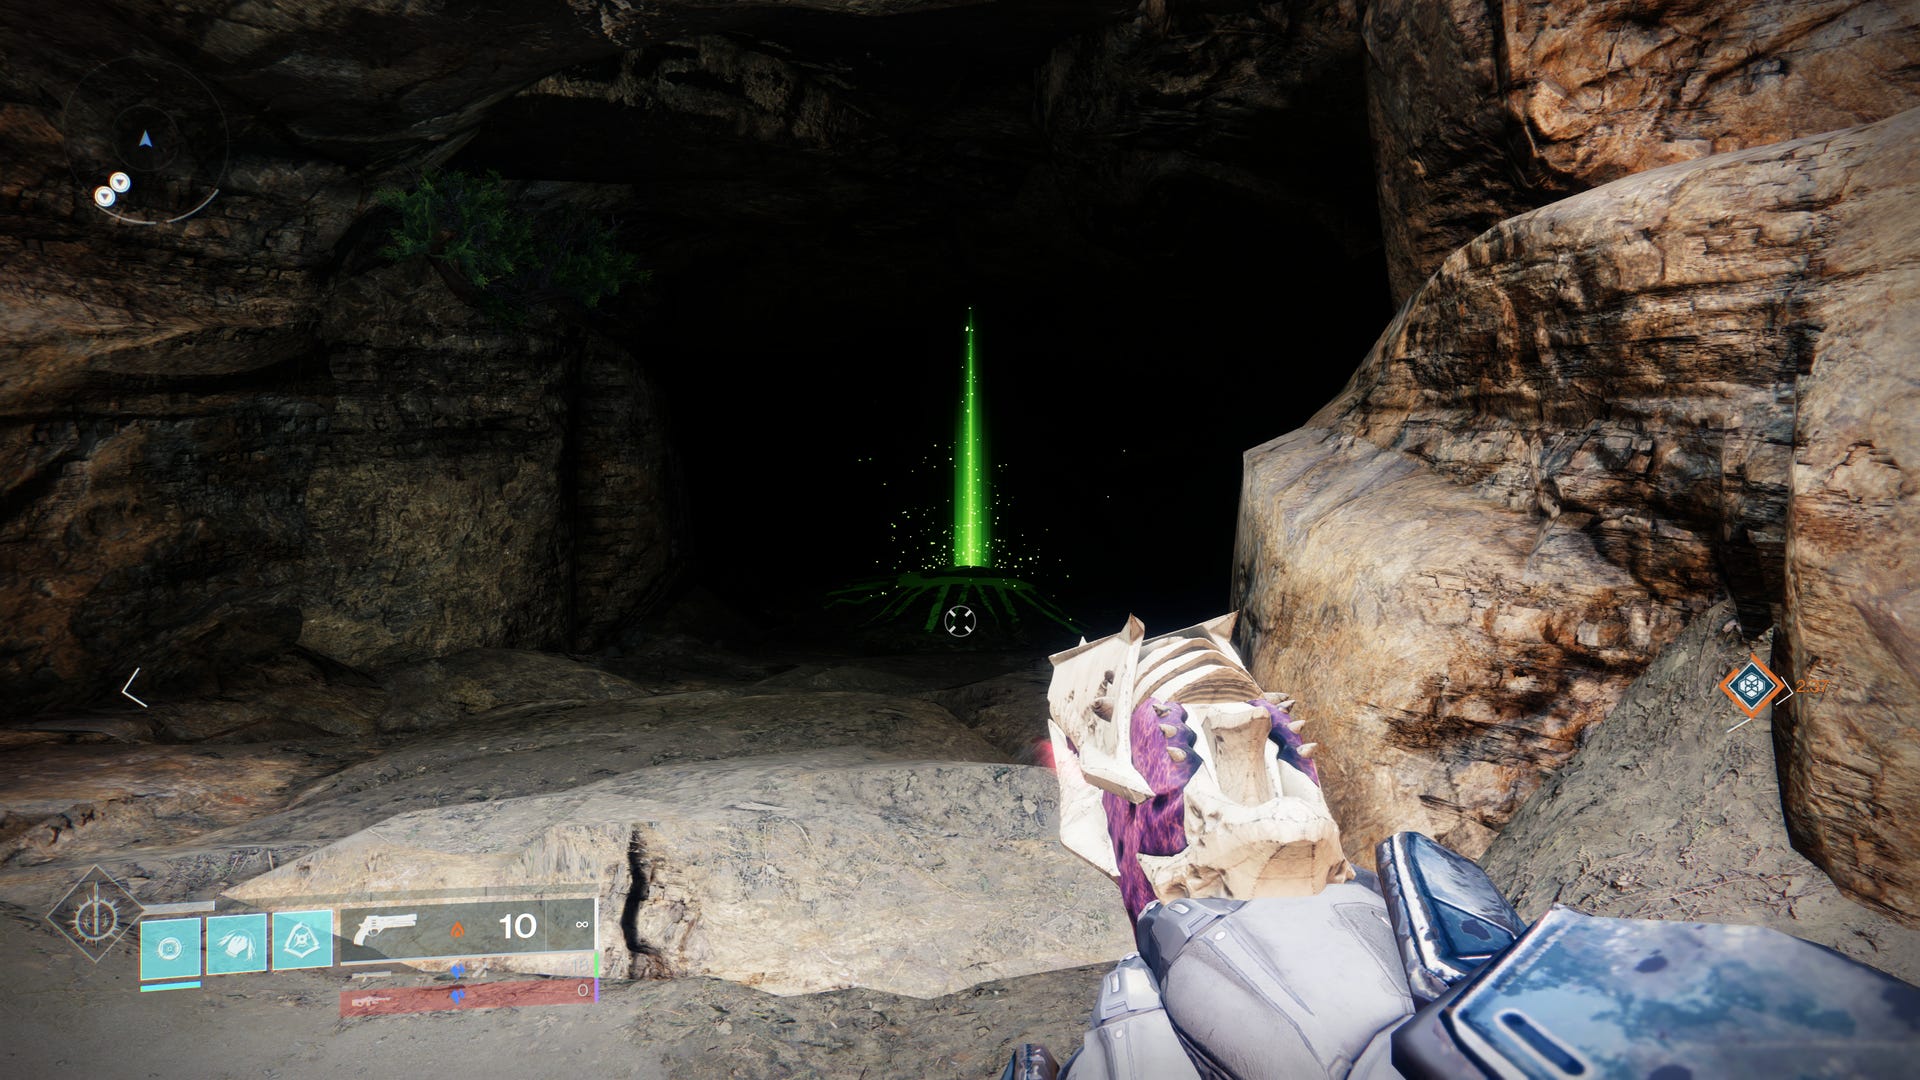
As you approach the entrance, you should see the green glow once again emanating from the ground.
Interact with the dig site and plunder your final reward!
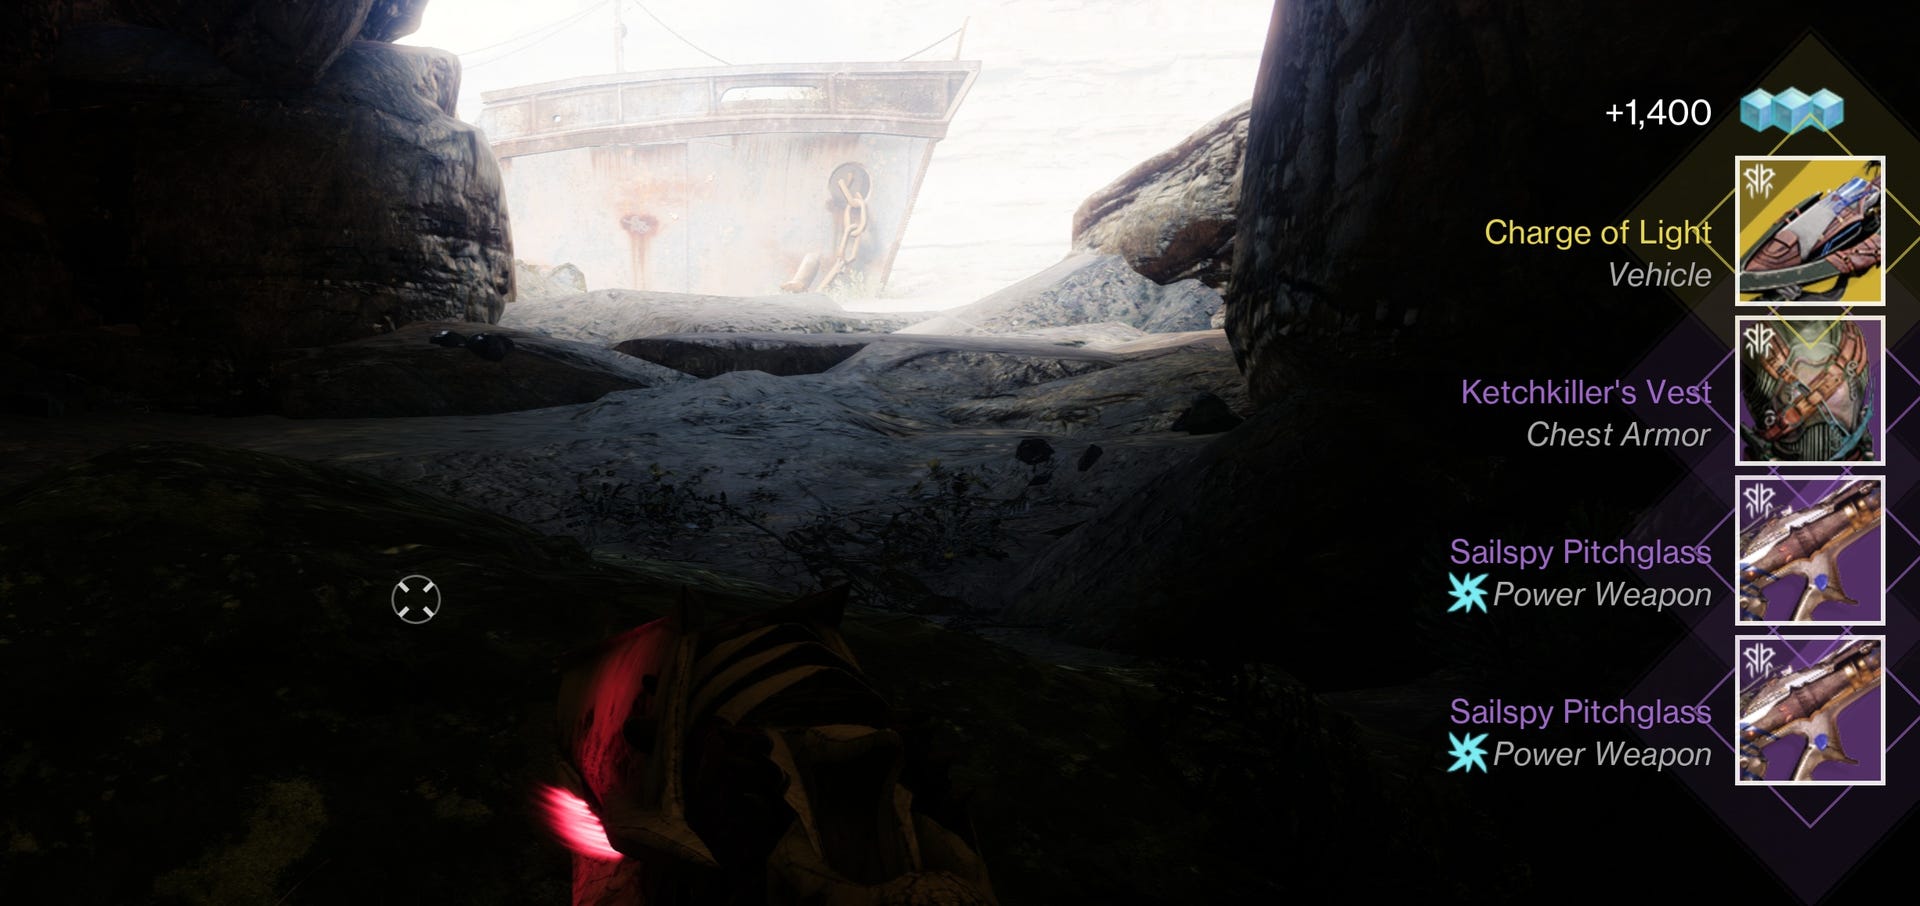
Congratulations, you’ve completed the third and final Cryptic Quatrain quest, netting yourself a bunch of rewards and a unique Exotic sparrow to commemorate the occasion.

Additionally, you will have also unlocked a triumph for completing all three quests, one that is required for Season of Plunder’s ‘Scallywag’ seal and title.
Enjoy the rest of Season of Plunder!