How to get the Cosmo Canyon Chocobo in Final Fantasy 7 Rebirth
How to wrangle Aponi without getting caught.

Getting the Cosmo Canyon Chocobo in Final Fantasy 7 Rebirth will take a bit of patience and strategic thinking. You can get them as soon as you arrive in the region, and we highly recommend doing so as you'll need this Chocobo's abilities to get around.
Just like other Chocobos in Final Fantasy 7 Rebirth you'll need to wrangle the one for Cosmo Canyon, and there will be a few obstacles in your way - namely skittish Chocobos.
Without further ado, we're here to show you how to get the Cosmo Canyon Chocobo in Final Fantasy 7 Rebirth.
How to get the Cosmo Canyon Chocobo in Final Fantasy 7 Rebirth
To get the Cosmo Canyon Chocobo in Final Fantasy 7 Rebirth you need to use the Carts on the track to avoid being seen by the other Chocobos to get to Aponi.
To start getting your Cosmo Canyon Chocobo, you need to begin the 'Bonds of Trust' side quest by talking to Kamaria at the Cosmo Chocobo Ranch. You can get here by following the path from the Landing Strip where you first arrive in Cosmo and it's right next to the Activation Intel 1: Kamaria's Ranch Remnawave Tower.
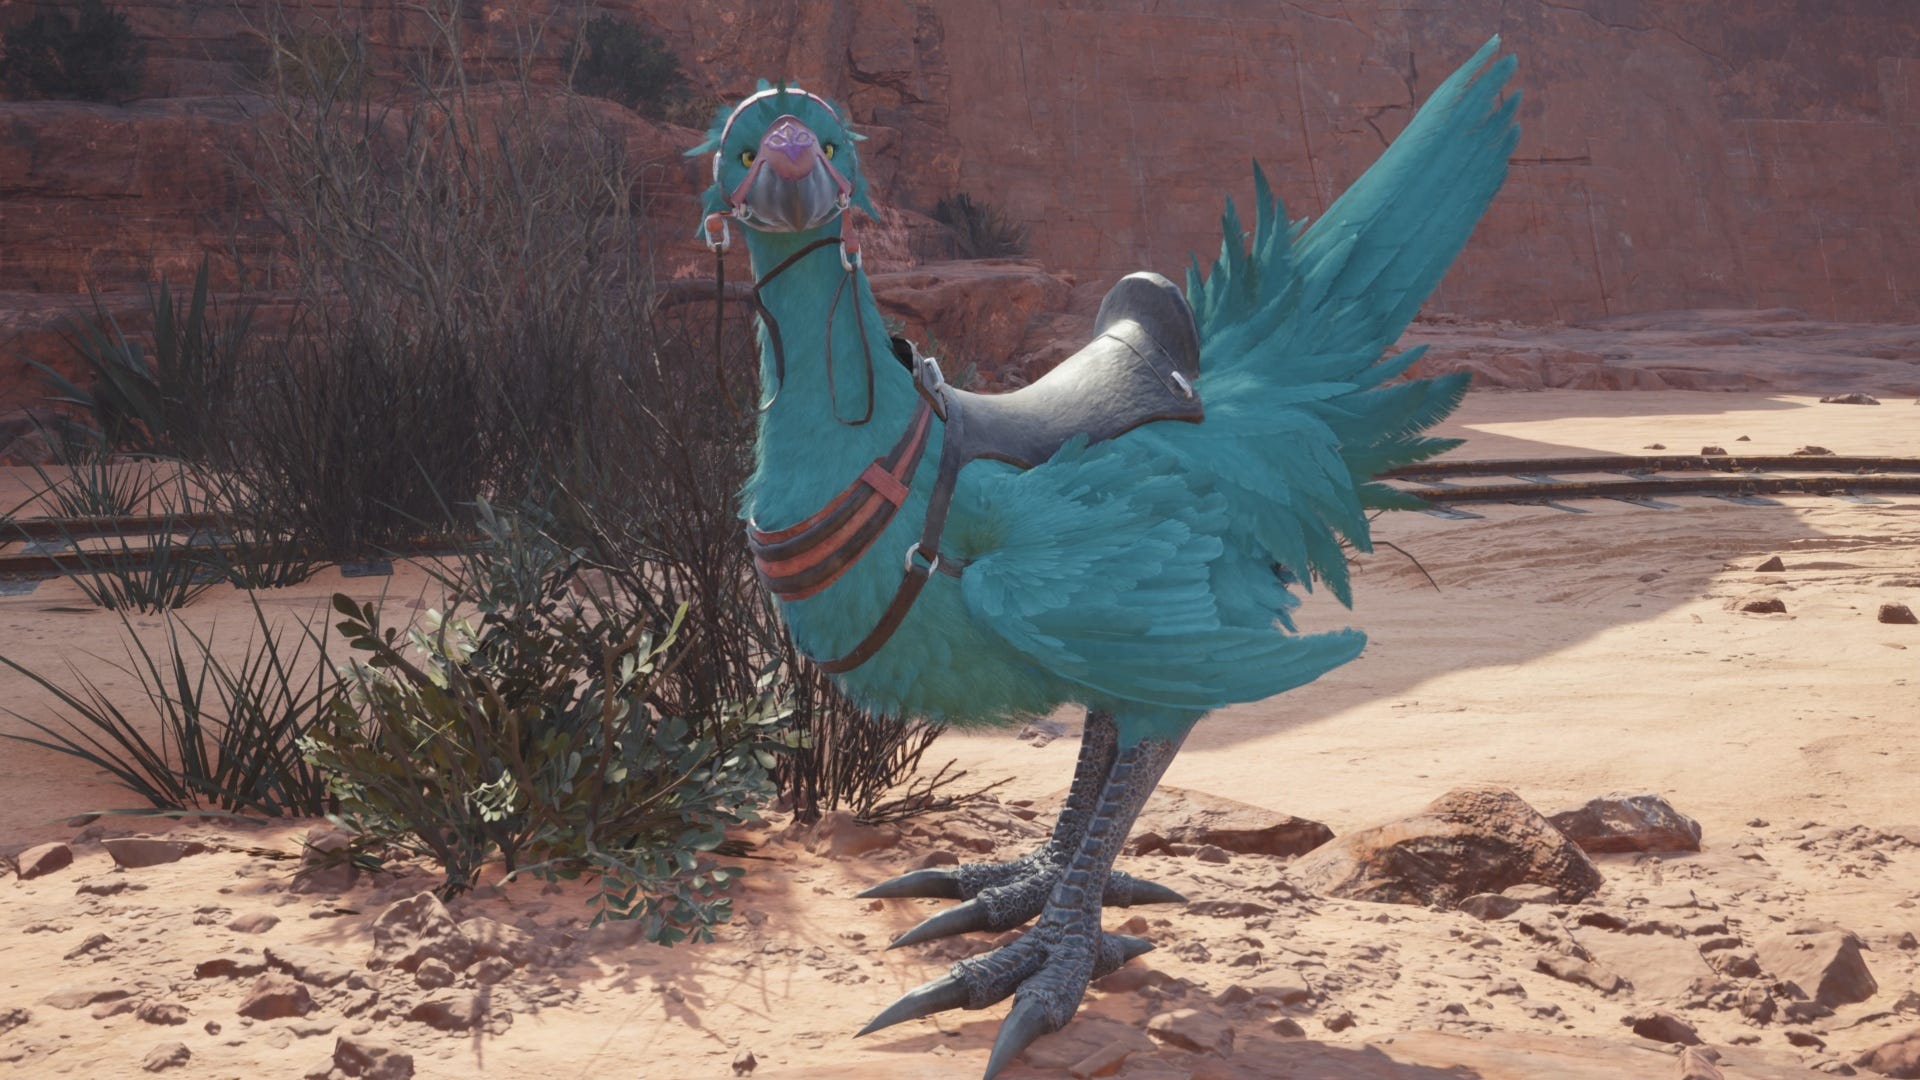
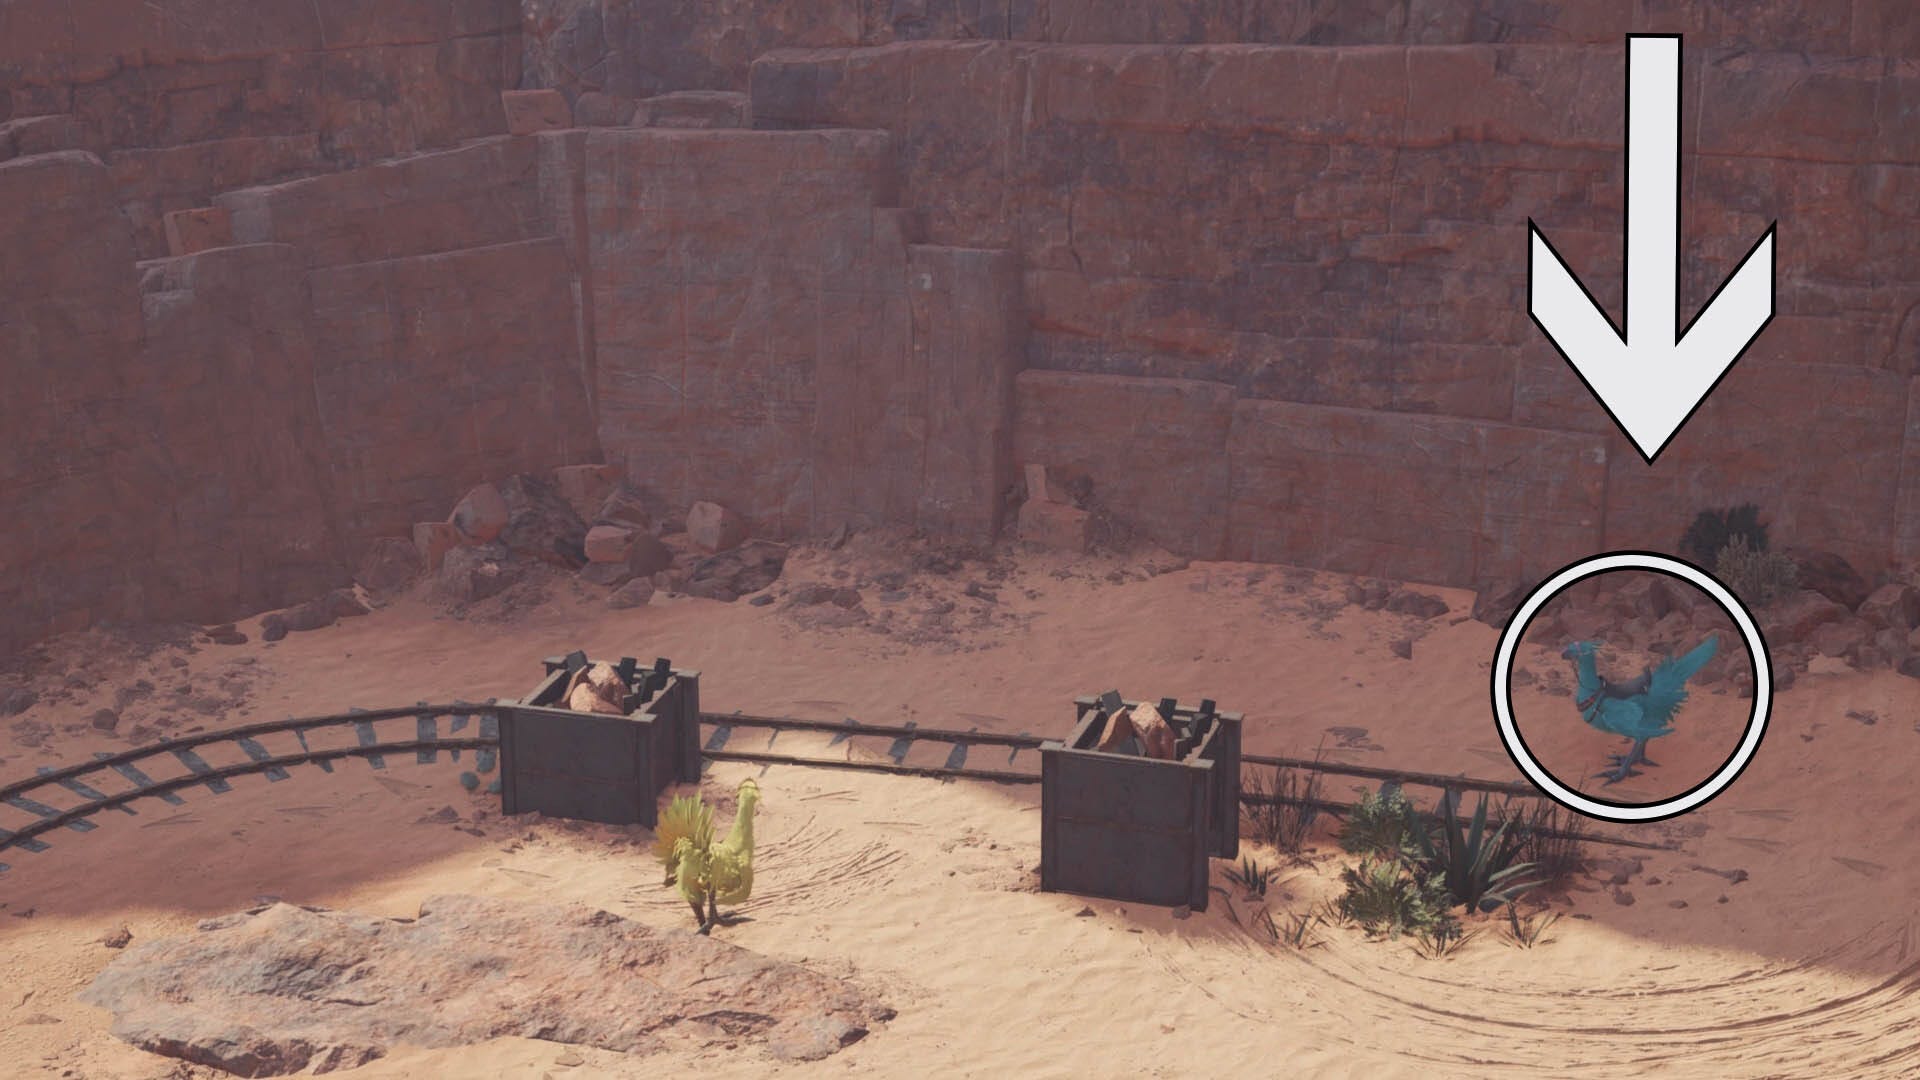
Kamaria will then point you to the location of the Cosmo Canyon Chocobo called Aponi, just north of the Chocobo Ranch:

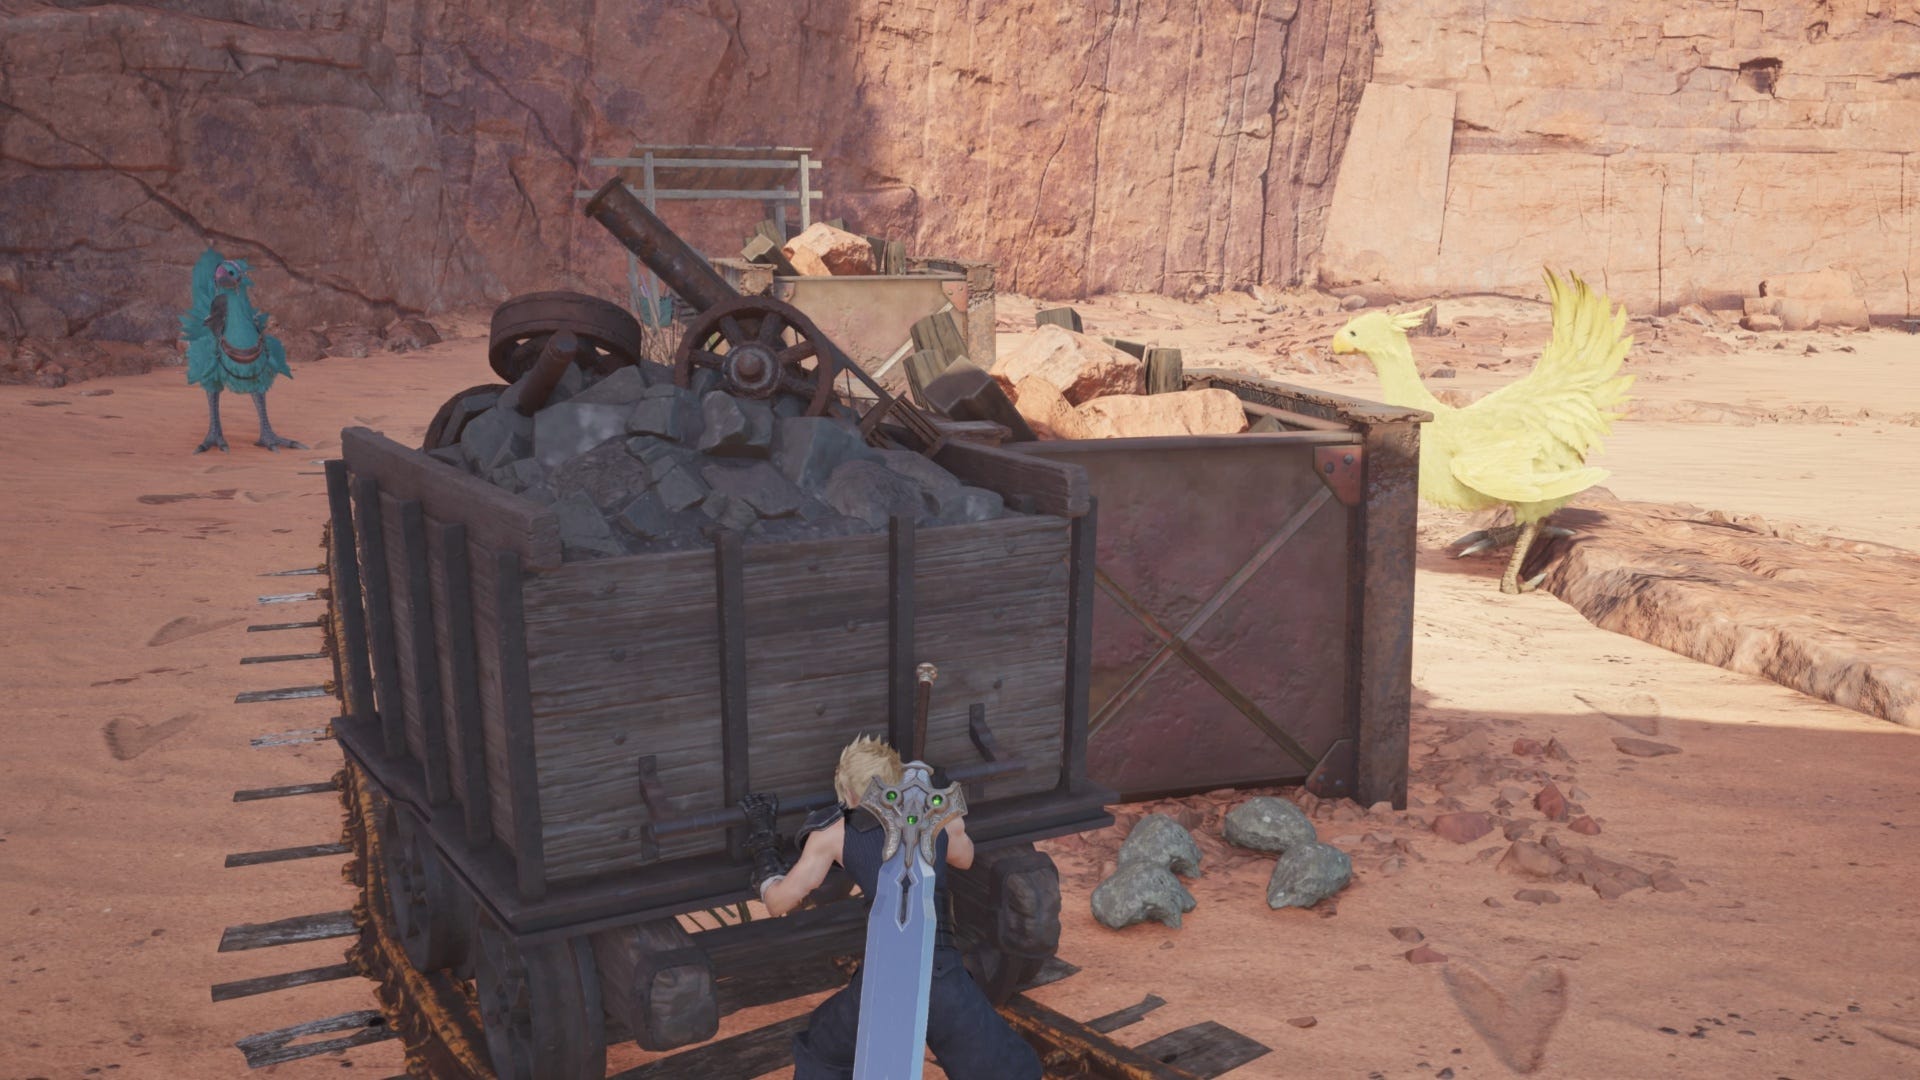
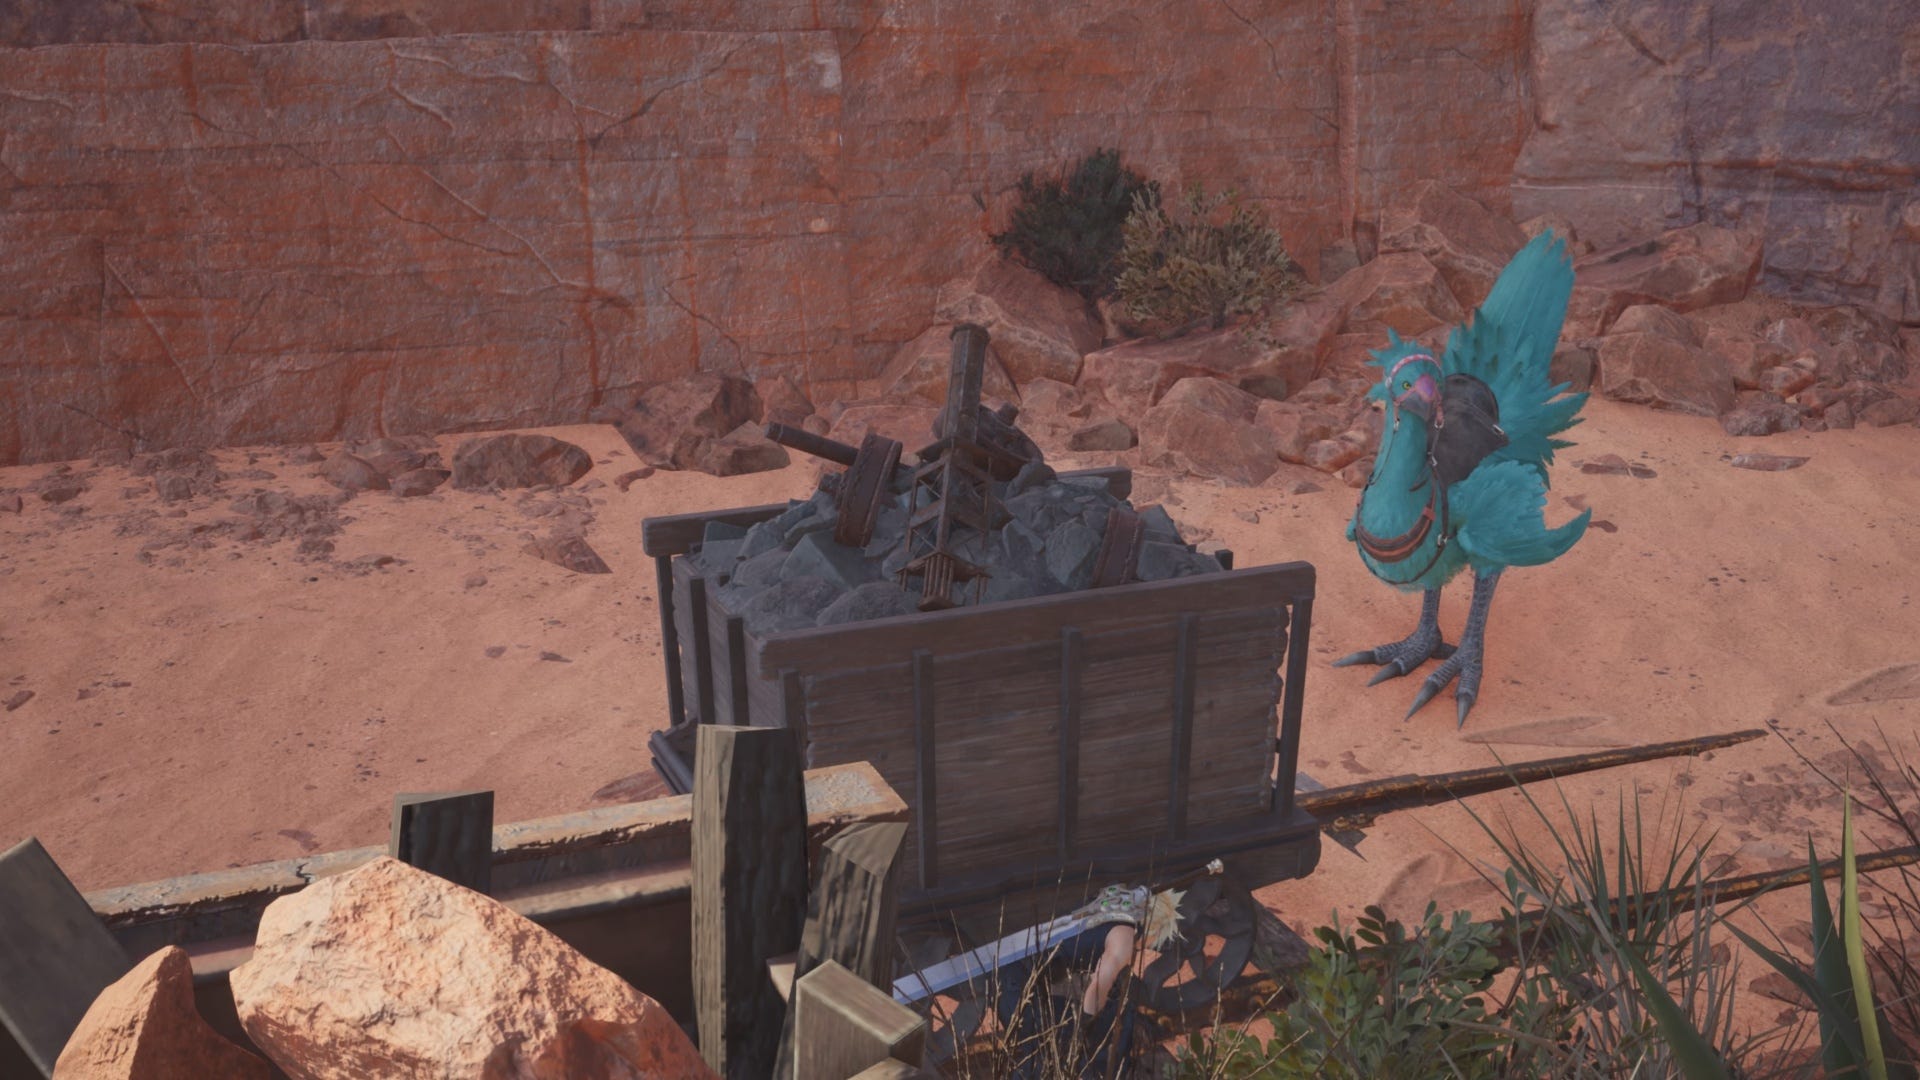
Head here and when you approach the Chocobos, you will instantly start the mini-game to capture Aponi. Your target is the Blue Chocobo at the rear of this area, and there are several other Chocobos on high alert. You'll need to use the Carts around the area to hide from view.
If a Chocobo is alerted and you don't duck away in time, it will alert the other Chocobos and you'll either need to start again from the beginning or from a checkpoint. This depends on how far you've gotten across the area.
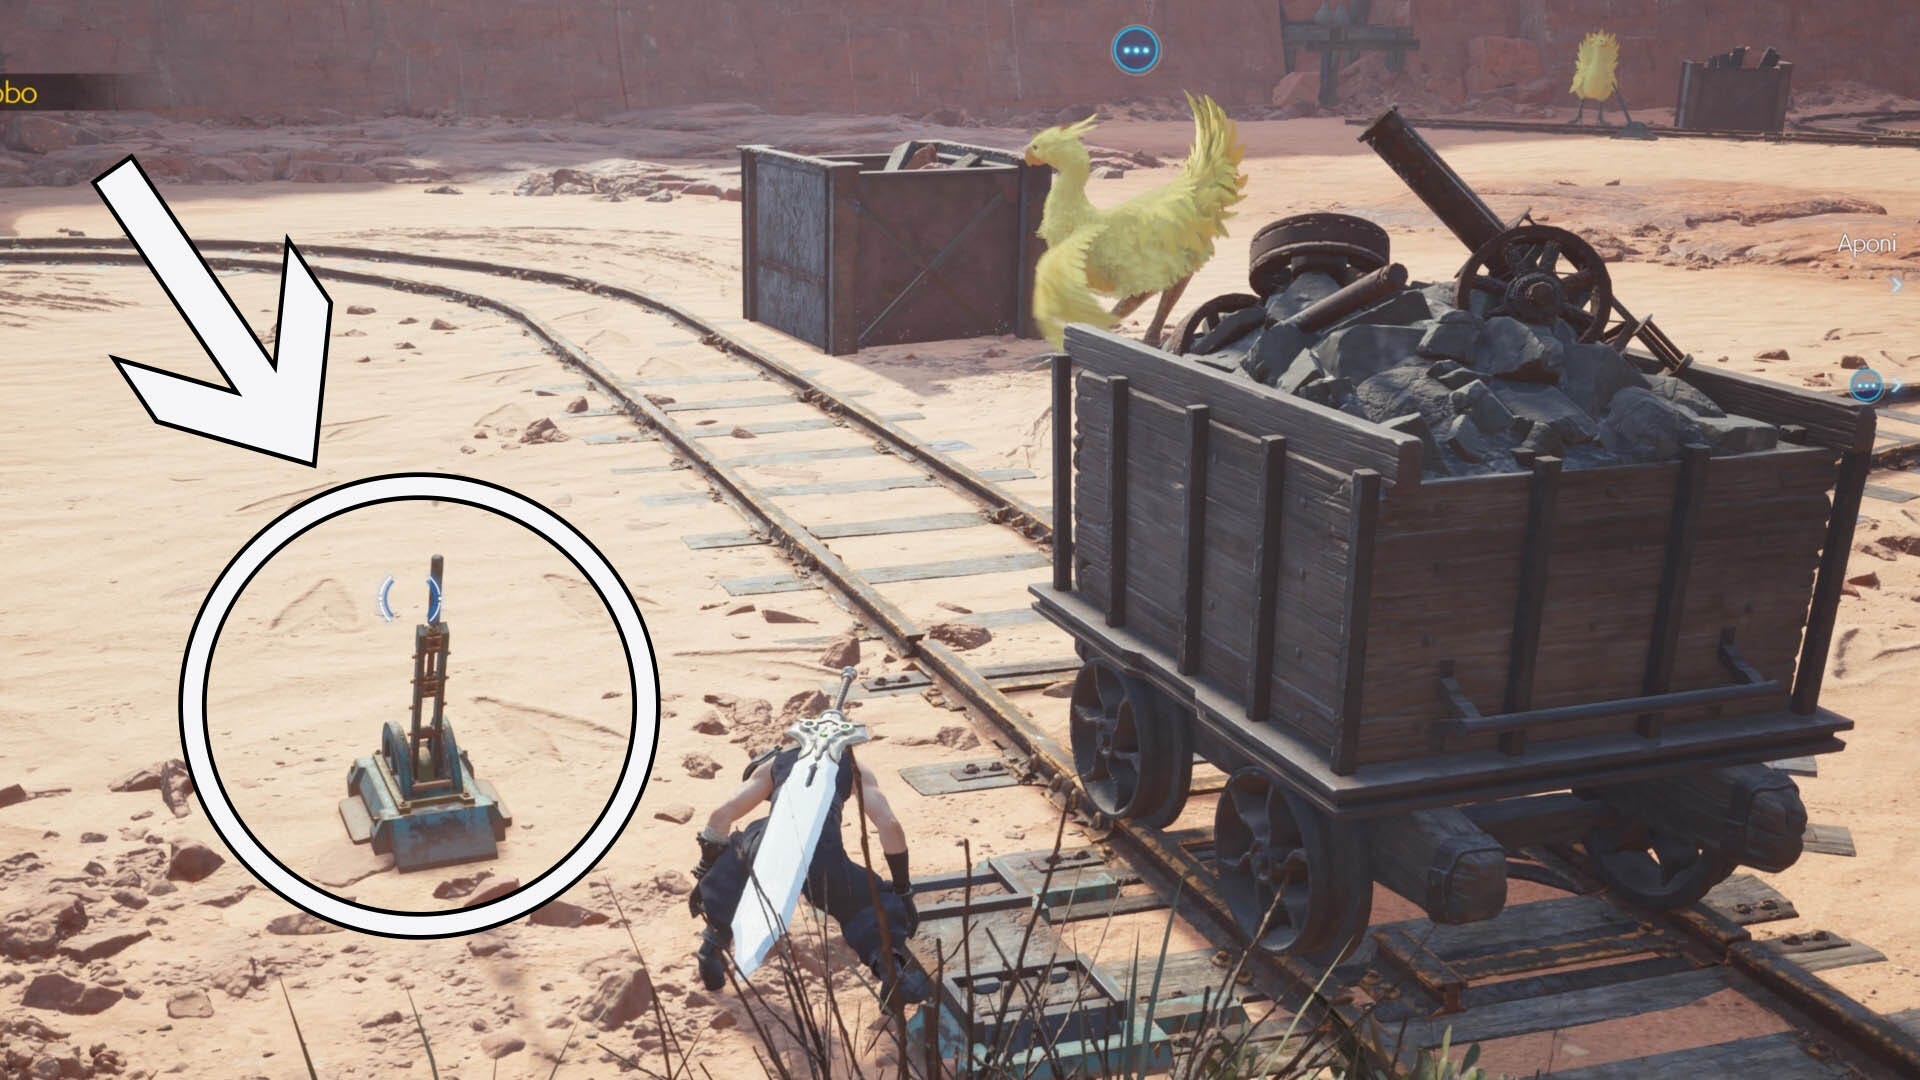
At the beginning of the area, press and hold L2 to push the Cart forward on the tracks so it's in front of the Chocobo to the right. Make sure you don't push it too far, otherwise they'll spot you.
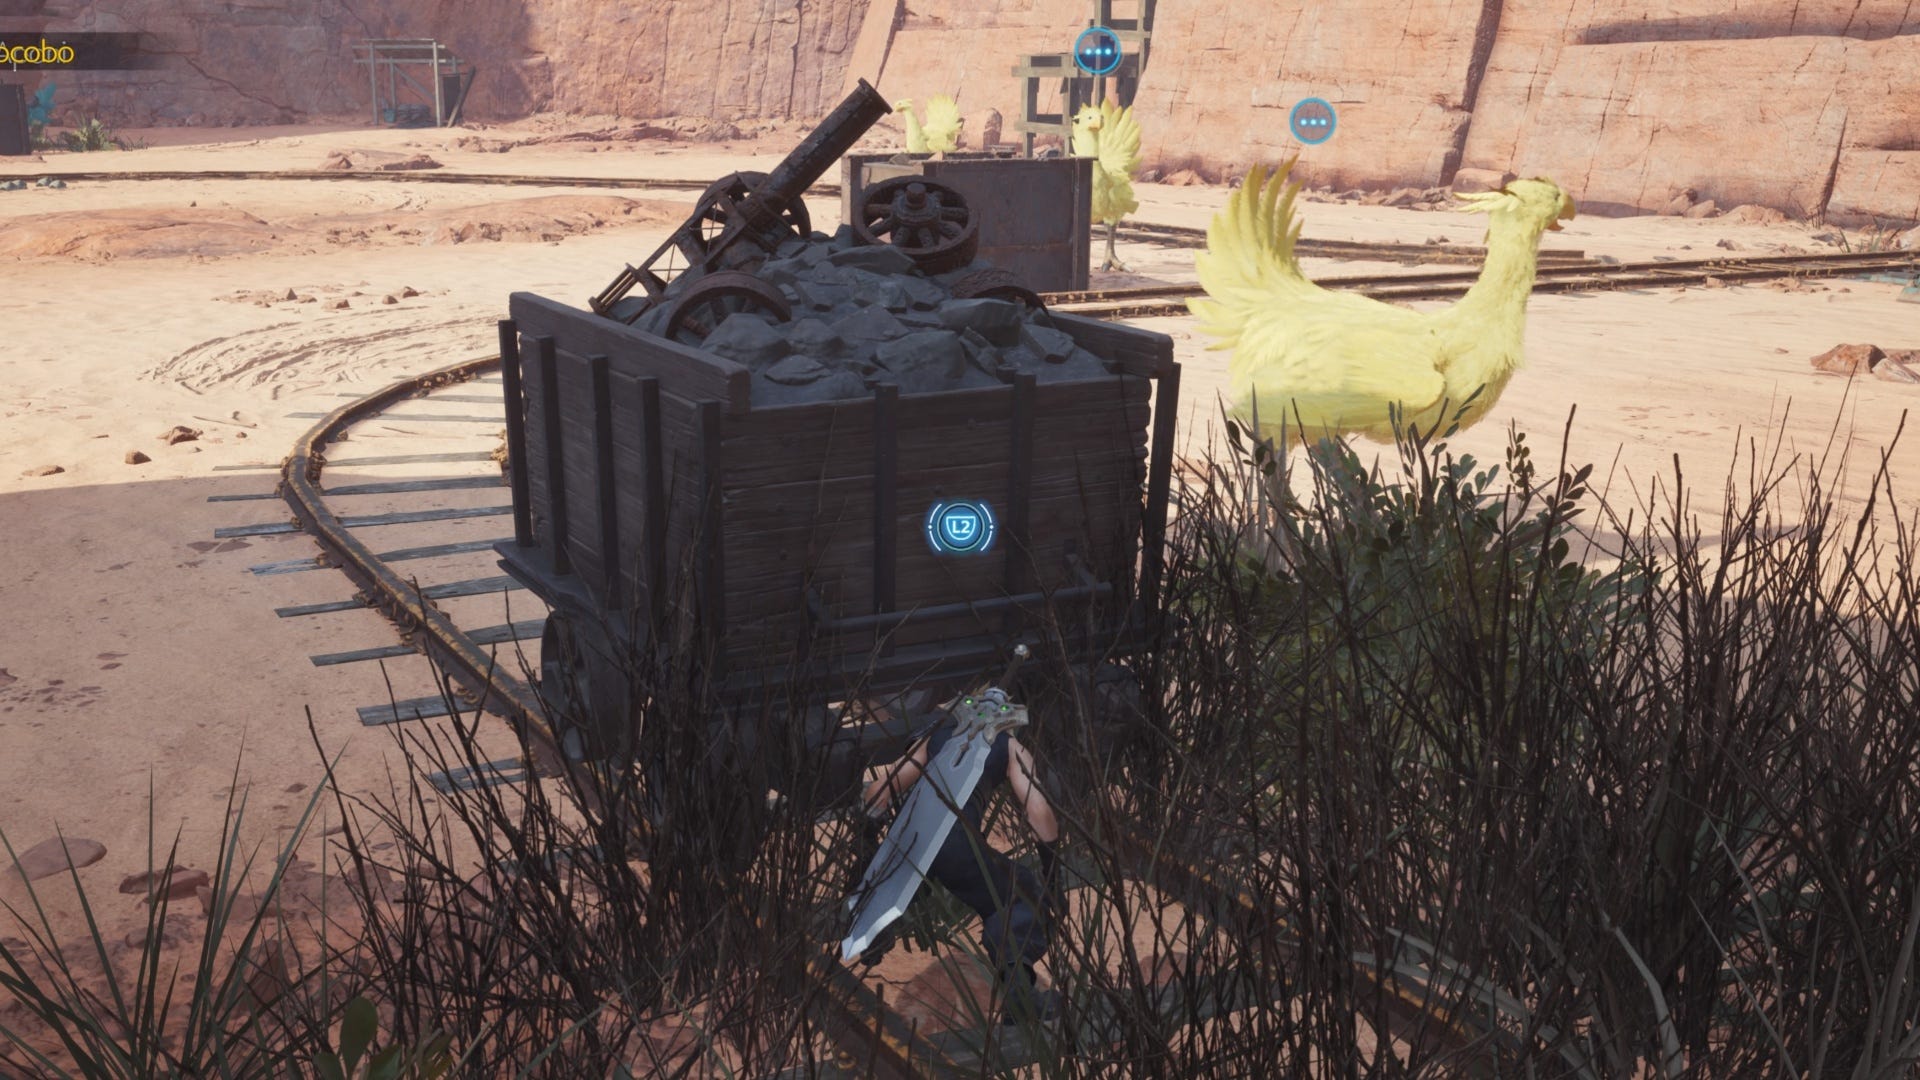
Once you're confident the Chocobo won't be able to see you, switch to the other side and start pulling the Cart along the tracks until you come to a large metal box with another Chocobo beside it. Switch sides again so you're pushing the cart along the tracks and push it past this metal box, lining it up to block the Chocobo's view.
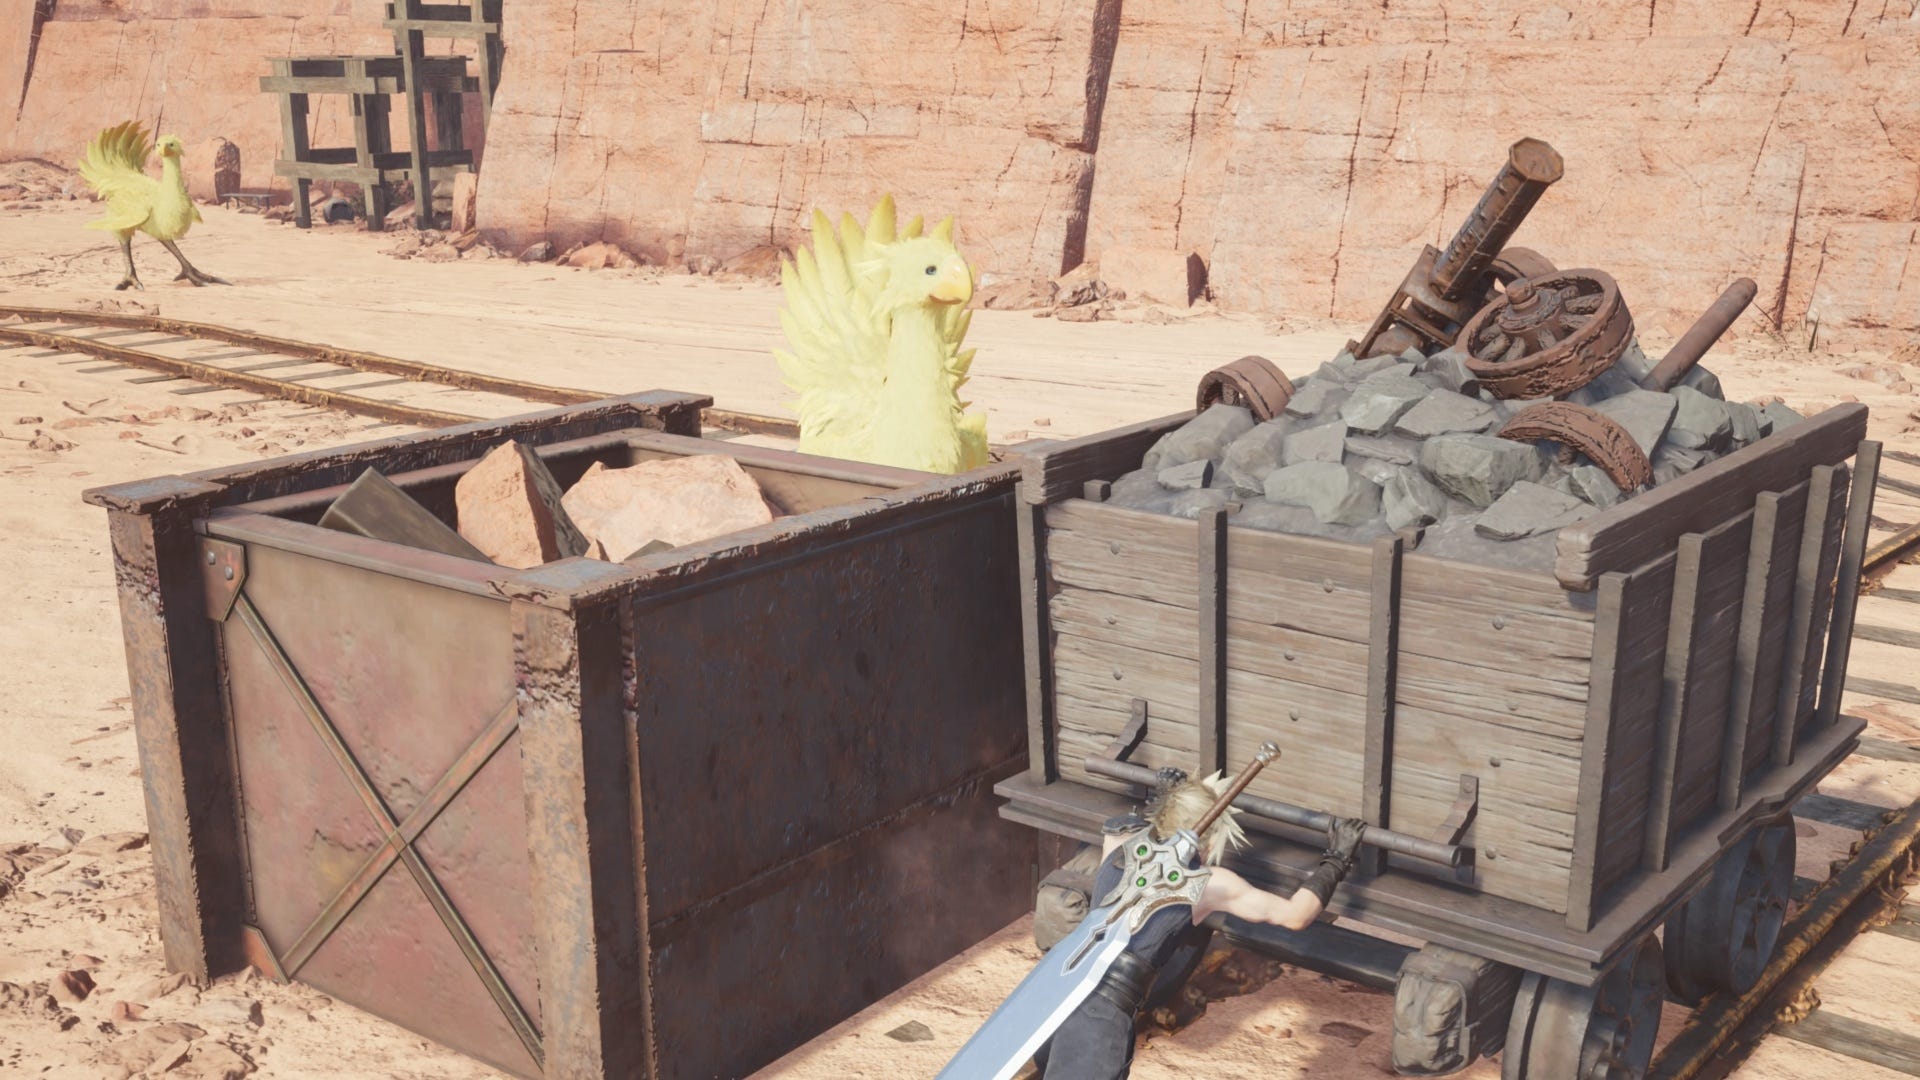
Then, switch to the other side of the Cart again so you can pull it along the tracks here. As you're pulling, keep an eye out on your left for the track switch lever.
Make sure the Cart is hiding you from view, then press and hold Triangle to use the lever to change the tracks.
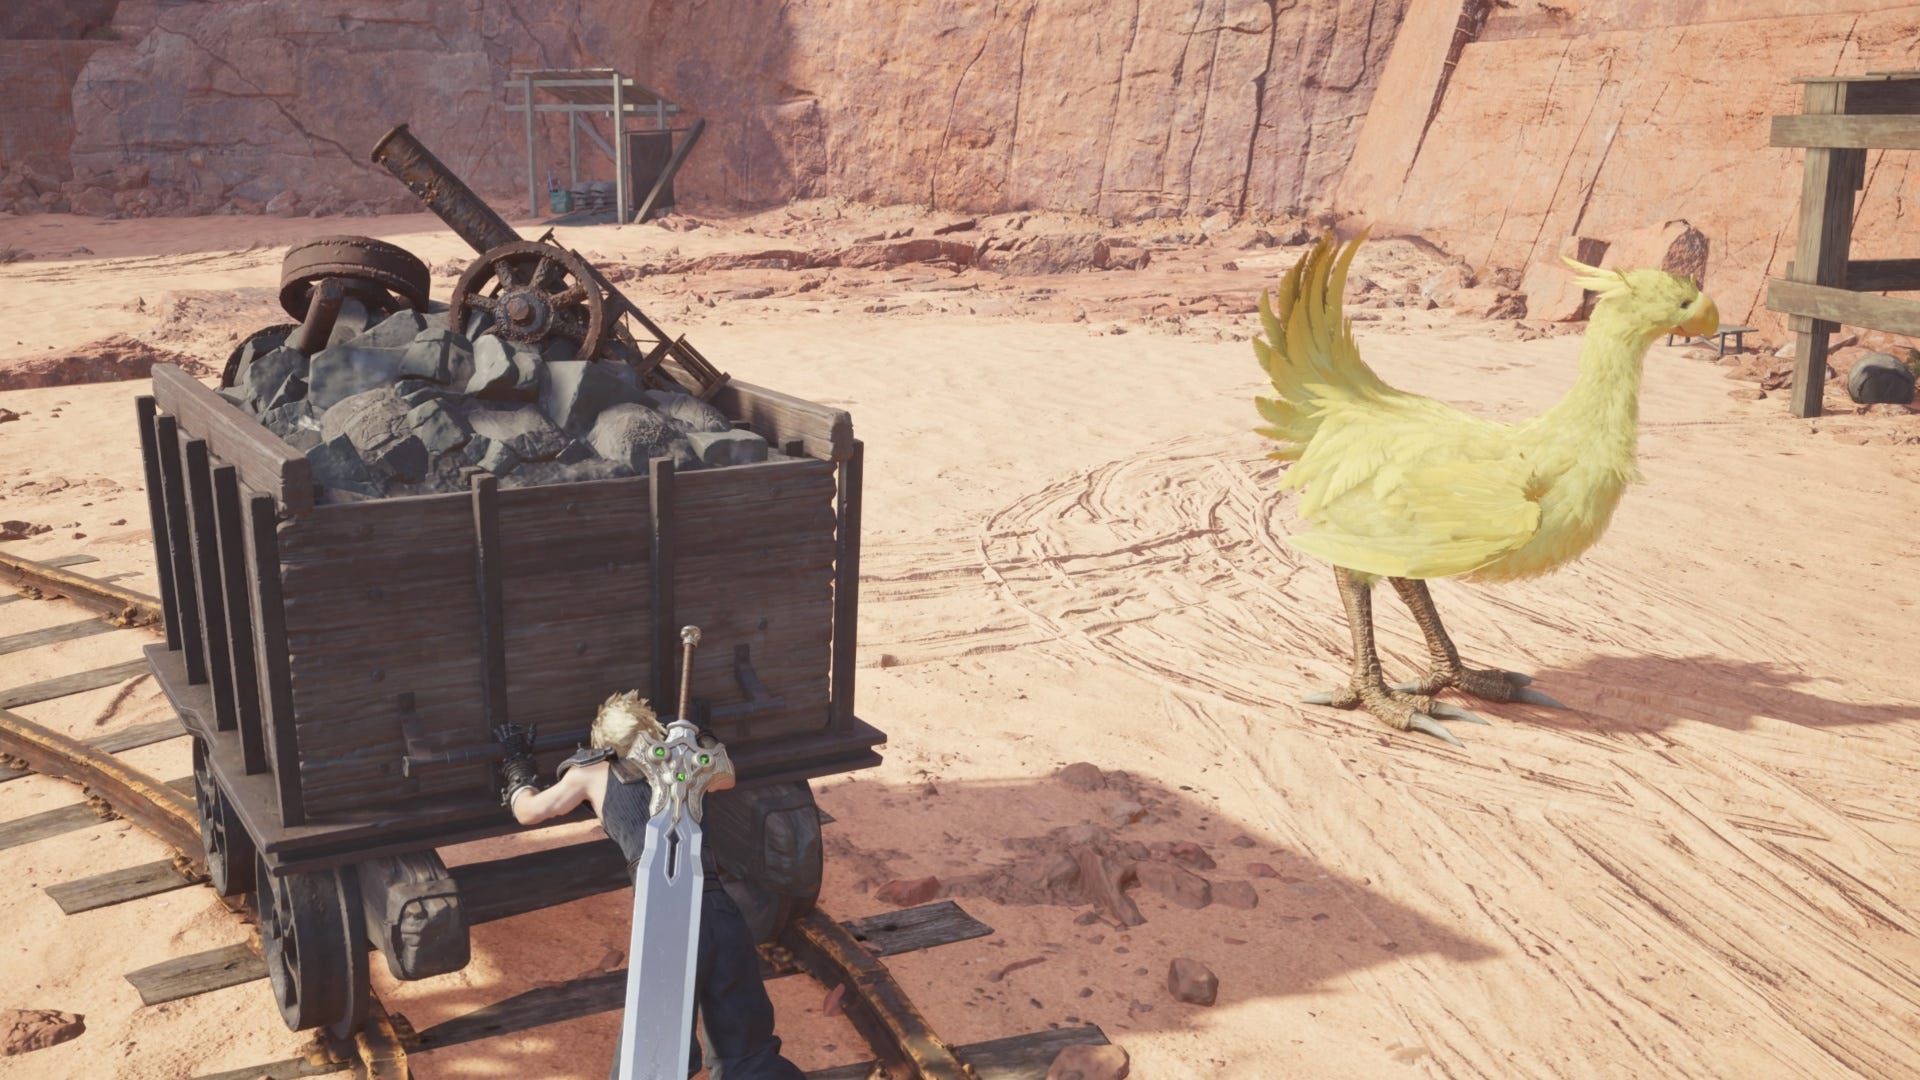
When the tracks have been switched, push the Cart along the new path that has been made past the Chocobo. Wait for it to turn its back to you and then continue pushing the Cart along while being aware of the Chocobo a bit further away on your right.
Again, line the Cart up on the tracks so that it blocks this Chocobo's view then wait for them to turn their back. As soon as they do this, continue to push the Cart along the track.
You'll soon come to a part of the track that has a cluster of rocks on the ground to the left. Use Triangle to quickly pick up some, or all, of these rocks. Then, stand behind your Cart again and use L1 to aim behind the Chocobo in the distance.
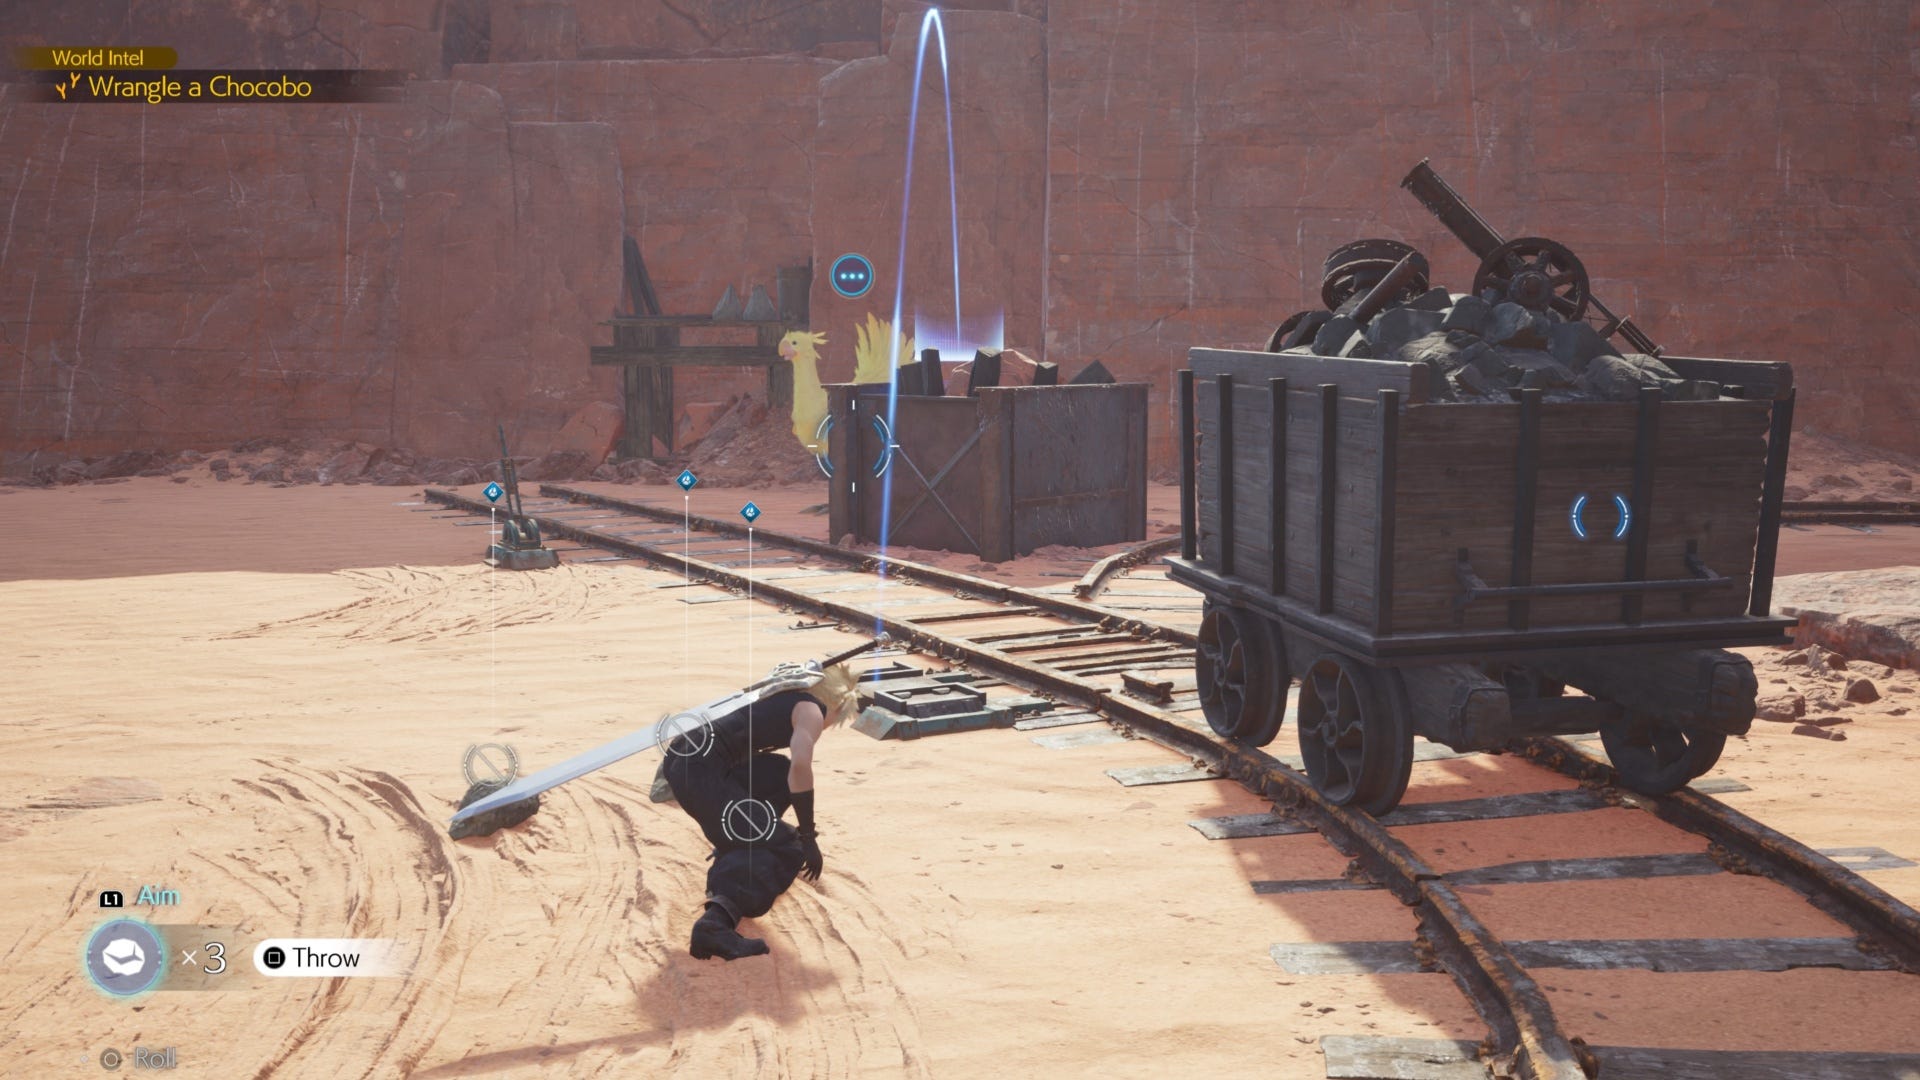
Throw the rock with Square and the Chocobo will turn around. There will be a green timer on this Chocobo and you've only got until the green bar disappears before they'll turn back around. As soon as they're distracted, run to the track switch lever then press and hold Triangle to switch the tracks.
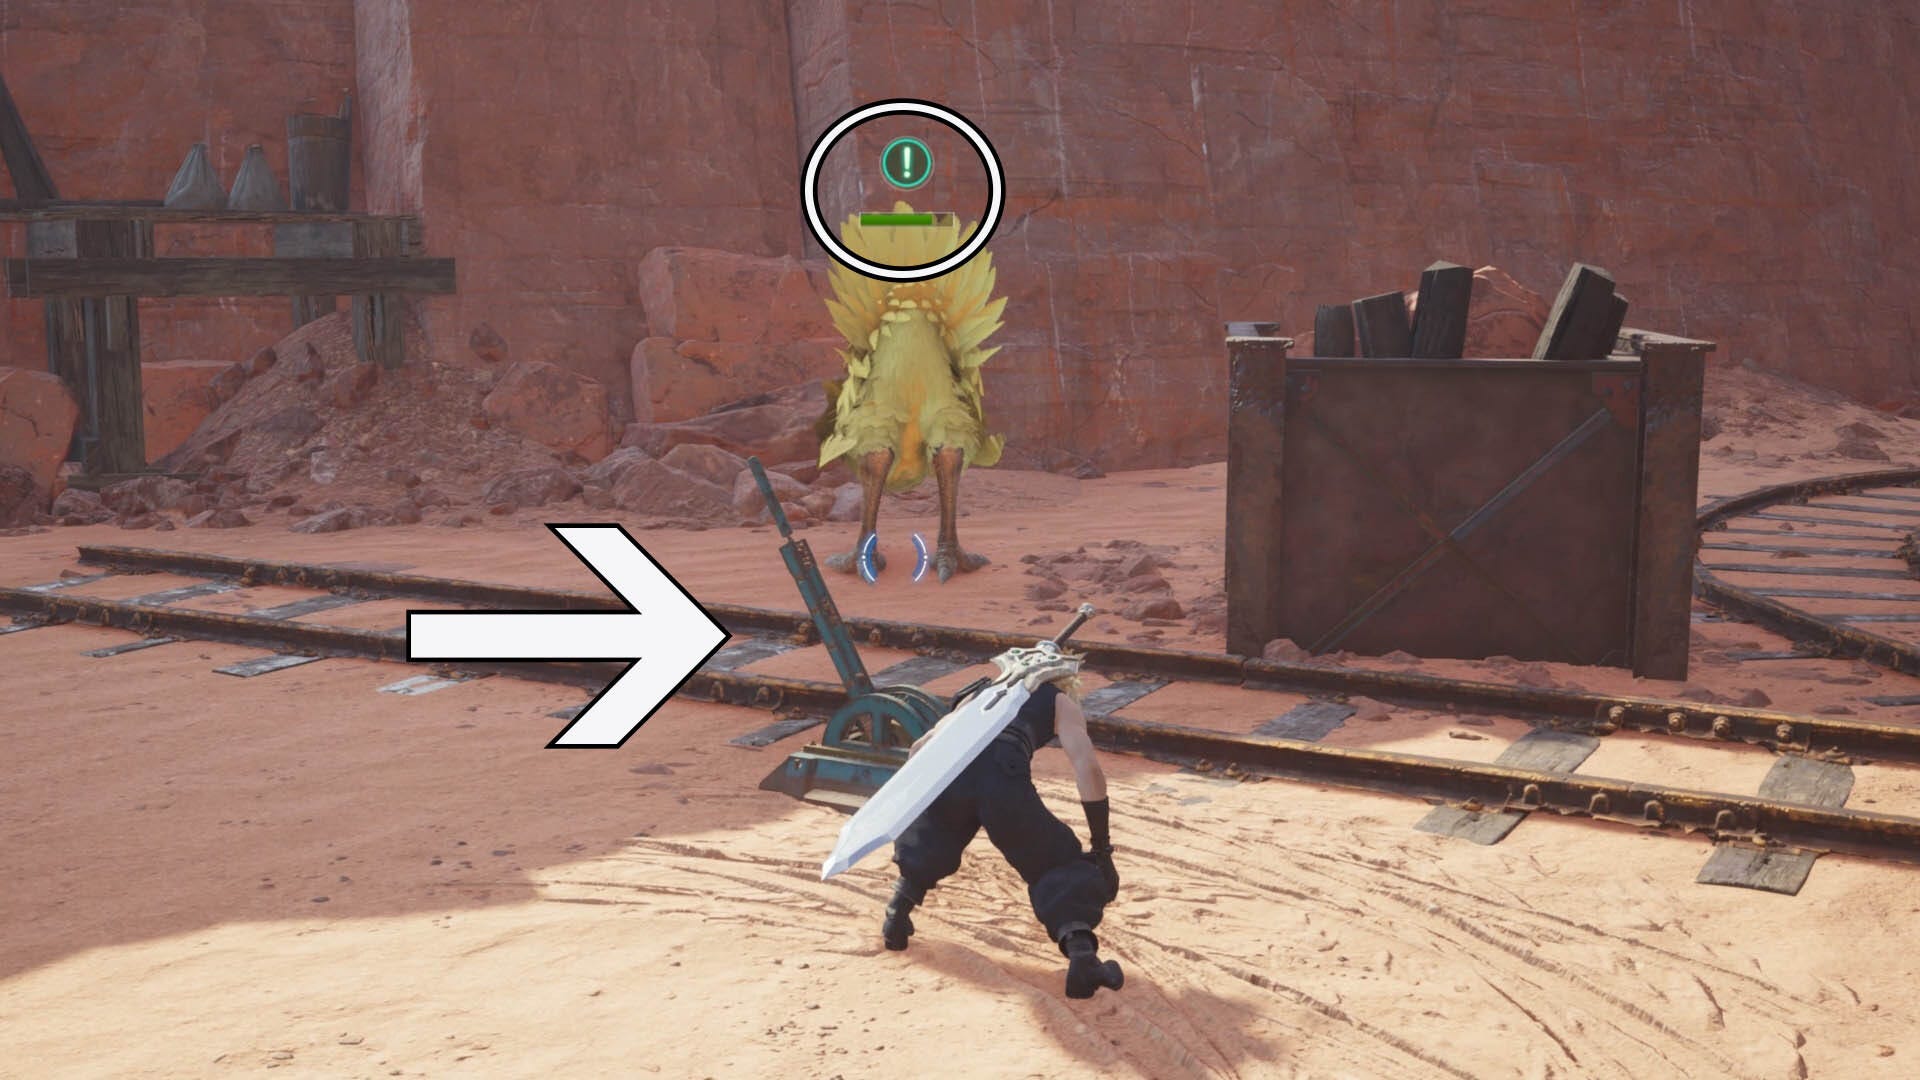
Then, continue to push your Cart forward with L2, the Chocobo you previously distracted shouldn't bother you here. Continue to push the Cart forward but stop by the next set of rocks on the ground just before the final yellow Chocobo.
Pick up more rocks here if you need them, then stand behind your Cart and use L1 then Square to throw one behind the Chocobo. Like the one earlier, a green countdown bar will appear as soon as the Chocobo turns around. When this appears, push your Cart along the track until you can't push it any further.
At this point, you should be very close to Aponi but don't try to get them yet. Instead, keep yourself hidden behind your Cart and throw one more rock behind Aponi. They won't stay distracted as long as the other Chocobos, so as soon as they begin to turn around you need to run up behind them and press Triangle to wrangle them.
You should now have your very own Cosmo Canyon Chocobo!
That's it for now, but if you're looking for more Chocobo antics then check out our Chocobo Racing explainer or our list of all of the Gongaga Chocobo Stop locations. Also, if you fancy it, we've got lists of all of the Corel Chocobo Stop locations and all of the Junon Chocobo Stops too.