Zelda Tears of the Kingdom Morok Shrine solution
How to complete the A Bouncy Device shrine.

The Morok Shrine in Zelda: Tears of the Kingdom is a unique shrine, located on a strange outcropping of rock and containing some interesting bouncy puzzles.
We’ve created this guide to help Link spring into action, first by finding the Morok Shrine location, and then to work out all the Morok Shrine puzzle solutions in order to clear the A Bouncy Device shrine and find its hidden chest.
If you'd like to learn more about Link's adventure, visit our Zelda: Tears of the Kingdom walkthrough. If you are after more Shrine help, we've put together a handly list of Tears of the Kingdom Shrine locations for you too.
On this page:
Morok Shrine location in Zelda Tears of the Kingdom
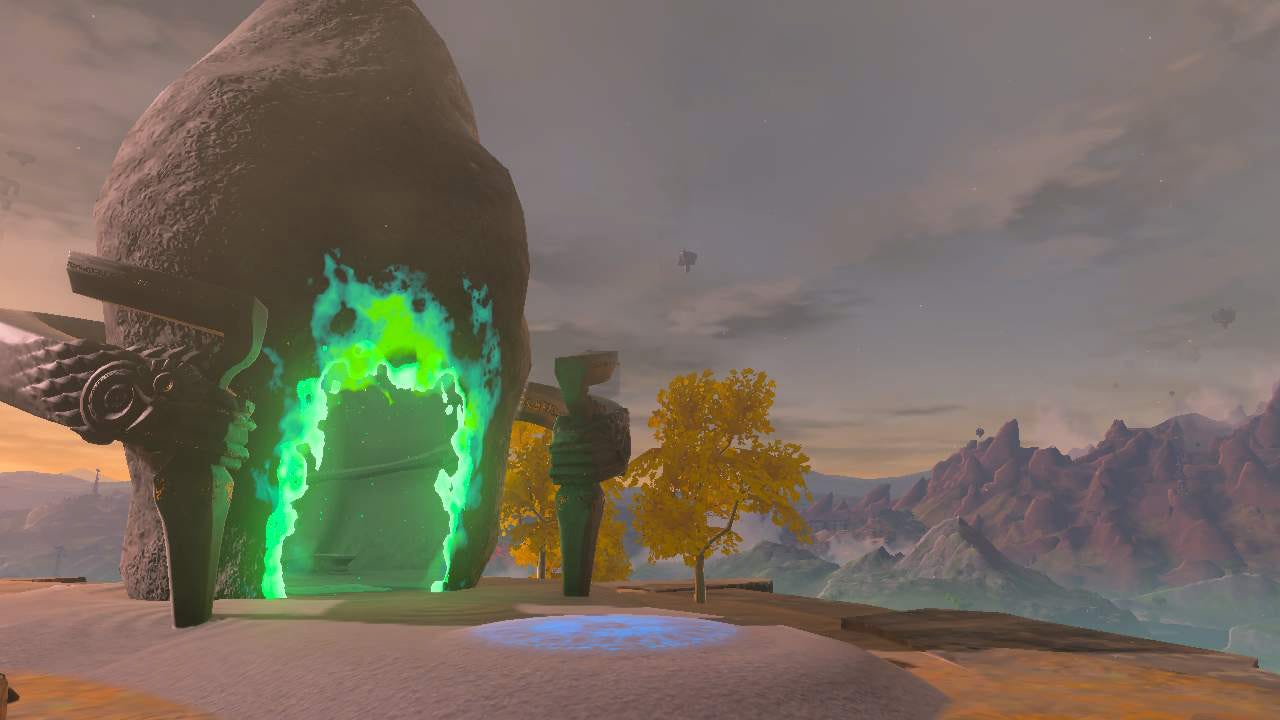
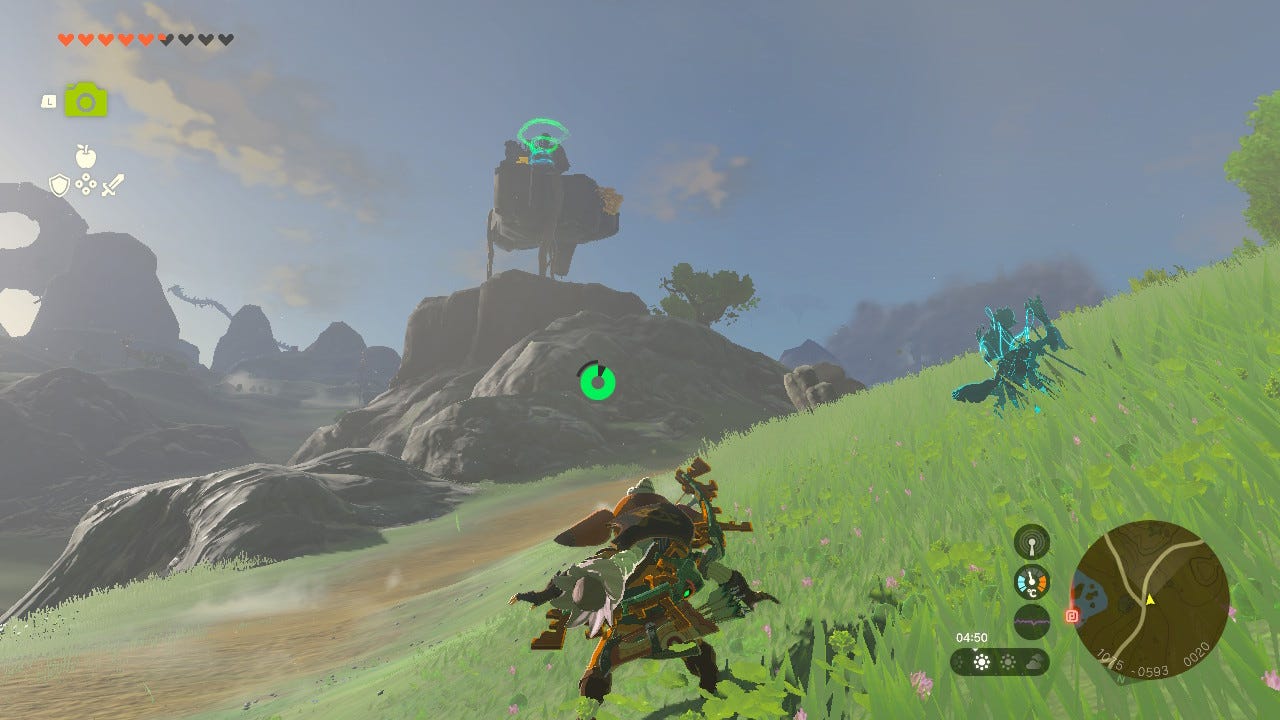
Morok Shrine can be found in quite an unusual spot. Firstly, head over to the Sahasra Slope, a little north of the Sahasra Slope Skyview Tower.
Look up! The Morok Shrine isn’t on a sky island, exactly, but it’s above the ground, connected by a strange stone root. Climb this root to reach the shrine. The coordinates are 1183, -0780, 0133.
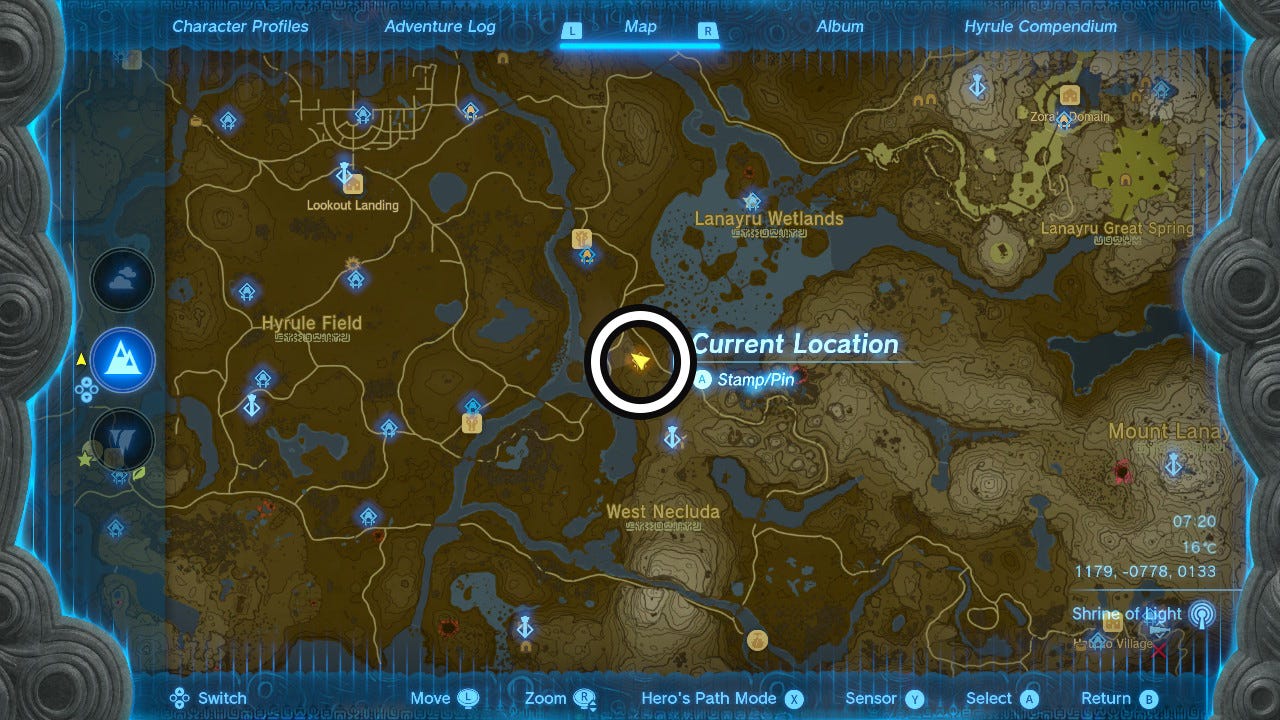
Here’s where it appears on the map:
Morok Shrine puzzle solution in Zelda Tears of the Kingdom
Morok Shrine has three main A Bouncy Device puzzles to solve in order to receive the Light of Blessing, plus a chest to be found. Here you can find all the solutions to complete the shrine.
Morok Shrine puzzle solution one
Upon first entering the shrine, you will find yourself in a room with nothing but a raising and lowering platform. Stand on the platform and be prepared for it to raise - it will toss Link into the air. Use the paraglider to reach the next level.
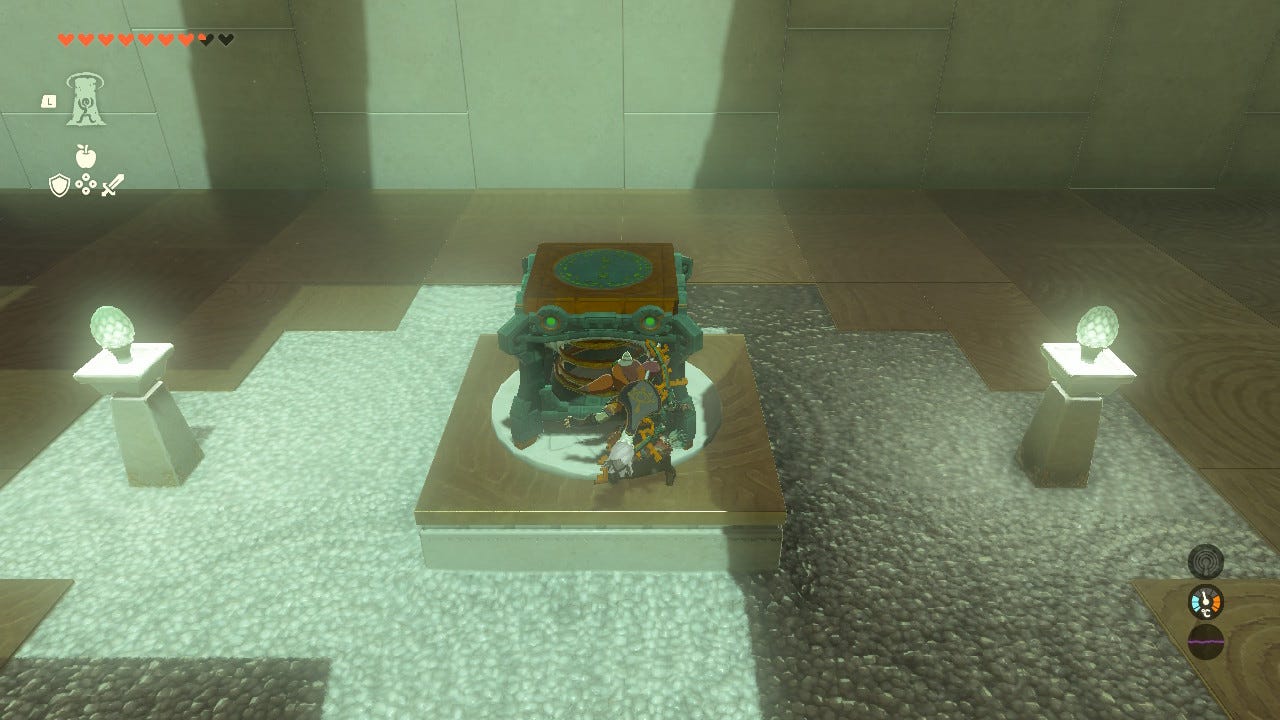
In the next area, there is a platform with a spring-like Zonai device sitting on it. Climb on the device, then hit it with a weapon. It will activate and send Link flying into the air. Again, use the paraglider to safely move forward.
Morok Shrine puzzle solution two
In this room, you will see a Zonai spring and a goal for a ball to be placed in, but no ball. Use the spring to go towards the righthand wall (looking from the entrance to this room) to find a new platform.
On this platform you will find the ball that you need to solve this puzzle. There is also another Zonai device. Using Ultrahand, put this at a 45 degree angle resting between the two platforms, facing back towards the way you came.
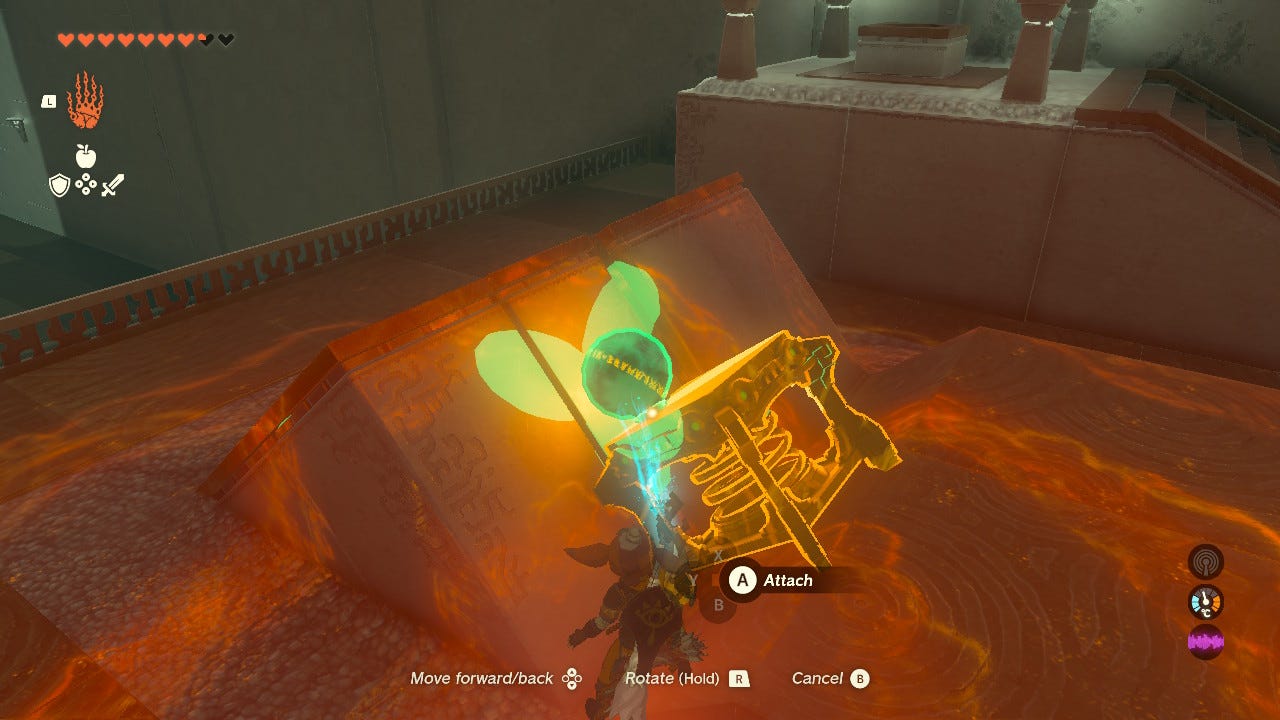
Now place the ball on top and quickly hit it to send the ball over to its destination. (Speed is of the essence here as the ball has a tendency to roll off.) Then hit the spring to reset it before stepping on and hitting it again to return to the other side.
Place the ball in the hole if it hasn’t rolled there of its own accord. Go through the gate that opens.
Morok shrine chest
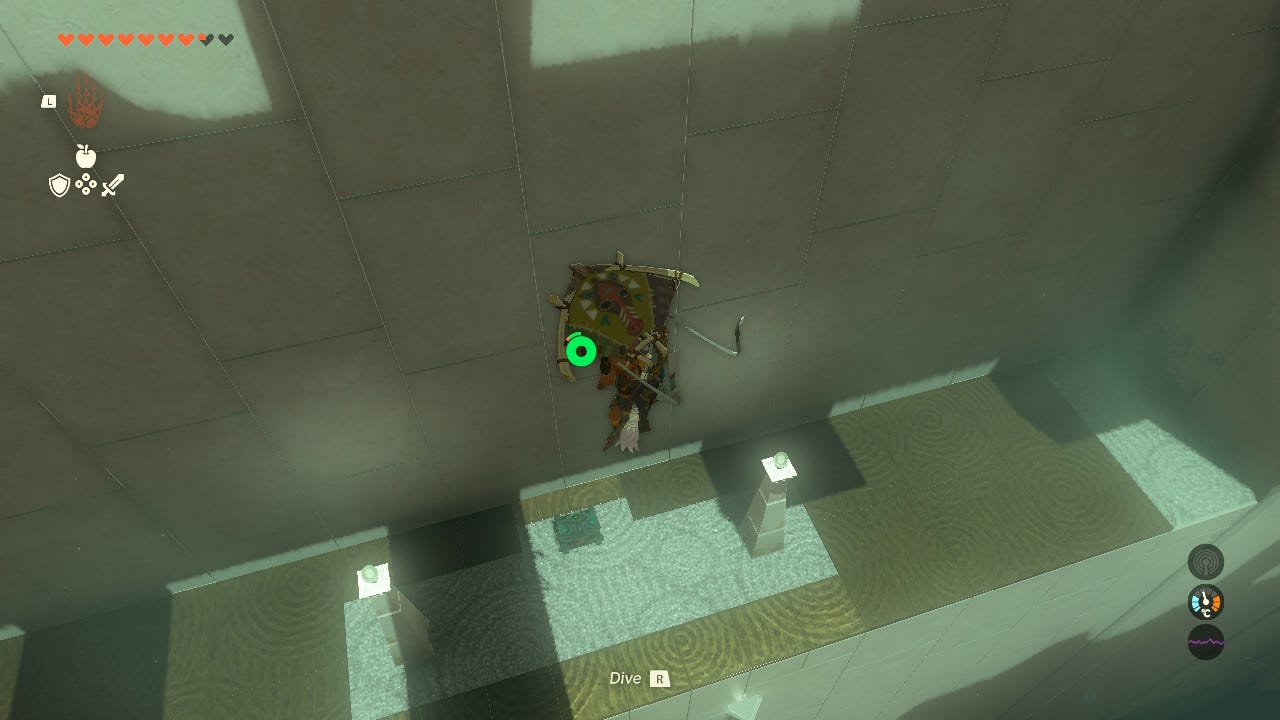
Take out the double spring from this room and place it anywhere on the flat ground. Climb up and hit it to be sent high enough into the air to find the chest platform on the back side of the room.
Open the chest to receive a Sneaky Elixir.
Morok Shrine puzzle solution three
Now, reset all three springs before stacking them together into one giant spring.
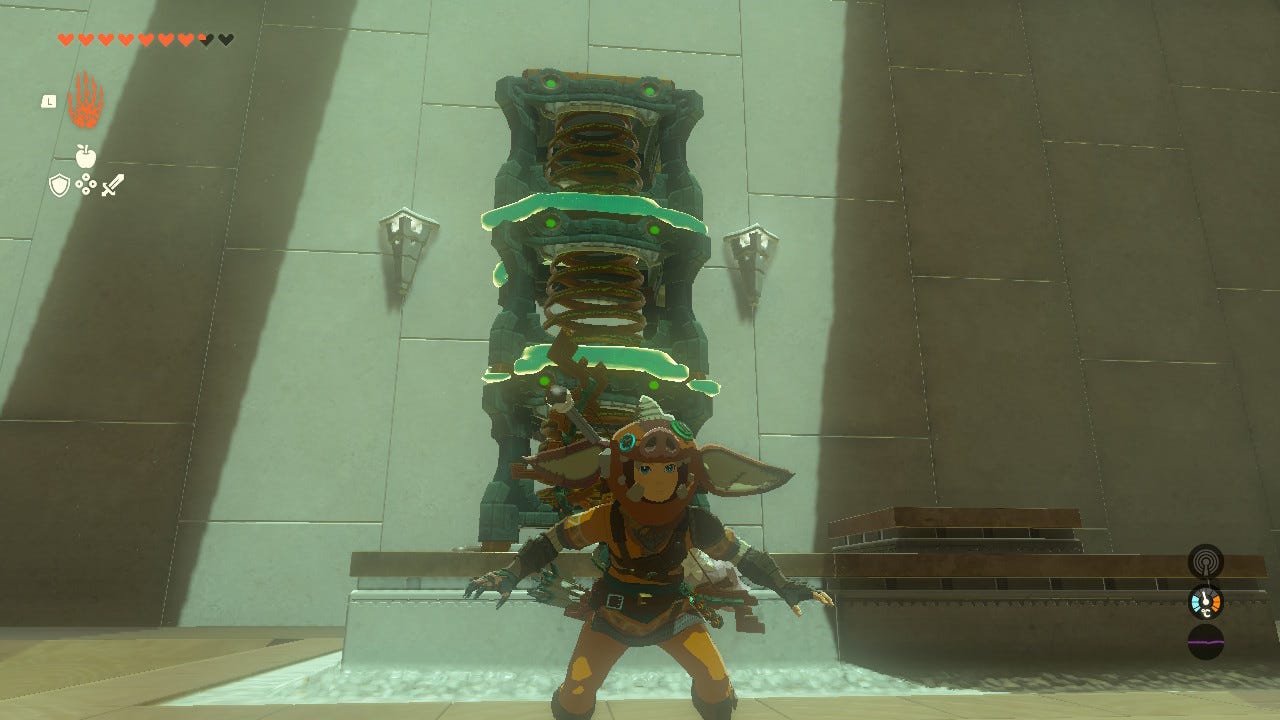
Climb and hit them one final time to go higher than ever before. Again on the back wall of the chamber, above the chest platform, you will find the exit for this shrine. Congratulations and enjoy your Light of Blessing!
If you’d like to learn more about Link’s adventure, visit our Zelda: Tears of the Kingdom walkthrough.