Monster Hunter World Shara Ishvalda strategy and weakness
How to take down the final boss of the Iceborne expansion.
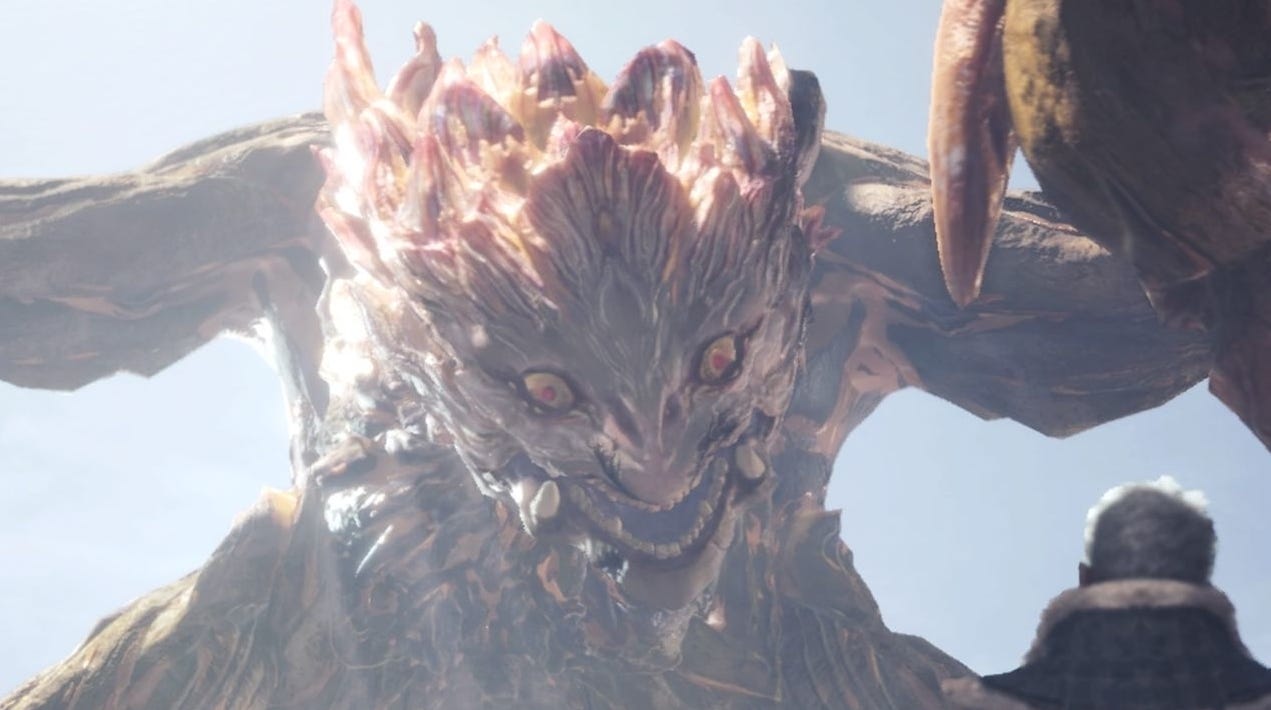

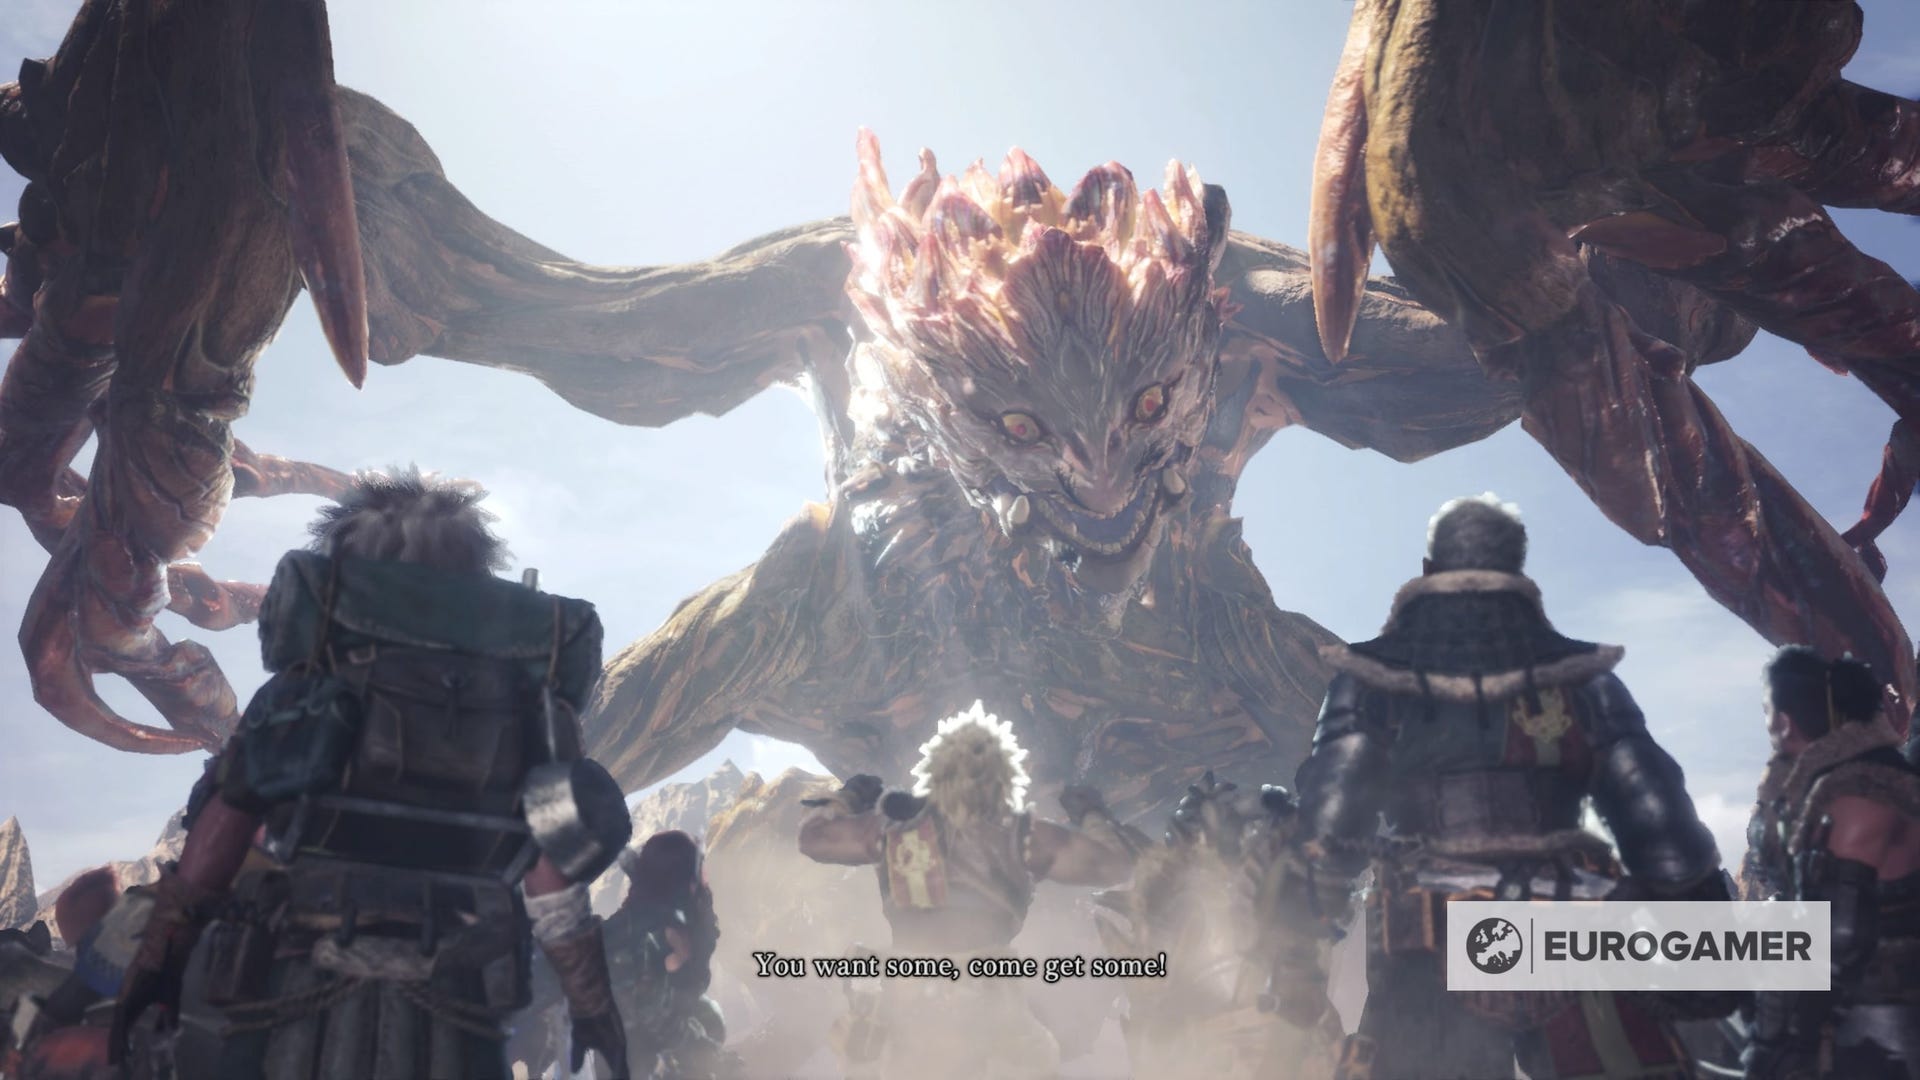
Shara Ishvalda is the final boss of the Monster Hunter World Iceborne expansion.
As you can imagine Shala Ishvalda is far from a pushover in Monster Hunter World, and requires knowledge of everything the game has to offer in order to survive.
We explain Shara Ishvalda strategies and weaknesses below to help, and once you've mastered the encounter, start earning various monster parts, including the Shara Ishvalda Tenderplate.
On this page:
How to prepare for Shara Ishvalda in Monster Hunter World
Shara Ishvalda is the final boss of Iceborne, and as such will be your biggest challenge yet. Preparation if of the utmost importance when sighting this gigantic boss.
Here's some recommendations on how to prepare for Shara Ishvalda:
- Iceborne throws a curveball in beginning the fight with Shara immediately after defeating the variant of Nergigante. This can put a strain on your resources, but you can return from the quest if you want to back out and start the fight with Shara refreshed.
- Ramp up your Defense as much as possible. Shara Ishvalda has no element, but both of its forms hit extremely hard. Make sure to focus on getting the best defensive gear you can, as well as skills that can help you survive.
- The Clutch Claw is imperative in this fight, especially if you use a close-range weapon. Using the Clutch Claw is the safest way to get in close, and weaken most of Shara Ishvalda's parts so you can break them. It's hard to get to a part of Shara that's weak during the first part of the battle as a close-range weapon user, so the Clutch Claw allows everyone to get in and do damage.
- Bring a Farcaster. This is a long fight, but you can't get back to camp to restock on items unless you have a Farcaster to get back. Getting carted because you ran out of healing items is far from ideal.
With a defensive mindset and maybe a few friends, Shara Ishvalda won't be too hard to defeat once you know its moveset.
Monster Hunter World Shara Ishvalda weakness and strategy
Shara Ishvalda is solely located in The Guided Lands, and similar to Xeno'Jiva, requires no tracking to find.

Here are the various Shara Ishvalda weaknesses:
- Fire - Low
- Water - Medium
- Thunder - Null
- Ice - High
- Dragon - Low
- Poison - Medium
- Sleep - Null
- Paralysis - Low
- Blast - High
- Stun - Low
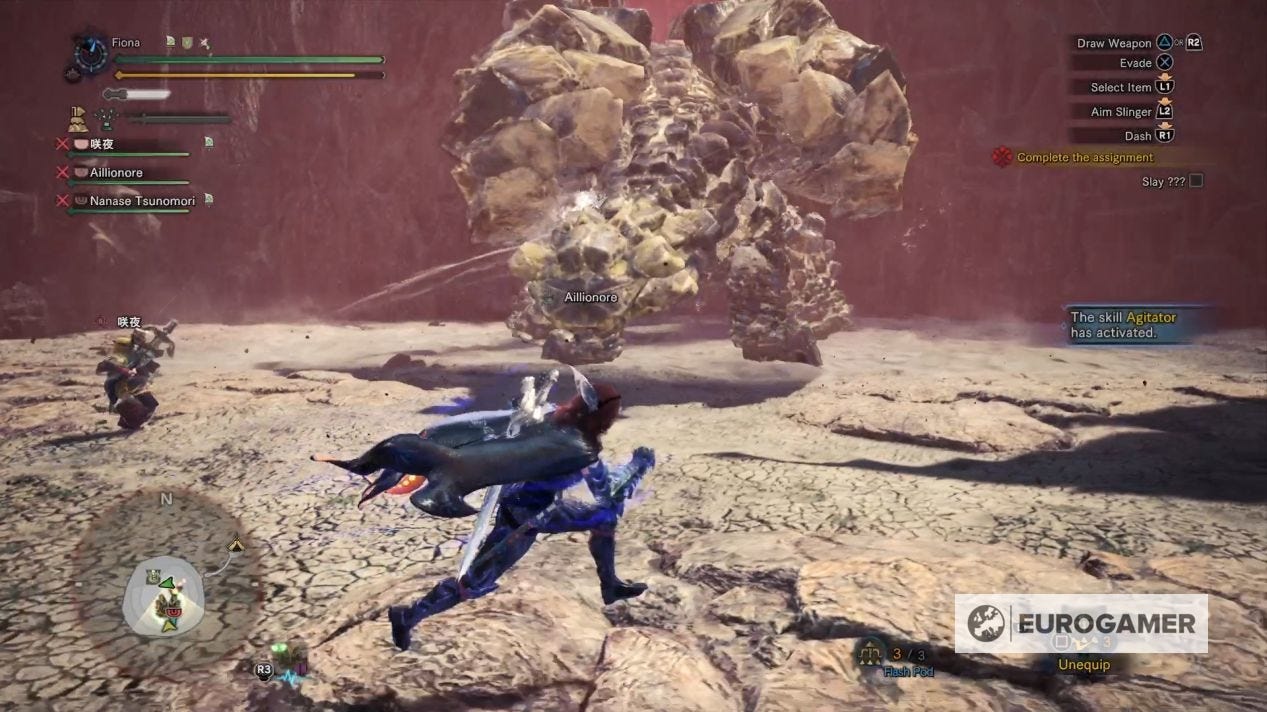
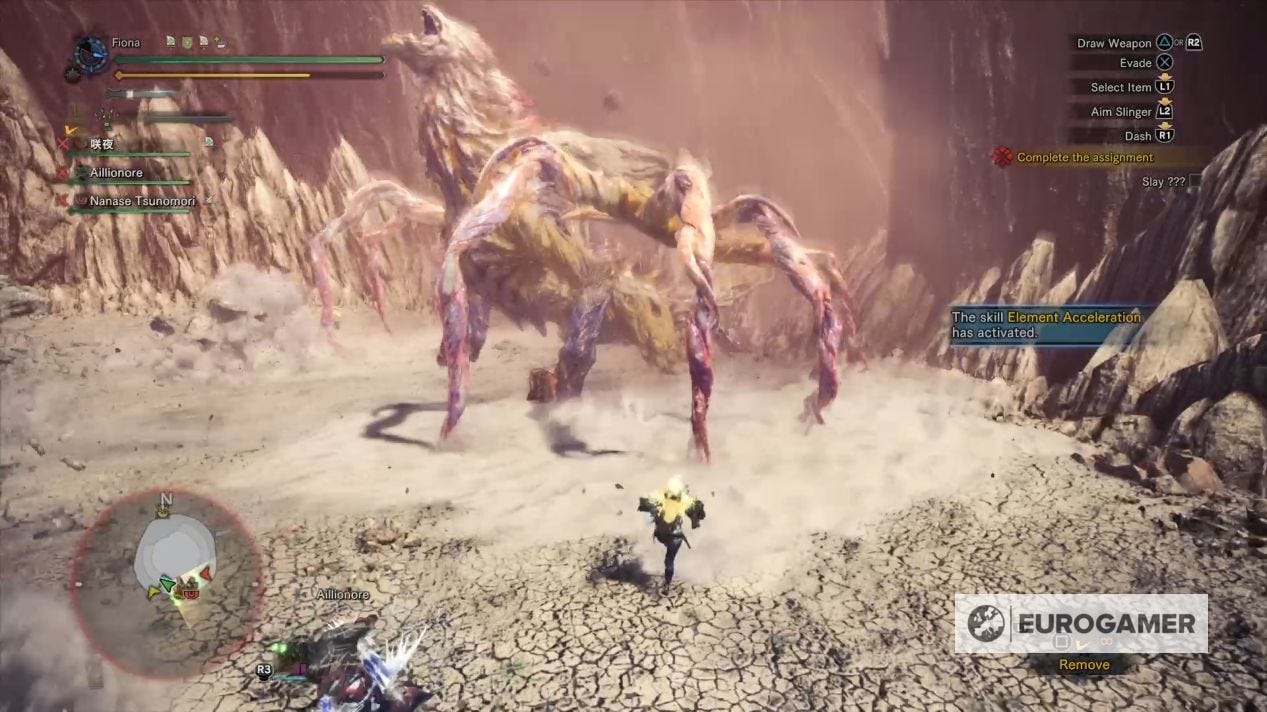
Shara Ishvalda has two parts to it. The first part of the battle involves removing its stony outer shell, while the second half of the battle involves taking Shara down.
During part one, Shara Ishvalda will be covered with thick rocks. Most parts of the monster will not be vulnerable during this phase, with only the chest and head being weak points. However, Shara Ishvalda will also be extremely slow, is as long as you're careful you should be able to avoid most of its attacks.
For the first part of the phase, Shara Ishvalda will normally resort to slamming on the ground to damage you. The attacks do a lot of damage, but provided you keep back and are careful, most of them won't hit you.
Occasionally, Shara Ishvalda will bring its wings in front of its head and rush forward - that's your queue to dodge to the side.
When it's agitated, Shara Ishvalda will dig its wings into the ground and liquify the earth, effectively turning it into quicksand. You can stand in the sand without taking damage, but it'll slow you down similar to water and snow.
Additionally, Shara Ishvalda will dive into the earth, not fully submerging itself like Diablos but creating more quicksand as it moves around.
For the entirety of this first phase of Shara Ishvalda, fortune favors the cautious. Long-range weapon users will be able to hit Shara Ishvalda's face from afar, knocking away pieces of the shell easily.
Melee weapon users, however, will not be so lucky. Melee weapons can technically hit the chest for a weak point, however, it's for from the safest place to be when fighting the rock beast and you'll be vulnerable to getting tripped up by tremors.
The best idea is to stay to one of Shara Ishvalda's sides and use the Clutch Claw to latch onto and attach its face. Shara Ishvalda isn't able to easily shake off hunters with its shell on, so it's relatively safe to swoop in, land a damaging counter, and then run away.
When it's agitated and submerged, the safest place is actually right next to its head, against all common sense. You will eventually get caught in the current when it leaves the sand, but the amount of damage you're able to do and how likely you'll still get away unscathed far outweighs that.
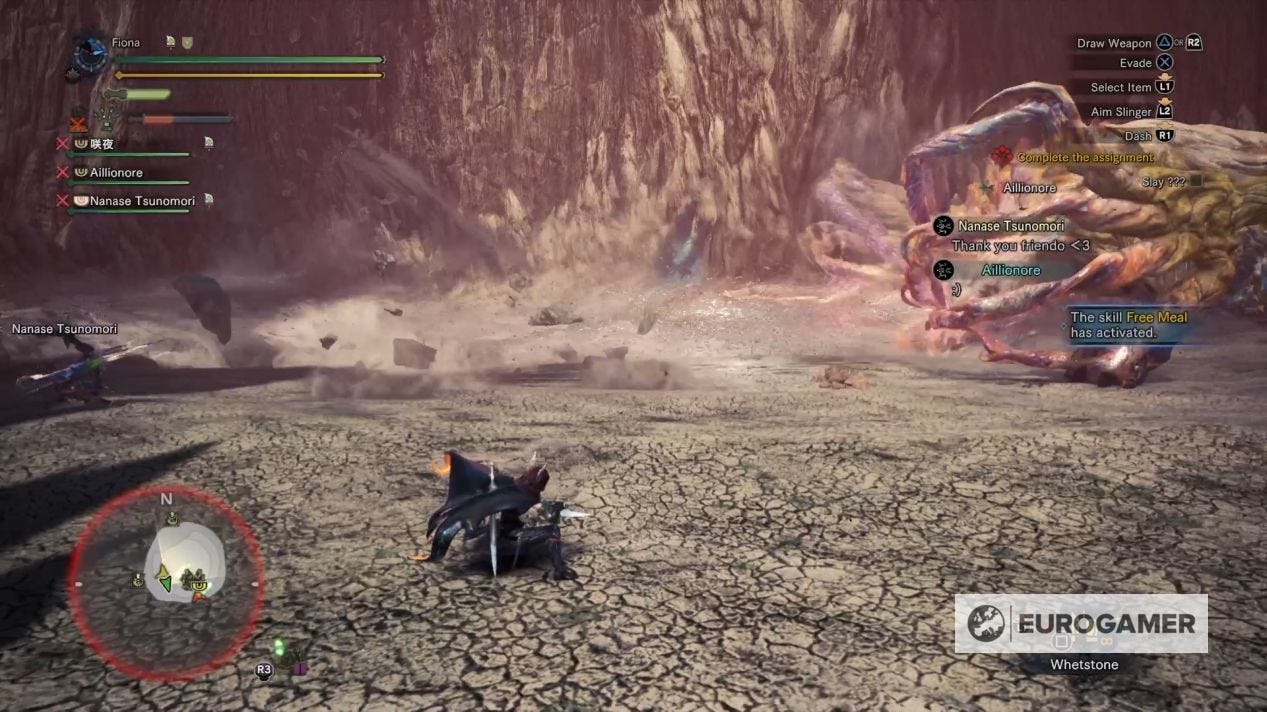
Once you break off enough pieces of the shell, Shara Ishvalda will jump back and shed its shell, revealing its true form. Unlike Xeno'jiva, there will not be a break in the fight here, so sharpen your weapons and heal up in this rare second of rest.
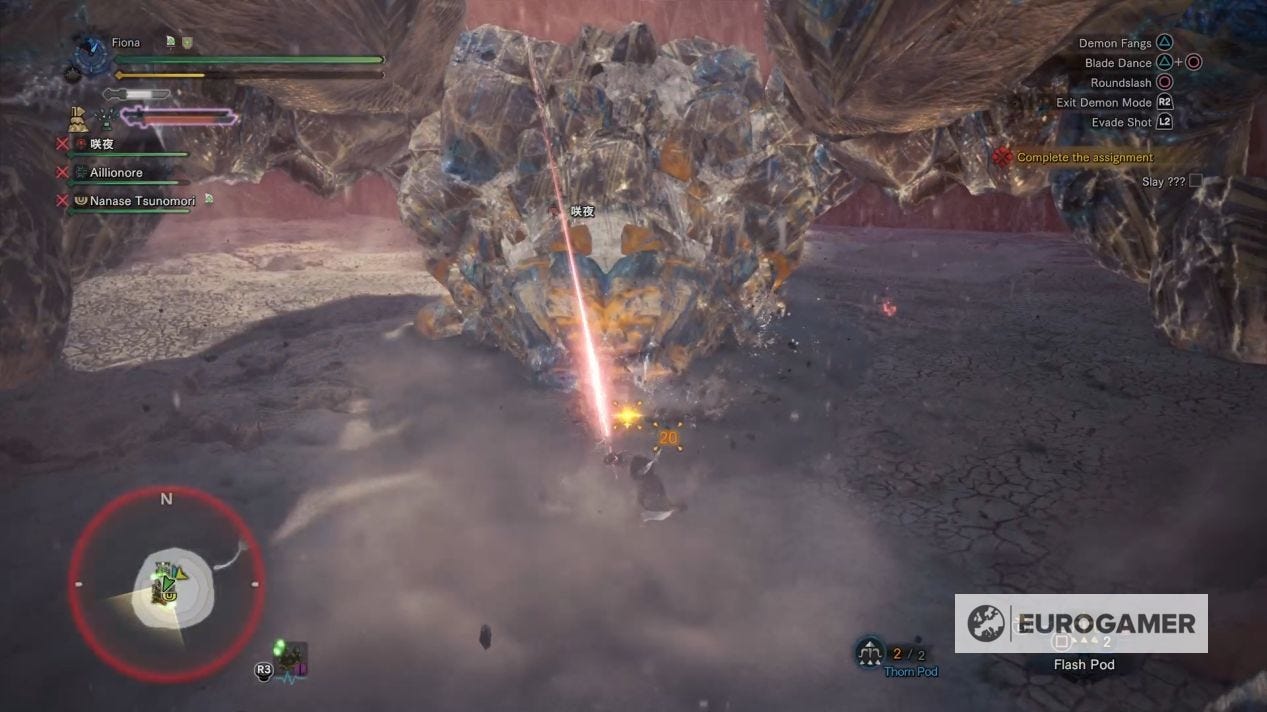
Shara Ishvalda's second form is for more agile, and far more dangerous. It'll use pressurized wind from its fingerlike wings to attack from all sorts of directions and distances, as well as use the wings like claws to swipe at hunters underfoot.
Shara Ishvalda's most dangerous attack is when brings its wings forward and launches an airstream forward like a laser beam across the field. It's extremely damaging if you get hit.
When it's agitated, Shara Ishvalda will turn the ground to quicksand similar to its first form, but will now affect a larger range. Most of Shara Ishvalda's attacks are the same as when its not agitated, but it moves faster and some of the attacks will turn the earth to quicksand.
To finish its enraged state, Shara Ishvalda will jump back and launch a huge ball of air into the ground, causing a massive AOE (Area of Effect) attack that will take a large chunk of your life should you be hit.
For this second phase, the safest place for fighting Shara Ishvalda is being directly underneath it. While the wings and head are the main weak points to grab, its front claws also take full damage from attacks, allowing a low-risk place for melee weapon users to attack while ranged weapon users go to the head.
Also, the tail is not a weakened body part, but two full attacks from the Clutch Claw will weaken it.
From underneath Shara Ishvalda, there are only three main things to watch out for. First, its powerful laser attack pushes Shara Ishvalda back - put away your weapon and run backward with it to avoid getting hit.
Second, if Shara Ishvalda looks to its side, it's getting ready to use its wing to swipe underneath itself. Dodge to the other side of Shara Ishvalda (or even dodge between its fingers if you're confident) to get away. Finally, if Shara Ishvalda rears up, its pressurized air may hit you. Move to its haunches or tail area and you'll be safe.
Shara Ishvalda's ultimate move is very damaging and difficult to tell where it's going to hit, making it difficult to completely dodge. However, there's enough of a wind-up for the attack that you can quickly prepare yourself for the blow.
There's enough time to put on the Temporal Mantle if you have it, allowing you to dodge completely. The Vitality Mantle can also absorb some of the blow, but you'll still take enough damage to immediately heal.

But, if you're at full health and a decent Defense rating from armor and the Armorskin drink, the move will not kill you, so if worst comes to worst chug some Mega Potions to make sure you're at full health.
If you dodge the attack completely, it may be a good idea to have a Dust of Life ready for those that got hit by the AOE.
Keep up the onslaught, and keep your health topped off, and you'll eventually take Shara Ishvalda down.
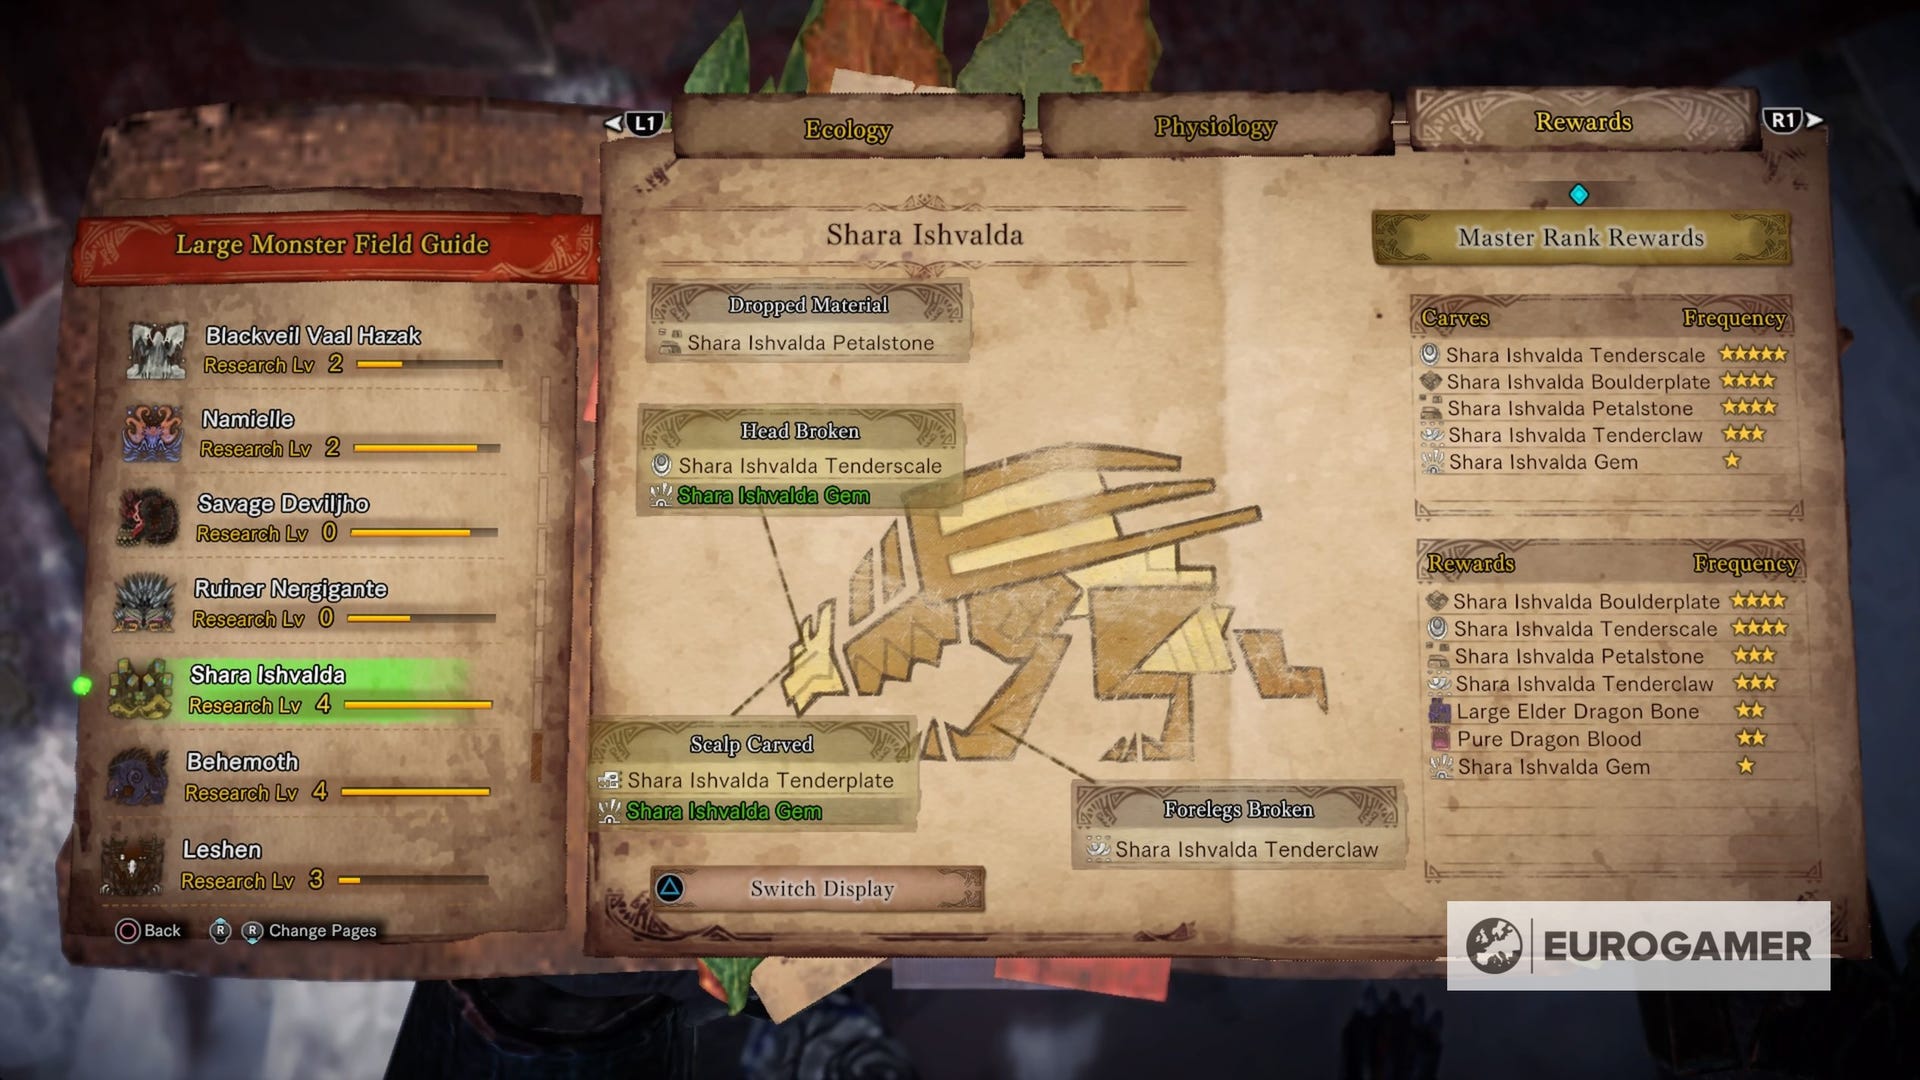
How to get Shara Ishvalda Tenderplate, Tenderscale, Boulderplate and Petalstone
The following materials are available from Shara Ishvalda depending on what you break off, carve or receive as a reward.
Shara Ishvalda Master Rank materials list:
- Shara Ishvalda Tenderplate (Scalp carved)
- Shara Ishvalda Tenderscale (Head Broken, also carved, reward)
- Shara Ishvalda Boulderplate (Carved, reward)
- Shara Ishvalda Petalstone (Forelegs Broken, also carved, reward)
- Shara Ishvalda Tenderclaw (Wings Broken, also carved, reward)
- Shara Ishvalda Gem (Head Broken, also carved, reward)
- Large Elder Dragon Bone (reward)
- Pure Dragon Blood (reward)
Shara Ishvalda is an Elder Dragon, and as such cannot be captured. Your best bet of getting the needed parts are to break the proper body parts and hope for the best while carving.
Good luck taking on Shara Ishvalda!