Bowser's Fury Shine locations: Where to find all 100 Cat Shines in the Super Mario 3D World expansion
Where to find every hidden collectable in the Nintendo Switch expansion.
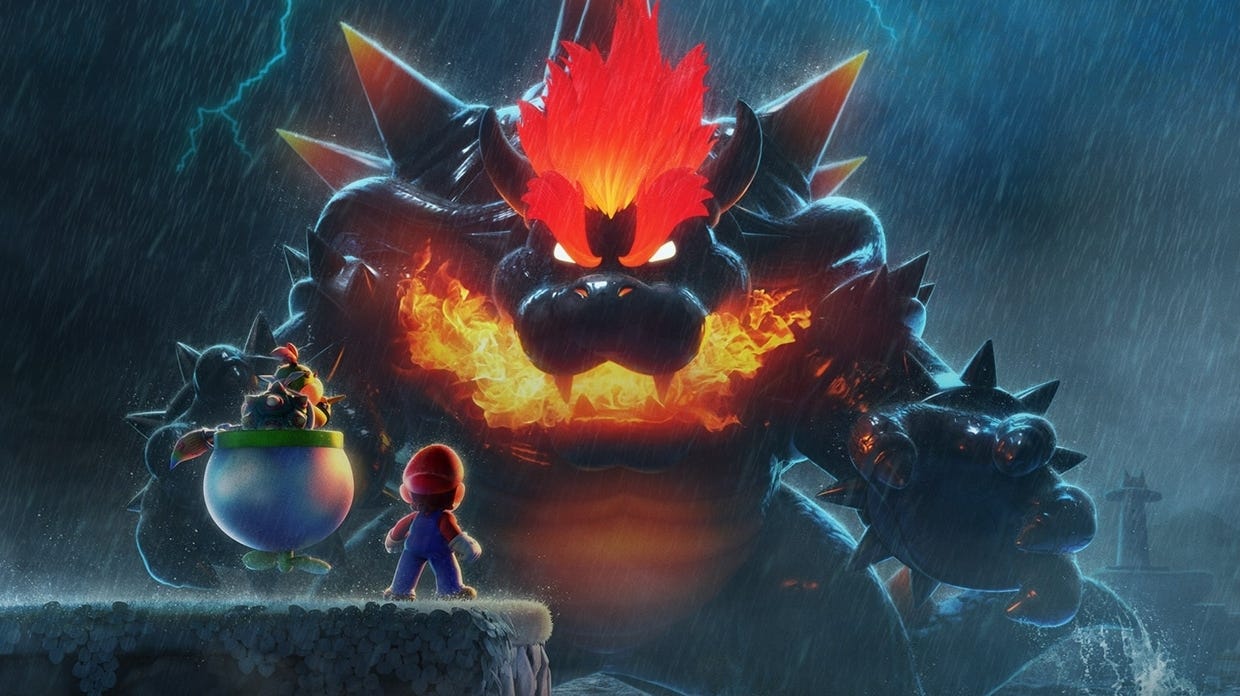

Bowser's Fury, the Nintendo Switch expansion to Super Mario 3D World, has its own unique set of collectables to find.
With the introduction of the Kaiju like Fury Bowser and the more open world setting, these collectibles come in more unfamiliar forms - specifically the Cat Shine.
This page will lead you all Shine locations in Bowser's Fury, area-by-area - including those you must revisit in the post-game once you have defeated the final boss.
Cat shine explainers:

Bowser's Fury Shine locations available straight away:
- How do Cat Shines work and how many Shines are there in Bowser's Fury?
- Fur Step Island Cat Shine locations
- Scamper Shores Cat Shine locations
- Fort Flaptrap Cat Shine locations
- Pounce Bounce Isle Shine locations
- Lakeside Giga Bell Shine locations
- Slipstake Slope Shine locations
- Clawswipe Colosseum Shine locations
- Trickity Tower Shine locations
- Crisp Castle Climb Shine locations
- Ruins Giga Bell Shine locations
- Risky Whisker Island Shine locations
- Pipe Path Tower Shine locations
- Mount Magmeow Shine locations
- Roiling Roller Isle Shine locations
- Wasteland Giga Bell Shine locations
Post-game Shines:
How do Cat Shines work and how many Shines are there in Bowser's Fury?
Hidden throughout the lake and the many islets of Bowser's Fury, there are 100 Cat Shines in total to collect. You don't need that many to complete the game, but if you want them all you'll have to search high and low to find them all.
Each island has its own lighthouse, and each lighthouse has five Cat Shines. Of those Shines one is always Bowser Block, and another is always collecting five collectibles hidden across the island. Two Shines on each lighthouse need players to leave and return to the island before they can be found. Once a lighthouse has all its Cat Shines, you will see a Mario flag hoisted at the top.
But there are plenty of Cat Shines that aren't attached to any lighthouse, found either on tiny rocks out on the water or elsewhere on the world map. Some of these can only be found with a specific costume, or the use of your watery friend Plessie.
There are also some Shines cannot be found until after you defeat Fury Bowser. One of these is an additional area named Lucky Isle, while others are found at existing locations, revealing new Shines to find.
Finally, though we number every Shine in this list, you are free to collect them in any order - this is to offer a sense of progression and help if you want to create a checklist to tick off as you go.
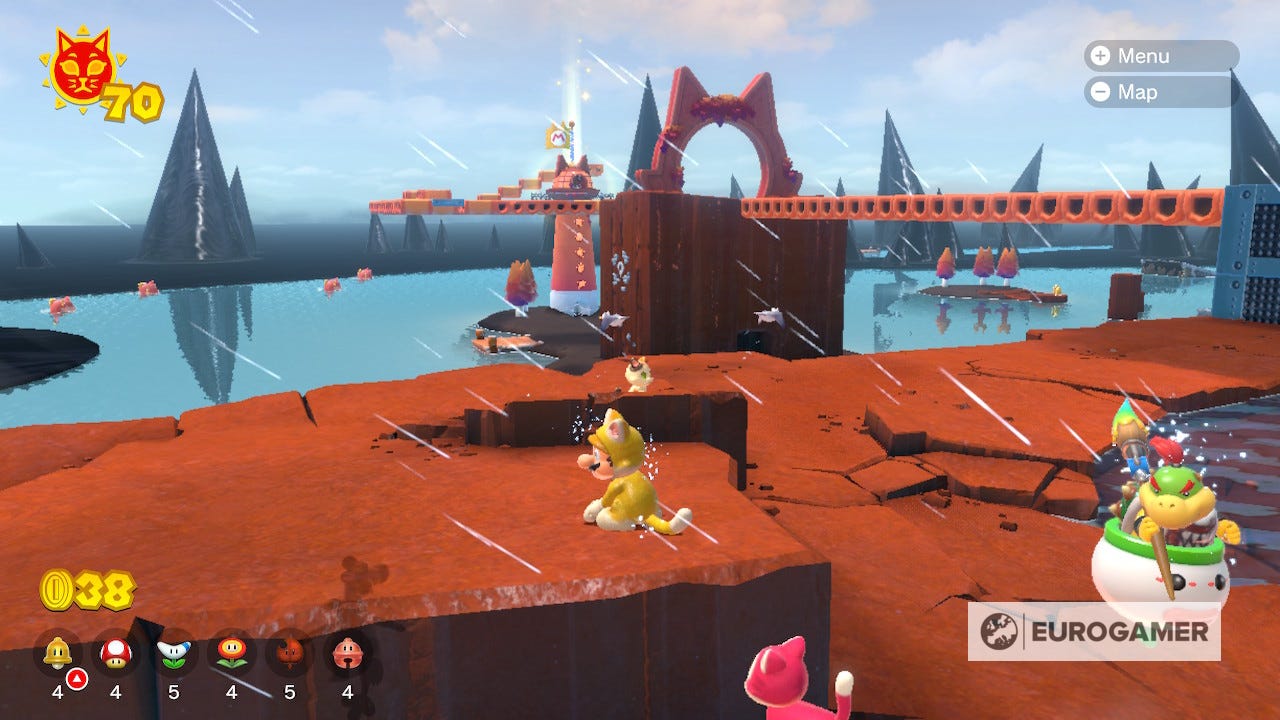
Fur Step Island Cat Shine locations
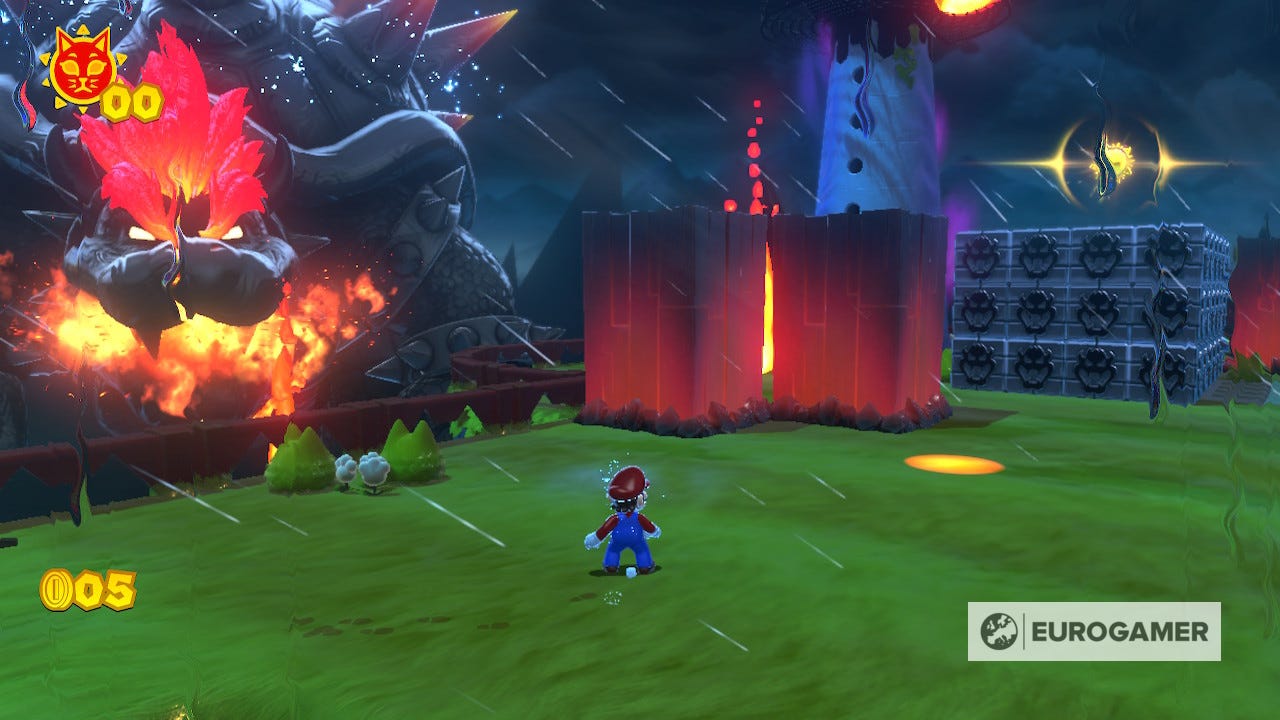
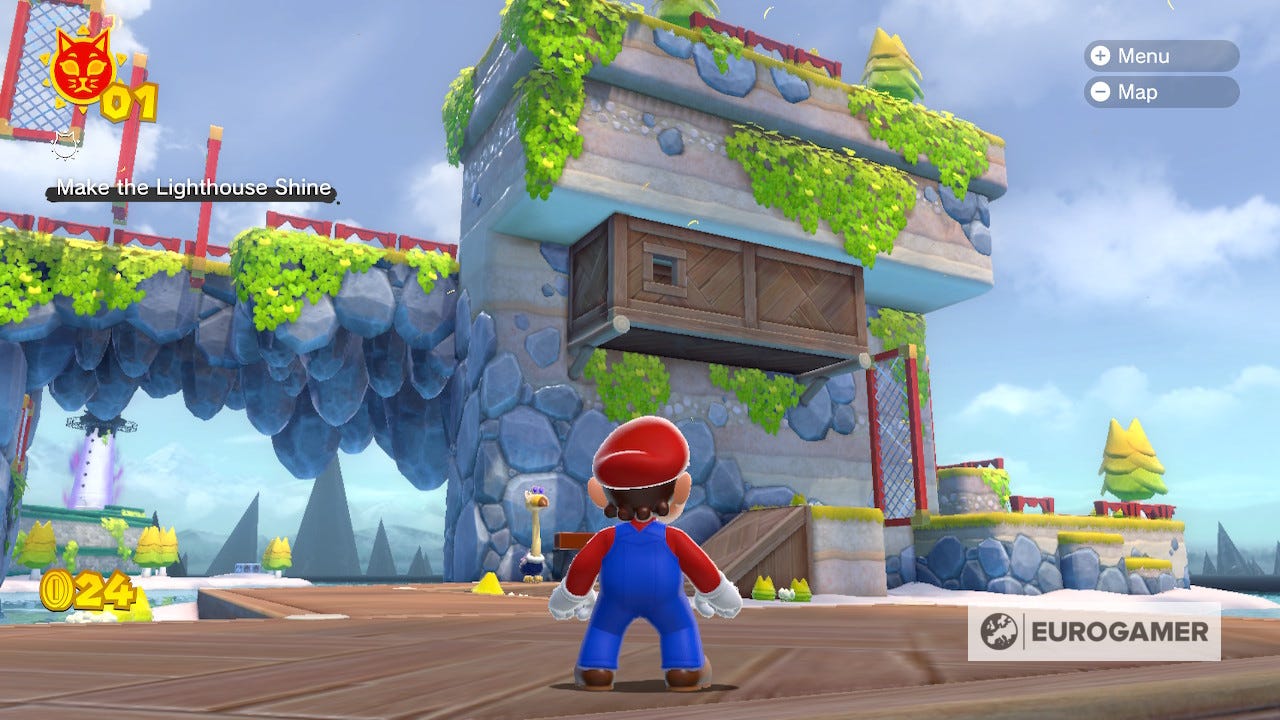
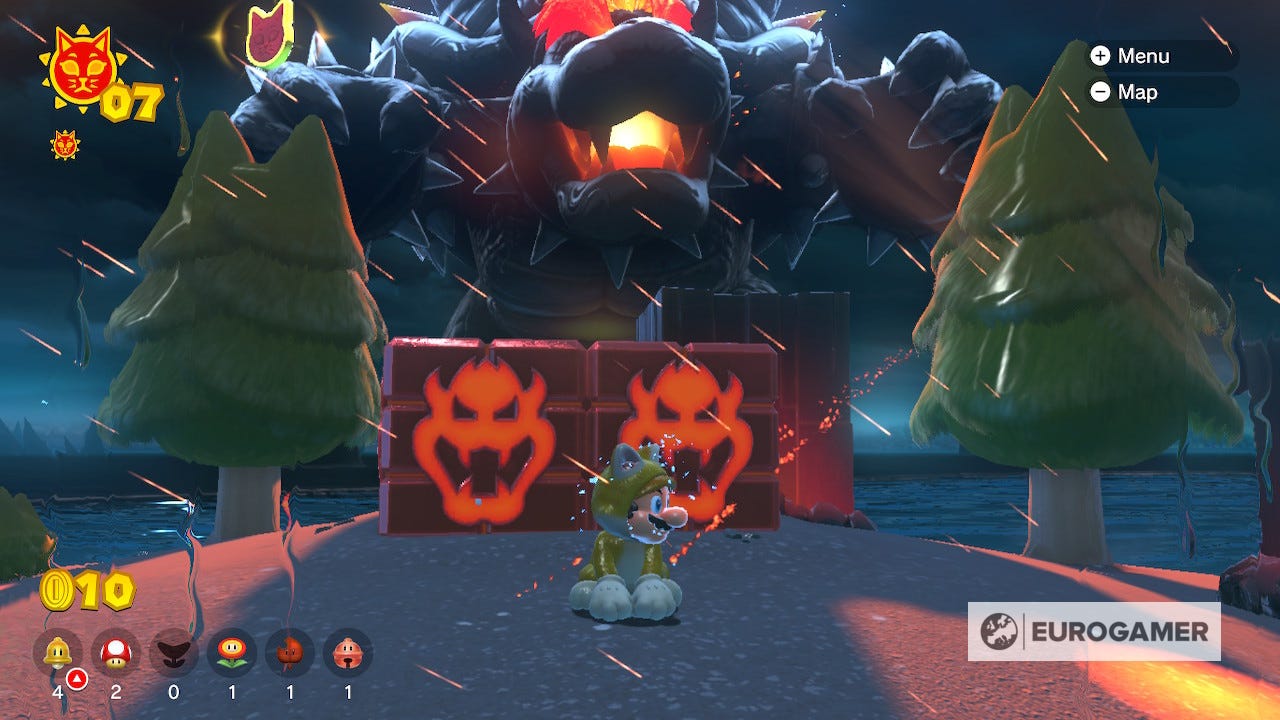
Cat Shine 1 Location
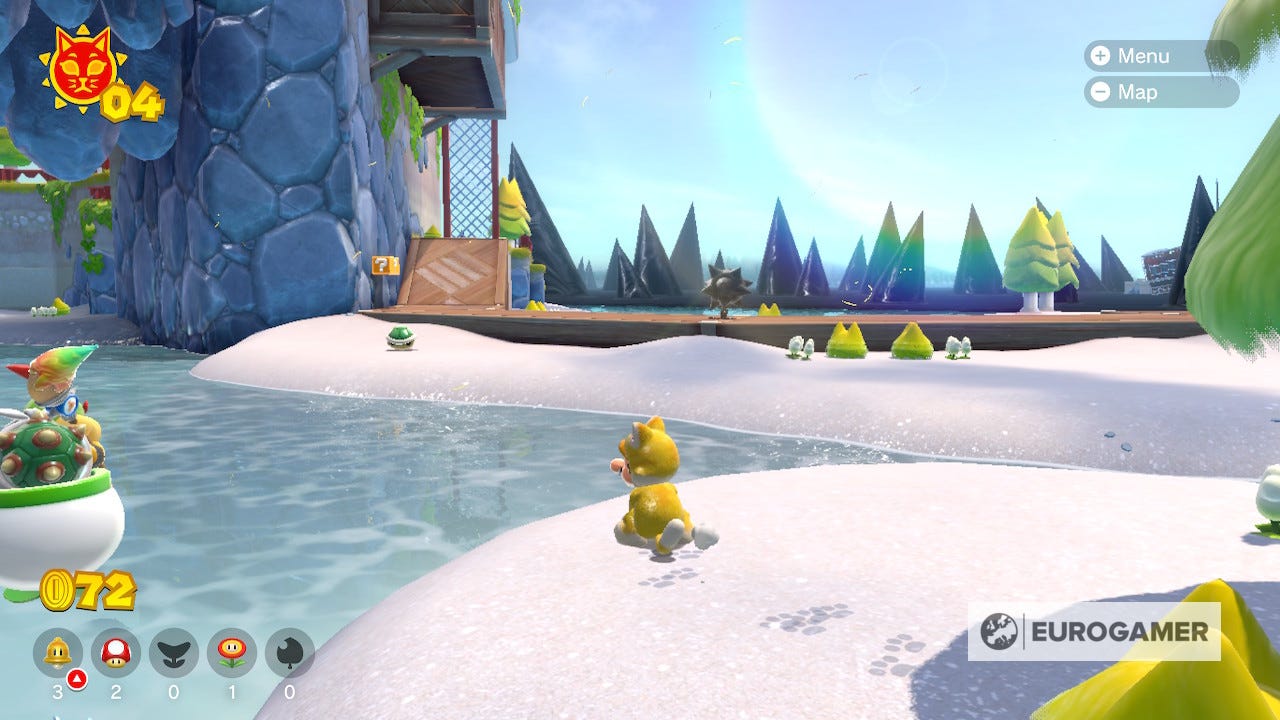
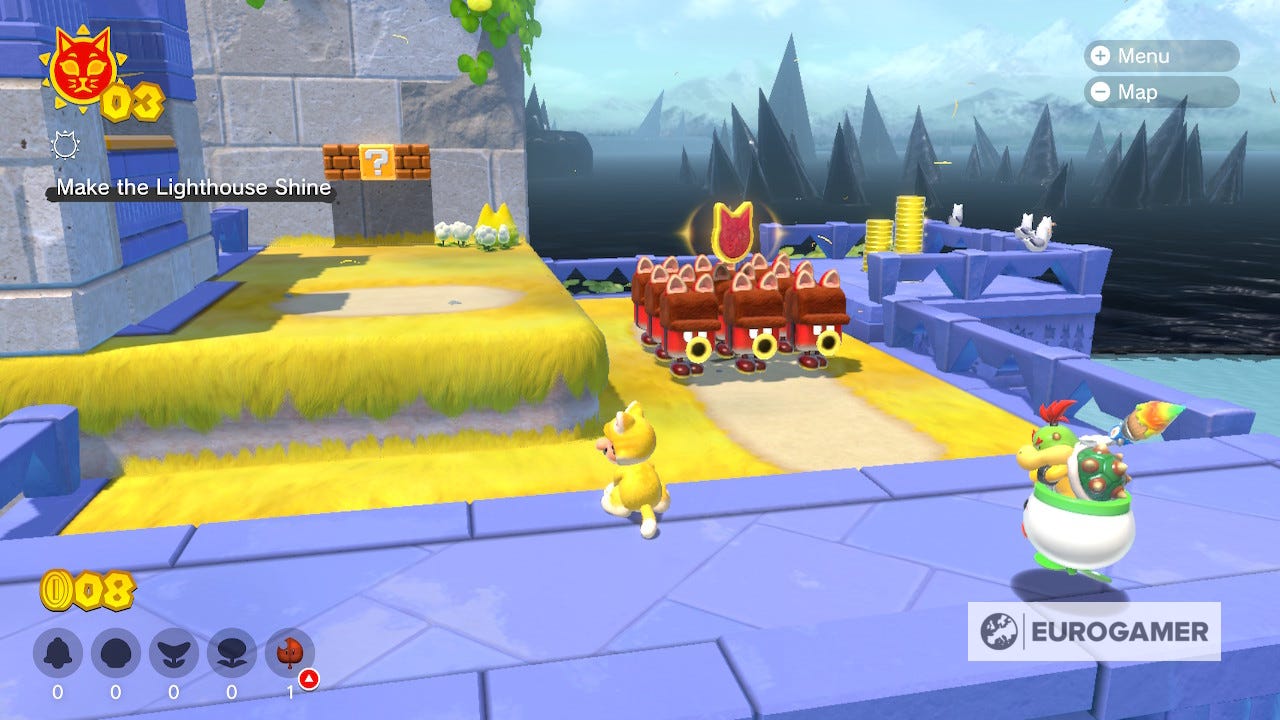
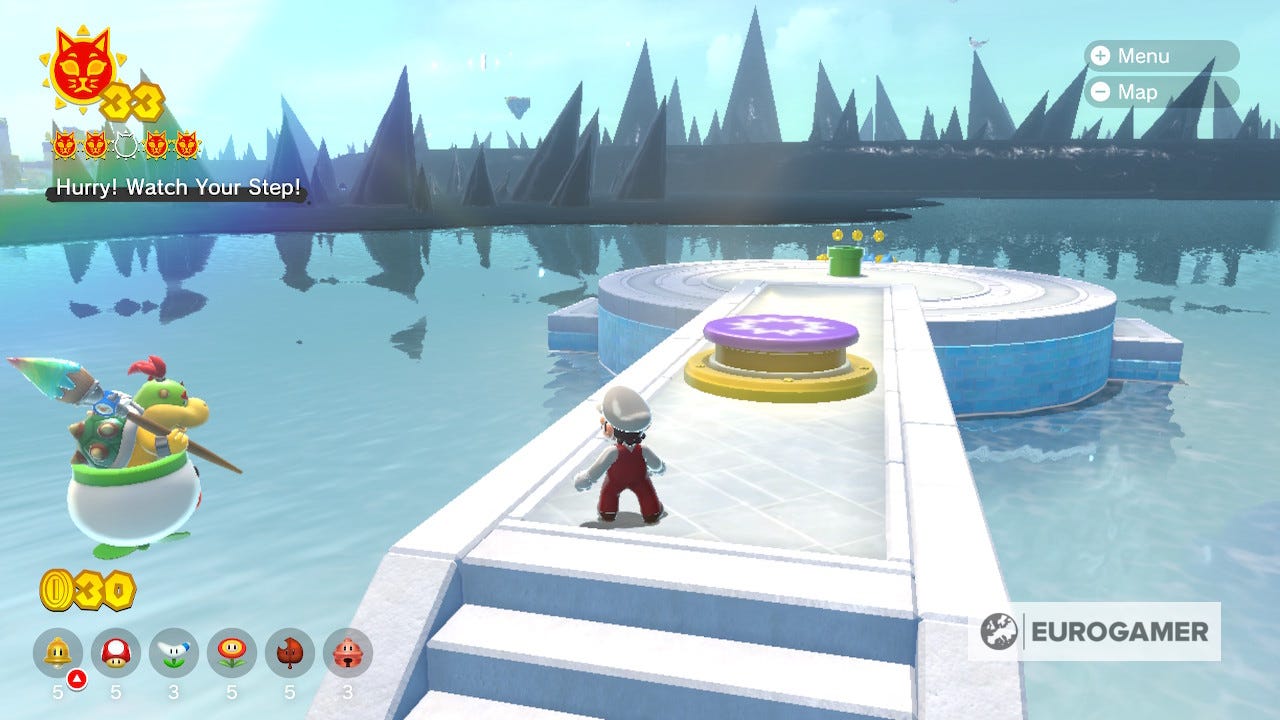
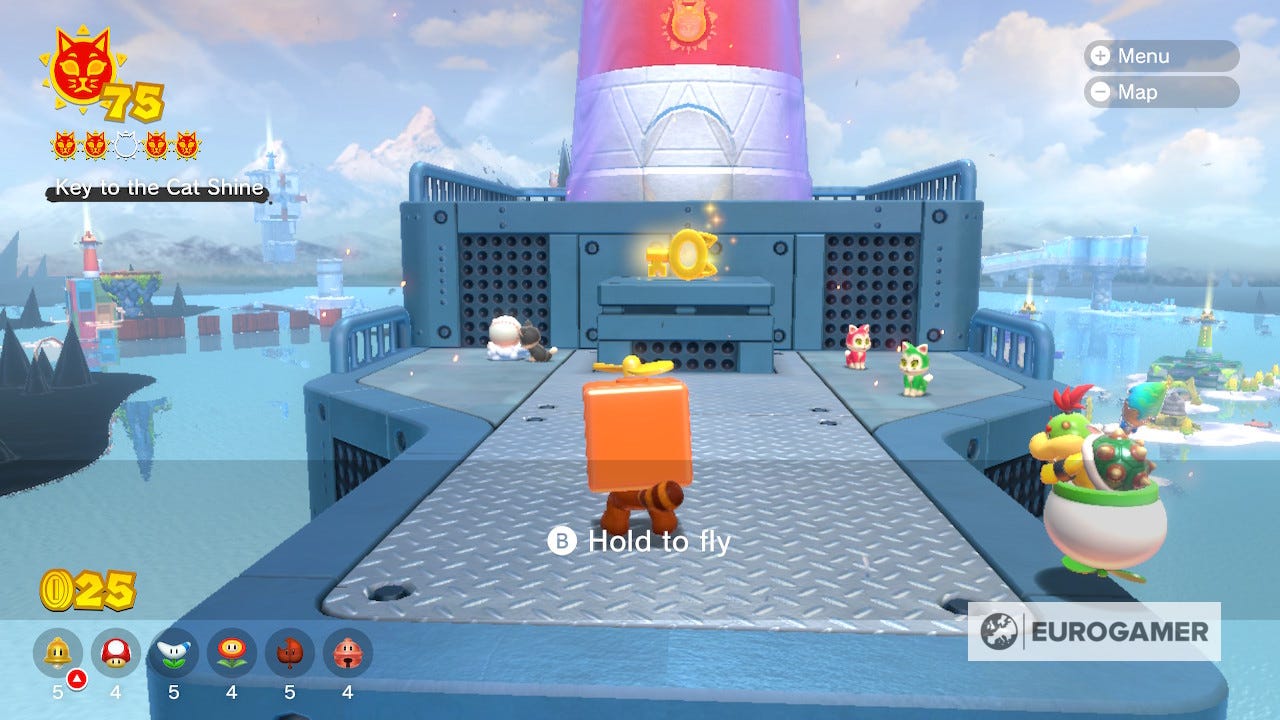
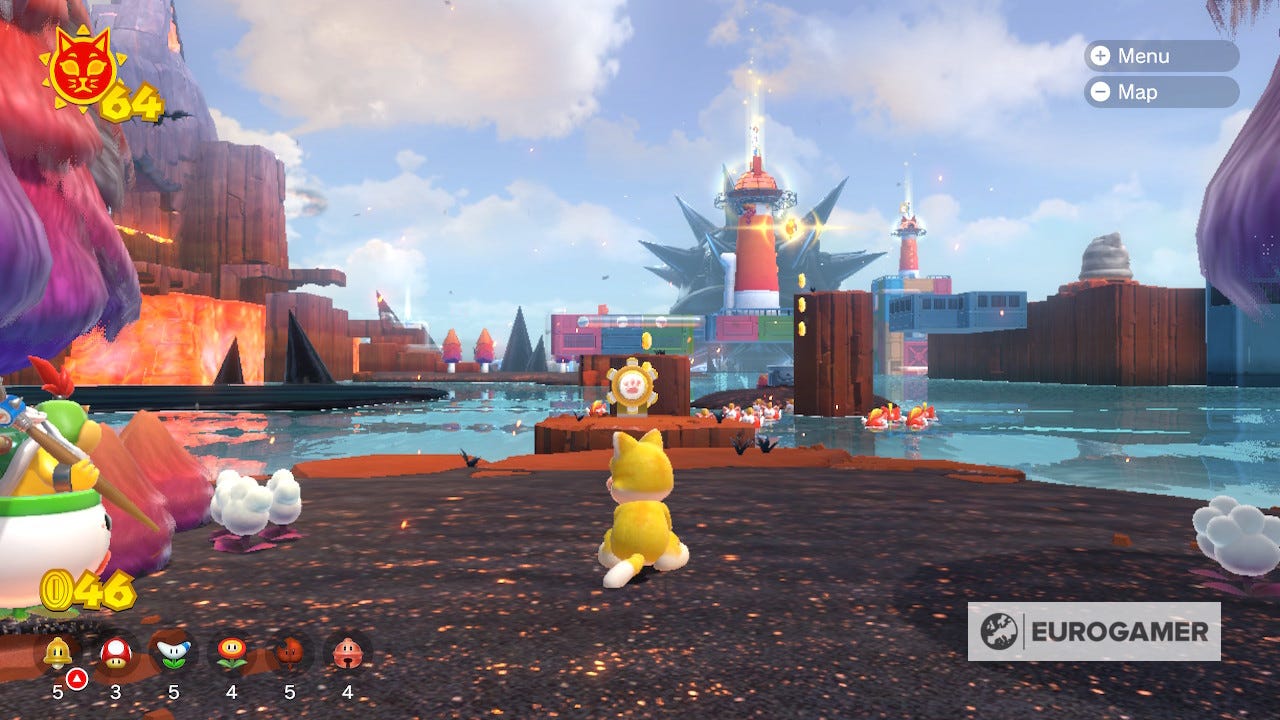
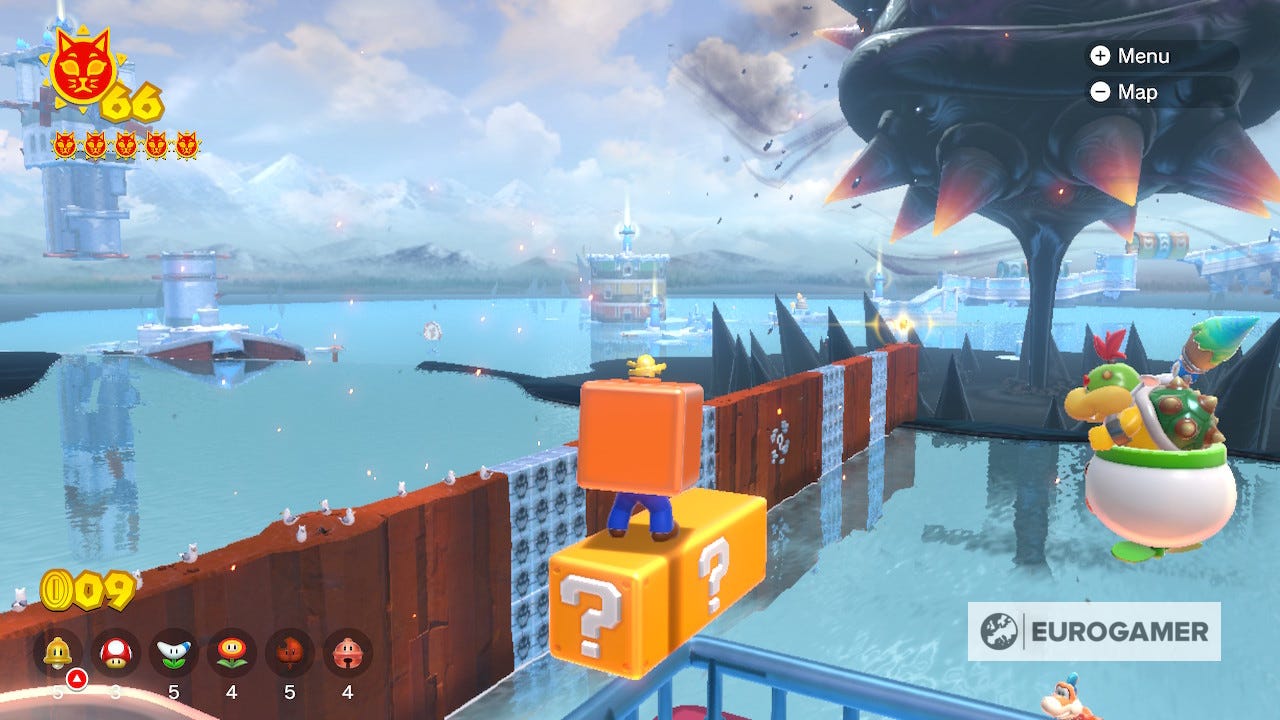
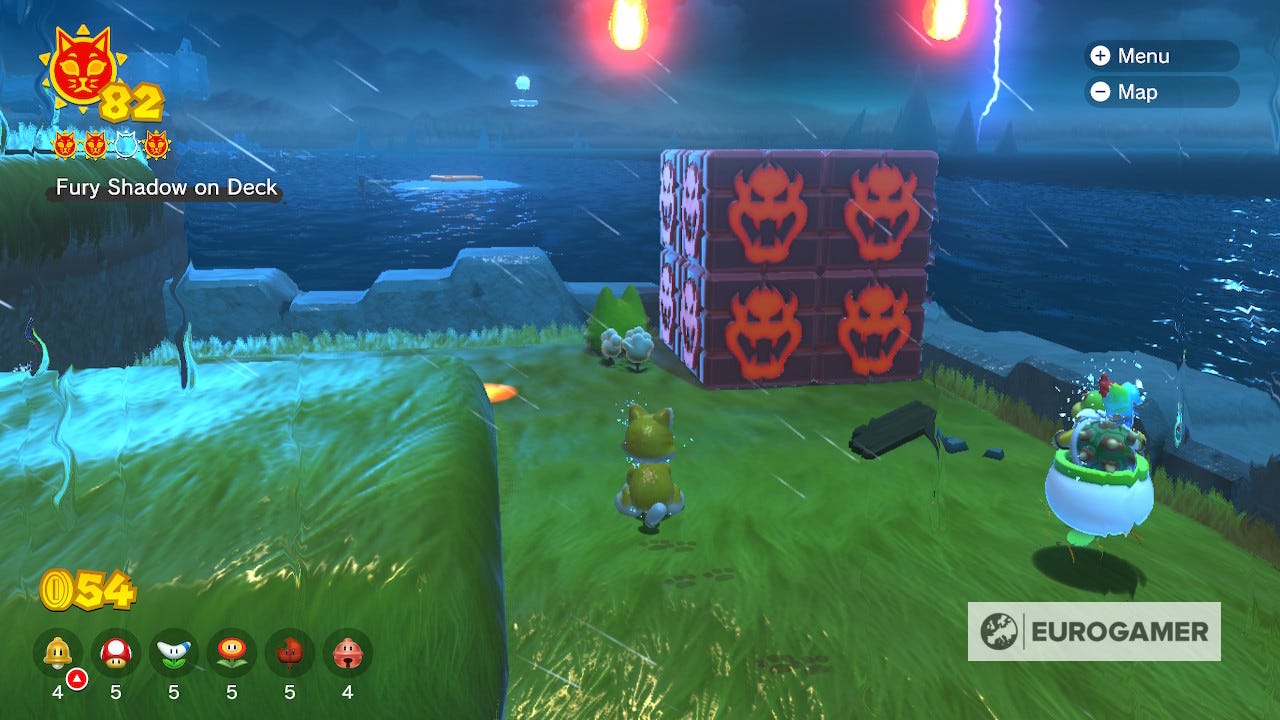
From the very beginning of the game, follow the path through the trees and climb onto the ship on the left. From there you'll have to avoid the raining fireballs from Fury Bowser as you approach the Shine.
To reach the Shine you'll have to wait for Bowser to unleash his fire breath and destroy the Bowser Blocks to reveal a staircase. Use the stairs themselves to shield yourself from the fire.
The rest of the four Shines found on Fur Step Island cannot be collected until after you defeat Fury Bowser in the final fight. For more information on that, head to Fur Step Island Revisited.
Scamper Shores Cat Shine locations
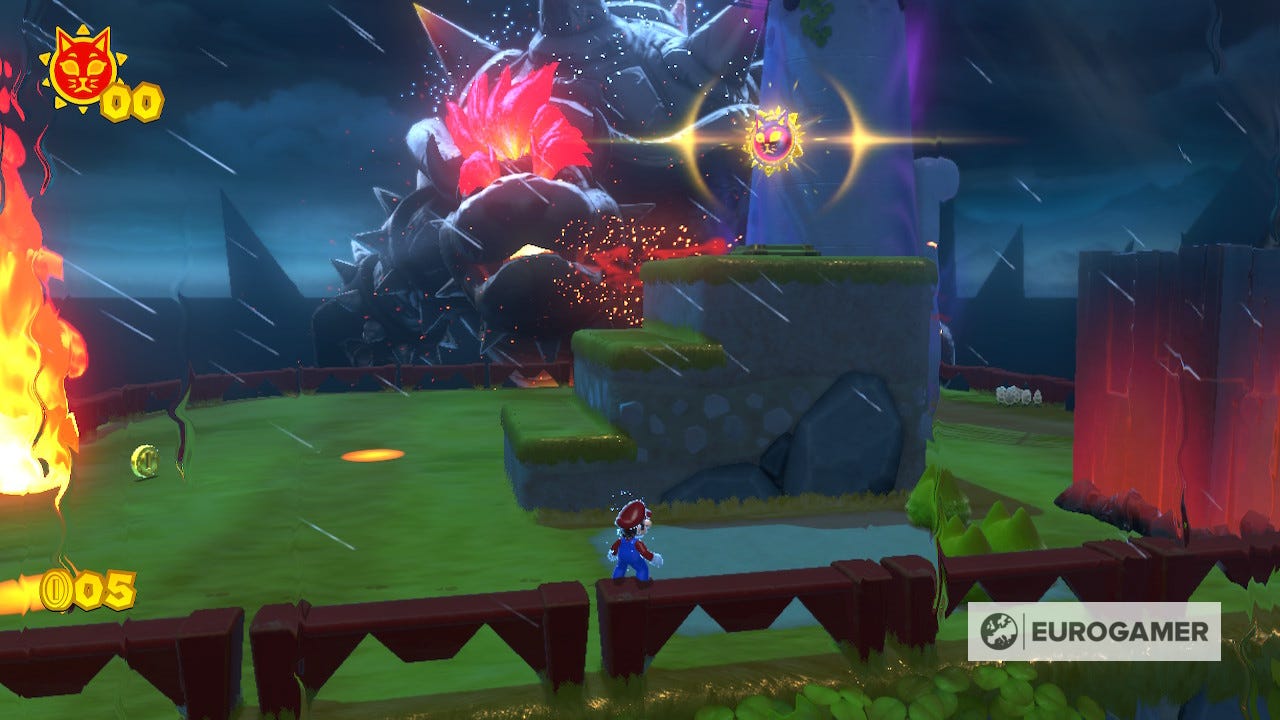
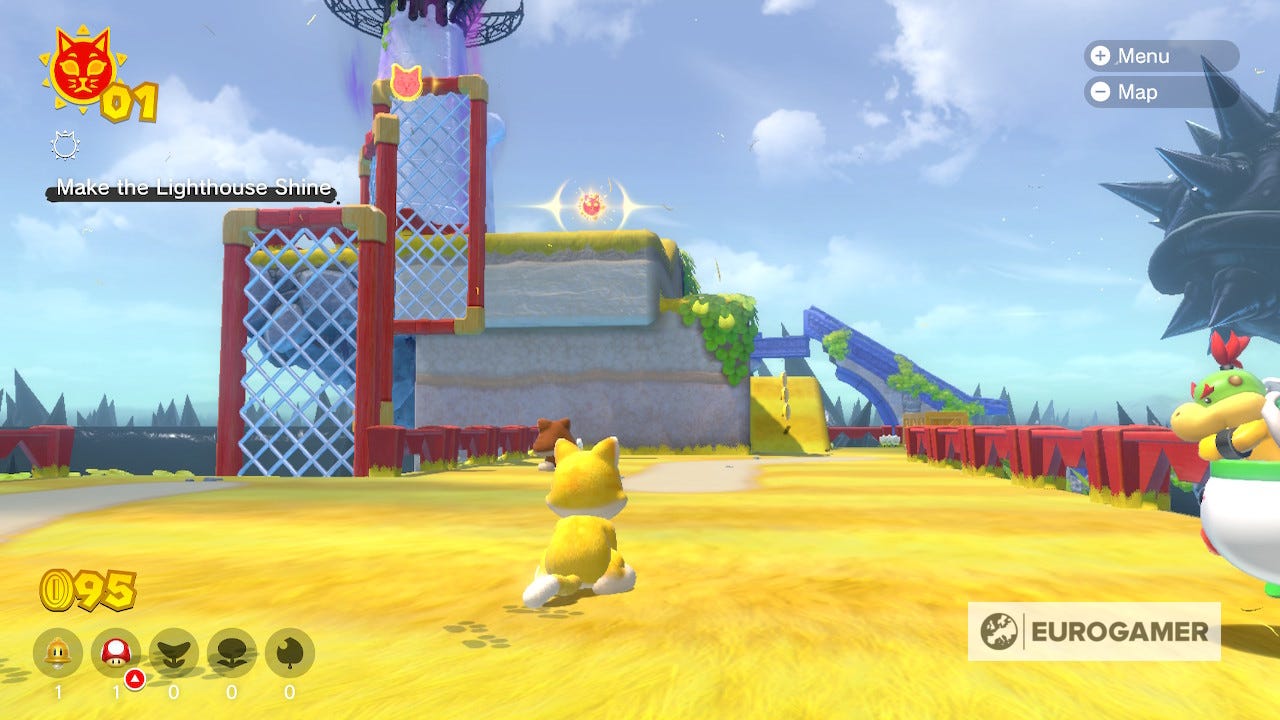
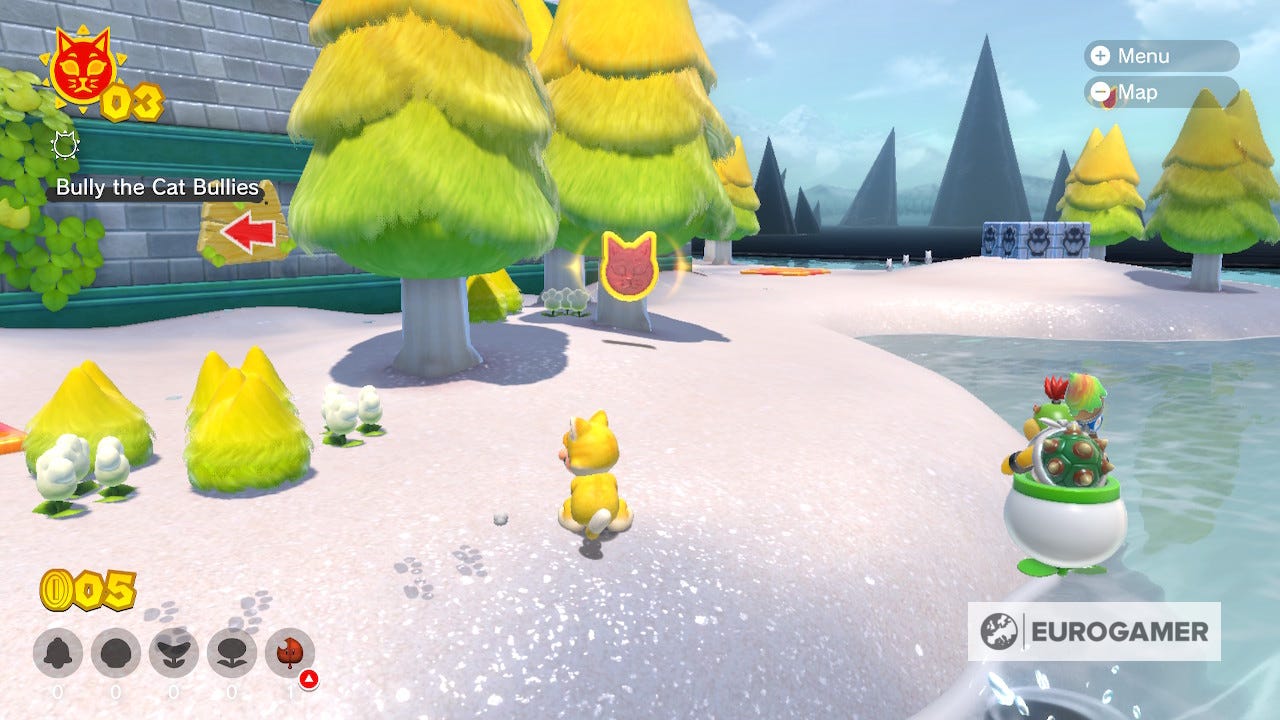
Cat Shine 2 Location
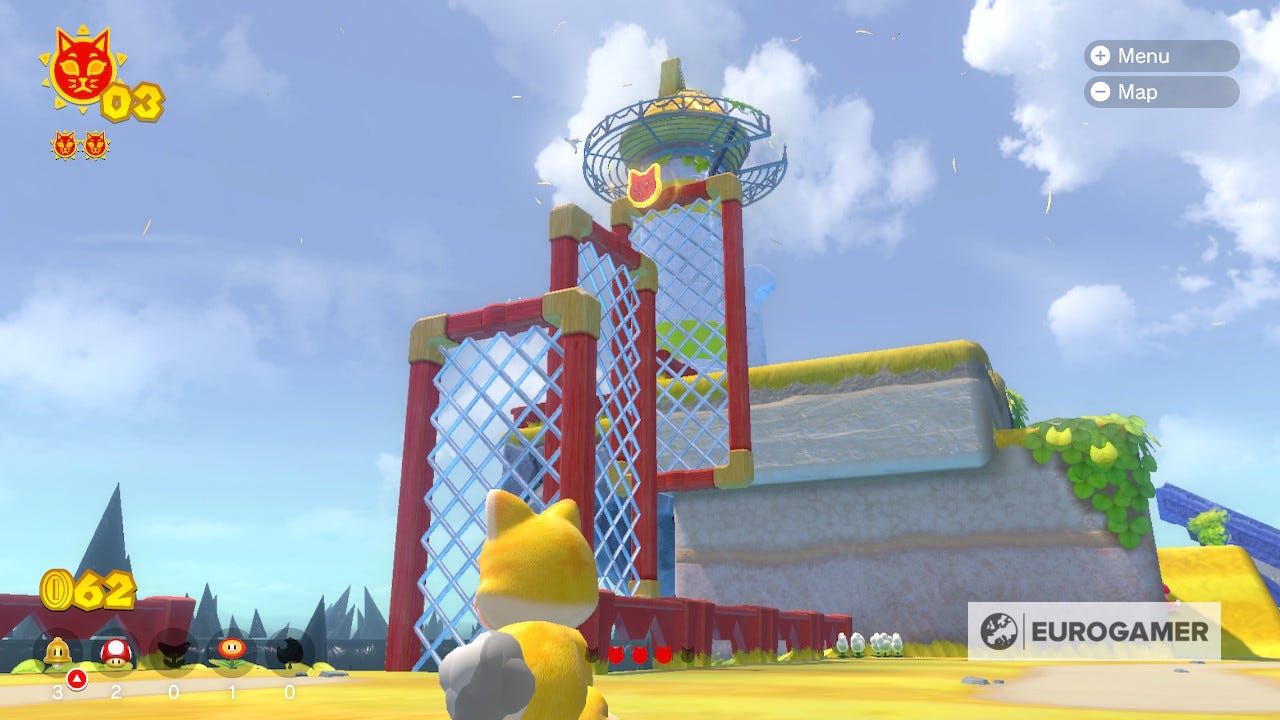
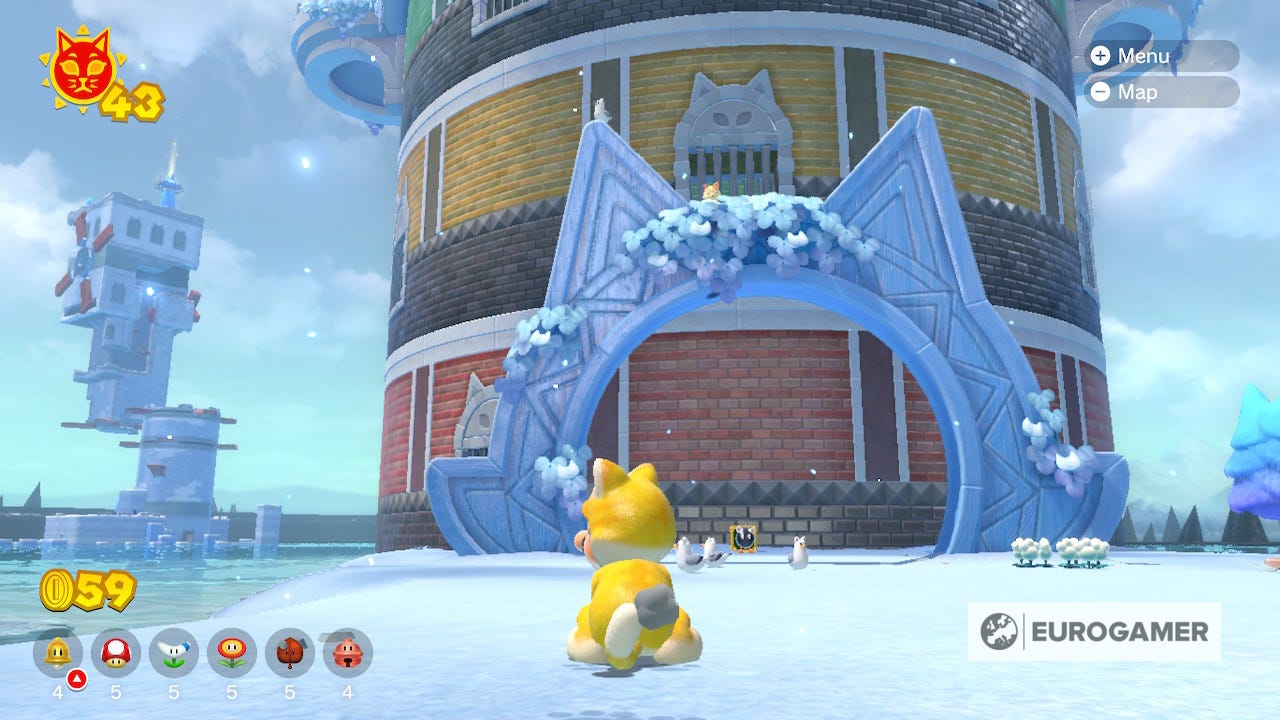
Once you've met Bowser Jr, you see a circular gate gate in front of you. This is the entrance to the Scamper Shores, the first Shine is easy enough to find though. Follow the path to the right and use the rotating nets to ascend the island.
Sprint over the narrow beam surrounded by Conkdors and continue to follow to the path up the final hill to the right to reach the Shine.
Cat Shine 3 Location
Shine 3 on this island is found along the beach sealed behind some dark blocks. Once you've found them, all you have to do is wait for Fury Bowser to awaken and destroy those blocks with his fire breath to gain the Shine.
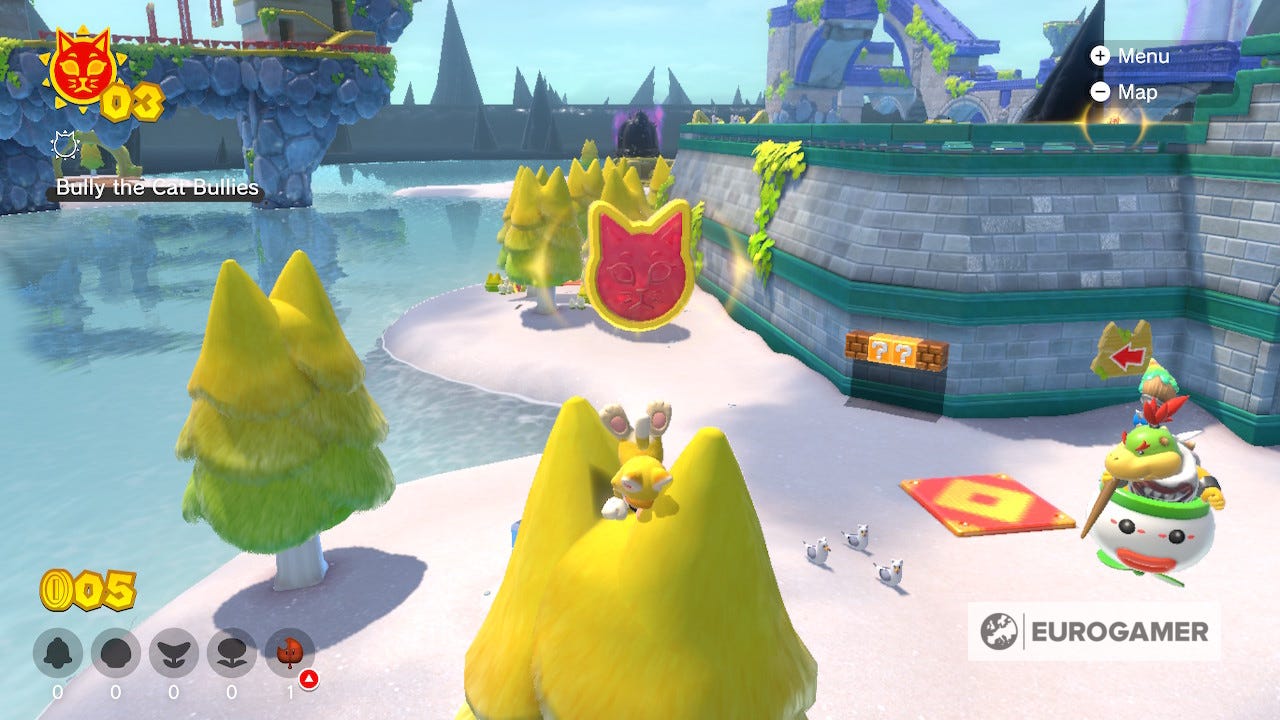
Cat Shine 4 Location
Shine 4 is acquired by finding five hidden collectibles across the Scamper Shores island. The first collectible can be found behind a rotating net on the outcrop column, you'll need to use the cat costume to climb up.
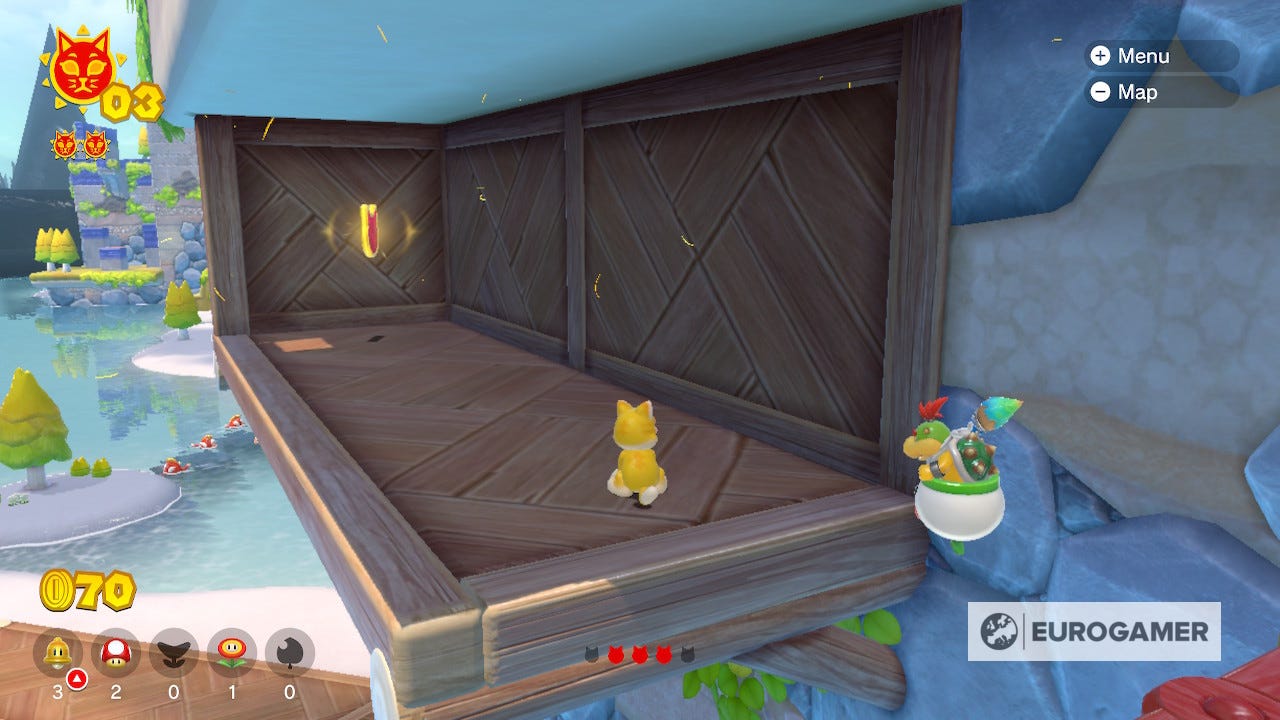
Another is hidden in a wooden corridor that can only be accessed from the first rotating net at the start of the island. Climb to the top of the net and jump backwards to reach the Shine.
The next rotating net has another collectible that you can see plainly. Simply climb to the top and jump back to reach it.
Hidden in an alcove behind some wooden crates where you encounter the kittens is another collectible.
The final collectible can be found at the top where you find the first Shine, surrounded by rotating nets, but you can reach easily from the peak.
Cat Shine 5 Location
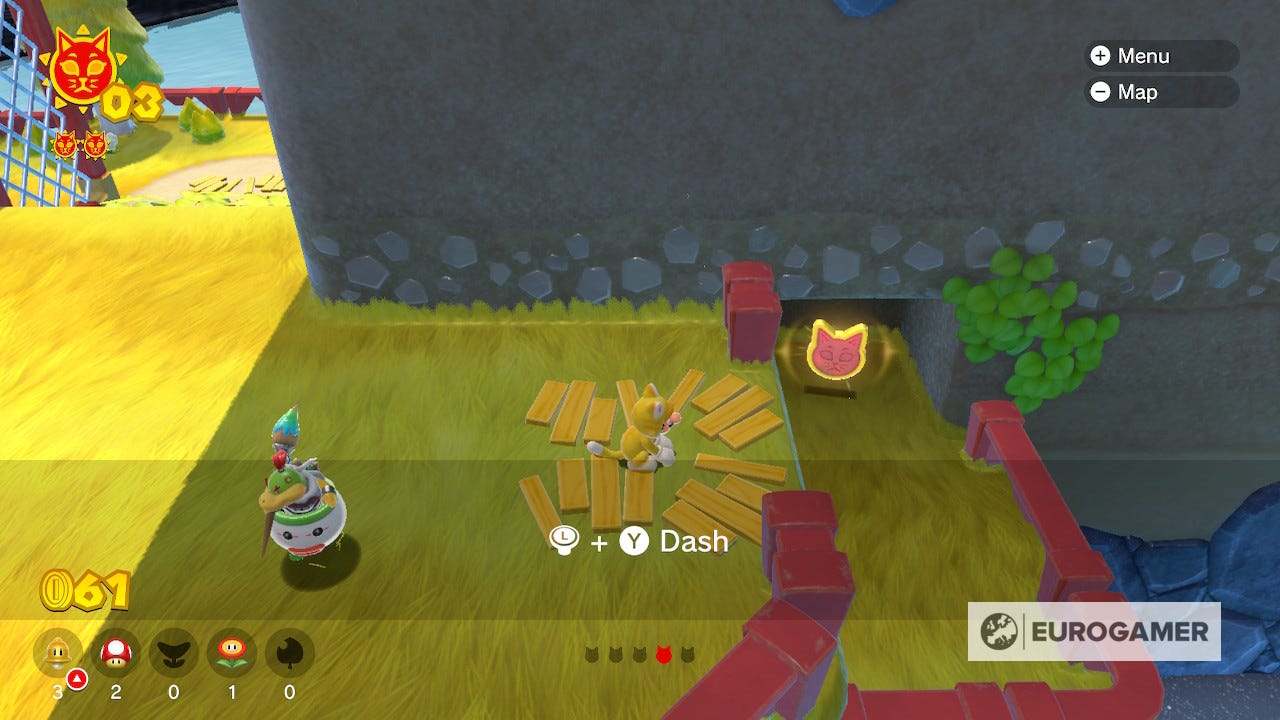
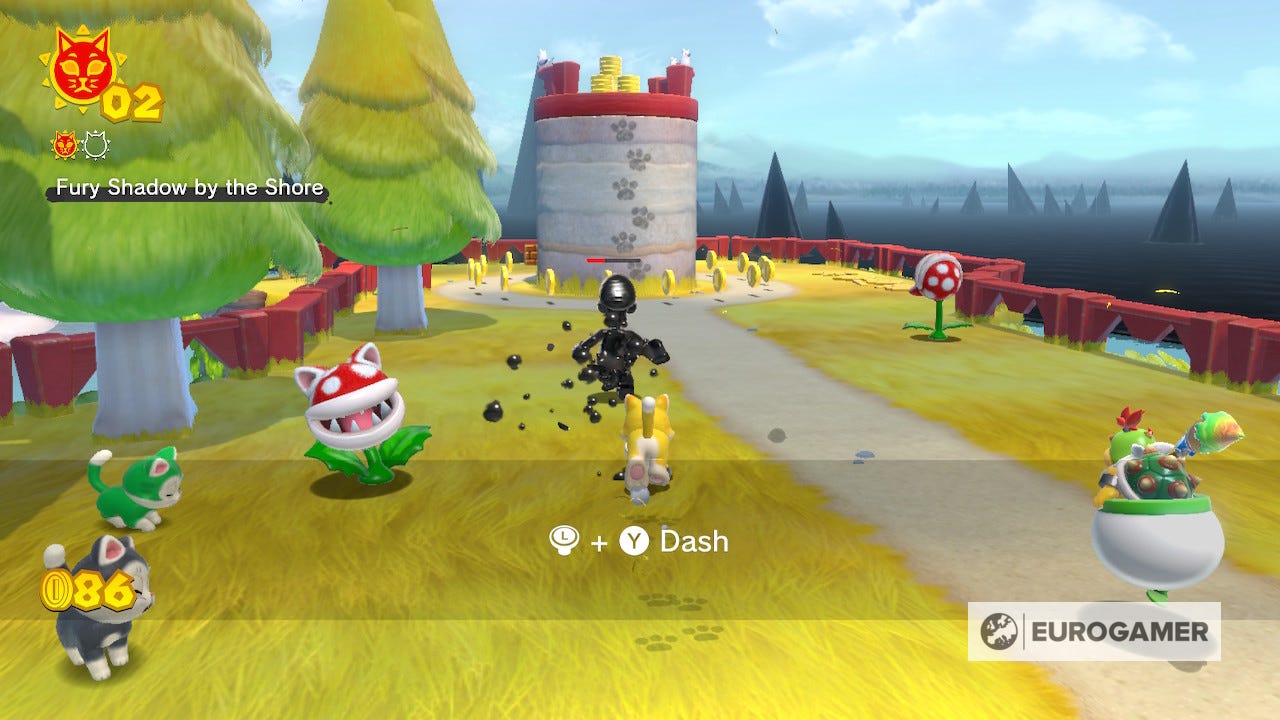
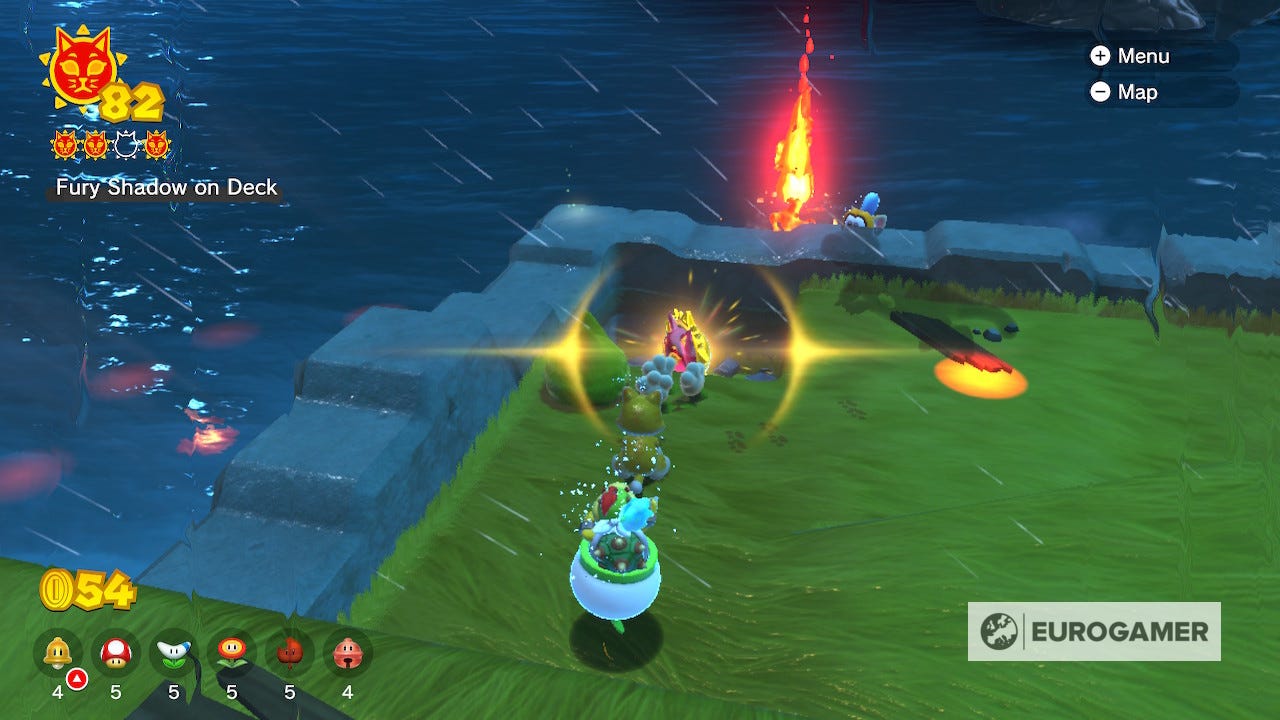
The fourth Shine at Scamper Shores requires you to leave the island and return. All you have to do is go to the giga bell and come back and you should see a inky, spikey ball floating at the beginning of the path.
Once you approach, it will transform into Dark Luigi and run away. Chase the shadow and strike it three times (easiest in cat form) to achieve the next Shine. Be careful though, as the enemies will have changed since the last time you were on the island.
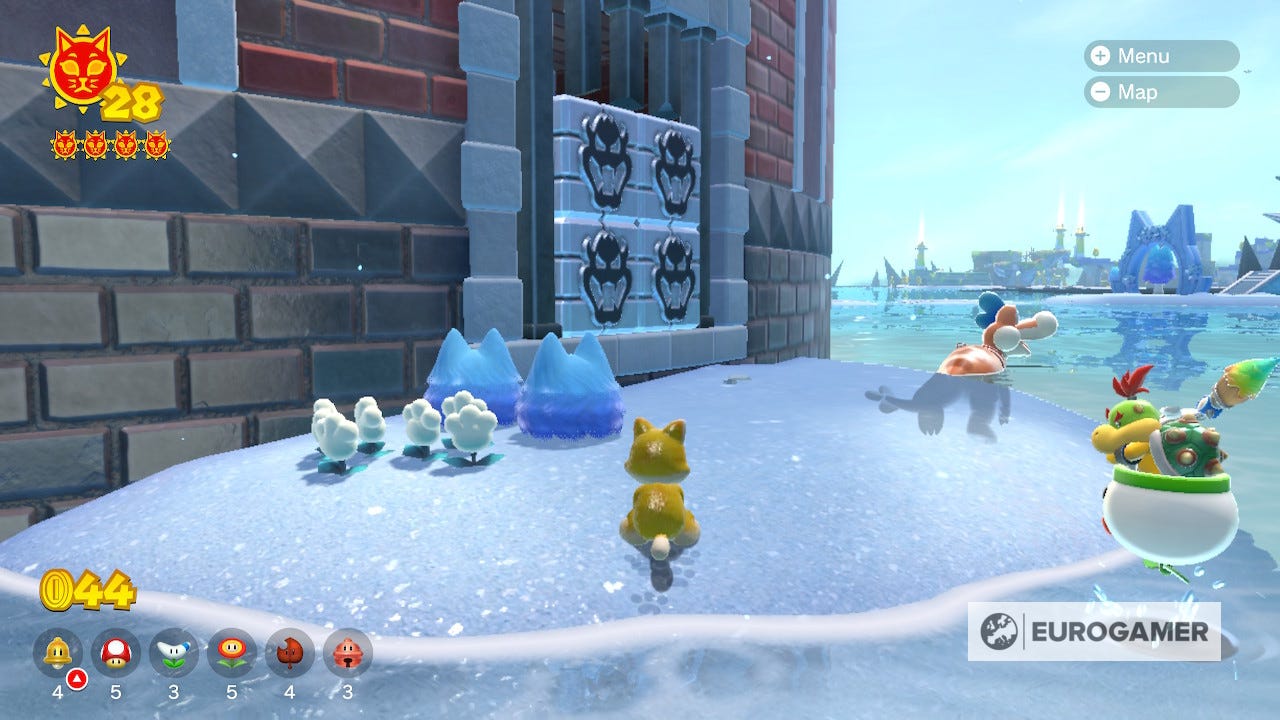
Cat Shine 6 Location
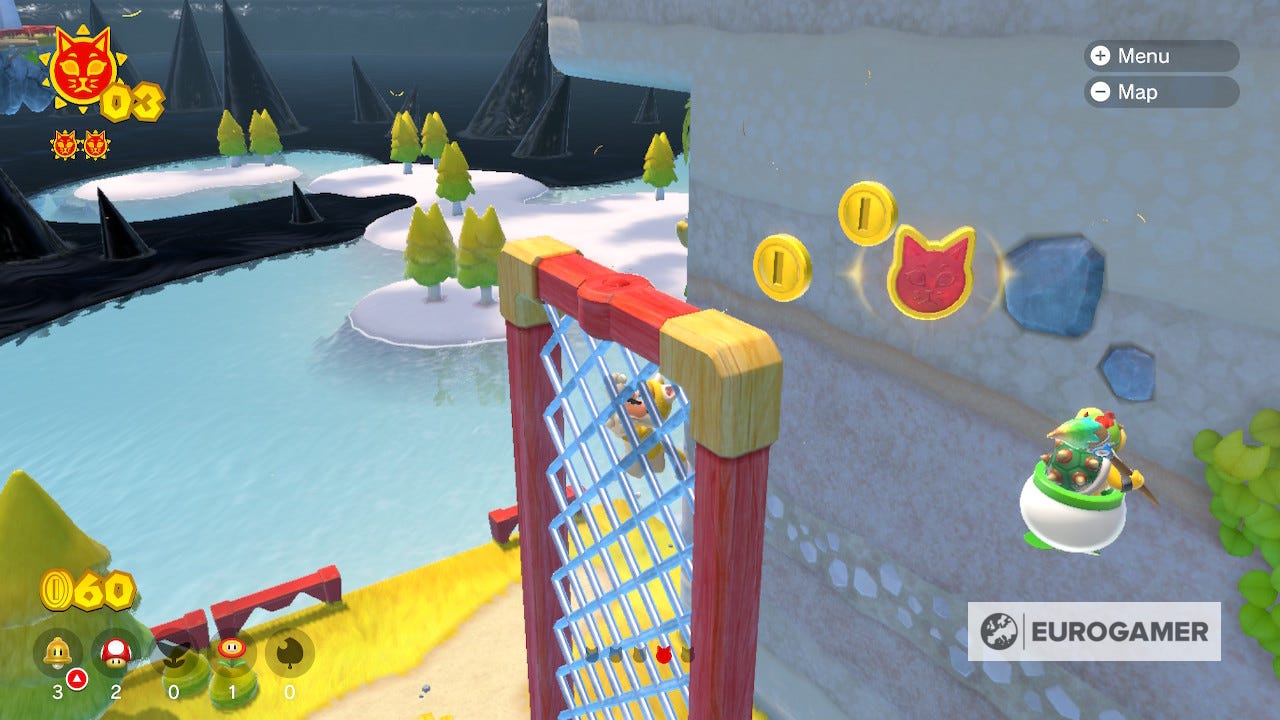
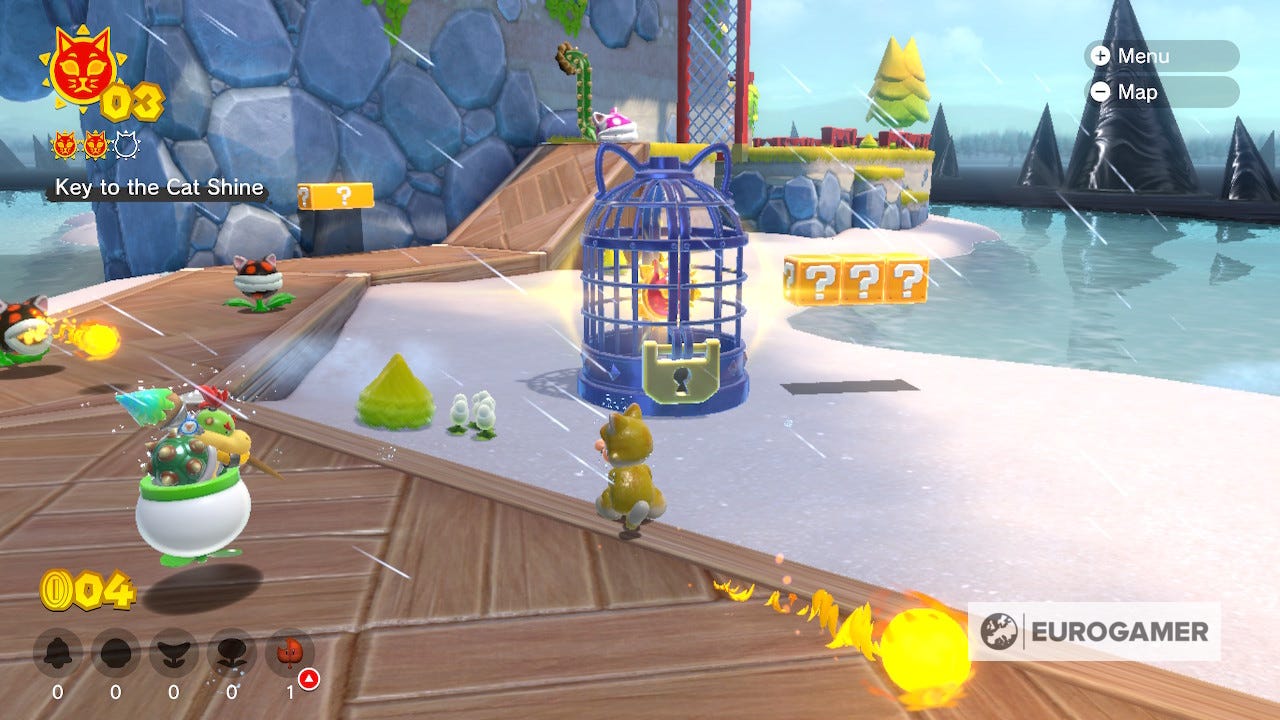
Leave the island again, and come back and you'll see a Shine locked in a cage on the beach.
You'll find the key at the top of the island near where you collect the first Shine. Once you've found it, you'll have to carry it back to the cage, but mind out for the new enemies again!
Fort Flaptrap Cat Shine locations
Cat Shine 7 Location
Make your way up the walls towards the lighthouse and you'll find a small arena with swinging traps and large enemies. Clear the enemies to reveal the Shine.
The easiest way to do that is to lure the creatures onto the trap and then jump to activate it, dropping the monster into the lava below.

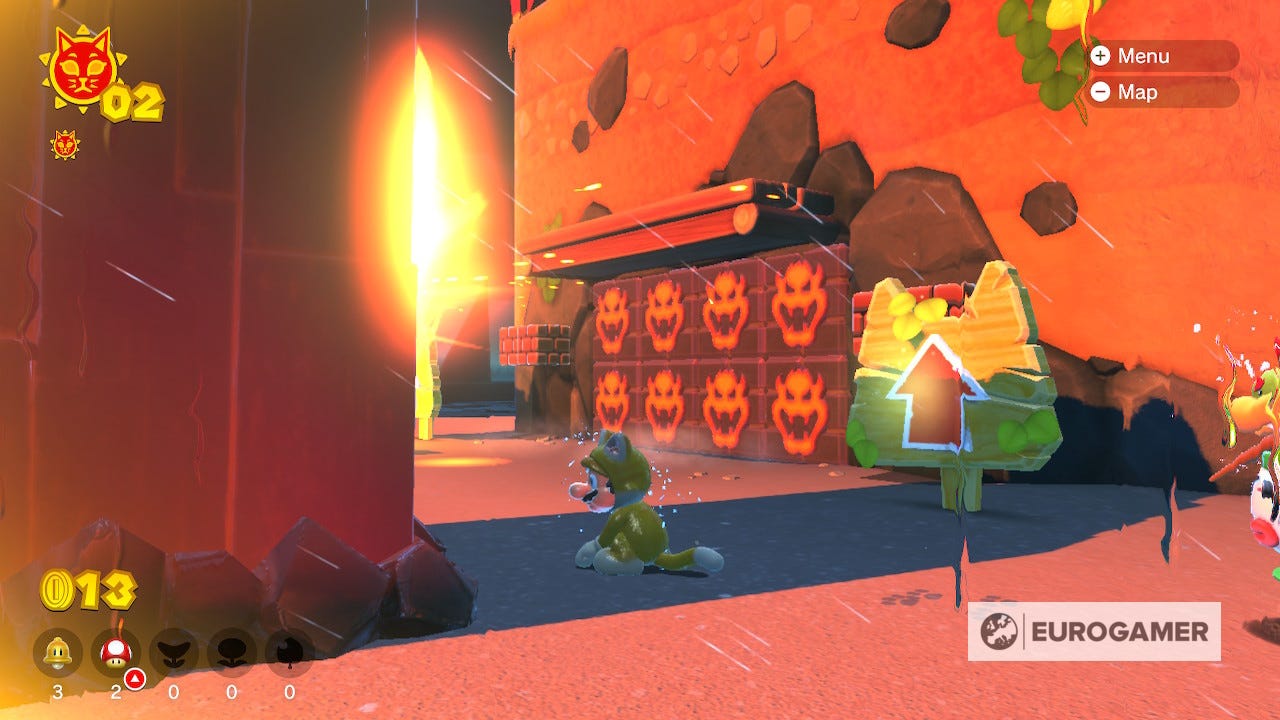
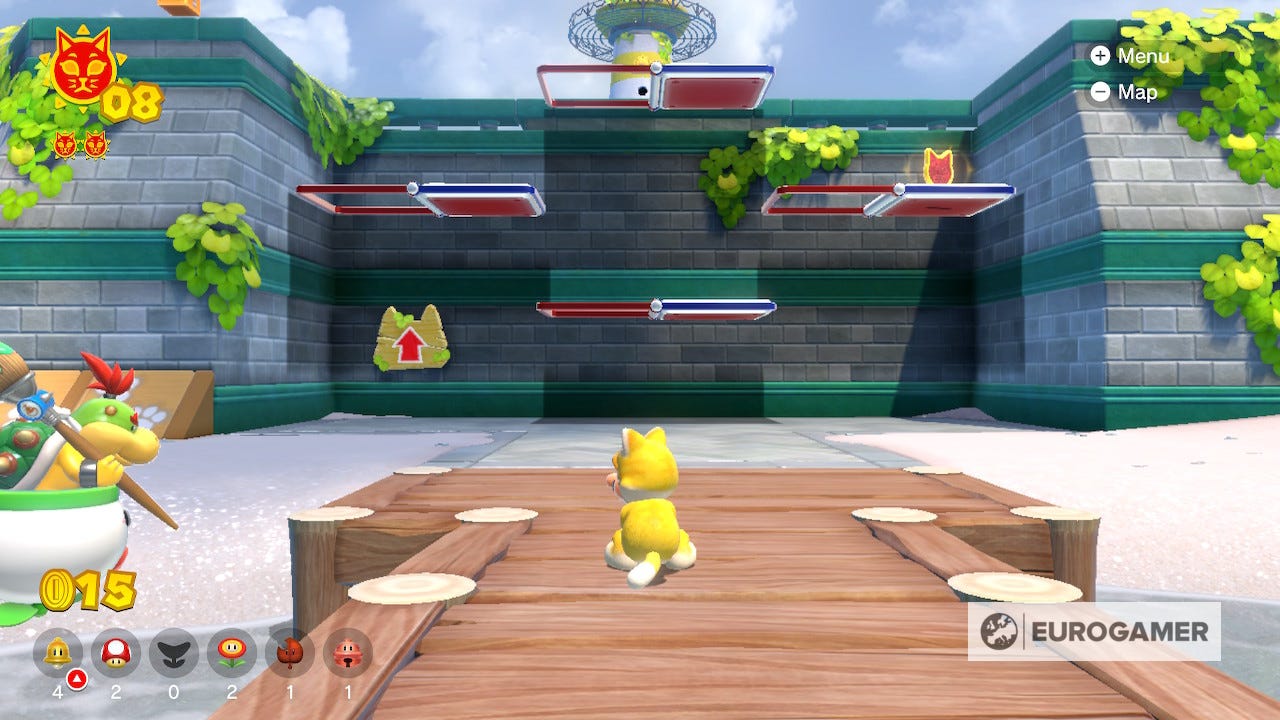
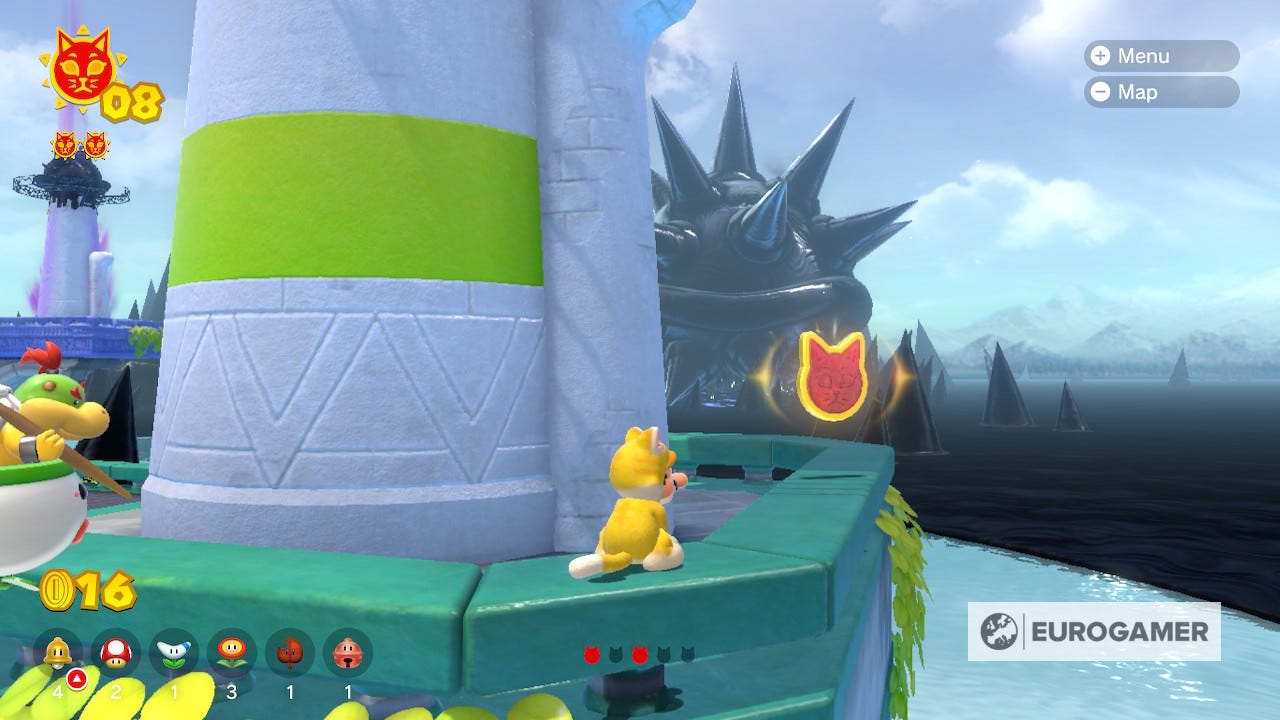
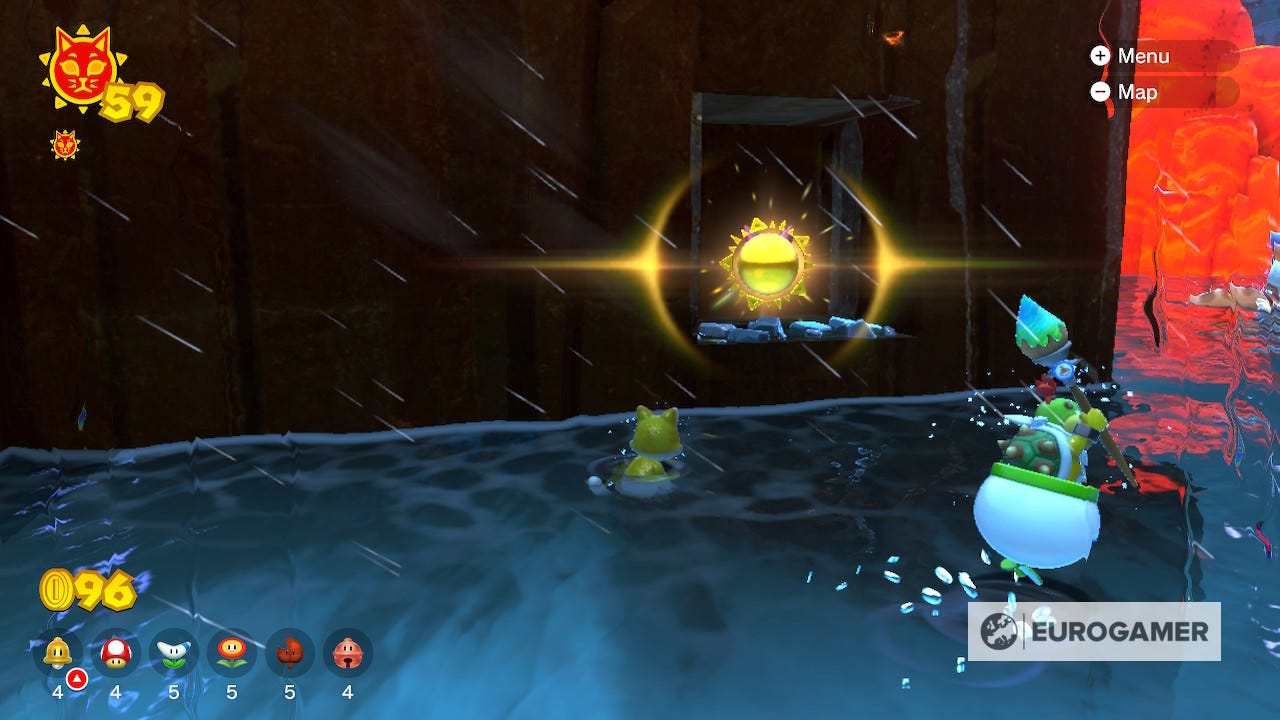
Cat Shine 8 Location
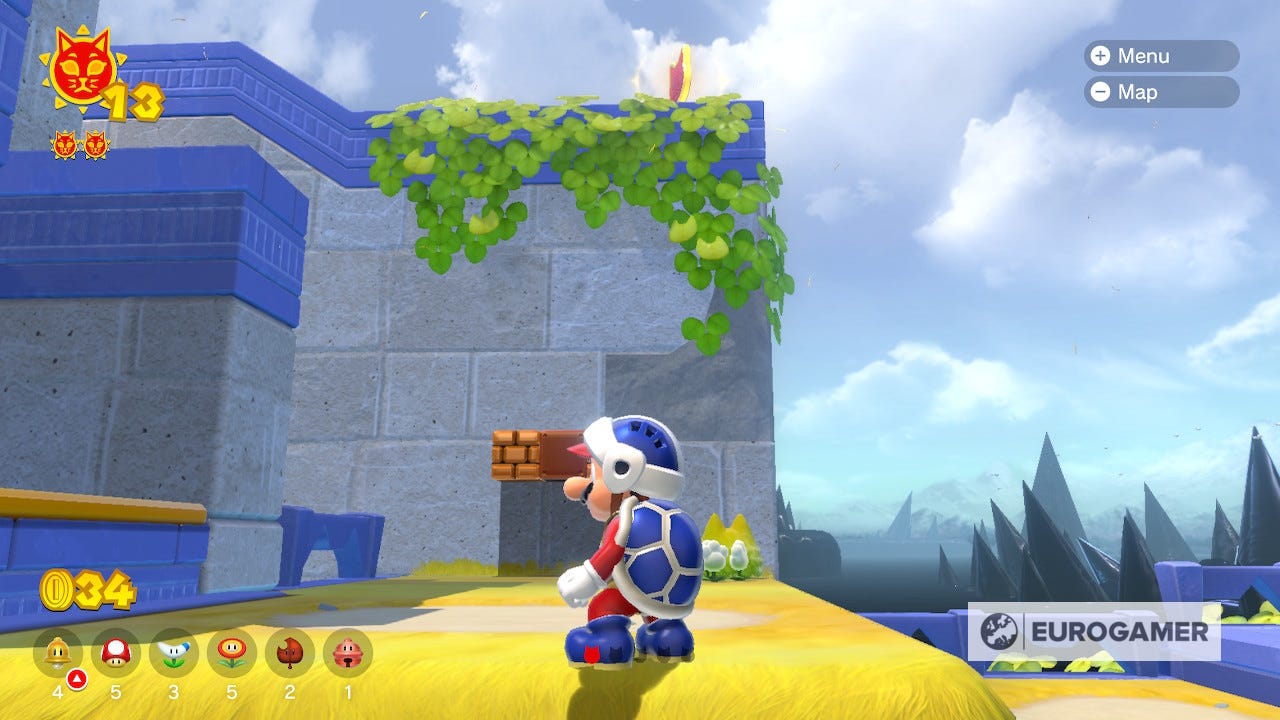
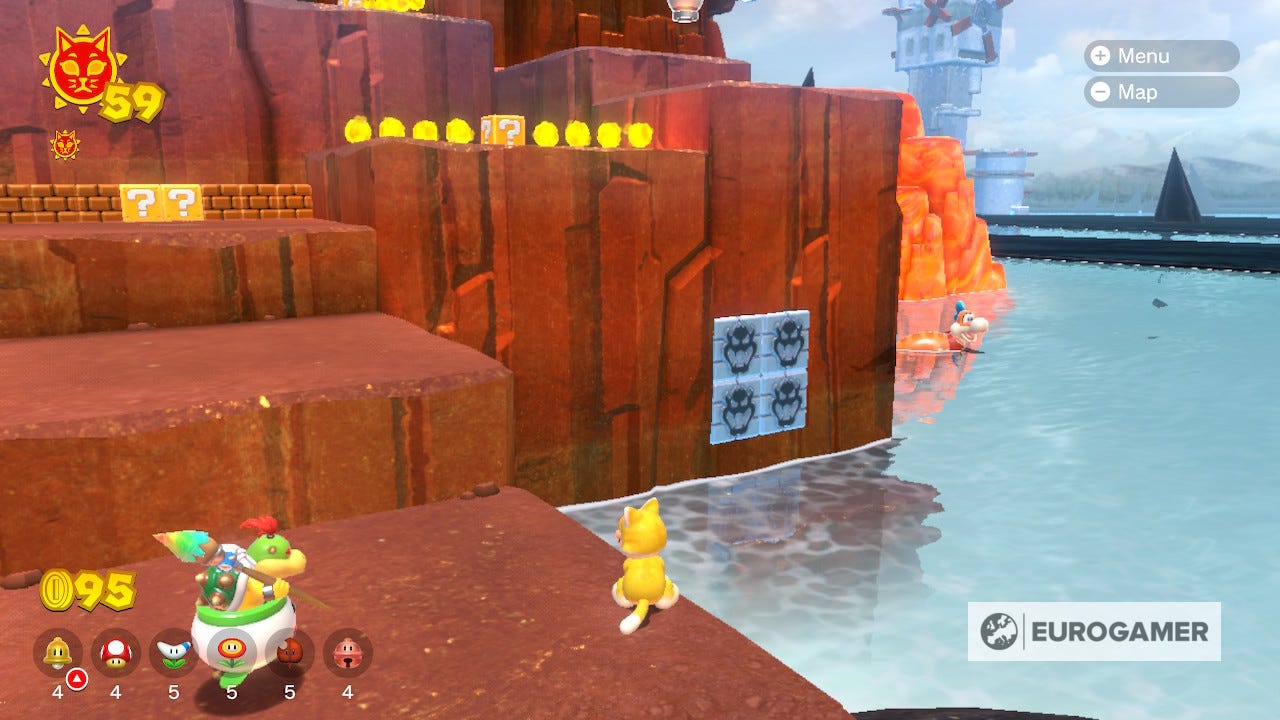
Circle the beach surrounding the fort and look for a small stack of Bowser Blocks. Simply wait for Fury Bowser to destroy them with his fire breath to reveal another Shine.
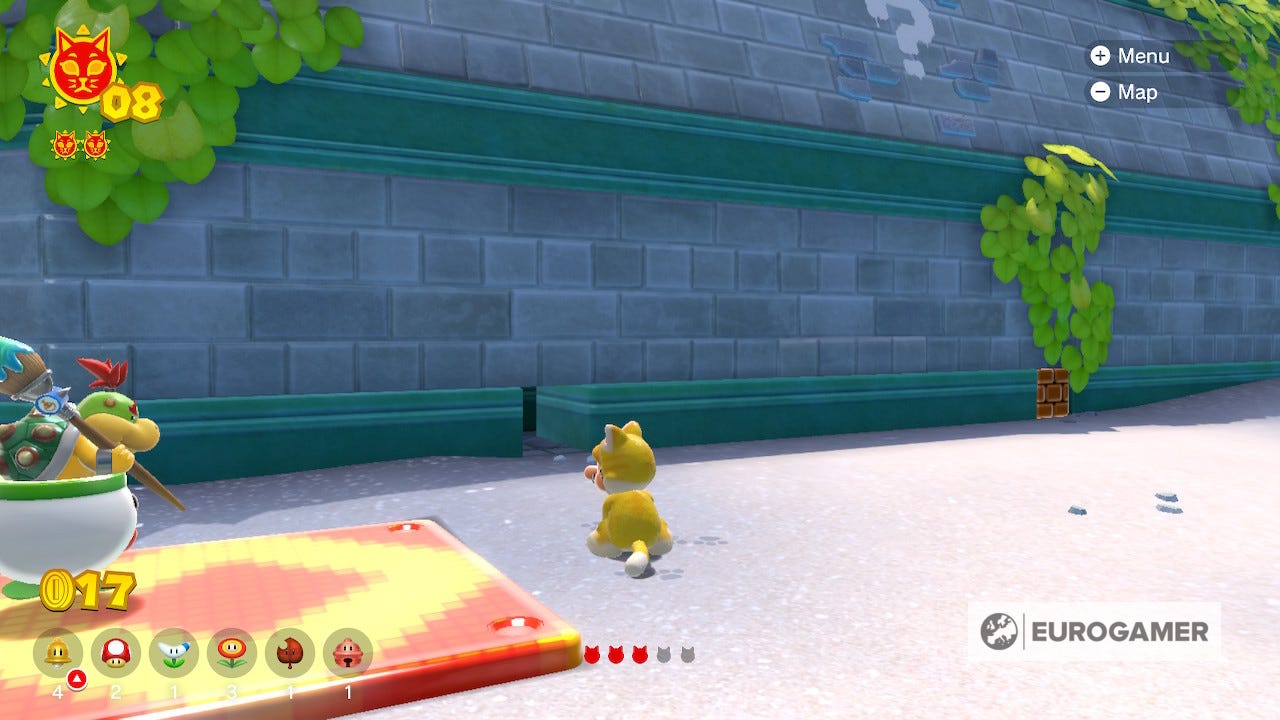
Cat Shine 9 Location
The third Shine in Fort Flaptrap is acquired by finding all five collectibles. You can see the first when you first arrive at the island, on one of the trapdoors on the fort wall.
The next can be found to the right, hidden amongst the second cluster of trees.
The third is at the top of a tree further up the beach. You don't have to be in a cat costume to climb trees so you can reach it easily. If the tree isn't there for any reason, simply leave the island and return to respawn the tree.
After that, you can find the fourth collectible behind the lighthouse.
The final one is found on the beach on the opposite side of the fort. You'll need a cat costume to smash through the bricks wedged into the wall and reveal a hidden passage with the collectible in the middle.
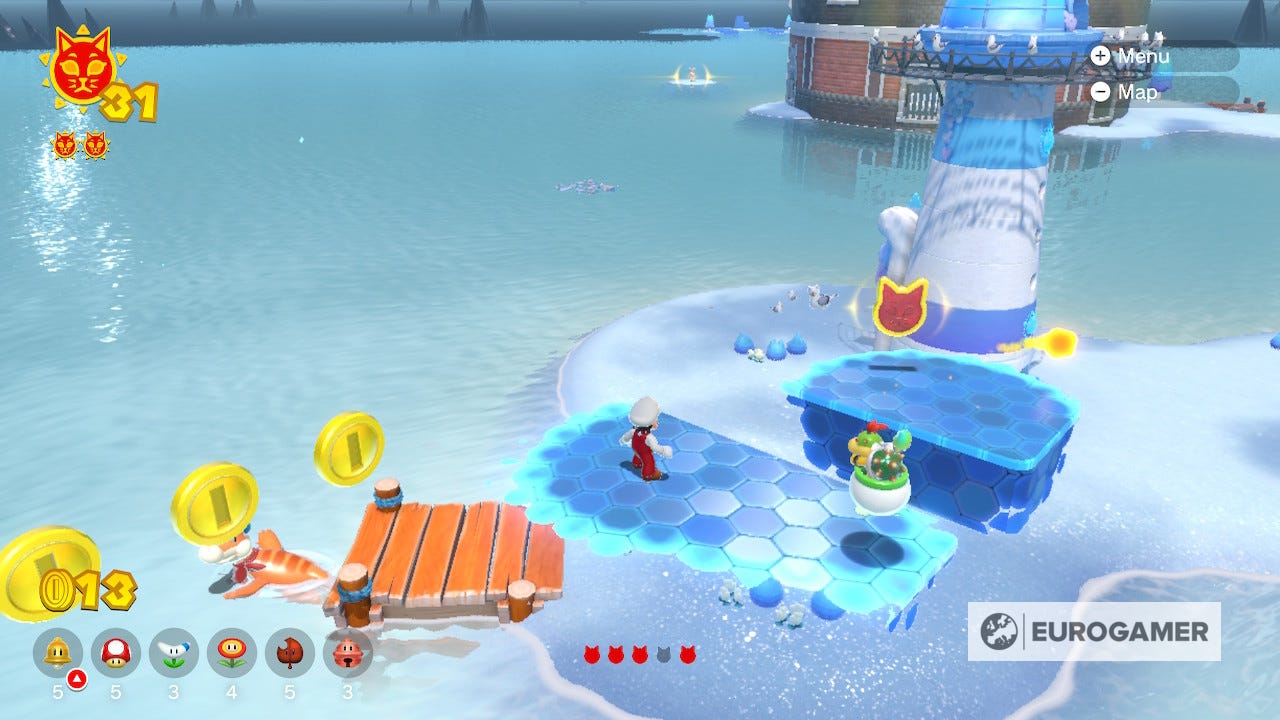
Cat Shine 10 Location
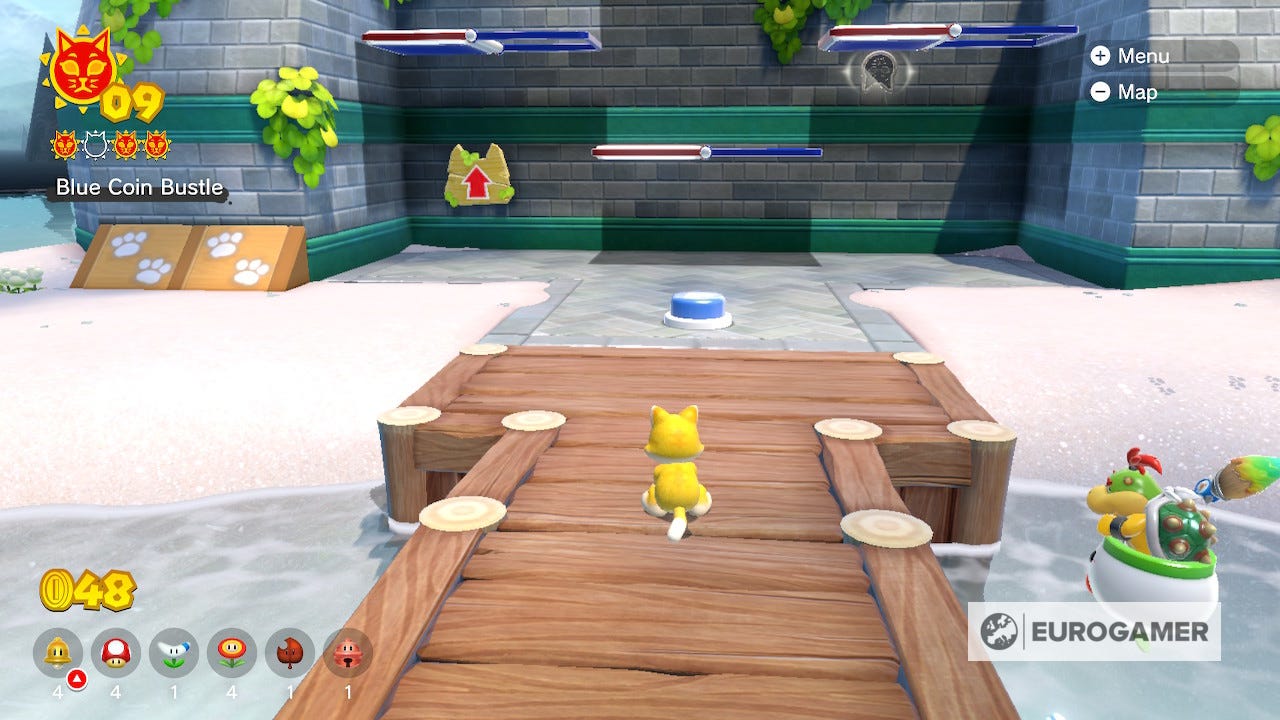
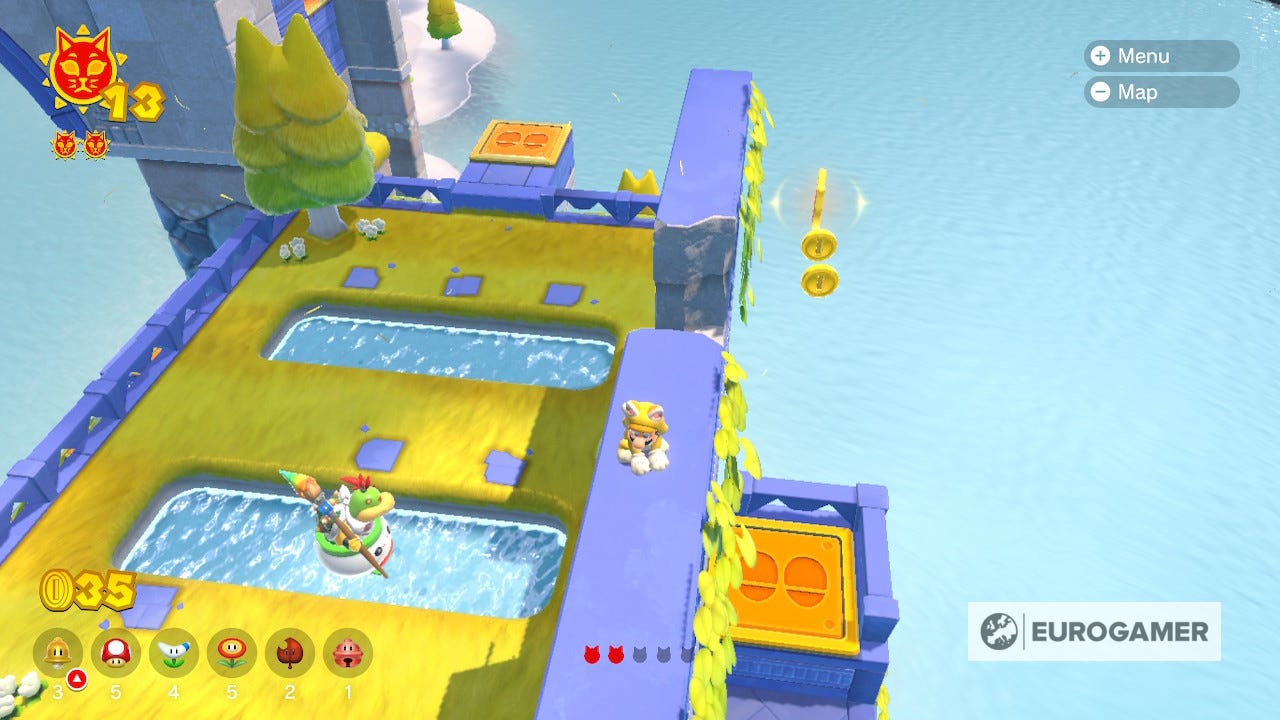
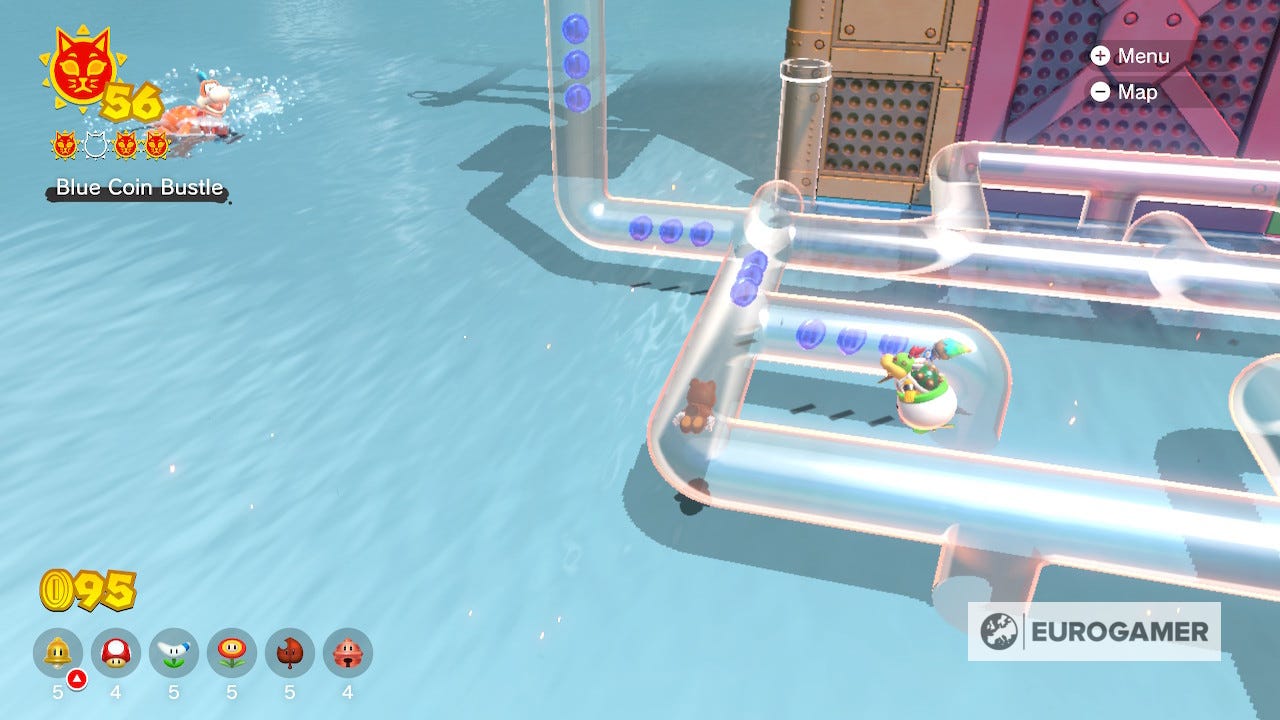
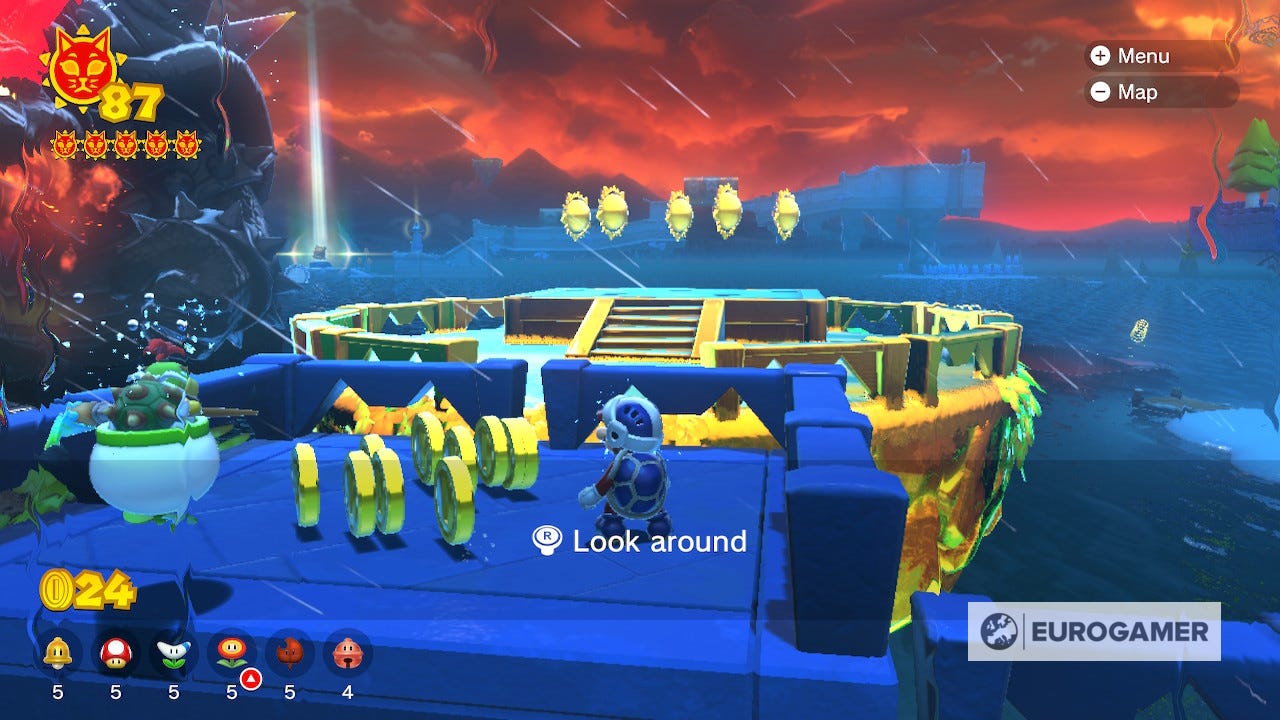
Leave the island and return to find a big blue button at the base of the fort walls. Smashing it starts a mad dash to collect three sets of blue coins before they disappear to reveal the next Shine.
You'll have to plan your jumps well to make sure you collect all the coins, but if you run out of time you can always start again.
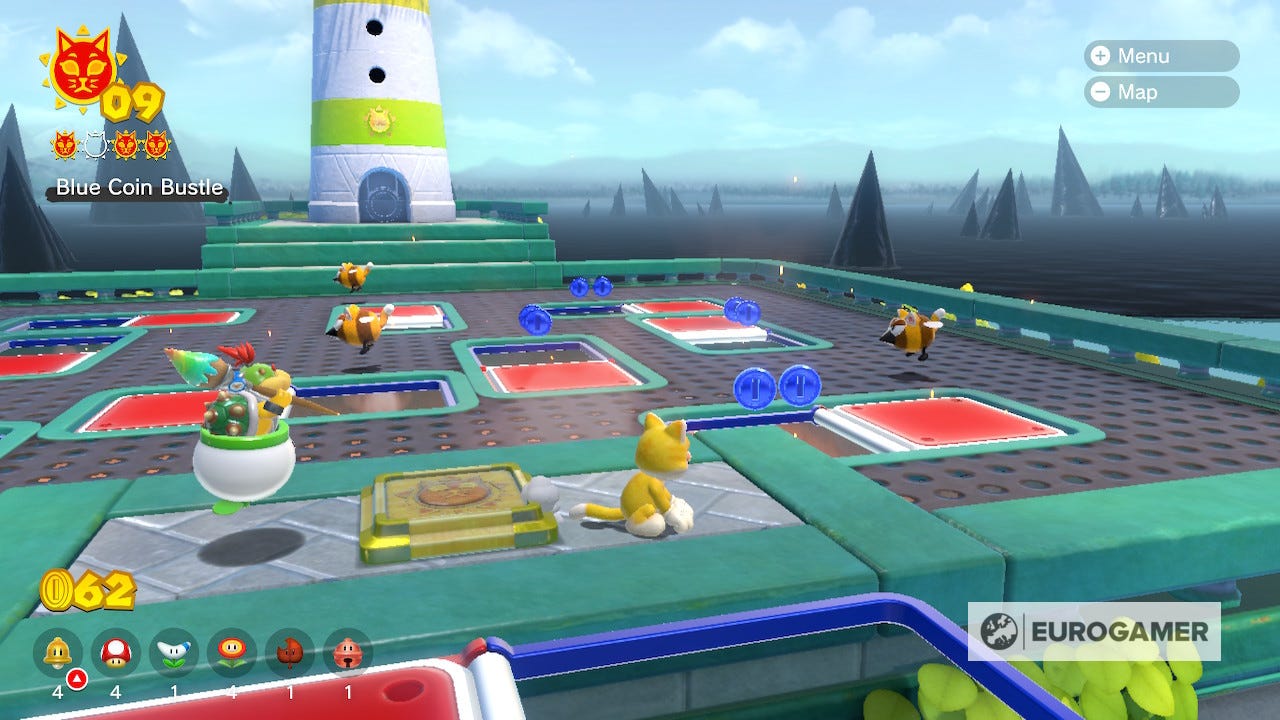
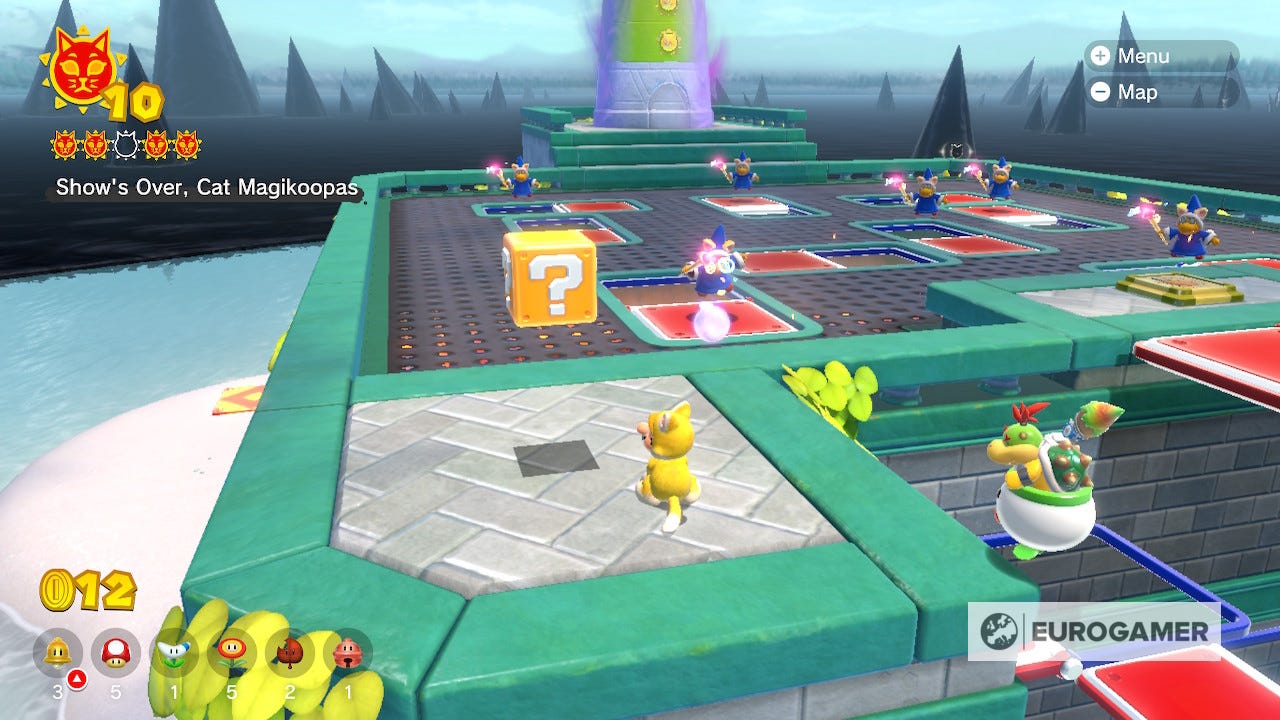
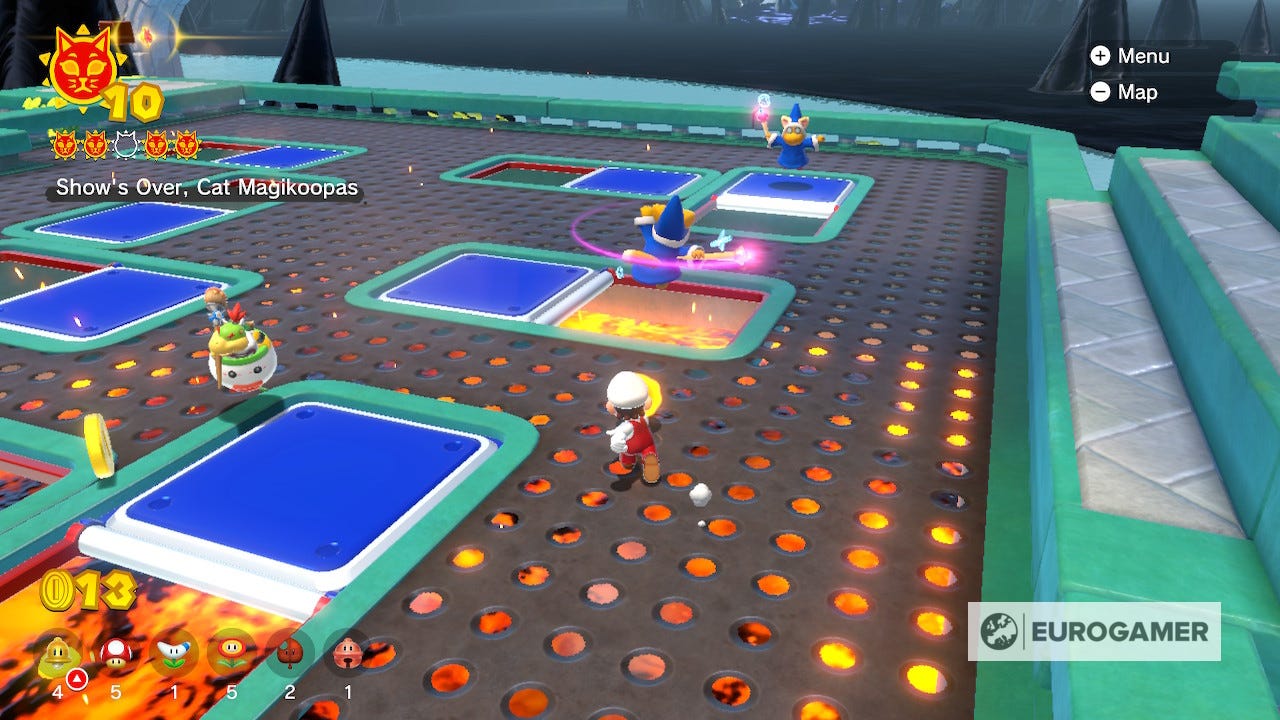
Cat Shine 11 Location
The final Shine at Fort Flaptrap requires you to once again leave and come back after completing the blue coins. Climb the fort walls and find several Magikoopa floating above the trapdoors. You won't be able to drop them into the lava but you'll still have to get rid of them to uncover the Shine.
The question mark box to the left contains a power flower that can help.
Pounce Bounce Isle Shine locations
Cat Shine 12 Location
The first Shine on Pounce Bounce Isle is found by following the obstacle course as its laid out. You'll have to use several bouncepads and avoid some enemies to make it to the Shine which can be seen at the base of the lighthouse.
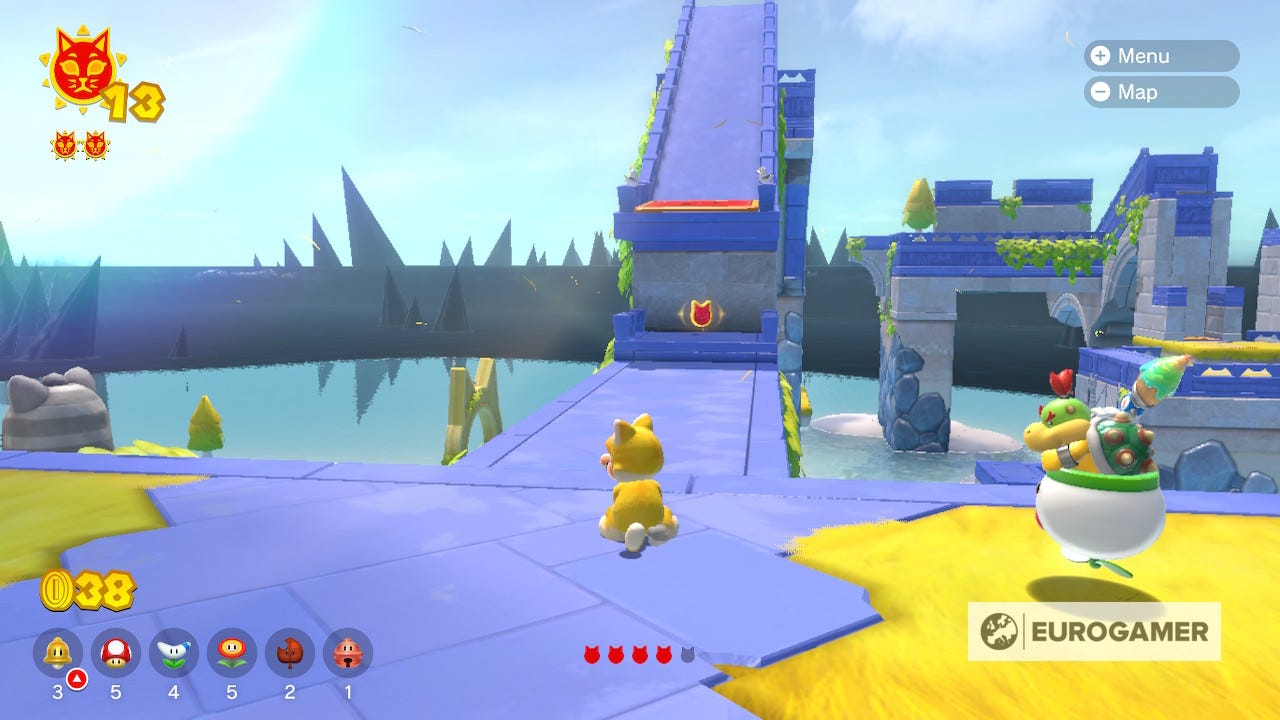
Cat Shine 13 Location
Cat Shine 13 requires Bowser to destroy the Bowser Blocks in your way. You can find them on the shore, to the left of the first large bouncepad you come across near the entrance.
Cat Shine 14 Location
There are five collectibles needed to unlock the third Shine on Pounce Bounce Island. You can find the first atop a squad of matching cat soldiers.
The second can be found on the large wall behind the marching cat soldiers. You can climb up as a cat, or use the bouncepads to find a way up.
The third collectible is hiding behind the wall to the right of the boomerang enemies further up the island.
The fourth is further ahead still. After the series of fouring moving bouncepads, you'll see it floating past the barriers to the right. If you wait for Fury Bowser, he'll create platform you can walk across, otherwise you can jump for it.
The final collectible is near the lighthouse, hidden underneath the large bouncepad you used to get there.
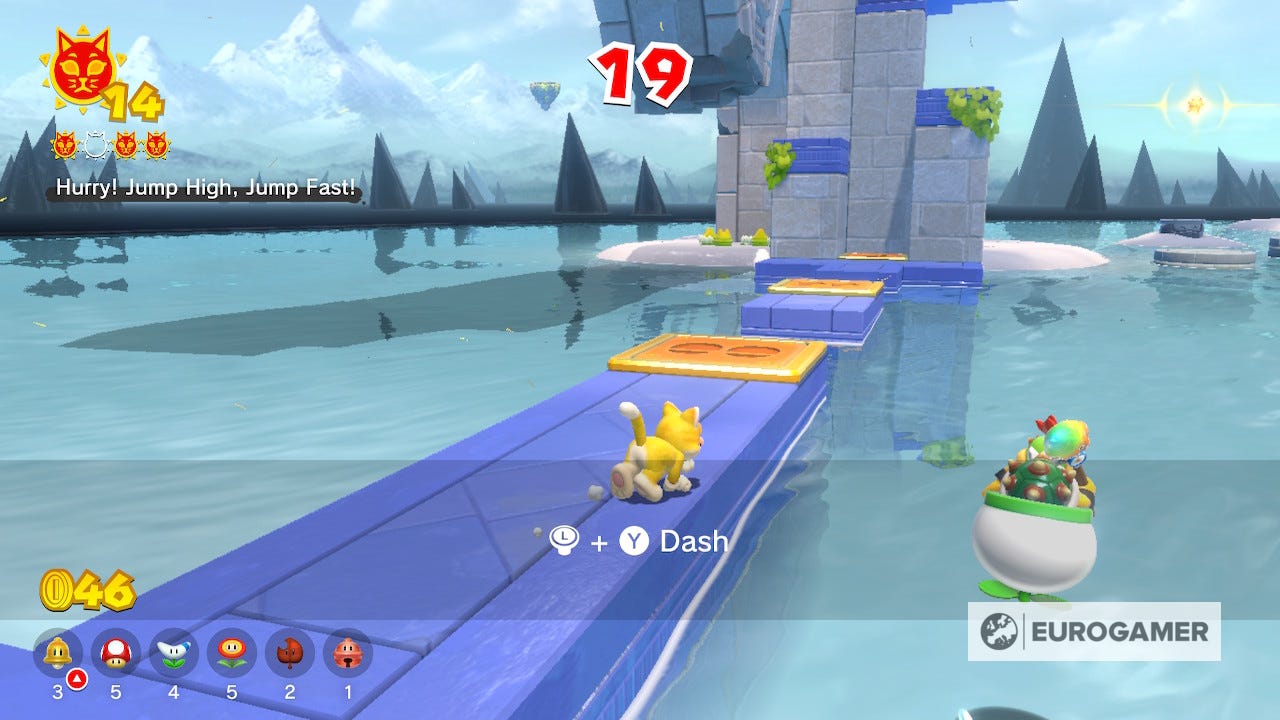
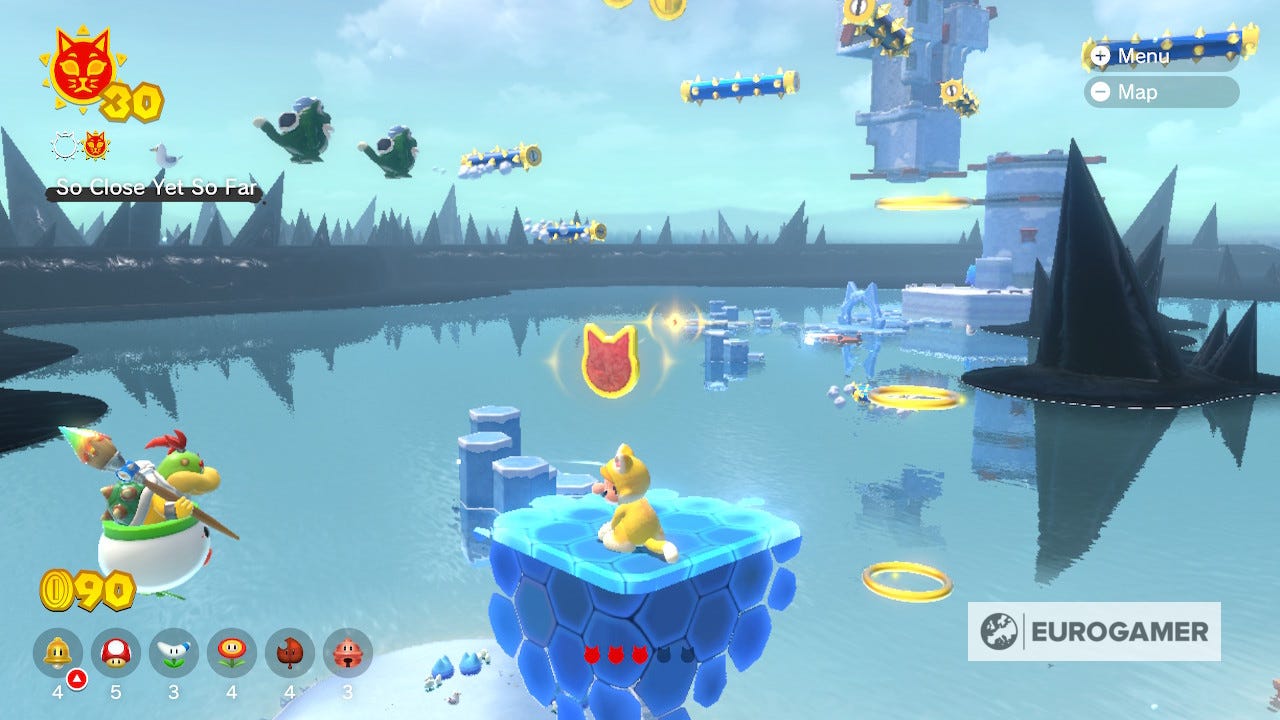
Cat Shine 15 Location
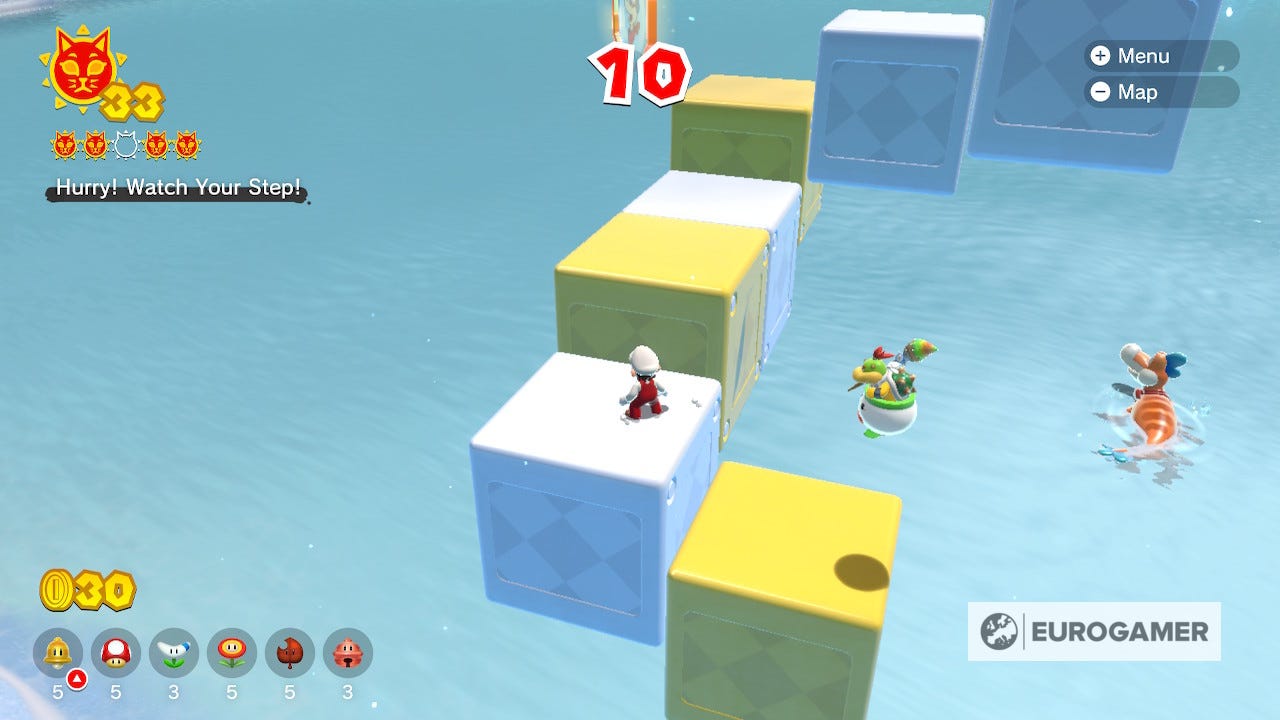
Once again you'll have to leave Pounce Bounce Isle and return in order to get Shine 15. When you arrive again, you should see several signs pointing to a giant button. Hit the button and a time trial will appear on a new area of the isle.
You'll have twenty seconds to reach the submit via this new route, so you'll need to sprint in order to earn this Cat Shine.

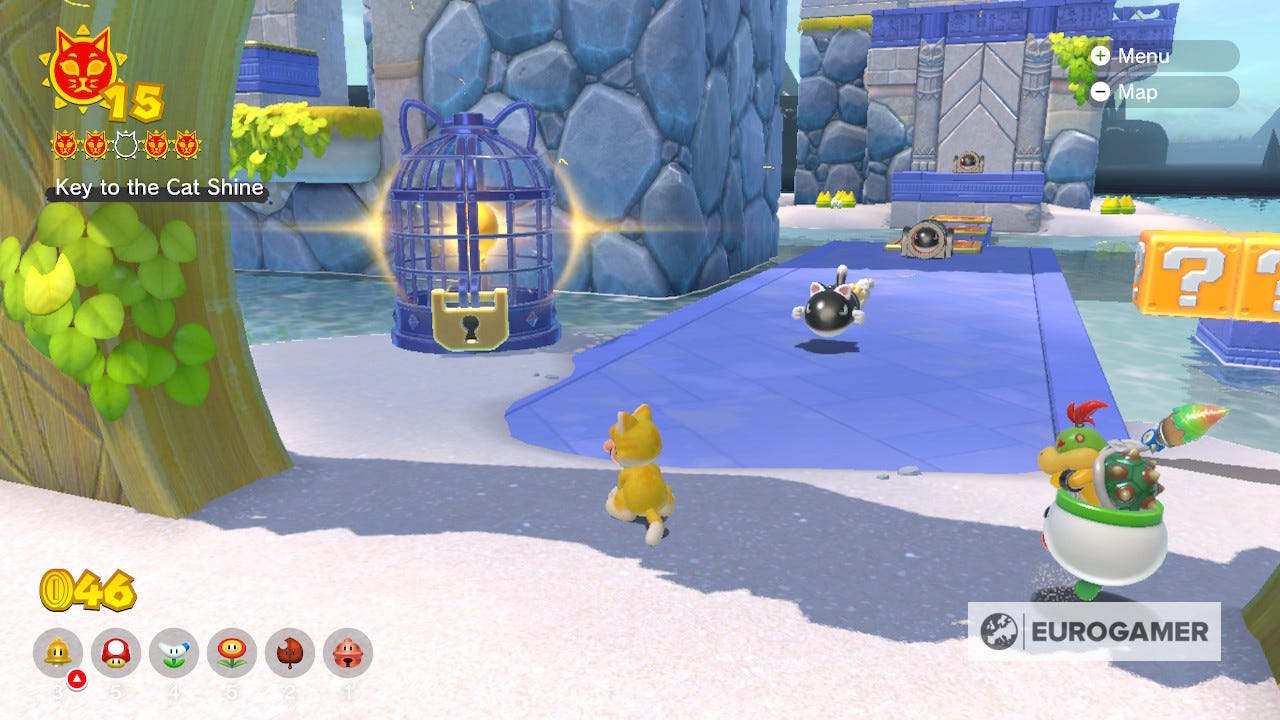
Cat Shine 16 Location
Leave and return once more and you'll find a Shine at the entrance locked in a cage. Bullet Bills now cover the isle so be careful as you explore, and you can find the key up the wall that was hiding the third collectible.
Bring back to the cage but be careful, if the key falls into the water you'll have to go back to the wall to retrieve it.
Lakeside Giga Bell Shine locations
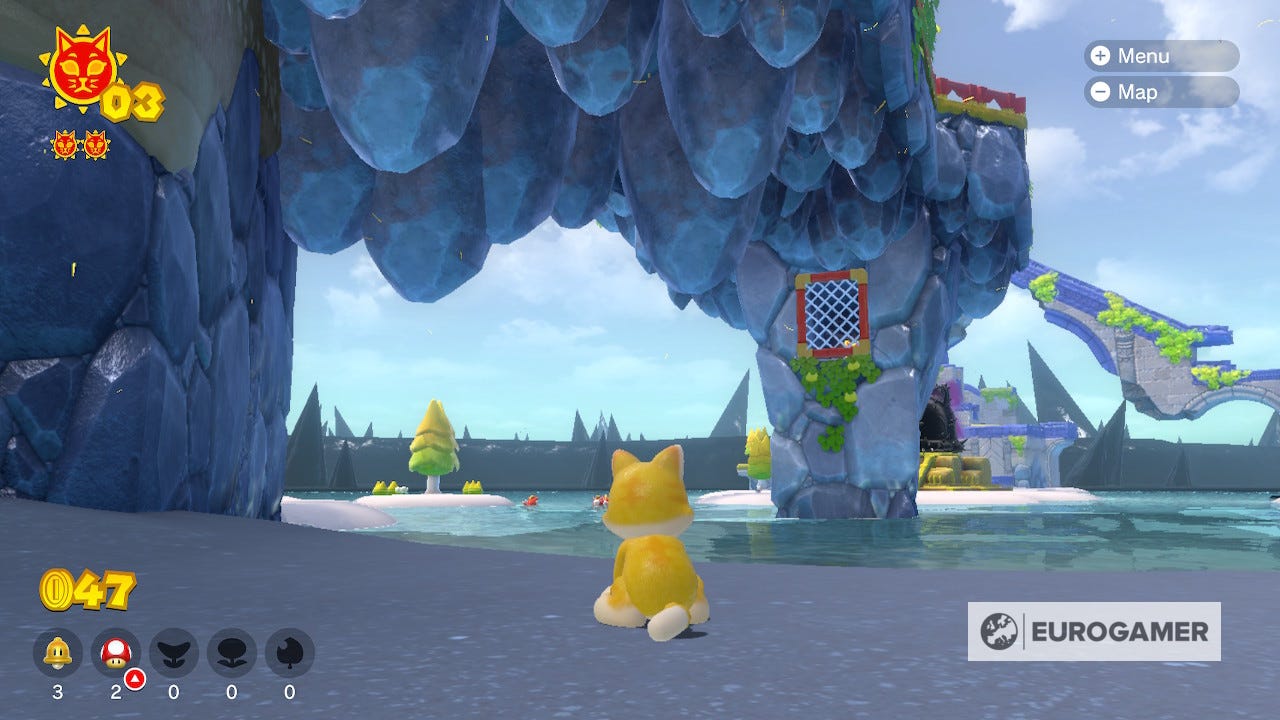
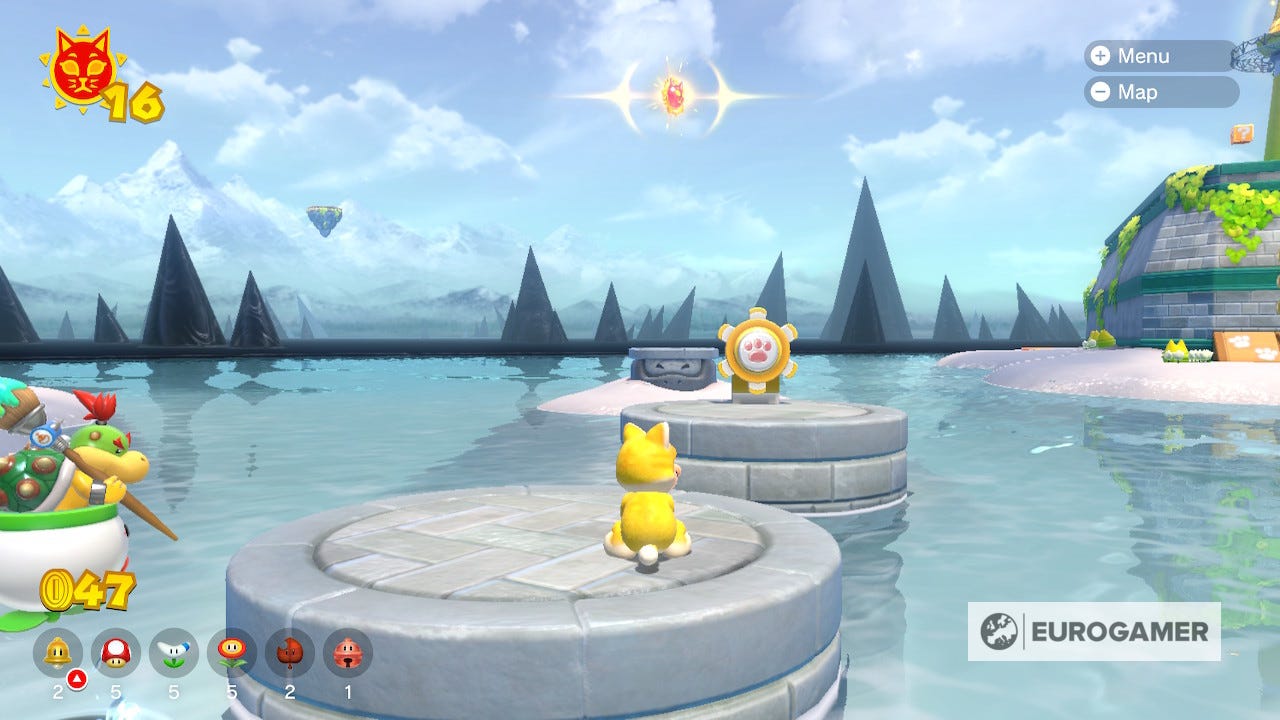
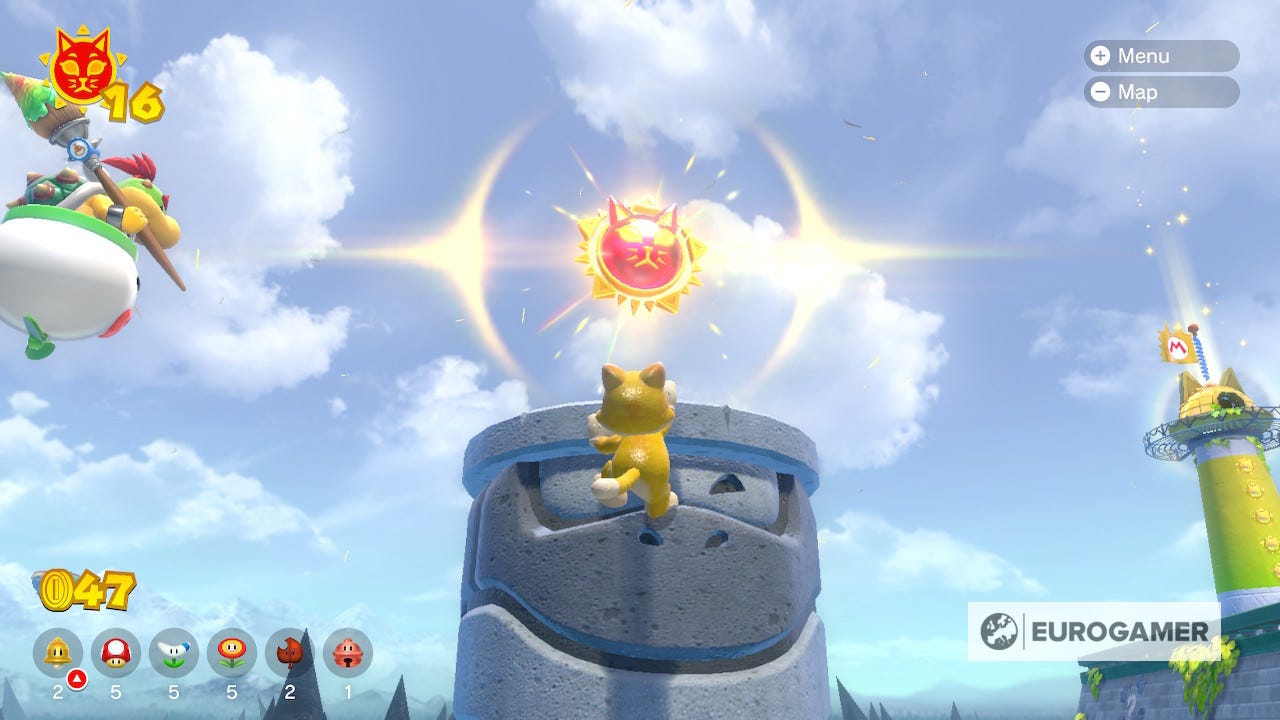
Cat Shine 17 Location
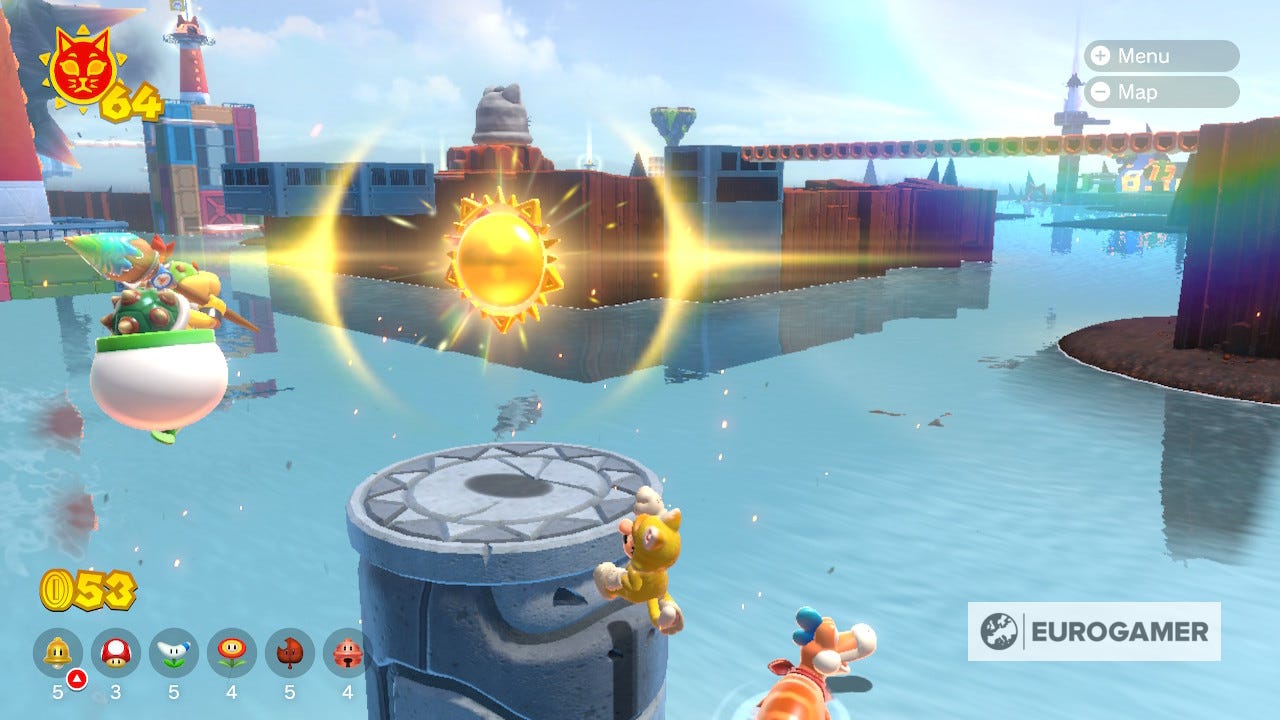
After completing the first Shine on Pounce Bounce Isle, you might notice a small area is cleaned of the black ink nearby. To get the Shine on these platforms, simply use a cat costume to spin the cog (by hitting it multiple times with Y) then climb the emerging pillar before it sinks to reach the Shine.
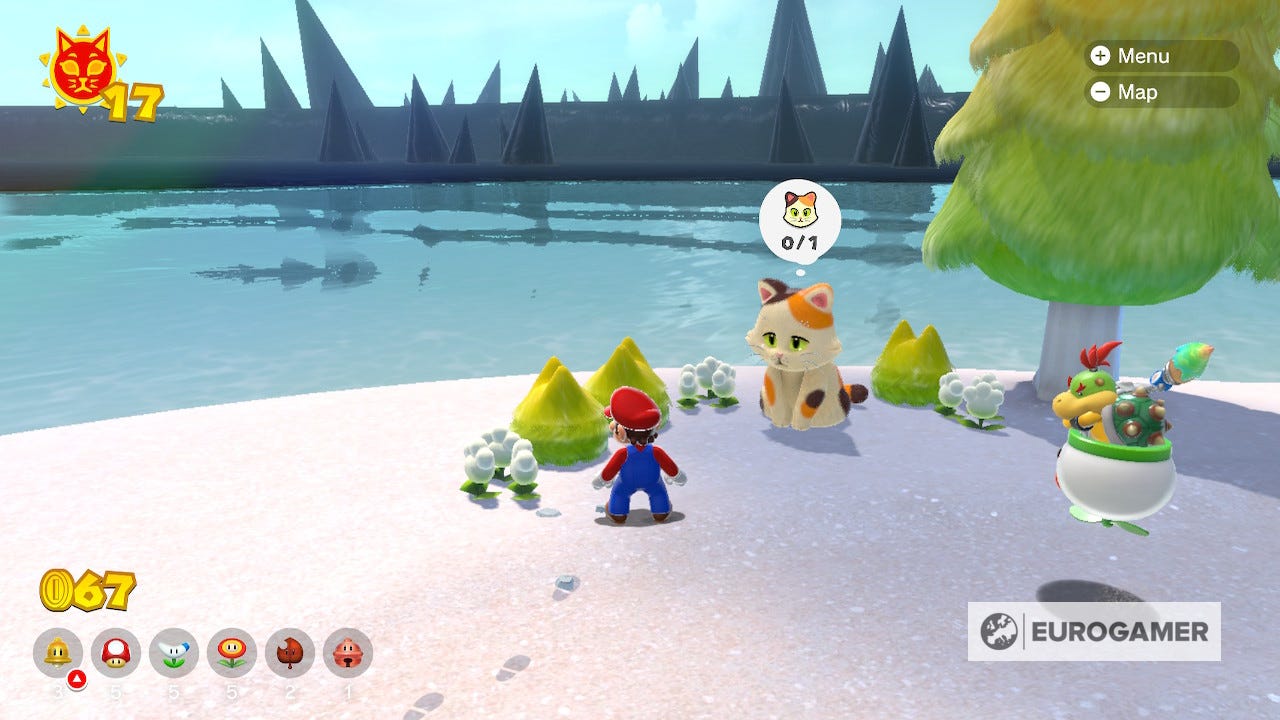
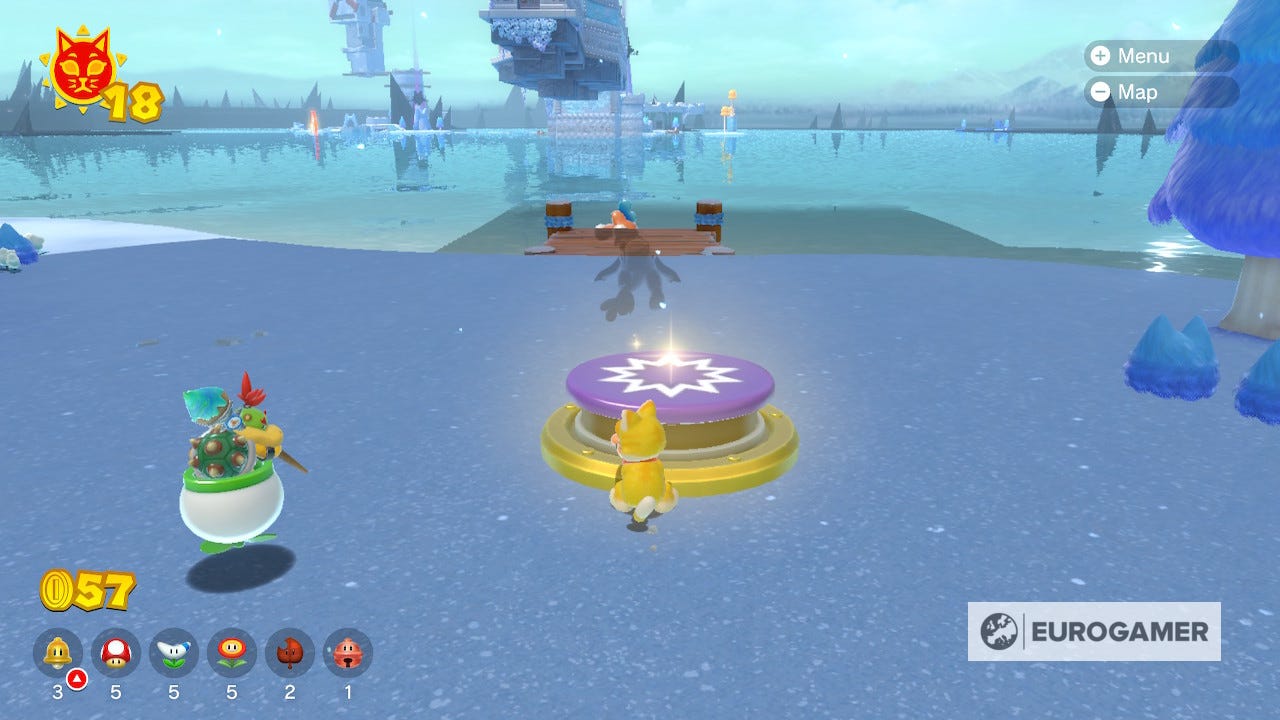
Cat Shine 18 Location
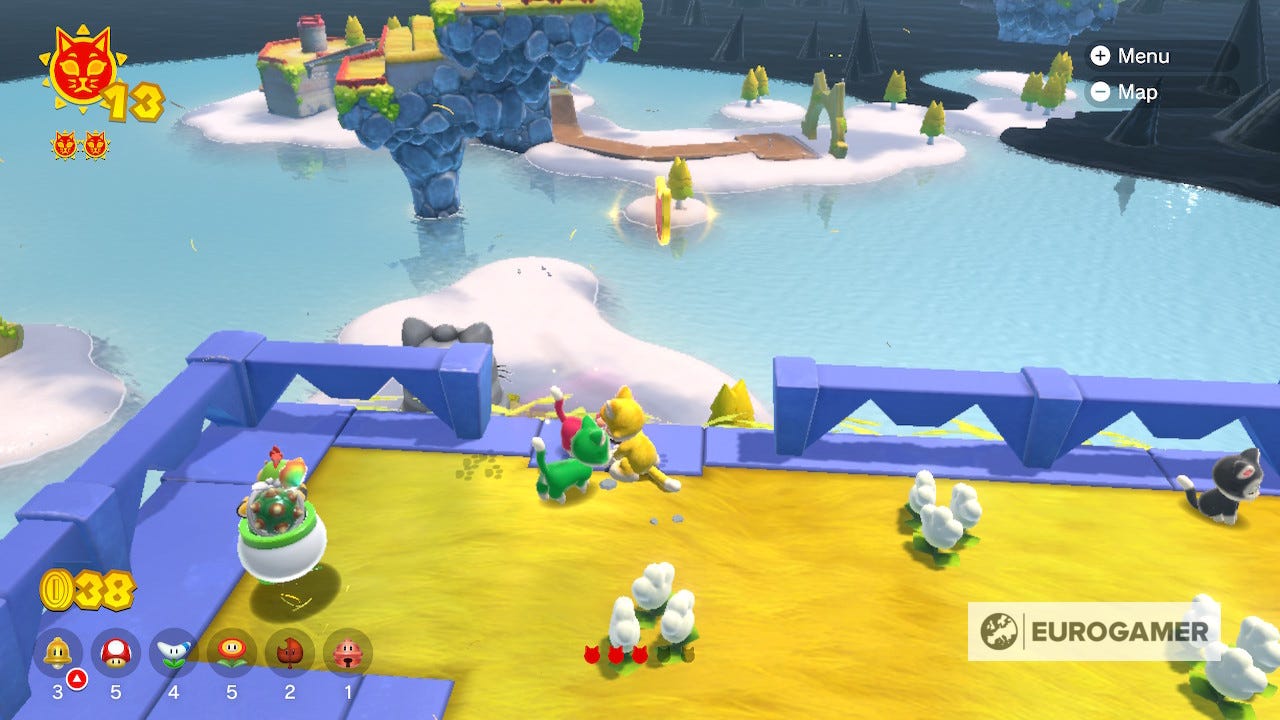
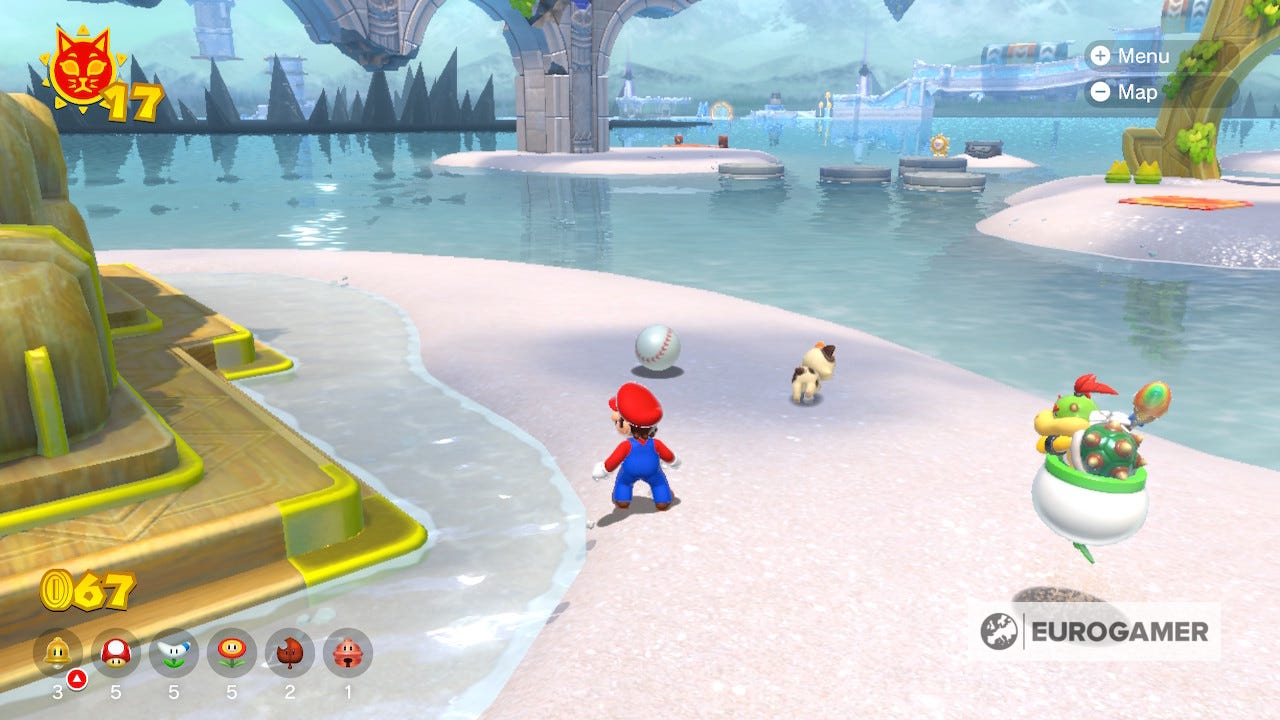
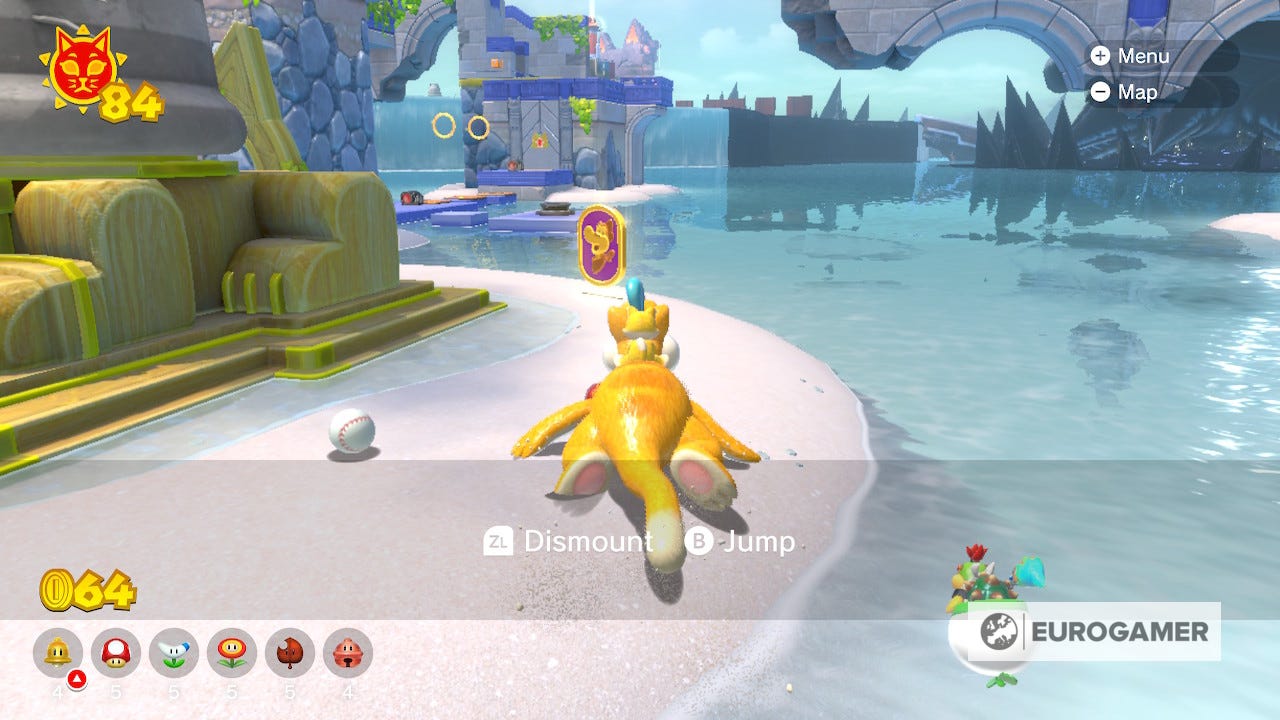
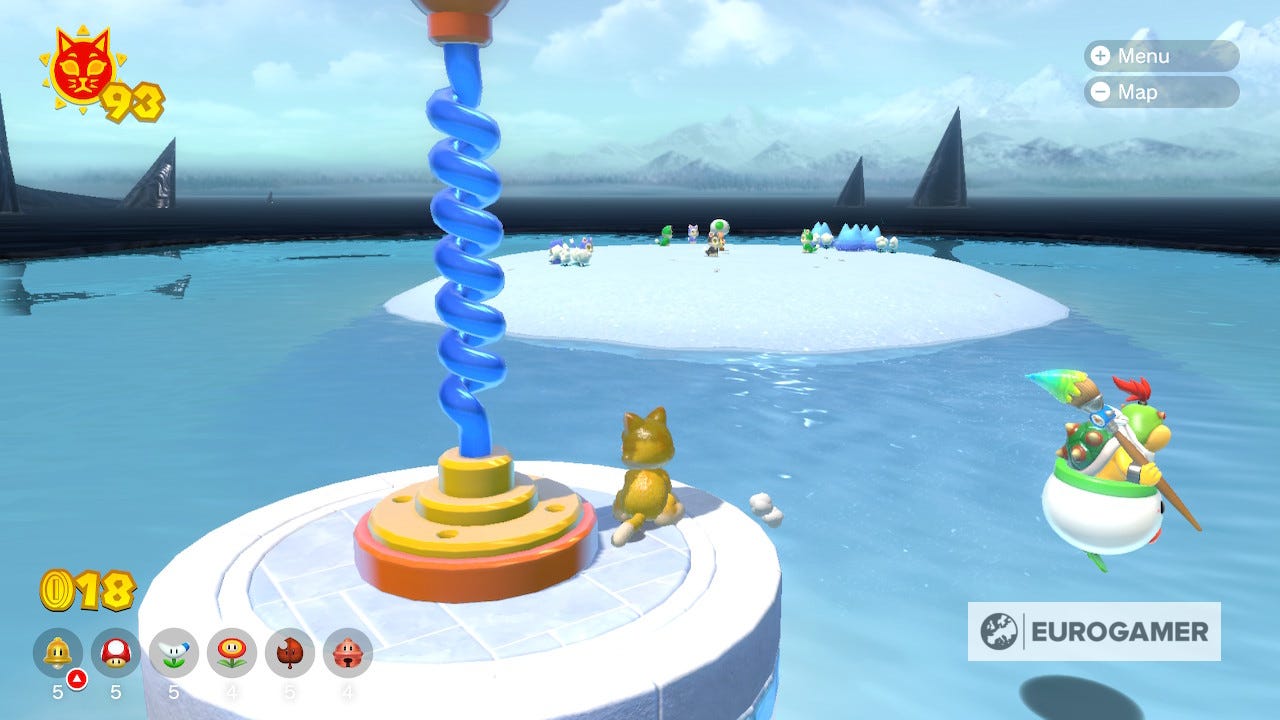
Once you've battled Fury Bowser as Giga Cat Mario, you'll find a large sad cat next to the Gigabell. They're upset because they have lost their kitten, but you can find the little rascal just on the other side of the bell, playing with a ball.
The kitten will run from you unless you're in a cat costume so prepare for a chase. Once you've returned the kitten, you'll receive a Shine for your trouble.
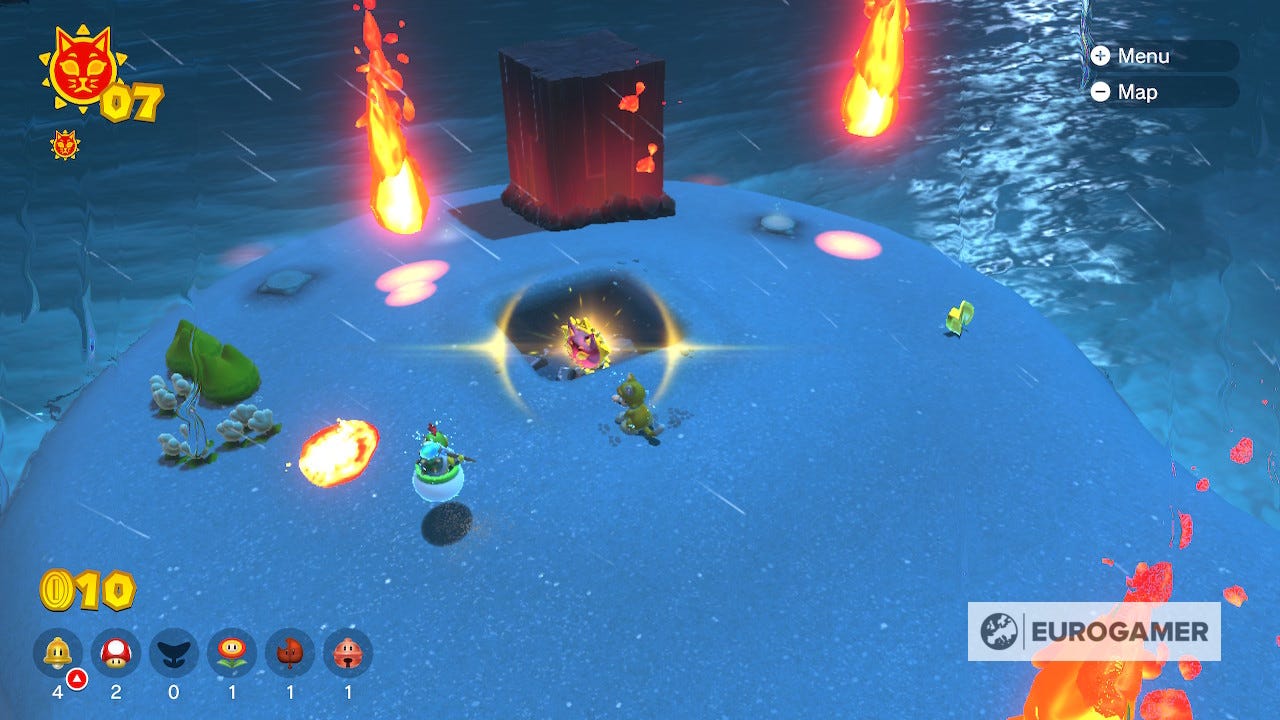
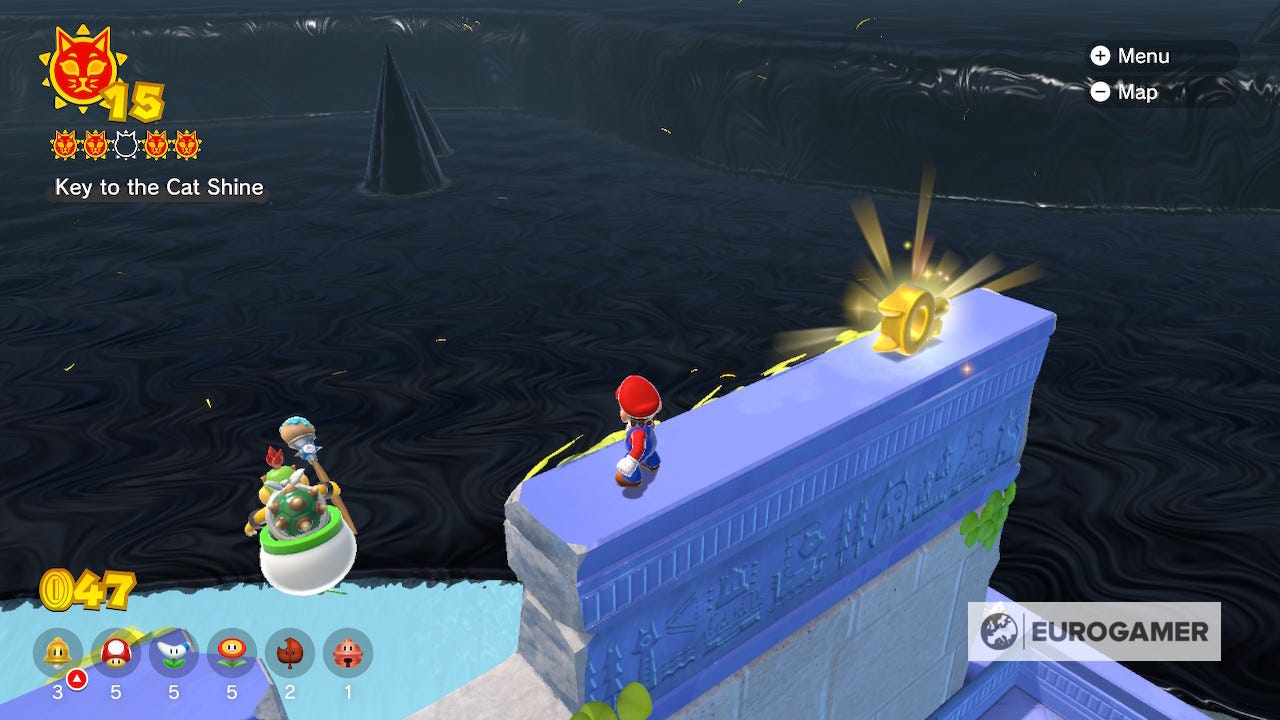
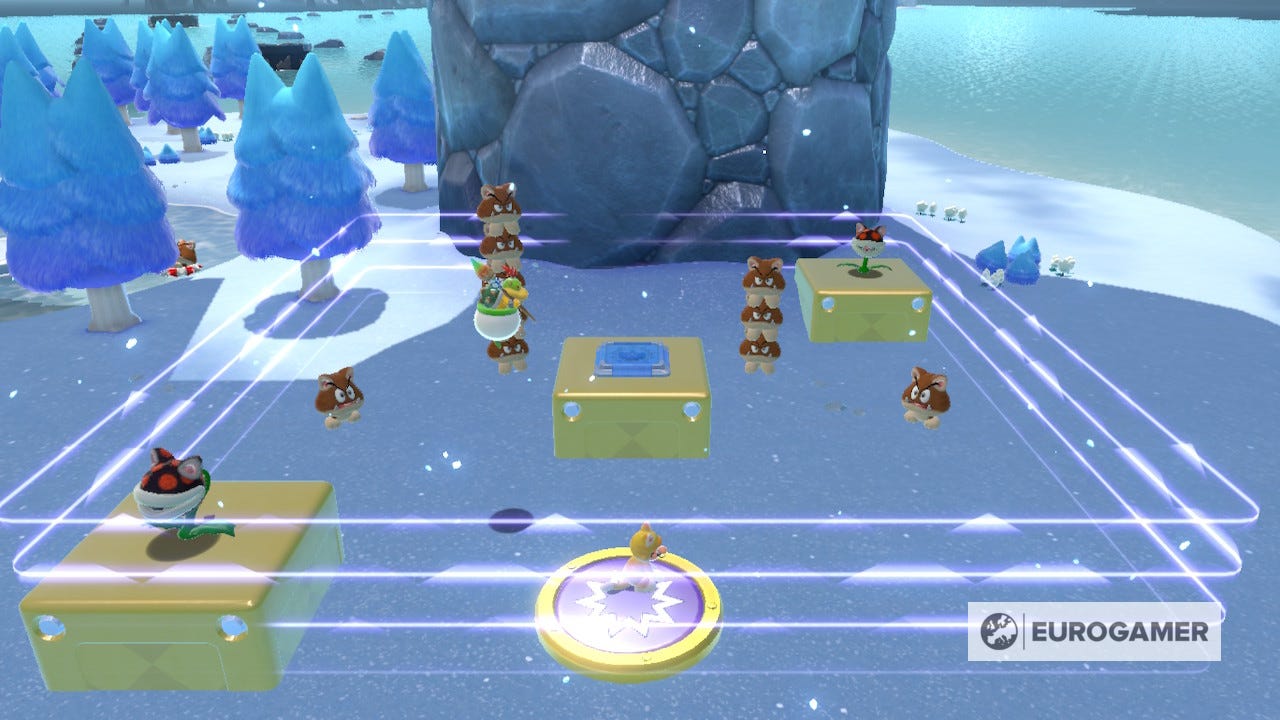
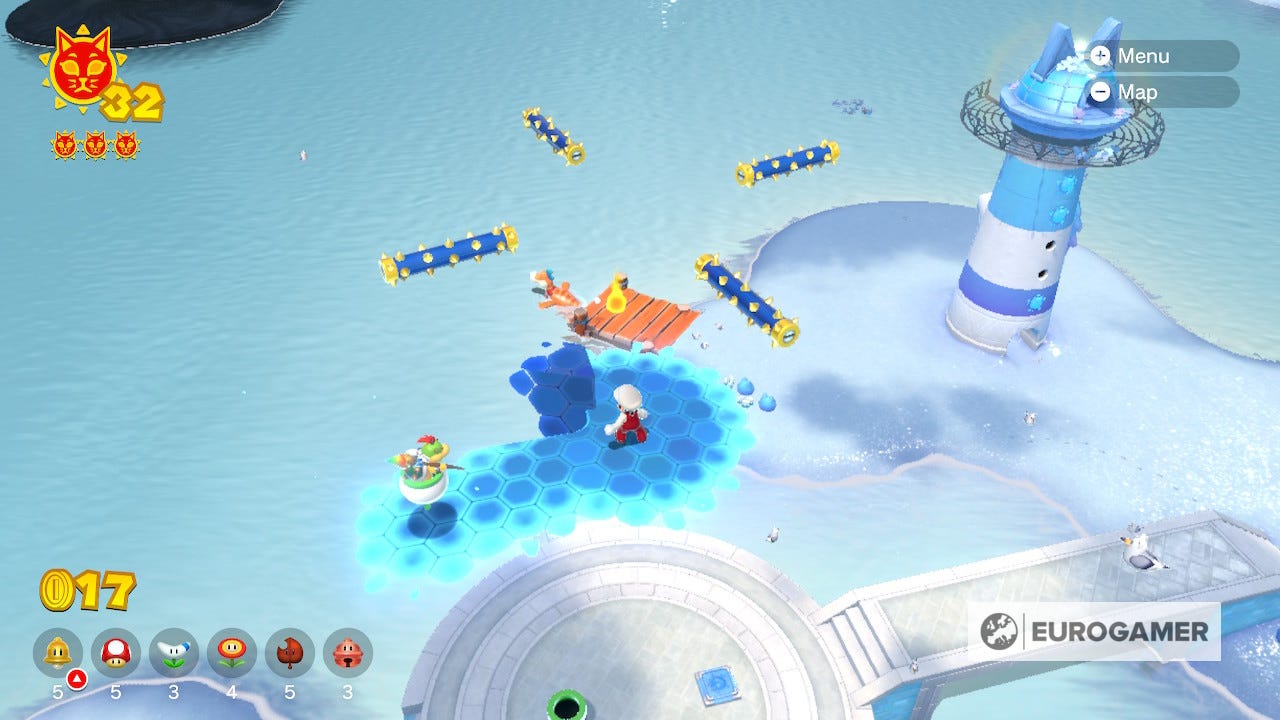
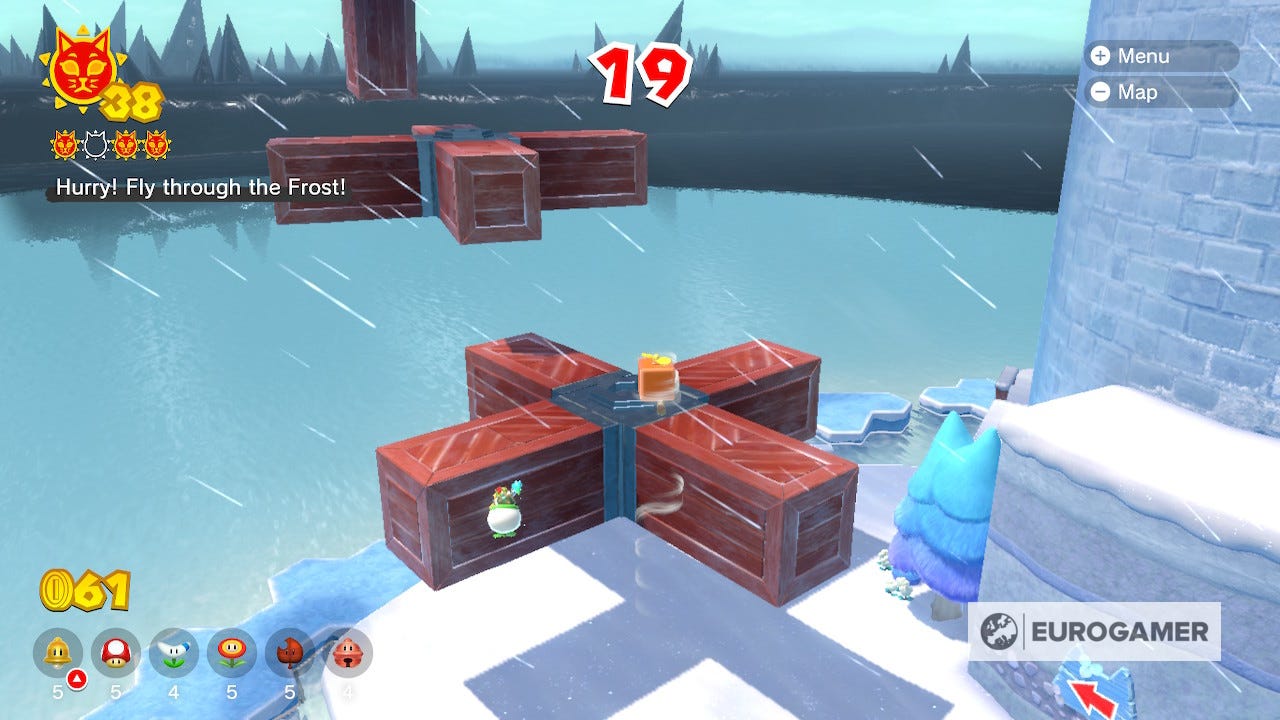
Cat Shine 19 Location
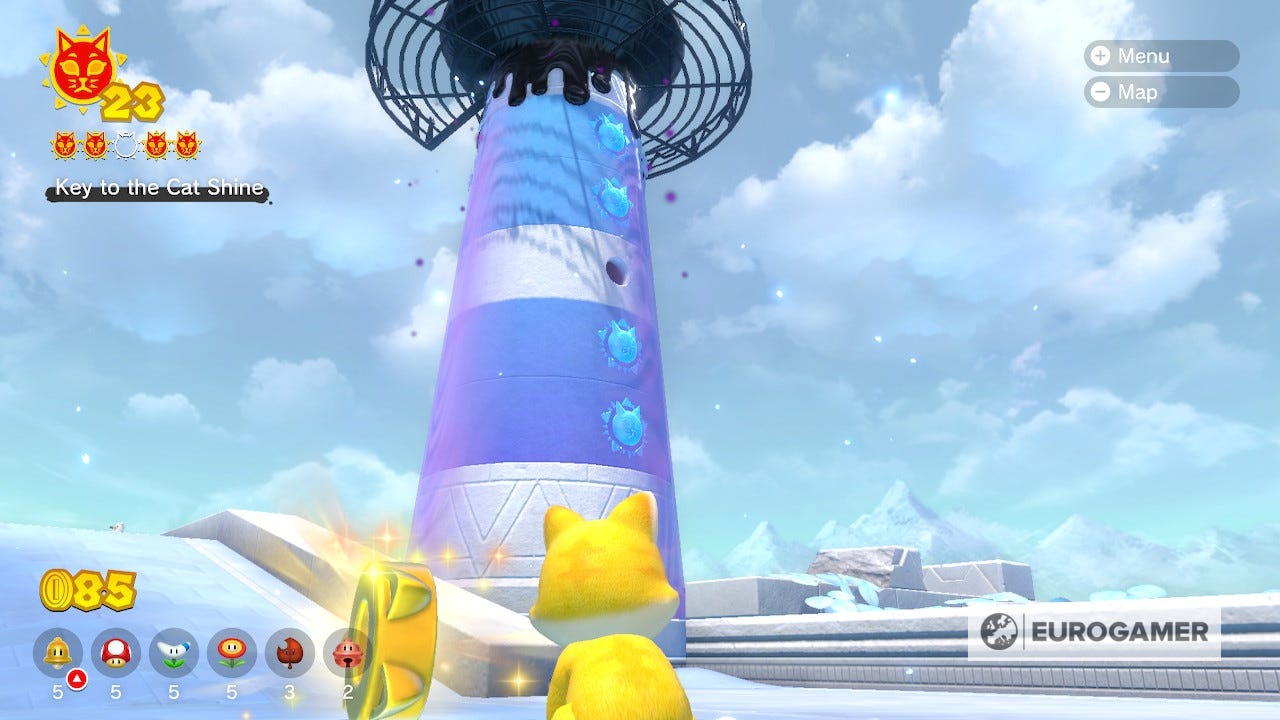
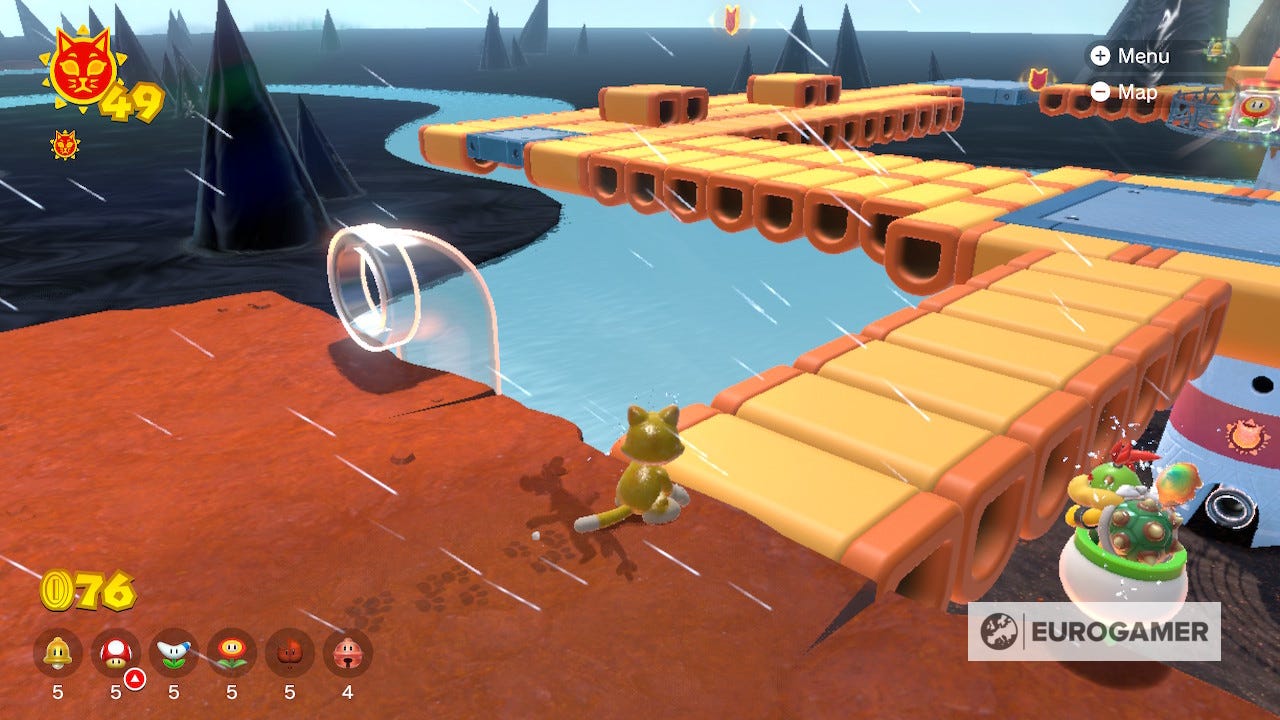
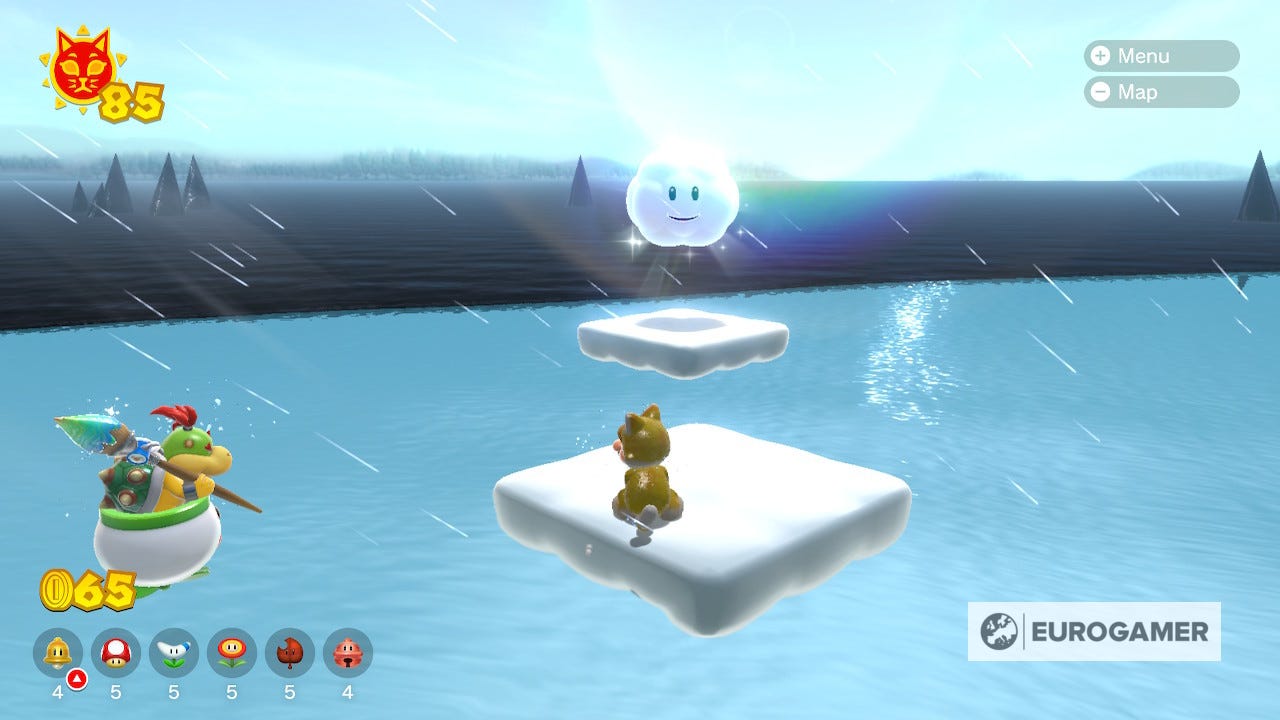
After getting the last shine from around the Lakeside Giga Bell, you'll need to hop on Plessie to reach the new area. On route you'll come across a snowy island beneath Slipskate Slope. Look for the large purple button hidden behind some trees.
Once pressed, you'll be locked in an arena fight. Once you've overcome the competition, you'll be rewarded with a Cat Shine.
Slipstake Slope Shine locations
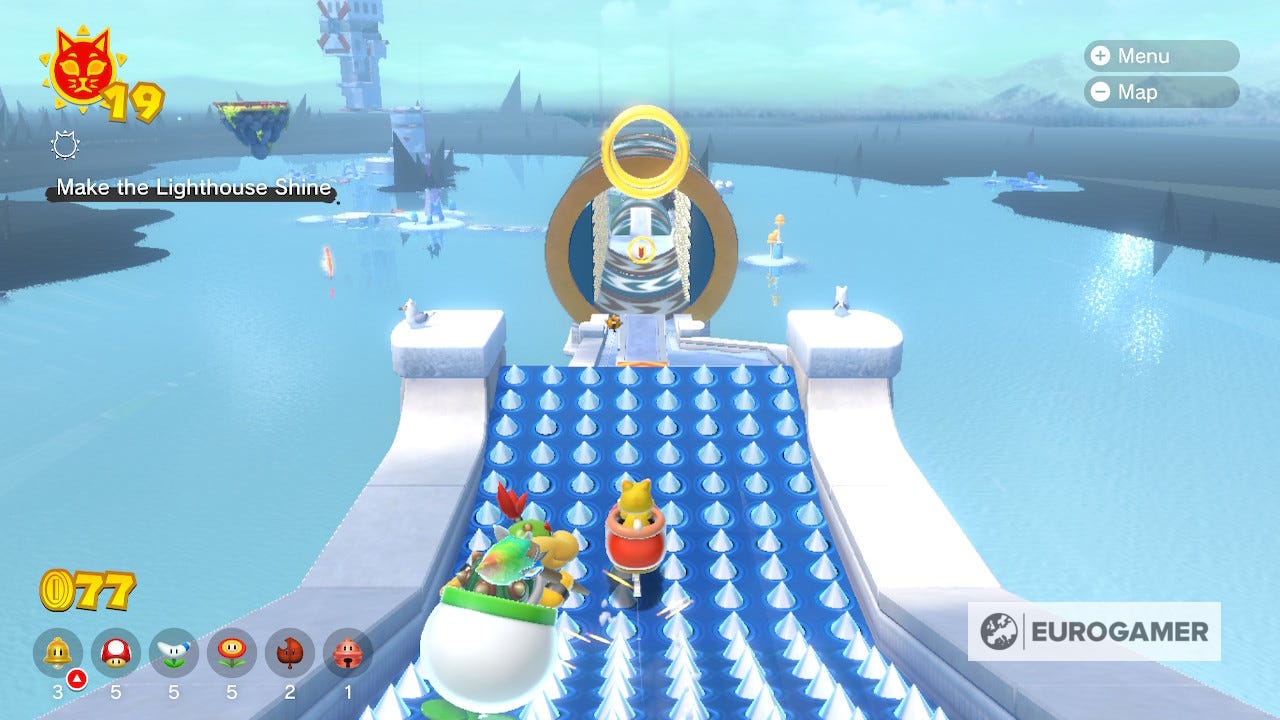
Cat Shine 20 Location
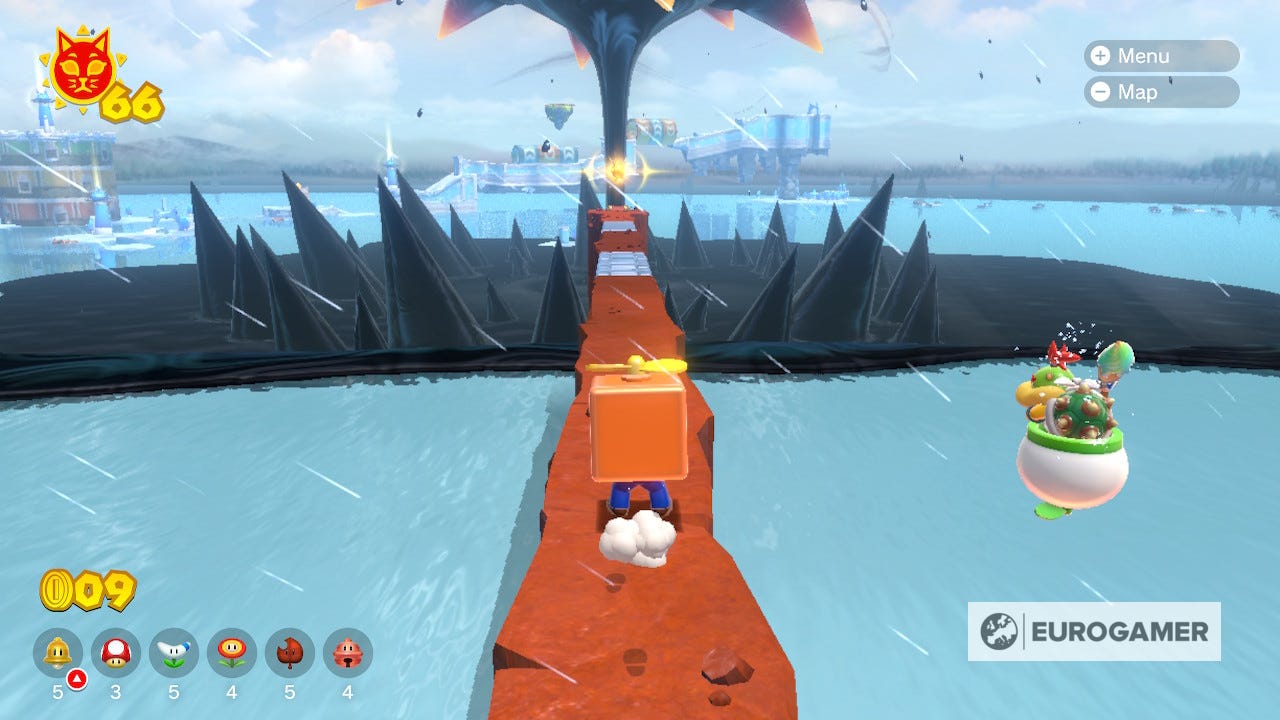
This island is an inverse of the ones you will have explored up to now, so you'll have to make your way down the slopes to reach the lighthouse where the first Shine is.
Use the overlarge ice skates to pick up some speed on your descent, but watch out from the spiked tunnels.

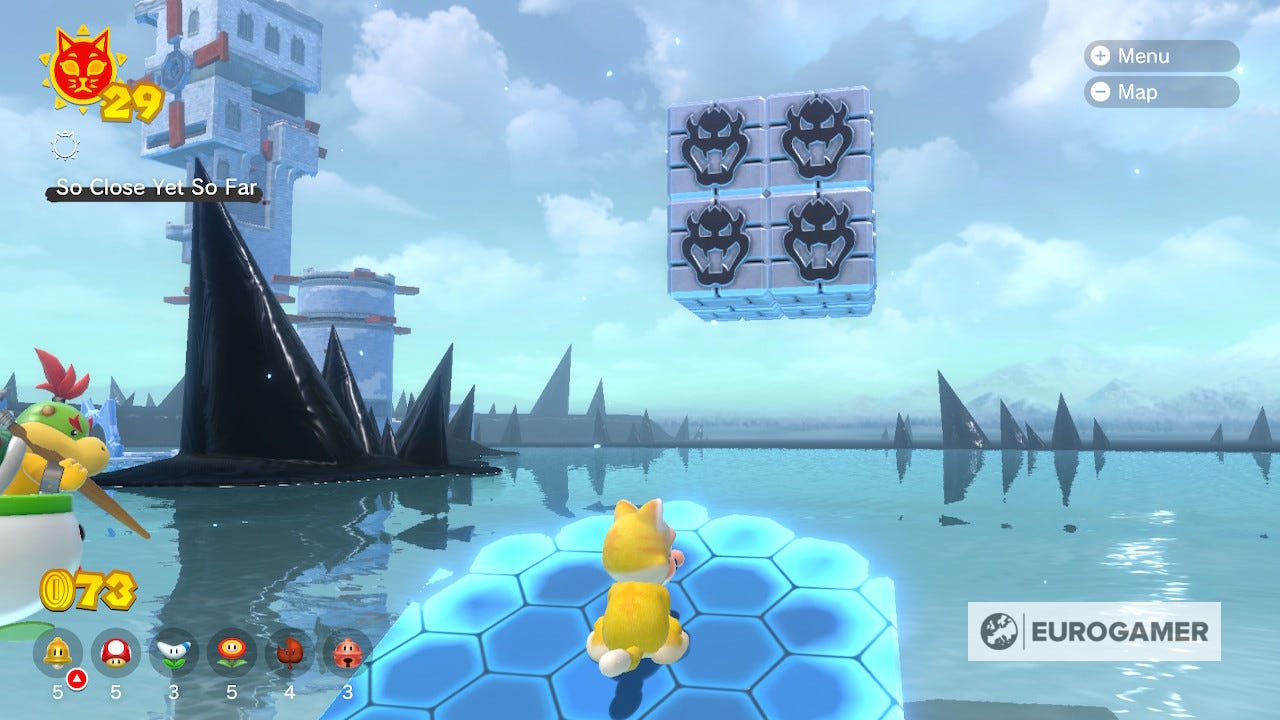
Cat Shine 21 Location
For the second Shine in Slipskate Slope, jump down to the Ruins Giga Bell island just past the lighthouse and turn around to find the dark blocks nestled into the wall. Then just wait for Fury Bowser to remove them with his fire breath.
Cat Shine 22 Location
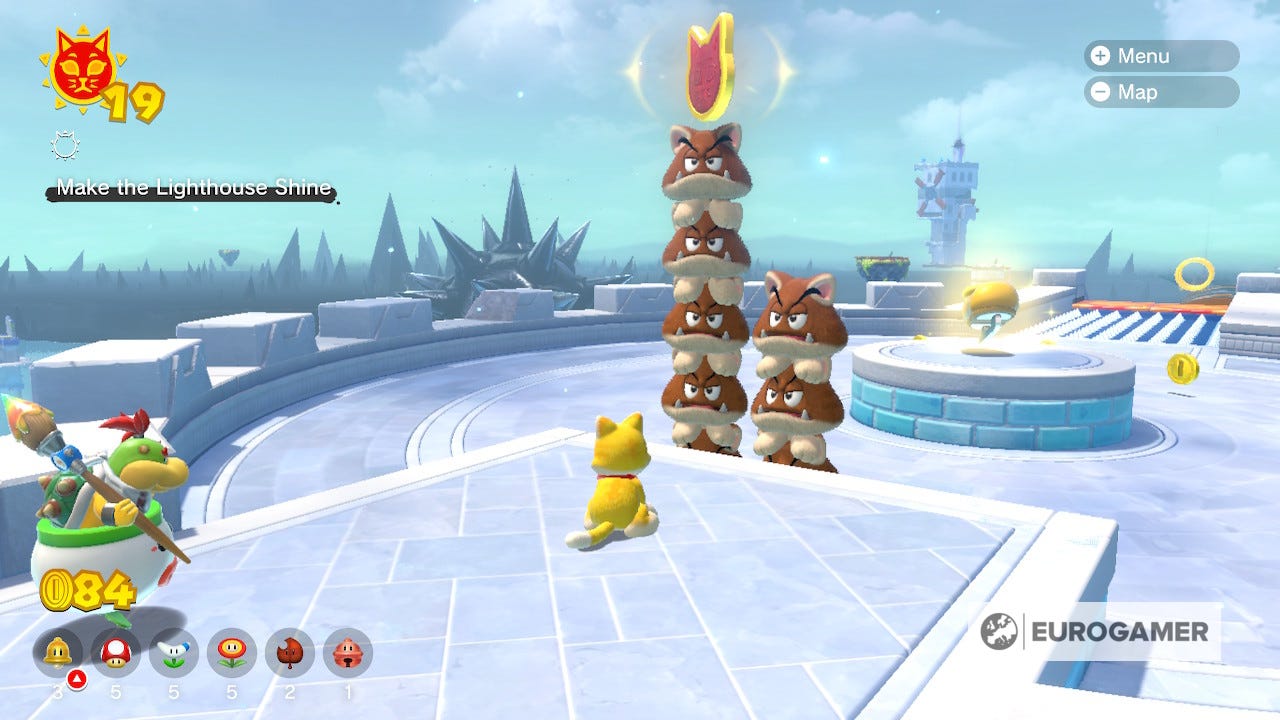
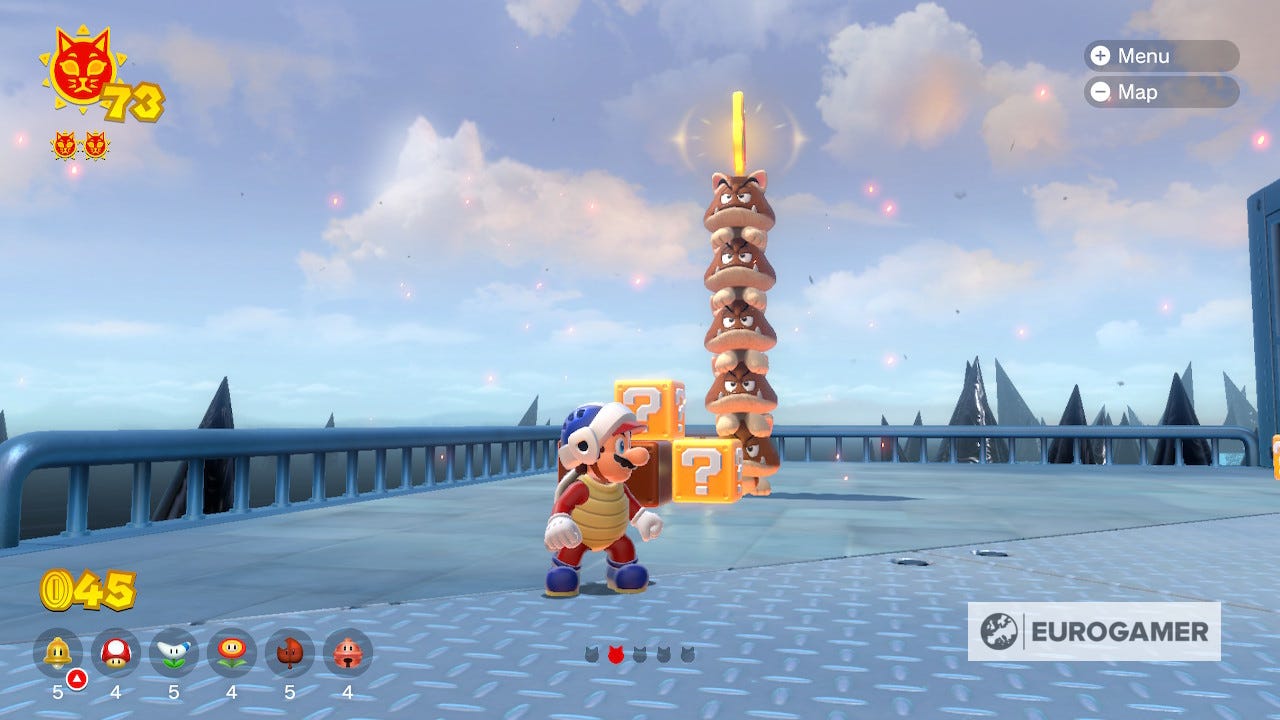
The five parts to make up this Cat Shine can be a little tricky to catch on the high speed slopes of Slipstake Slope. But the first one is hard to miss, atop a tower of Cat Goombas at the very beginning of the island.
The second is can be grabbed while launching yourself from the first ramp.
Immediately after that, you'll enter a rotating tunnel surrounded by spikes. The collectible is on the left hand side in the middle. If you're having trouble with this one, consider abandoning the ice skate and trying with your feet.
The fourth collectible can be found on top of the next tunnel. To reach it you'll have to use the boost ramp immediately before the drop and keep your balance. Don't worry about the rats though, if you're inside an ice skate, you'll kill them when you touch them.
The final collectible is over the last jump before the lighthouse. Simply line yourself up and jump off the ramp to collect it.
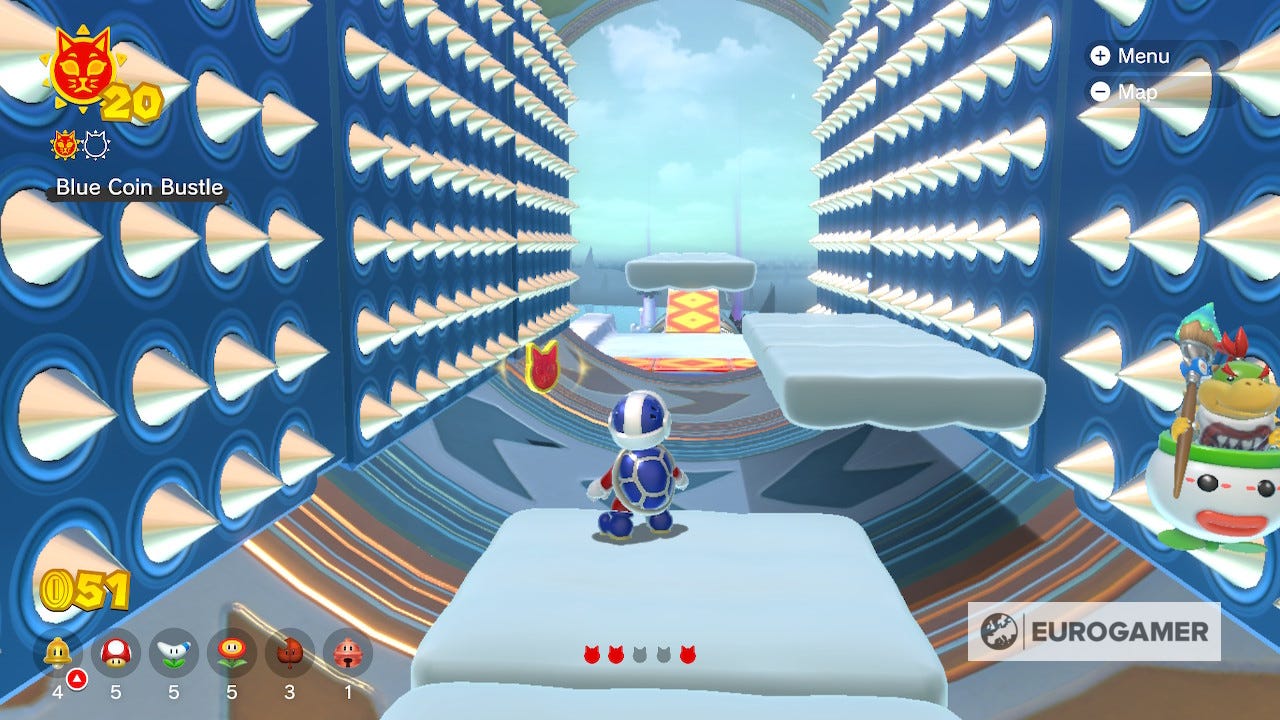
Cat Shine 23 Location
For this Shine, you'll have to go back to the start of Slipskate Slope, but Plessie can get you there nice and quick. Once there you'll see a blue button on the ground that reveals three sets of blue coins you'll have to collect to get the Shine.
You'll need the ice skate to get enough speed to collect them all, and don't forget about the last three coins down by the lighthouse.
Cat Shine 24 Location
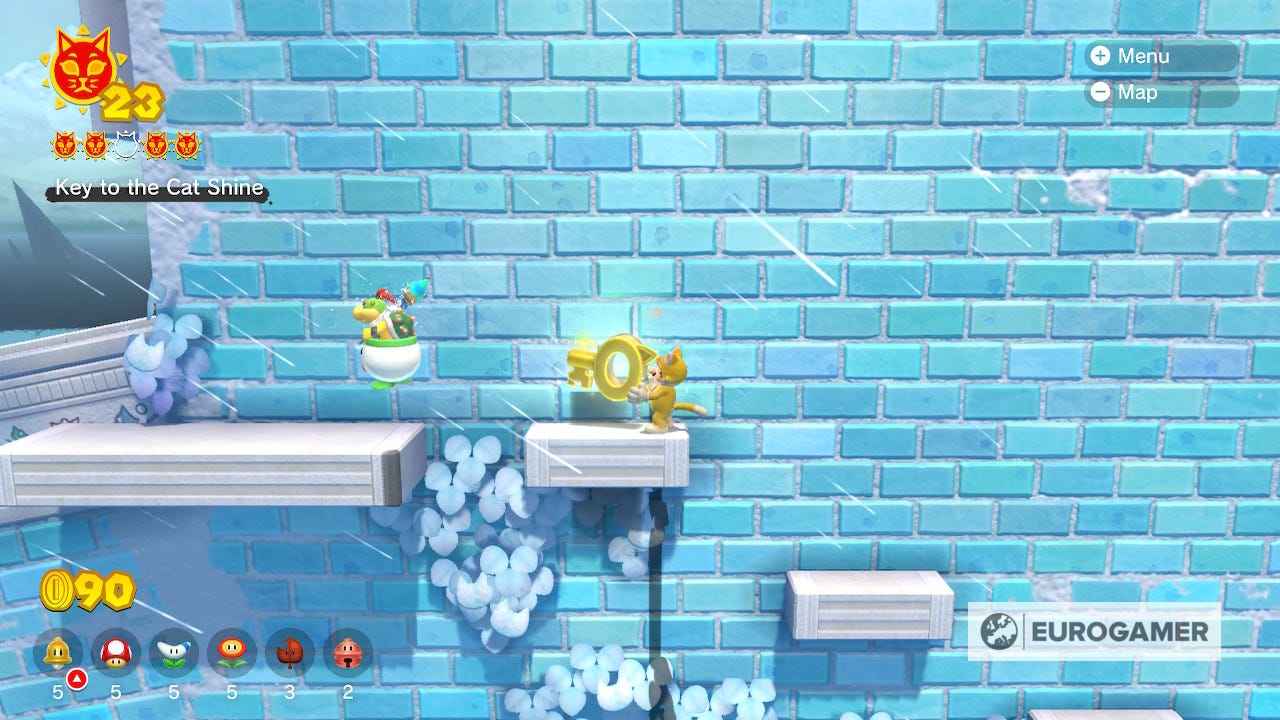
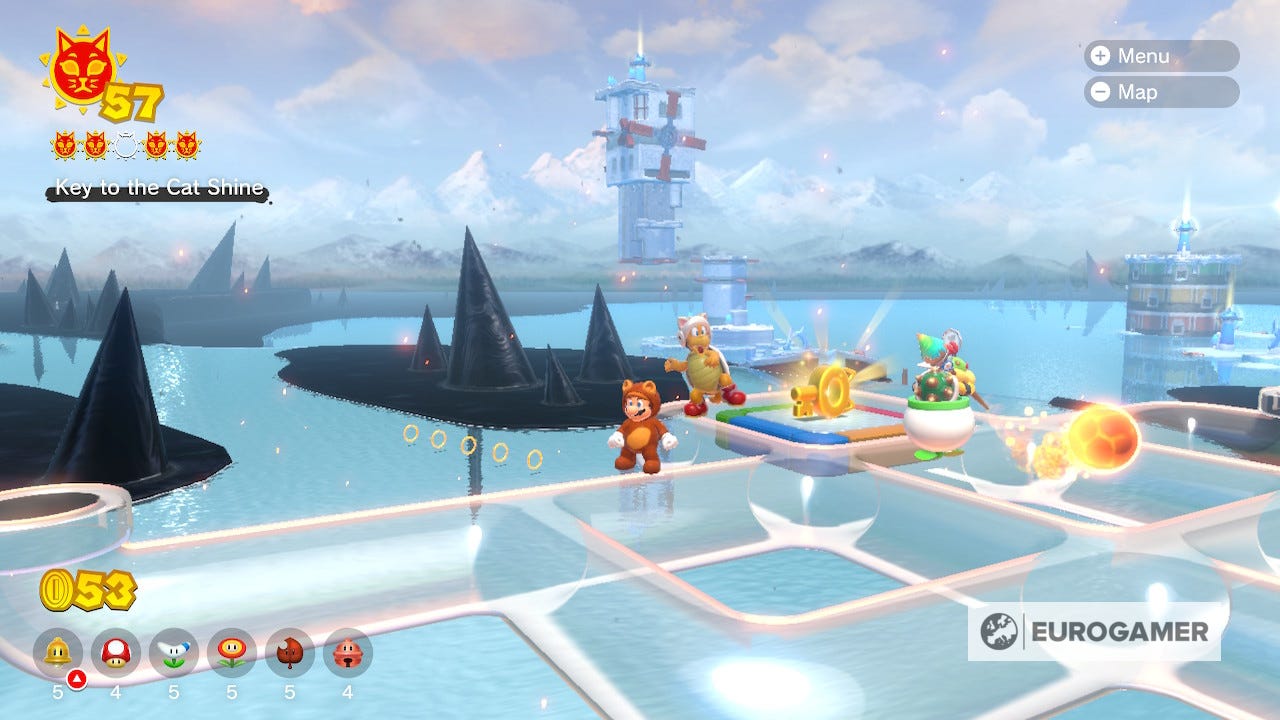
Leave and come back once more to find a Shine in a cage. The key is at the very bottom of the course, next to the lighthouse. Once you've picked it up, turn around and head to the right (the route should be highlighted with coins).
This ledge will take you back up the slope, with a bit of platforming.
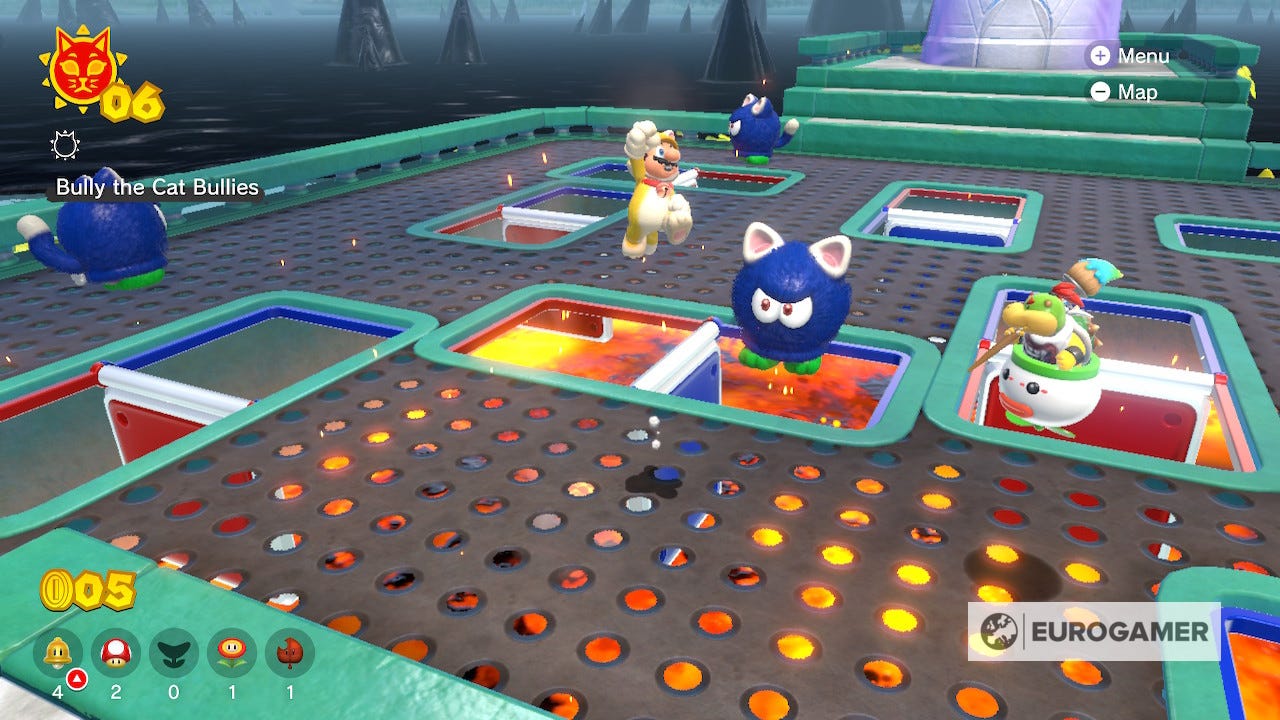
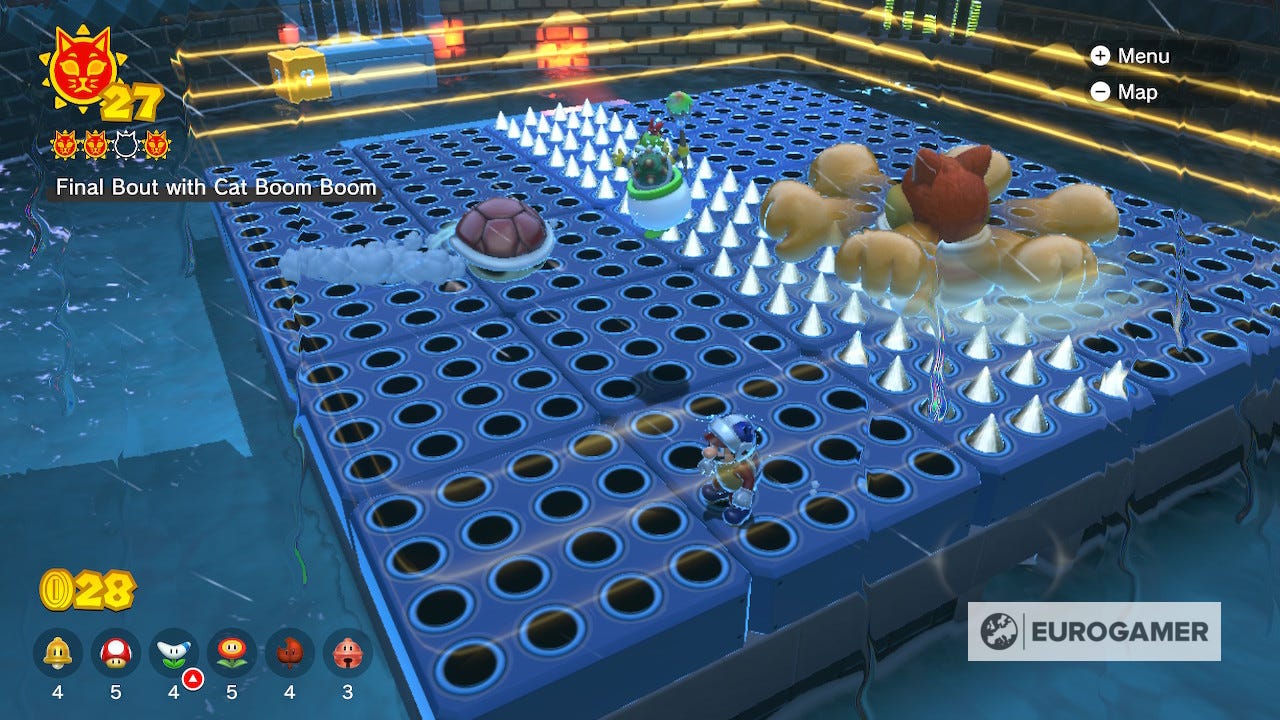
Clawswipe Colosseum Shine locations
Cat Shine 25 Location
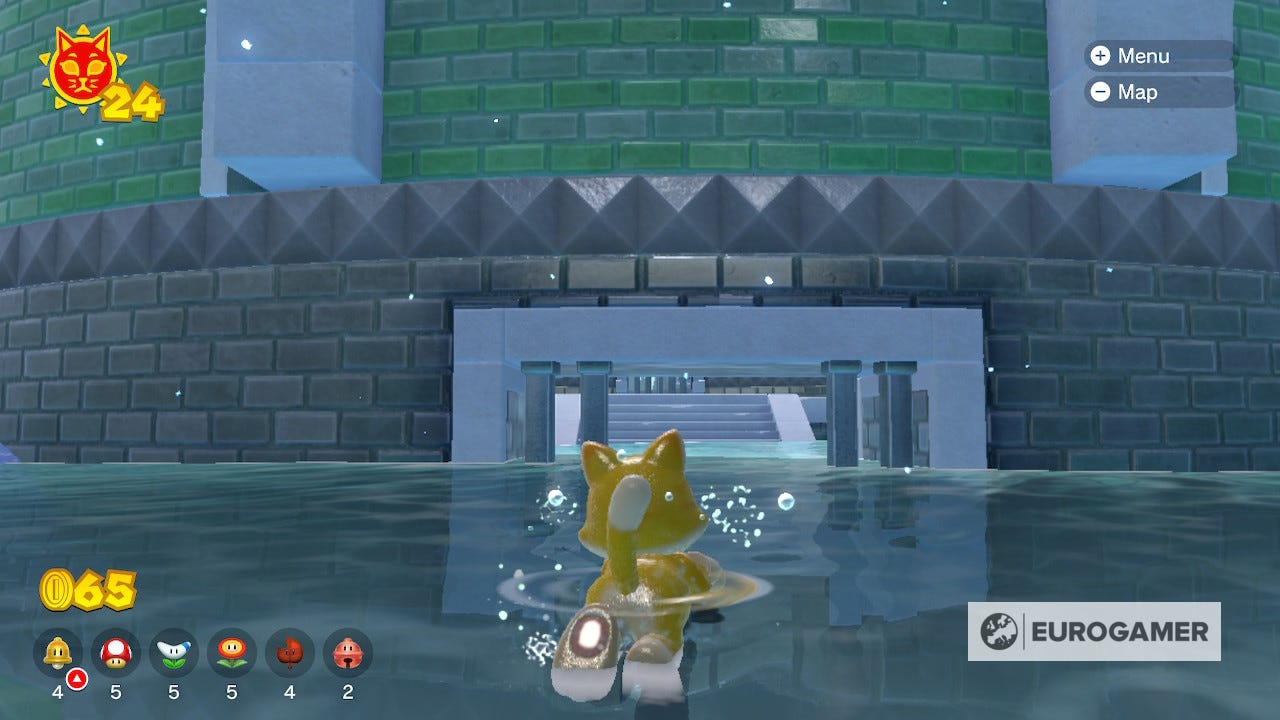
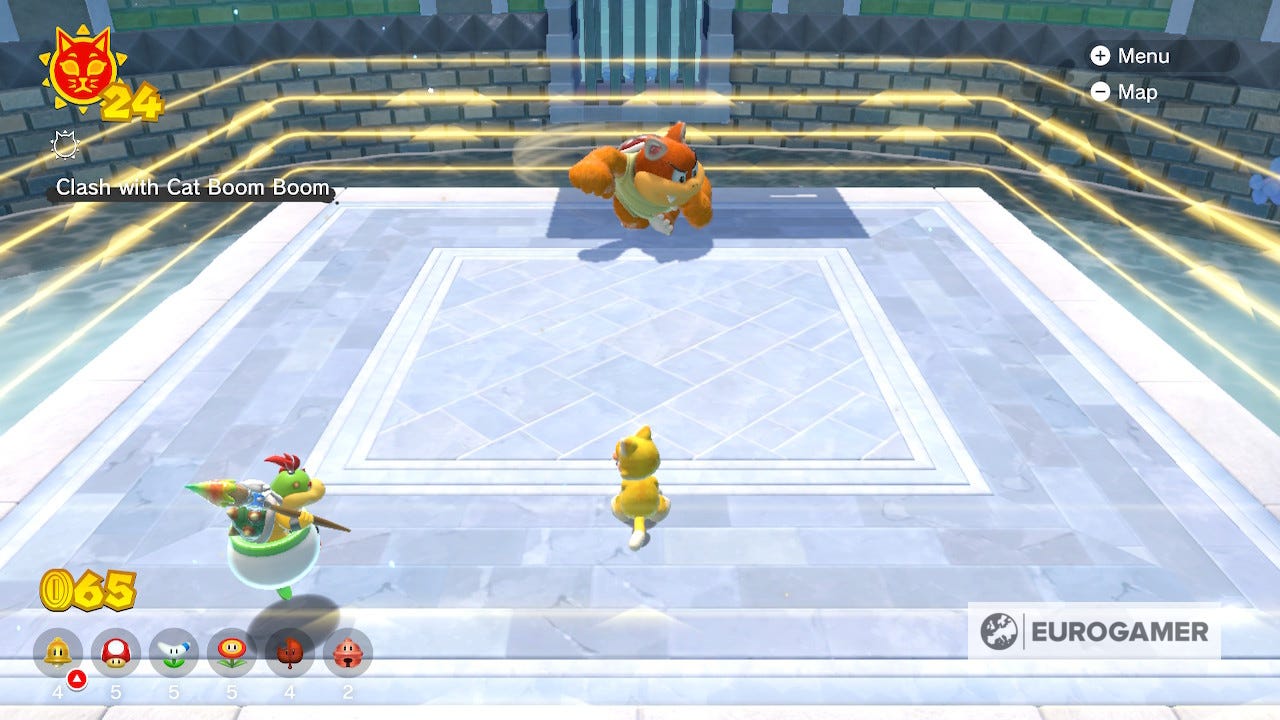
Enter the colosseum through a half submerged passage on the left. Once inside you will be attacked by Boom Boom. Avoid their spinning attacks until they stop to catch their breath and attack them however you can (fireball, catswipe, or classic jump).
Once you've done that three times, they will be defeated and leave behind a Shine for you to collect.
Cat Shine 26 Location
The Bowser blocks you'll need to remove to get this Shine can't actually be found until you've fought all three mini-bosses in the arena. Once that is completed, you'll be able to see the Shine from inside the arena, but you'll have to go outside and wait for Bowser to arrive to line up his fire breath and destroy the blocks.

Cat Shine 27 Location
The first collectible you need at the Clawswipe Colosseum is outside the structure itself. From the Ruins Giga Bell island, go left around the arena until you see a collectible nestled in a small hole near the wall.
The second collectible is inside the colosseum. From the arena where you fought Boom Boom, look around the windows to spot this one next to the cat ramp.

Underneath the arena where you fought Boom Boom, there is a hidden alcove where another collectible is hidden. If you're struggling to find it, swim between the colosseum walls and the arena and look out for the red and gold sparkle.
Use the cat ramp to climb to the top of the colosseum walls, and you'll spot this collectible looking out towards Slipskate Slope.
This collectible is floating high above the colosseum. Head towards the flinger on the colosseum walls and use that to reach this collectible.
Cat Shine 28 Location
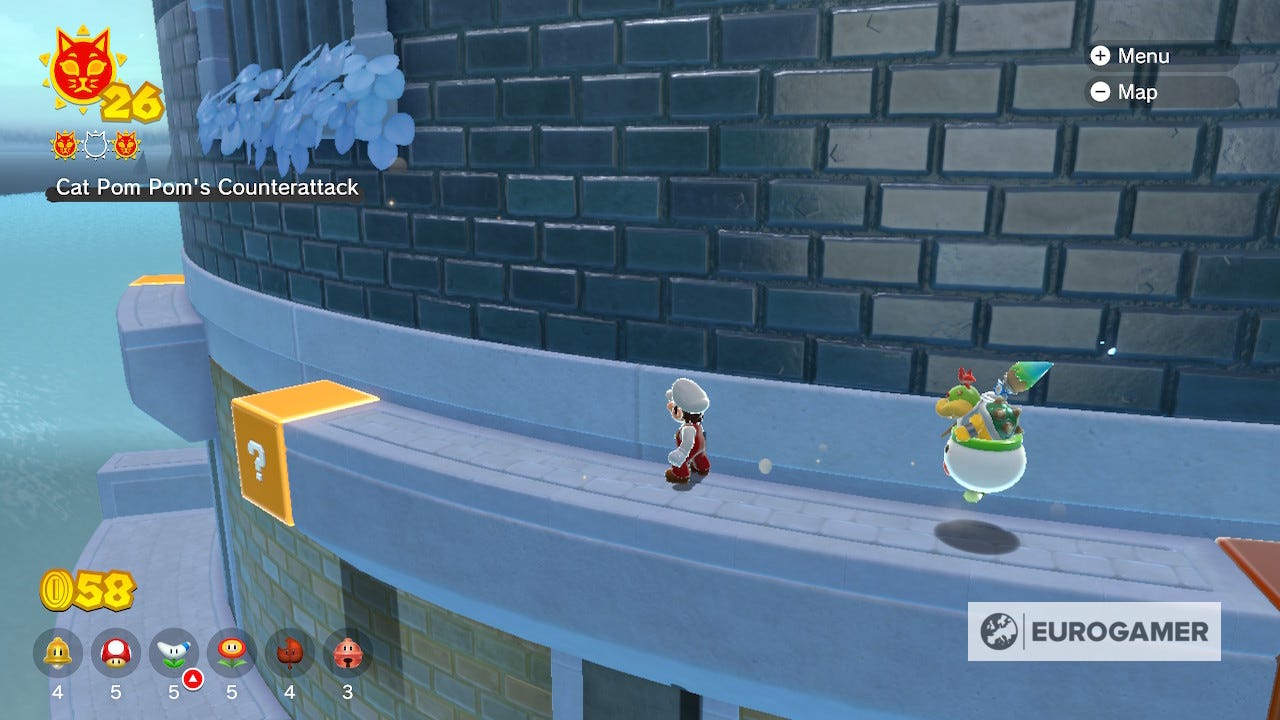
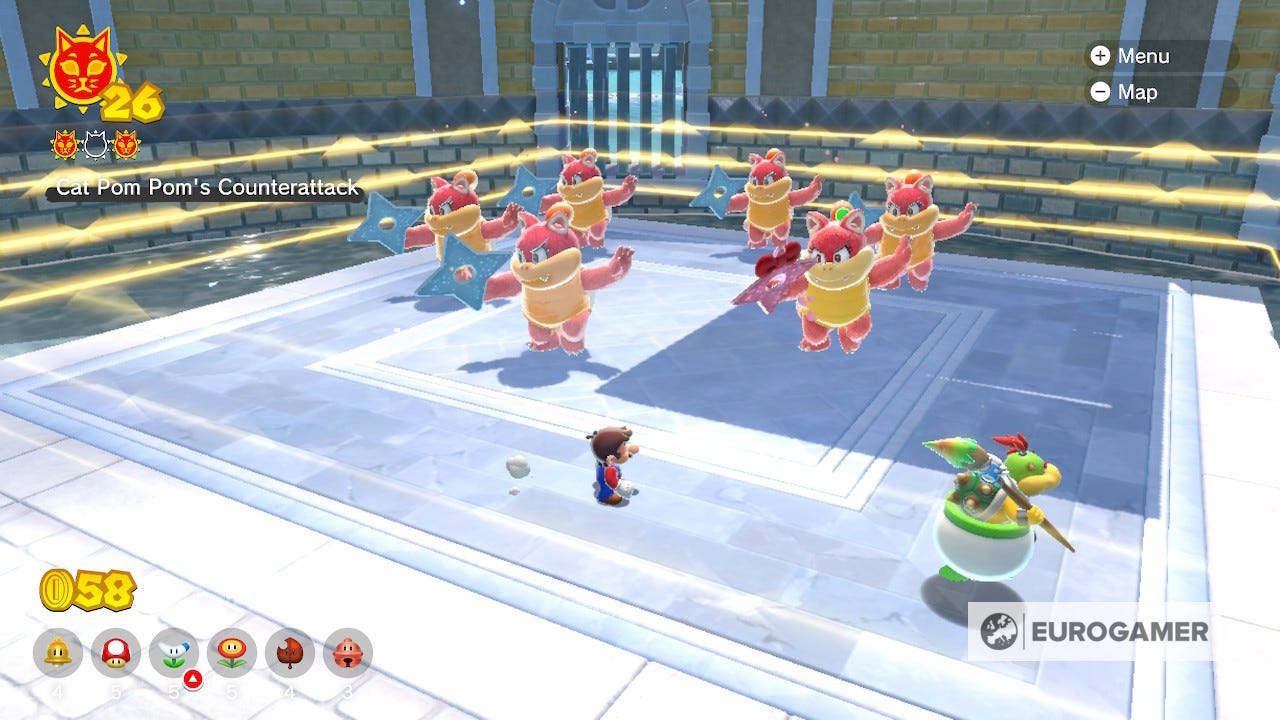
The semi-submerged passage won't be accessible when you return to the Clawswipe Colosseum because the whole building will have risen, but if you head in the same direction you'll find some ledges you can platform across that leads inside.
Once inside you'll have to face off against Cat Pom Pom. They will use illusions of themselves to try and confuse you, but the real one has a sparkly throwing star and looks brighter than the clones.
Jump on their head three times to defeat them and earn a shine.
Cat Shine 29 Location
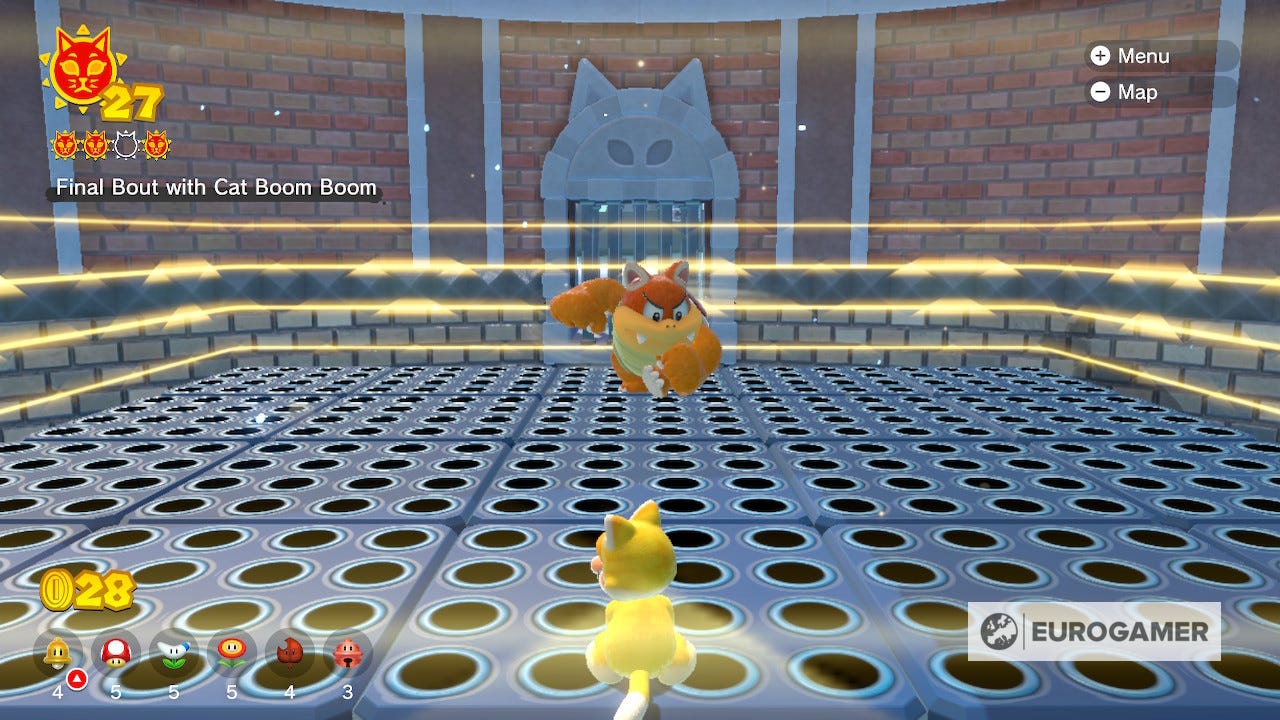
Return once more to the colosseum and you'll find it has risen up another floor. Head again to the right and use the platforms and boxes to reach the entrance, but you'll find it blocked. Backtrack to the bob-ombs just below.
Ground pound on the boxes to create a staircase and then grab one of the explosives and rush it up to the bricks to clear the way. This final fight is the toughest one yet, with Boom Boom. This time the floor is covered in retractable spikes, and Boom Boom will send multiple shells after you.
The spikes follow a pattern so keep an eye on that to avoid being punctured, while you'll have to react quickly to dodge the shells. But the same rules apply, wait for your opening and either jump on their head, or swipe them as a cat three times to win.
Trickity Tower Shine locations
Cat Shine 30 Location
This Cat Shine might look easy, but as you get closer you'll find it's inaccessible from the ground as an invisible wall blocks your path. Go behind the shine and you'll find an invisible path that leads up.
Watch out for the log throwers, and the edge of the structure or less you'll have to start again. If you use the fire flower, you can throw fireballs ahead that will help reveal the path.
Using a ground pound will also help reveal the area around you. Once you make it to the wooden crates you'll have to destroy them to reach the lower level and second ramp that will eventually take you to the hole surrounded by four rolling spiky logs where you can jump down and claim this shine.
Cat Shine 31 Location
Head behind the lighthouse to see a small cluster of dark blocks seemingly floating above the ground. Run towards and you'll see an invisible structure is holding it up. Find the end nearest the lighthouse and you can jump up. Then just wait for Fury Bowser to do his thing.
Cat Shine 32 Location
The collectibles needed to get this Cat Shine can be a little tricky, given the invisible walls. The first is just below where Cat Shine 30 is, but you don't need to run the whole invisible course to reach it. It can instead be accessed by the water from the right hand side.
Following the invisible path again, you can see this collectible floating above the log throwing enemy.
Get past the second log throwing enemy and you'll come up to a stack of crates. Look up and you'll see this collectible on an invisible wall. While Bowser is attacking, you can see a lot more of the structure.
Smash through the stack of crates to reach the lower level of this invisible structure. Follow the path carefully as it leads towards the collectible, but be warned, there is a short jump to reach the collectible itself.
Make your way to the left of the last collectible, avoiding the logs from two more log throwers, then head behind them.
This path is twisting so be careful not to move too quickly. If you are struggling you can jump to this collectible from the large wall where you found the third collectible. You might need a cat costume to climb on to the platform, but you should be able to reach it.
Cat Shine 33 Location
Leave and return to find a large blue button and another blue coin hustle to complete. The coins will take you through most of the invisible course, so it might be worth using a flower to help you scout ahead. Some of the coins are hidden on the lip of the path, so make sure you're not running past them.
The last set of coins are on a platform you might not have gone on yet, and there is a small jump to reach it.
Cat Shine 34 Location
Come back to Trickity Tower for a third time and you'll find a large button. When smashed you'll be given twenty seconds to run a shorter course that intersects with the invisible tower.
You don't need to sprint to make it there in time, but it will be close, so use your flower to help out as you move from solid blocks to the invisible paths.
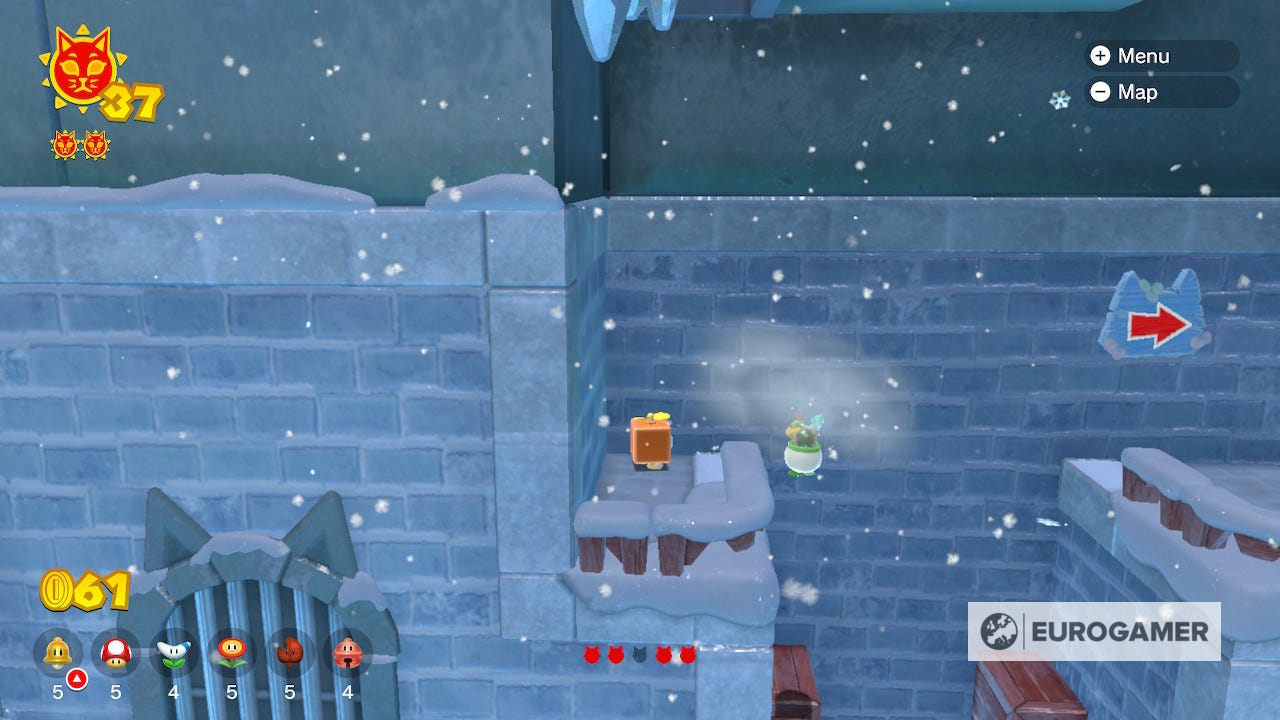
Crisp Castle Climb Shine locations
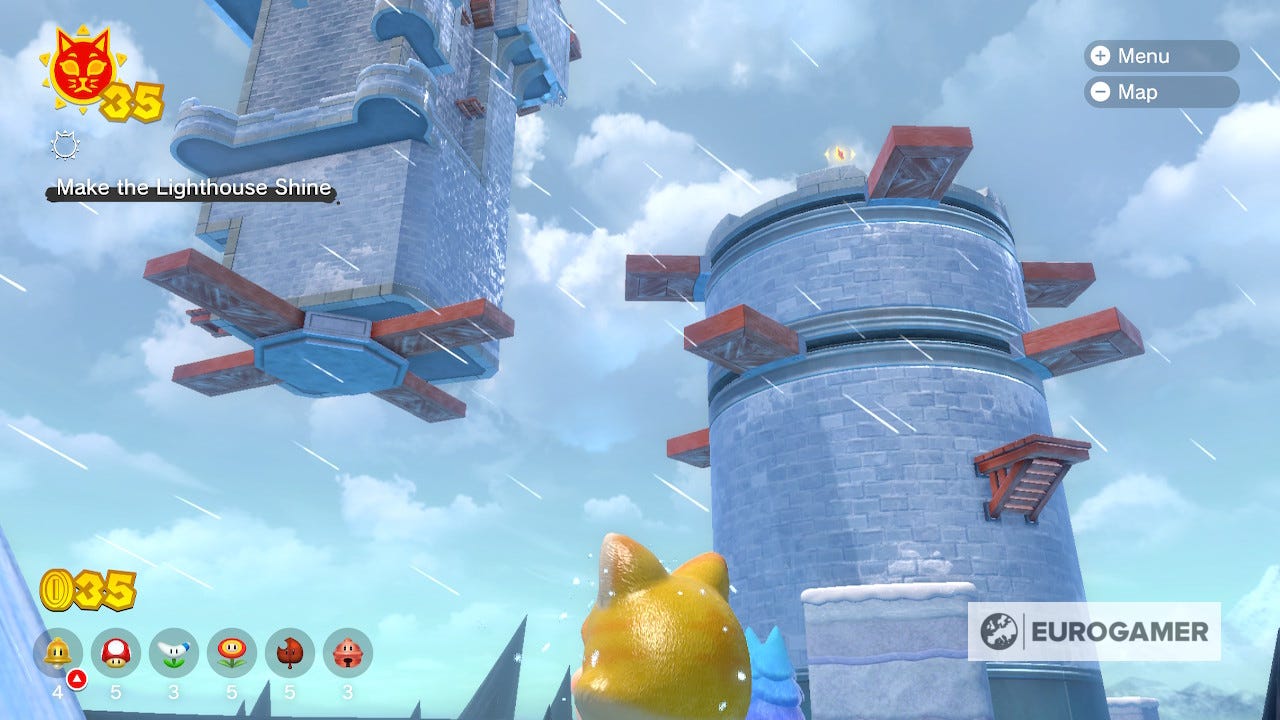
Cat Shine 35 Location
This large island is made of two huge windmills that you'll have to reach the top of to get the first Shine. Hit some boxes and you'll find propeller boxes you can use to jump extremely high.
You'll need this to ascend both buildings, but there is quite a lot of platforming and moving ledges to keep track of. Take your time and make sure you are holding down the jump button in the air to slow your descent.
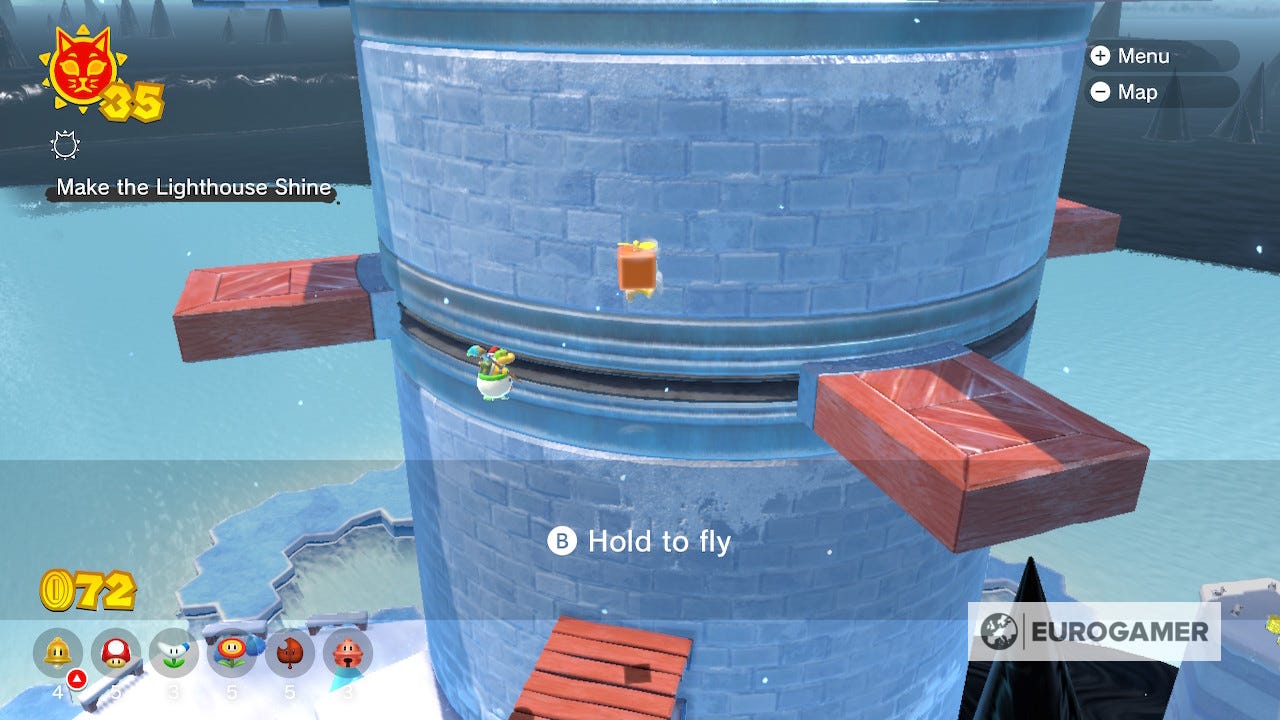
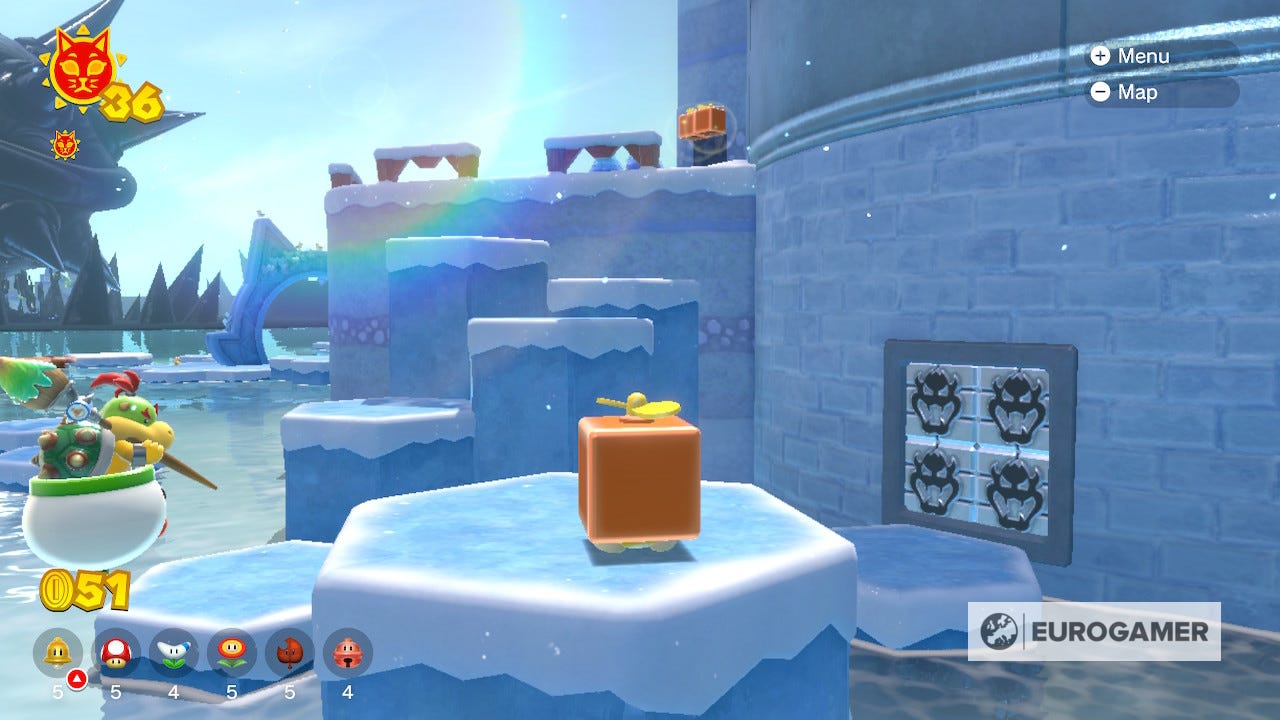
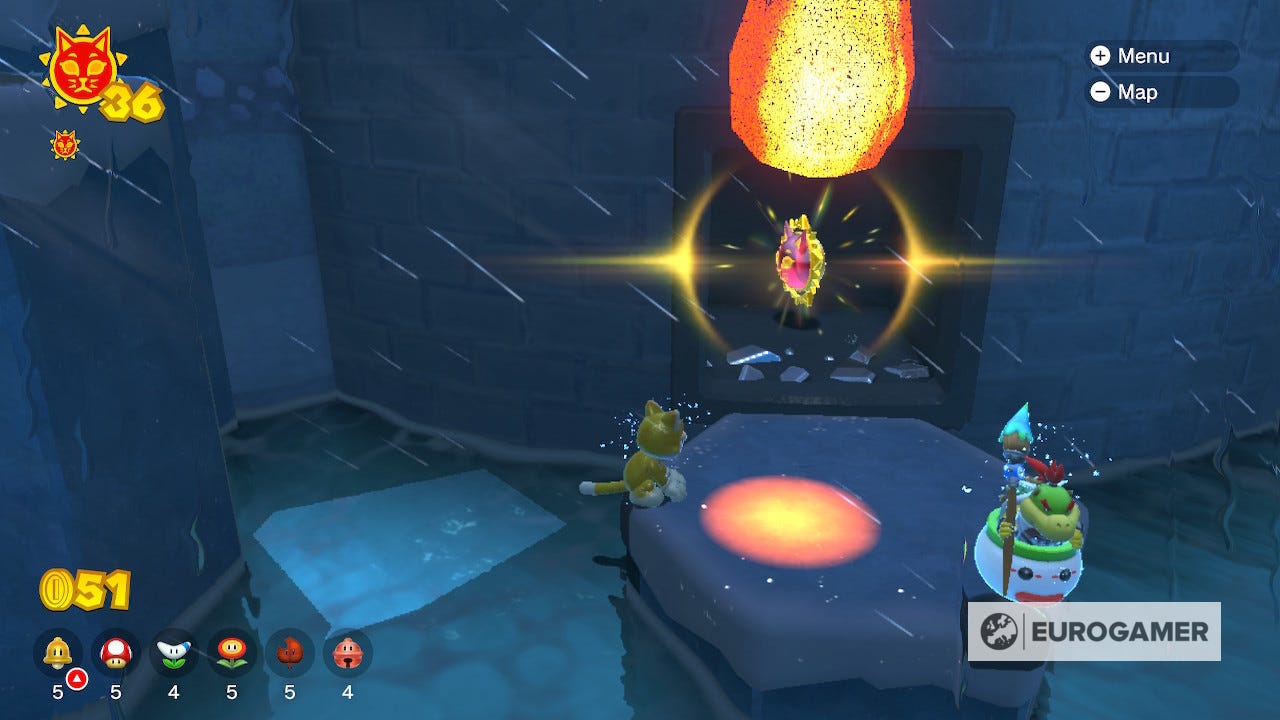
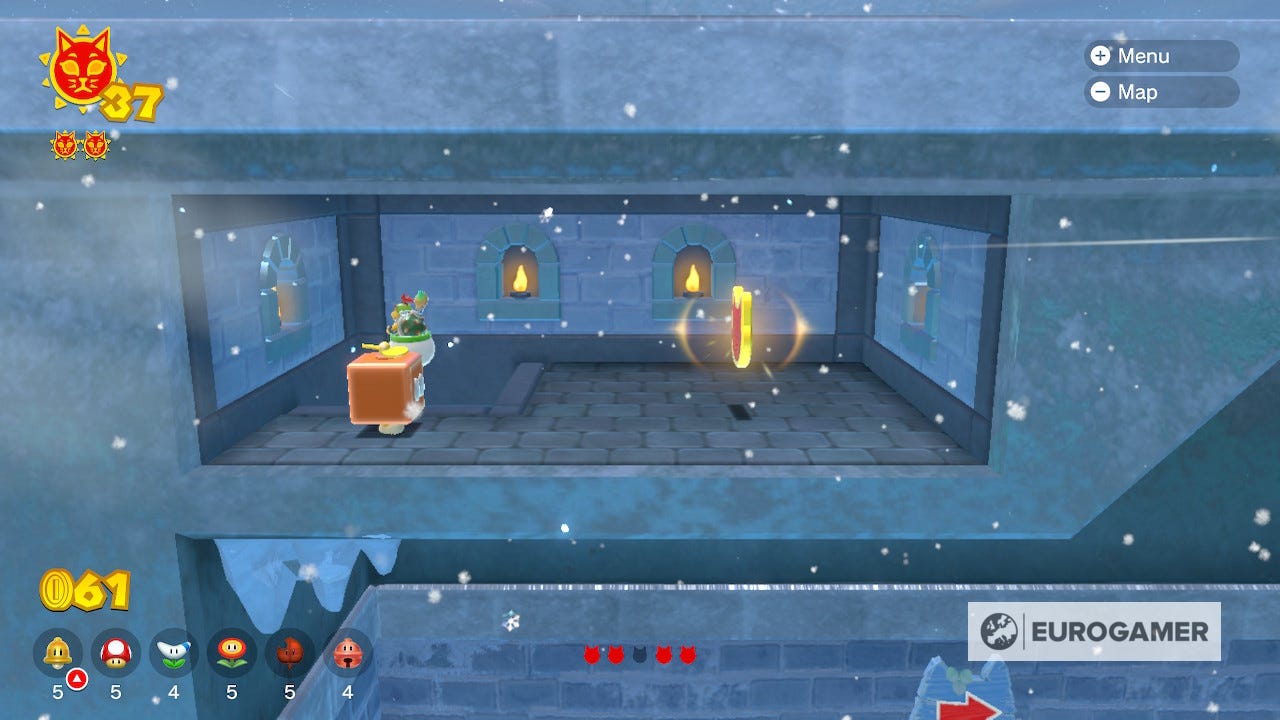
Cat Shine 36 Location
Right down on the ice covered beach is where you'll find the Bowser Blocks. Drop on the right hand hexagonal ice columns when at the start of the island and you'll spot them nestled into the tower.
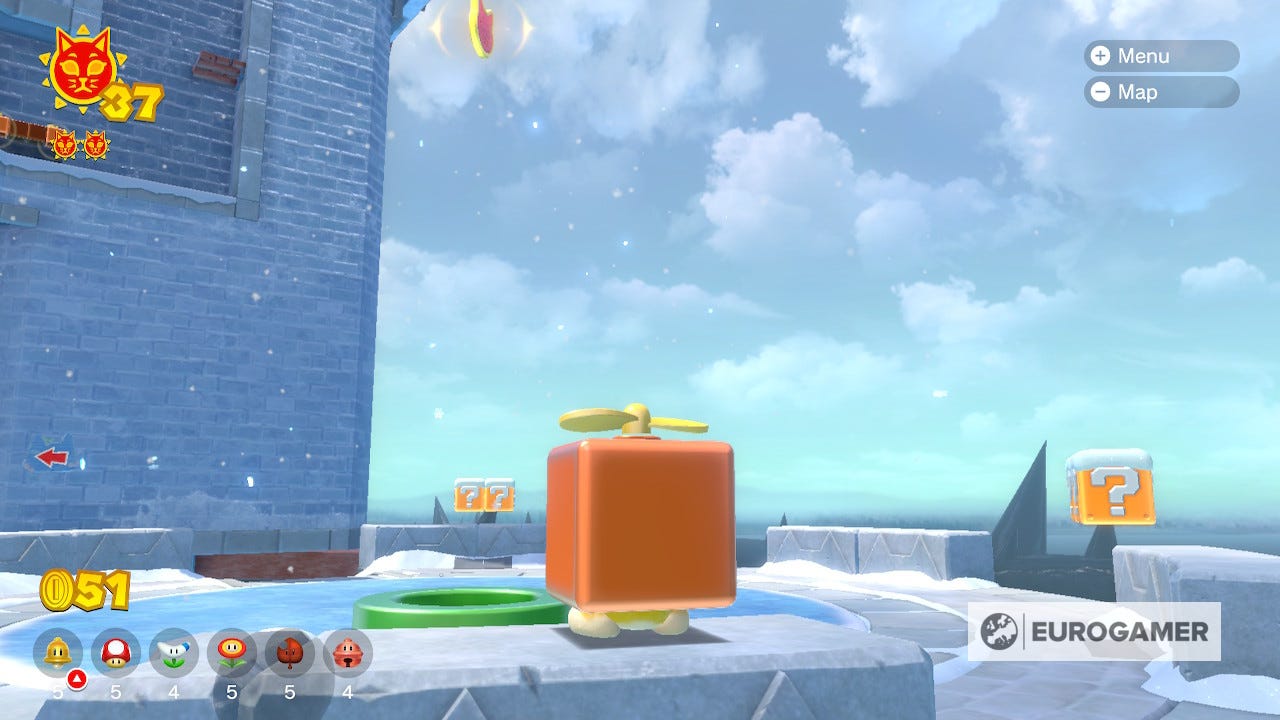
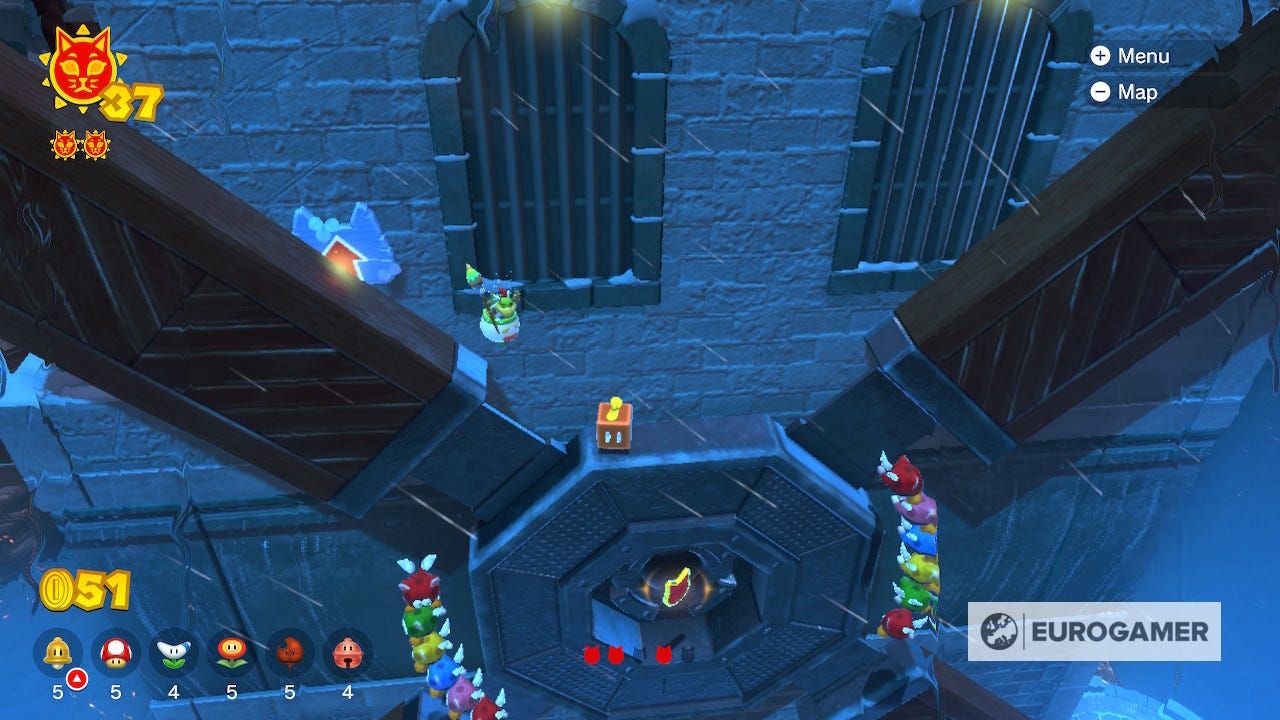
Cat Shine 37 Location
The first collectible can be found at the top of the first tower, only a few propeller jumps from the from the start. It can be a little hard to spot though, given its so high above. Use the shadow on the floor to line yourself up then propeller jump as high as possible to catch it.
The second collectible is well hidden. When jumping from the first tower to the second, you'll have to land on a rotating platform. Stay on it until it has revolved around the entire tower and you'll see this collectible hidden in an alcove in the tower.
The third collectible is also well hidden. After climbing from the rotating platforms you'll see a sign directing you right, and a dead end to the left. Go left and then use the propeller hat to go straight up into a hidden hatch where the collectible is hiding.
This collectible can be seen as you make your way up the tower. To reach it you have to fall off the platform you are standing on and grab it before activating your propeller to catch the moving platform ahead.

The final collectible is in the centre of the largest windmill wheel. Just before you reach the top of the tower. Use your propeller hat to make your way carefully into the centre to collect it.
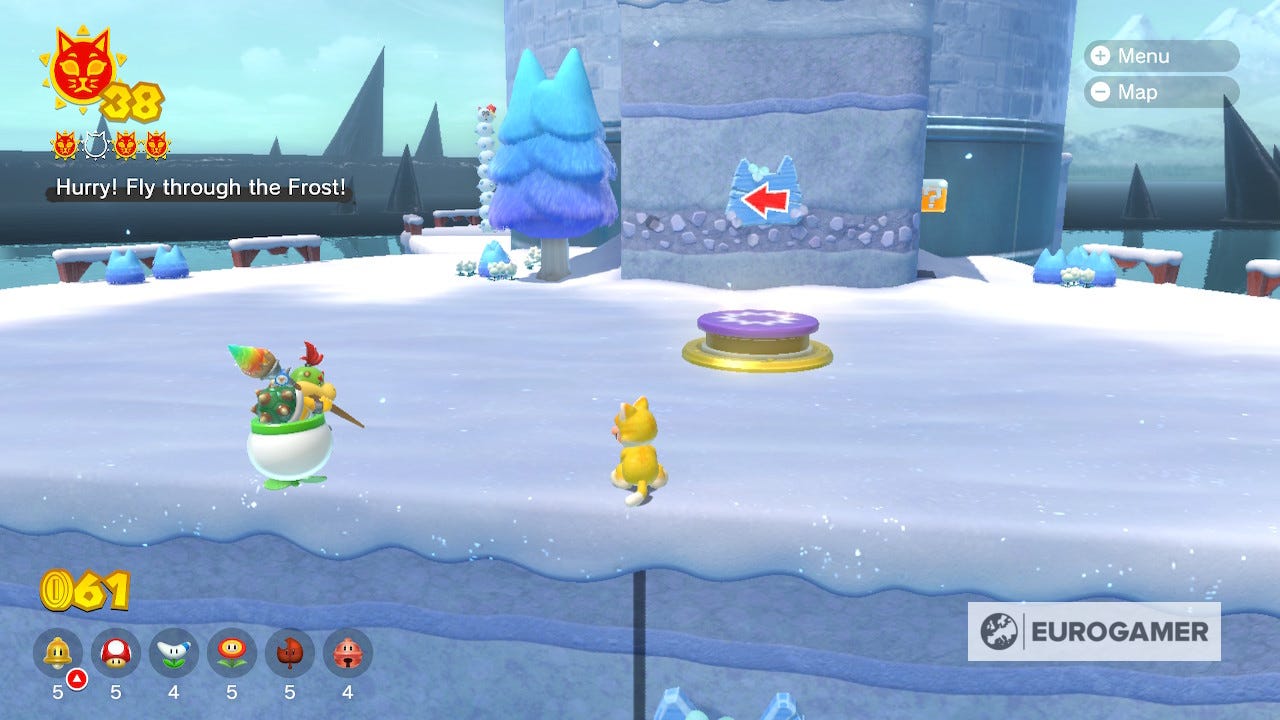
Cat Shine 38 Location
Leave and return, and you'll find a large button up the first jump from the starting gate. Make sure to have a propeller hat before you activate it. When you do a series of windmill wheels will spawn and you'll have twenty seconds to use them to reach the top of the first tower.
Try to avoid hovering in the air and you should have plenty of time.
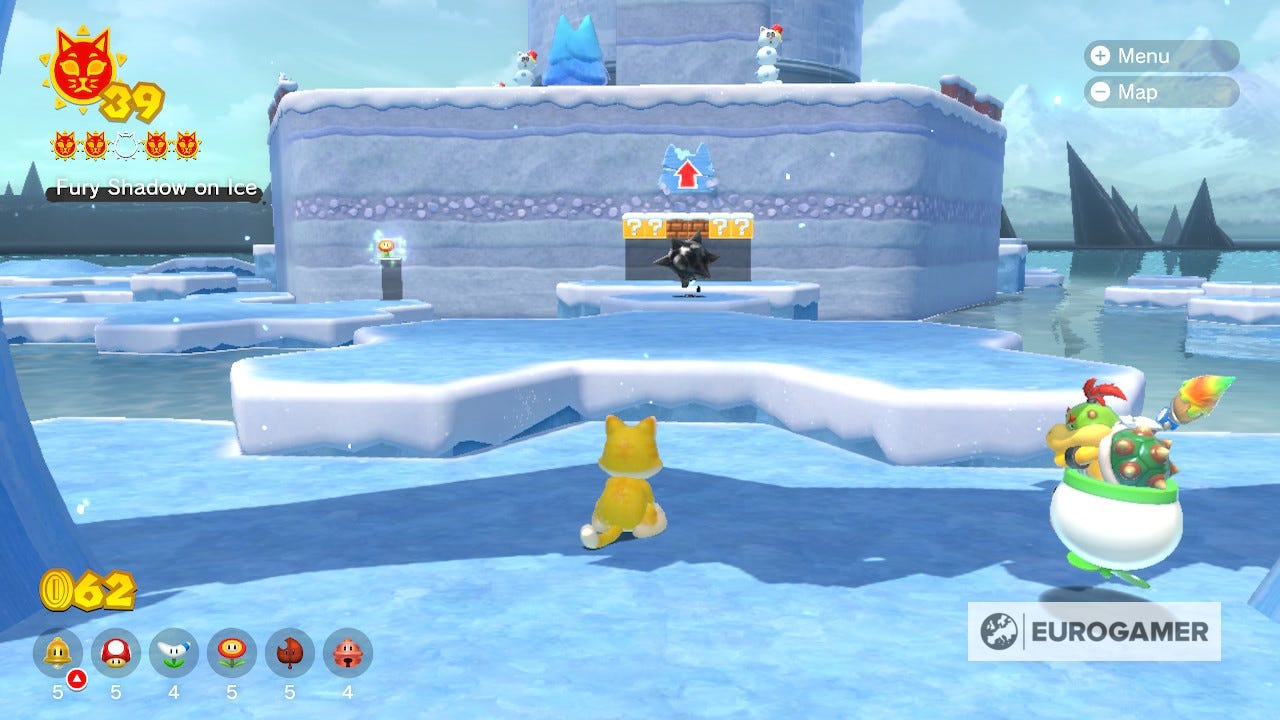
Cat Shine 39 Location
Come back to Crisp Castle Climb one more time and find Dark Luigi causing mischief. Catch him three times to be rewarded with a Cat Shine. Luigi doesn't climb the tower much, so you don't need a propeller hat, although it can be useful to get a drop on him.
Ruins Giga Bell Shine locations
Cat Shine 40 Location
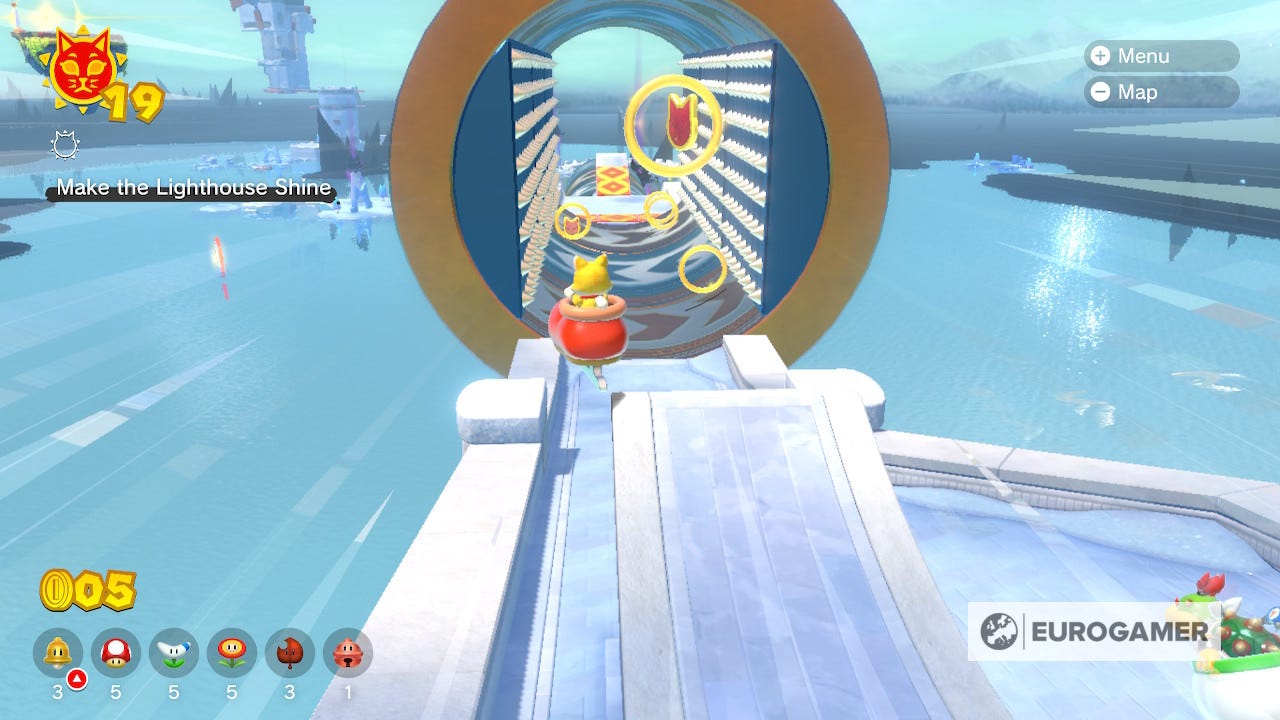
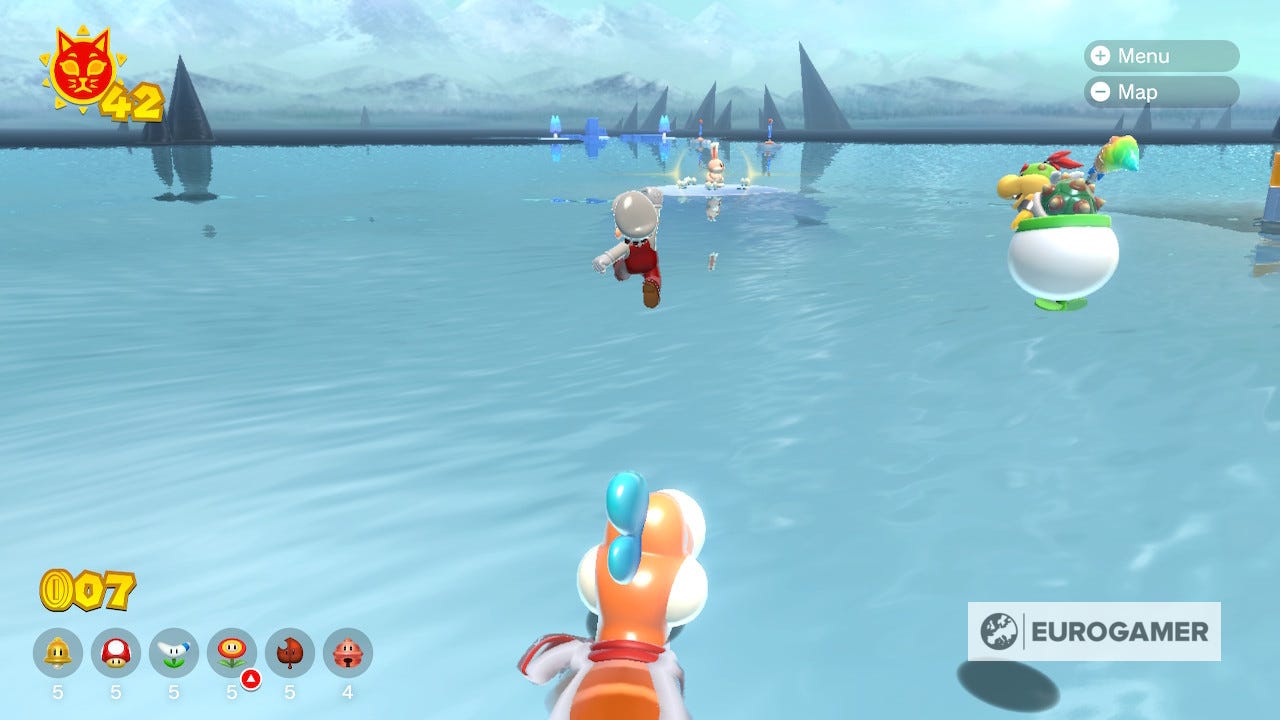
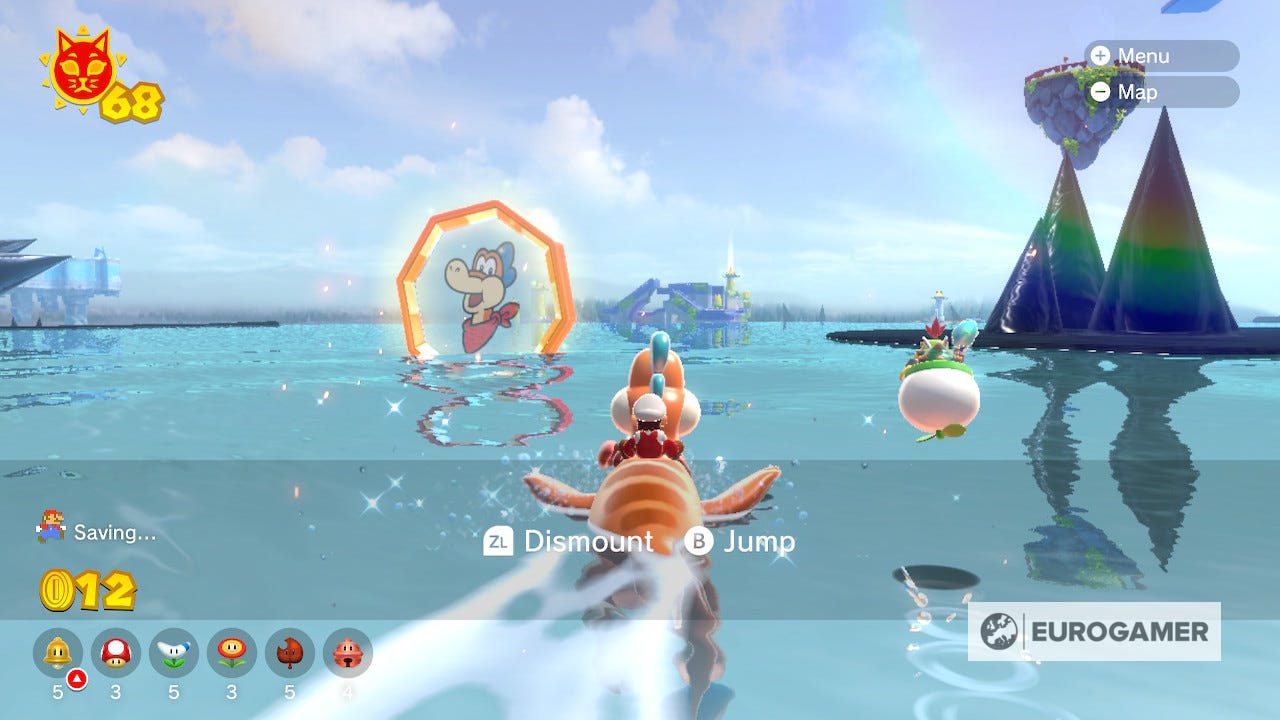
To the right of the Slipstake Slope you can see a large glowing gate with Plessies face on it out in the water. Go through that (while riding Plessie) and a small obstacle course will appear, leading you back to the Lakeside Giga Bell.
Complete the course within the timelimit and there will be a Shine waiting for you at the end.
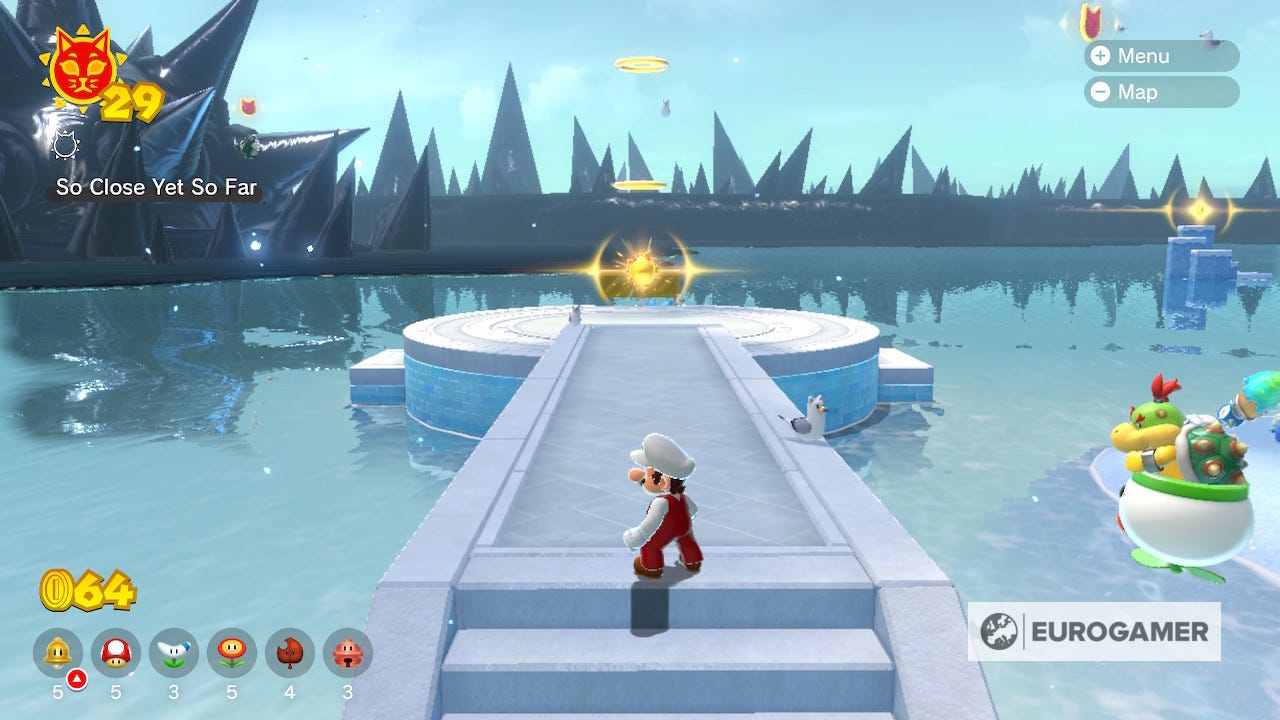
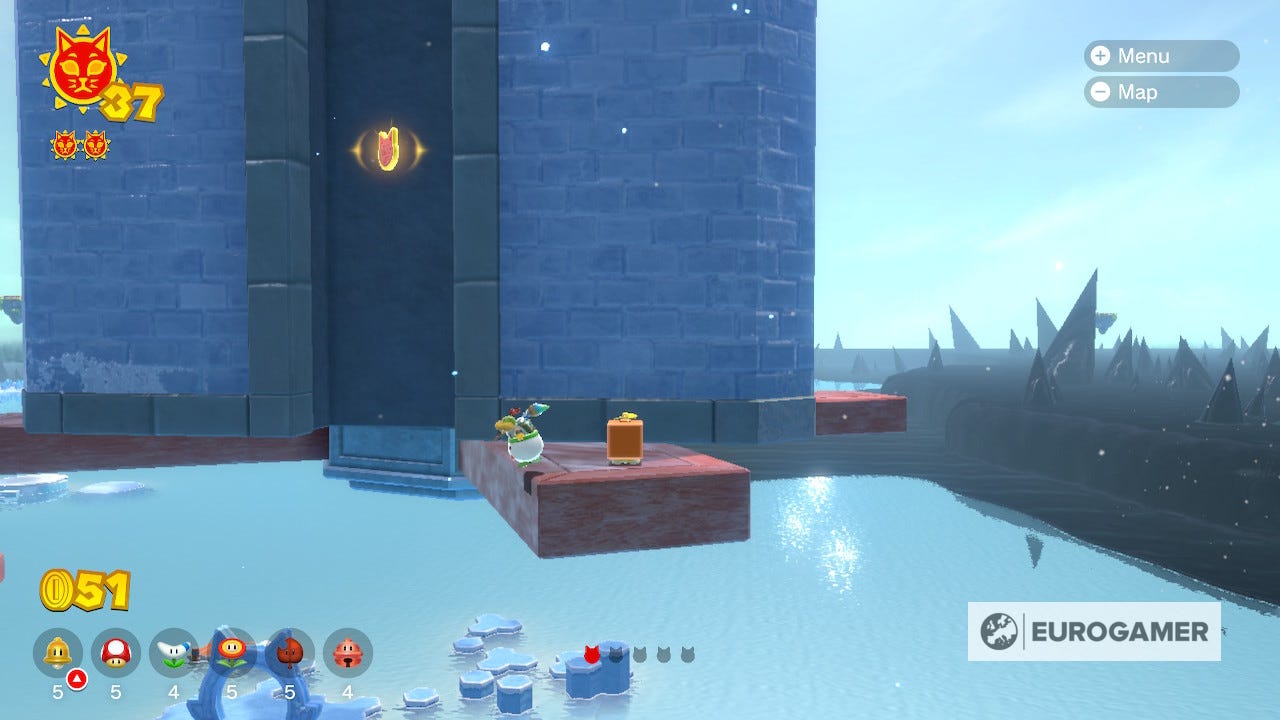
Cat Shine 41 Location
After collecting your first Shine at Crisp Castle Climb, you'll see a new island and another Plessie gate appear out at sea near the island. This obstacle course takes you back to Ruins Giga Bell island and ends on a platform underneath Slipskate Slope. Be careful at the end, because if you miss the Shine and fall off the platform, you'll have to start again.
Cat Shine 42 Location
By the Giga Bell on Ruins Giga Bell island you'll see yet another sad cat looking for their kittens, but this time you'll have to find three. The first is very close, hidden on a secluded beach opposite the sad cat on the same island. Look at the beaches facing away from Fury Bowser's lair if you're struggling.
The second kitten can be hard to reach but you can see it playing on top of the Clawswipe Colosseum gate. Remember that while in cat costume, the kitten won't be scared of you.
The final one is further afield. Just outside the Crisp Castle Climb gate you'll find this kitten hanging out. To get them back you'll have take them over to the Ruins Giga Bell island via the iceberg. If the kitten falls in the water they'll disappear and respawn where you found them, so be careful.

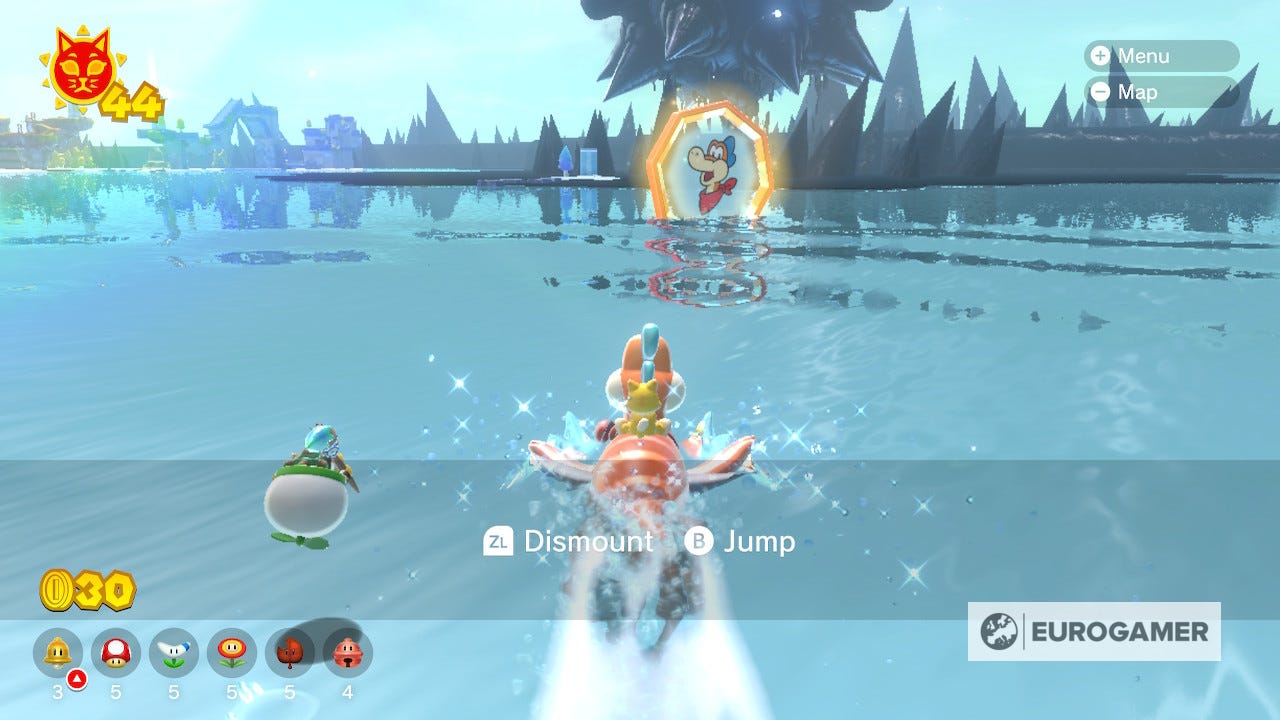
Cat Shine 43 Location
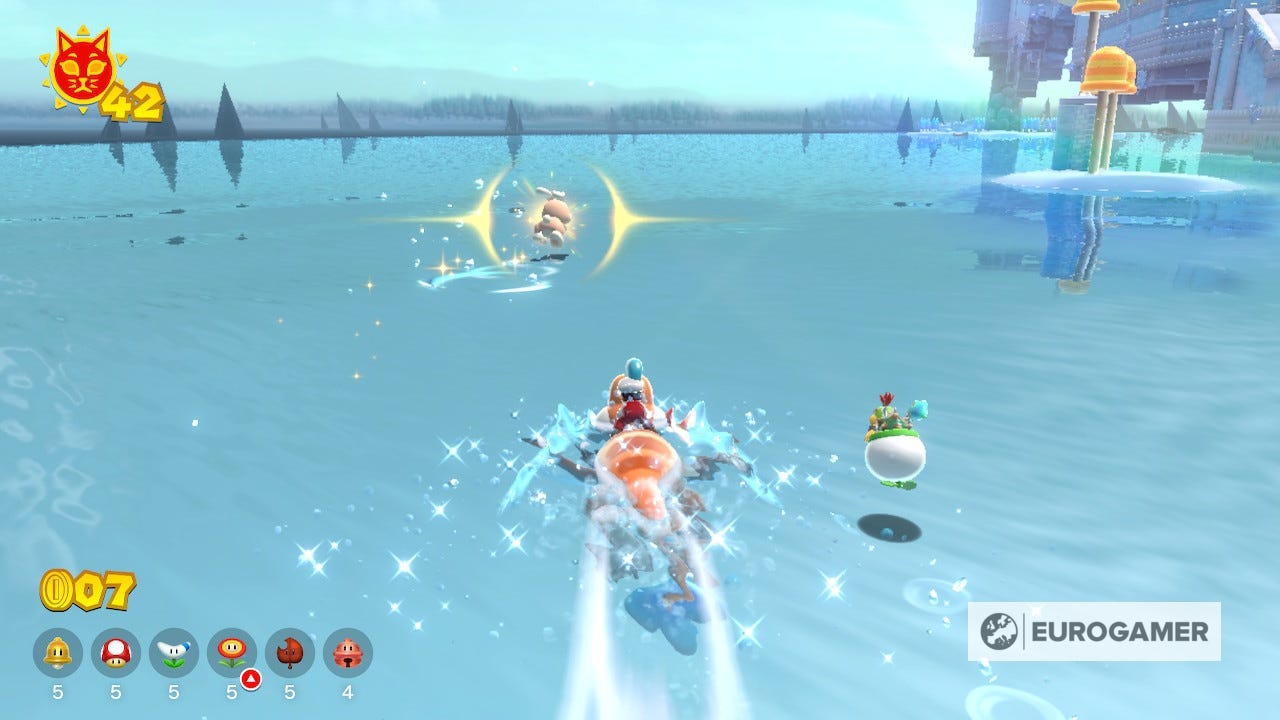
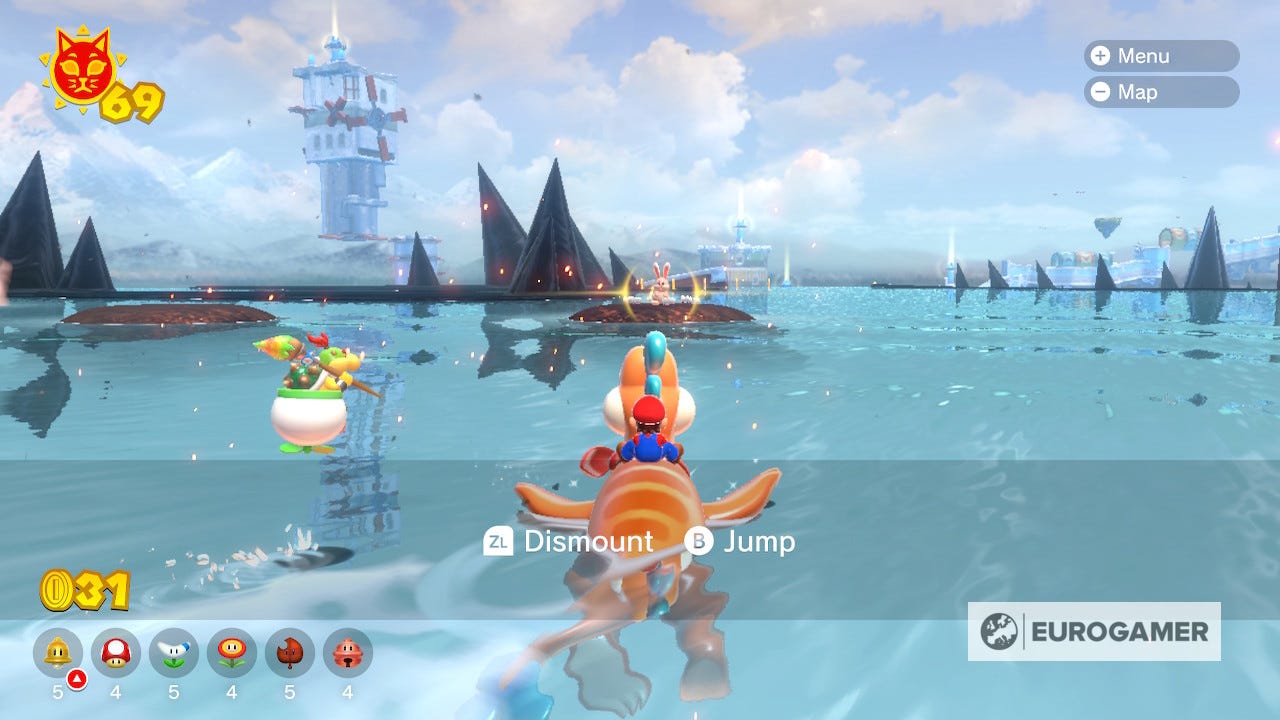
Once you've completed one of the Shines at the Clawswipe Colosseum, you'll see this small island emerge from the ink with a large rabbit on it. Approach the rabbit and it will flee, but if you can catch it (with the help of Plessie), you will be rewarded with a Shine.
Cat Shine 44 Location
You can see this shine floating in the air above between Trickity Tower and Crisp Castle Climb. An iceberg floats between the to, starting at Crisp Castle. Head there and make your way to the top of the berg before it passes the shine. Remember to jump to reach the shine as you pass under it
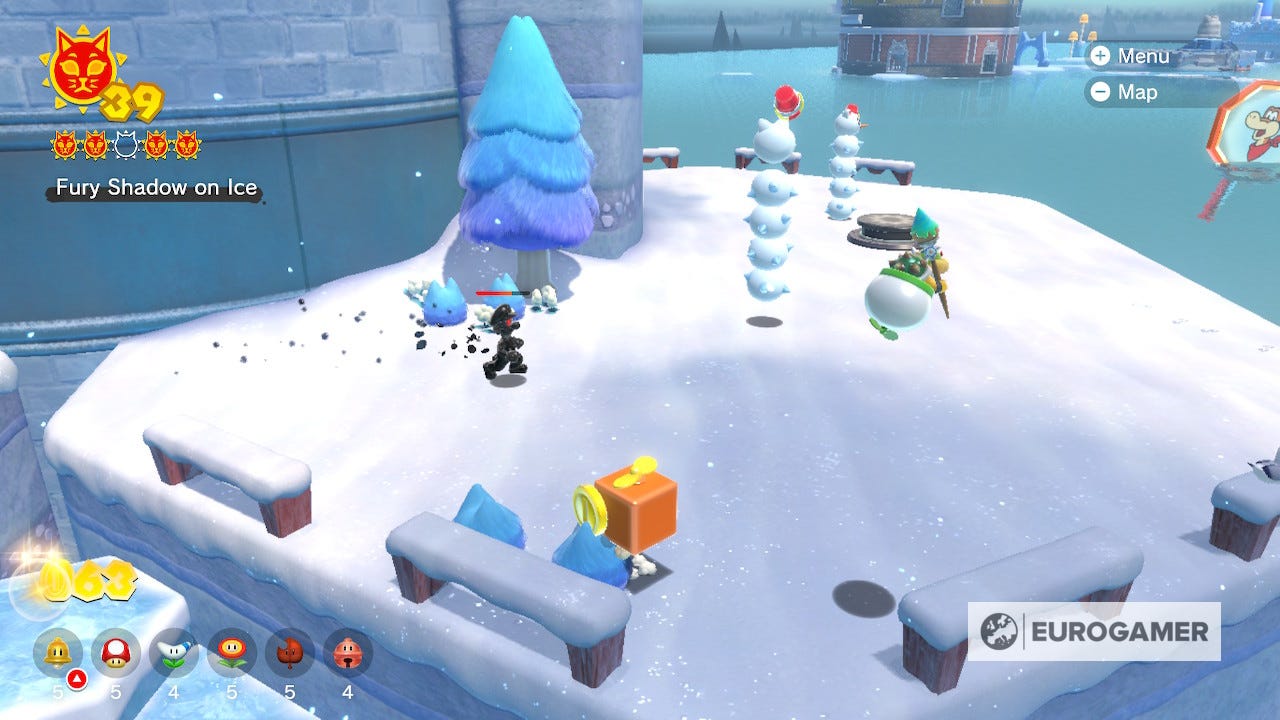
Cat Shine 45 Location
On the ice before you enter Crisp Castle Climb proper, you might see a large button. Use the ground pound to activate it and you'll be locked in a fight with some spiky snowmen and angry fish. Dispatch them and you'll be rewarded with a Shine.

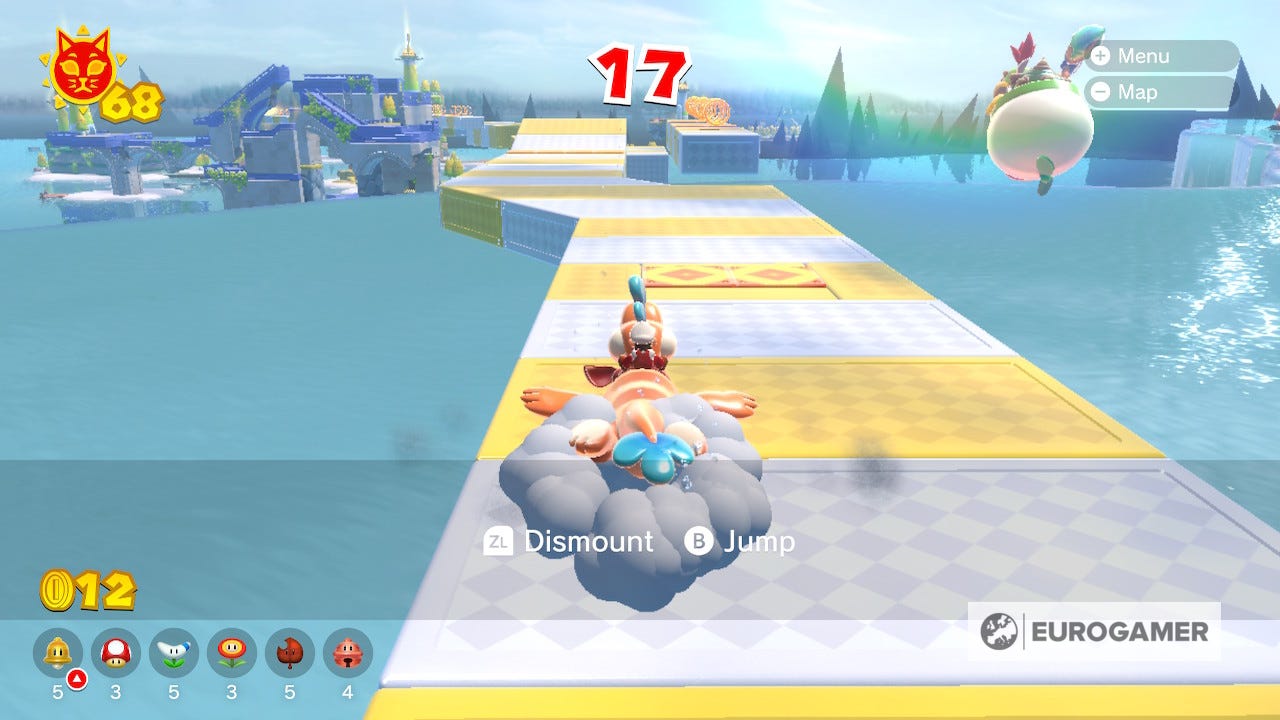
Cat Shine 46 Location
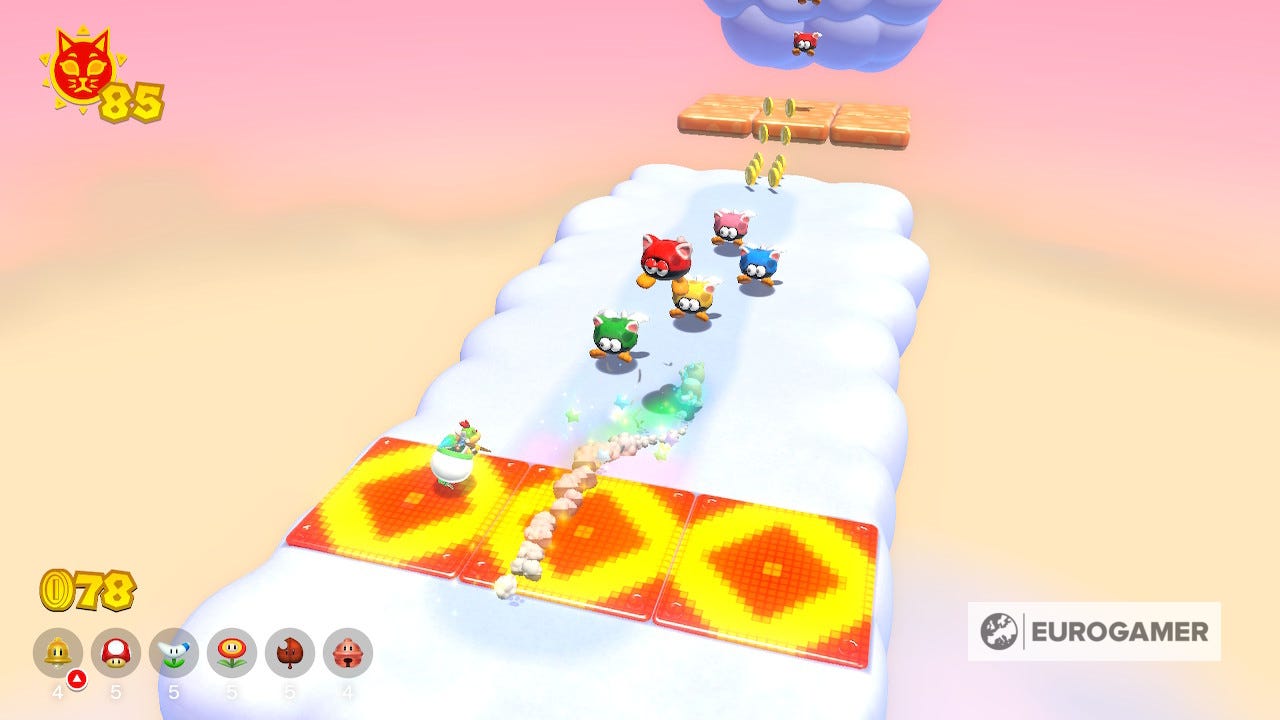
Just off the coast from the Ruins Giga Bell island and you'll see a cloud happily sitting on top of a tree. Climb up and you'll be transported to a cloud island with a lot of coins, boost pads and star power ups. Use them all to defeat all the enemies on the path and you'll be rewarded with a Shine.
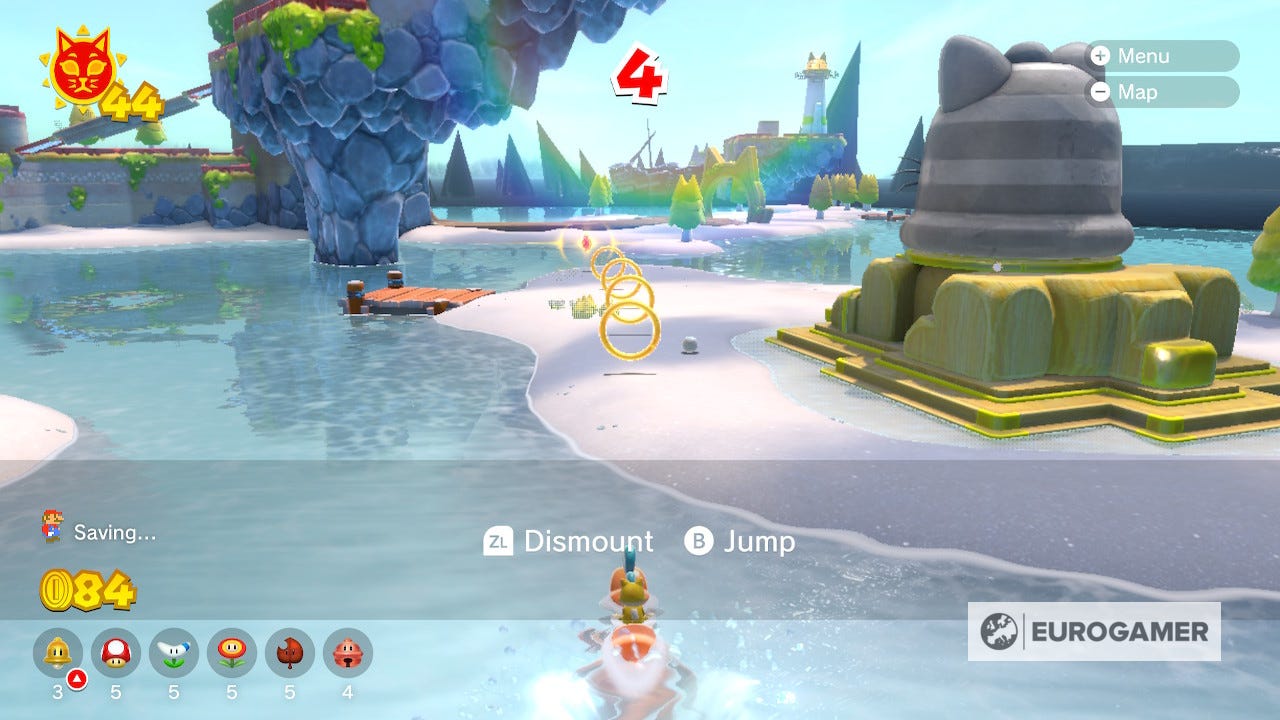
Cat Shine 47 Location
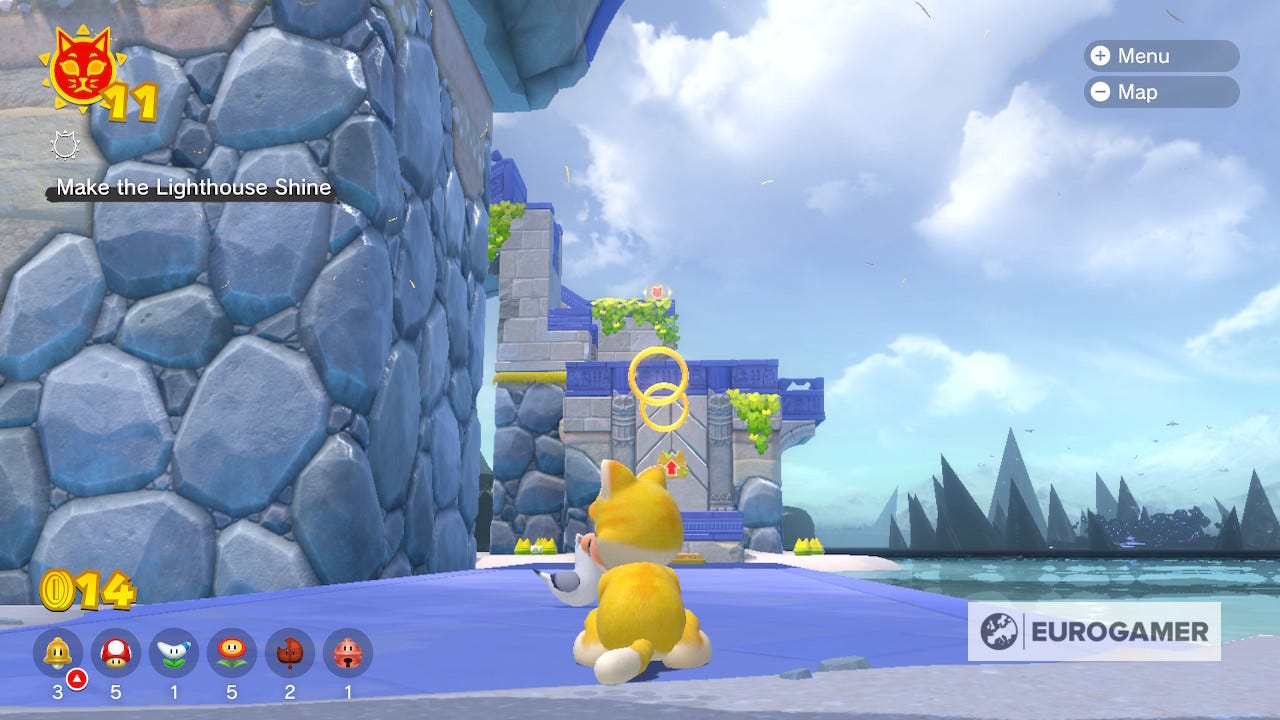
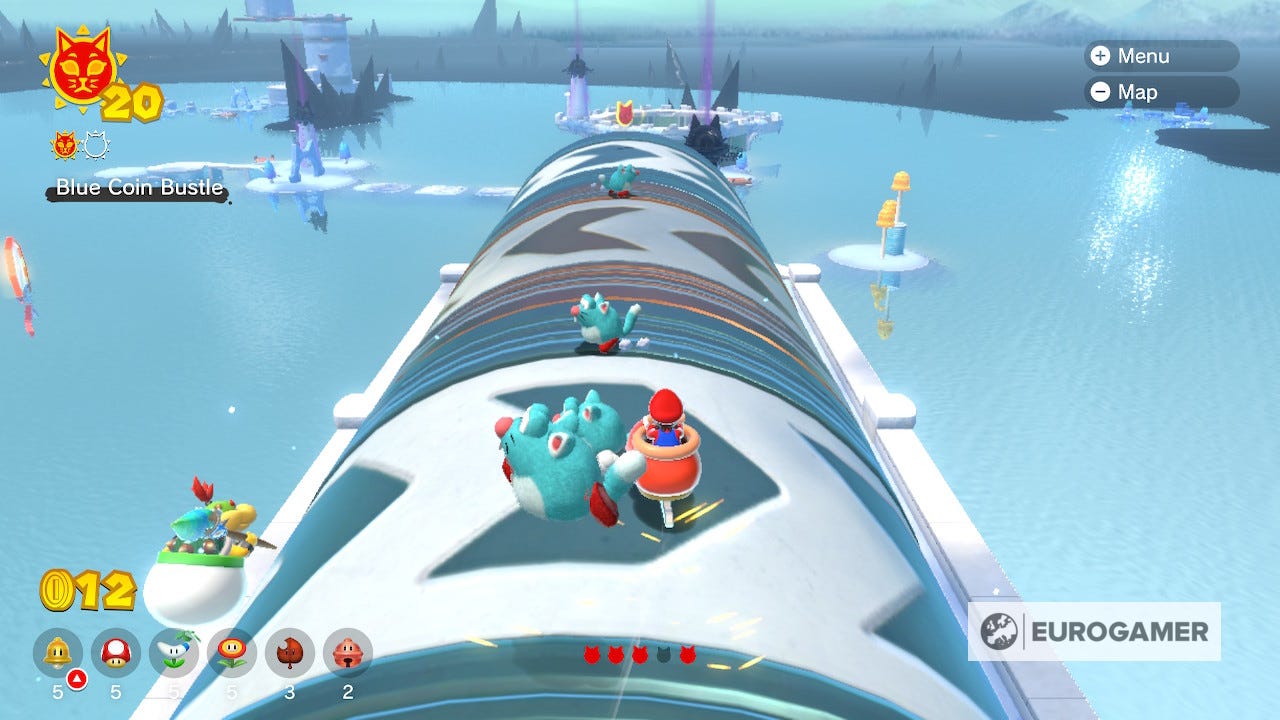
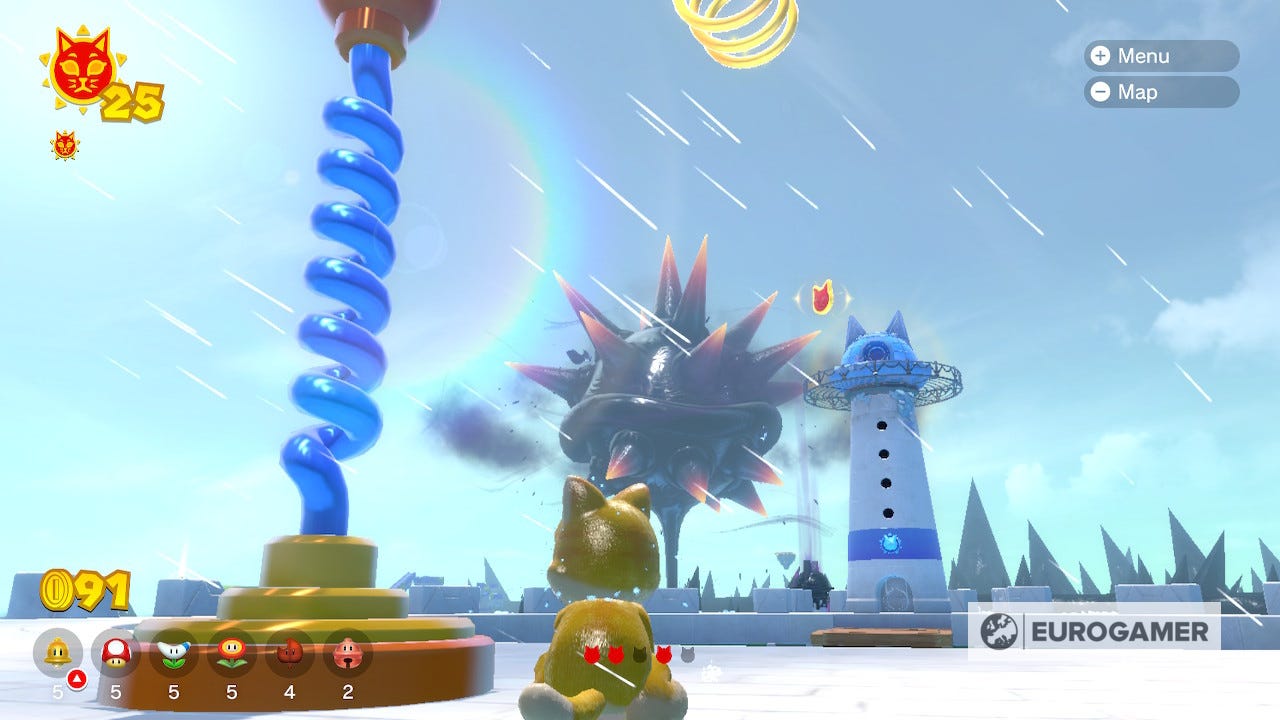
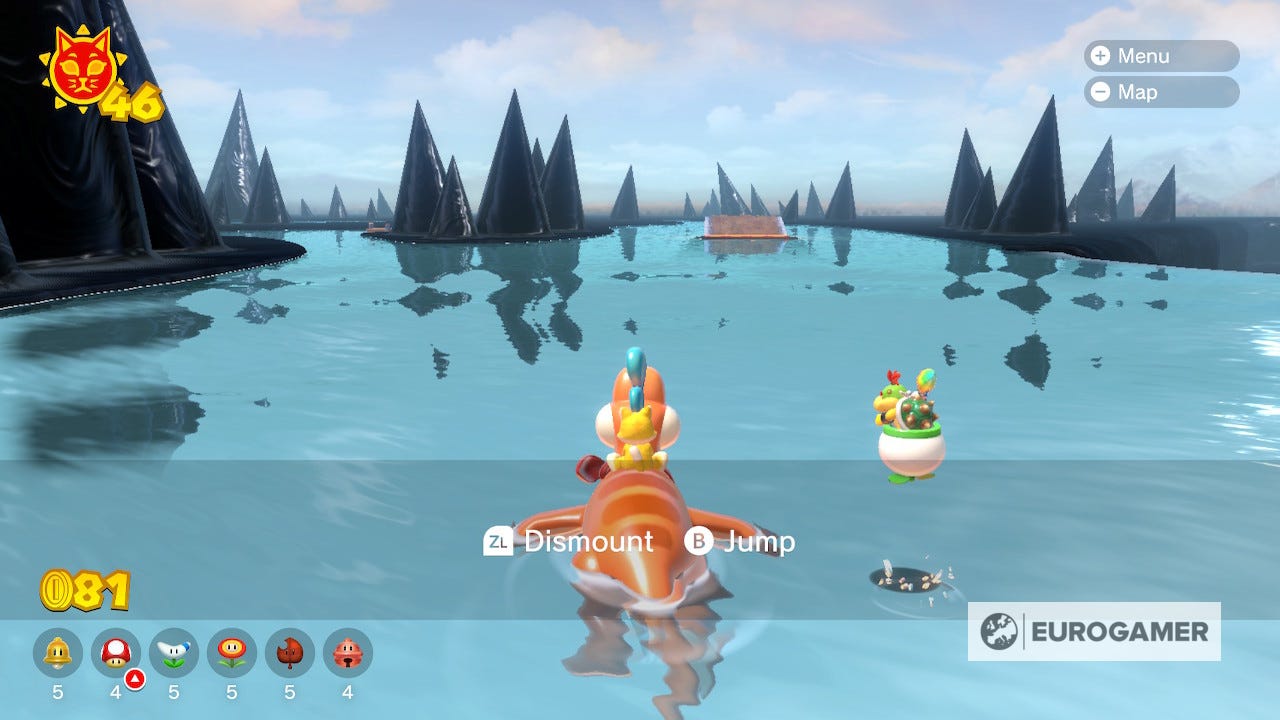
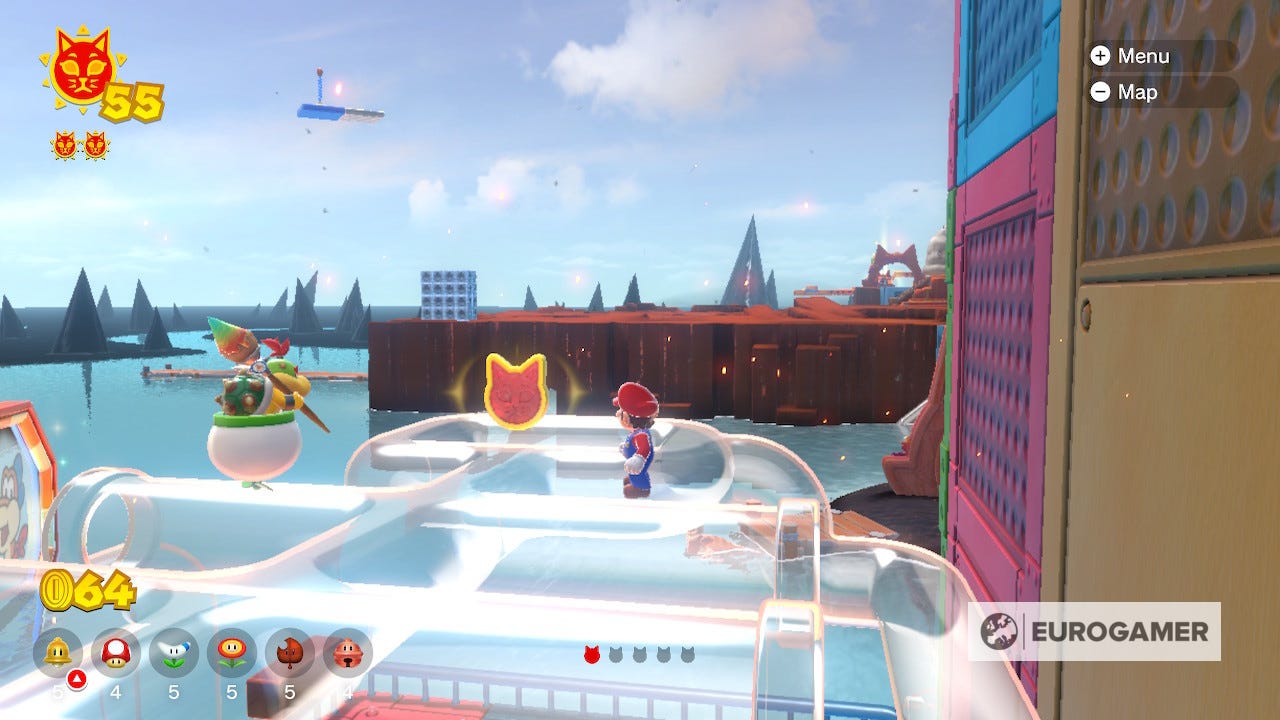
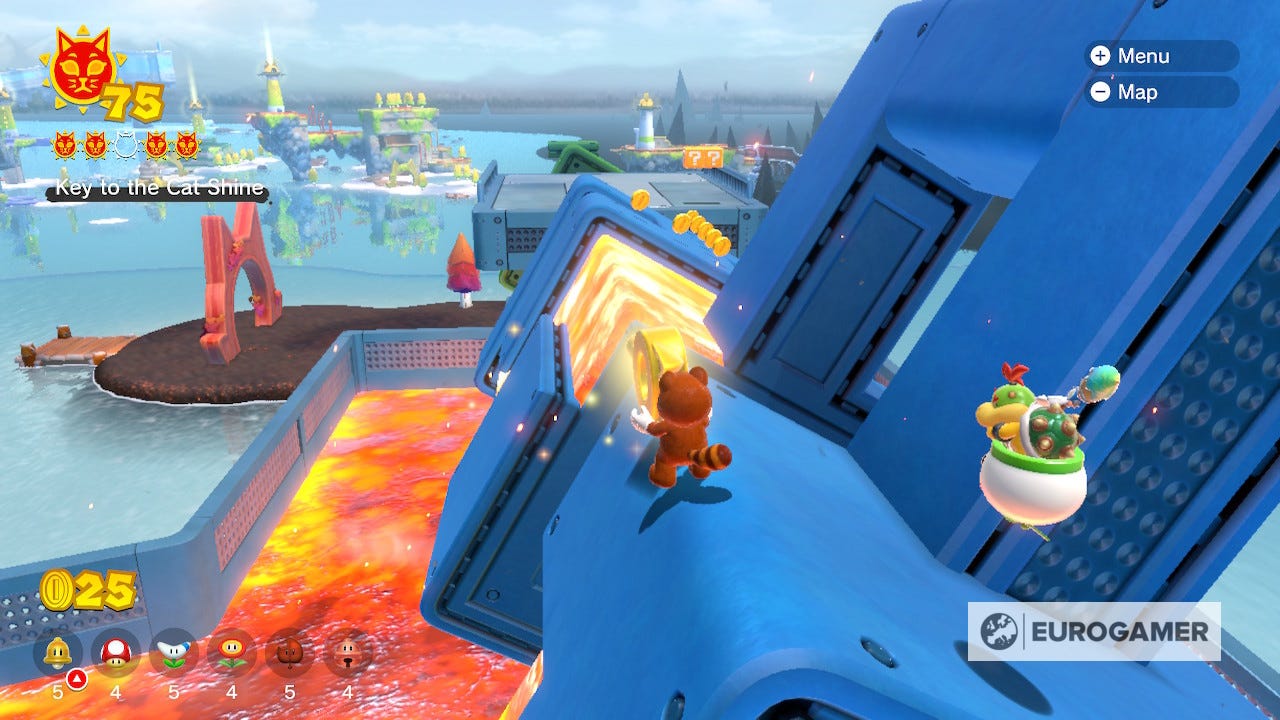
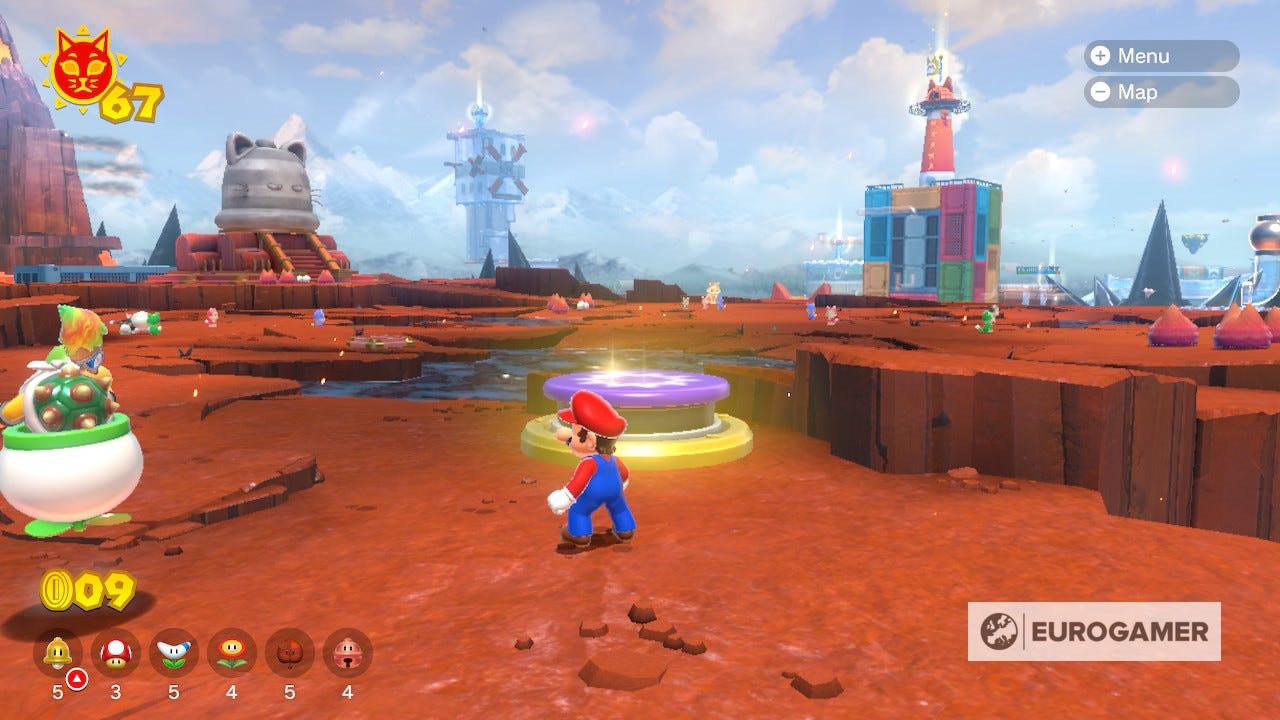
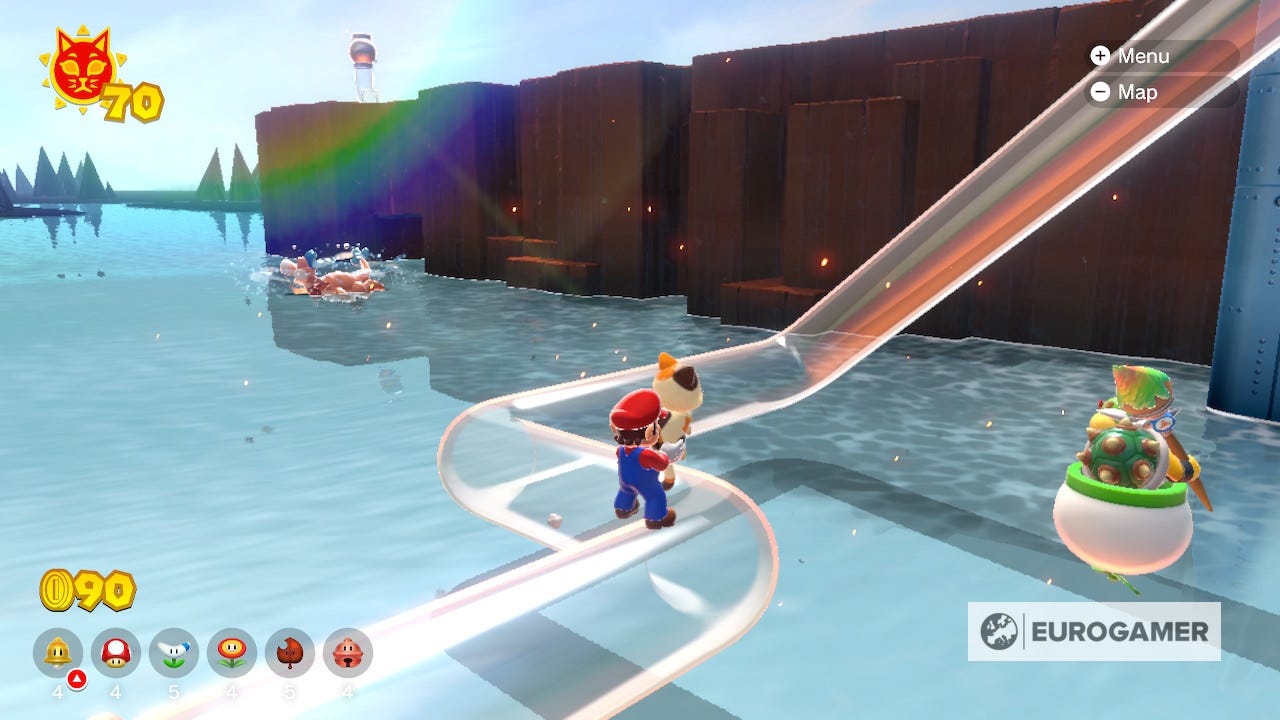
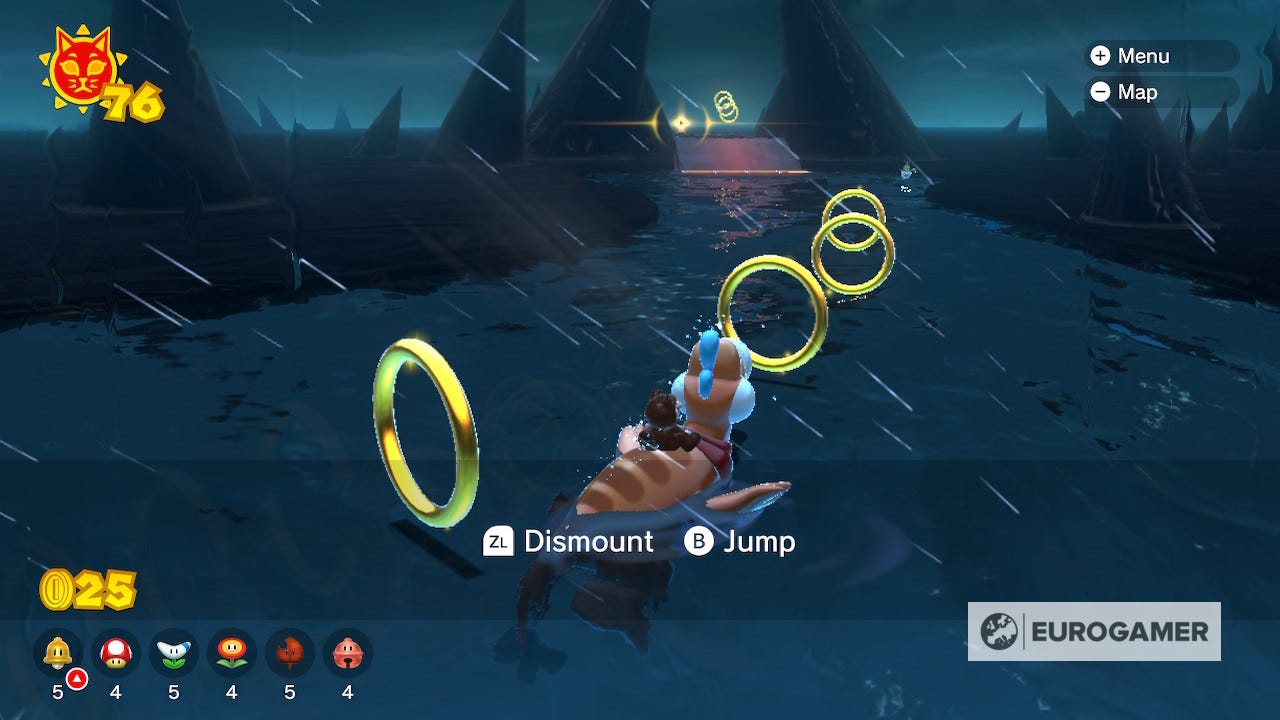
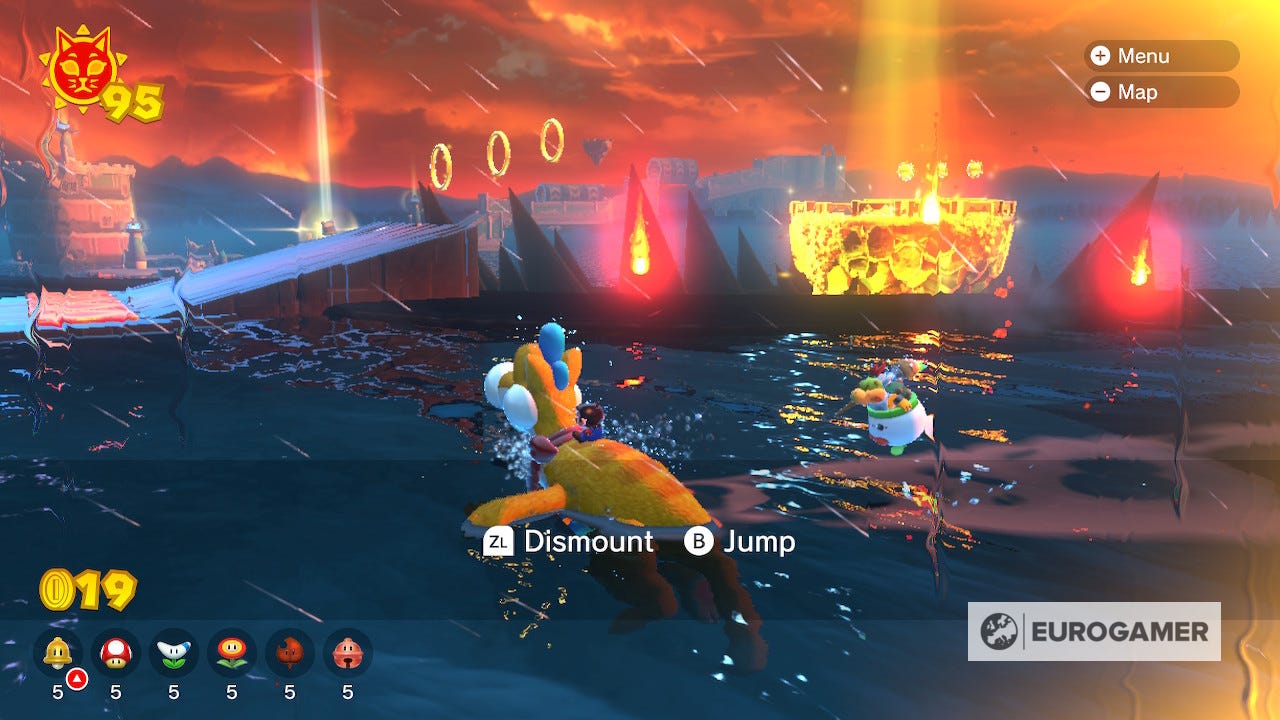
After defeating Fury Bowser for the second time, he will reveal the last section of the map. Follow the route highlighted with golden rings to this new location on Plessie until you enter a new inky area by sliding up a large ship.
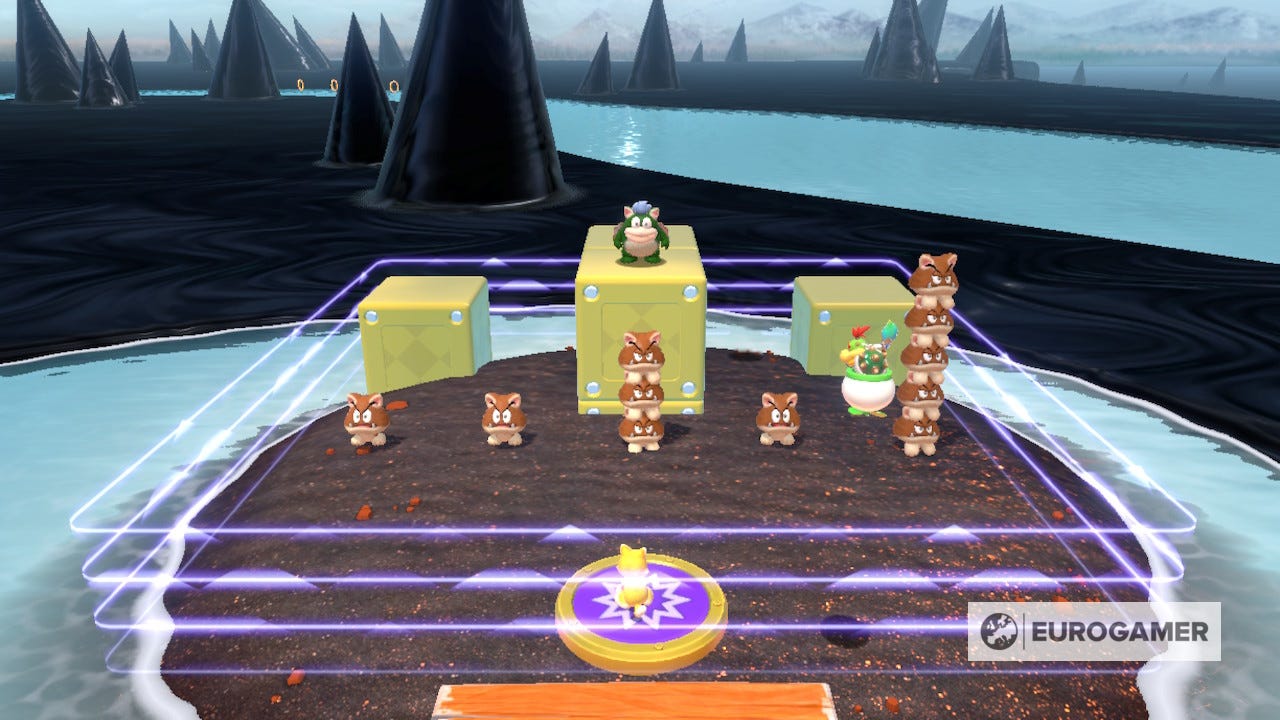
Once in this region, you'll have to keep swimming on Plessie, but keep an eye out for a small fork in the water. Take the left path and you'll find a large button that spawns a fight.
Defeat all the enemies, including the invisible enemy hiding, to unlock a Shine.
Cat Shine 48 Location
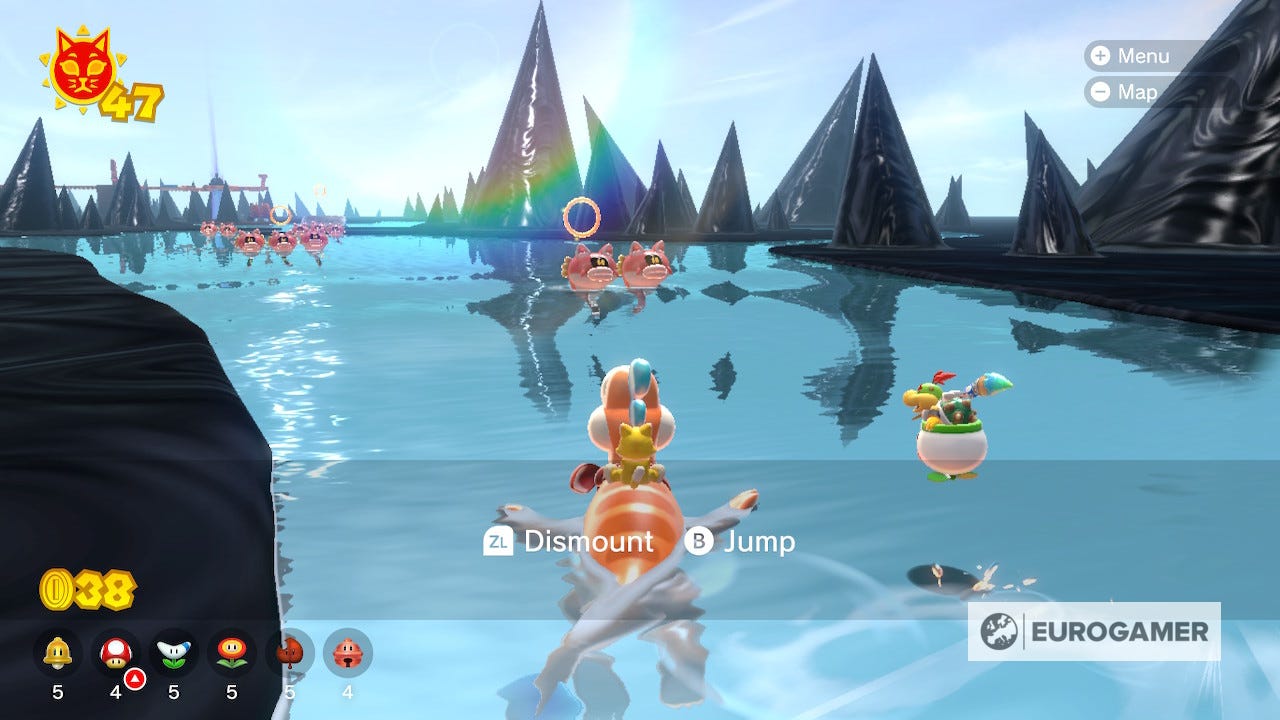
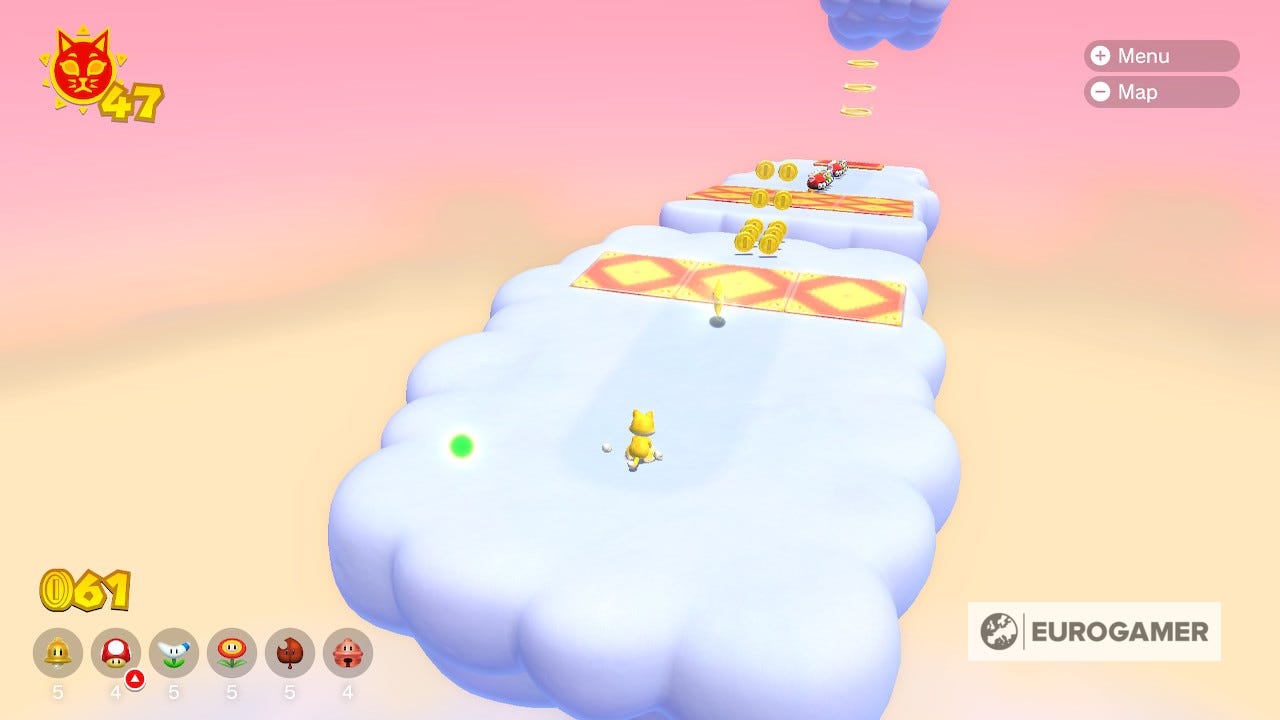
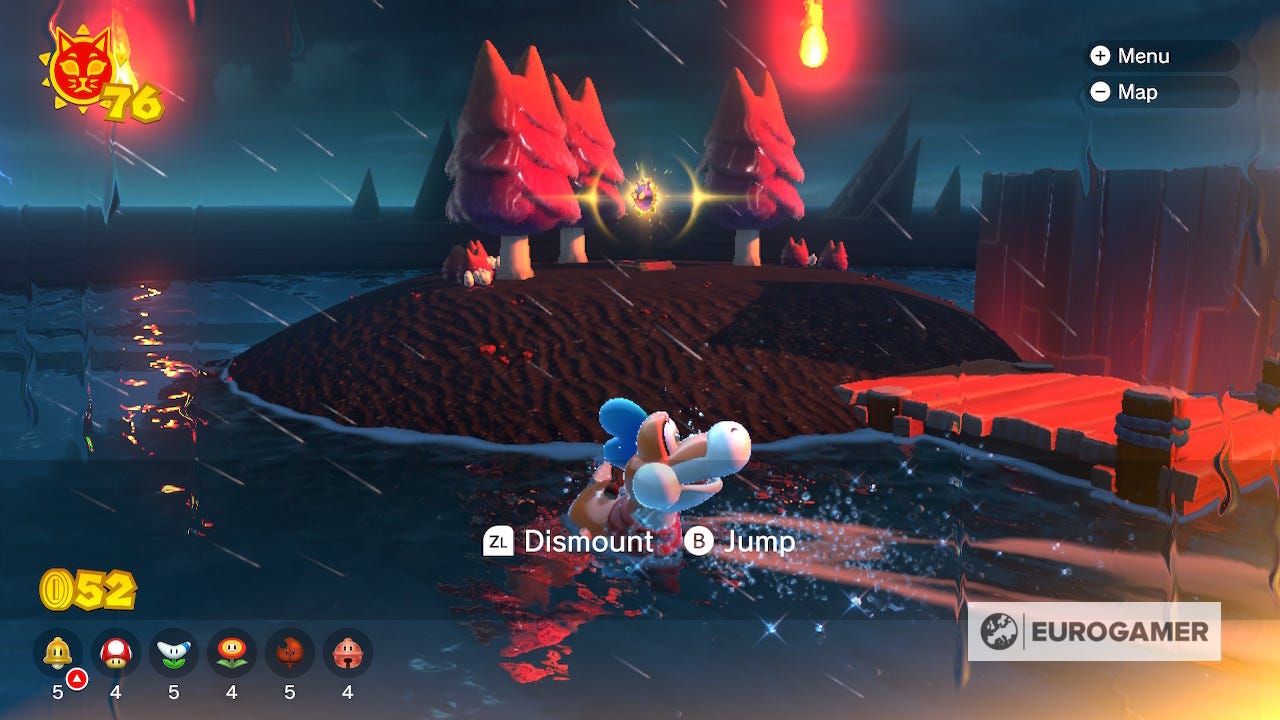
Continuing down the inky road until you reach the lane where you can jump over large catfish. Look for a hidden route to the right to find an island with a cloud atop. Run the cloud course, making sure to defeat every enemy on it and you will unlock a Shine at the end.
Risky Whisker Island Shine locations
Cat Shine 49 Location
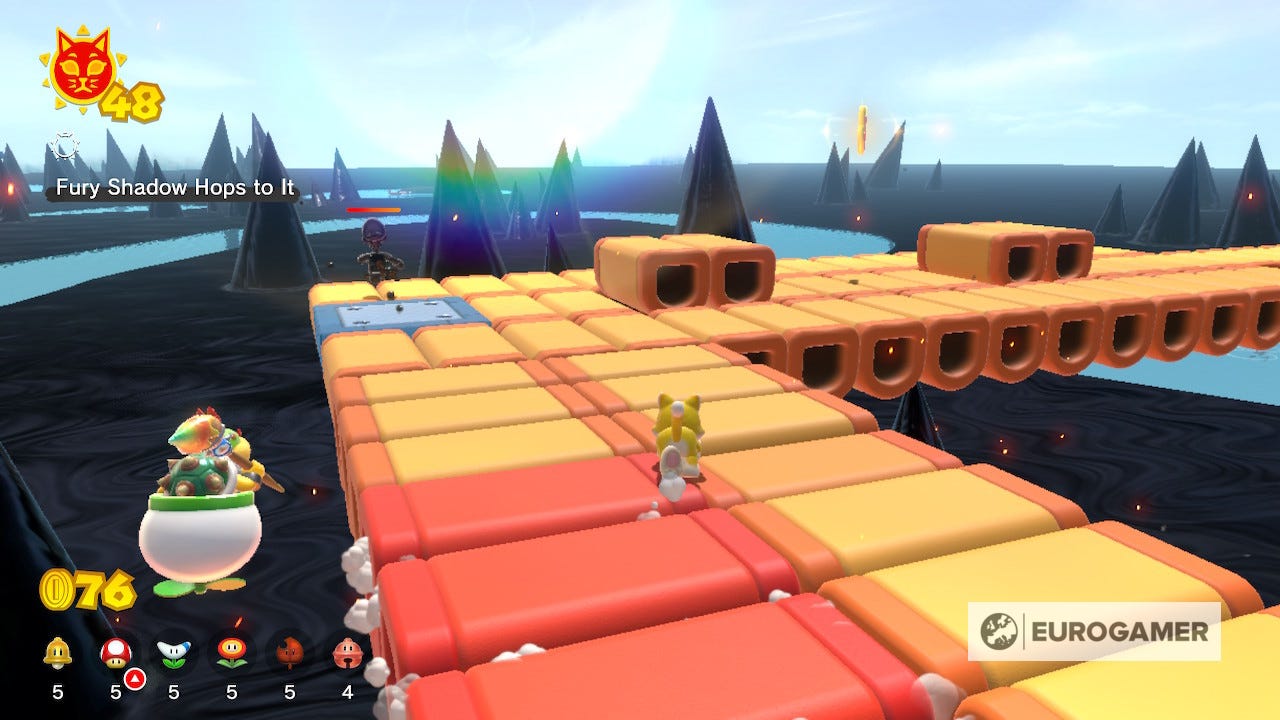
The moment you go through the gates of Risky Whisker Island, you'll spot the inky blob of Dark Luigi waiting for you to chase him. Like the others you have to catch him three times but this island is a little tricky.
He will run along collapsing platforms so you have to be quick and make sure you don't go back on yourself as you chase him.
Cat Shine 50 Location
To find the Bowser blocks you will have to already have a Shine on this island. Once you have, the ink will dissipate around the beach. Head down to the waters edge and you'll find the blocks sitting more or less in the middle of the island.
Cat Shine #51 Location
There are five collectibles dotted around Risky Whisker Island that can be collected to reward you with a Shine. The first one is to the left as you approach. You'll need to jump onto the raised platform and then quickly leap up to catch this collectible before the platforms sink.

The second collectible is on the corner just behind the first. Or rather it is over the corner. Luckily you won't have to plunge into the waters below as its actually on an invisible platform, letting you grab it easily.
The third platform is up a flight of sinking stairs around the corner (behind the lighthouse from the start). Move quickly and you should get to it easily enough.
The fourth collectible is floating above several small gaps in the disappearing platforms. Move quickly and carefully to reach it and make sure to jump to reach it.
The final collectible is on a small platform just away from the final corner. Its easy enough to reach, and theres a safe spot just before if you need to line up your jump.
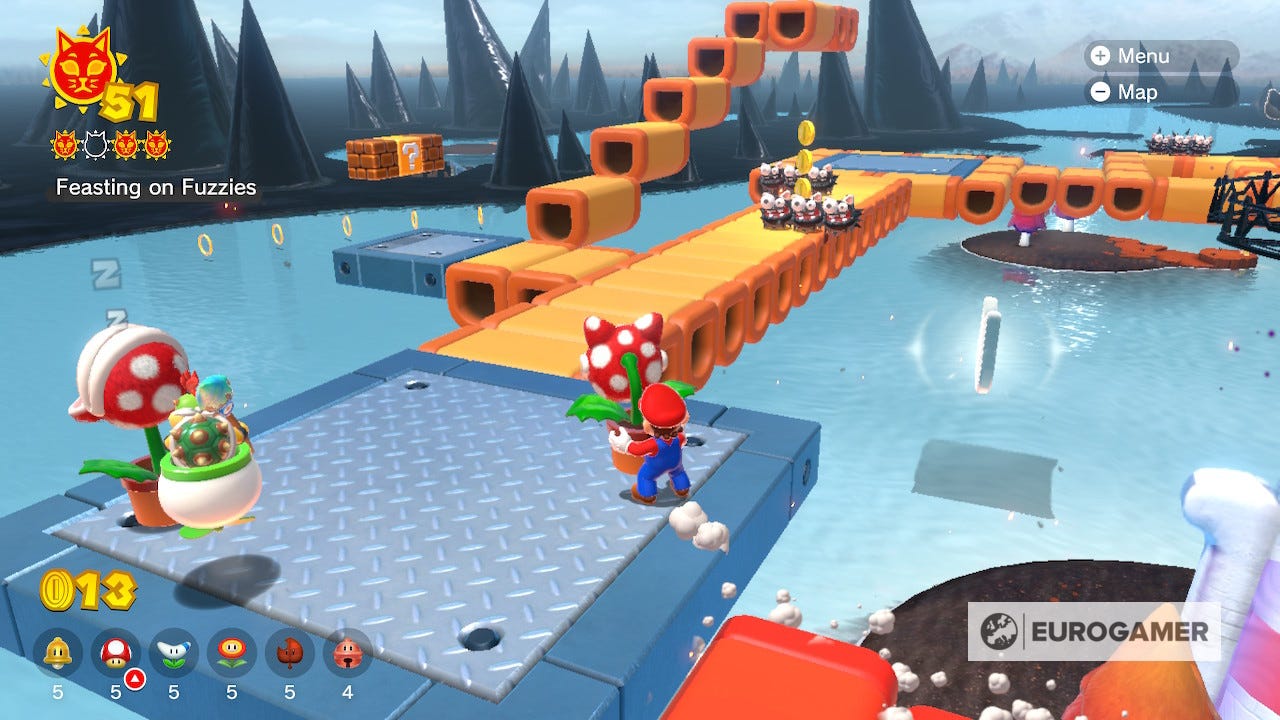
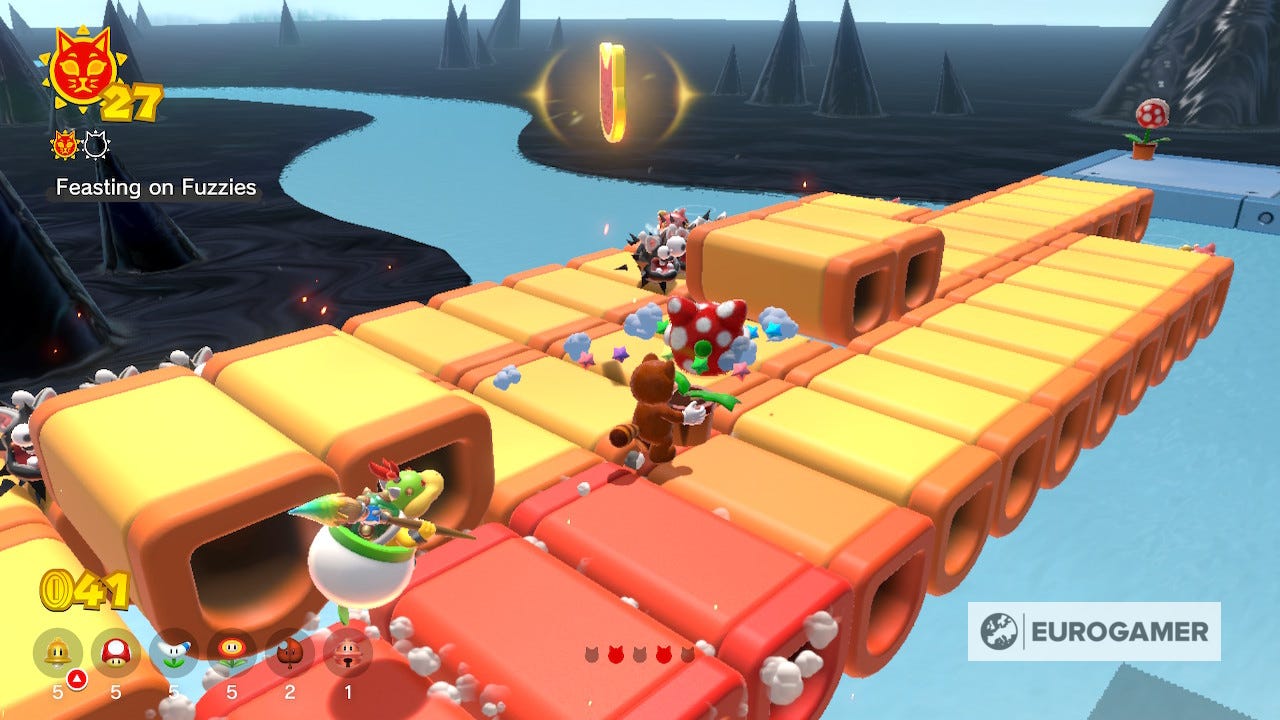
Cat Shine 52 Location
Leave and return to Risky Whisker Island and you'll find a potted Piranha plant and several enemies floating around the sinking platforms. Pick up the Piranha plant and use it to eat all the other enemies and you'll be awarded a Shine for your trouble.
If you're struggling to get all the enemies before the platforms sink, try and learn their route and then run it in reverse, halving the time you need to spend.
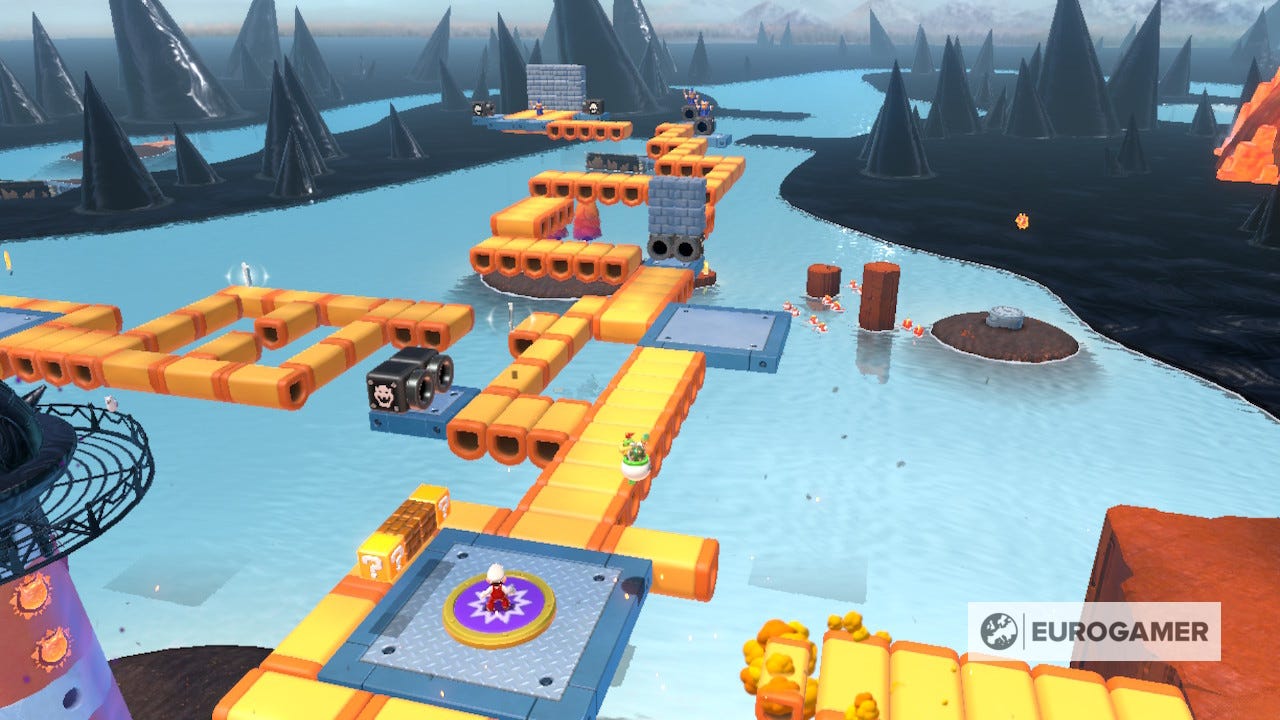
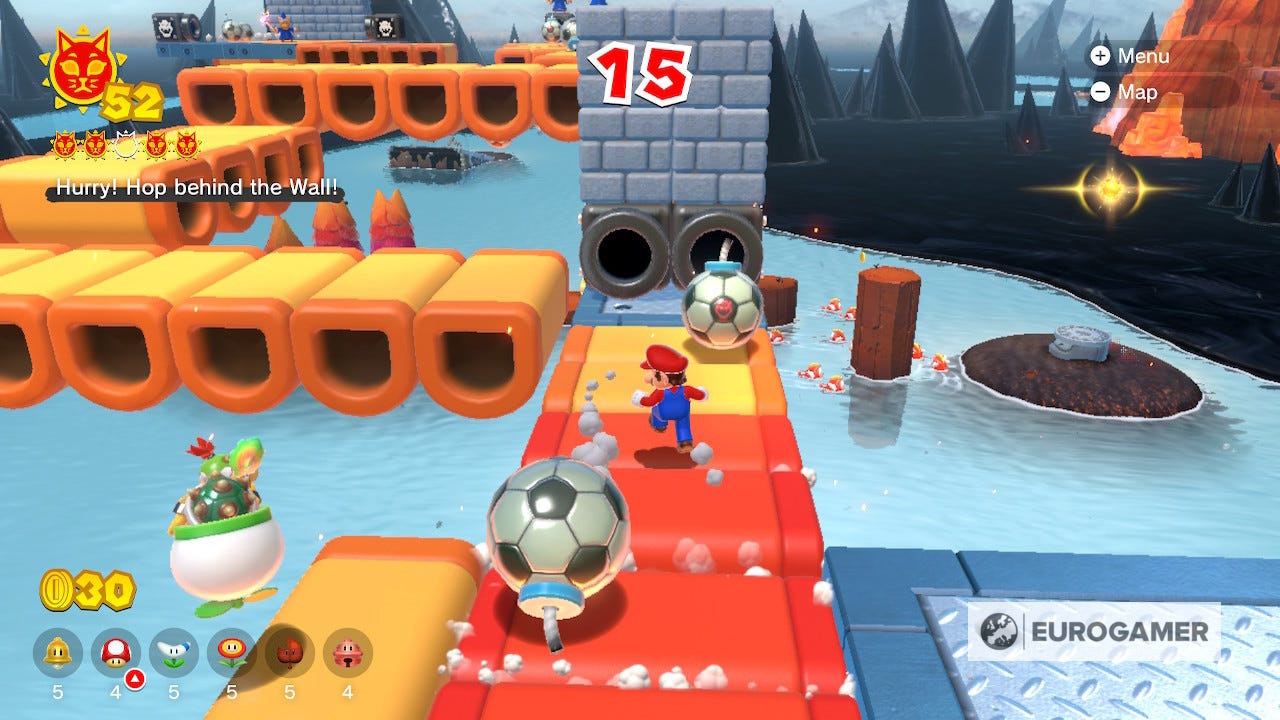
Cat Shine 53 Location
Return one final time to Risky Whisker Island and you'll find a button that launches a rather difficult obstacle course for you to clear in 20 seconds. The route itself is tricky enough but at the end you'll also have to use one of the spawning football balls to destroy the wall blocking the Shine.
All you have to do is run into the bomb to kick it in the direction you're moving, but you'll have to be careful you're not too close to the explosion.
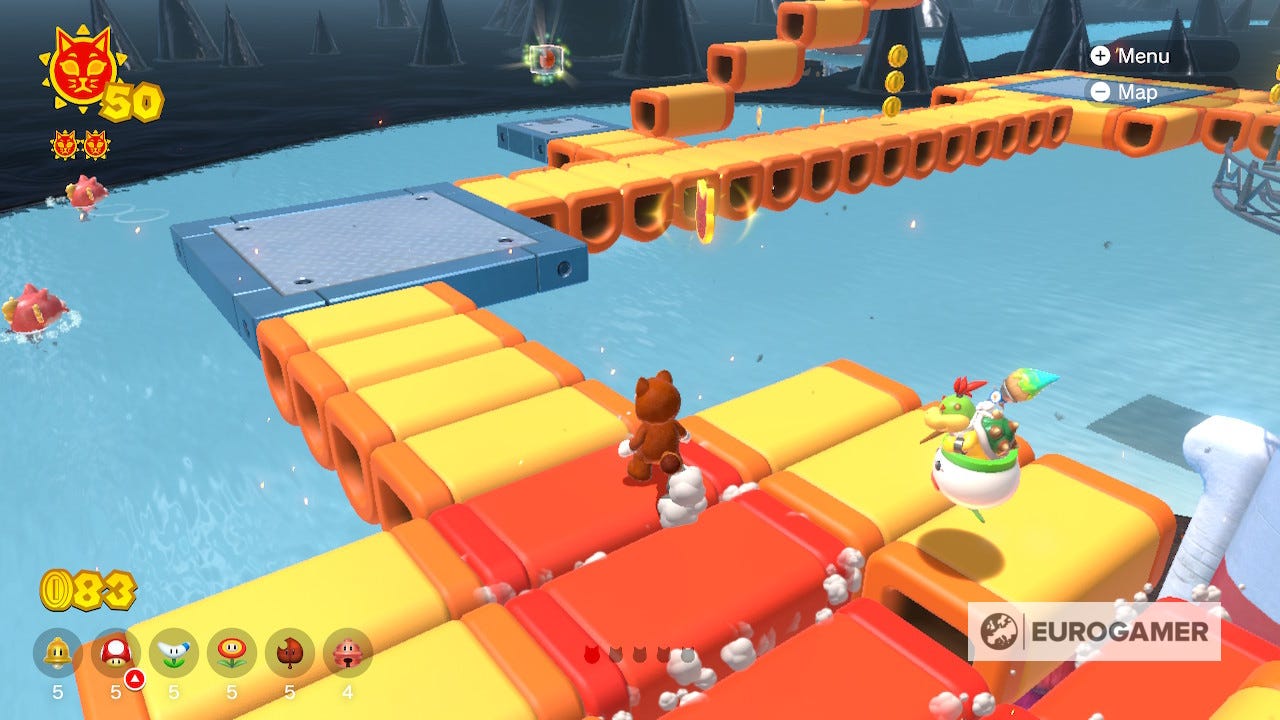
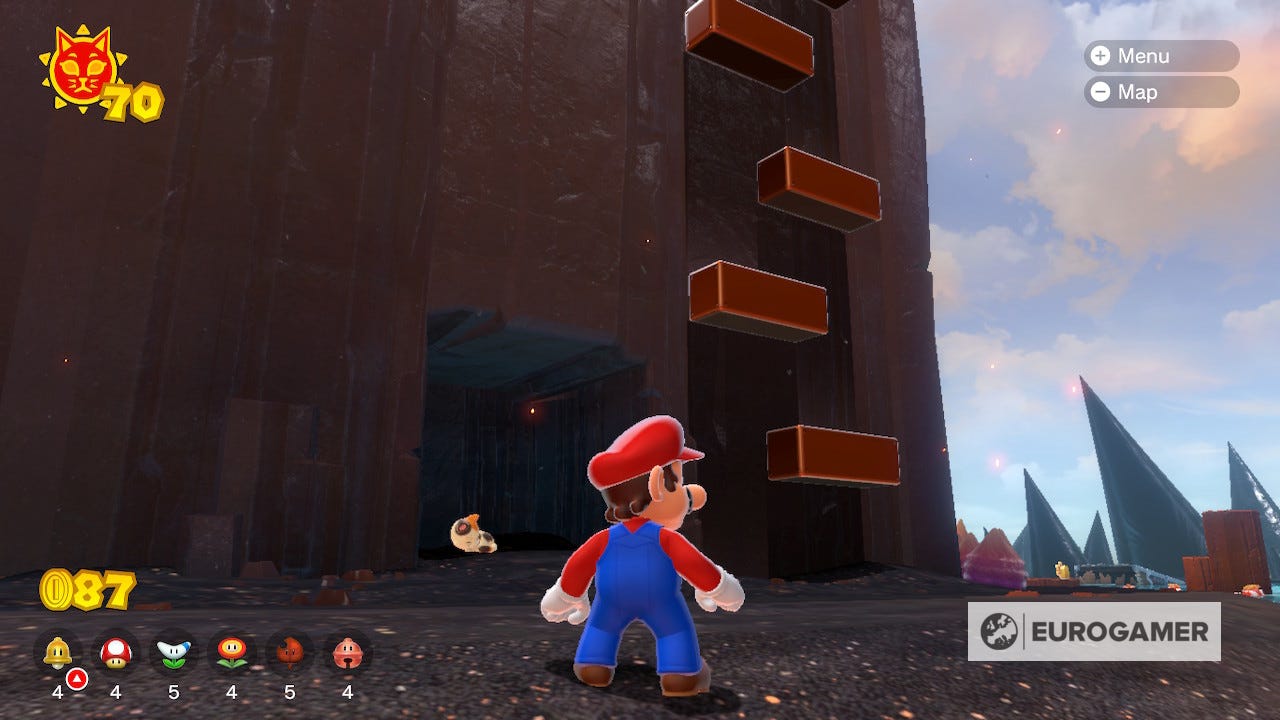
Pipe Path Tower Shine locations
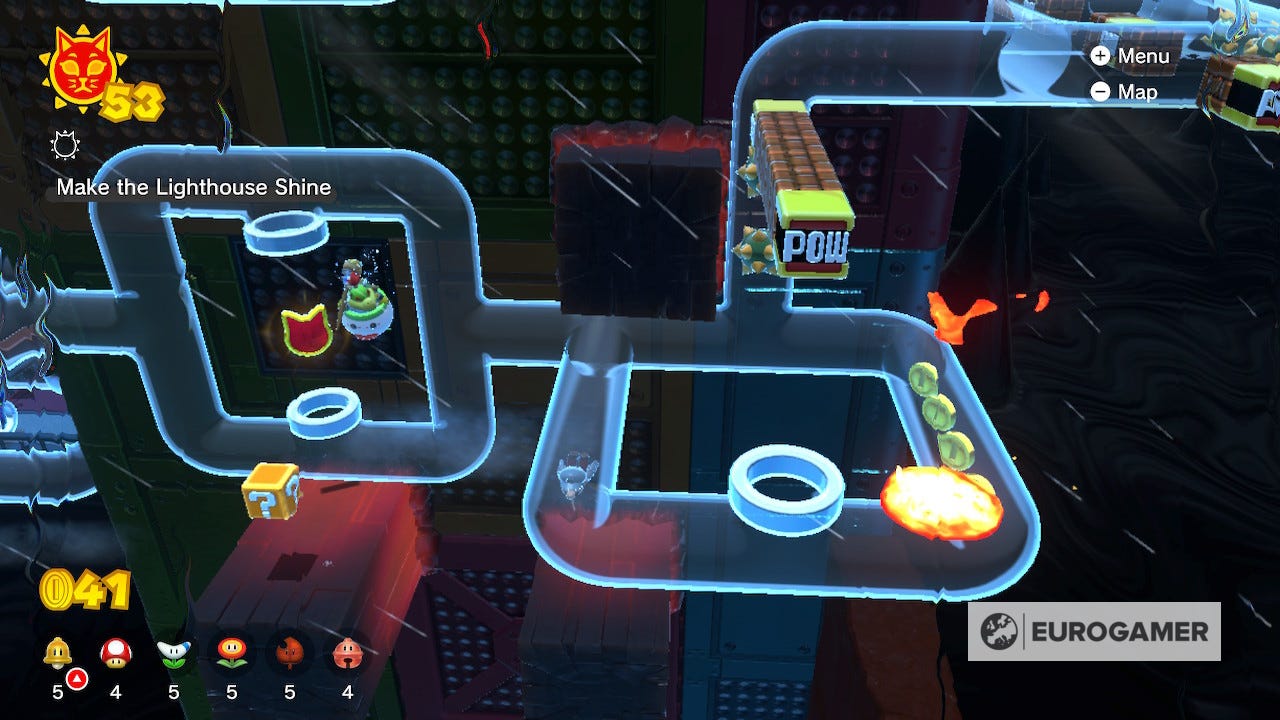
Cat Shine 54 Location
Arrive at the this island you'll see a network of pipes to travel through. The first few are simple, although you will have to dip under the ink at a few points to progress. Nearer the top of the island you'll find some pipes filled with spiky shells.
Look around for any POW boxes, and hit them to clear the pipes and continue upward. Once you reach the lighthouse, you'll find the Shine right in front of you.

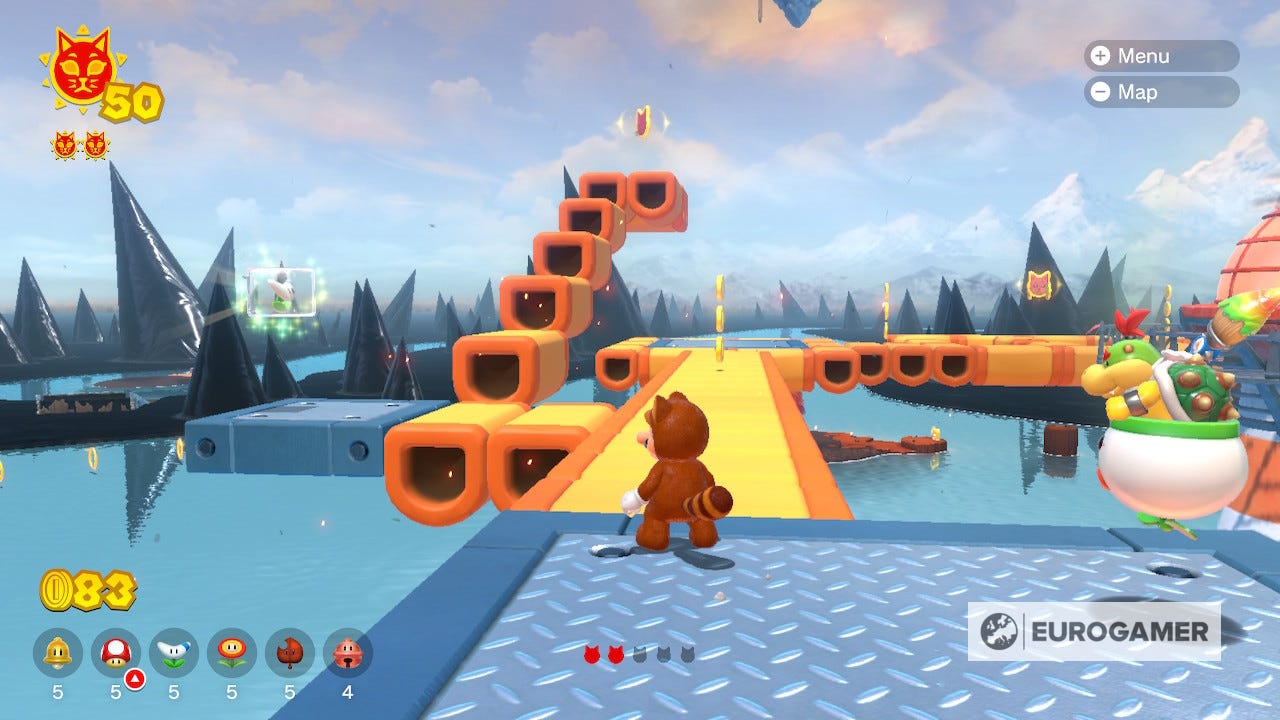
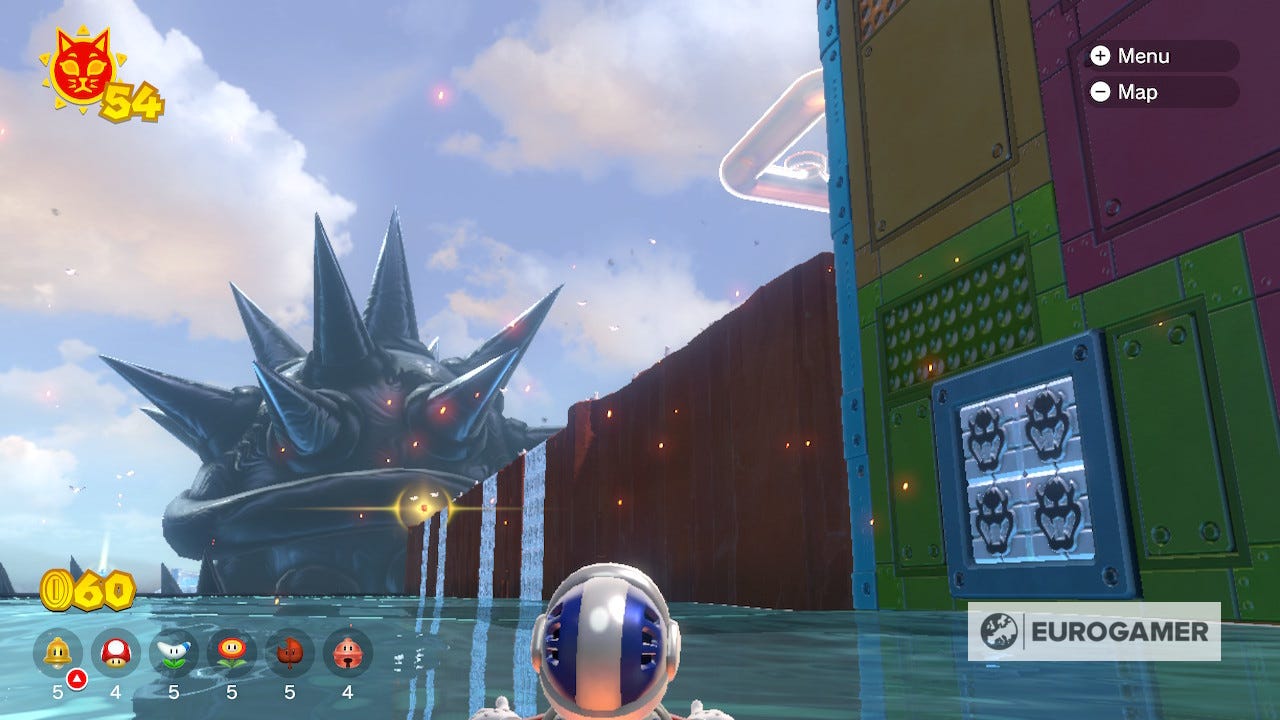
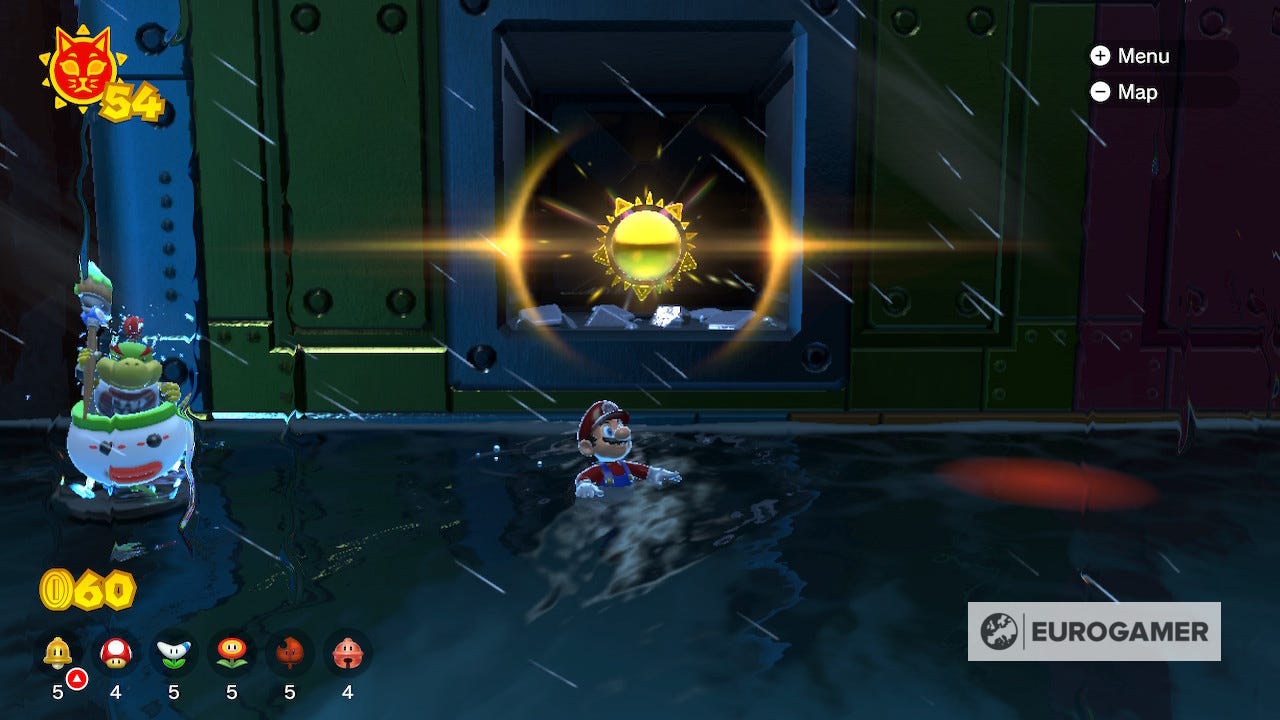
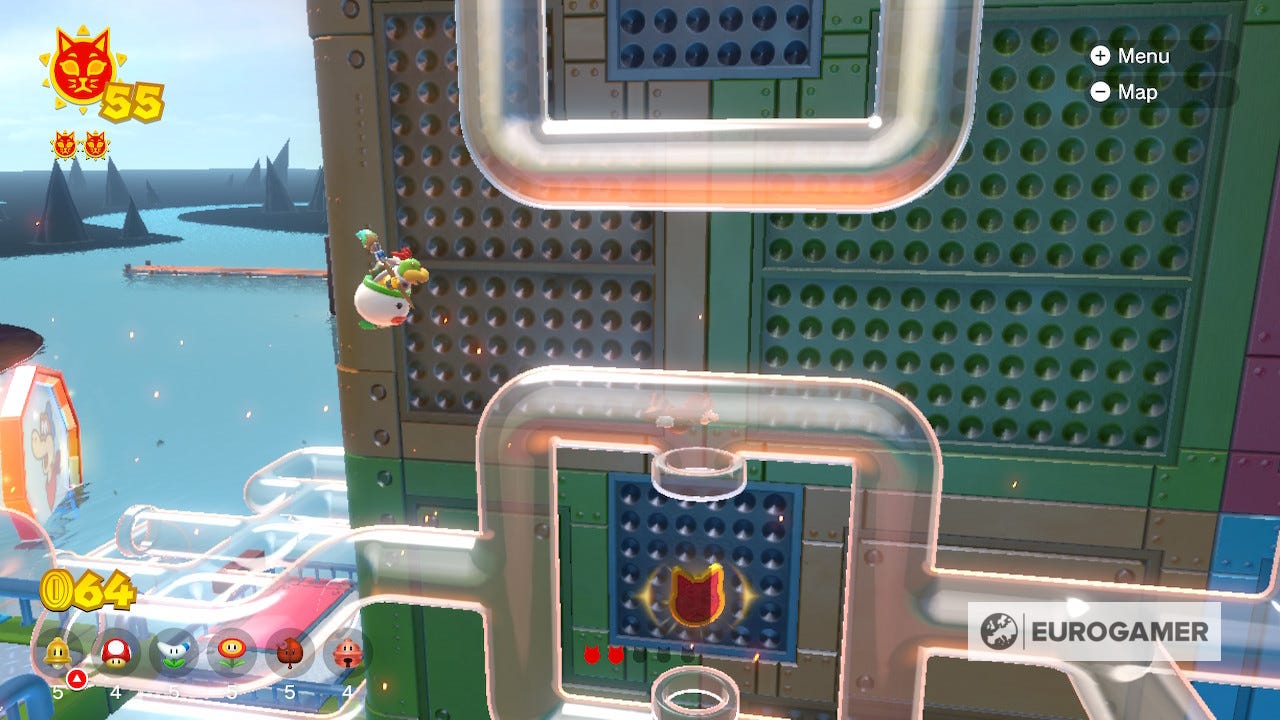
Cat Shine 55 Location
On the left side of the blocky island, just above the water line, you'll find some Bowser blocks that hide a Shine behind. Wait for Bowser to destroy the blocks with his fire breath and collect the reward.
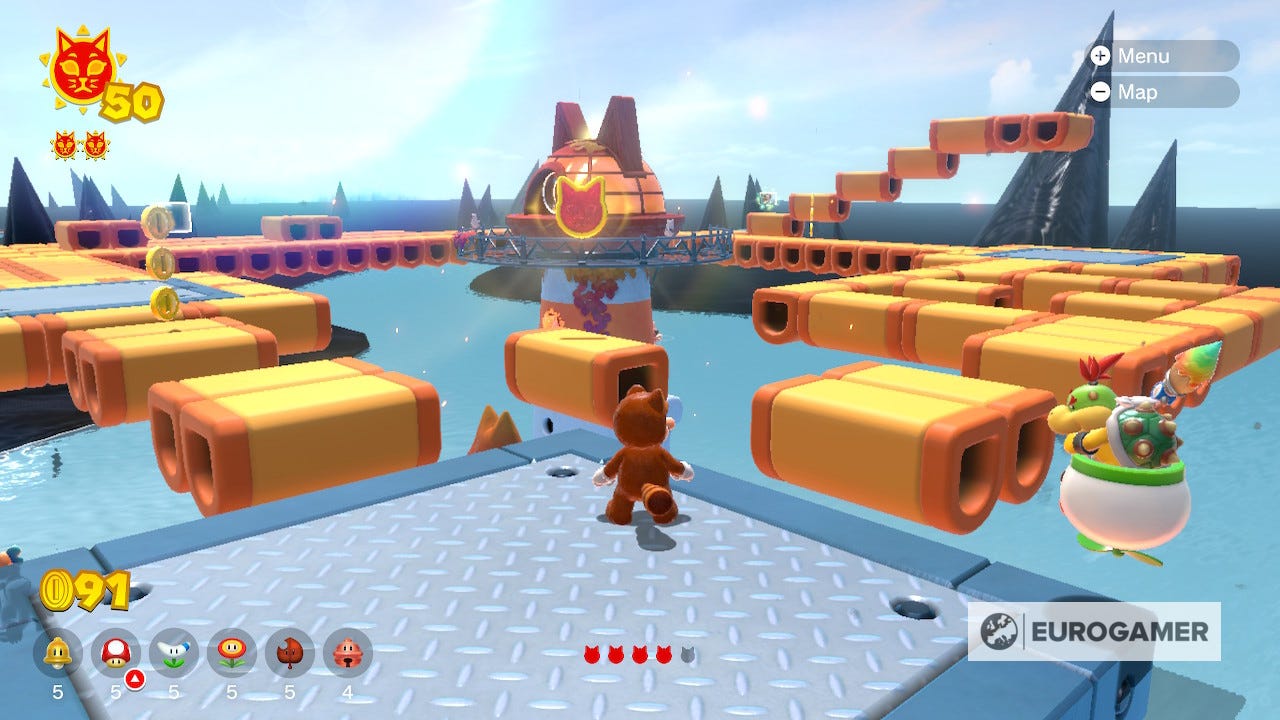
Cat Shine 56 Location
The first collectible on Pipe Path Tower can be found in the first pipe network you enter. You can see it floating on the left hand side and can reach it using the downwards pipe pressed against the blocks of the island.
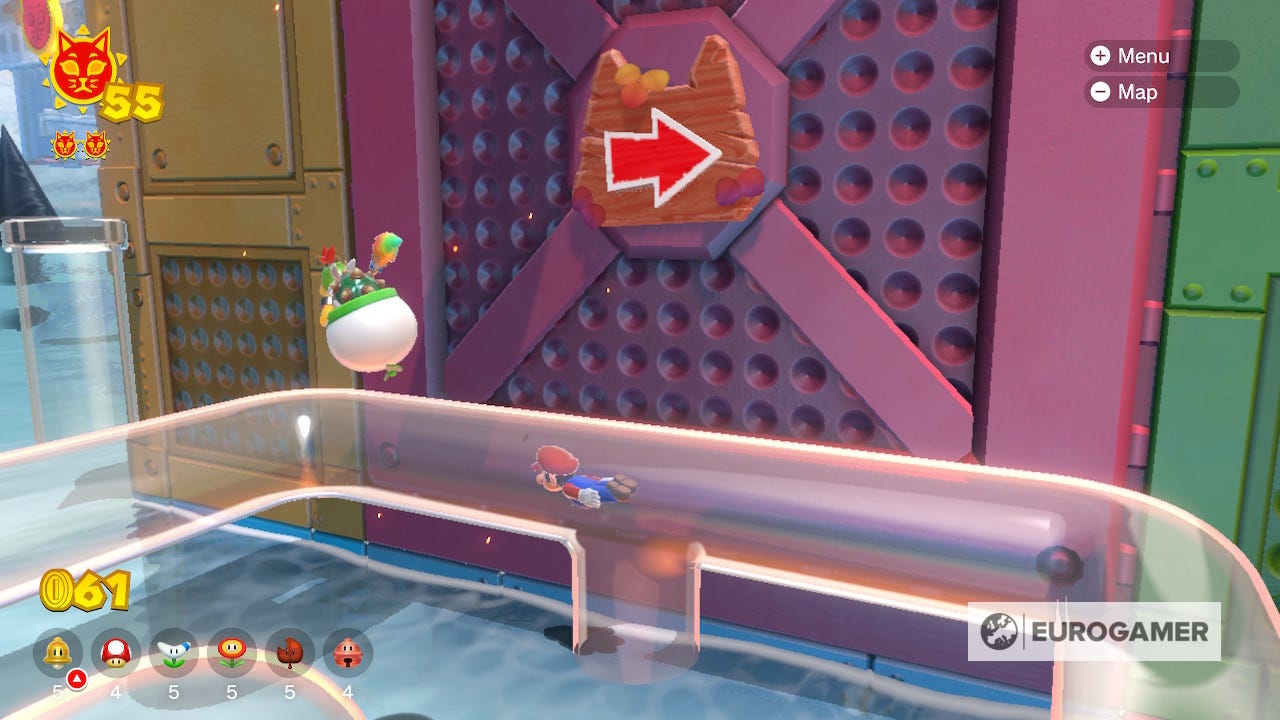
The second collectible can be obtained from the second pipe network. To reach it you'll have to use one of the exits that enemies are throwing fireballs through, then walk along the top of the pipes to grab it.
In the next pipe network, you'll see a collectible floating between the pipes. Just use the exits to hop out and grab it.
Follow the pipes up another level and you can see this collectible is also floating above a pipe exit. Simply make your way to that section and hop out to grab it.
At the top of the Pipe Path Tower, next to the lighthouse, you'll see another pipe blocked by spiky shells. This pipe leads to the last collectible but is clearly inaccessible. Luckily you can jump down and grab the collectible without the pipe.
If you're struggling you can use a Tanooki suit to help guide you in.
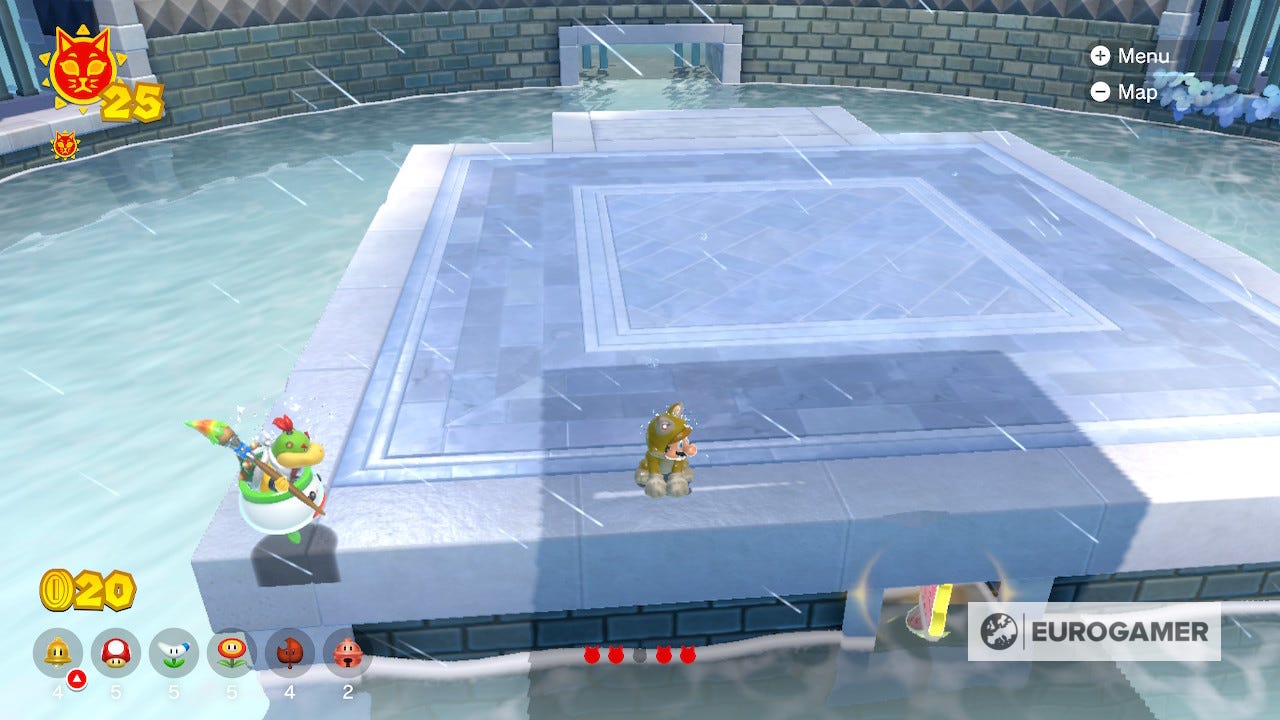
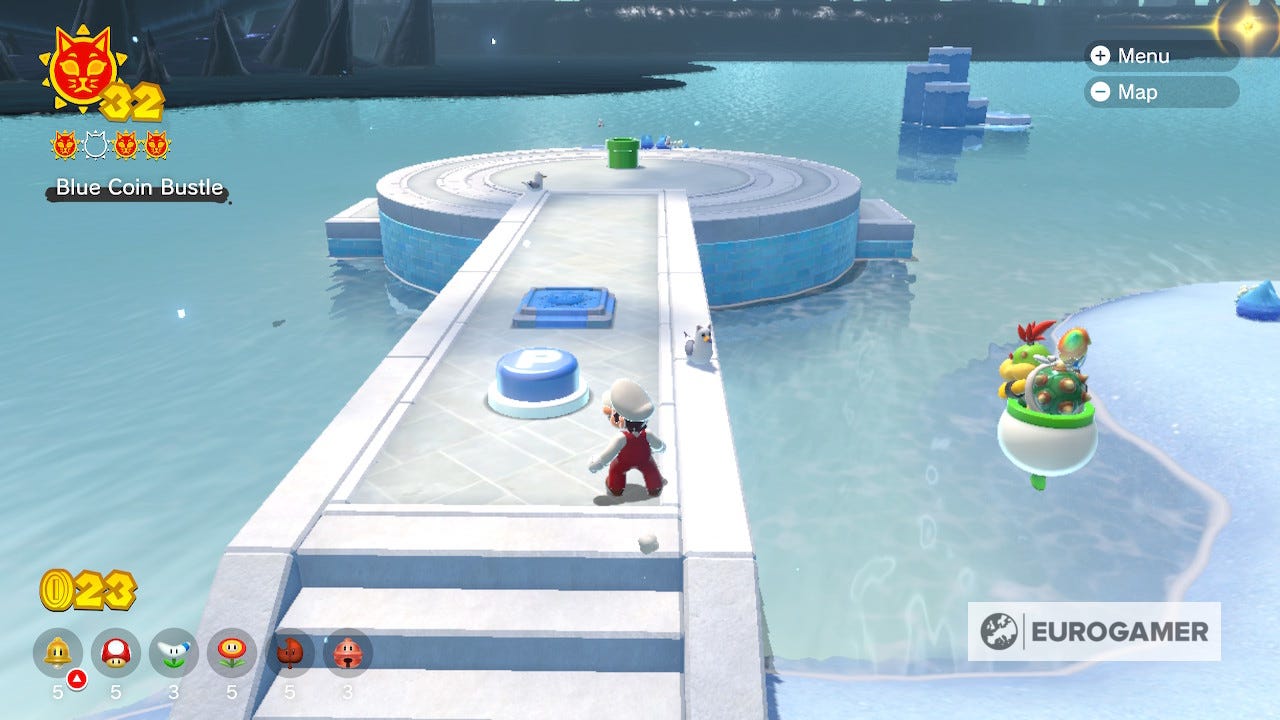
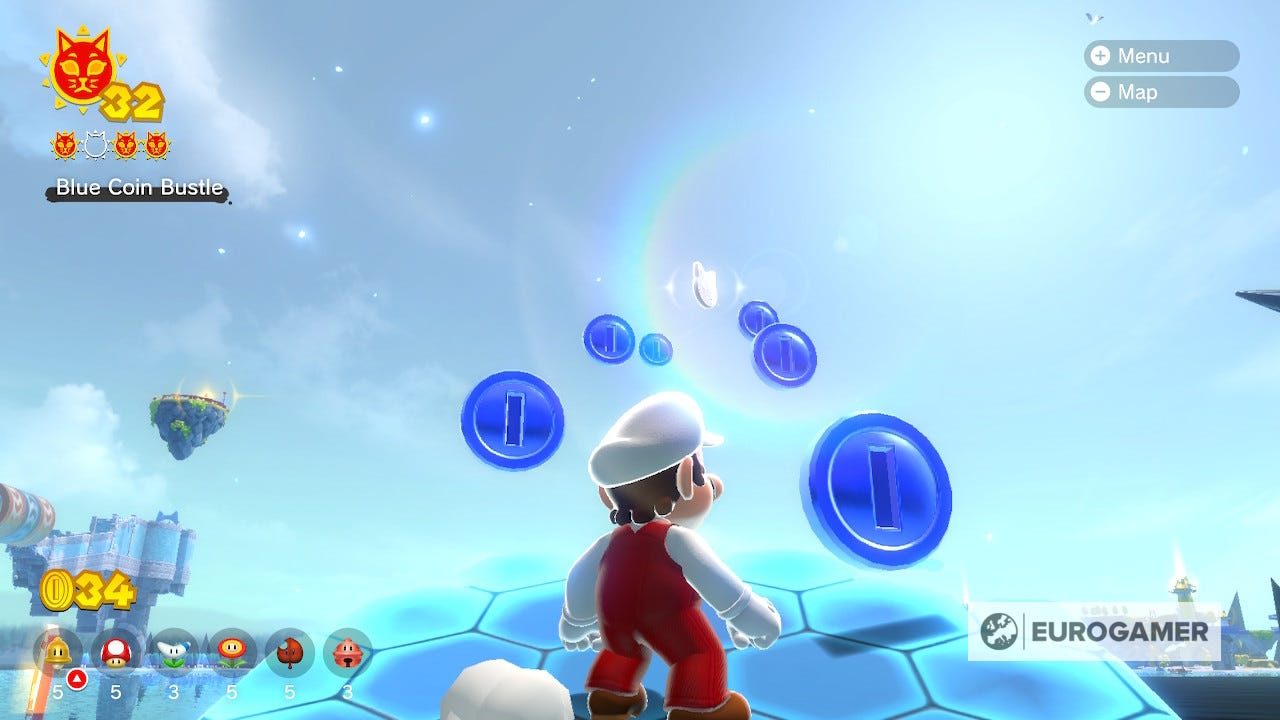
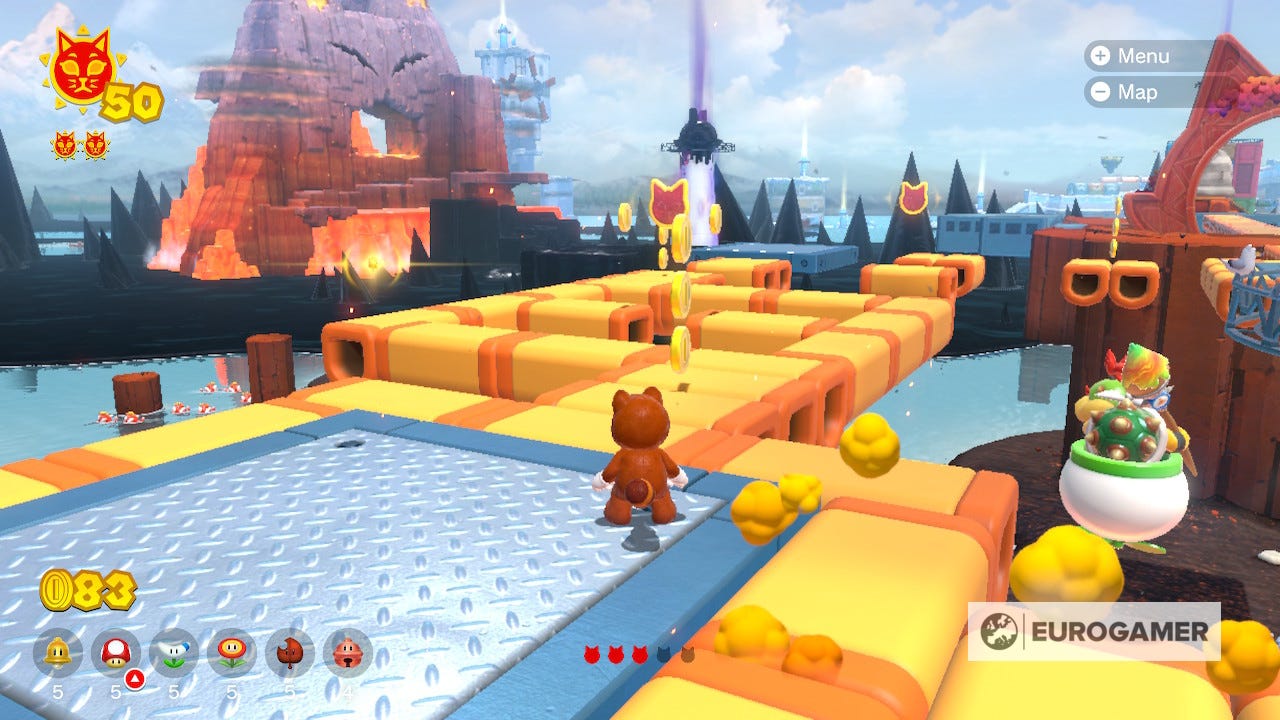
Cat Shine 57 Location
Leave and return to Pipe Path Tower and you'll find a blue button that spawns a blue coin chase when pressed. You'll have to collect all the coins before they disappear to receive the Shine.
Make sure not to go down the wrong path as it might take too long before you can turn around. If you don't collect them all you can return to the button to start again.

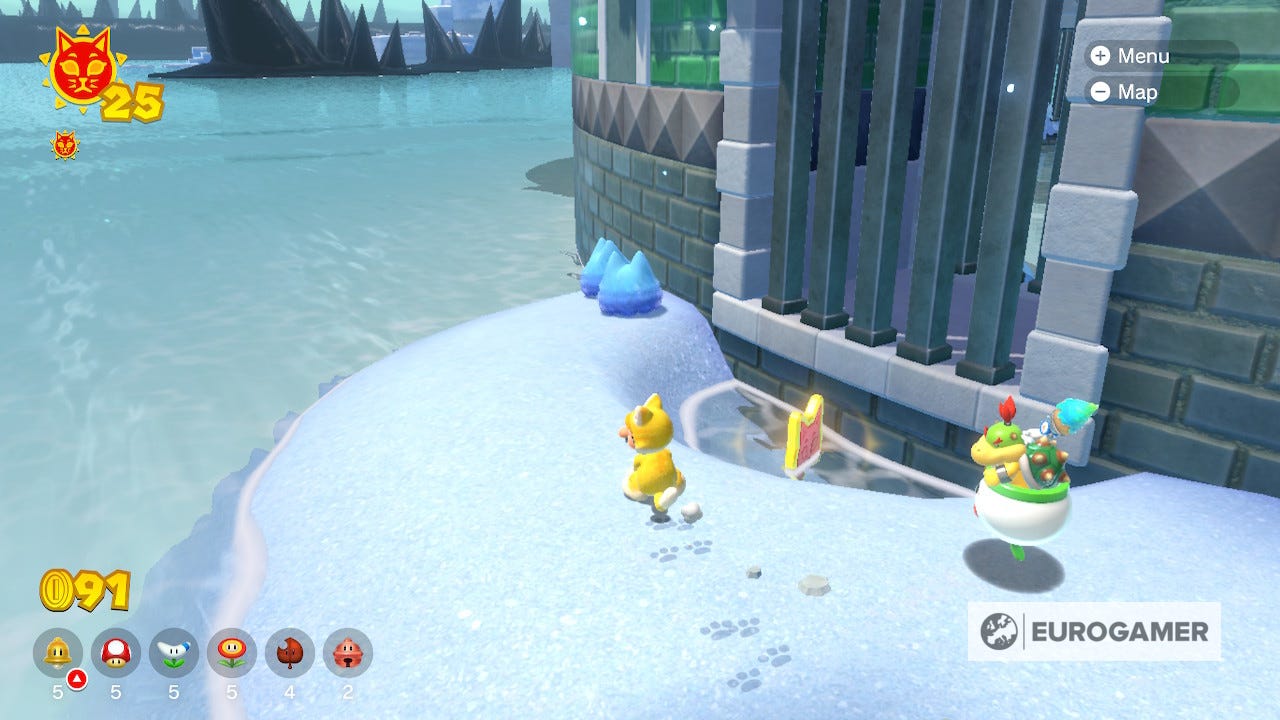
Cat Shine 58 Location
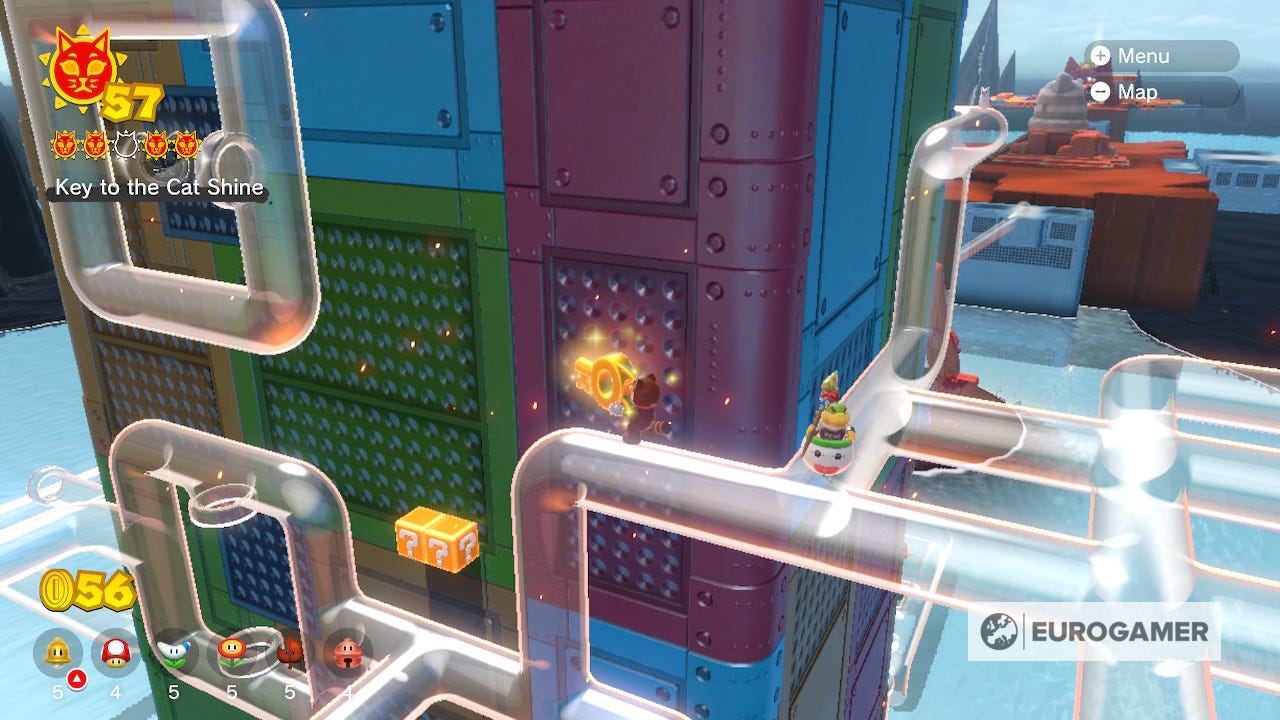
Leave and return one more time and you'll see a Shine locked in a cage. You can find the key on top of the third pipe network, on the left side of the tower when looking at it from the cage.
Once you have the key you'll have to carefully work your way down, since contact with water will make the key reappear where you found it.
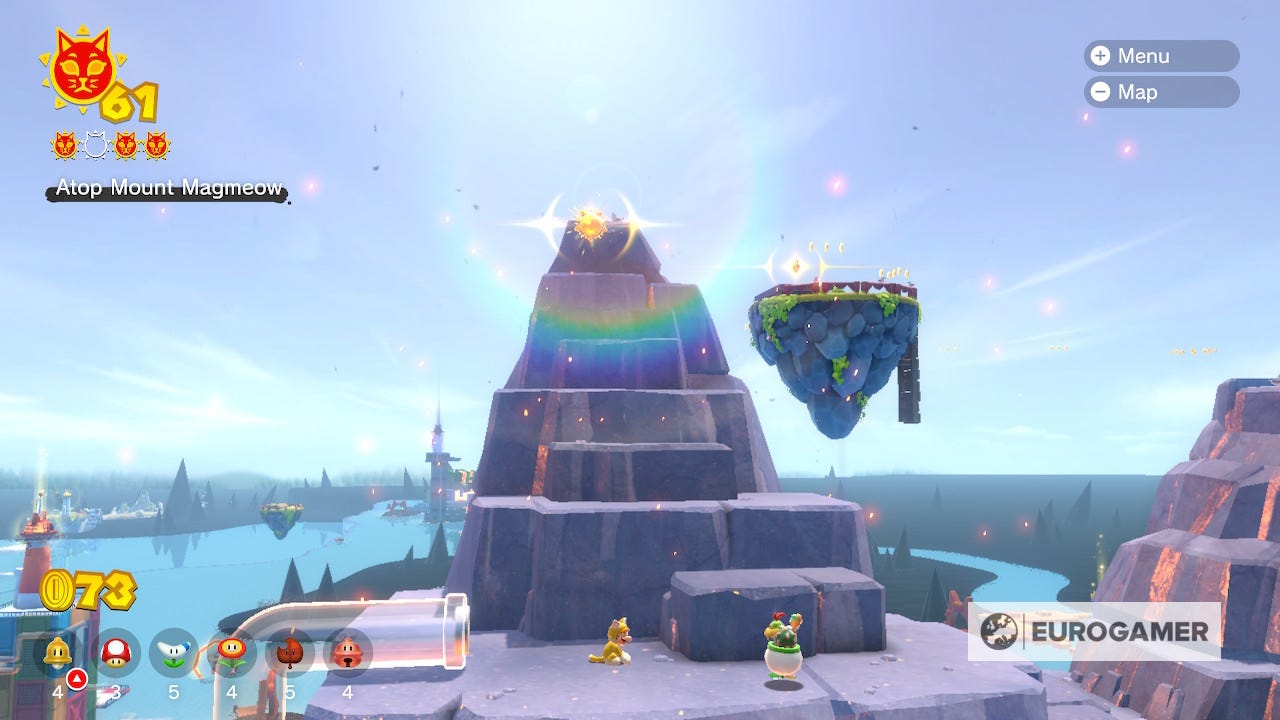
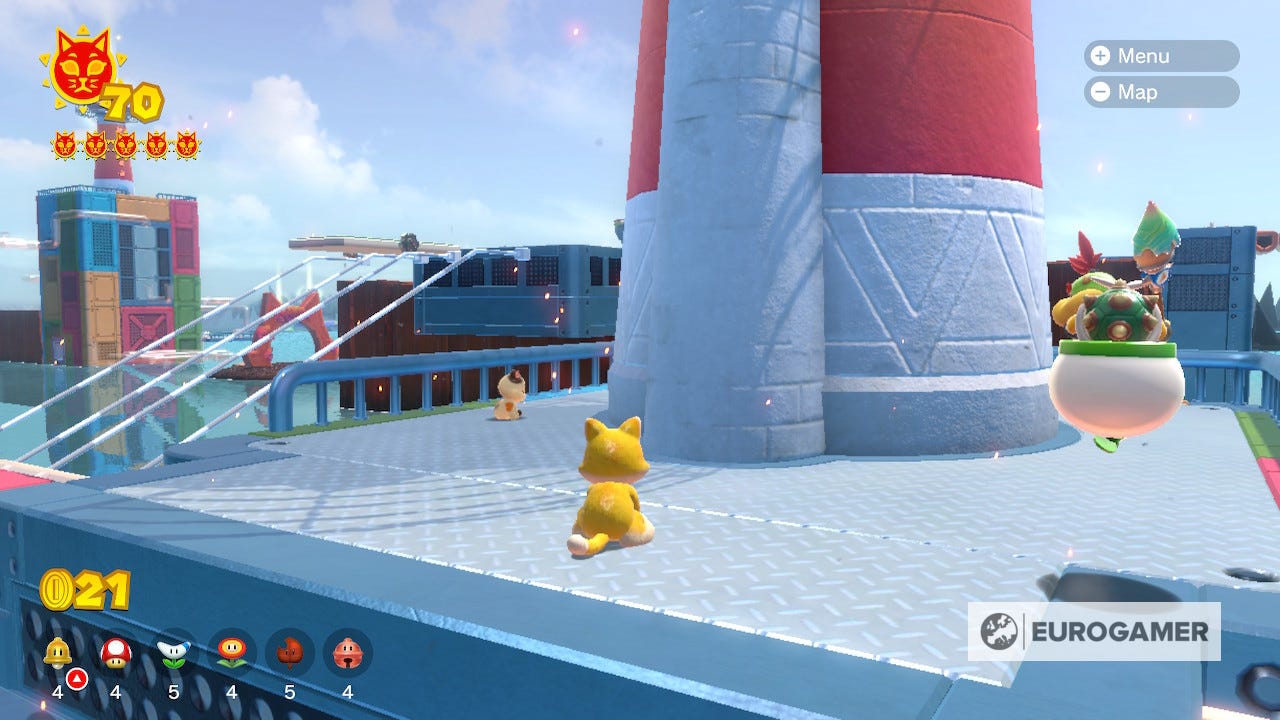
Mount Magmeow Shine locations
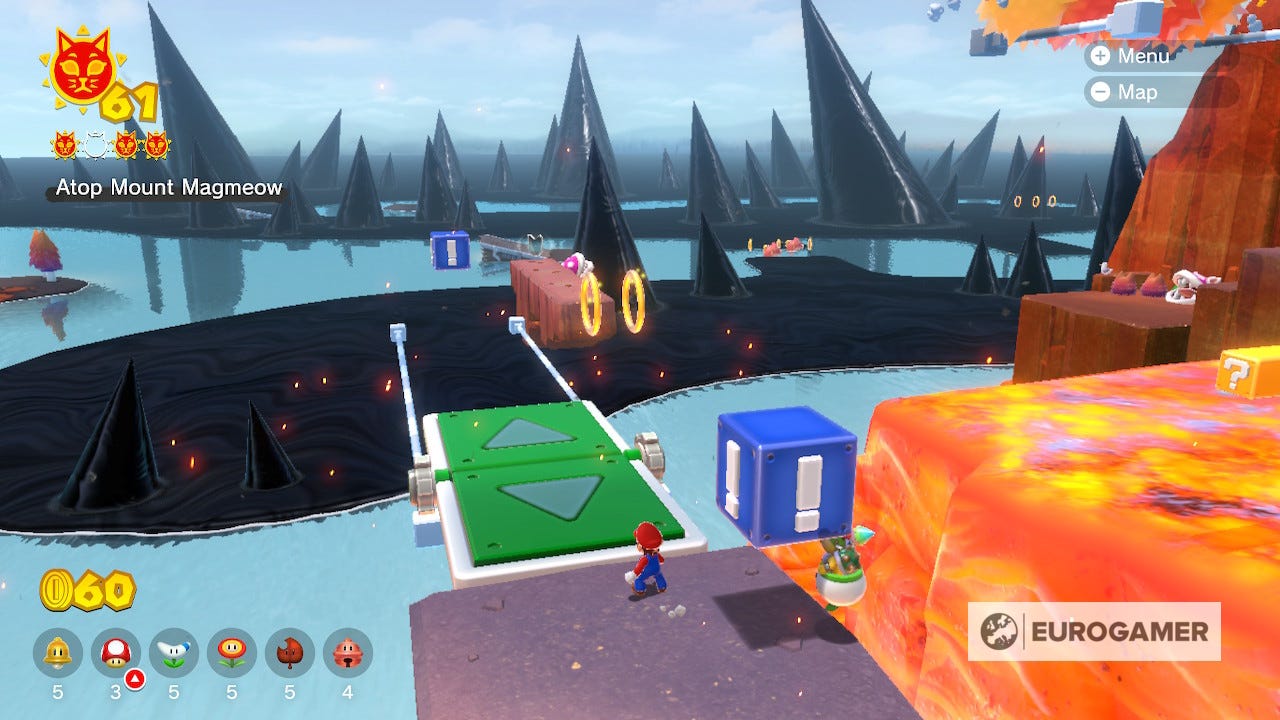
Cat Shine 59 Location
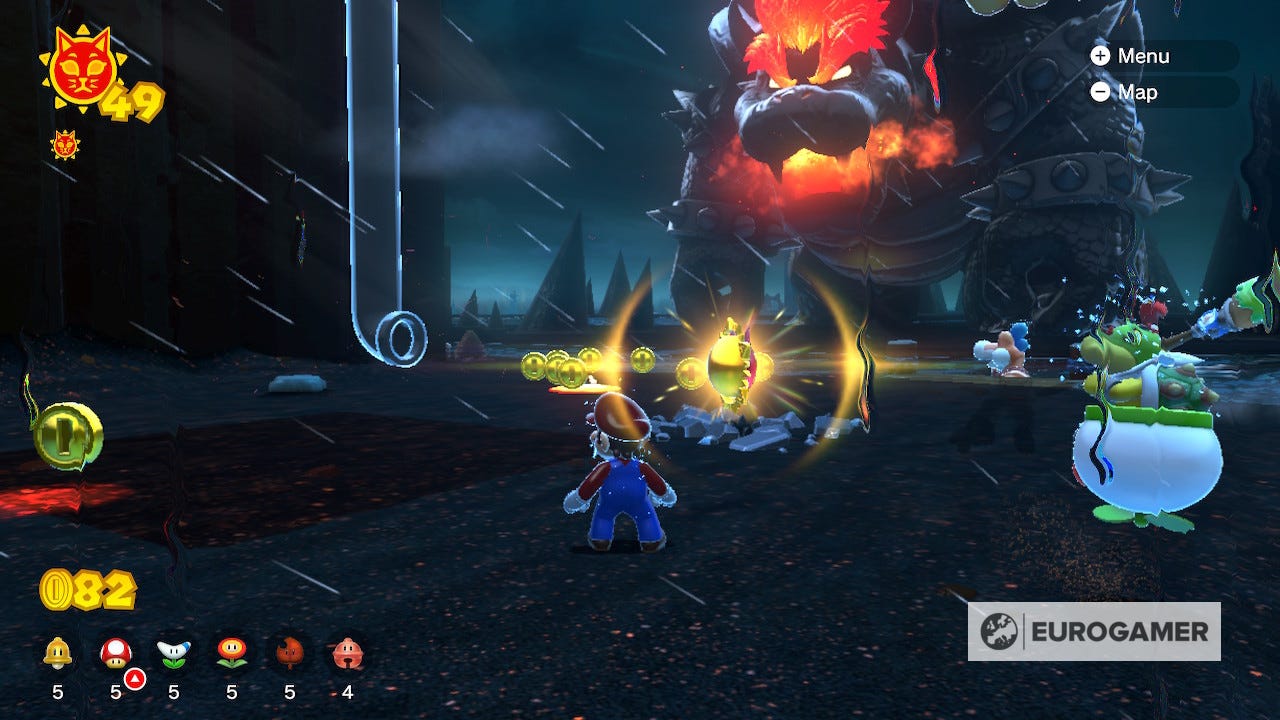
This lava soaked island is one of the largest in the game, and this Shine requires you to traverse across it then fight a large mouse mini-boss. The biggest hazard while exploring are the spinning fires you'll have to time perfectly to escape unharmed.
When you reach the lighthouse, the mini-boss will appear. To defeat them, you have to push it into a pipe along the wall, then strike it when it reemerges smaller. This is easiest to do with the cat suit as you can hit it into the pipe much easier.

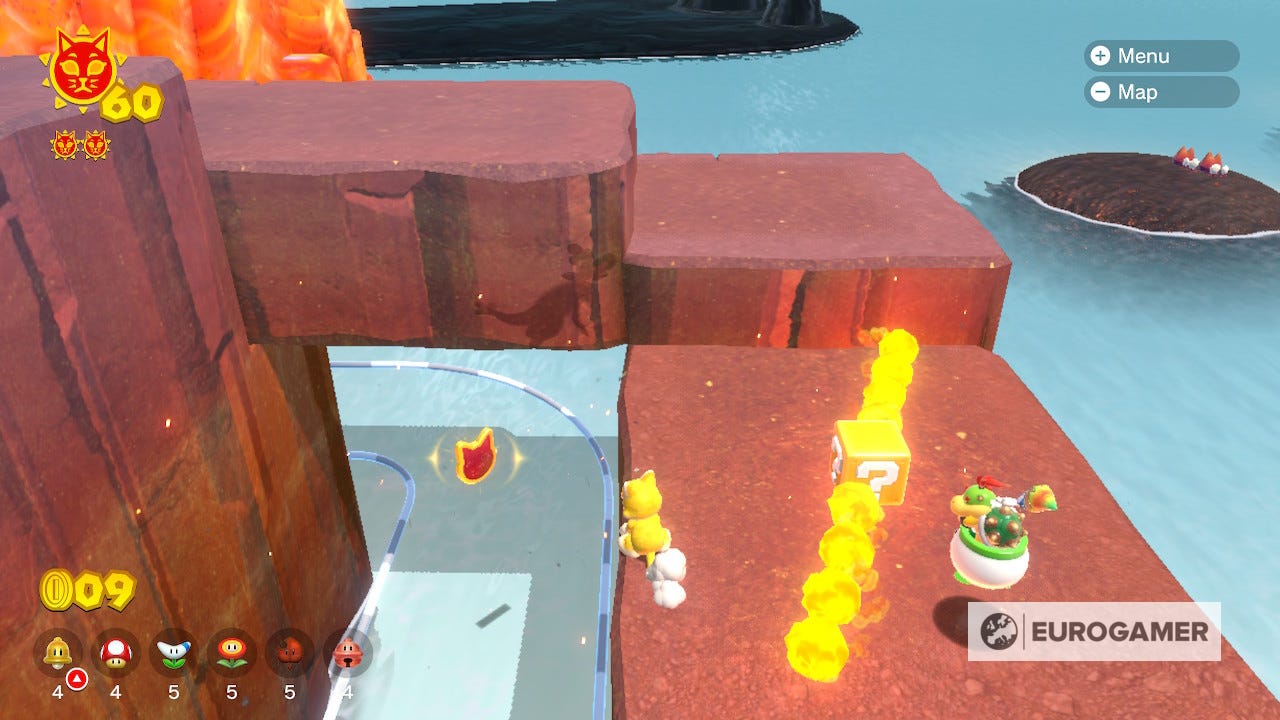
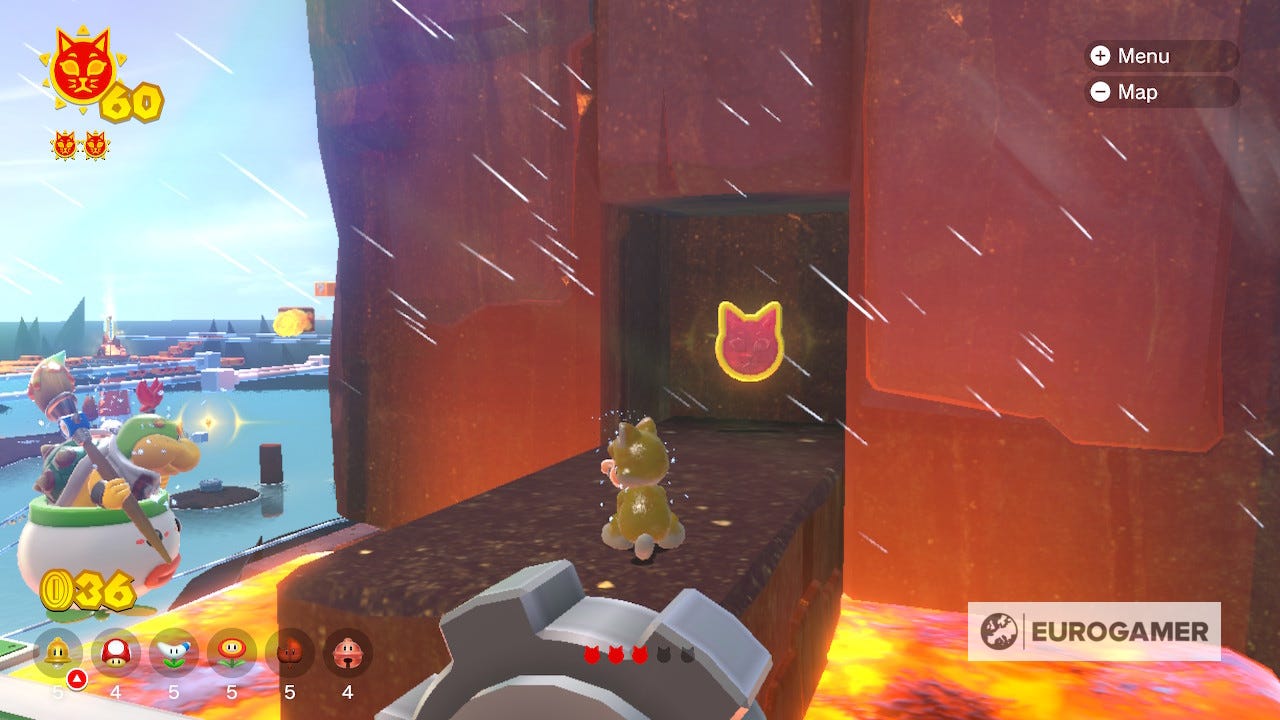
Cat Shine 60 Location
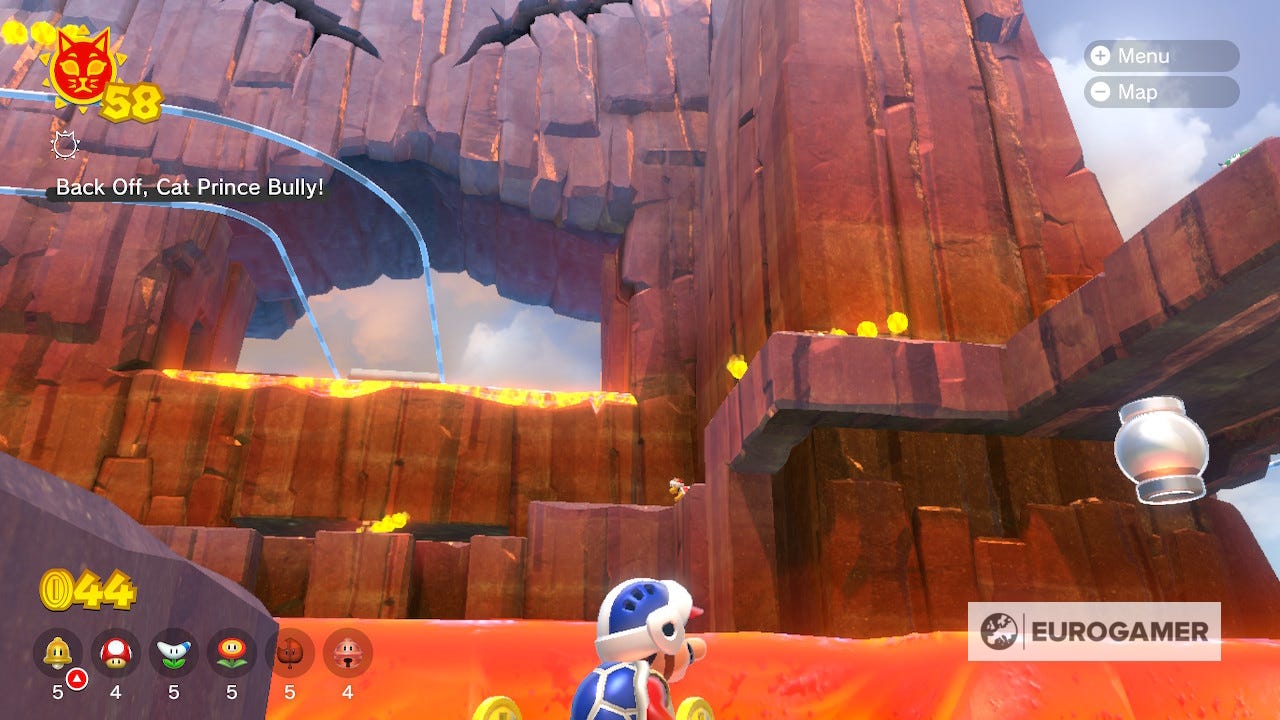
The Bowser blocks that can only be destroyed with the fury fire breath can be found right at the beginning of the island. You can see them from the gate, to the right of the platforms you'll be jumping up. Now all you need is the firepower.
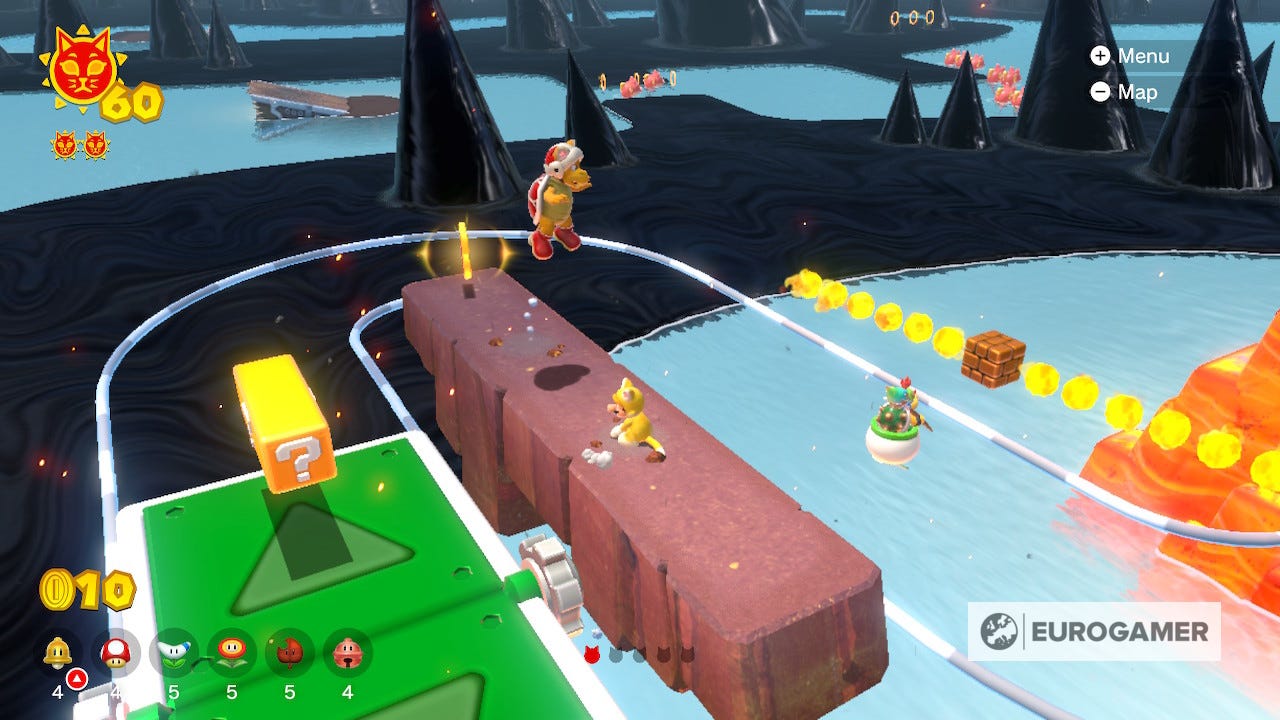
Cat Shine 61 Location
The first collectible you'll come across is to the left of the walkway you make your way up at the beginning of the island. When you come to the first spinning fire obstacle, look off to the left hand side and you should see it floating below an arch.
Follow the rails and you can find a switchboard that will help reach the collectible.
The second collectible can be seen as you use the switchboard. It is right at the U-turn with the fire throwing enemy. Simply jump onto the stone ground to stop your ride from leaving without you.
The third collectible is below the thin ledge you'll have to travel across. Just after the lava throwing enemy, you can see it below, in a gap. Get it by jumping down then immediately using the walls to jump back up before you fall into the lava. The cat costume can help if you're struggling.
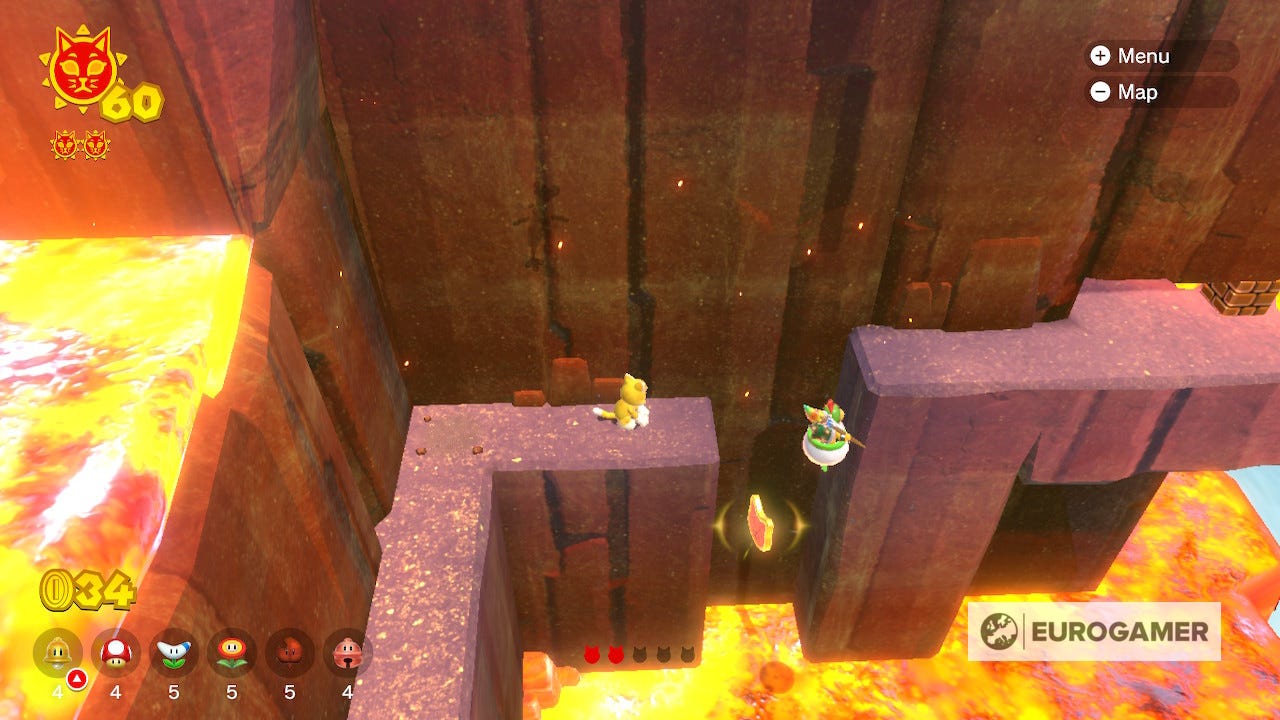
This one is one of the most well hidden in the game. As you ride the switchboard past the tower of spinning fire, you'll spot the POW walls and another platform to transfer over to. Instead, stay on yours and duck to get below a wall.
After that you'll need to let the platform ride ahead before you jump over the next wall to land on it, collecting the fourth piece.
The final collectible is easy enough to spot. You should see a brick wall with several POW blocks in as you leap from one switchboard to another. Hit the POW to destroy the wall and grab the final piece on the other side.
Cat Shine 62 Location
Leave and return and the route to Mount Magmeow will have changed. Now you won't be heading to the lighthouse but to the peak itself where another Shine is waiting for you.
The switchboards have become more complicated though, and you'll need to hit the exclamation boxes to shift the rails to make your way up safely. At the end, you'll have to jump up a pipe to reach the very top.
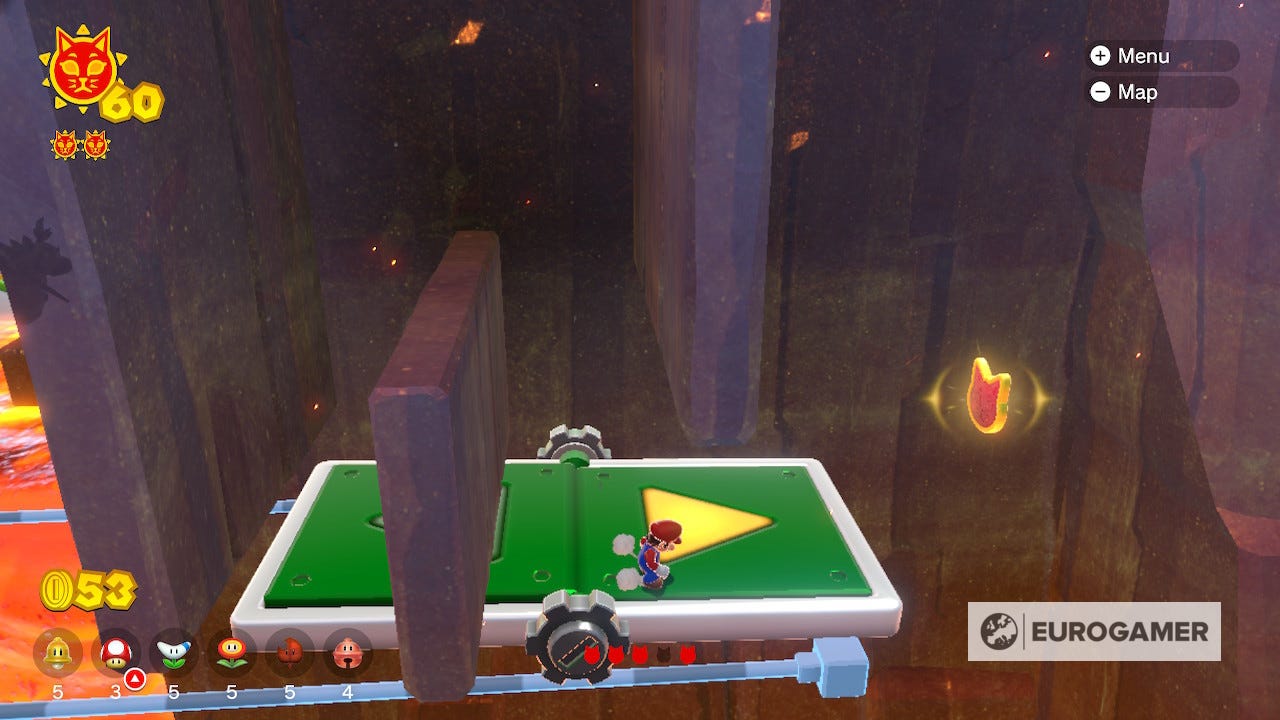
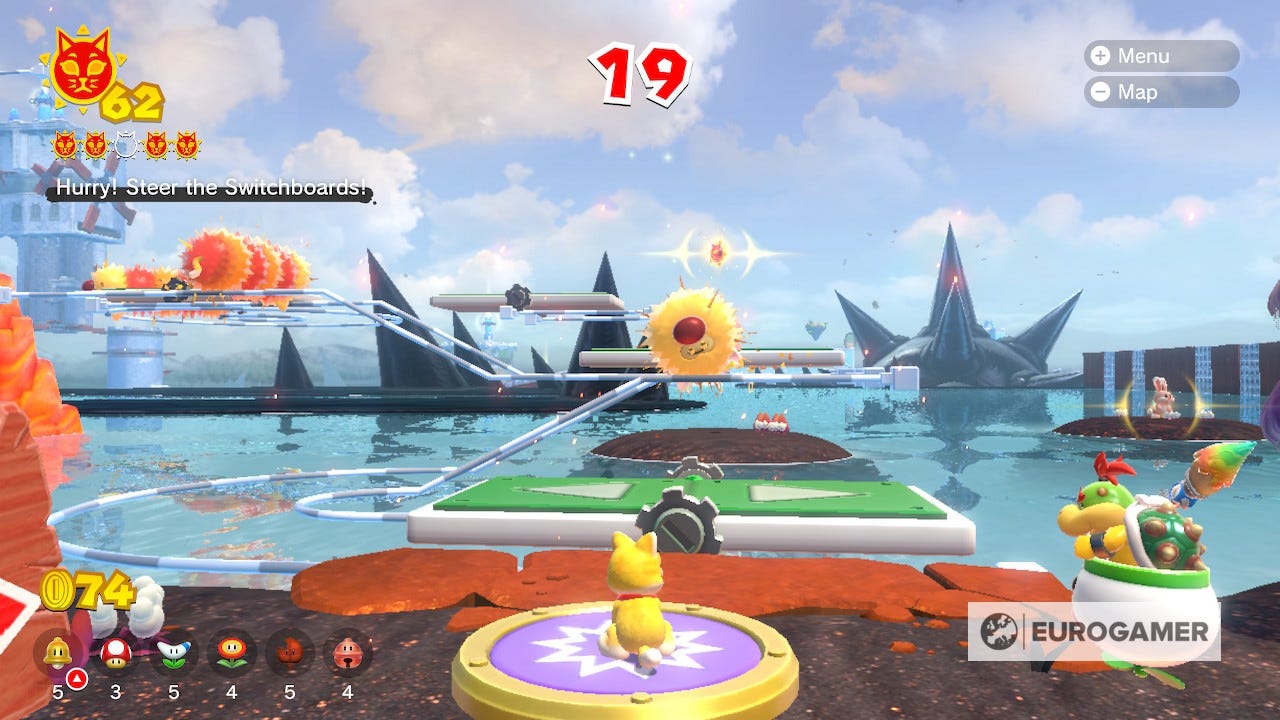
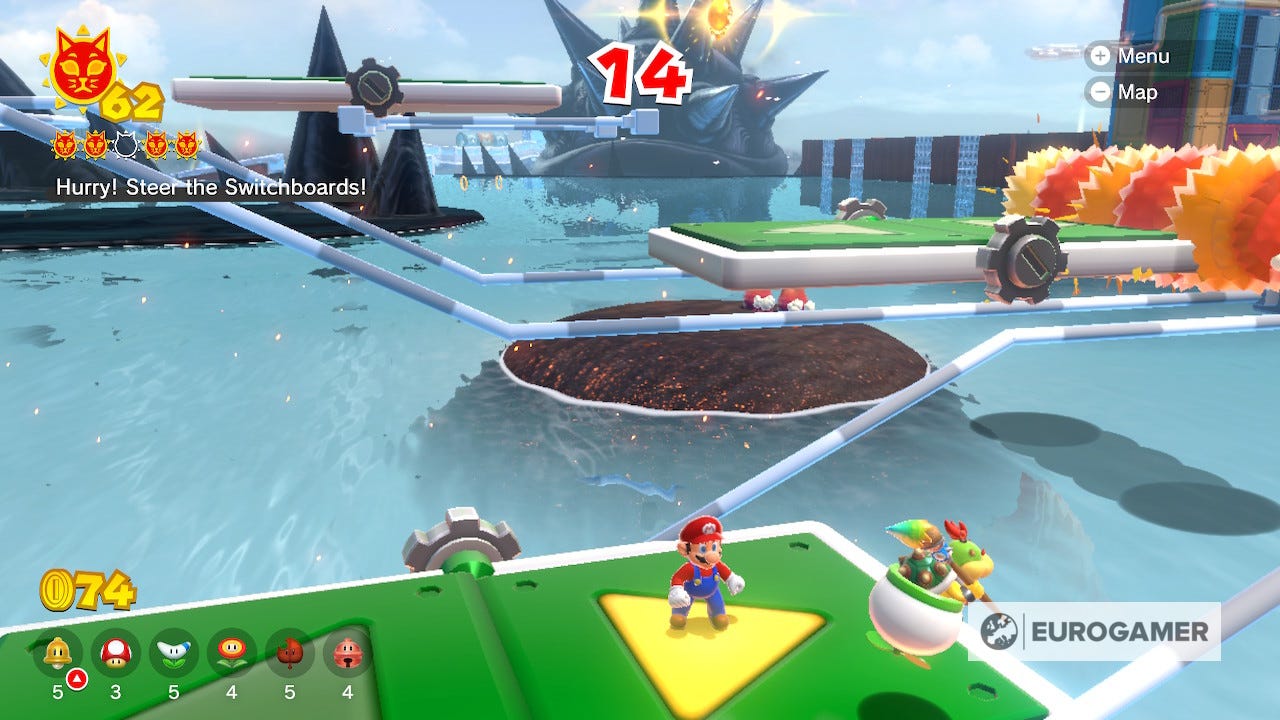
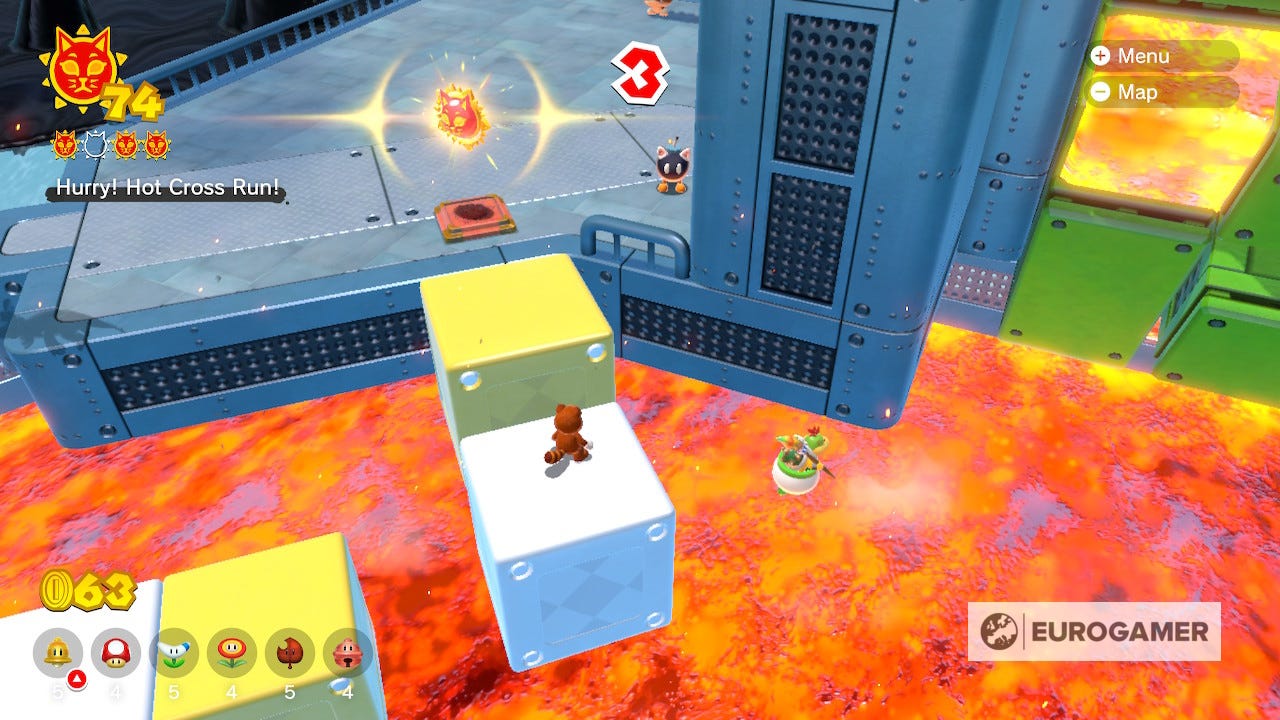
Cat Shine 63 Location
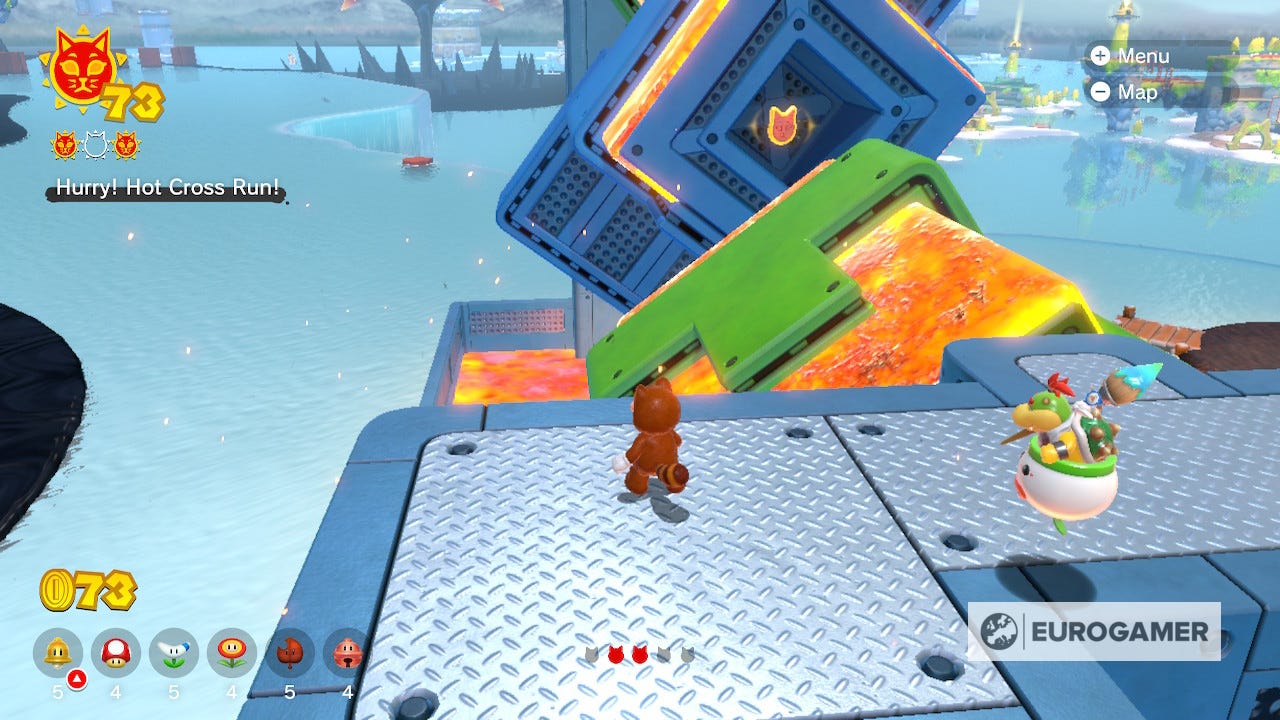
The final Shine at Mount Magmeow is a short obstacle course that revolves around your control over the switchboards. You've got to be quick, which means spending as much time as possible on the right arrow, but enemies will force you to jump occasionally.
Make sure to jump on the next switchboard as soon as possible and you should just manage to get to the Shine in time.
Roiling Roller Isle Shine locations
Cat Shine 64 Location
Perhaps the trickiest island in Bowsers Fury, Roiling Roller is a rotating mess of platforms and lava. The first Shine is collected by reaching the lighthouse, but doing so requires you to navigate the deadly traps.
Use the bob-ombs to break the grey brick walls blocking your path, and use the rotating platforms to reach the higher levels of the isle until you find the Shine.
Cat Shine 65 Location
The Bowser blocks on Roiling Roller Isle are pretty easy to spot. Directly underneath the lighthouse, on the shore, you can see the four of them pressed against the wall. Wait for Fury Bowser to do his thing and you'll find a Shine behind them.
Cat Shine 66 Location
The first collectible of Roiling Roller Isle is hidden below the spilt on the first rotating trap. When you get to the jump look down and you'll see it floating above the lava. It is resting on an invisible platform though so if you lower yourself down carefully, you'll avoid a fiery death.

The second collectible can be found on the first large rotating structure, at the far end. Make your way carefully over, minding the lava and piranha plants to grab it.
After that jump onto the stable ground ahead and you'll see goomba towers, the tallest of which has a collectable on top.
The fourth collectible is hidden behind grey bricks. You'll have to grab a bob-omb and dash across a rotating trap to destroy the bricks and reveal the collectible.
The final collectible is on the last green rotating trap. To catch it you'll have to run along the columns while they're horizontal, or backtrack to make the jump.
Cat Shine 67 Location
Leave and return to Roiling Roller Isle and you'll find a button that will activate an obstacle course over the lava. It is recommended you use a Tanooki suit to have more control over your jumps, since falling will force you to restart. And while it looks far you can accomplish the task without sprinting.

Cat Shine 68 Location
The final run of Roiling Roller Isle asks you to find a key to the caged Shine. The key is by the lighthouse, but the propeller boxes will help you get there quickly.
To get back, use a Tanooki suit to get past the tiered cubes, but you'll have to carefully navigate the first rotating trap to reach the cage safely.
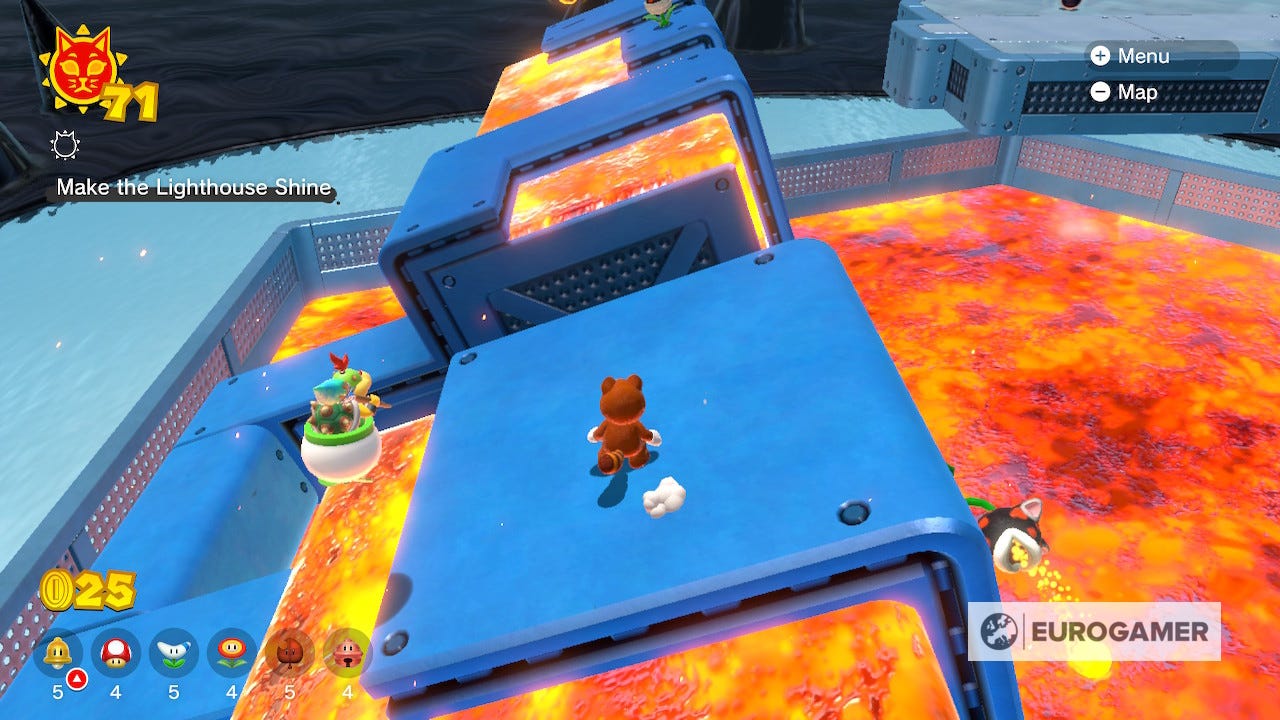
Wasteland Giga Bell Shine locations
Cat Shine 69 Location
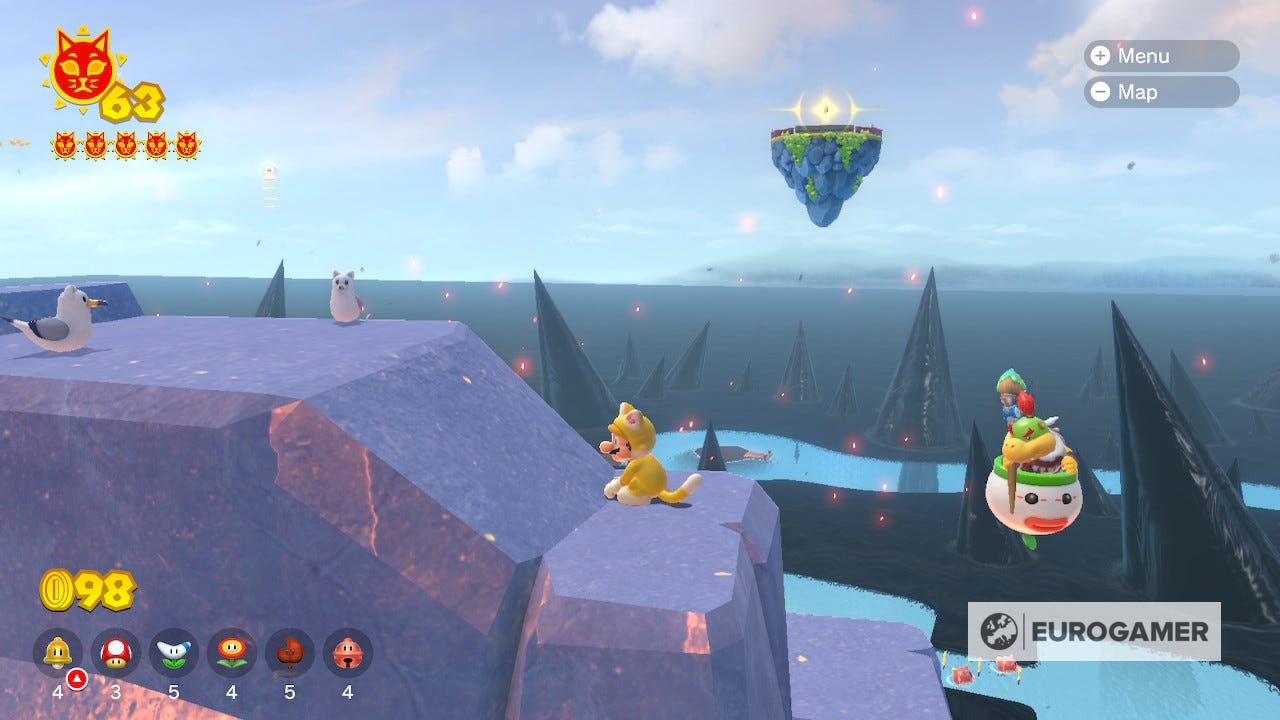
To find this Shine, you'll have to head back to Mount Magmeow once you've made your journey to its submit. Retrace your steps and make your way back there before checking the horizon.
You should see a floating island drifting along. Make sure you're wearing a cat costume and standing on the opposite ear to the one where you found the Shine. The island will stop for a moment as it floats close by, allowing you to climb up and get the Shine.
Cat Shine 70 Location
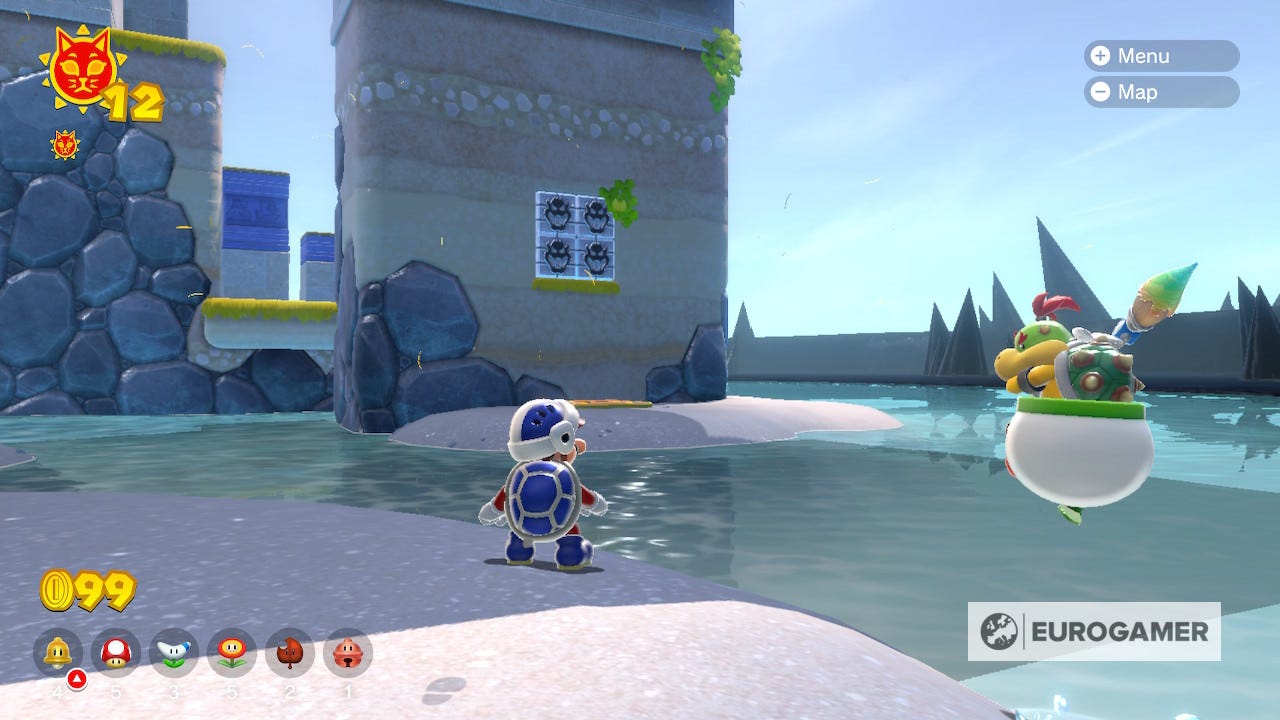
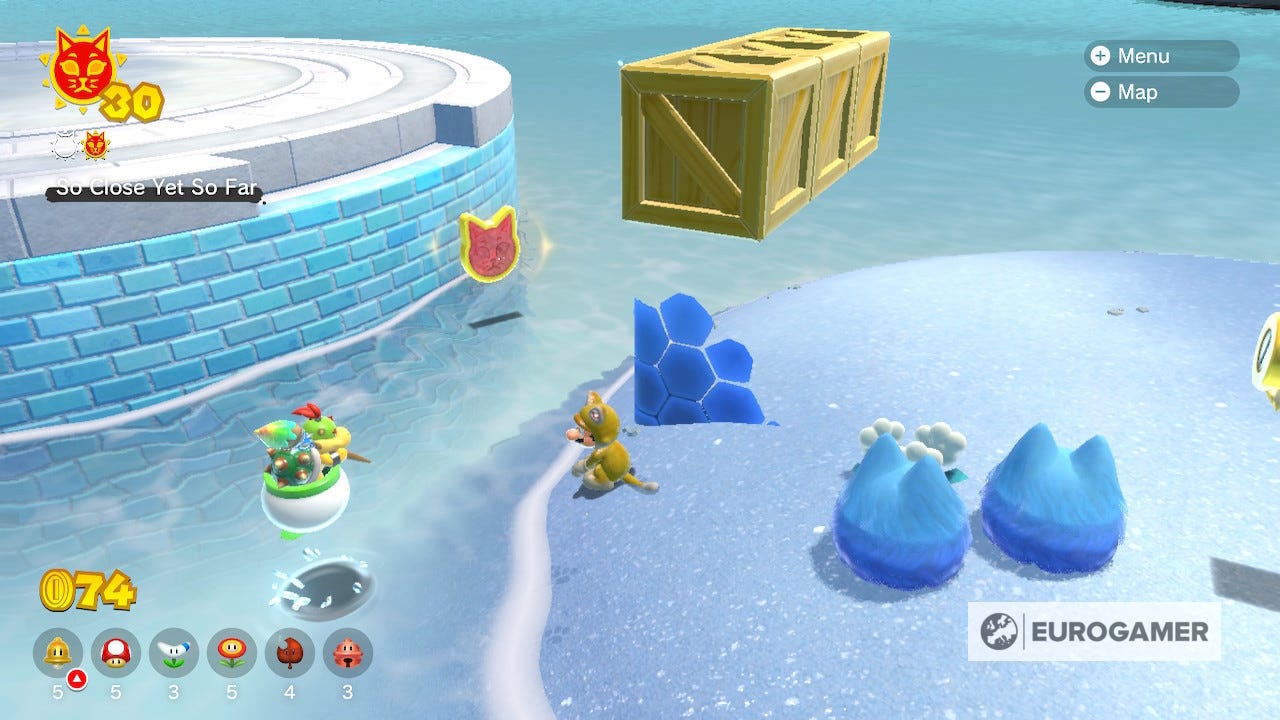
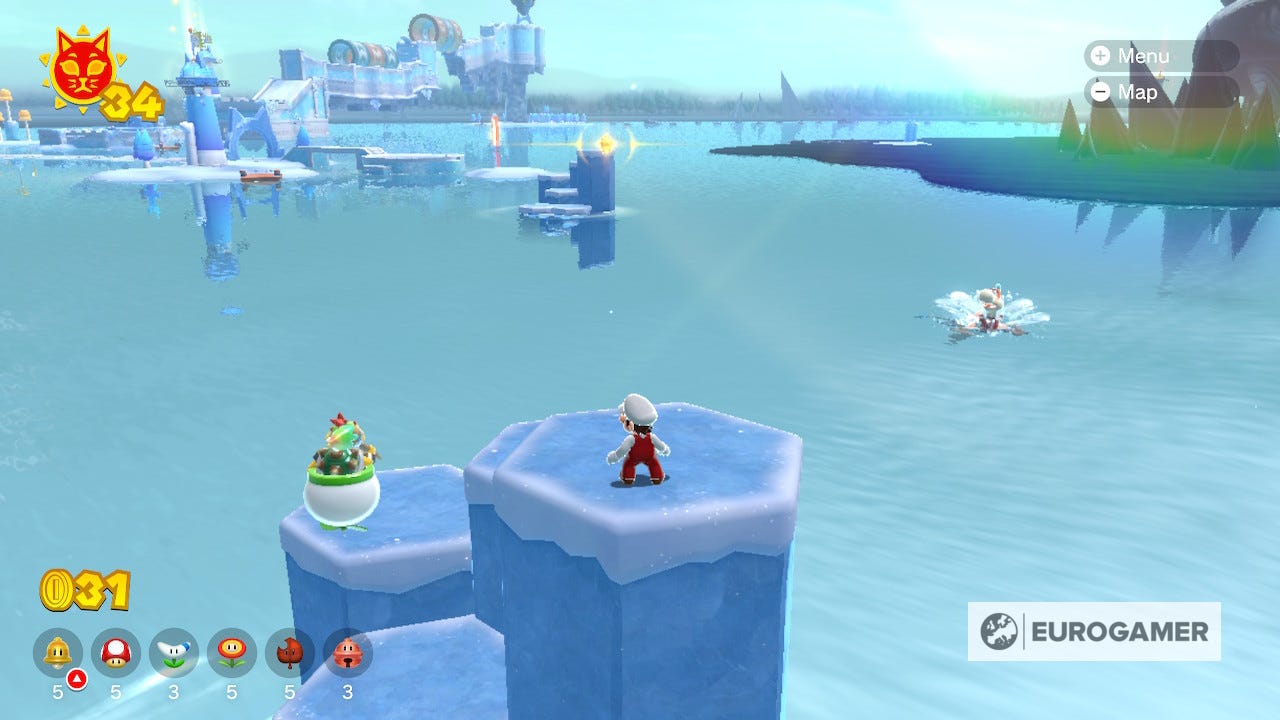
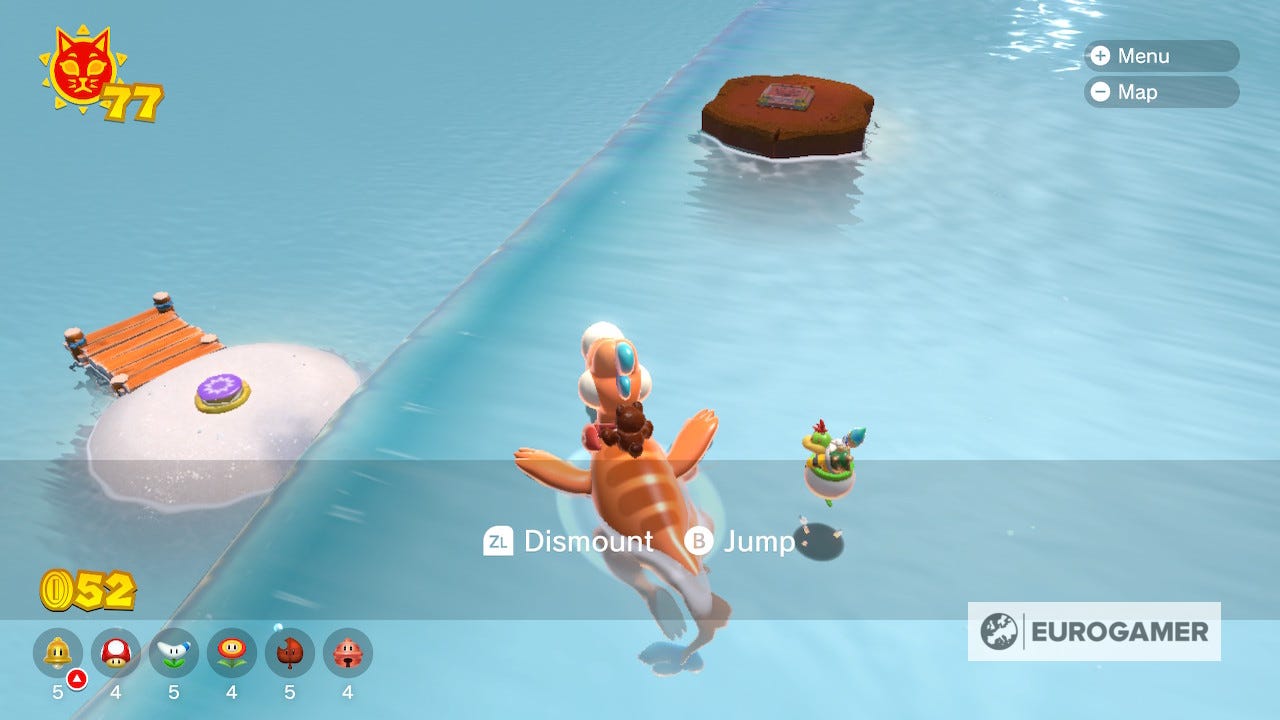
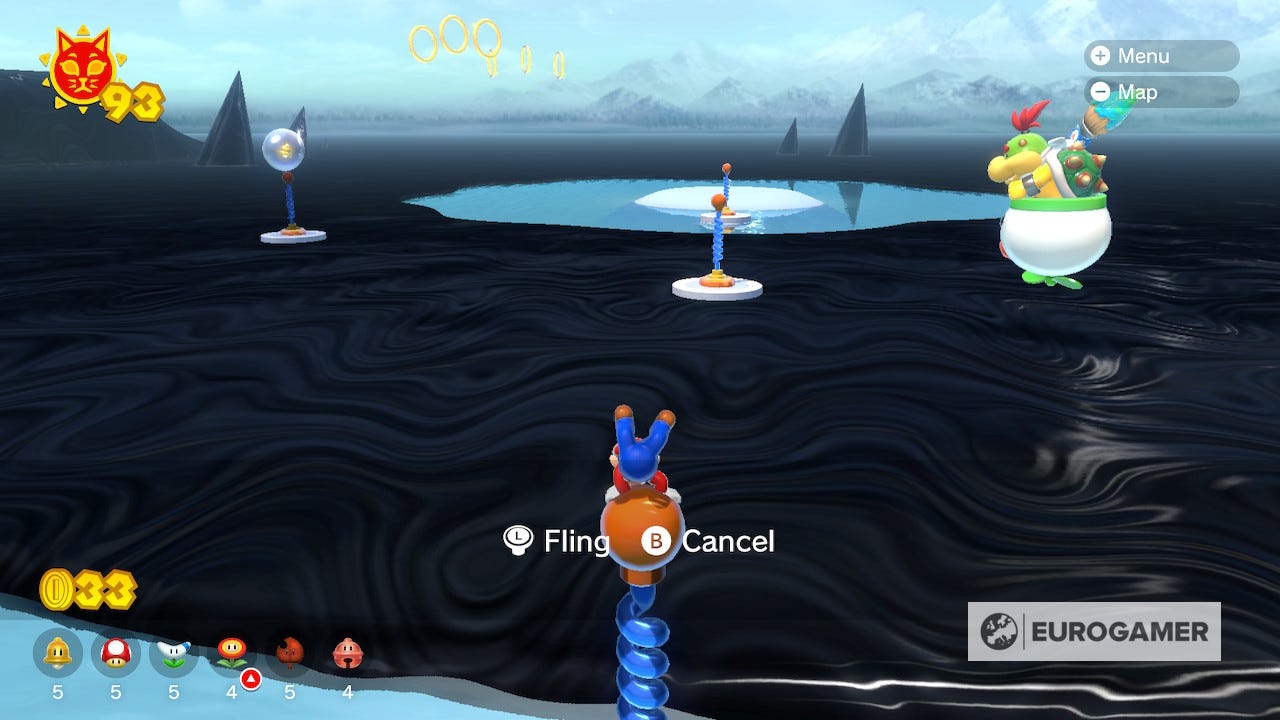
Look around the edges of Risky Whisker Island and you'll see a small island and a floating Shine. Head to the island and you'll see a cog that Cat Mario can spin. When spun it will raise a pillar to reach the Shine.
You can either use the columns to make your way there, or swim there and avoid the fish. Either way the pillar only lasts a couple of seconds so you'll have to be quick.
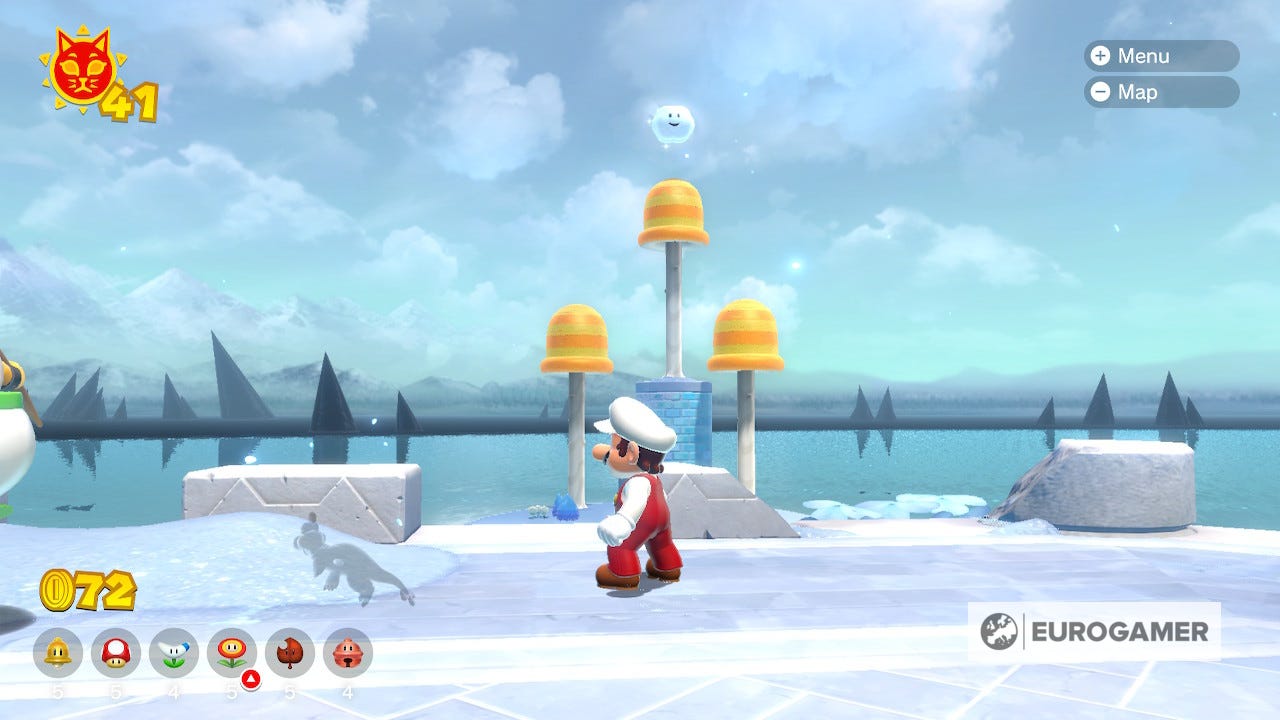
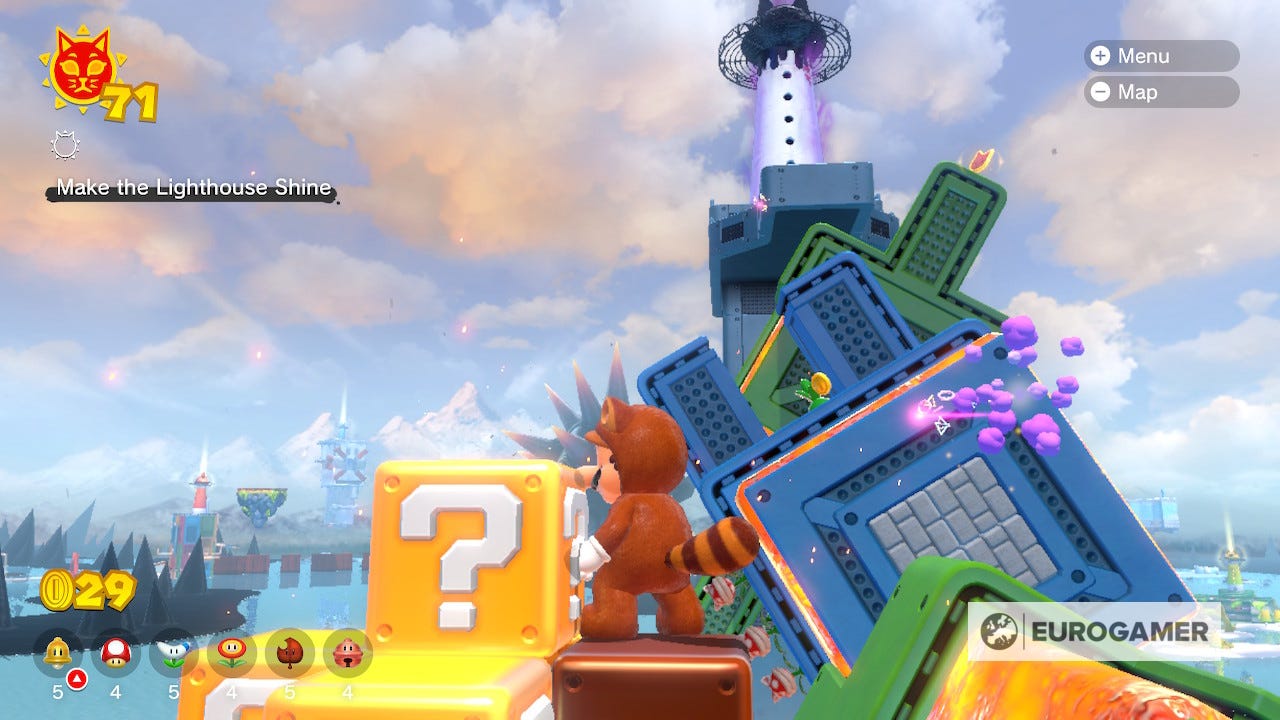
Cat Shine 71 Location
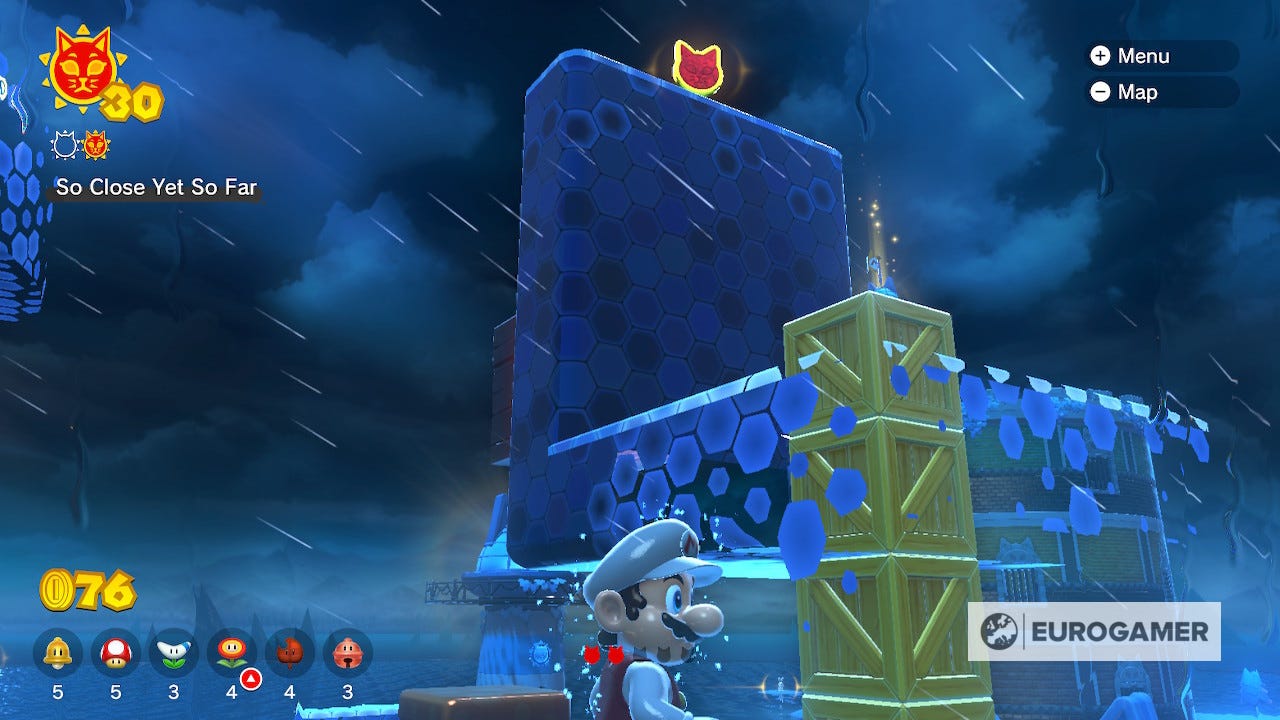
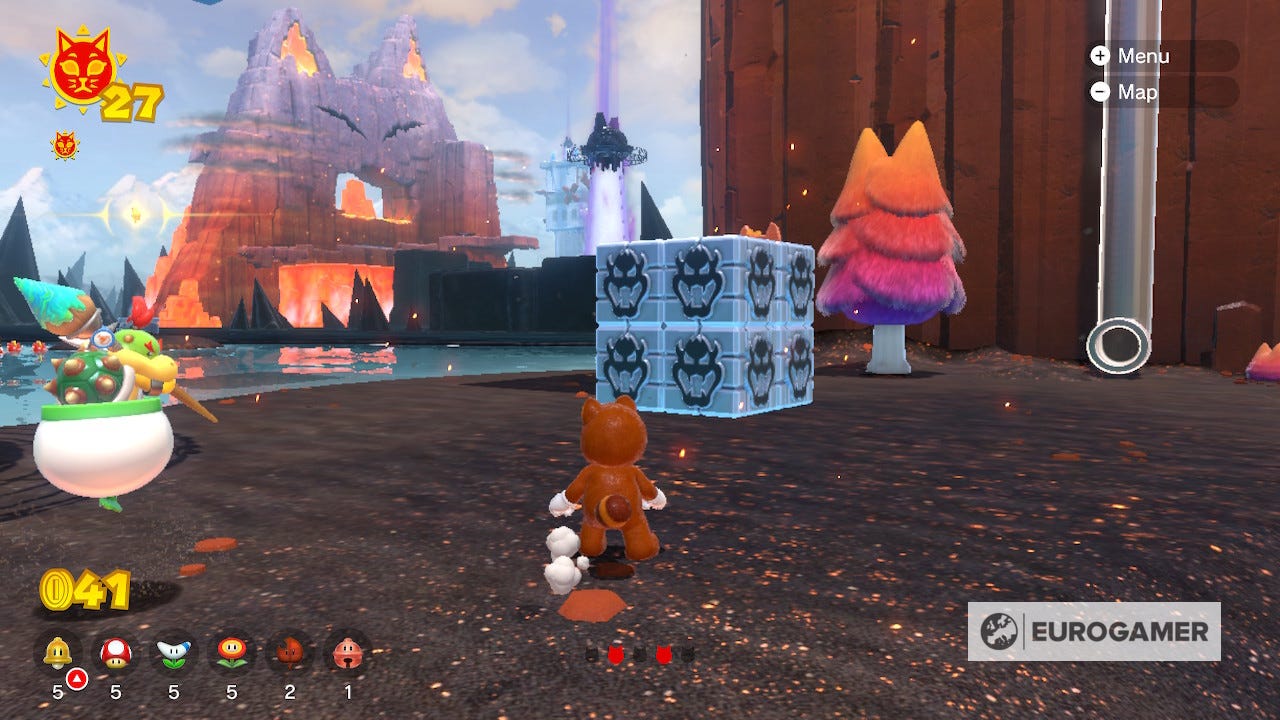
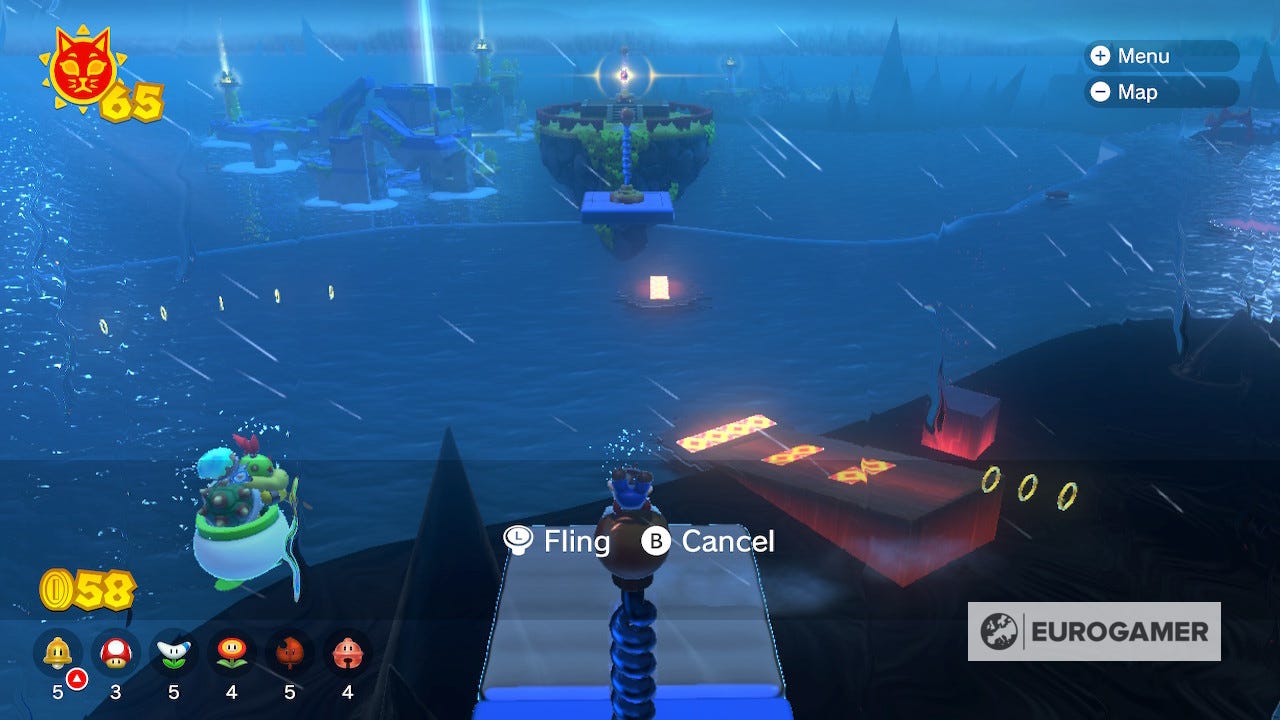
Near the Giga Bell itself you can see some Bowser blocks, which once destroyed reveal a pipe that launches you into the clouds. Use the flingers to carefully traverse the sky and you'll find a Shine on the far island.
Be careful when landing on the island, as the momentum of the Flinger might have you running off the far side.
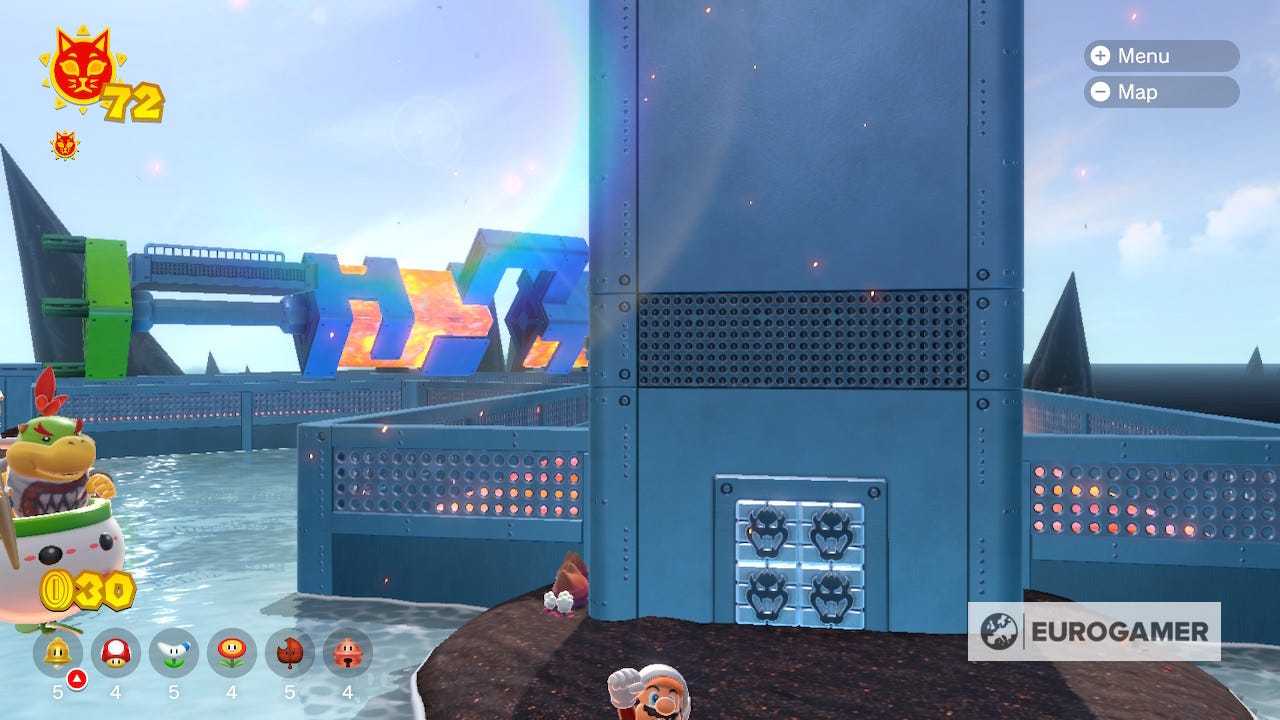
Cat Shine 72 Location
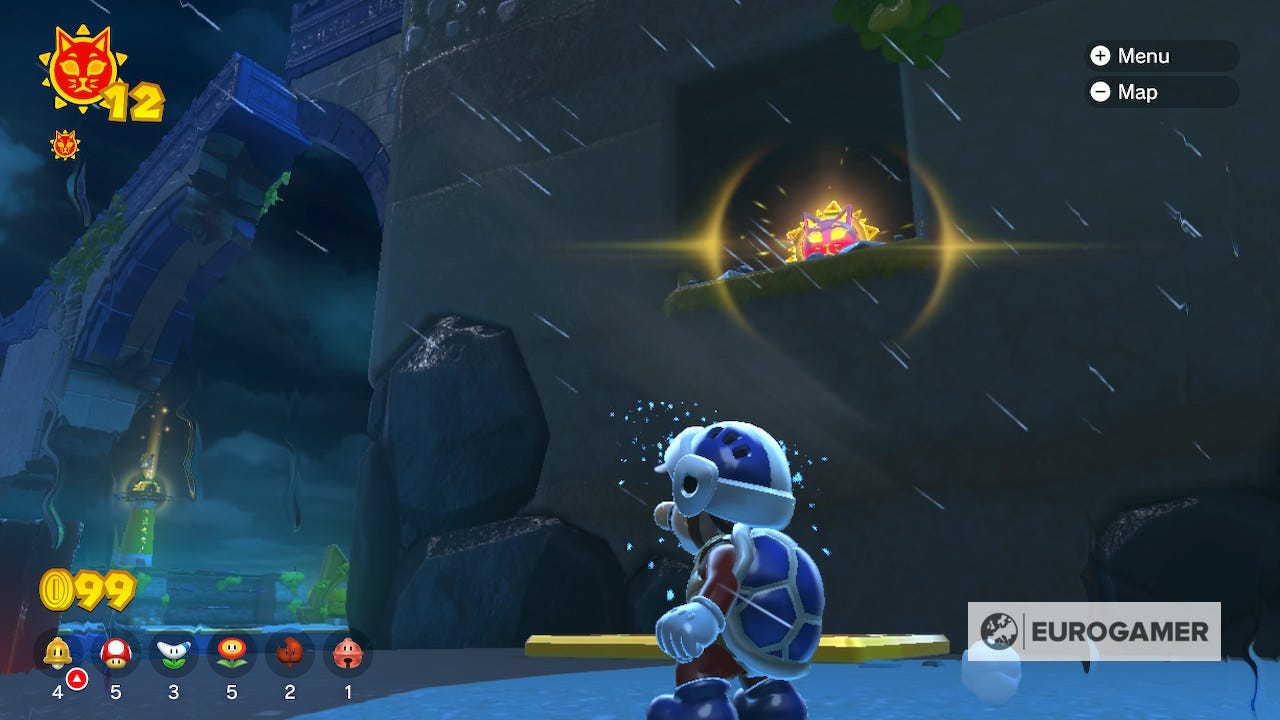
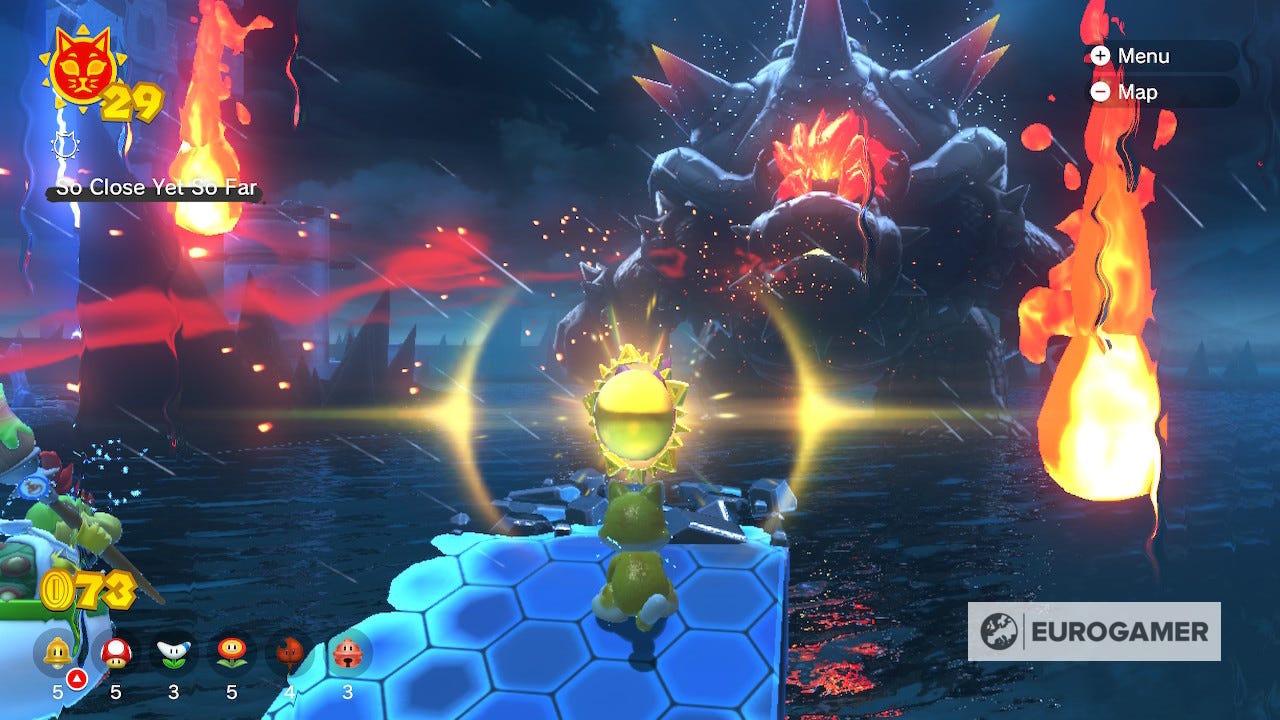
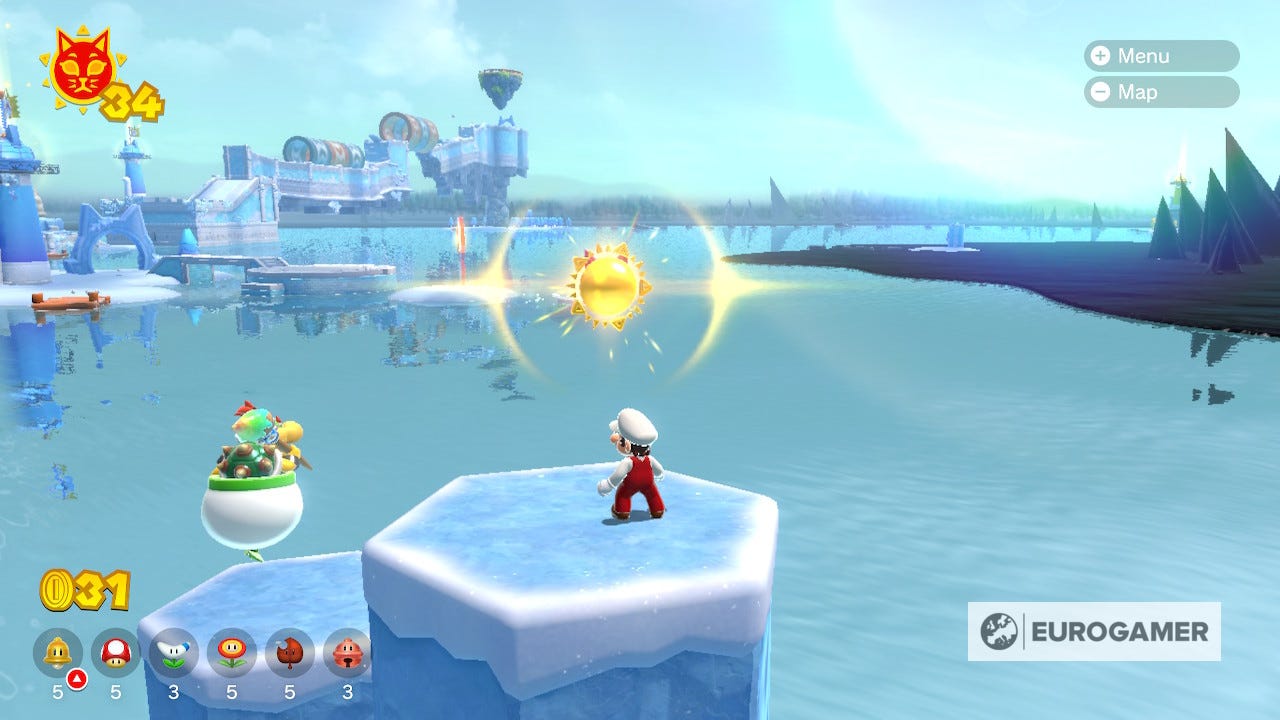
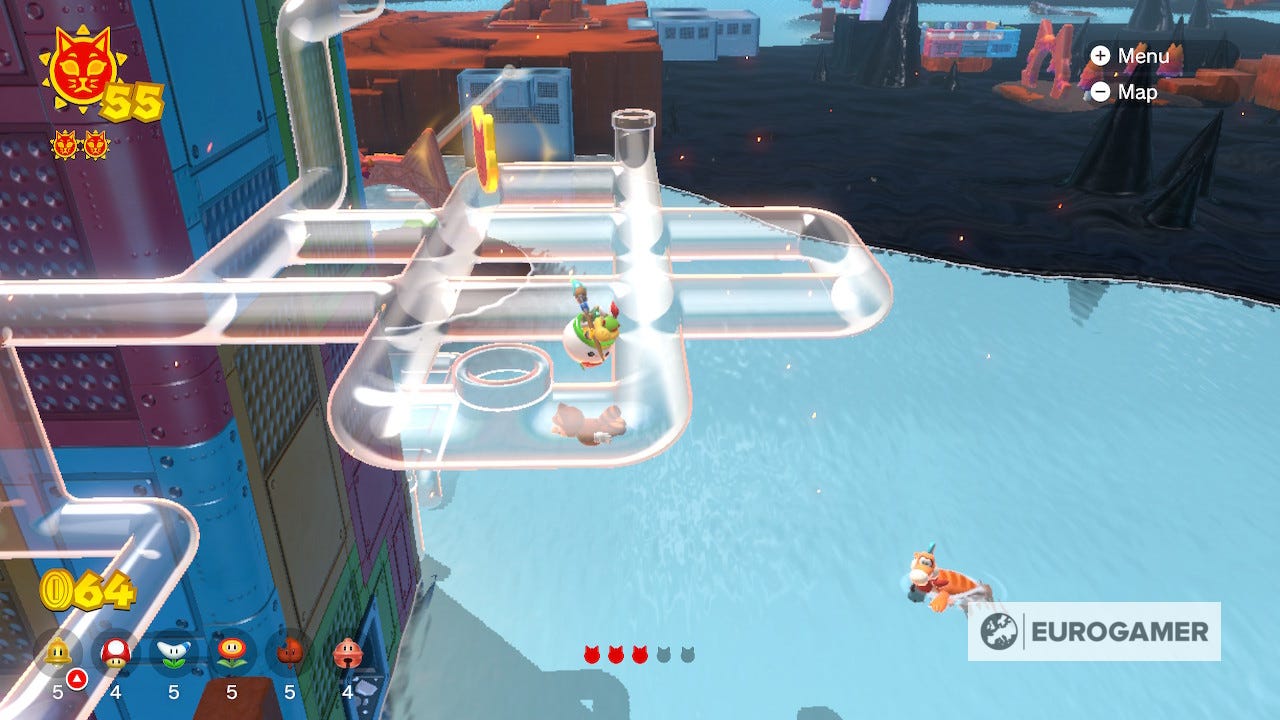
Behind Pipe Path Tower there is a thin sea wall that leads to Fury Bowser's inky lair with a Shine at the end. It's best to head for this one right after Fury Bowser goes back to sleep as you'll have no cover from his attacks if he wakes up while you're running across.
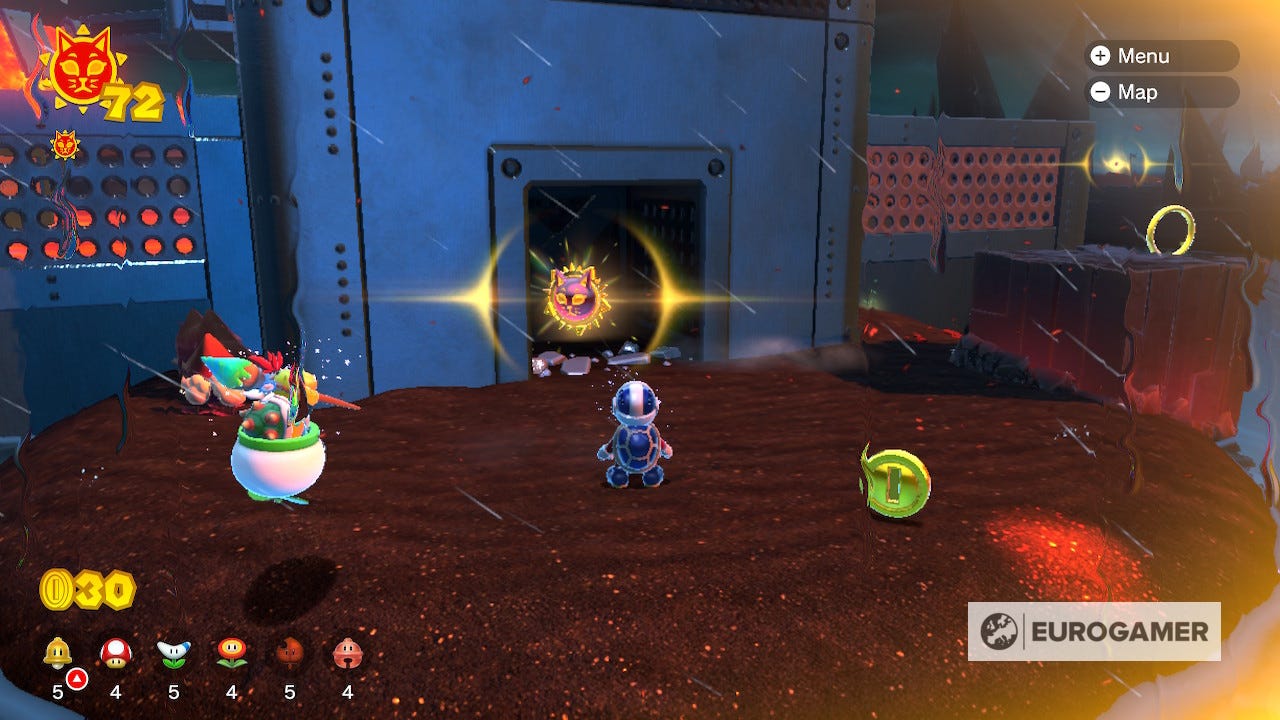
Cat Shine 73 Location
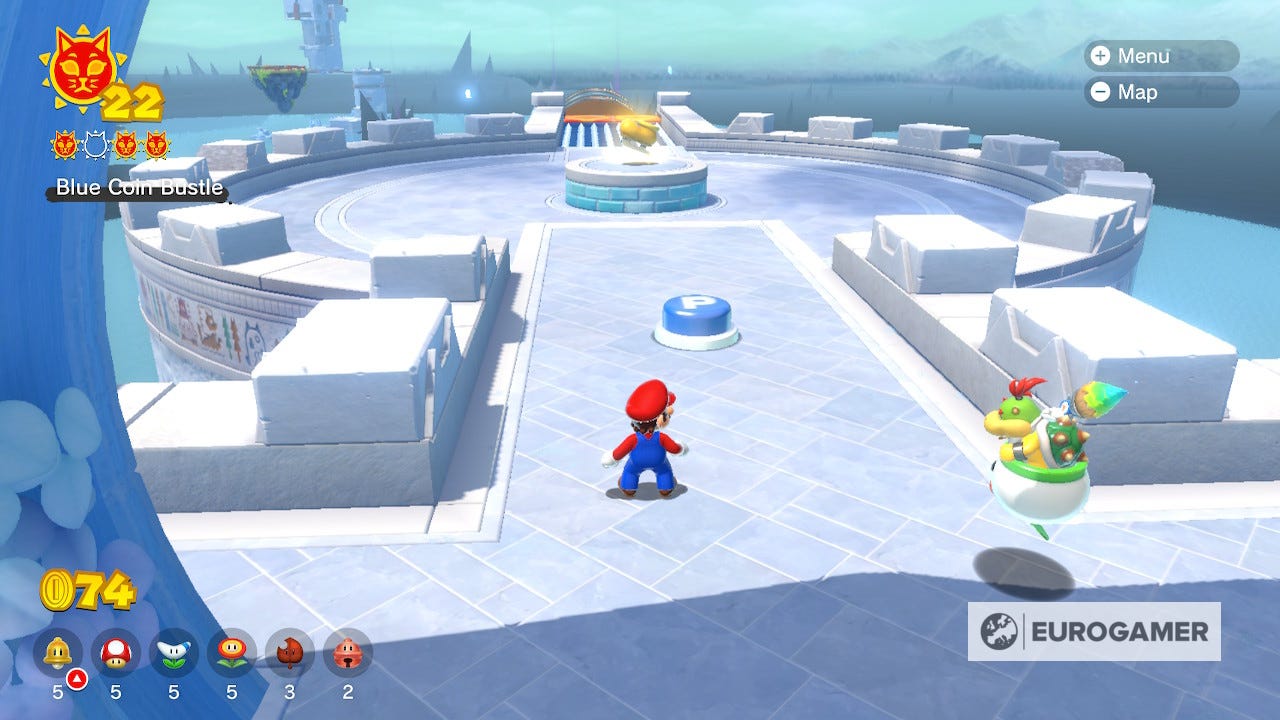
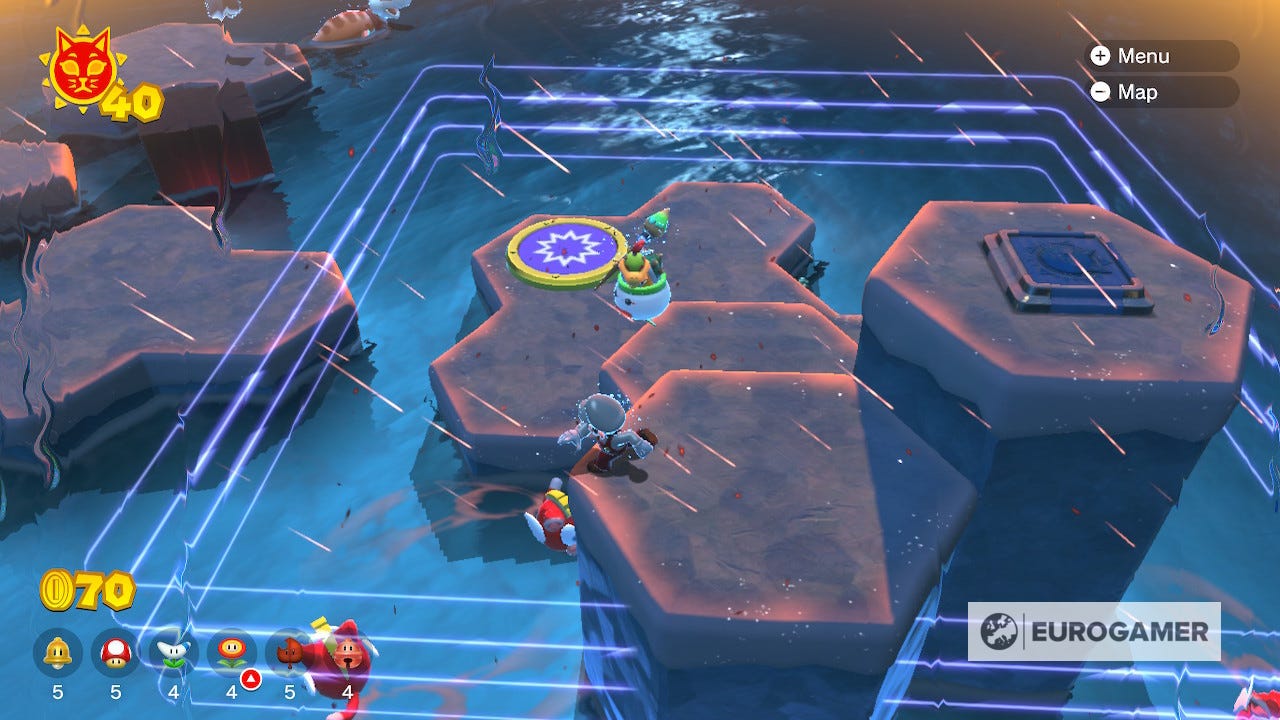
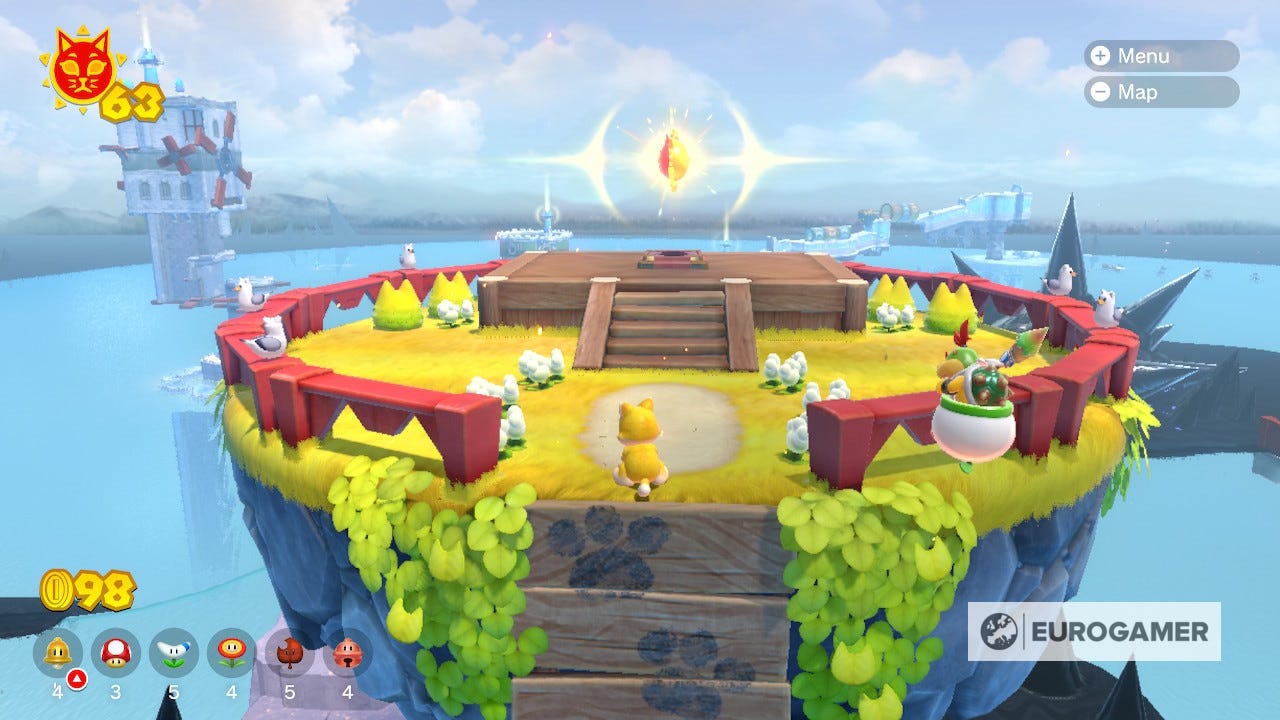
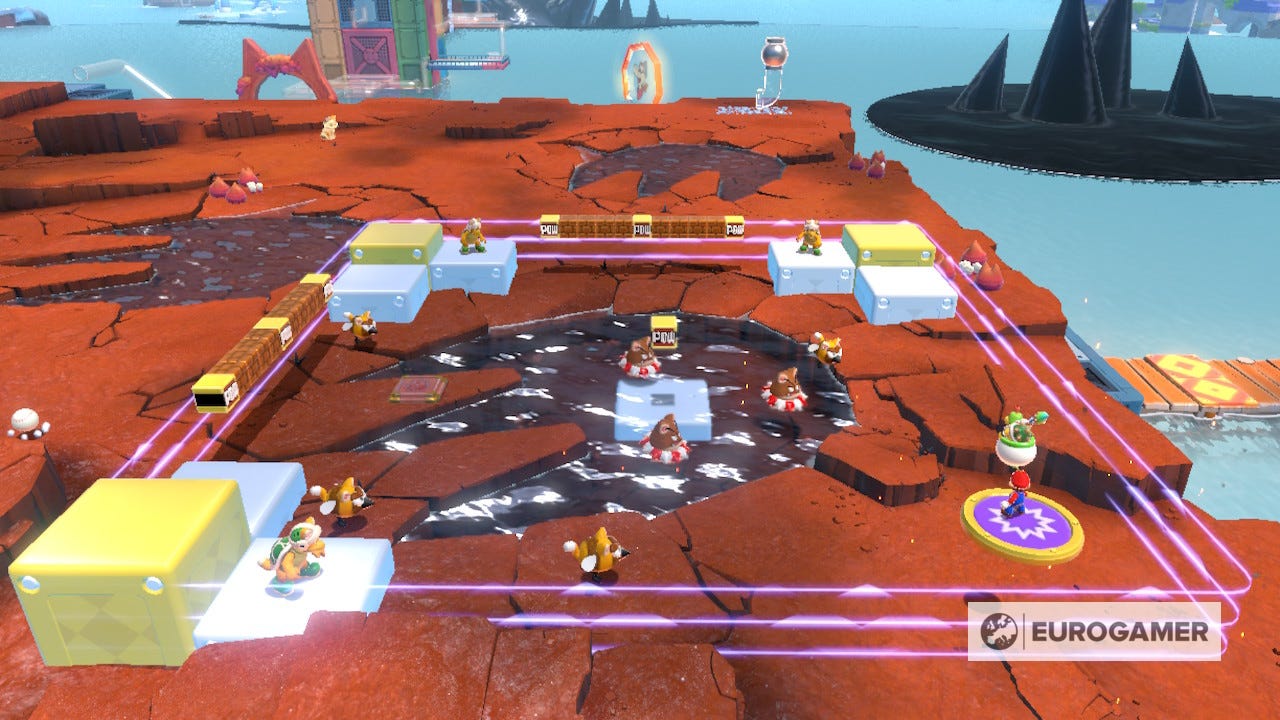
On the Wasteland Giga Bell island, you can see a large button hidden near some of Fury Bowsers footsteps. Slam it down and you'll be locked in an arena with several enemies. Use the POW boxes around the edge to help control the baddies and once they're all defeated you'll be rewarded with a Shine.
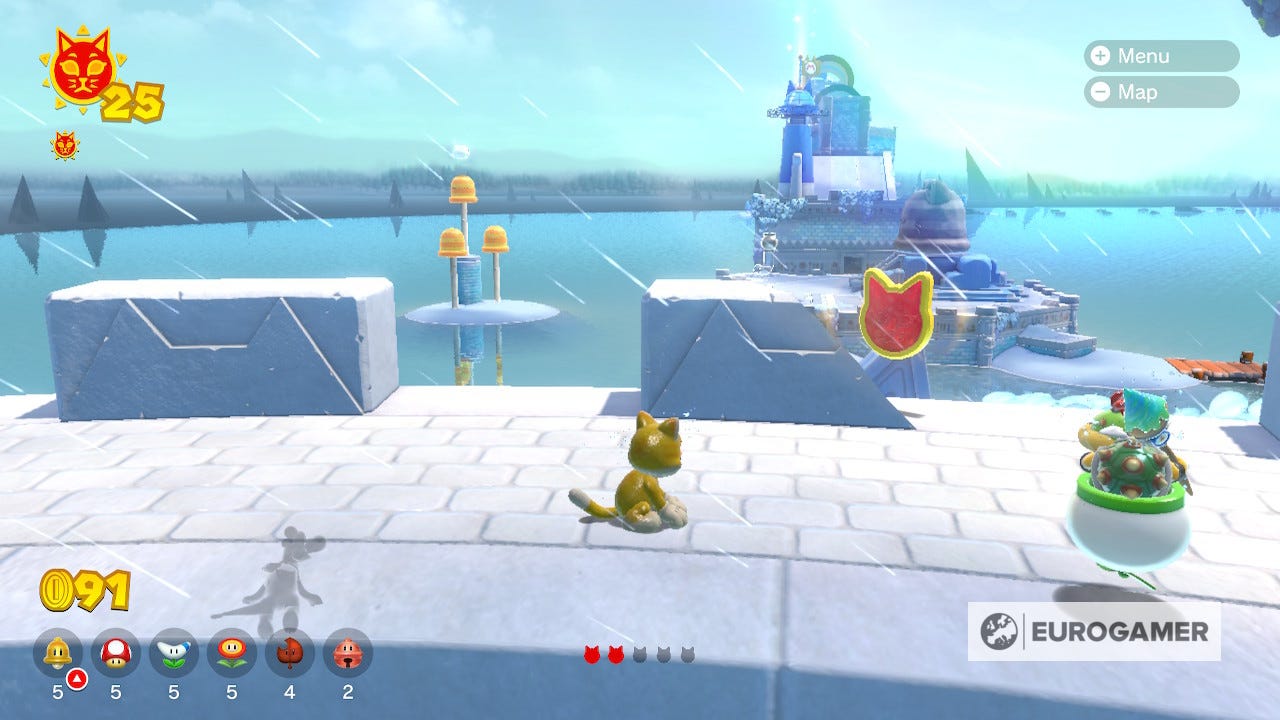
Cat Shine 74 Location
After acquiring a Shine at Pipe Path Tower, you'll see a Plessie gate revealed in the water. Go through it and race to the end before time runs out and you'll catch a Shine. The course is mostly on raised platforms so if you fall off, you'll likely have to start again.
In particular, mind the final stretch as it is narrow with a boost at the start that can take you off balance.
Cat Shine 75 Location
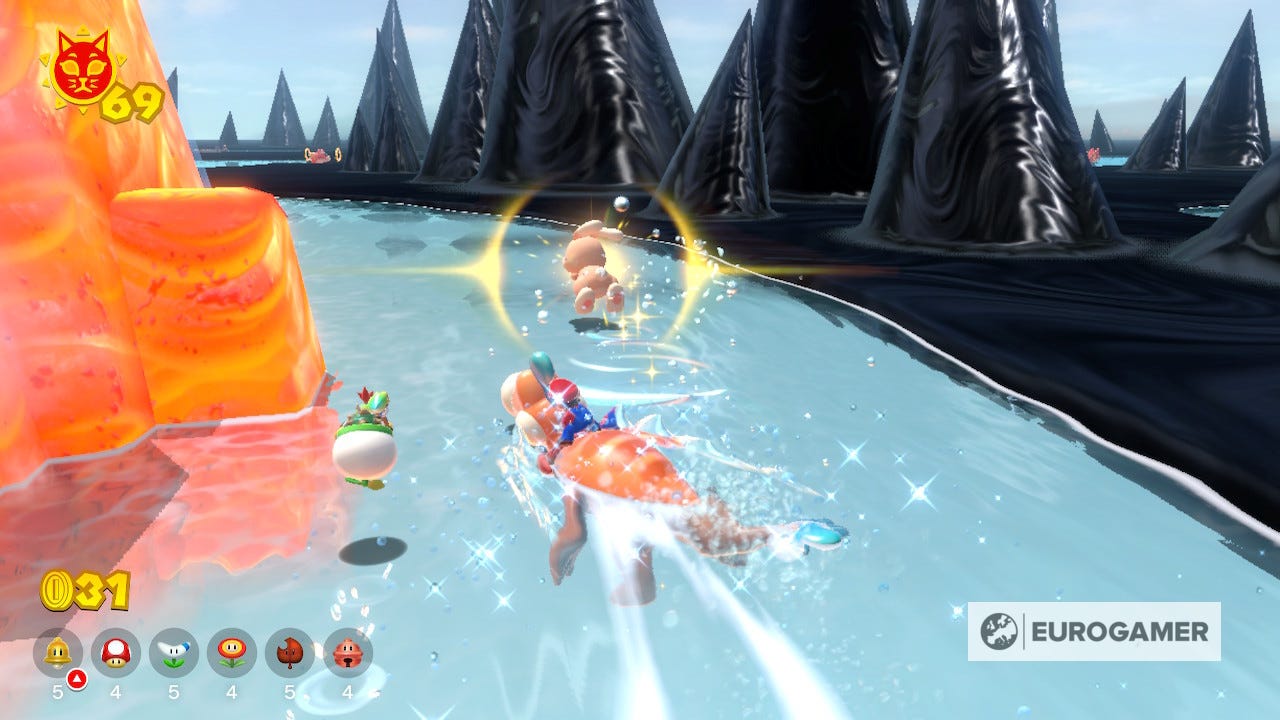
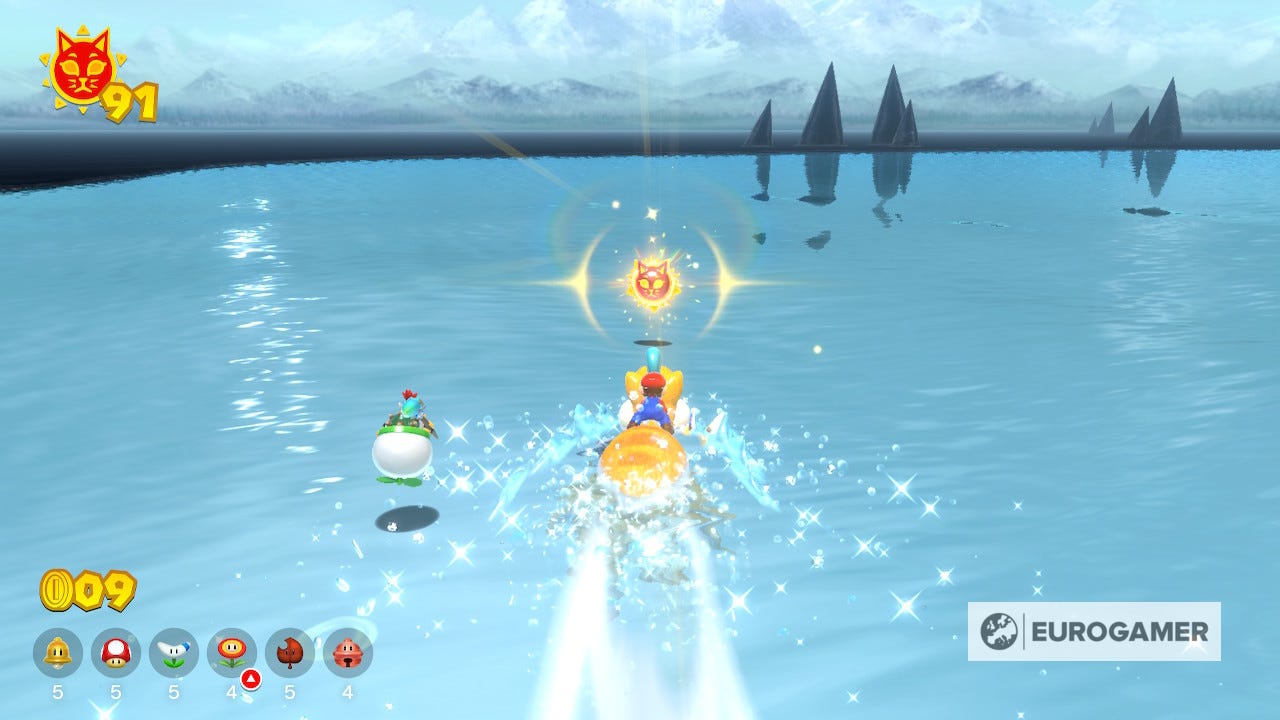
To the right of Mount Magmeow, after you've collected at least one Shine from the island, you'll spot another large, playful rabbit waiting for you to approach. As soon as you do, be prepared for a chase that might lead you between the ink and lava so you'll need good control of Plessie.
Once you catch the rabbit, it'll reward you with a Shine
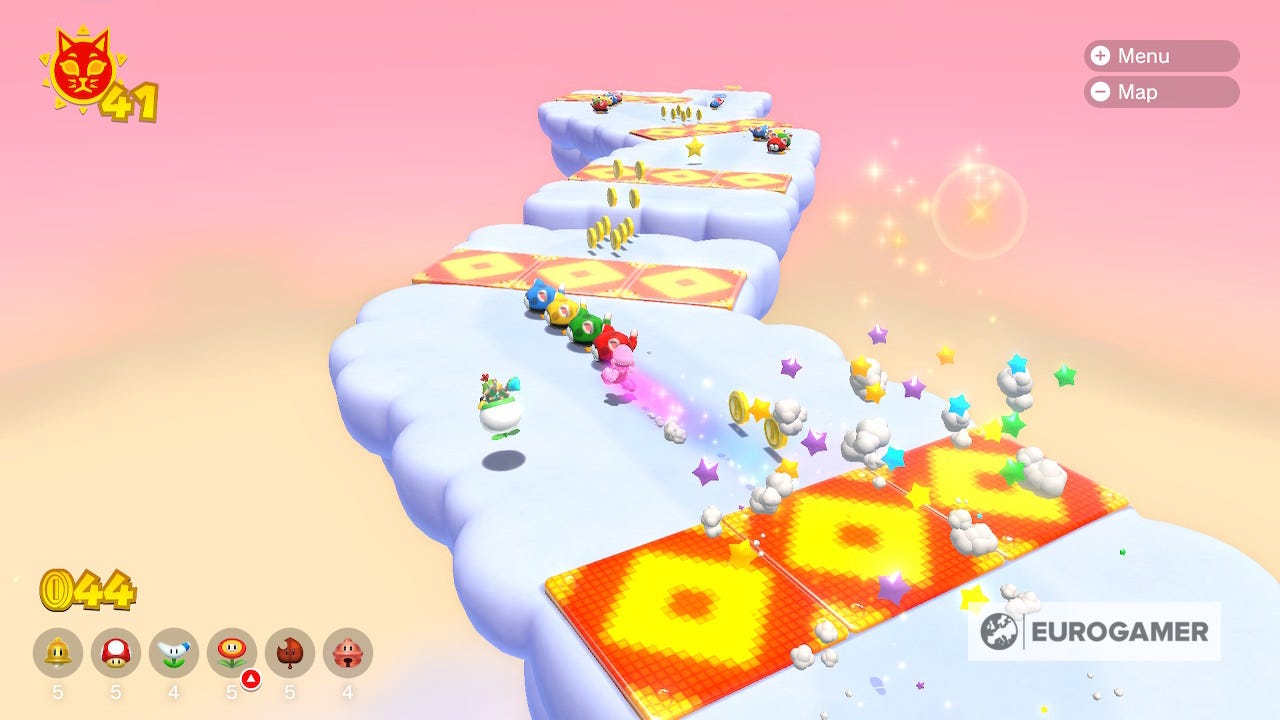
Cat Shine 76 Location
Beside the Wasteland Giga bell there is another sad cat, this time missing five kittens. Find and return all of them and you'll be rewarded with signs. The first can be found on the same island, not far from the other side of the Giga Bell. Just make sure you find a similar looking kitten.
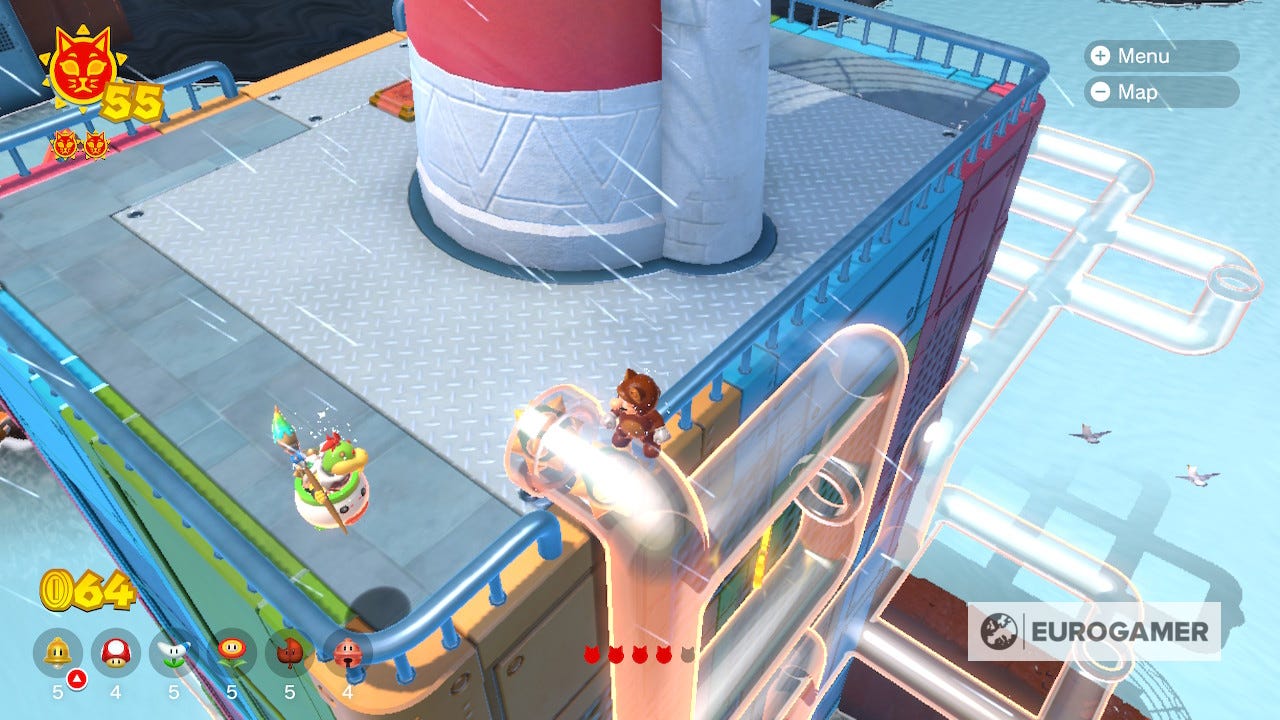
The second can be found at the dock you first arrive at the Wasteland Giga Bell island. Head to the very end of the harbour and it should be there.

The third can be found at the gate of the Pipe Path Tower. You can't take the kitten through the pipe though so you'll have to carry it on top of the pipe instead.
The fourth can be found in the small cave underneath the bridge to Risky Whisker Island. Once you've got the bundle of joy in your arms, you can make your way back up to the bridge by jumping on top of the boxes and jumping again to uncover a new box.
The final one is a little trickier to spot, as they are hiding by the lighthouse of Mount Magmeow. As long as you've got a Shine from the island already, you can reach the lighthouse easily from a pipe around the back, then use the switchboards to get back to the sad cat to unlock your Shine.
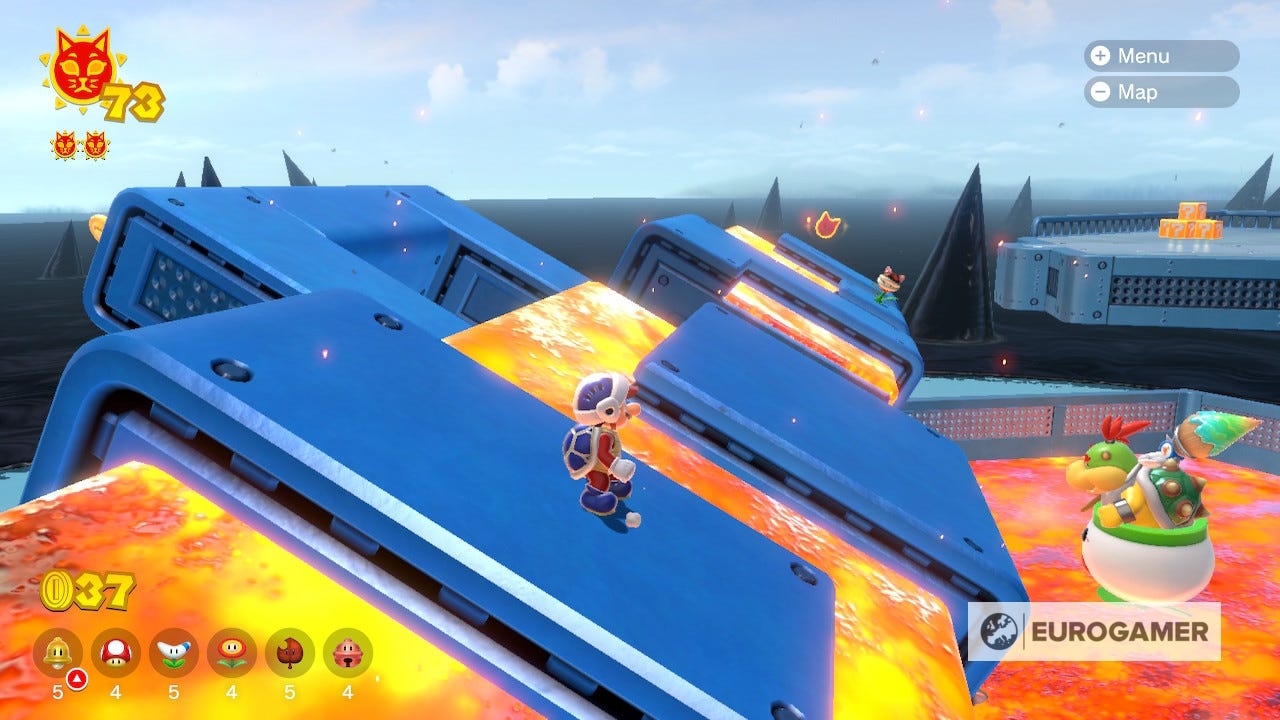
Cat Shine 77 Location
From the top of Roiling Roller Isle you might notice a Shine on a small isle surrounded by ink. You can find the path to it between Wasteland Giga Bell and Roiling Roller, but you won't be able to reach the isle until Fury Bowser arrives and a ramp emerges from the depths allowing you to make the jump.
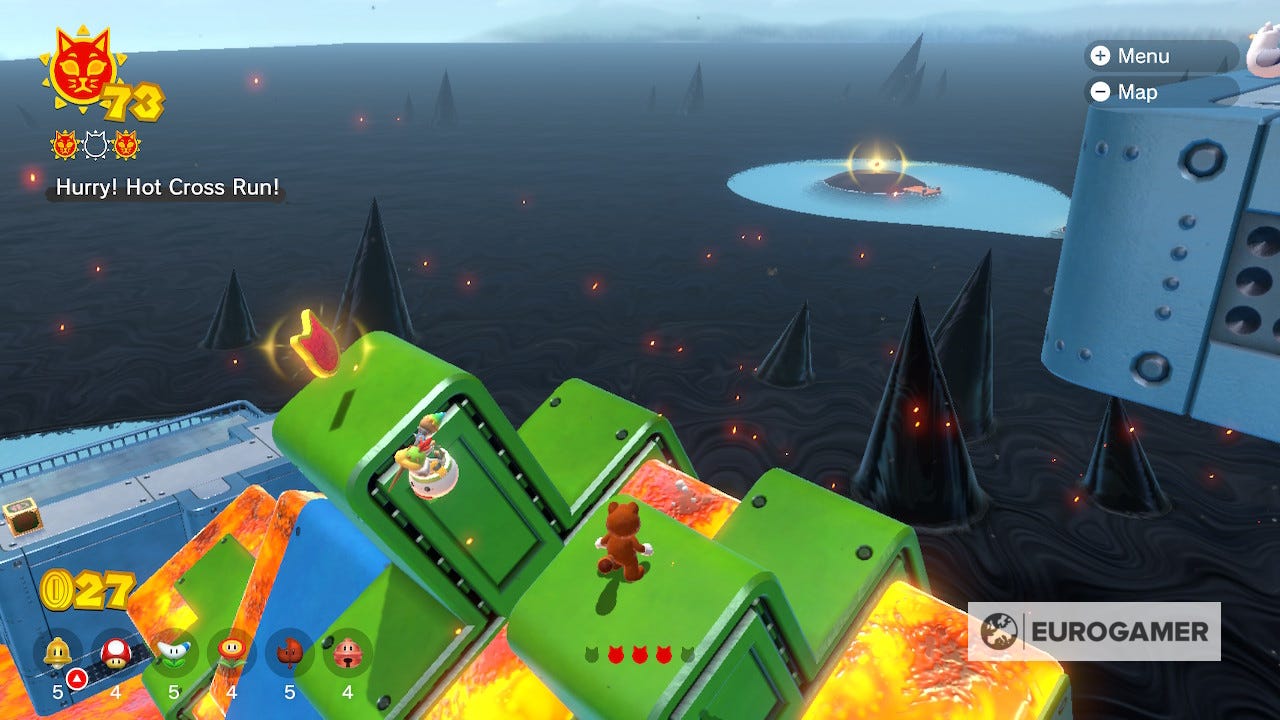
Cat Shine 78 Location
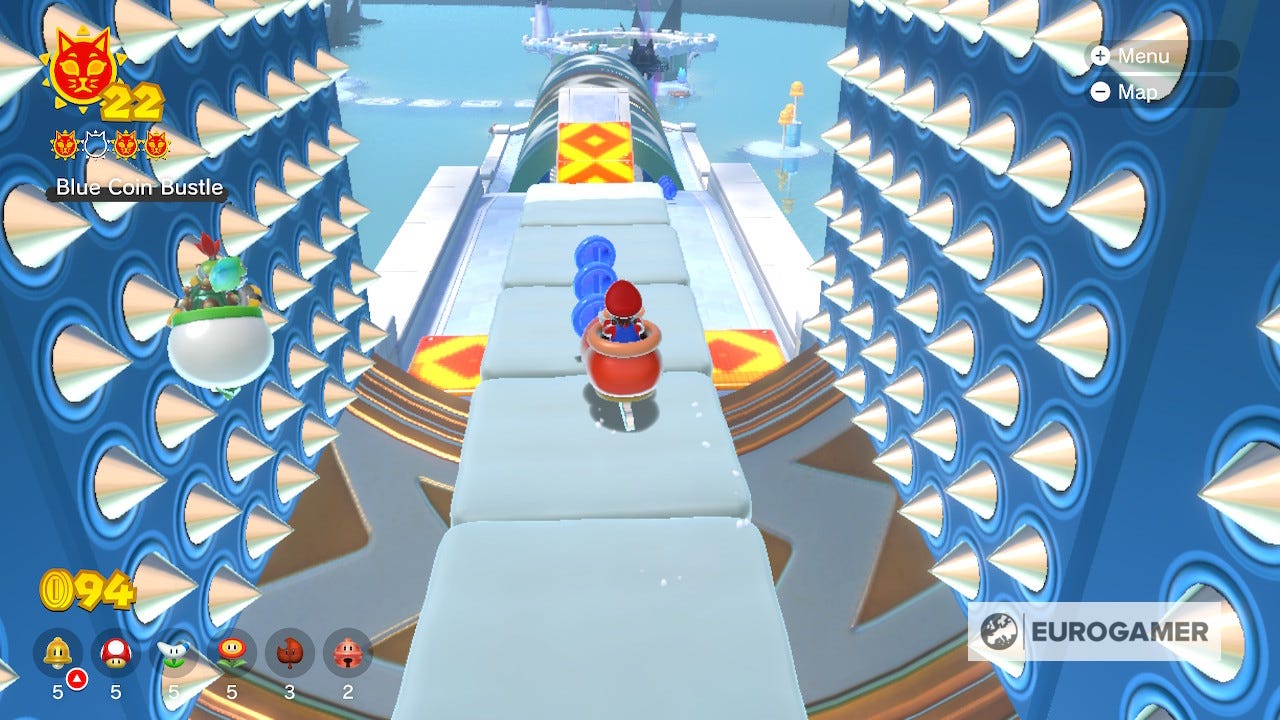
On the edge of the falls between the Wasteland Giga Bell and Roiling Roller Isle, there is a small rock. Peek over the falls and you'll see a small isle with a button below. Hop down and hit it to spawn an obstacle course and a twenty second timer to get back to the rock and claim your Shine.
The course looks very difficult, but its surprisingly easy if you use a cat costume to climb straight up.
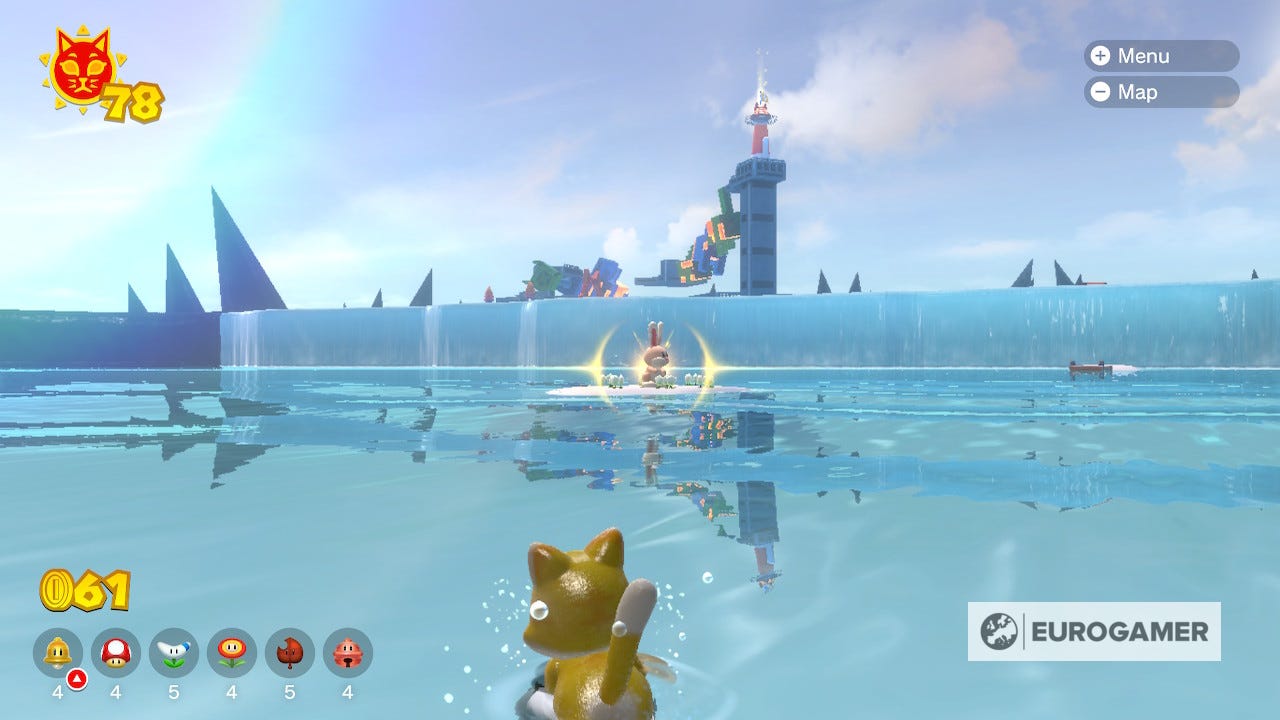
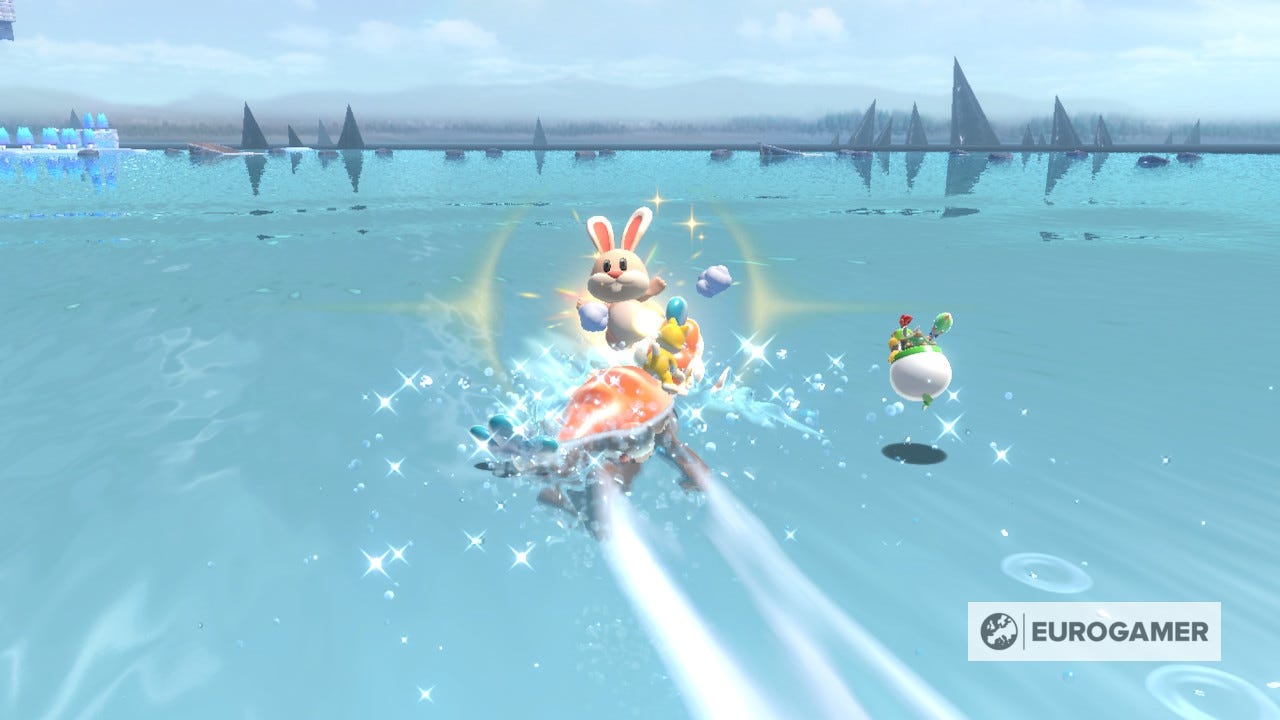
Cat Shine 79 Location
Return to the Lakeside Giga Bell after completing some shine around the Roiling Roller Isle and you'll see some new opportunities to collect Shines in the region. The first is the familiar rabbit that wants a race with you and Plessie. Catch the rabbit to gain a Shine.
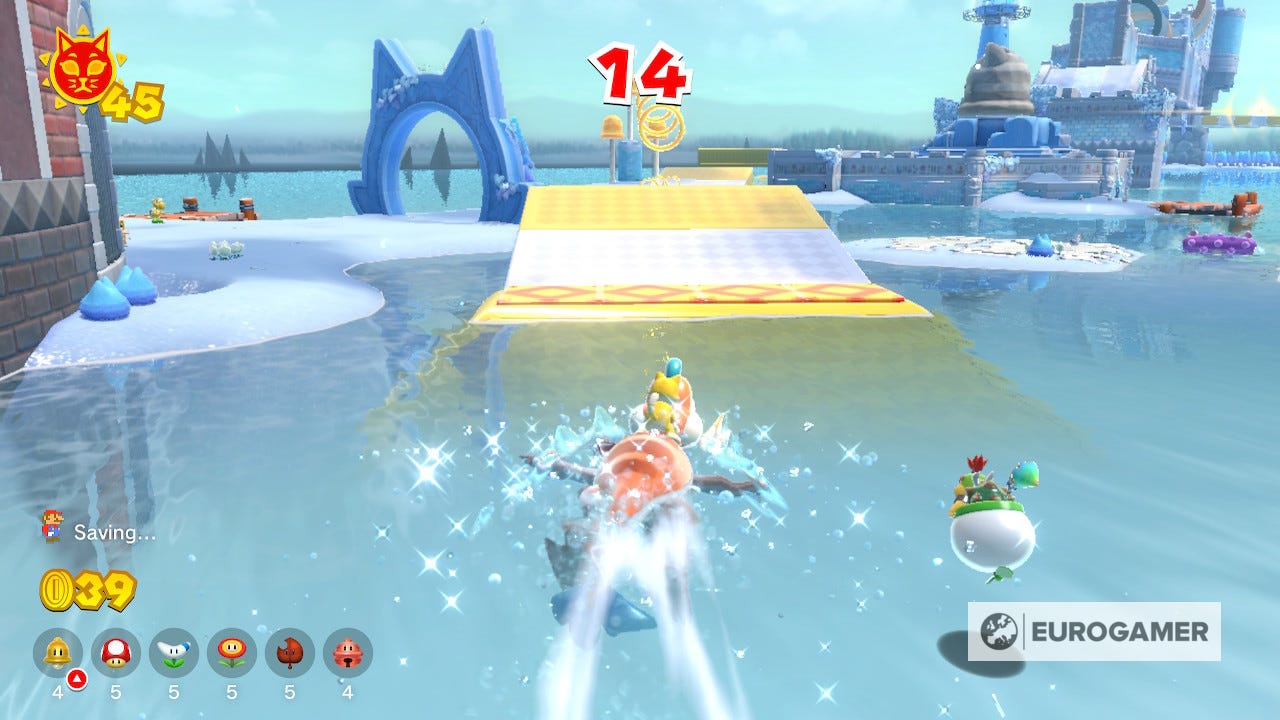
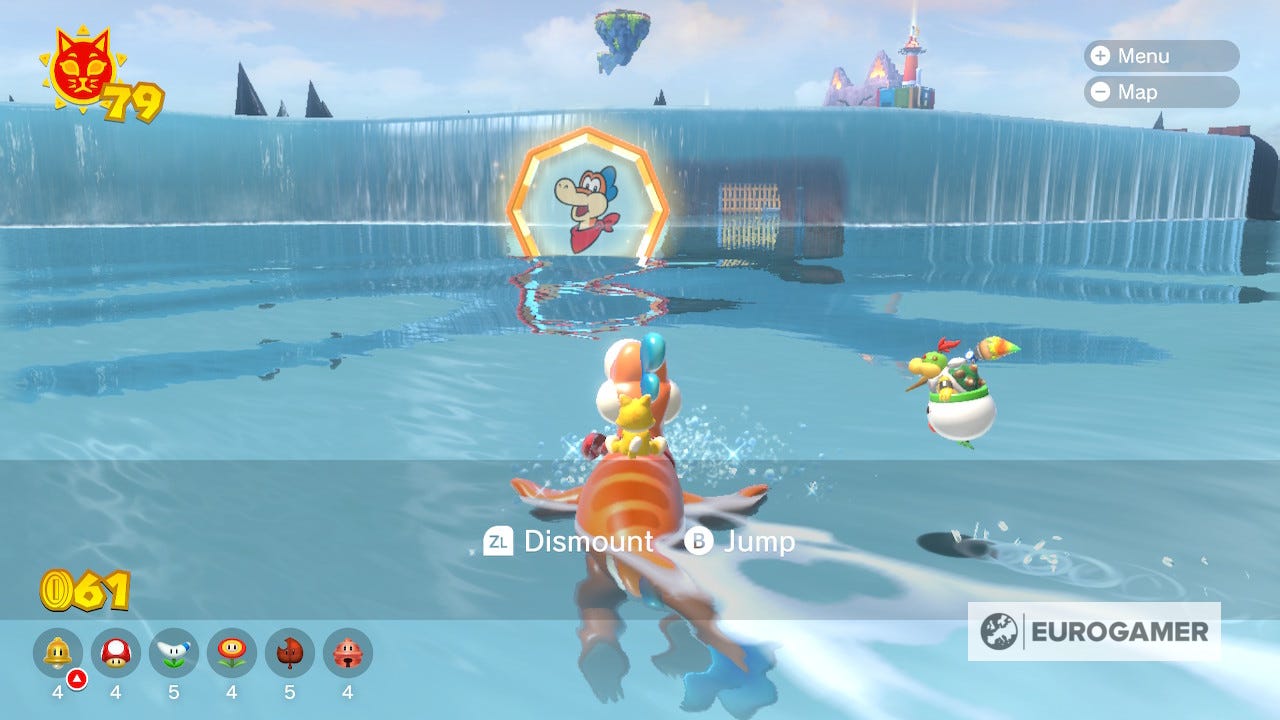
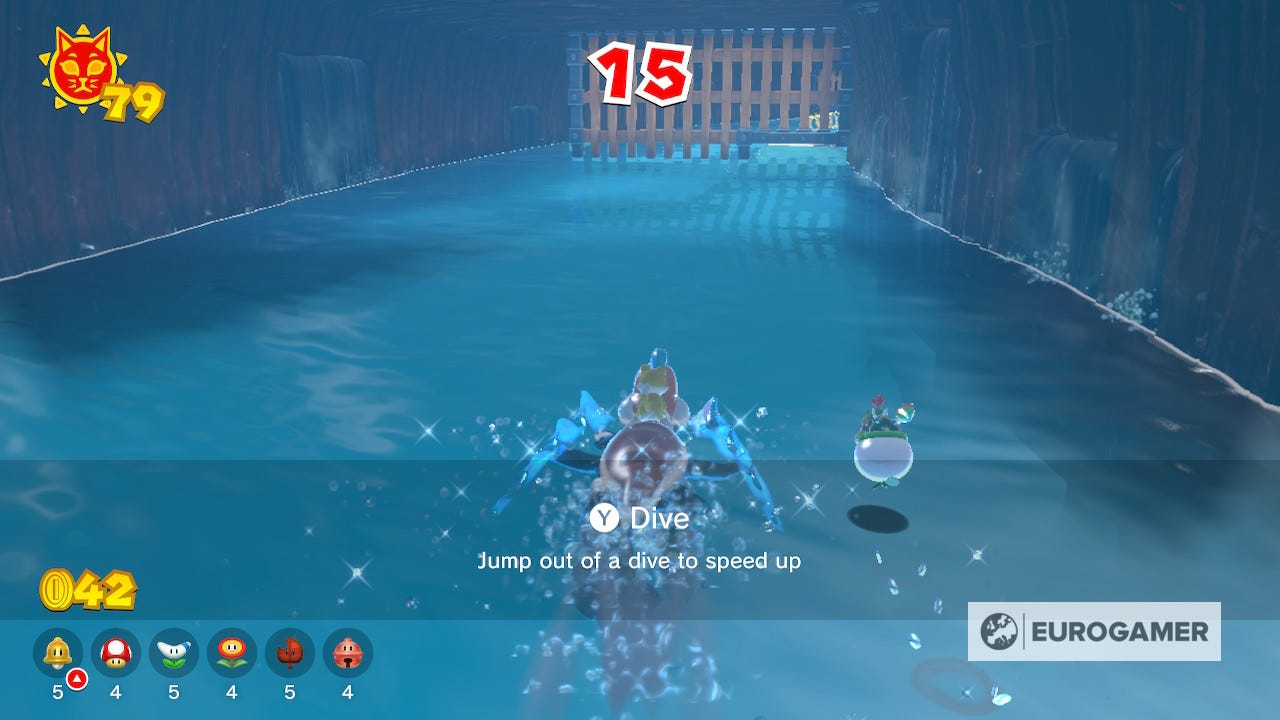
Cat Shine 80 Location
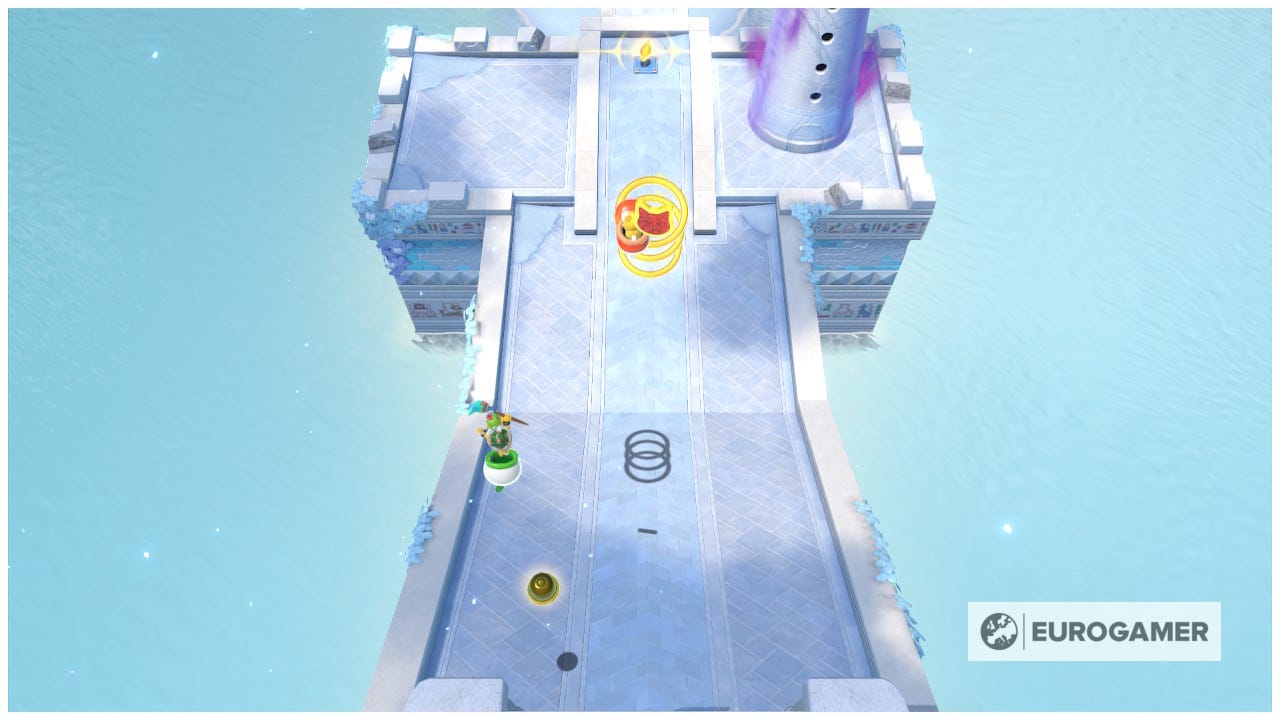
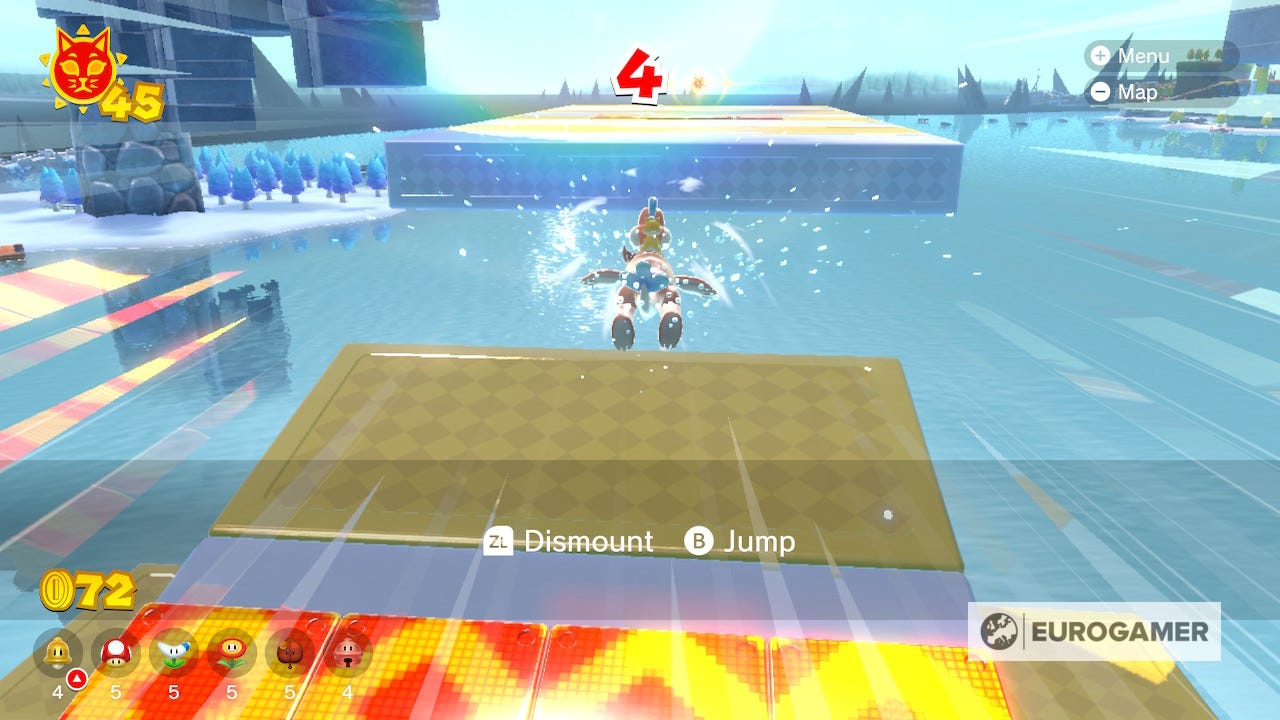
Beside the Lakeside rabbit is another Plessie gate that leads you through a waterfall beneath the Wasteland Giga region, so long as you've completed a Shine at Roiling Roller Isle. Use Y to dive under the gates in the way and jump to resurface with speed.
Reach the Shine at the far end of the water tunnel in 20 seconds to collect it.
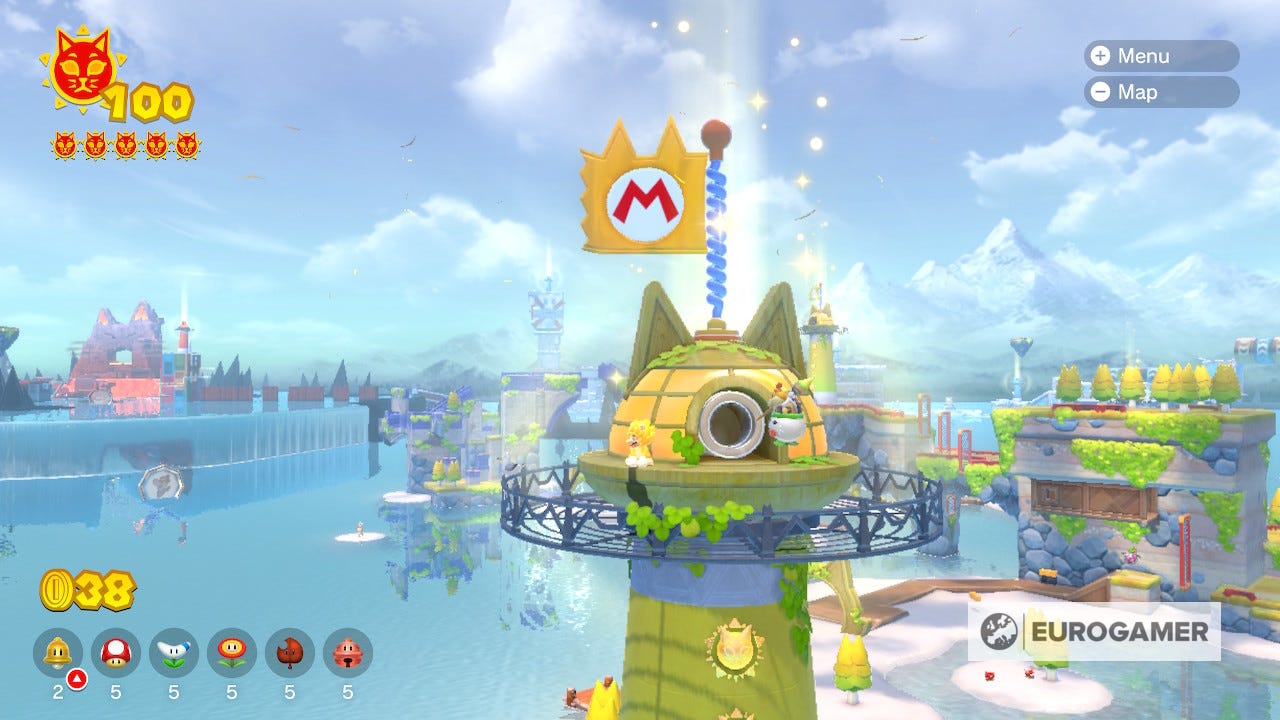
Fur Step Island Shine locations (revisited post game)
When you first started Bowsers Fury you would have gone through Fur Step Island quite quickly because there wasn't much else to do, but once you complete the game by defeating Fury Bowser three times, you'll be able to return here to collect some Shines you were able to find the last time.
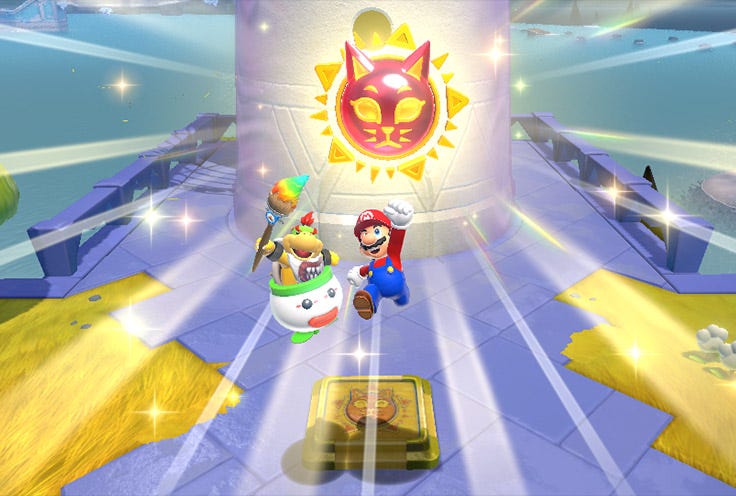
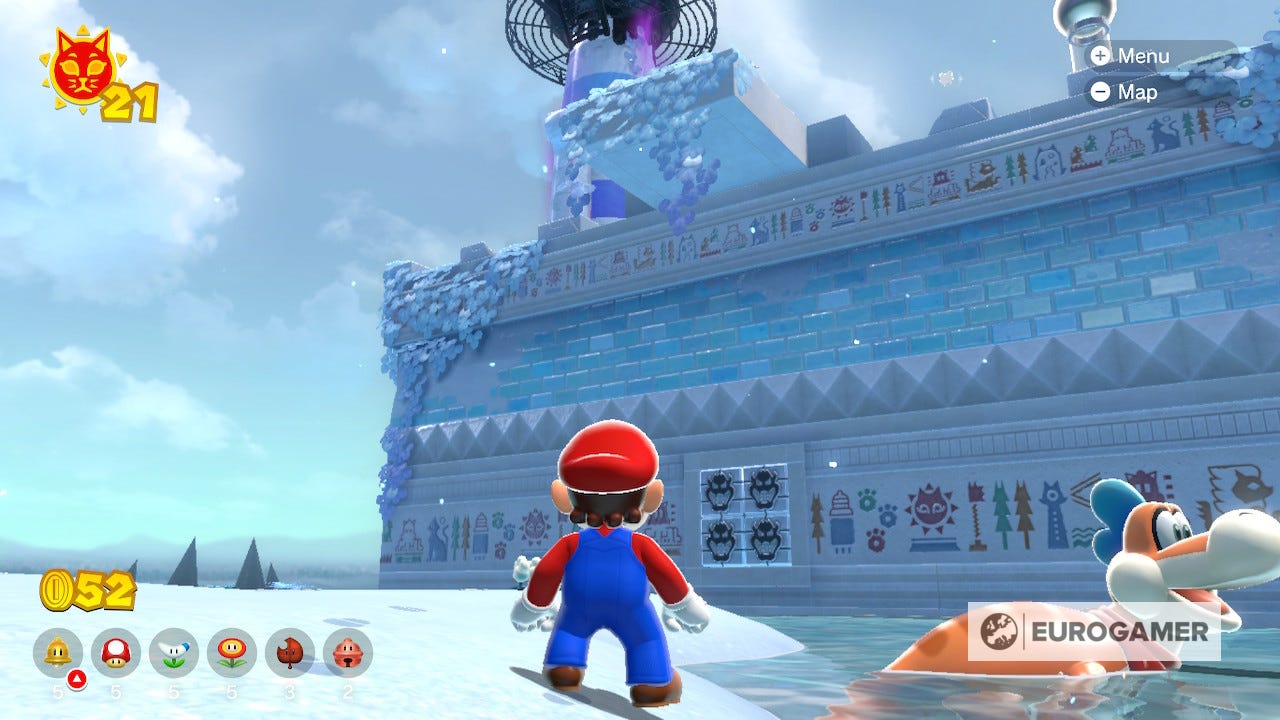
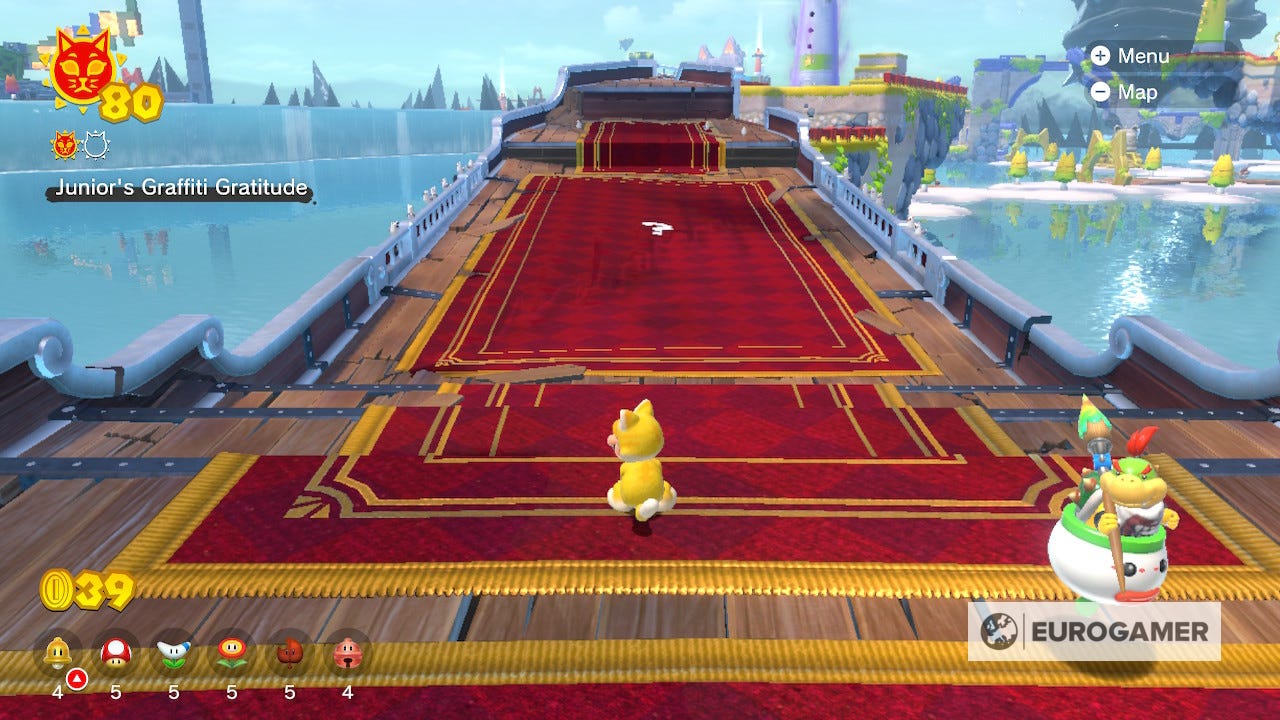
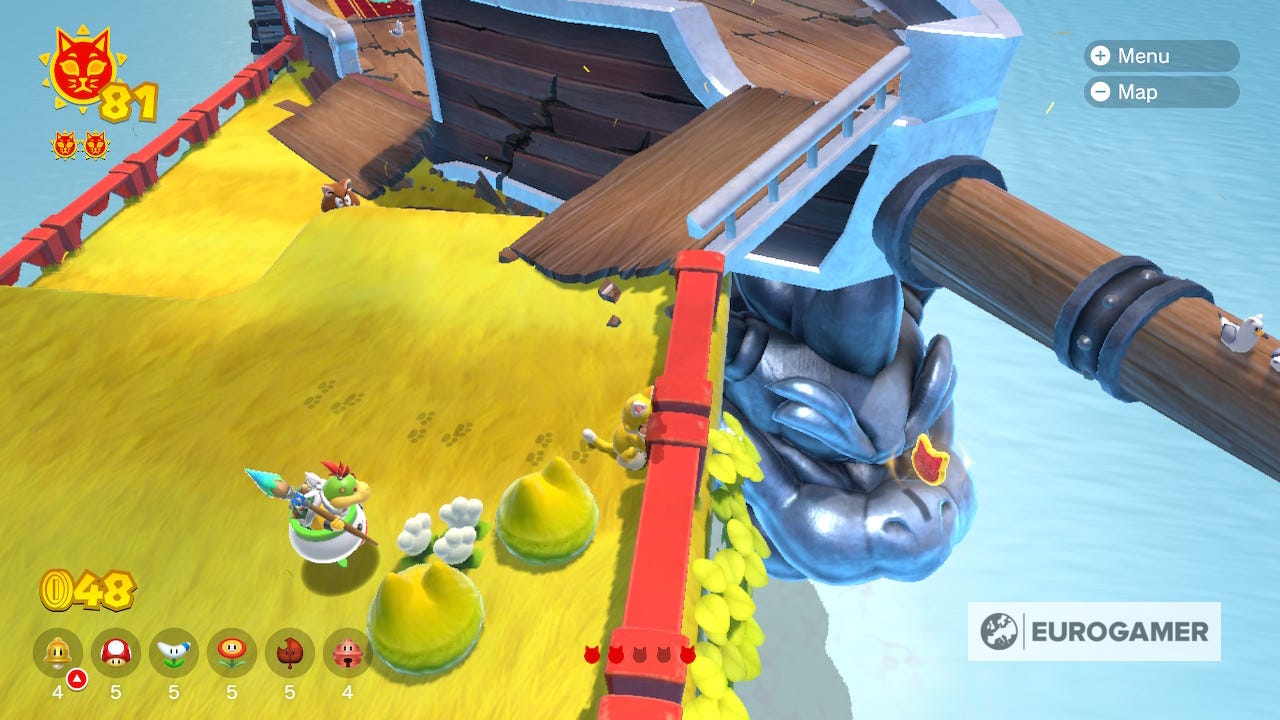
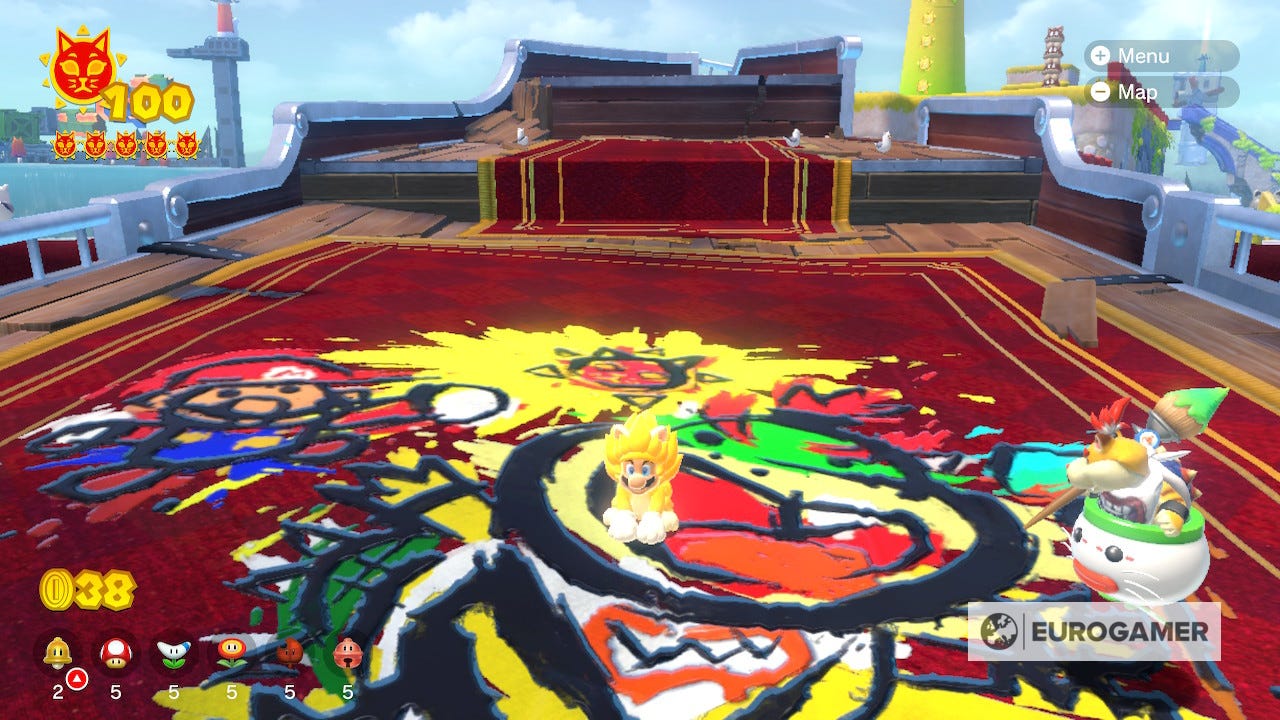
Cat Shine 81 Location
When you drop back into Fur Step island you might be tempted to wait for Fury Bowser to make an appearance to destroy the Bowser bricks you can see just off the path.
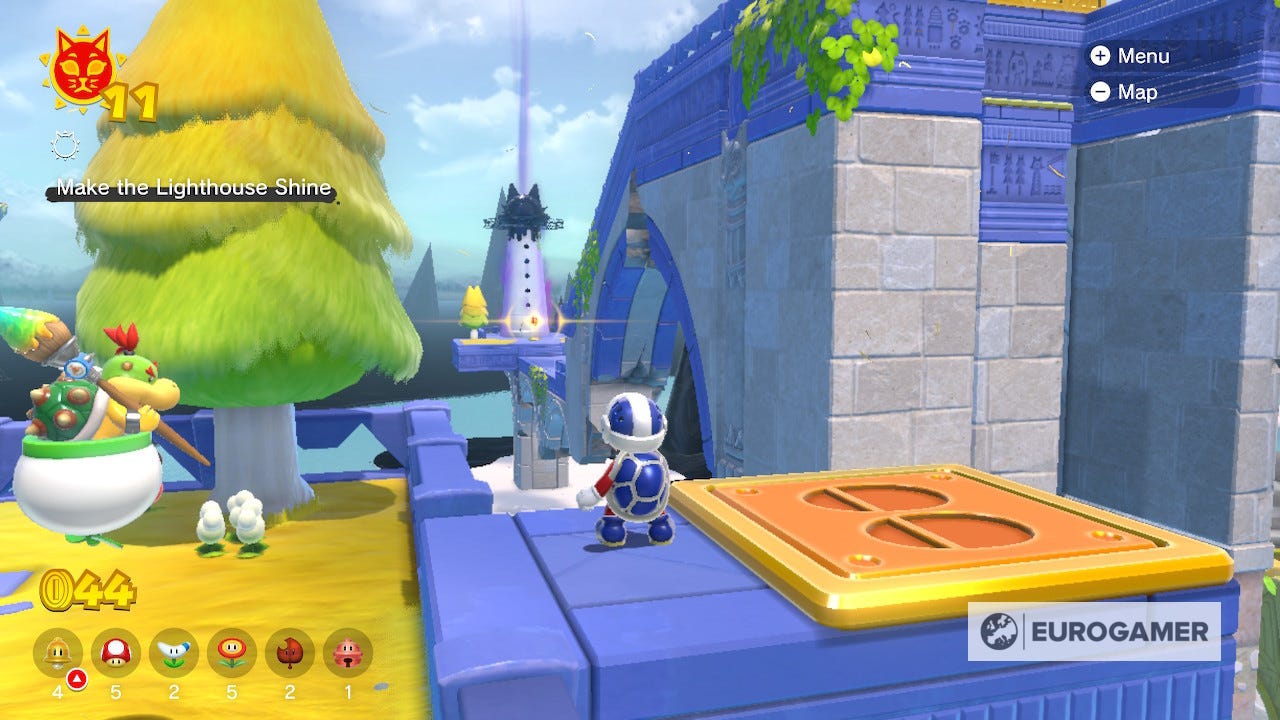
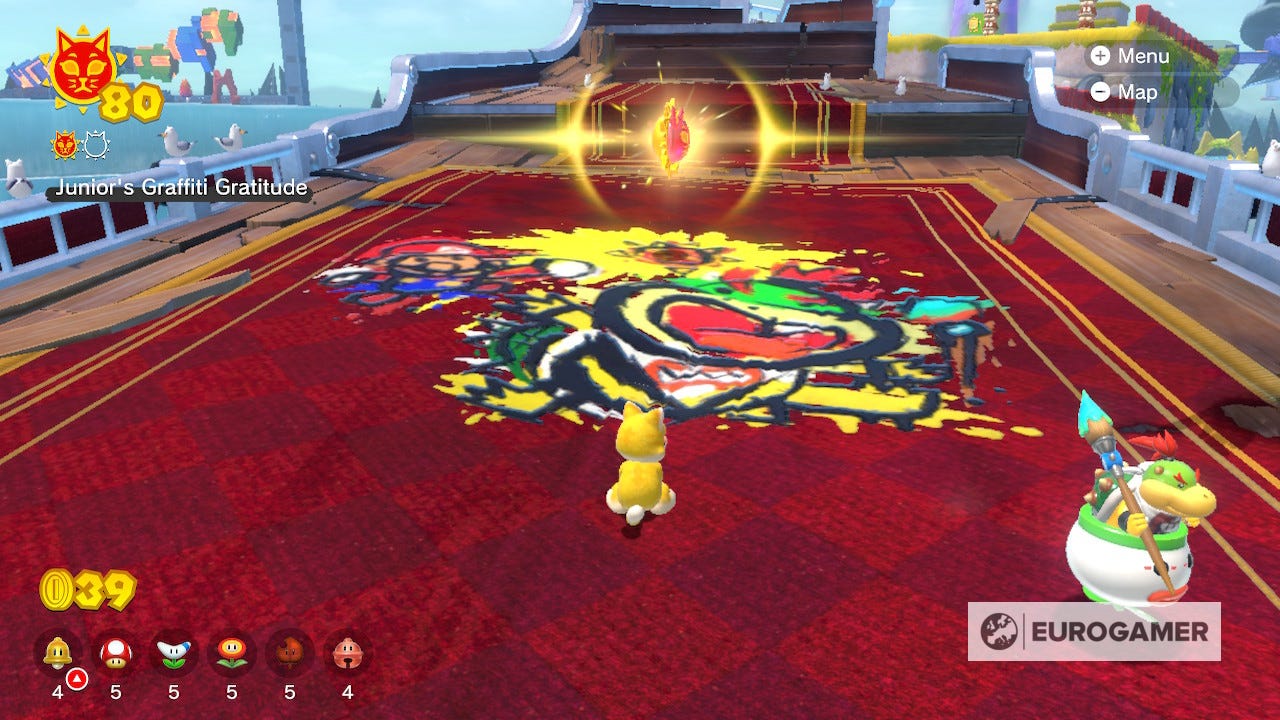
Ignore them for now. Instead head to the ship where you can see a question mark that means Bowser Jr can do some painting. Tell him to with the R trigger, and he'll paint a mural of your adventure, and give you a Shine as well.
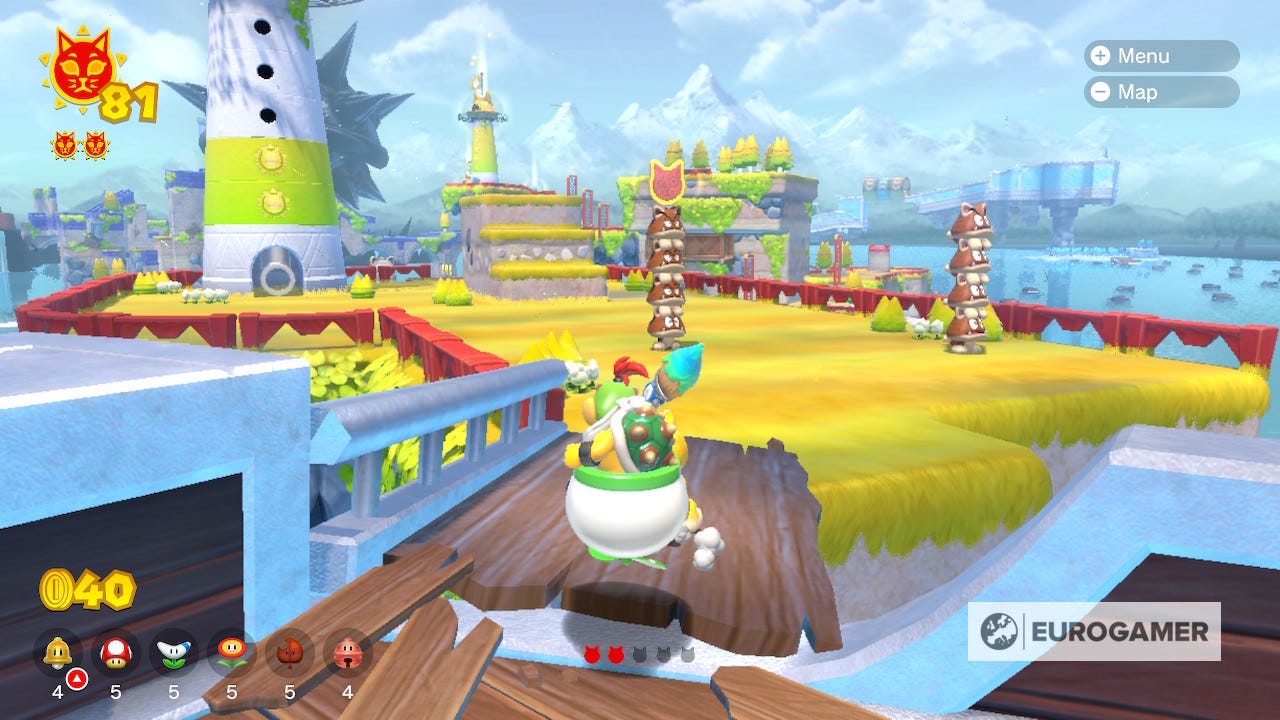
Cat Shine 82 Location
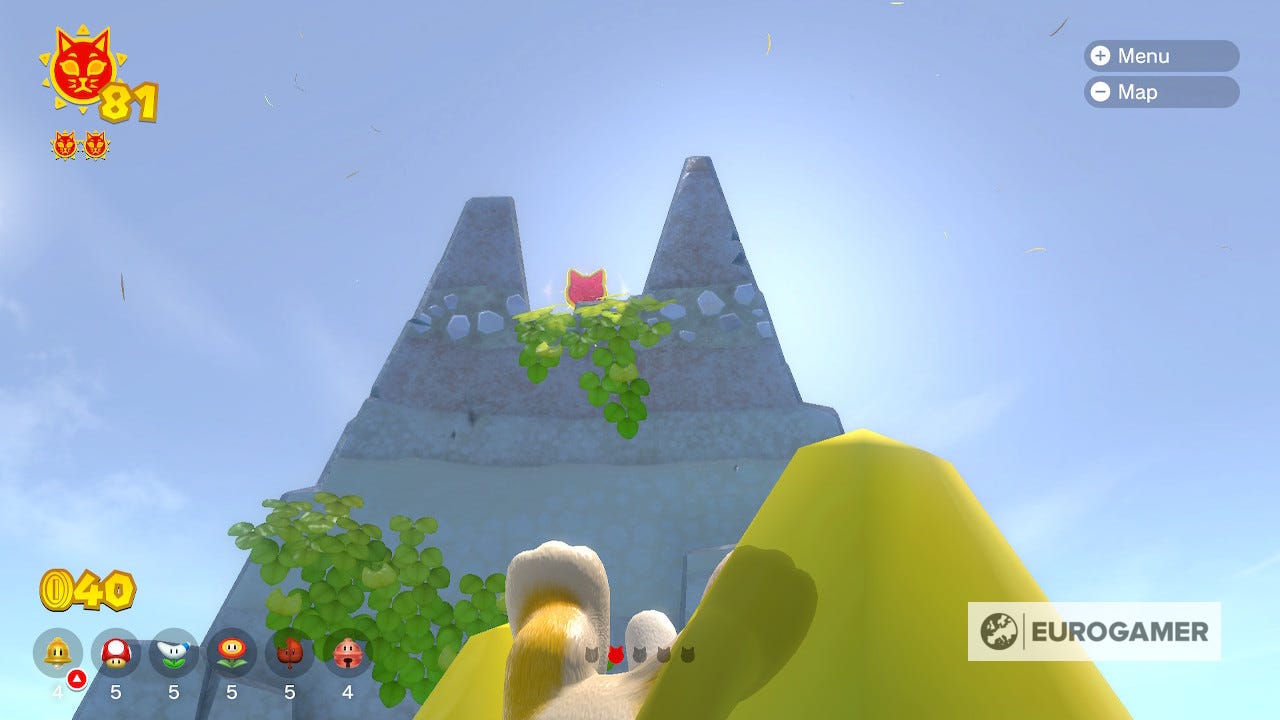
Now that you've defeated Fury Bowser, you'll find that some collectibles have appeared on Fur Step Island. Find all five and you'll get another Shine. The first one is atop the cat shaped stone behind where you start, use a cat costume to get there easily.
The second is found on the broken mast of the ship. You might pass under it without noticing so keep an eye on the ship to spot it.

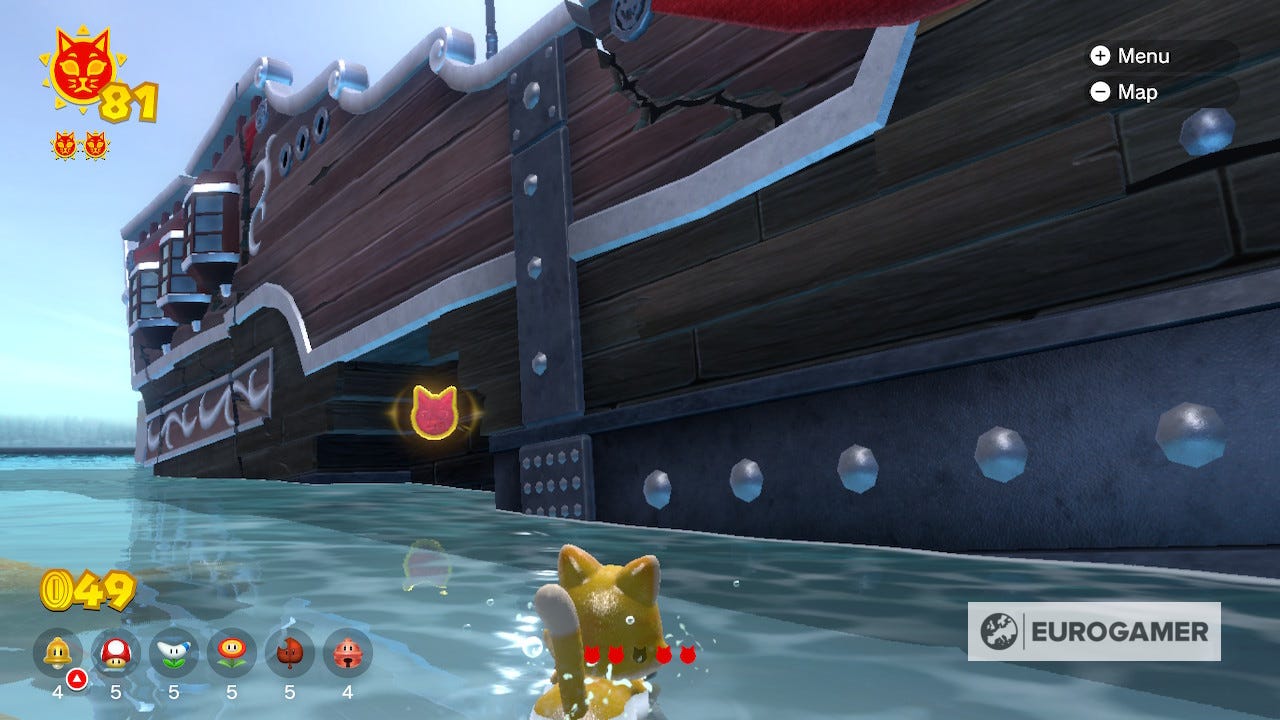
The third collectible is close by, but you'll have to abandon ship. Just above the water on the starboard side, hidden in an alcove is this collectible.
The fourth collectible is hidden on the figurehead of the ship. Look over the edge of the front of the ship or the lighthouse island, and you'll spot it on Bowsers nose.
The final collectible is just in front of the lighthouse, on top of a stack of goombas.
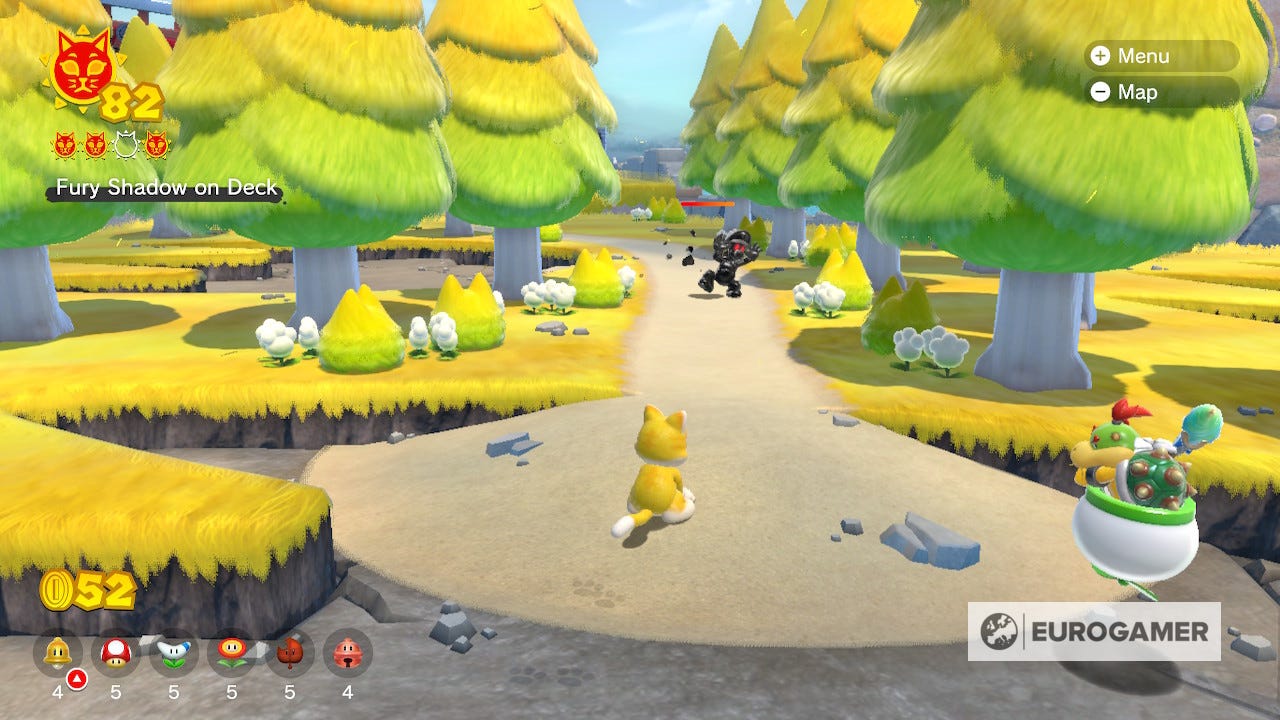
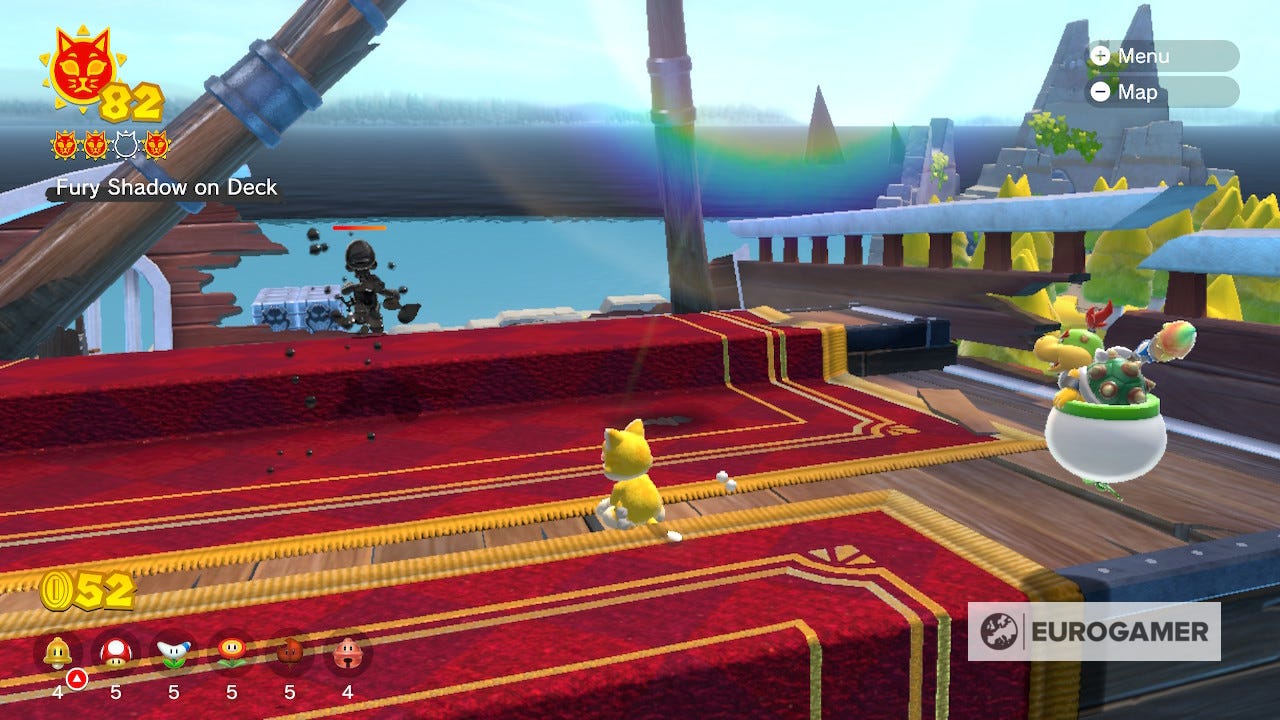
Cat Shine 83 Location
Leave Fur Step Island and return again and you'll find Dark Luigi hanging out by the gate. As always give him a couple bashes and he'll disappear leaving behind a Shine
Cat Shine 84 Location
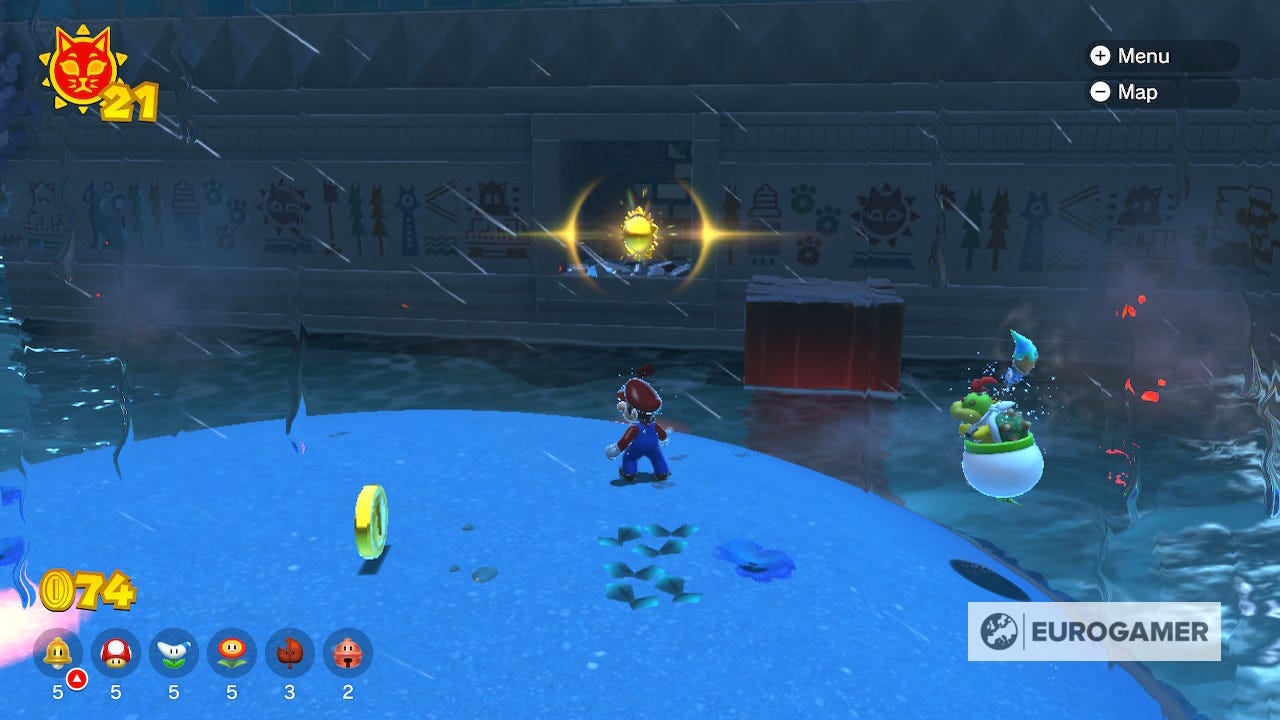
Once you have a few Shines under your belt, Fury Bowser will start to stir again. Wait for his fire breath to clear the blocks near the ship to get the Shine underneath.
Lakeside Giga Bell Shine locations (revisited post game)
Cat Shine 85 Location
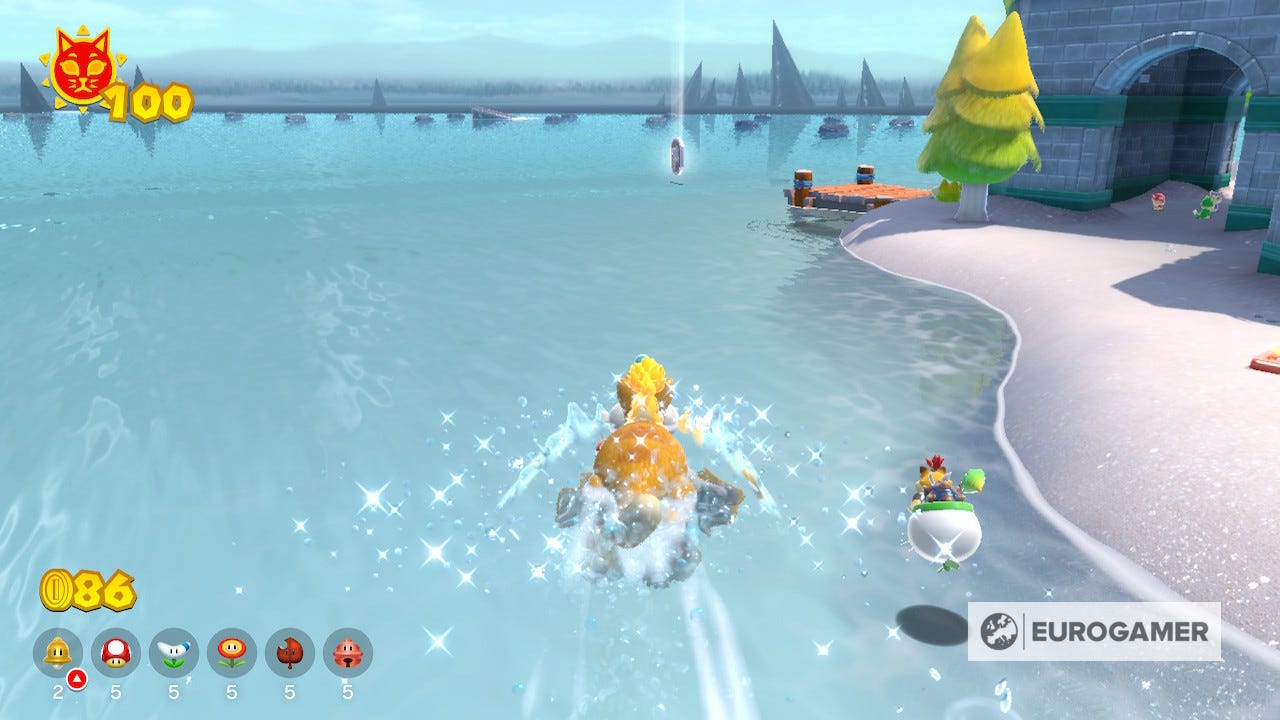
With Fury Bowser defeated there are new islets to explore and Shines to collect. From Fur Step Island you should see a smaller island to the east with a strange token shining in the water. Ride Plessie and grab and you'll see it teleport over to Scamper Shores.
Keep trying to grab it (you'll have to dismount Plessie to chase it over the island) and it will eventually lead you to the edge of Fury Bowsers liar before transforming into a Shine.

Cat Shine 86 Location
Back on the same island you saw the Plessie token has a cloud floating above which you can reach with the bouncepad. Once in the sky use the star power to defeat all the enemies along the route to be awarded a Shine at the end. If you miss an enemy you might have to leave and start again.
Cat Shine 87 Location
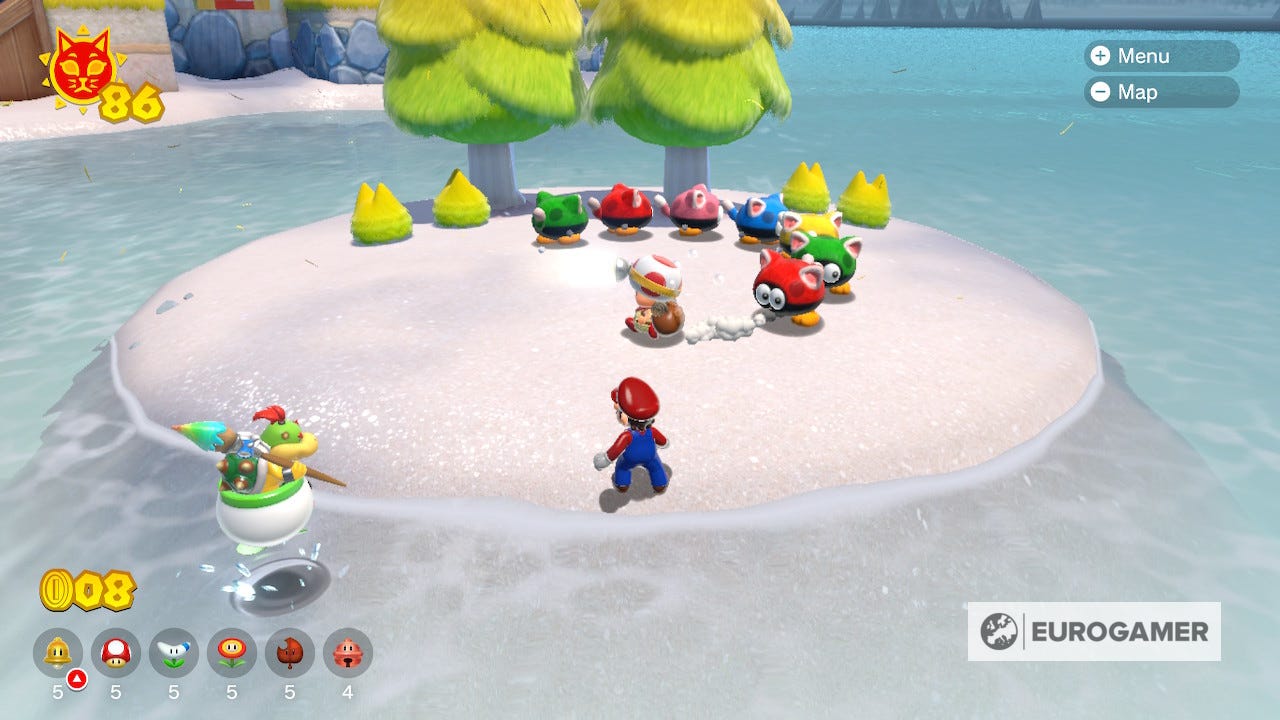
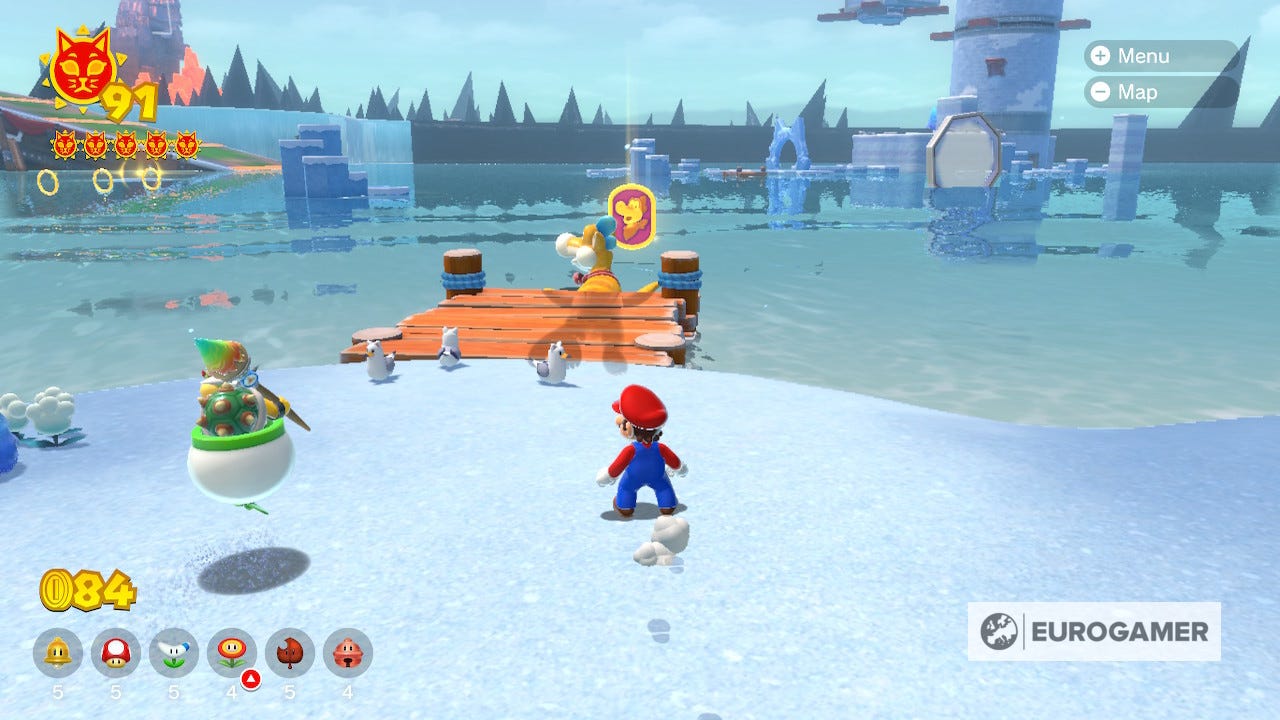
On the shores of the Lakeside Giga Bell you'll spot Captain Toad being chased by several enemies. If you defeat his pursuers, Captain Toad will reward you with a Shine.
Cat Shine 88 Location
The final Shine in Lakeside Giga Bell Revisited is another Plessie token hidden behind Fort Flaptrap. Its route will lead you toward Slipstake Slope, before heading back out to the water where it becomes a Shine.
Ruins Giga Bell Shine locations (revisited post game)
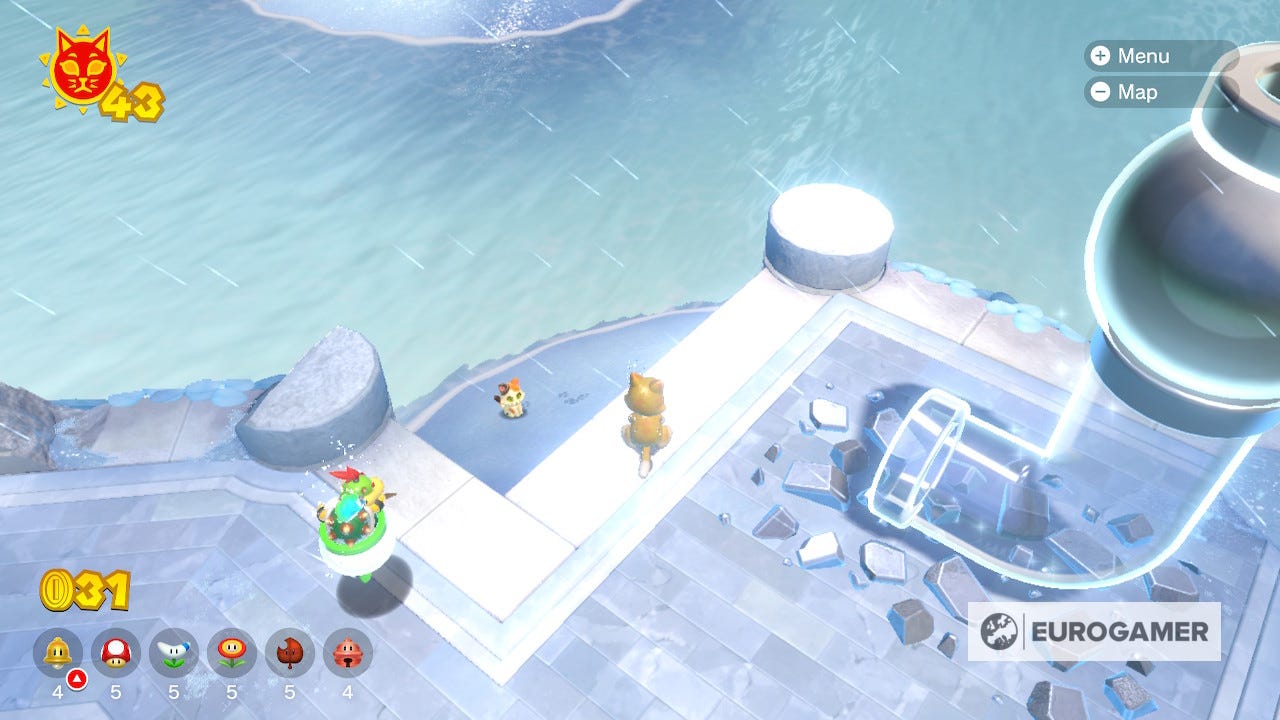
Cat Shine 89 Location
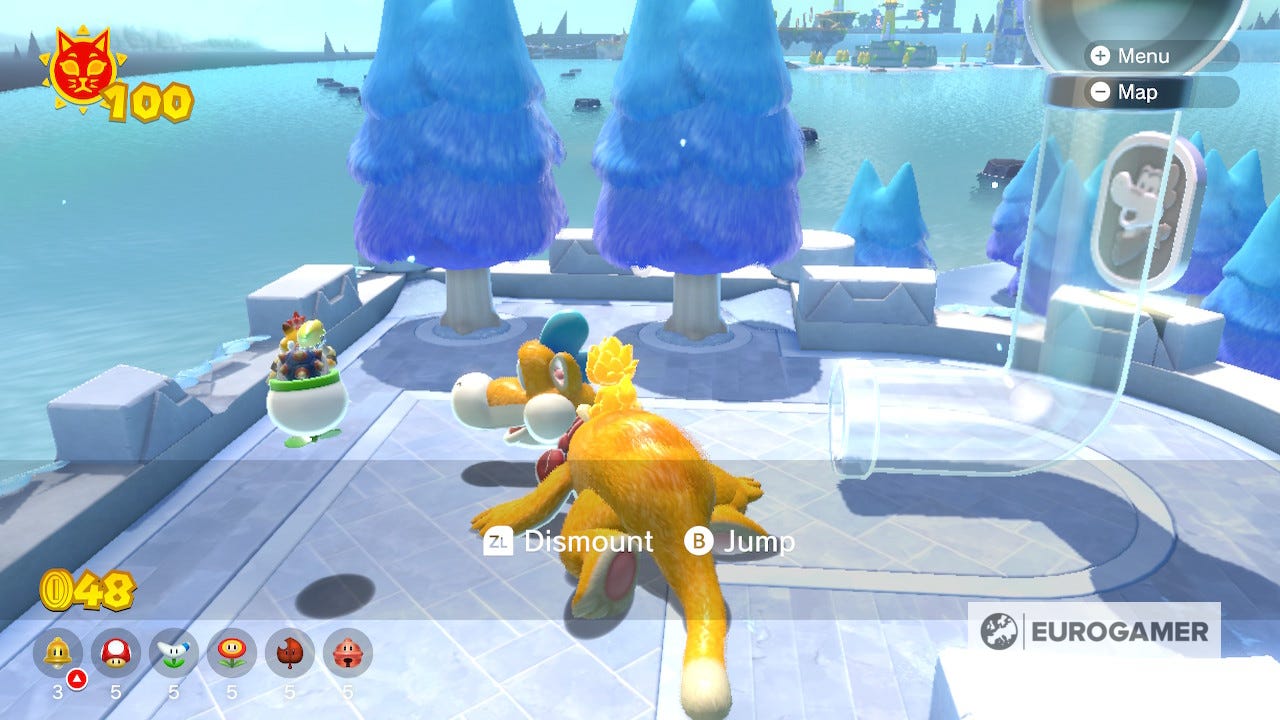
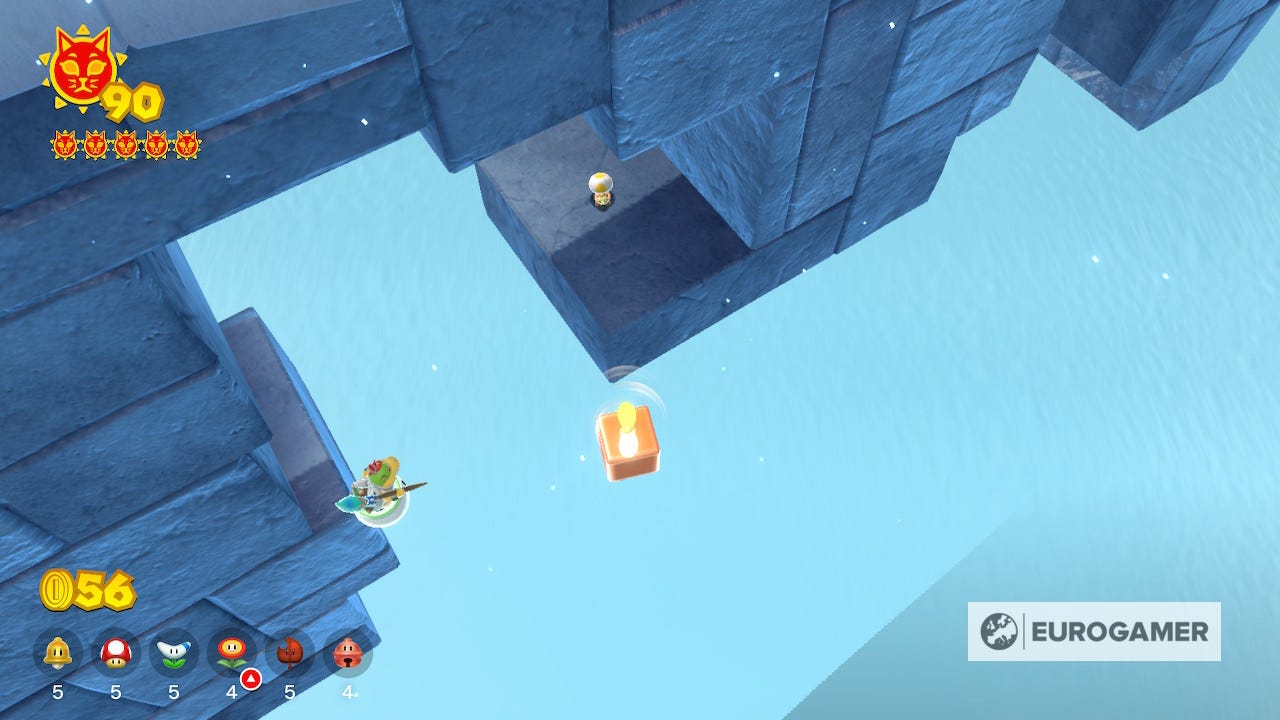
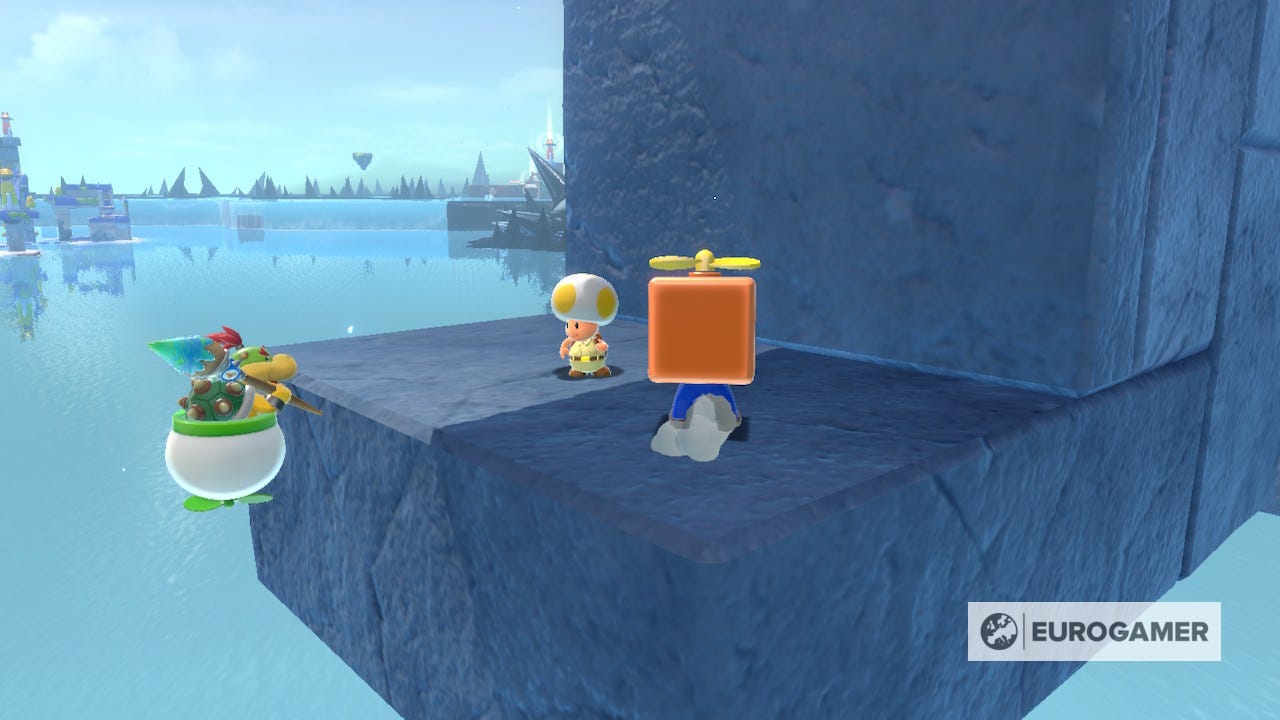
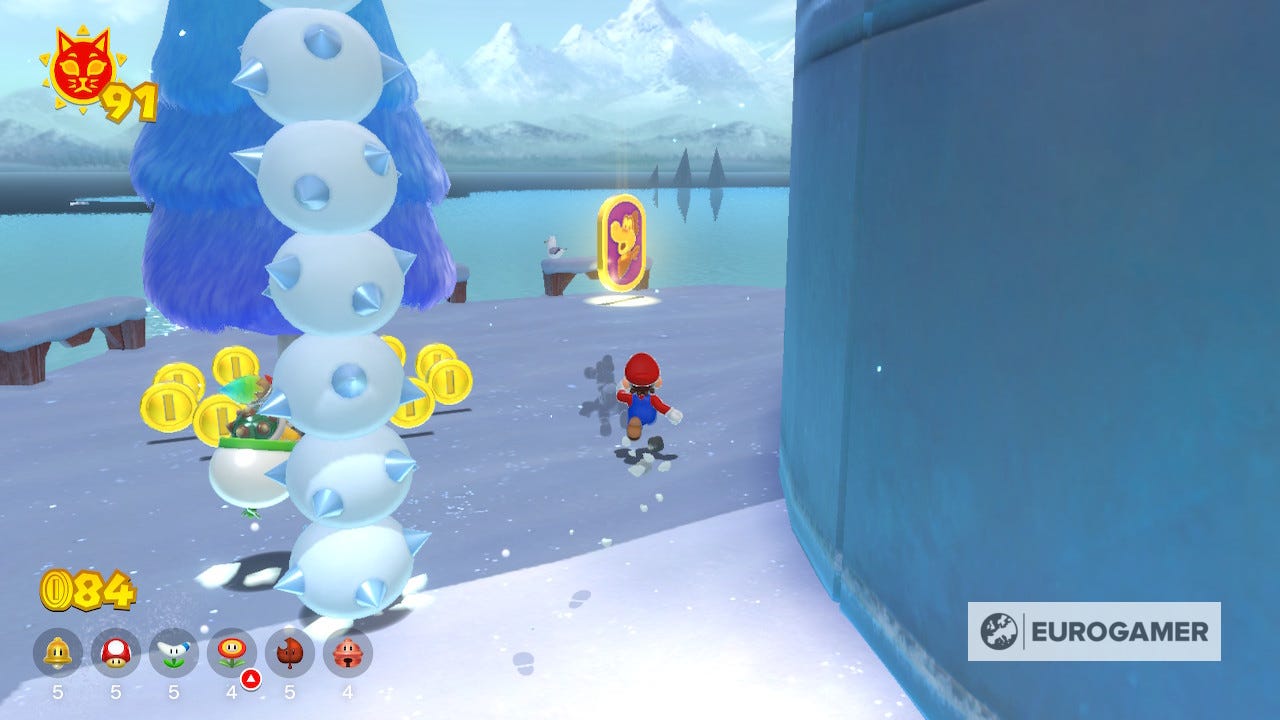
You'll find another member of the Toad Brigade stuck under Slipstake Slope. To reach the little mushroom, you'll need to head to the top of the slope and grab a propeller box. Then you want to run down the side of the slope until you reach the end of the spikes.
From there jump off and gently float down and you should Toad standing on a small platform waiting for you.
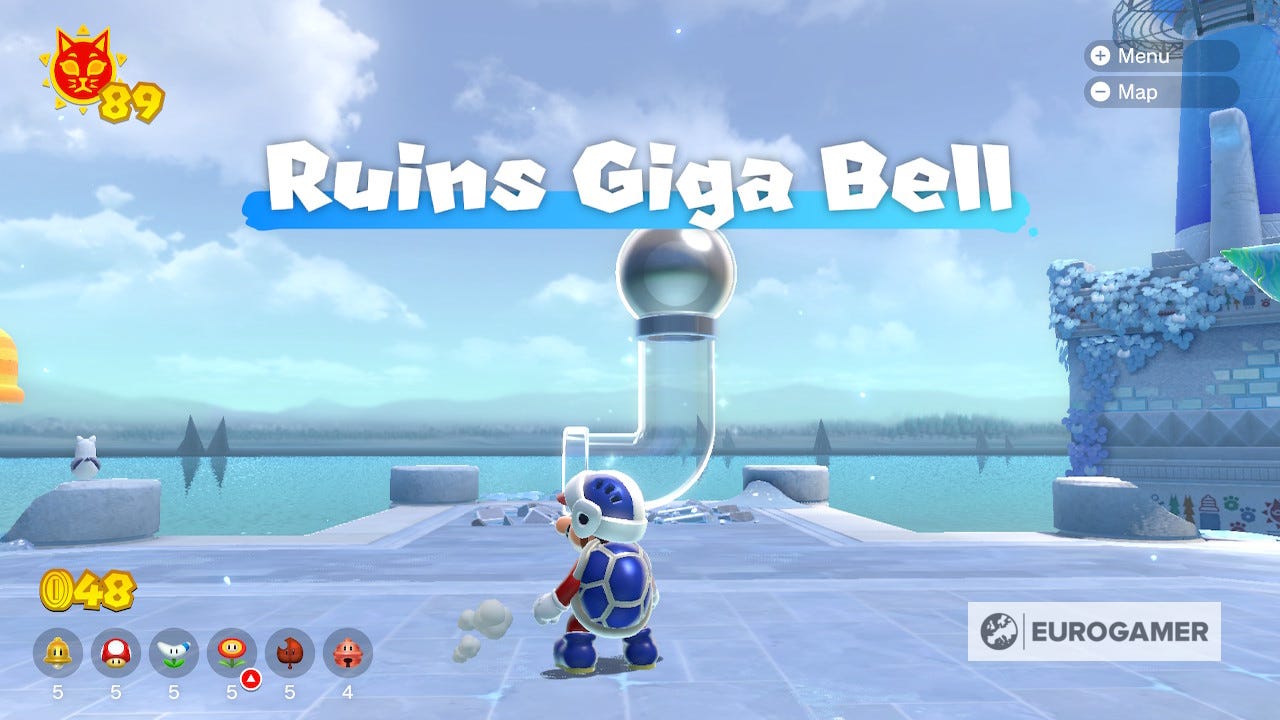
Cat Shine 90 Location
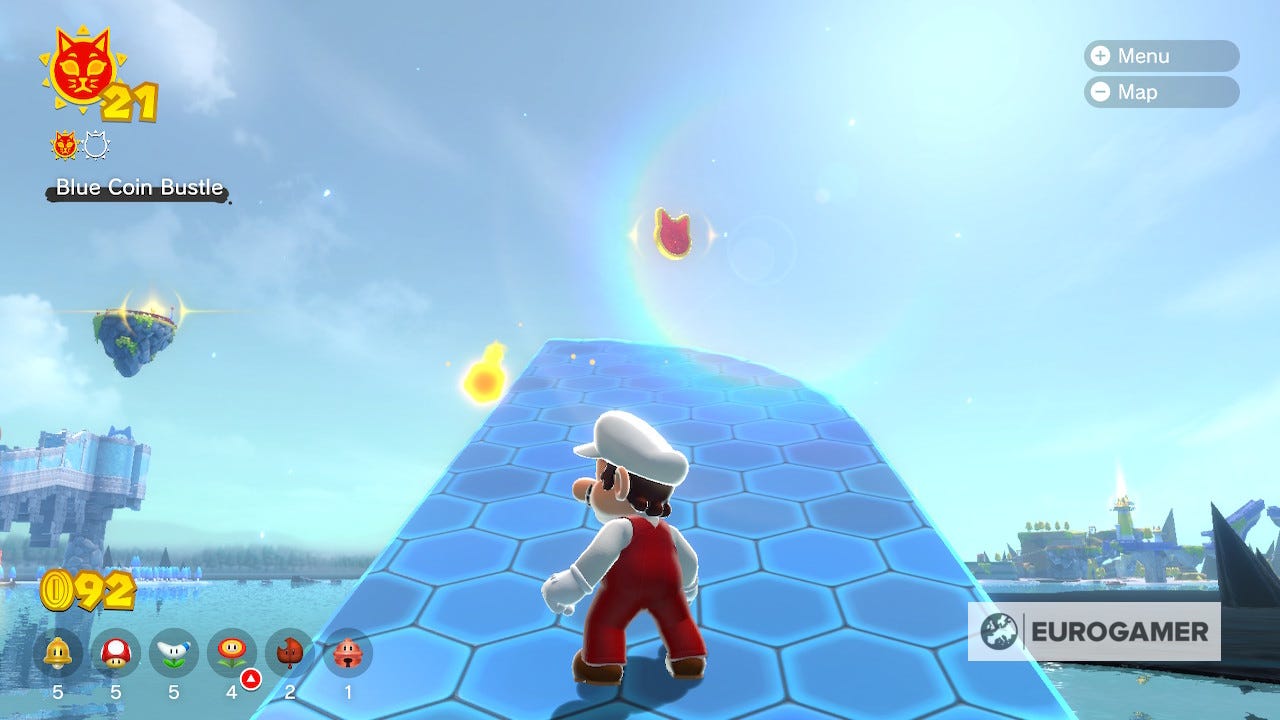
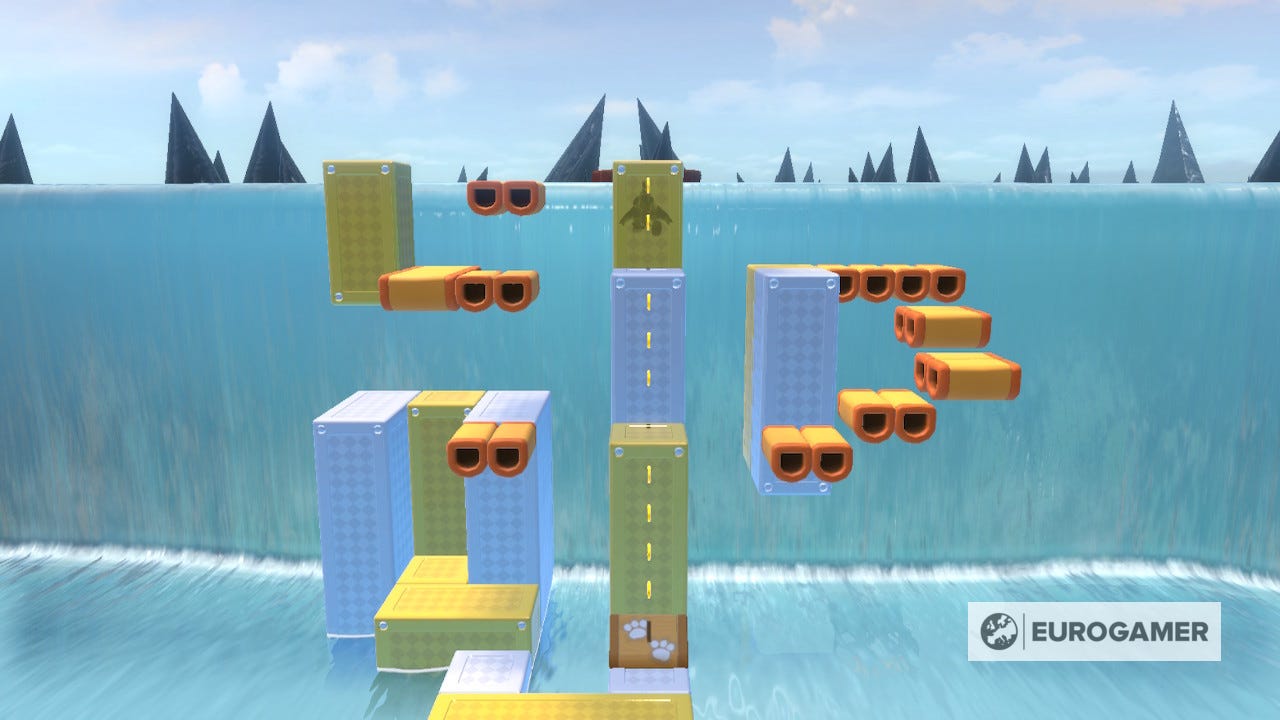
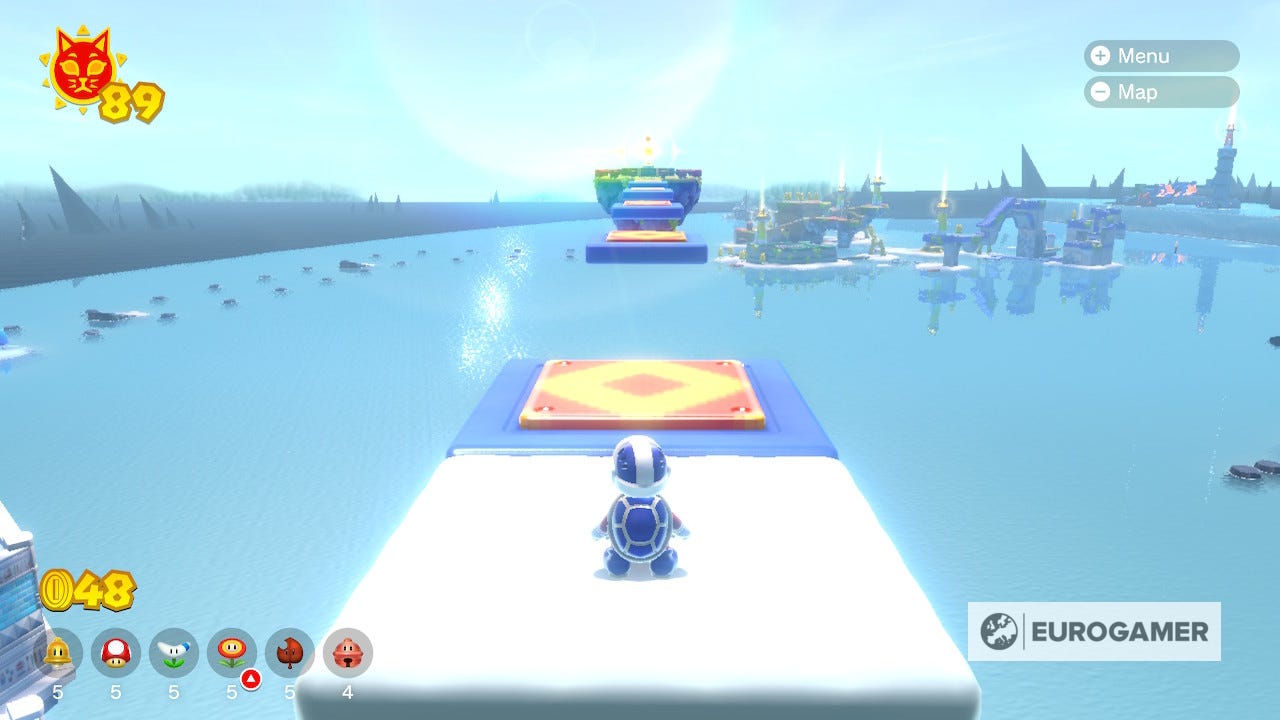
By the Ruins Giga Bell you might spot a pipe that looks like it leads to the top of Slipskate Slope. Instead it launches you onto a road in the sky that leads to a Shine. Use the boost pads to run in a straight line forward without jumping, invisible platforms will stop you from falling.
Cat Shine 91 Location
On the short pier behind the lighthouse at Trickity Tower there is another Plessie token. The chase will take you over to Crisp Climb Castle where you'll have to sprint over some ice and then back out to sea where the Shine can be collected.
Cat Shine 92 Location
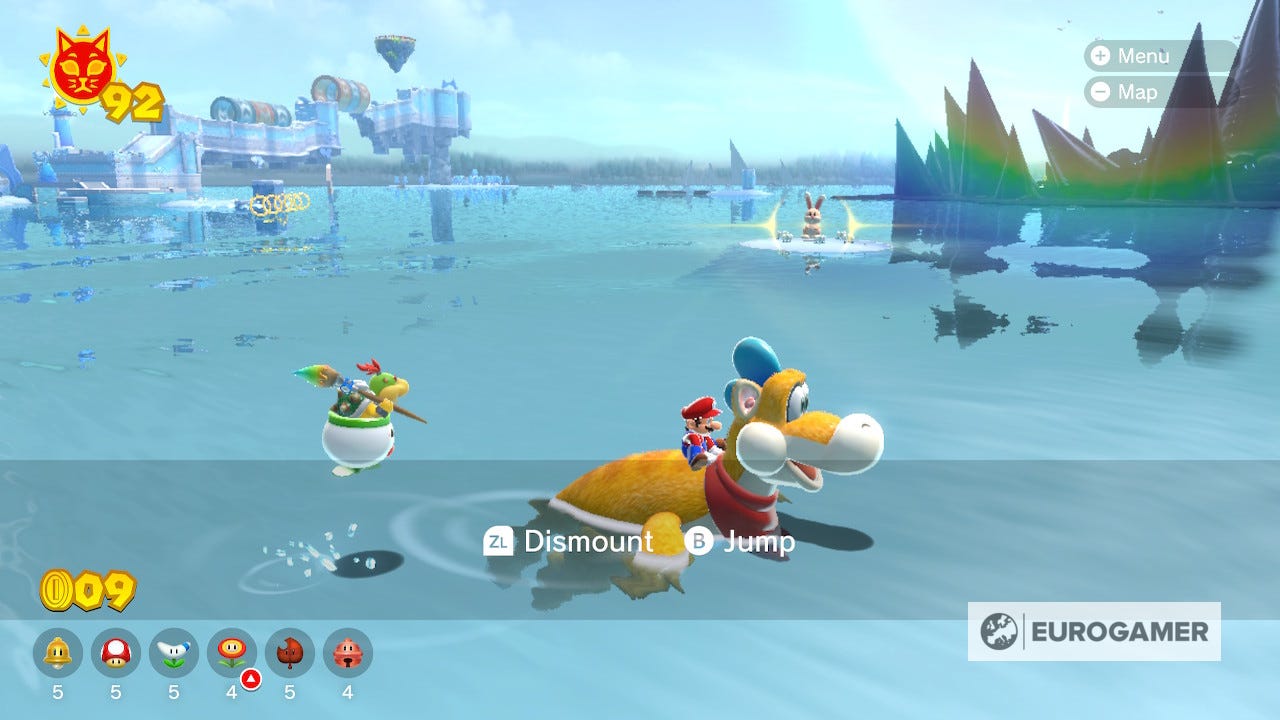
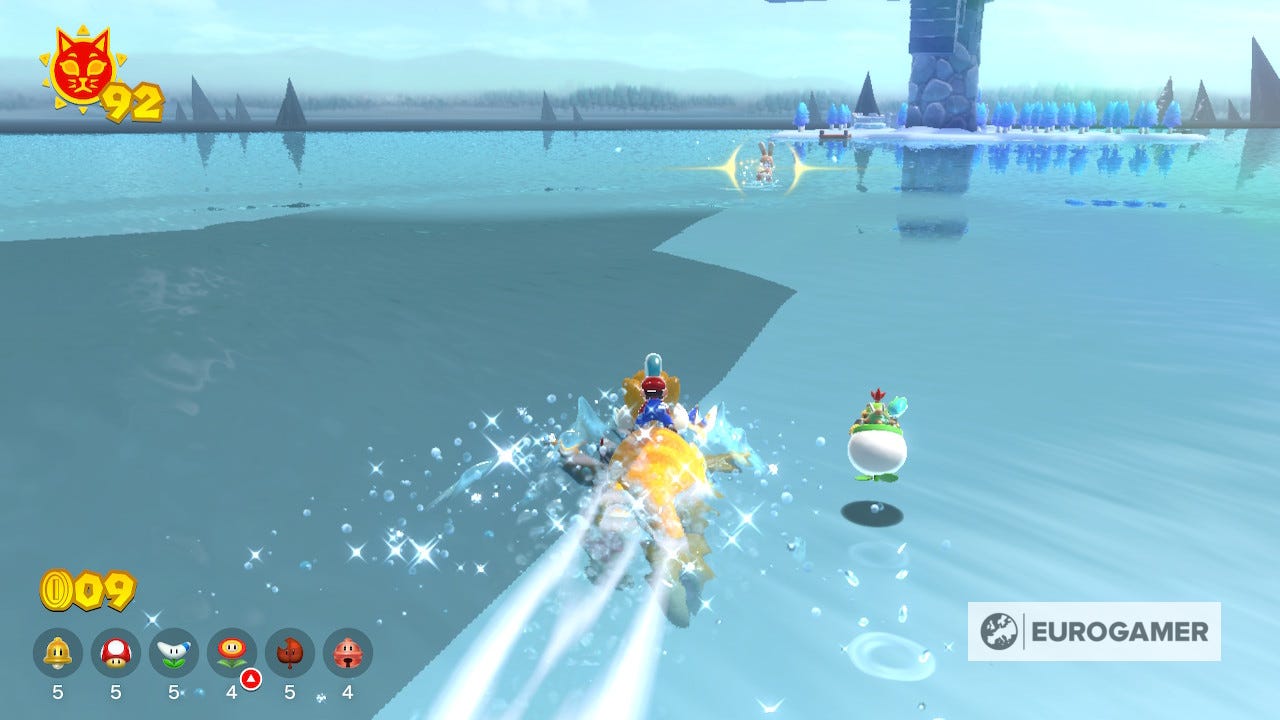
Between Crisp Climb Castle and Bowsers inky lair is yet another rabbit. This chase can go anywhere so be ready to take some jumps and corners on Plessie.
Cat Shine 93 Location
Head to the far north of Trickity Tower, near the edge of the map. You should see a small chain of flingers that lead to a small island past the ink. Make your way there and you'll find another member of the Toad Brigade and a Shine for your trouble.
Wasteland Giga Bell Shine locations (revisited post game)
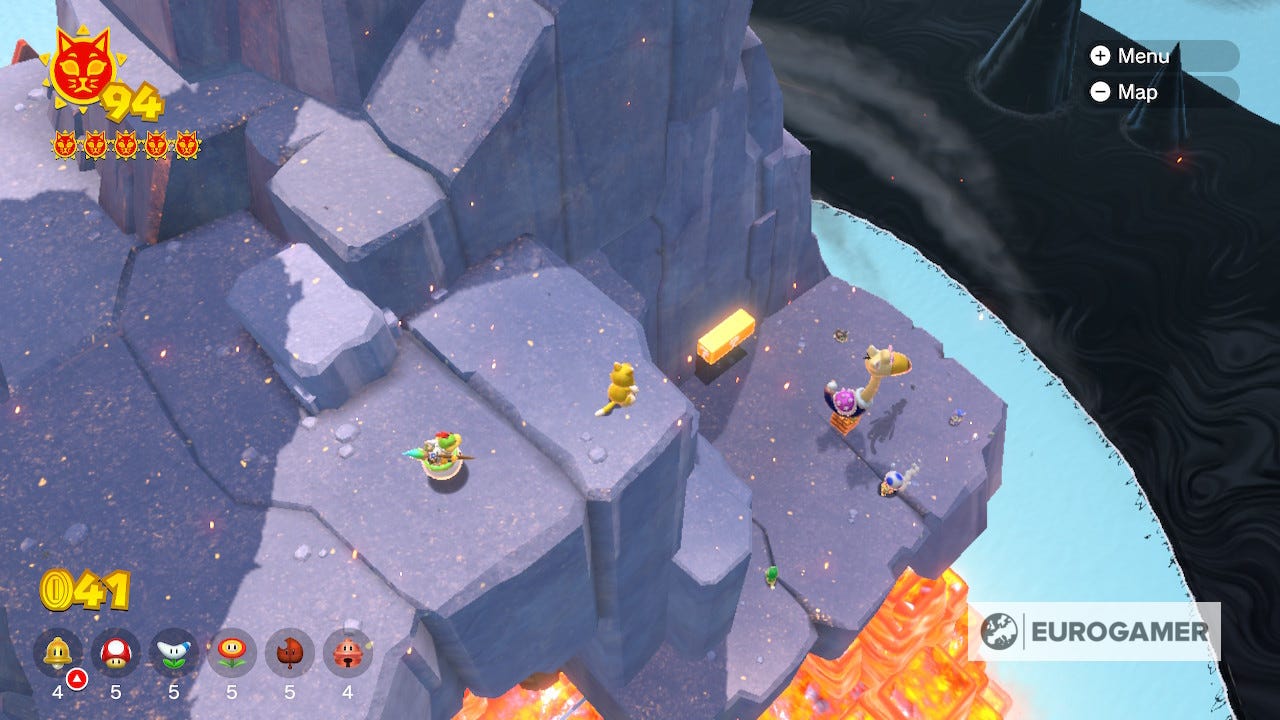
Cat Shine 94 Location
Once again reach the summit of Mount Magmeow and then look down to a ledge on the side. You'll see a member of the Toad Brigade accosted by Conkdor. Simply defeat this baddie by attacking the box they're standing and the grateful Toad will thank you with a Shine.
Cat Shine 95 Location
At the small pier of Roiling Roller Isle you will find another Plessie token, this one takes you over the Wasteland Giga Bell island and ends in the inky waterways between the Waste Giga Bell and the Ruins.
Lucky Isle locations (post game)
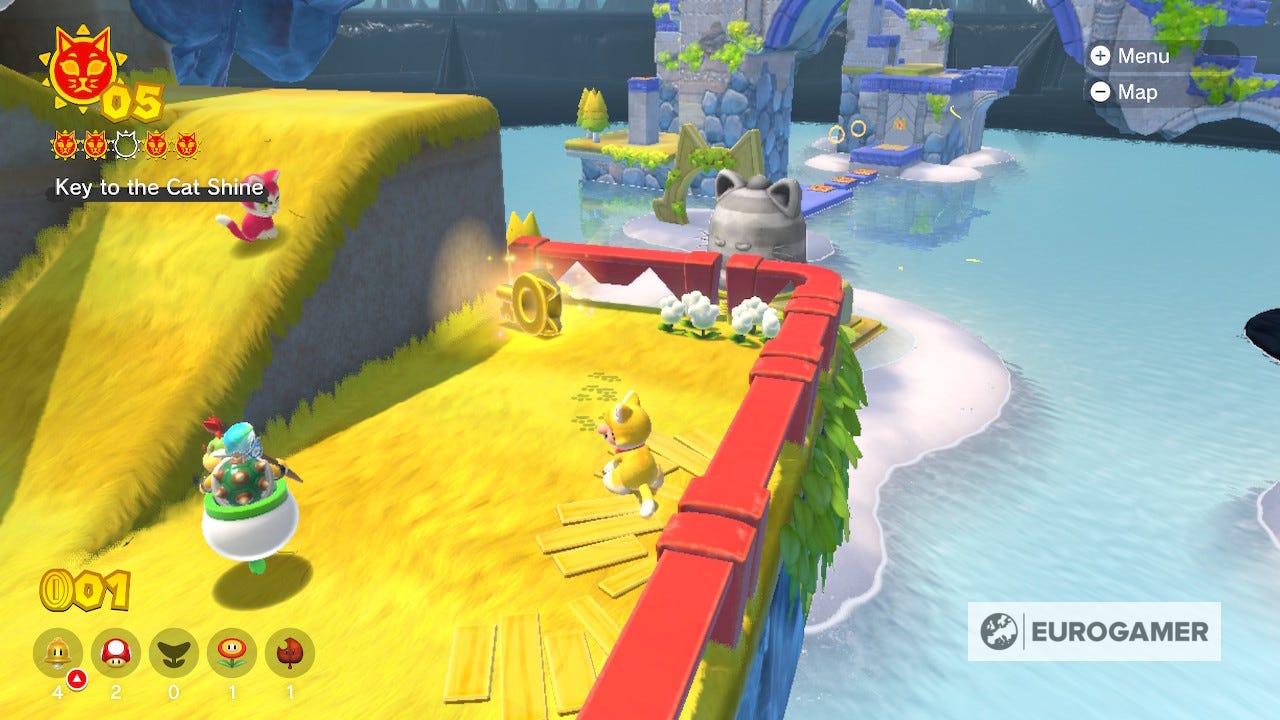
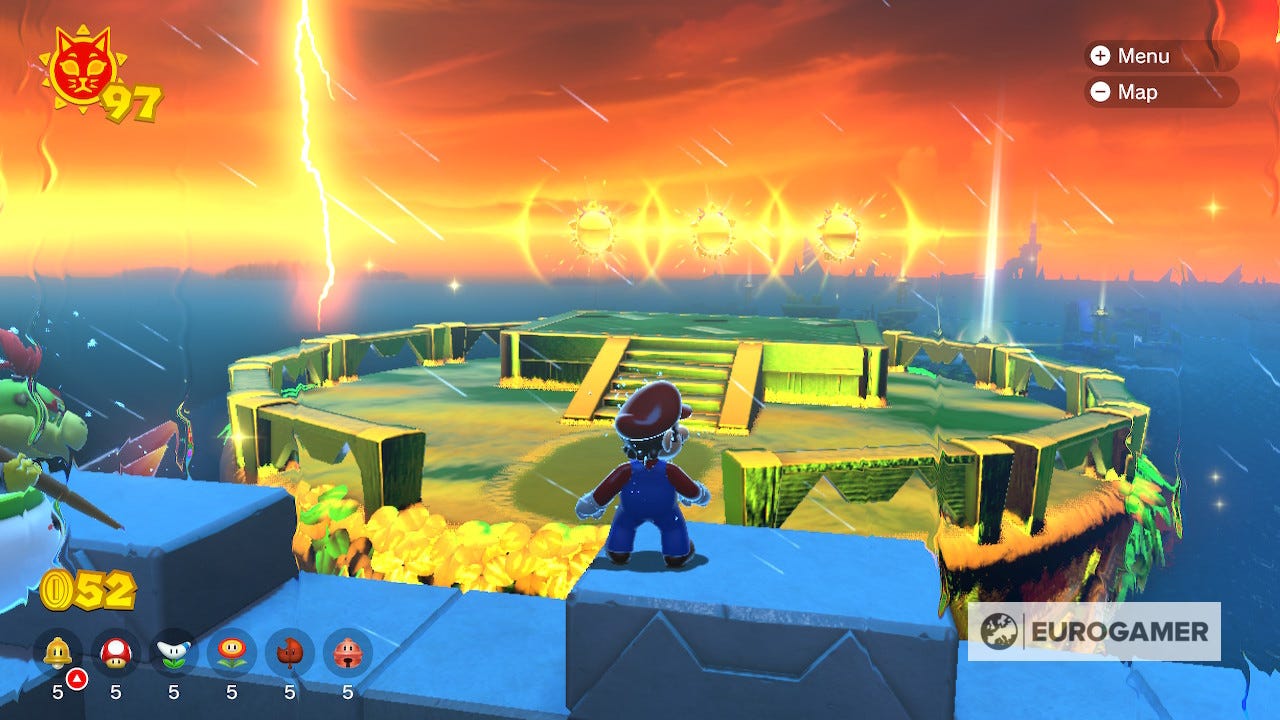
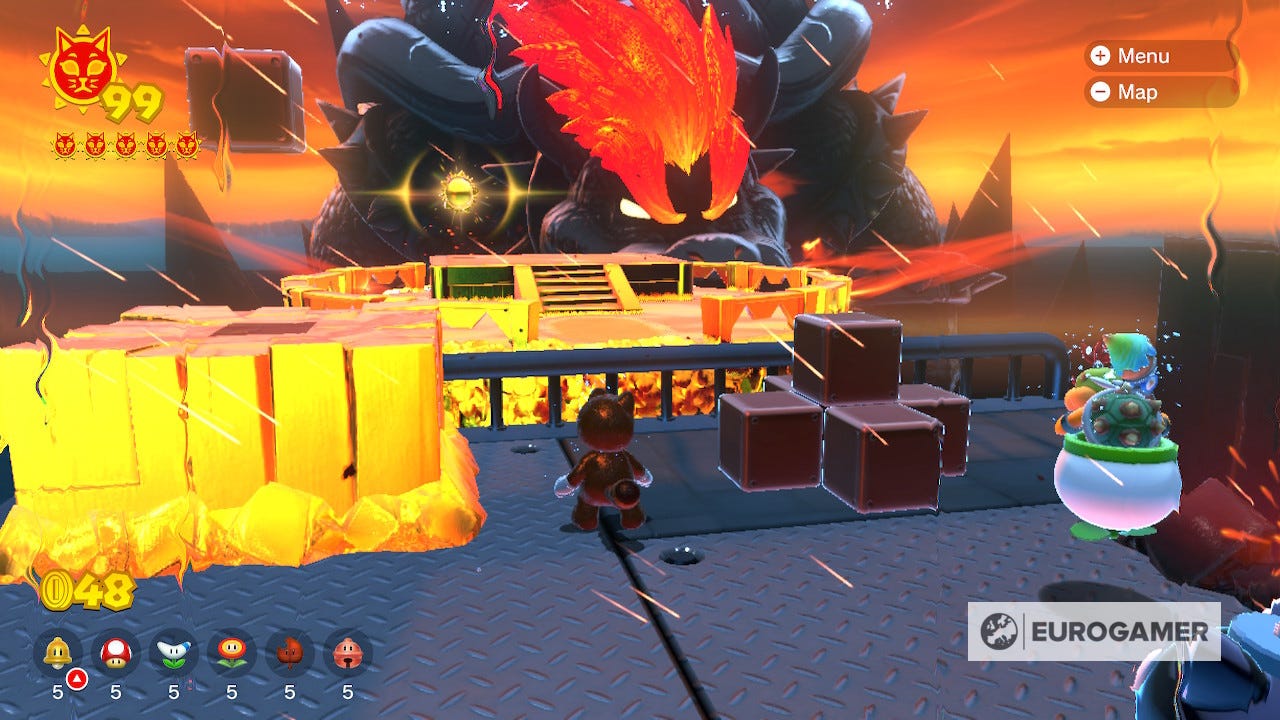
While you might have defeated Fury Bowser, he will still make an appearance when the mood strikes him, but his arrival also brings with it Lucky Isle. You will spot this floating landmass easily enough because it is made of gold and has five Shines on it.
Unluckily, the isle can only be found while Fury Bowser is active, and moves around between appearances. But it will always arrive at the closest point it can to you when Fury Bowser awakens. Collecting one of the Shines will also scare away Fury Bowser.
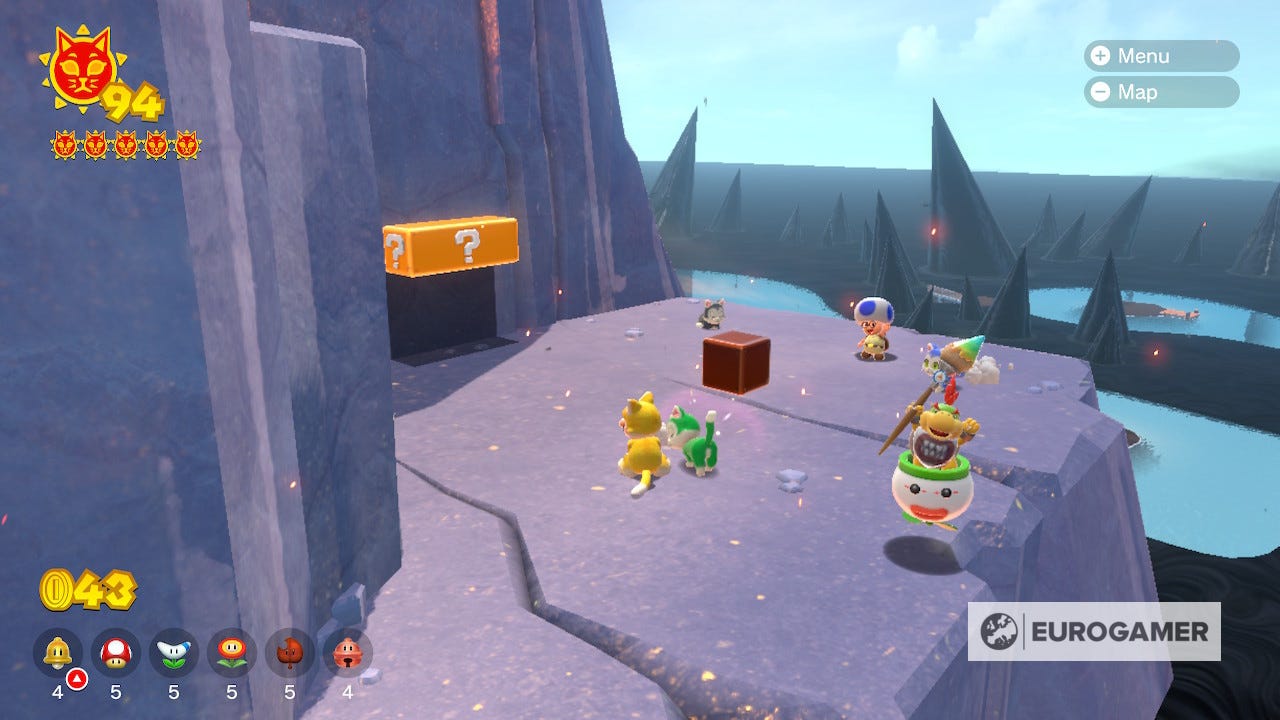
Cat Shine 96 Location
One location Lucky Isle can appear is Pounce Bounce Isle.
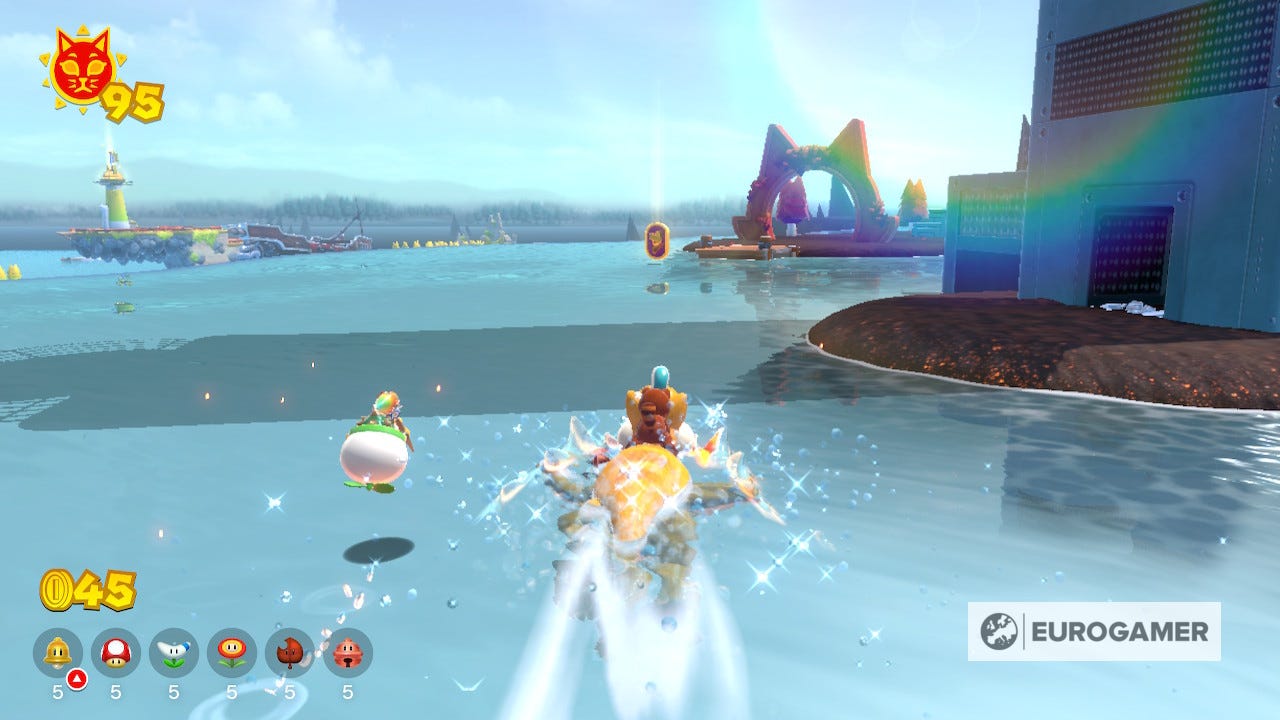
Cat Shine 97 Location
Another possible location for Lucky Isle to be is near the end of the sea wall that juts out from Pipe Path Tower. You'll need Plessie to use the ramp to jump over.
Cat Shine 98 Location
You can also find Lucky Isle at the top of the Slipskate Slope while Fury Bowser is active.
Cat Shine 99 Location
At Trickity Tower you can find the Lucky Isle floating at the height of the smallest tower. With a propeller box you can comfortably make it over from there while Fury Bowser is active.

Cat Shine 100 Location
Lucky Isle also descends above Roiling Roller Isle, and can be found next to the first bob-omb box, before the large rotating platform.
What is the reward for collecting all 100 Cat Shines in Bowser's Fury?
Once you've collected the final Shine, you can once again do battle with Fury Bowser, ending with an even more difficult Plessie chase than the first one. And that's it, there is nothing else to do in Fury Bowser.
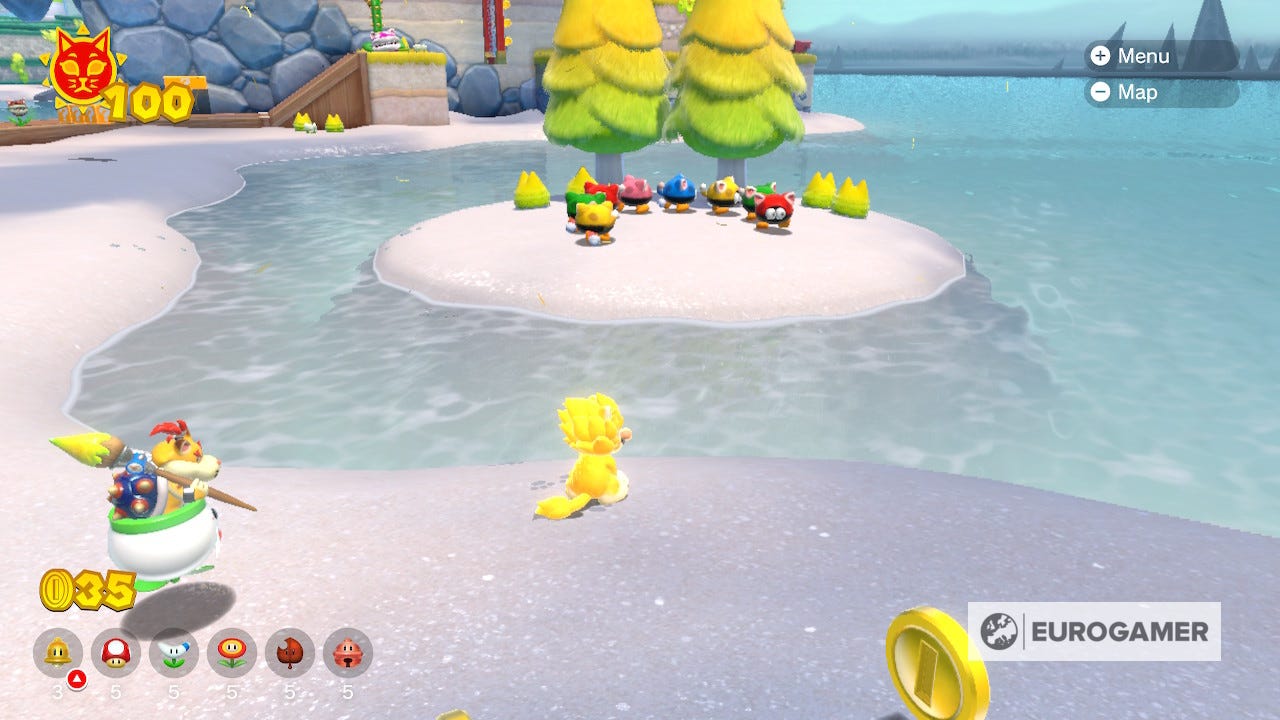
If you happen to return to the lake, you'll find your cat costume has changed. It's the more golden, Super Saiyan styled outfit that you don as Giga Mairo, except smaller, obviously.
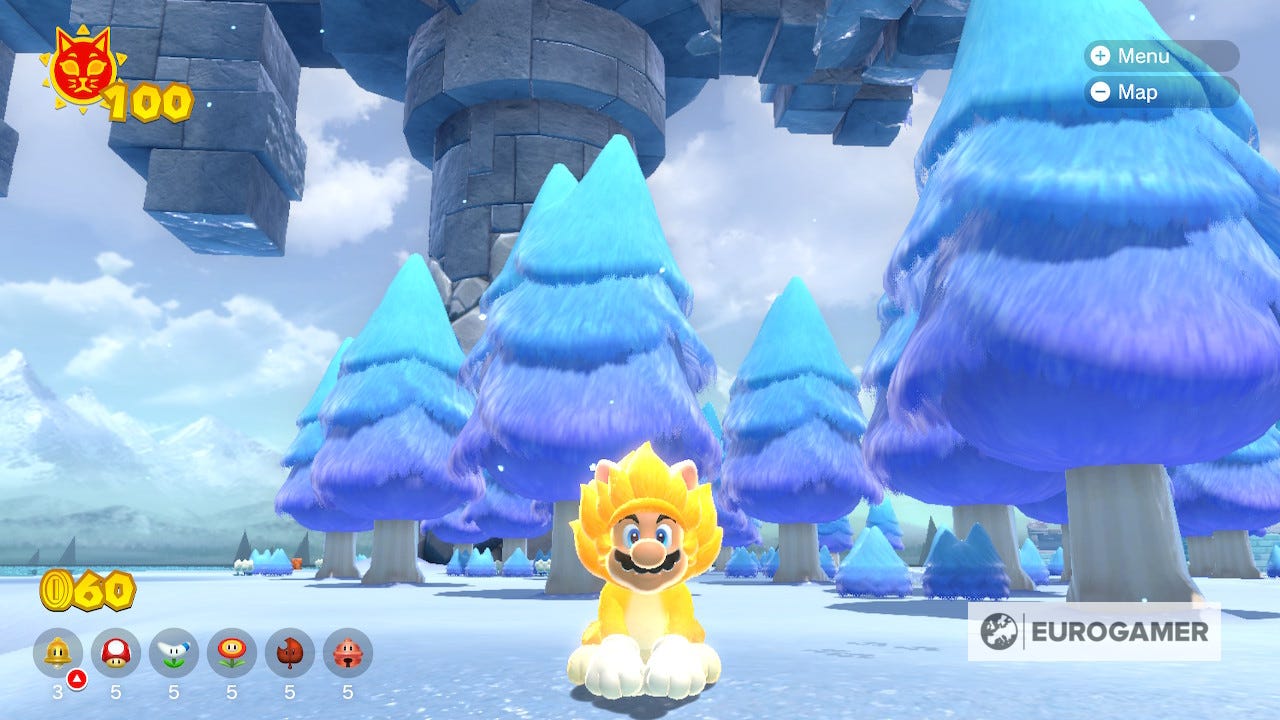
It doesn't confer any additional powers, but it looks pretty darn cool.
After defeating Bowser for the final time, you'll also notice he doesn't come back anymore at the lake. This means you can explore and take in the sights without any chance of rain, or giant angry turtle dragons.
Enjoy returning to any of Bowser's Fury levels in peace!