Destiny: King's Fall - Hard Mode guide
From team compositions to gearing strategies, here's how to beat every single boss in the Hard Mode version of Destiny's King's Fall raid.
For Guardians seeking to acquire the very best gear in Destiny, the Hard Mode flavour of the King's Fall raid is currently the only way to go about obtaining it. So-called 'Harrowed' versions of existing armour, weaponry, Ghost Shell and Class Items drop here, which all boost your chances of besting the ultimate PvE challenge in the game: Oryx.
Some Guardians may arrive at this trickier version of the Taken King's court with sufficient Light levels to handle the upgraded challenge, while others may need either a boost from better-equipped Clan mates, or make use of loot transferred over from alternative characters. That's the gear side of things covered, but what about mental preparation? Well, the short version is that while only small details have changed, there are some strategic considerations to take into account nevertheless.
Team composition and recommended level
Bungie recommends a Light level of 310 for the King's Fall Hard Mode, and it's certainly an essential milestone for the final Oryx encounter. Many teams are progressing fine with lower combined damage-per-second ratings (averaging around Light 305), but things are obviously going to go much better for your team, the more of you exceed this level. Anyone below Light 305 makes life much tougher for the whole team, although with this level of gear it is still possible to reach the penultimate encounter with the Daughters of Oryx.
Your desired load-outs remain as they were in Normal Mode, but rocket launchers are safer than Swords for clearing the trash enemies that appear during the Deathsingers and Oryx encounters. Remember also that Void damage is best against Taken enemies, while Defender Titans and Sunsinger Warlocks are life-savers for this read. Nightstalker Hunters are invaluable as well, and you should ensure that you take a balanced team with you.
If you're struggling and need ways to increase your Light level, our page on how to reach max Light level in Destiny can help.
The Court of Oryx, Pendulums and Basilica on Hard Mode
The Court of Oryx
The only change in this fight is that tougher and more plentiful adds appear in order to hinder your progress - Acolytes Eyes are particularly egregious. Since two team members are capable of retrieving the Relics - the higher Light level player clearing the way back - leave the remaining pair to clear the adds that appear in the main hall. Everyone should treat the Consumed Phalanx with more respect as well, especially on bridges where one shield bash is enough to send the Relic carrier or wingman soaring across the map.
Pendulums and Tomb Ships
The half-way checkpoint is no longer here, and so a perfect run from start to finish is required. Apart from this the sequence of Tomb Ship appearances remains unchanged. The fourth ride that takes you to the checkpoint platform in Normal Mode vanishes a split second after the next one appears to your immediate right. Prepare for this and the rest of the journey is exactly the same as it was before. Set those Agility levels to max.
The Basilica
With the addition of several Hallowed Knights, this relay run is tougher to manage unless those with the Deathsinger's Power assist with clearing the Hive while on the activation plate. Activity in the rooms left and right remains largely unchanged from Normal Mode, save for the splash damage caused by the solitary Knight which appears each time the Deathsinger's Power is passed along.
Your team will need to rely on those defending the Totems to snipe these Knights in one go, or stagger them long enough for the returning Guardian to provide support. Ensure that you reserve your Supers and Heavy Weapons for the central chamber - tethering adds and erecting Ward of Dawn shields - and this should be a pretty smooth fight.
Beating the Warpriest on Hard Mode
This is where the Hard Mode setting significantly raises the stakes in this raid.
For a start, the Defender Titan(s)' Blessings of Light becomes necessary in order to shield the incoming damage from the Warpriest, while he's being attacked under the Aura of the Initiate. The Warpriest himself fires a Taken Captain's Darkness orb, bolts usually associated with Hobgoblins, or Golgoroth's venom orbs, depending on the order the Glyph pillars are dissolved. These are, respectively, right, centre and left.
One advantage the dependency on Blessings of Light gives you is that the Exotic scout Touch of Malice [ToM] becomes very useful, rivalling Exotic sniper Black Spindle for pure DPS. By dipping back into the Blessings bubble, the final shot in the chamber of ToM continues to damage without completely depleting the user's life force.
It is highly likely that any Hard Mode-ready team will boast at least a couple of Touch of Malice carriers, so have them use this tactic. Everyone else should bring their highest impact sniper rifles and heavy machine guns to deal the damage.
Surviving the Golgoroth Encounter on Hard Mode difficulty
There are a few new considerations in this Hard Mode version of battle. First, Golgoroth fires four venom orbs per attack at the Guardian holding his gaze. Shortly after the gaze is taken, one person on the fireteam becomes de-buffed with Unstable Light, effectively turning them into a Cursed Thrall, and the Taken arrive in greater number for the final stages. For the gaze-grabber, the task of shooting the orbs is intensified, and is best handled at the front left corner of the room.
For the team in the pit applying DPS using the buff of Reclaimed Light, they need to be aware of who gets the Unstable Light as soon as possible, so that this person can hop out of the pit and explode without wiping out the entire team. The explosion does cause a small amount of damage to Golgoroth himself, but the risk of being stomped isn't worth it. The routine, then, is to focus only on that front-left ceiling capsule, deliberately missing Golgoroth's gaze after each DPS session in order to reset the capsules.
When Golgoroth's health is below 25 per cent (likely after the third assault if your DPS is good enough), the Taken swarm the pit. To prevent the pit crew from being clawed to pieces, have them hop out on the gaze-grabber's countdown of around four seconds to spare. They'll live to fight another round and comfortably end this encounter with surprising ease.
Fighting The Daughters of Oryx (Deathsingers) on Hard Mode
The one major consideration for this encounter is that the timer is triggered only once at the beginning of the fight, and as soon as the first plate is activated and the Spark Runner is on their way. It is then a race against time, to stay within the manageable appearance slots of Vandal snipers behind the activation plates, and the completion of the final Deathsinger's song.
As mentioned earlier, you'll need an exceptionally strong Guardian to tackle the adds in this encounter if they are using a sword - the unrelenting beams from the Acolytes Eyes are simply too strong to allow time for chopping up Taken Centurions and Vandals. It's also advised that everyone brings Light 300+ rocket launchers to keep the floor clear until the Spark Runner arrives.
This encounter has always been something of a short, sharp shock, but in Hard Mode it's worth pushing for the kill on the first Deathsinger Ir Anûk, if only to beat the timer. The very best place to aim from is between the activation platforms at the back of the map (farthest from the entrance door), where you'll face Ir Anûk above and to your right right, with Ir Halak above and left. As usual, the first wave of adds spawn a few seconds after the first platform is activated. The second major wave comes a second or so before the Spark Runner has taken Ir Anûk's protective Aura. These are the guys you need to rocket into oblivion.
The strategy depends upon your fireteam killing Ir Anûk as quickly as possible, leaving time to clear the remaining adds while the Aura is still active. Be quick to reorganise as soon as the Aura is gone, and a new Spark Runner is Torn Between Dimensions. Save the Titan's Weapons of Light and the Hunter's Shadowshot for Ir Halak to ensure that she is killed. After this you won't need to worry about the adds because it's all over.
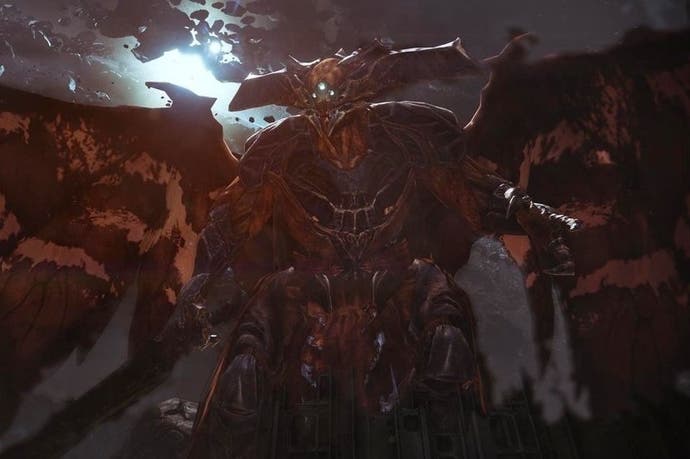
How to kill Oryx on Hard Mode
Before starting this battle, take a moment and be realistic about your fireteam's expectations. Anyone much lower than Light 310 is going to both struggle to stay alive and also lower your collective DPS. Light 300+ sniper rifles with high impact are essential here, and Black Spindle is a huge boost. The routine of the fight is mostly unchanged in Hard Mode, but the one small difference is a recipe for chaos and endless wipes.
As soon as the Ogre that appears next to each activation plate is killed, its Blight bomb still lingers but a Knight also spawns in the corner of the map directly opposite. That's four more Knights in addition to the Vessels of Oryx that go in search of Blight bombs to detonate. It at least helps that the newcomers run diagonally to reach their respective bombs, giving time for the guys responsible to take them down.
There's still the task of detonating the Blight bombs after Oryx is staggered though, and this is where failures are most likely to happen - unless the Runner and the adds-duty team member help by shooting outside of the Aura of Invincibility to drop Acolyte's Eyes and the rest. Assuming that all four platform defenders make it back to the Aura before detonation, the damage on Oryx should be around a quarter-health each time. The rest of the encounter, all things considered, should then feel familiar from Normal Mode.
In order to overcome the team's Light level disadvantages, alternative tactics are worth exploring but may take you even longer to perfect. One popular trick is to avoid killing the Ogres until after Oryx has been staggered, and then drop them while under the protection of the Aura of Invincibility. The additional Knights are slain as they head toward the centre of the map where the Ogres assemble. While this is certainly clever, it is tricky to stay safe while the Ogres are on the prowl.
As a general rule throughout the Hard Mode variant of King's Fall, we've found it best to build upon Normal Mode tactics instead of confusing your team with radically different approaches. Golgoroth is a great case in point, and is simplified in the extreme. The Oryx fight is a problem that only becomes easier to manage as your Light levels increase and the running order becomes increasingly familiar. The one overriding rule is that absolutely no one must die!
- Head back to the index page for the rest of our Taken King guide.
- Completing King's Fall on Hard will come in handy for finishing Destiny Moments of Triumph Year 2.
