Baldur's Gate 3 Adamantine Forge items and mould locations
Including how to reach the Adamantine Forge.


The Adamantine Forge is both the name of a side quest and an Underdark location in Baldur's Gate 3.
Using the correct Adamantine Forge items in Baldur's Gate 3 will start the process of making a new weapon, shield, or armour - as long as you have the mould for it. However, beware that once you activate the Adamantine Forge, you'll have to take on the Grym boss. We've got a quick and easy Grym boss strategy though if you're struggling with its mammoth health bar.
To help you get a new piece of gear and finish a side quest, we've went over the full process of the Forge below, including all mould locations, and how to get to and activate the Adamantine Forge.
On this page:
For more help in your adventures, check out our Baldur's Gate 3 tips.
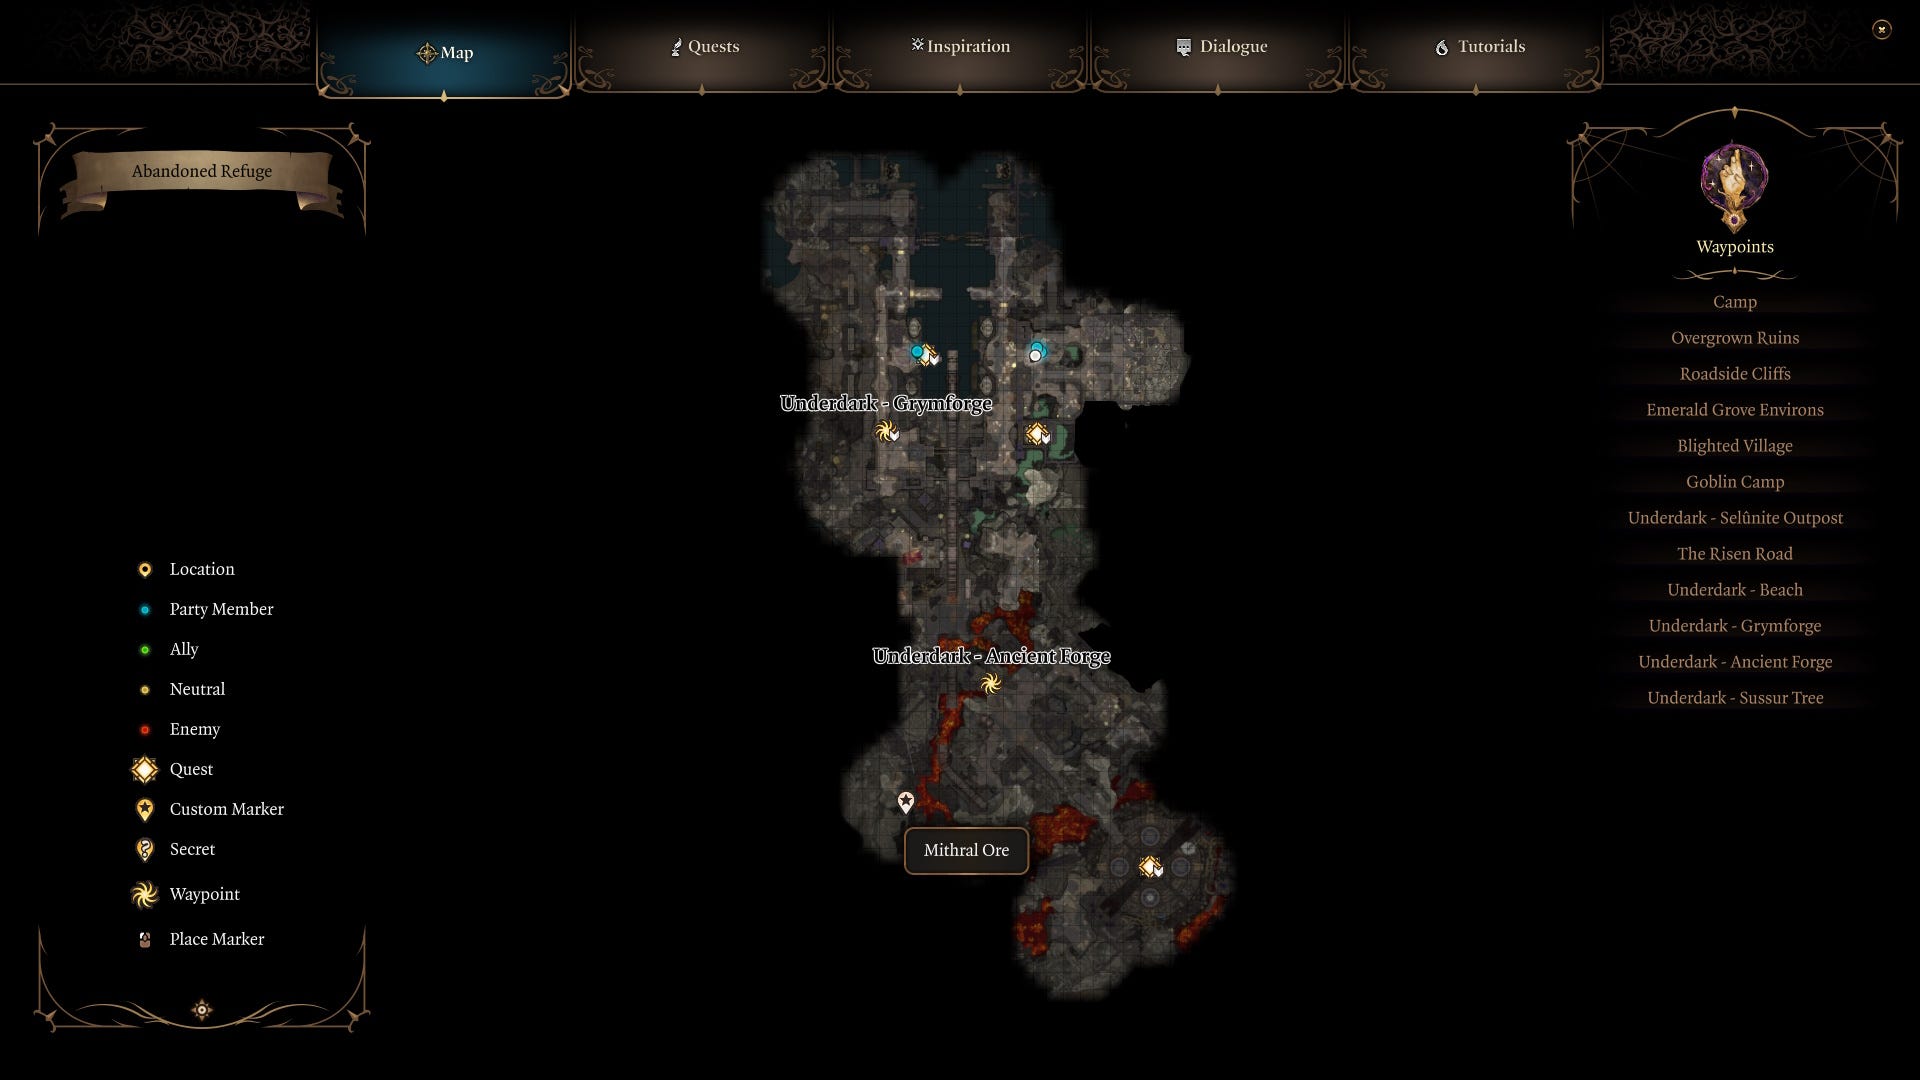
Baldur's Gate 3 Adamantine Forge location
The Adamantine Forge is located in the southeastern corner of the Ancient Forge region of the Underdark in Baldur's Gate 3.
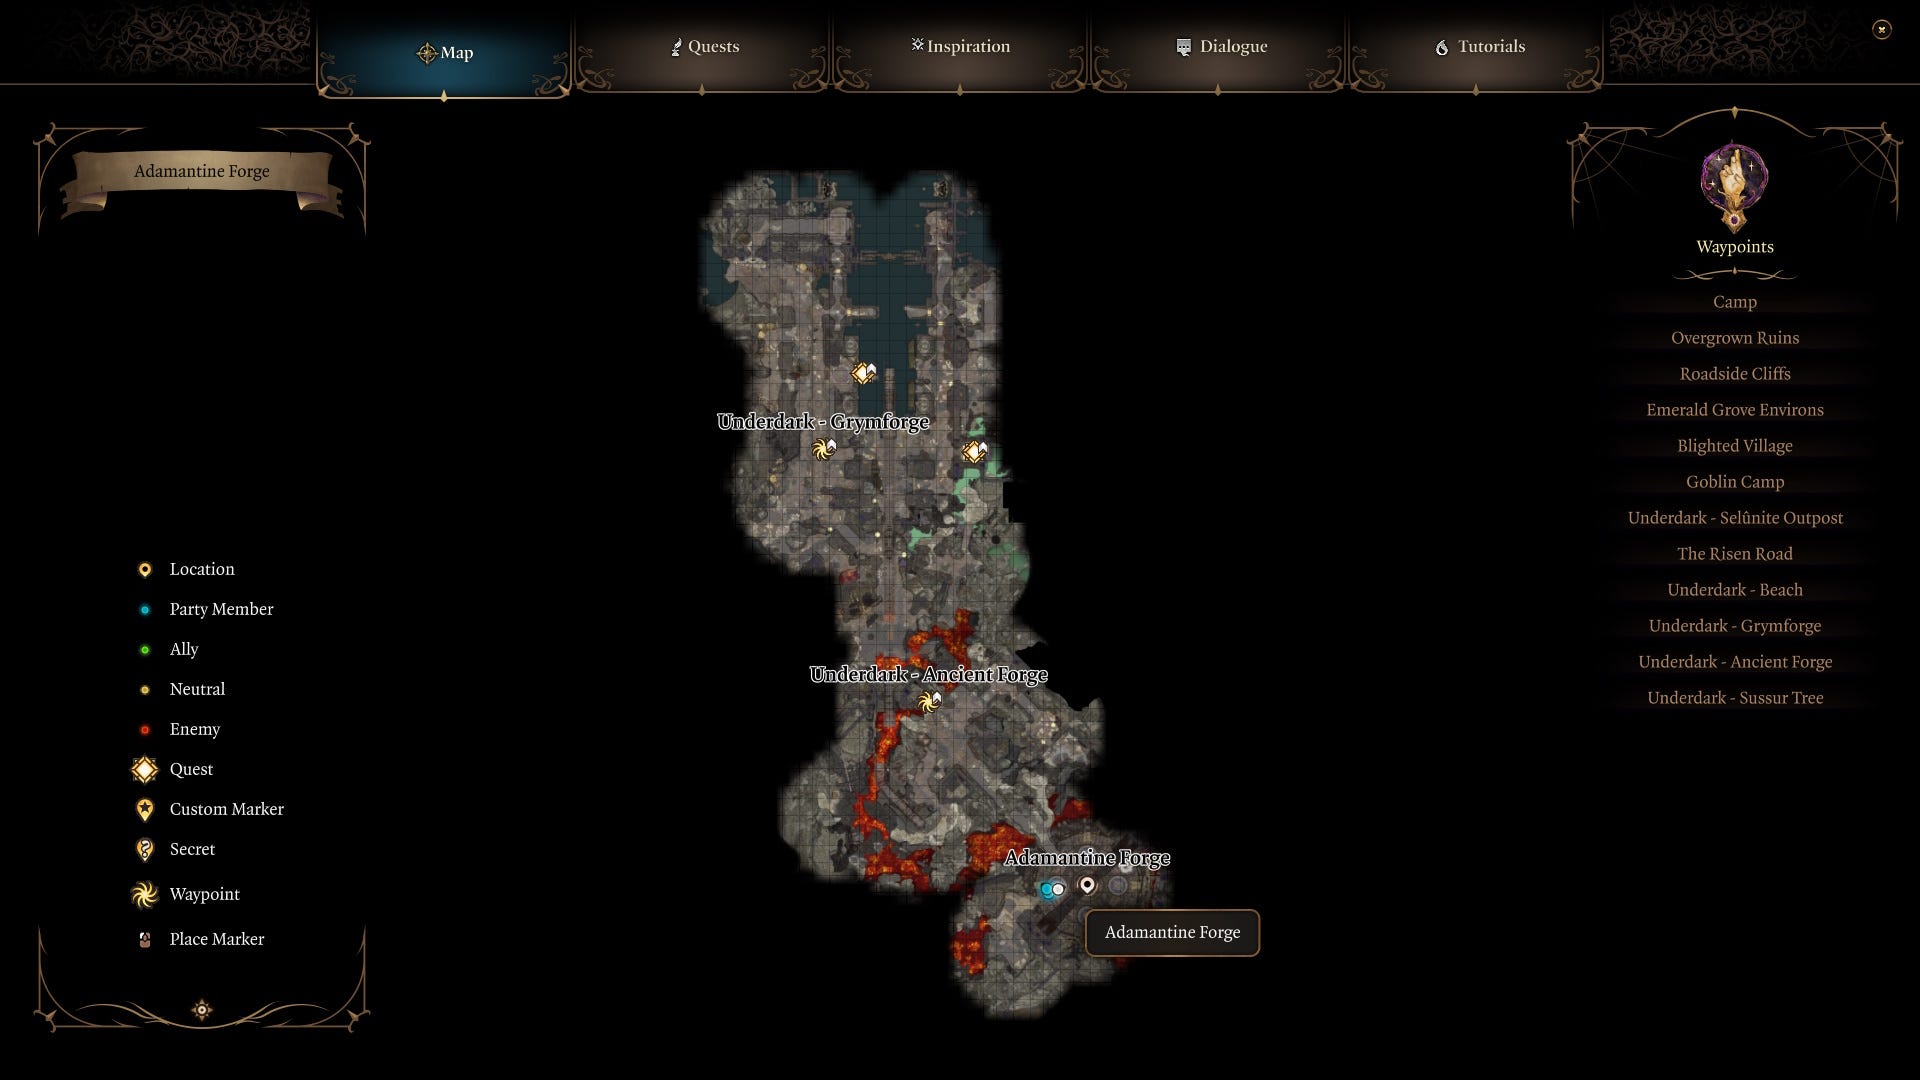
To get to here, you need to travel to Grymforge by going to the Beach region of the first Underdark area, then travel by boat.
How to get to Adamantine Forge in Baldur's Gate 3
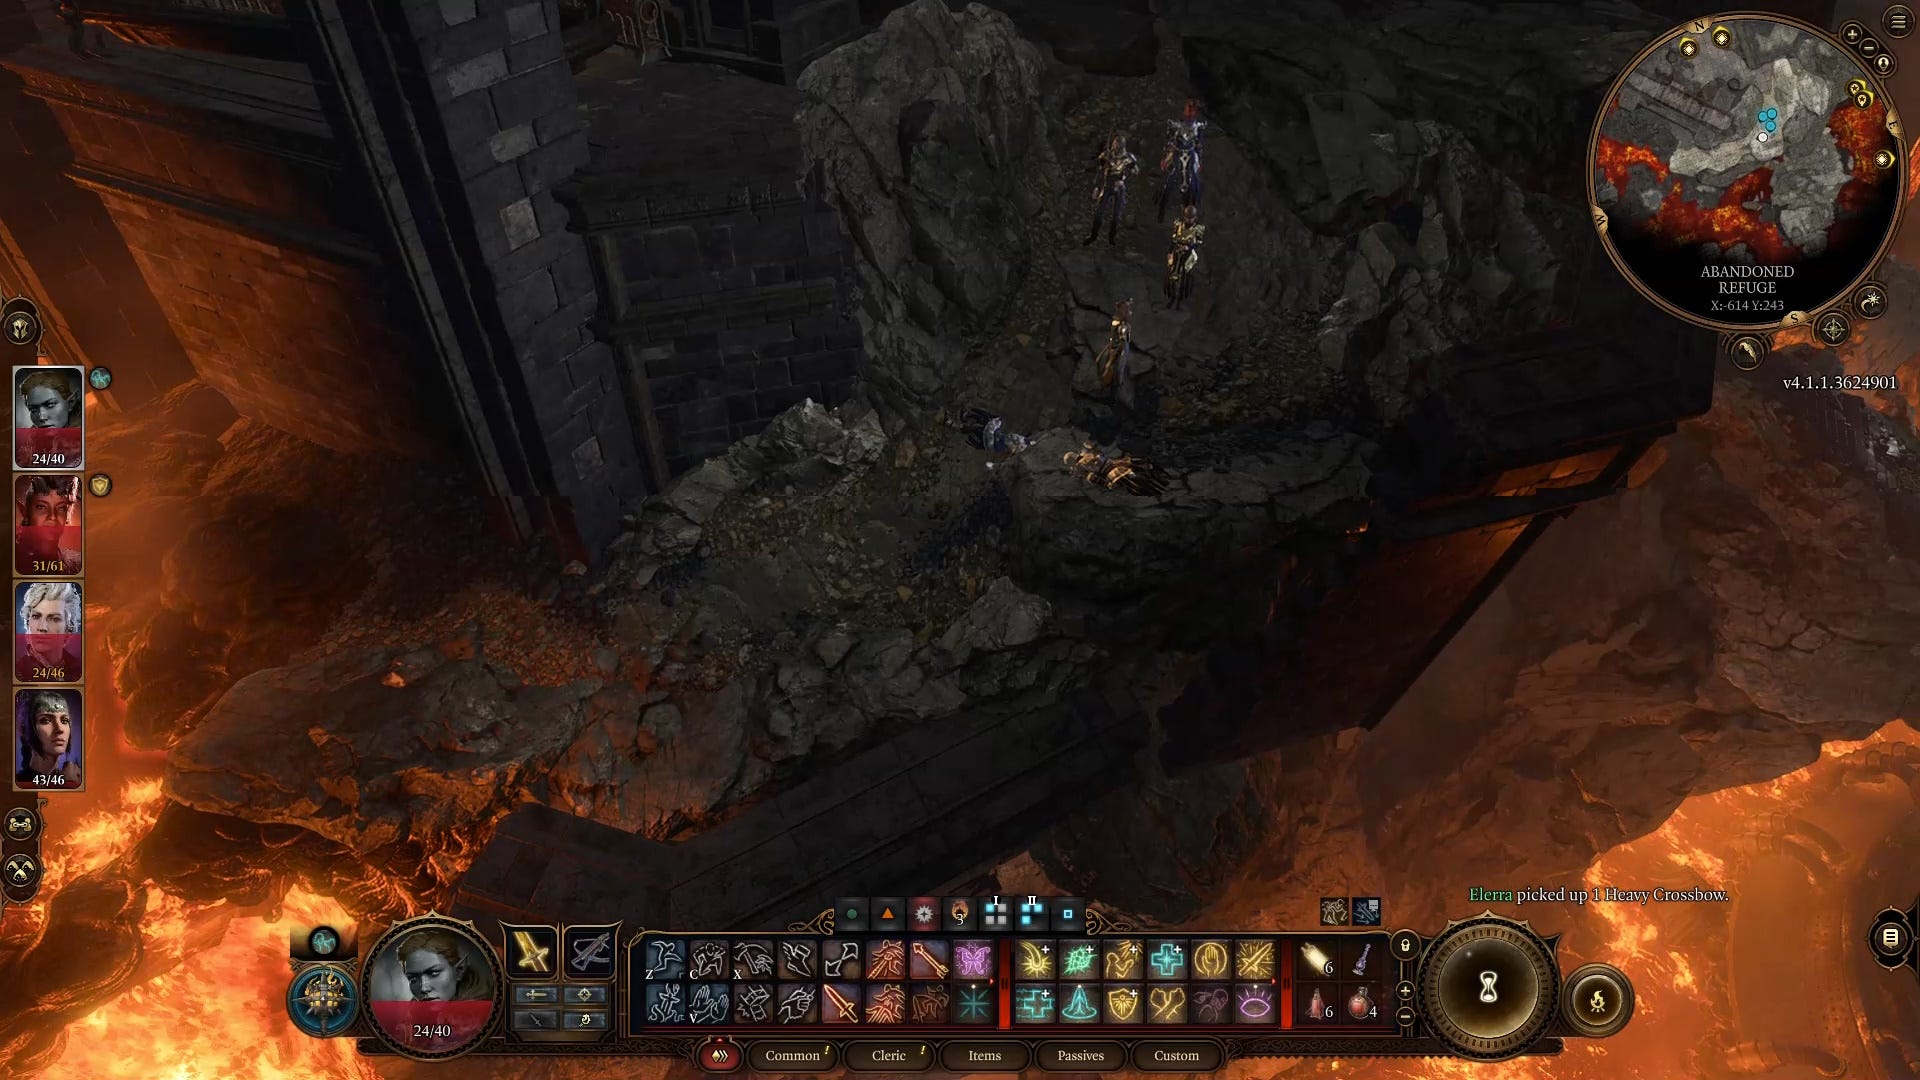
The first step to get to the Adamantine Forge is to go to the northern corner up the stairs in the Underdark - Grymforge area and clear the rubble. We did this by talking with one of the Deep Rothe's and convincing it to turn on its masters, then we killed the enemies together and asked the Deep Rothe to clear the rubble after.
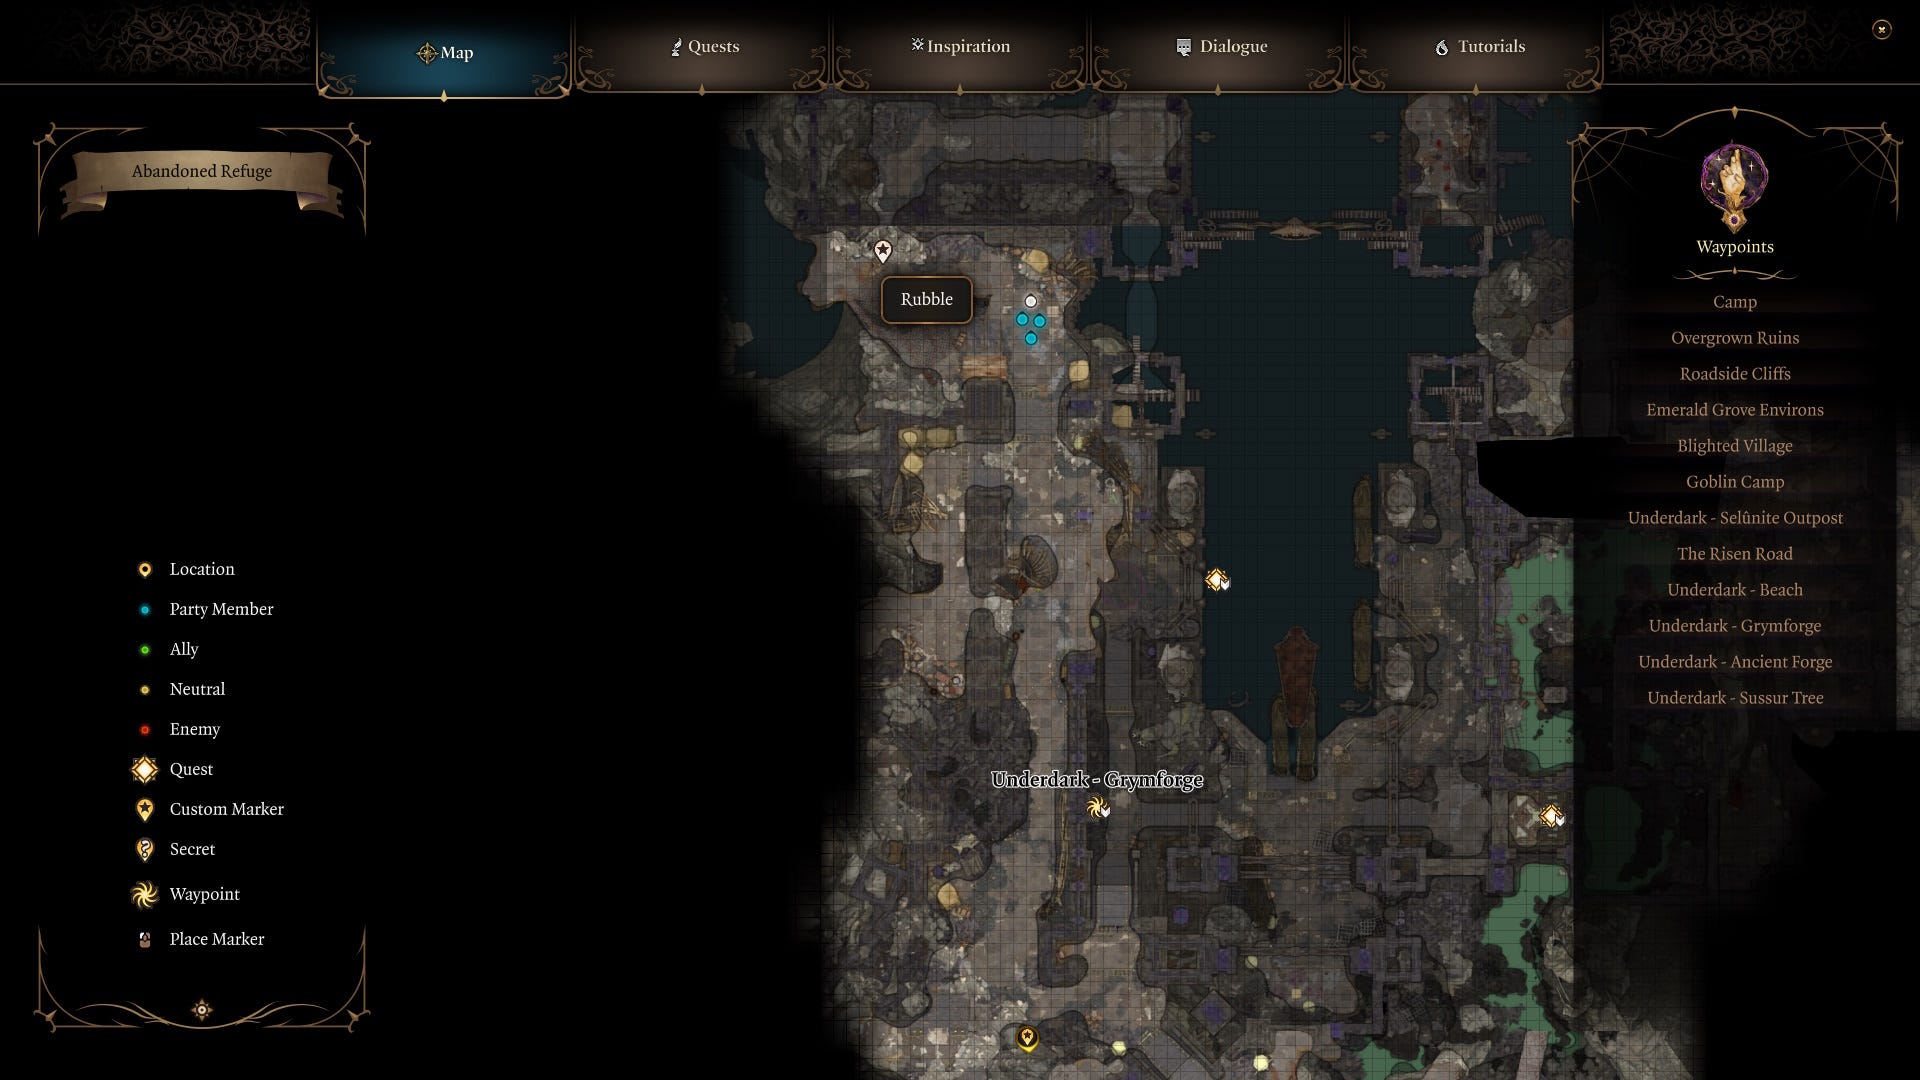
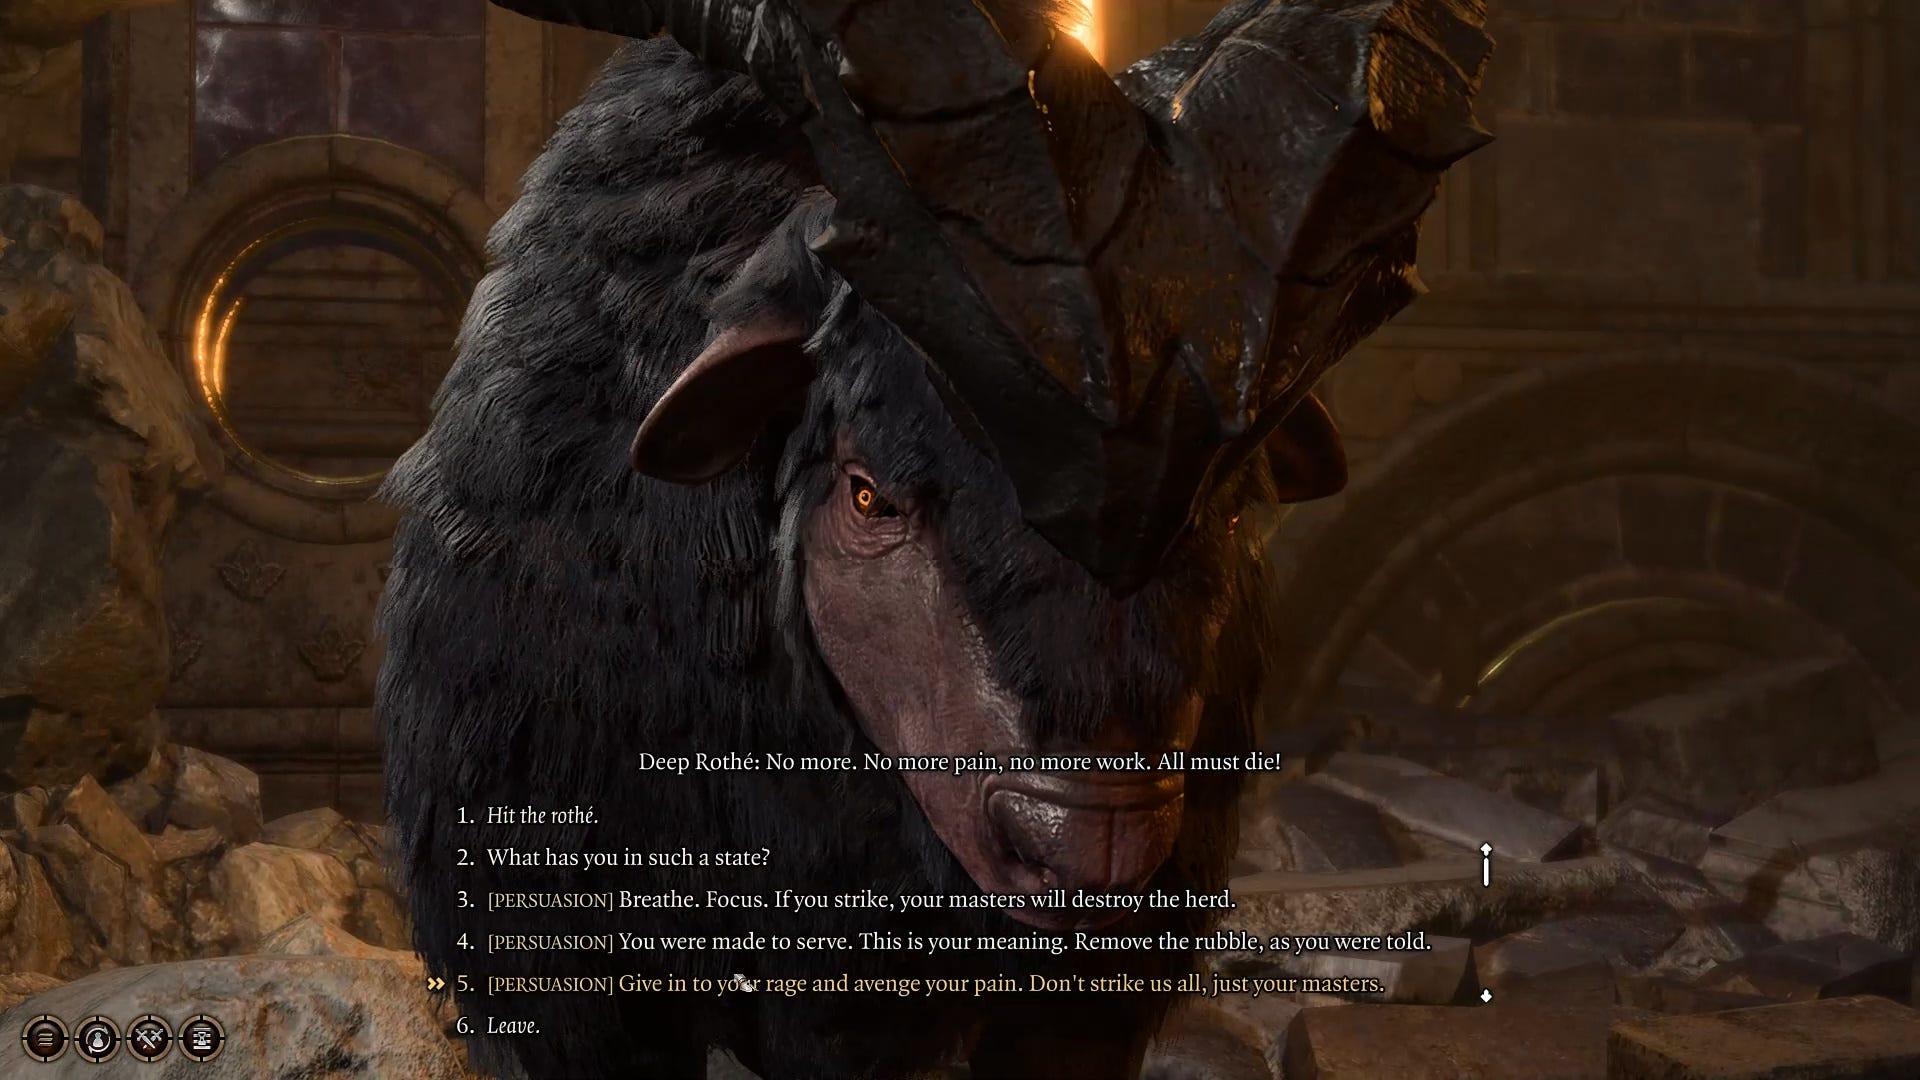
If you want to use this method, you have to make sure one of your party has the Speak With Animals spell cast on them. There's sure to be alternative ways to clear the rubble if you don't have this spell, but we're not aware of them.
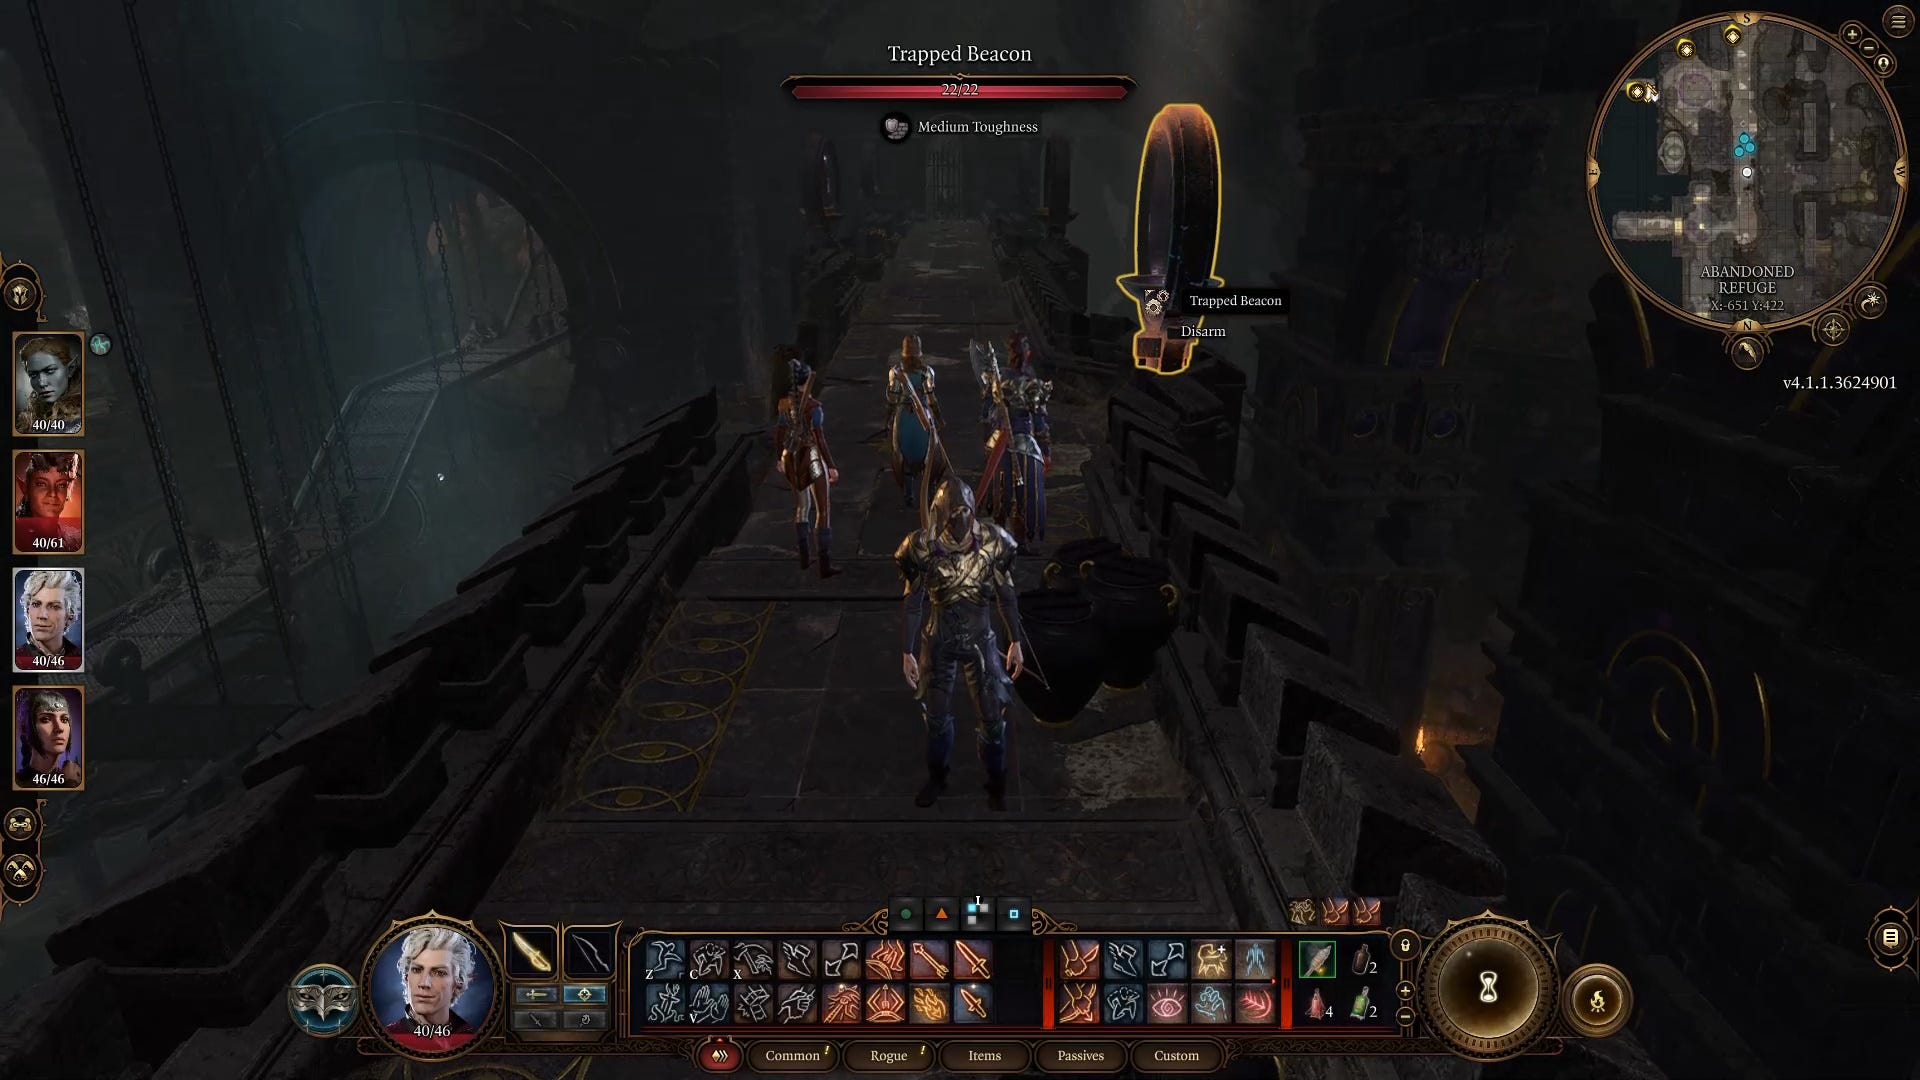
Once the rubble is cleared, follow the path until you get to a very long battlement path armed with multiple traps. Be careful of other traps on the way though, like gargoyle statues. We recommend bringing Trap Disarm Toolkits and a companion like Astarion to disable traps.
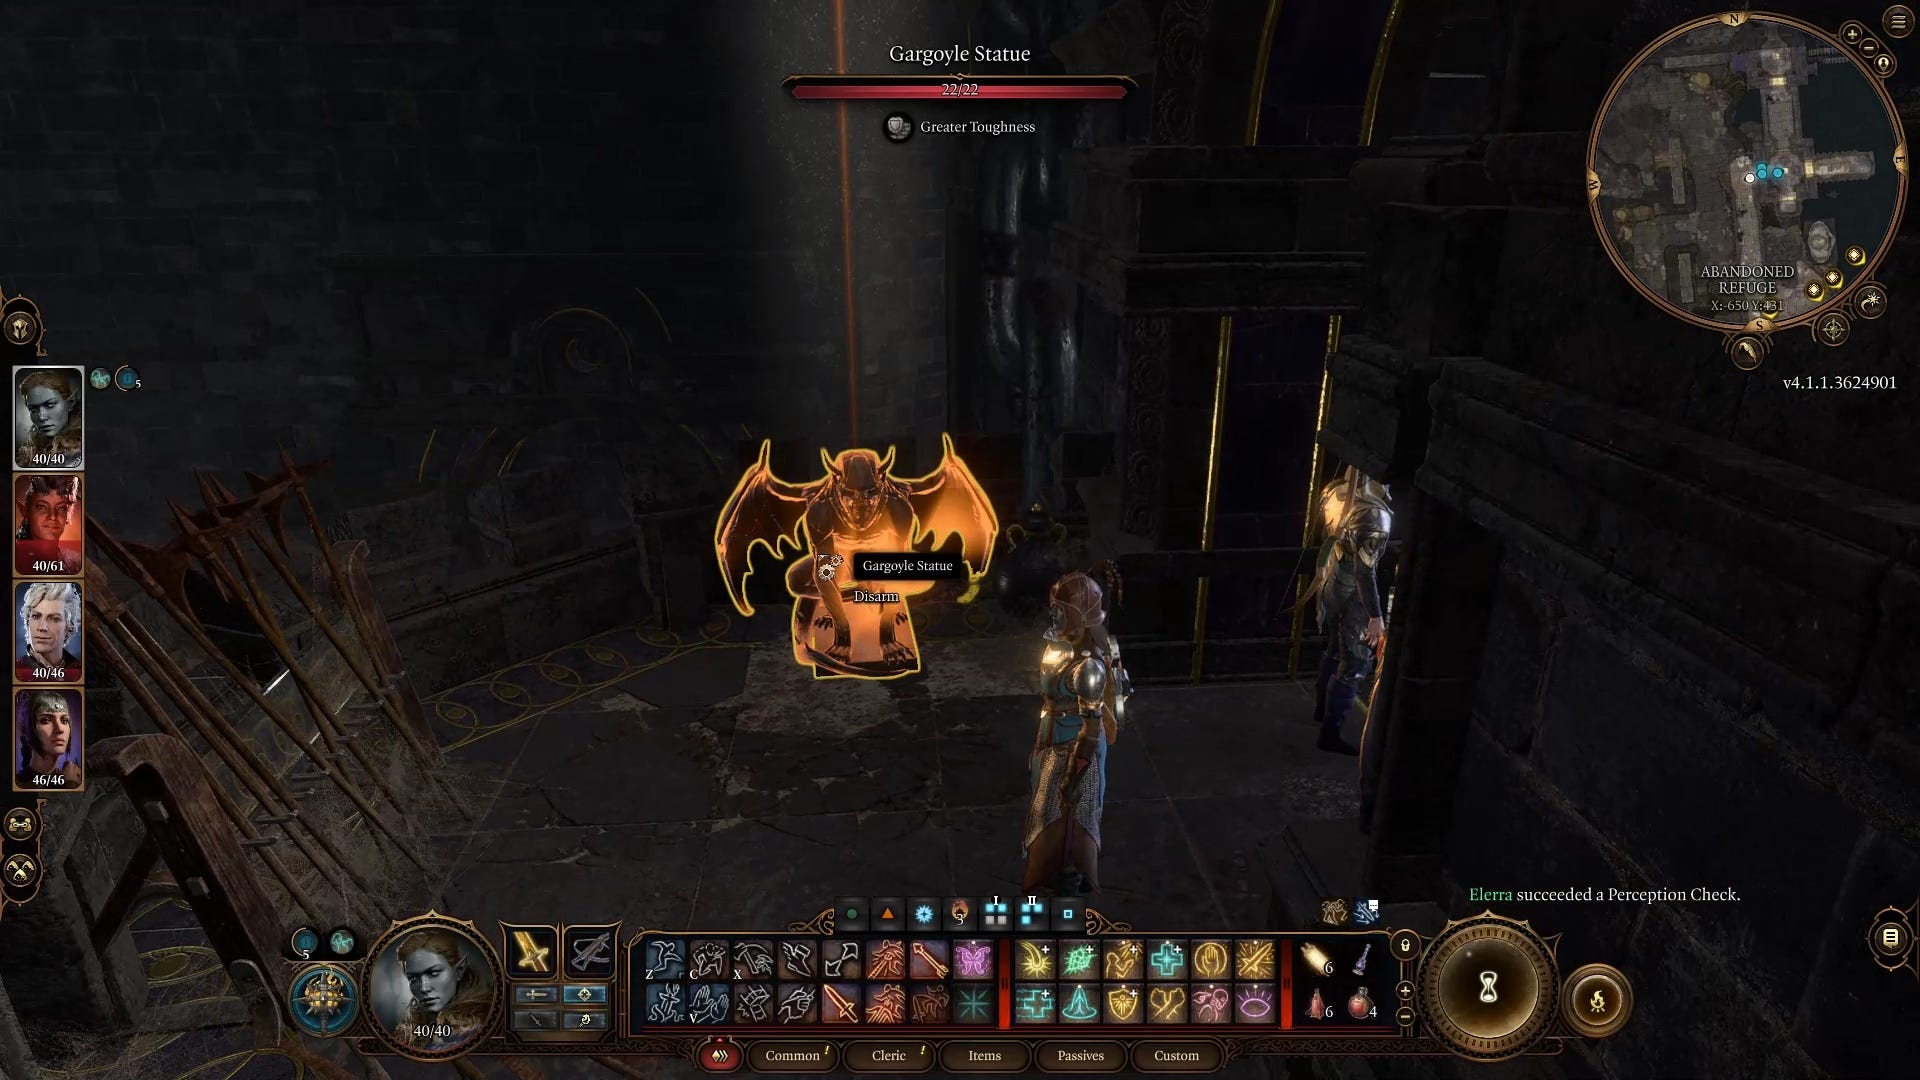
You'll need to bring at least three Trap Disarm Toolkits for the battlements path if you don't want to get hurt on the way to the iron ladder in the middle of it. You might be able to jump over the two floor traps, but this didn't work for us when we tried it.
When you reach the ladder, climb down it and ungroup (G), then use both levers to bring a platform over to you.
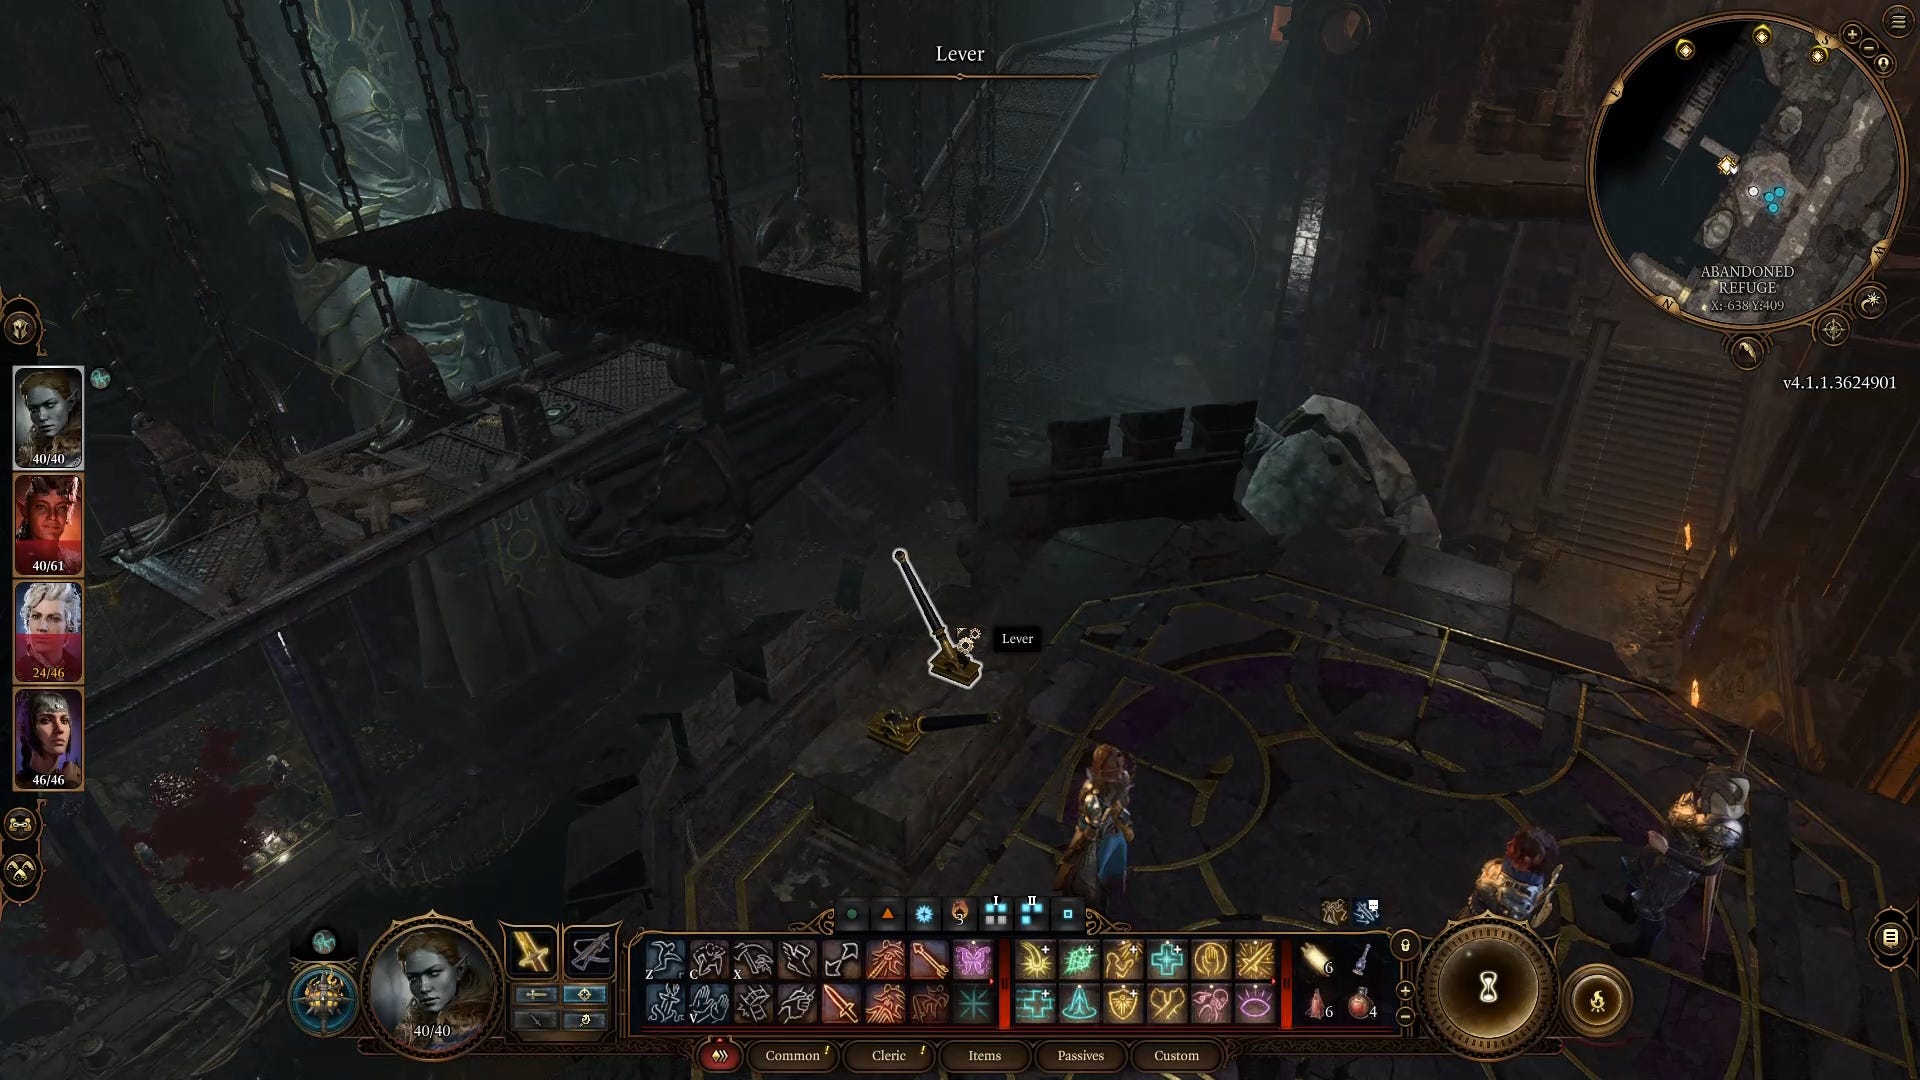
Make one of your characters jump on the platform, then activate both levers again to get them across the gap. Switch to the character on the other side and make your way to a lever at the end of this path, in the south.
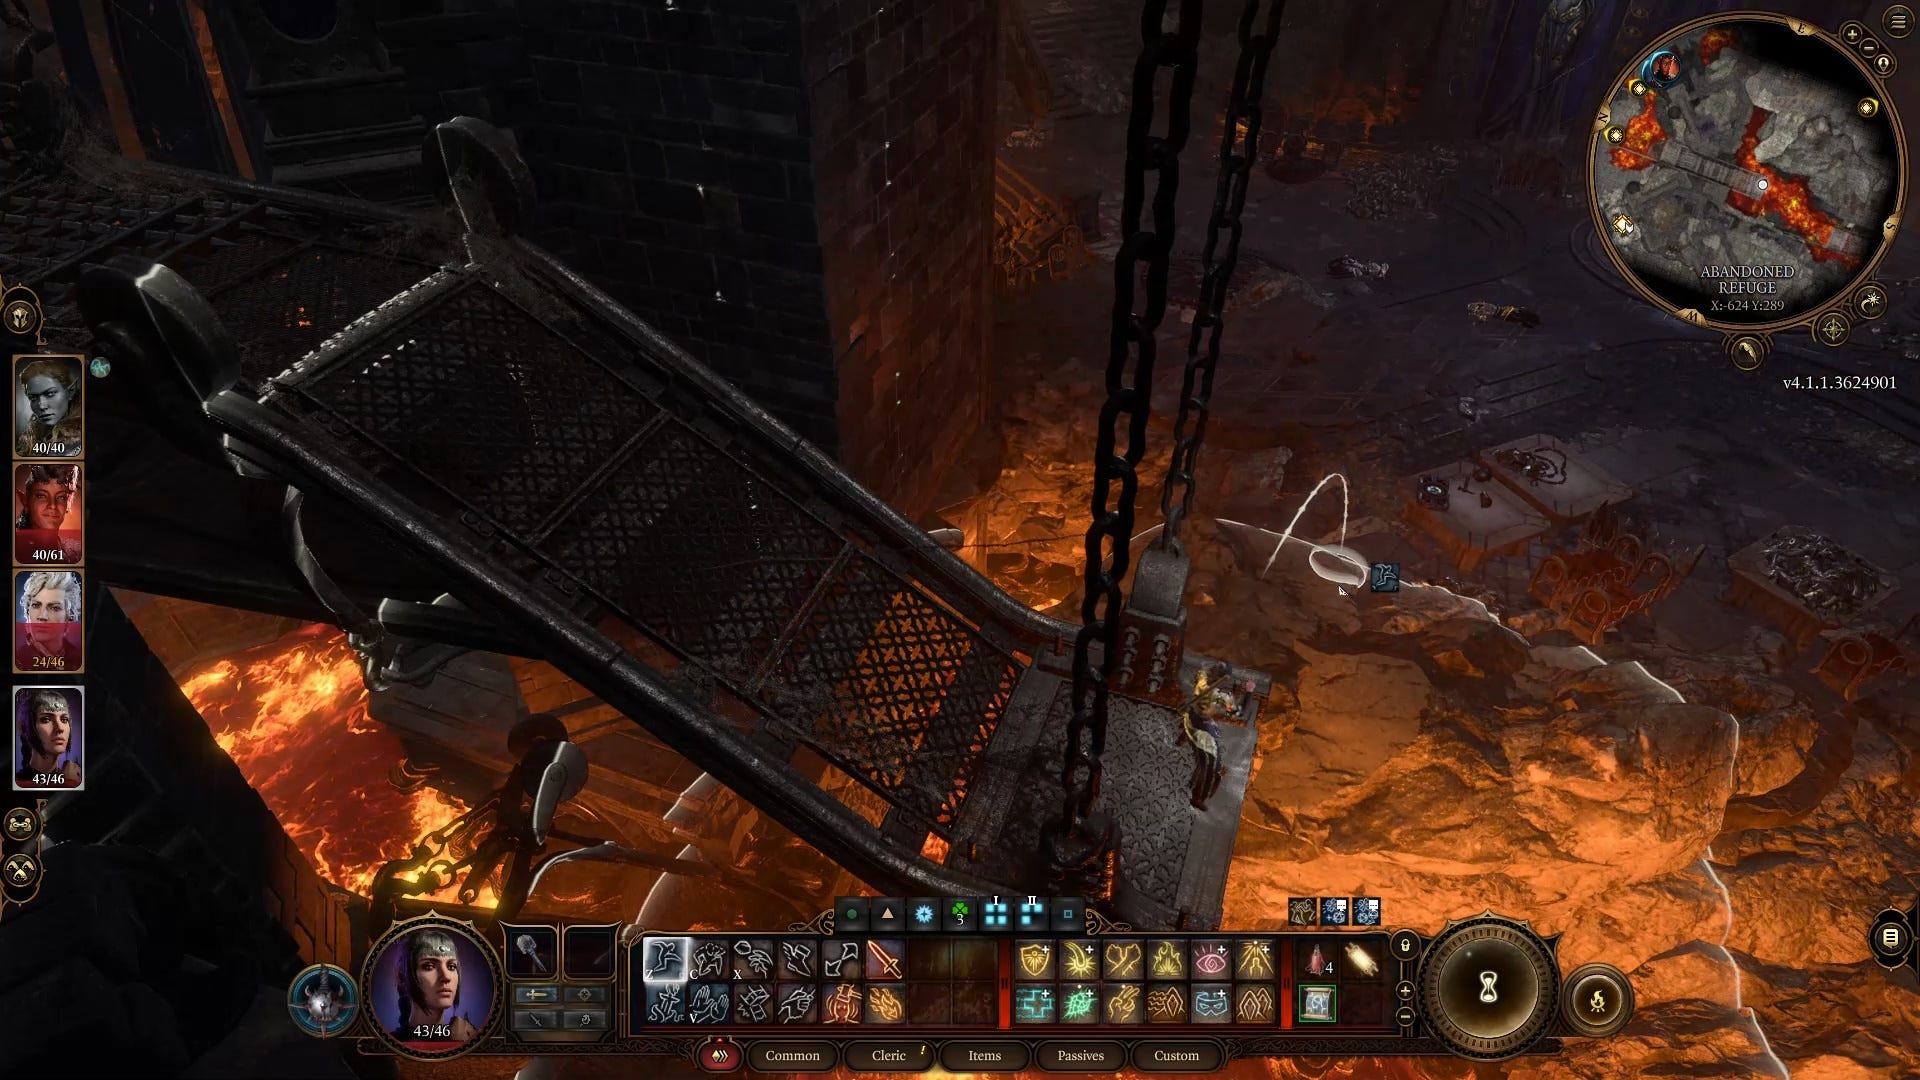
Switch back to the character by the first set of levers and bring the platform back to them. Then jump on this platform and make your way south to the end of this path. Then, jump on the platform floating on the left and get the character by the second set of levers to activate it. This moves the character on the platform to the other side.
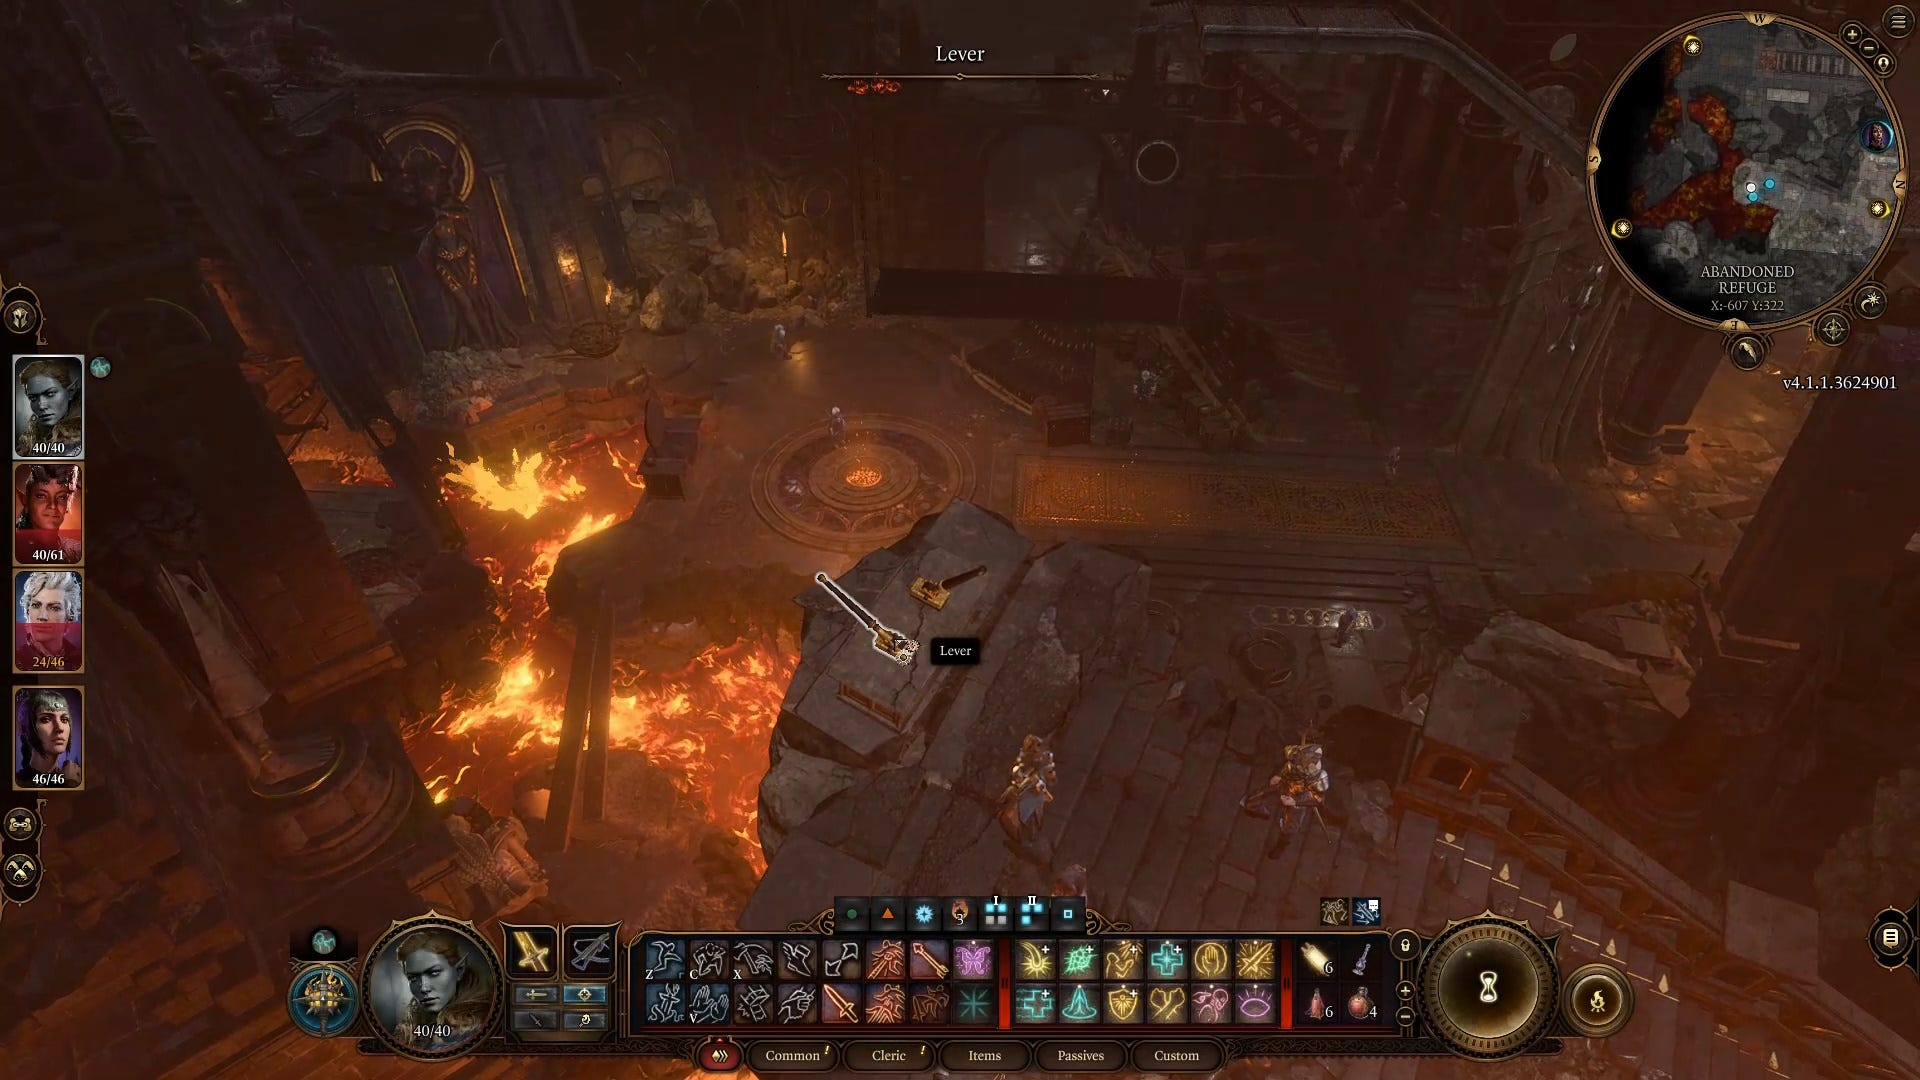
Jump down from this platform, follow the path, then jump to the ground at the end. The Ancient Forge waypoint will unlock and you can gather your party again by using the waypoint.
Now all you have to do to get to the Adamantine Forge in Baldur's Gate 3 is head southeast down the crumbling stairs and jump down to the Forge area. You'll need the correct items before you can use the Adamantine Forge, however.
Baldur's Gate 3 Adamantine Forge items
To activate the Adamantine Forge you need Mithral Ore and one mould item. Once you have Mithral Ore, select the Crucible in the middle of the Forge and drag and drop it into the empty slot. You might have to move your inventory menu slightly in order to successfully drag and drop the ore.
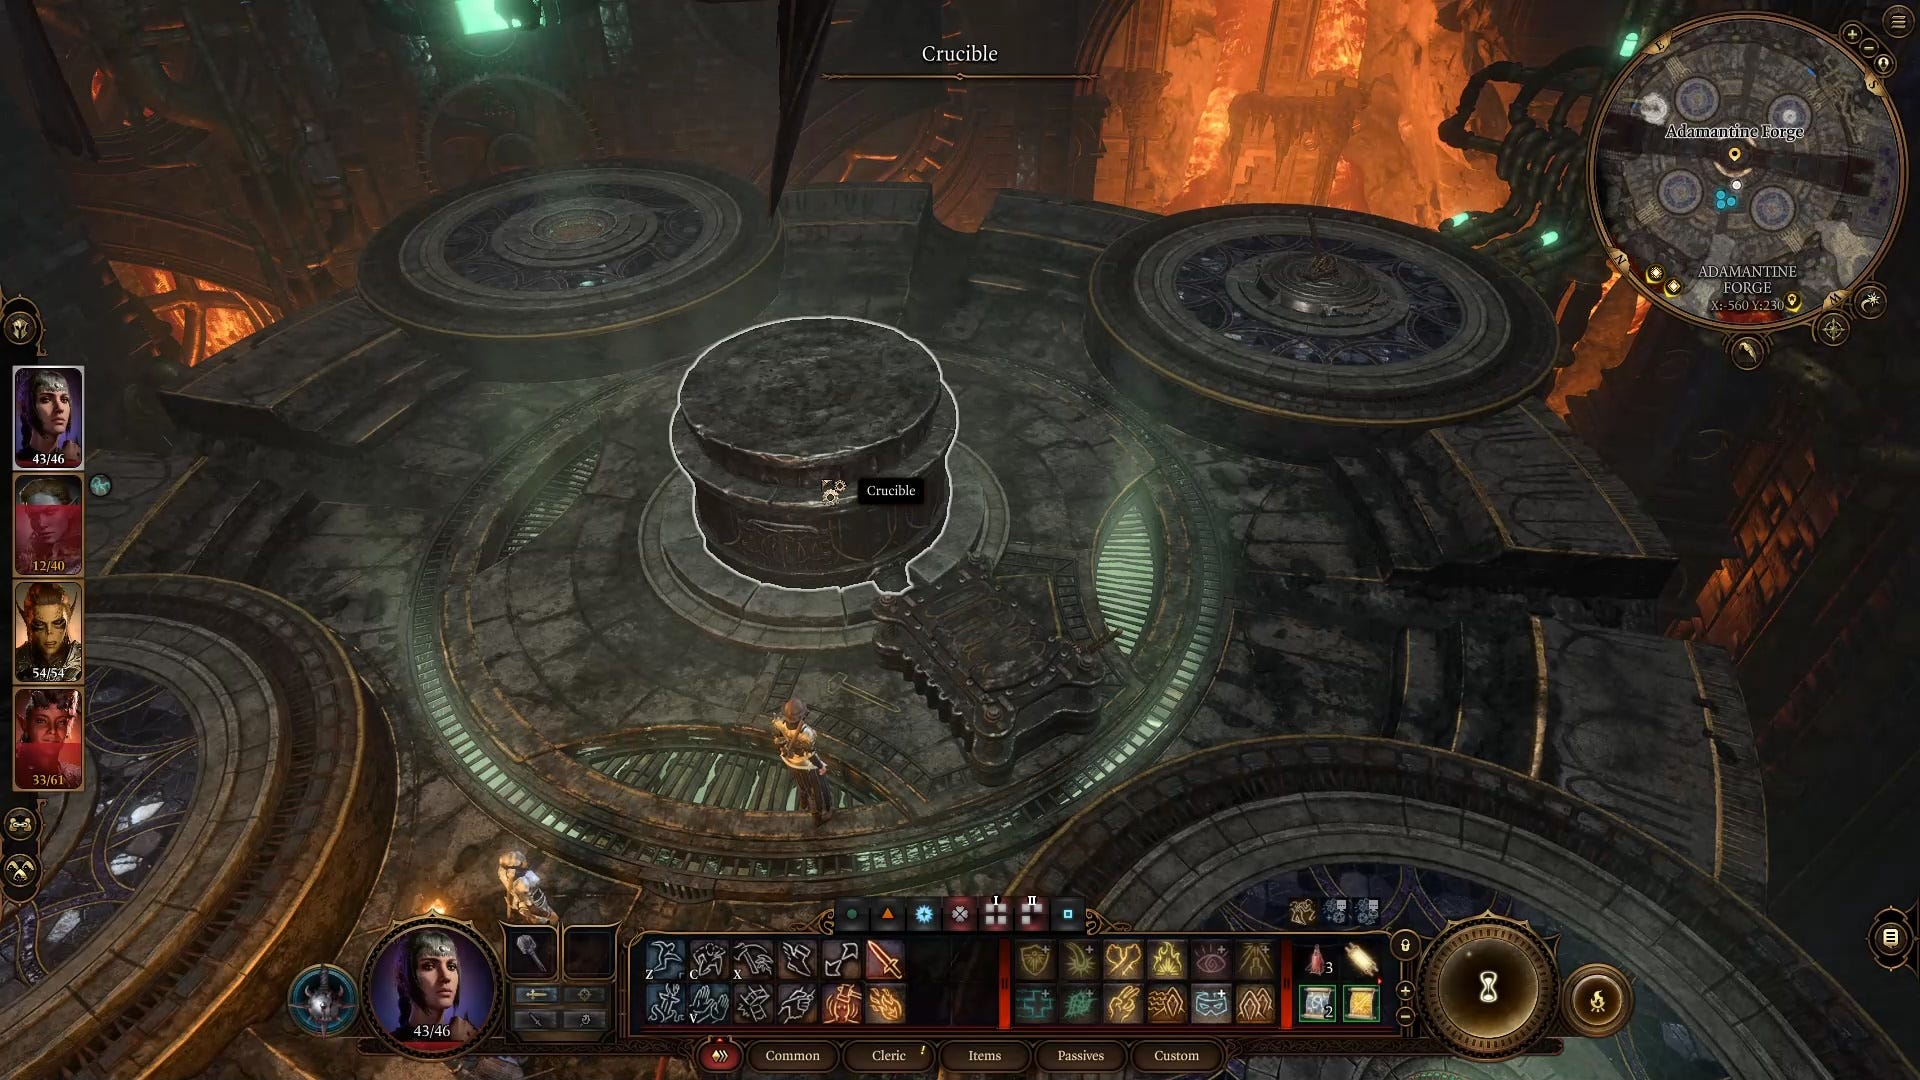
Now you have to decide what piece of gear you want to make at the Adamantine Forge by using one of these six moulds:
- Longsword Mould
- Shield Mould
- Scimitar Mould
- Mace Mould
- Splint Mould
- Scale Mail Mould
We recommend using the Scale Mail, Splint, or Shield mould, as the weapons aren't really that good when compared to those you can easily get during Act 2 - but it's entirely up to you!
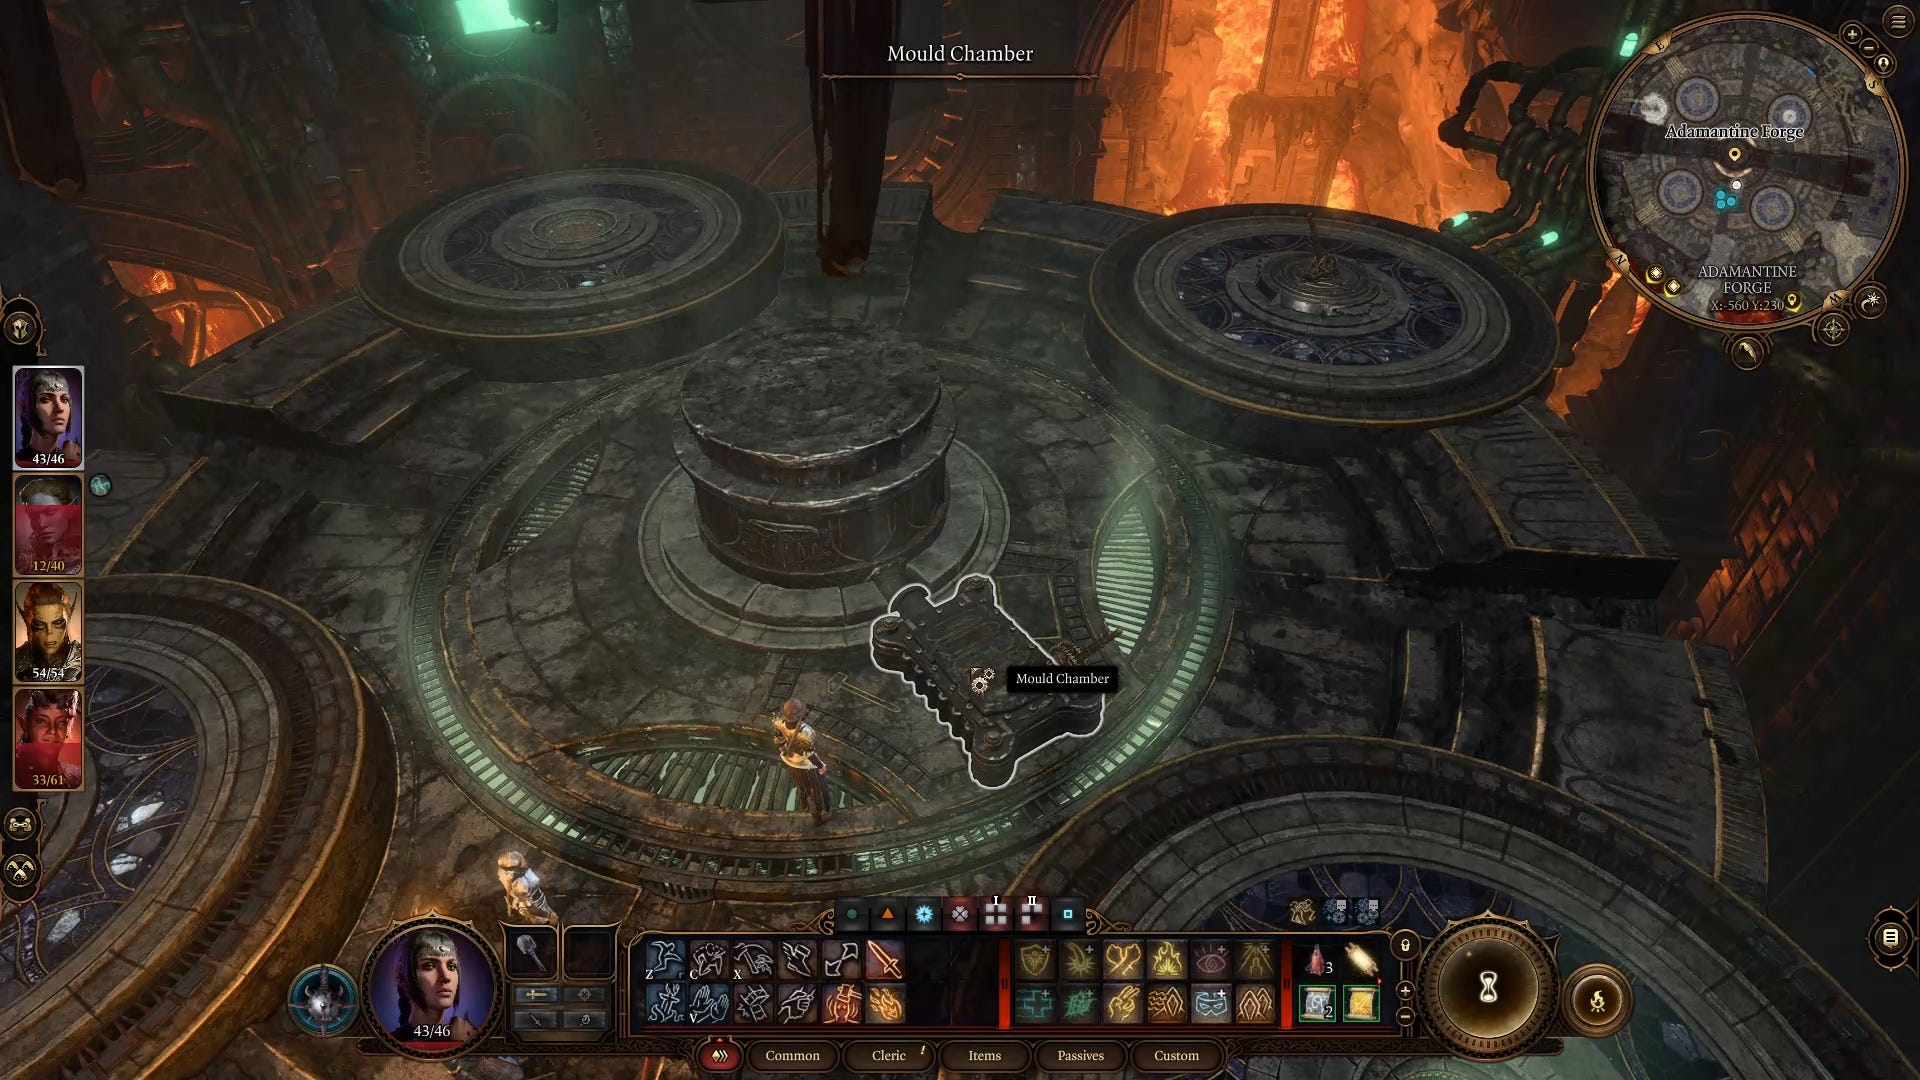
When you've made your decision, select the Mould Chamber beside the Crucible and drag and drop the mould you wish to make into it. Don't worry if you accidentally placed the wrong one, as you can activate the lever beside the Mould Chamber to eject a mould if needed.
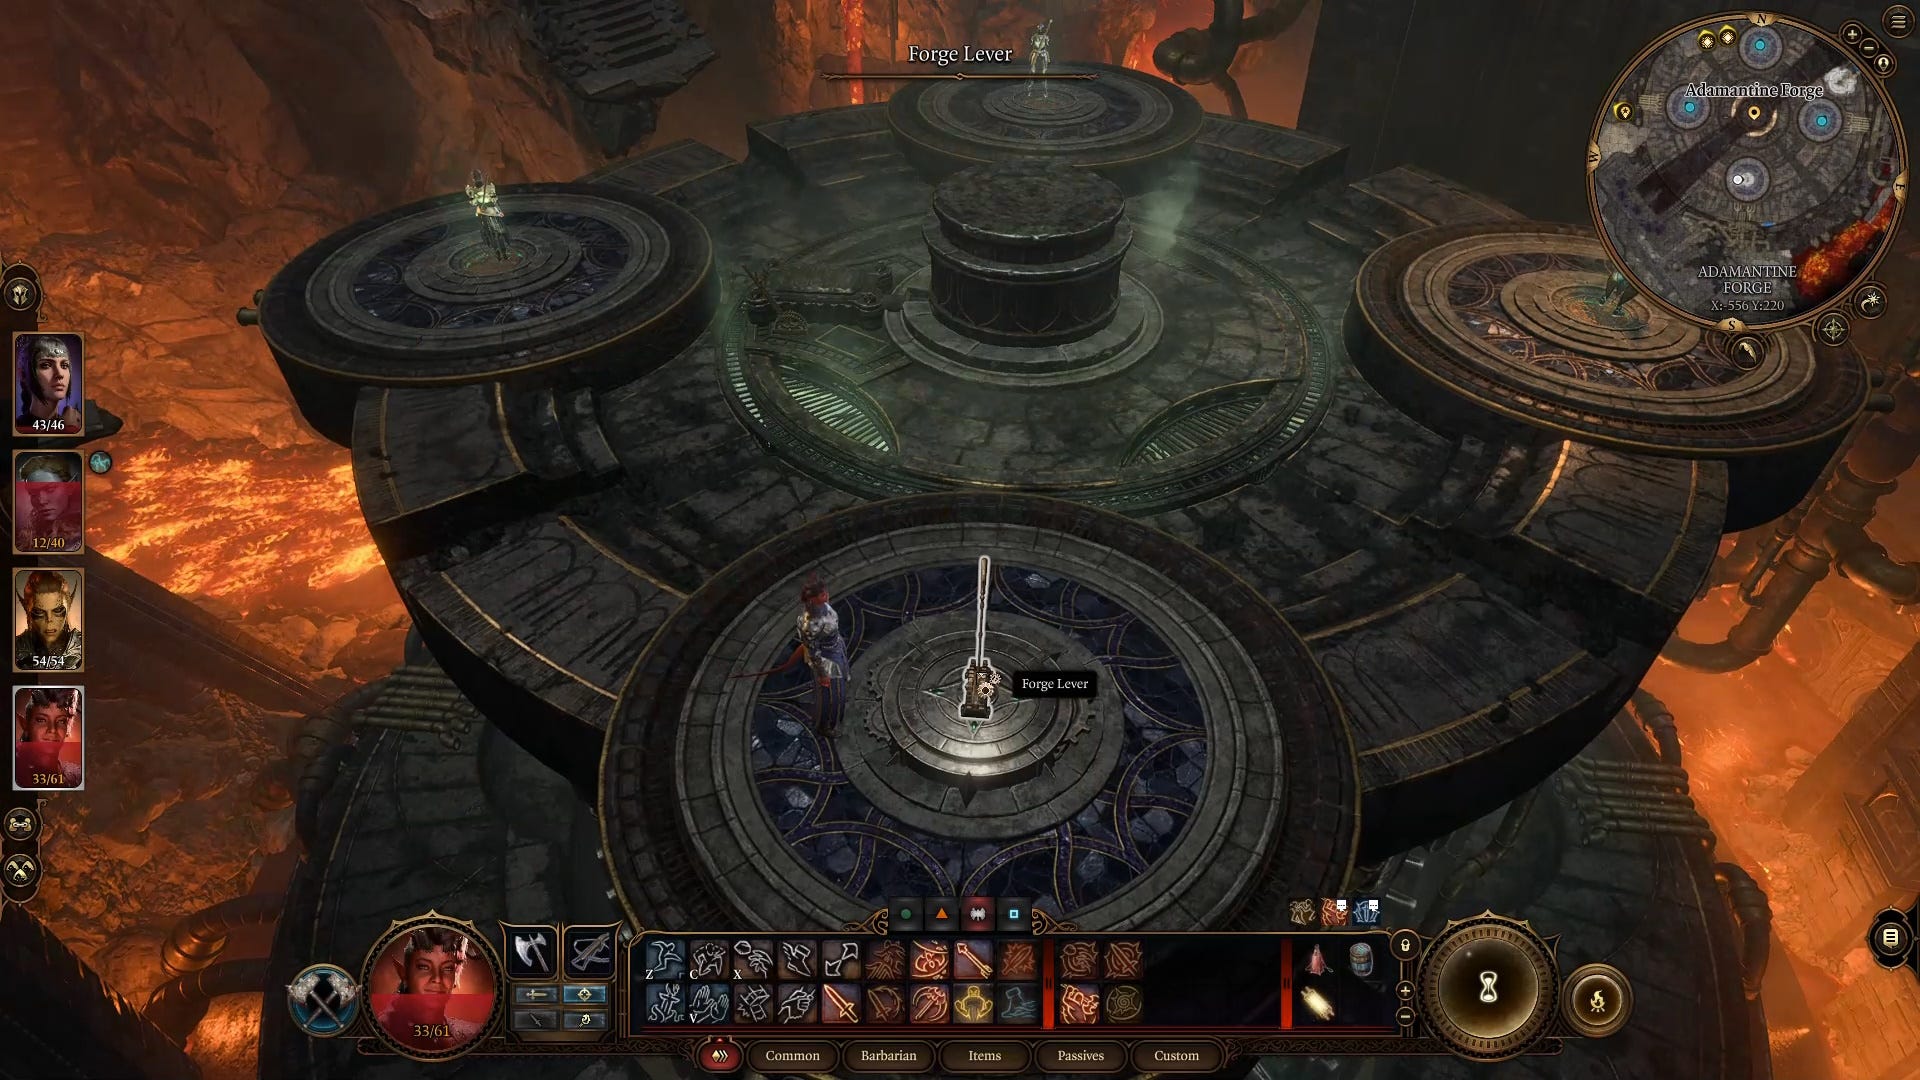
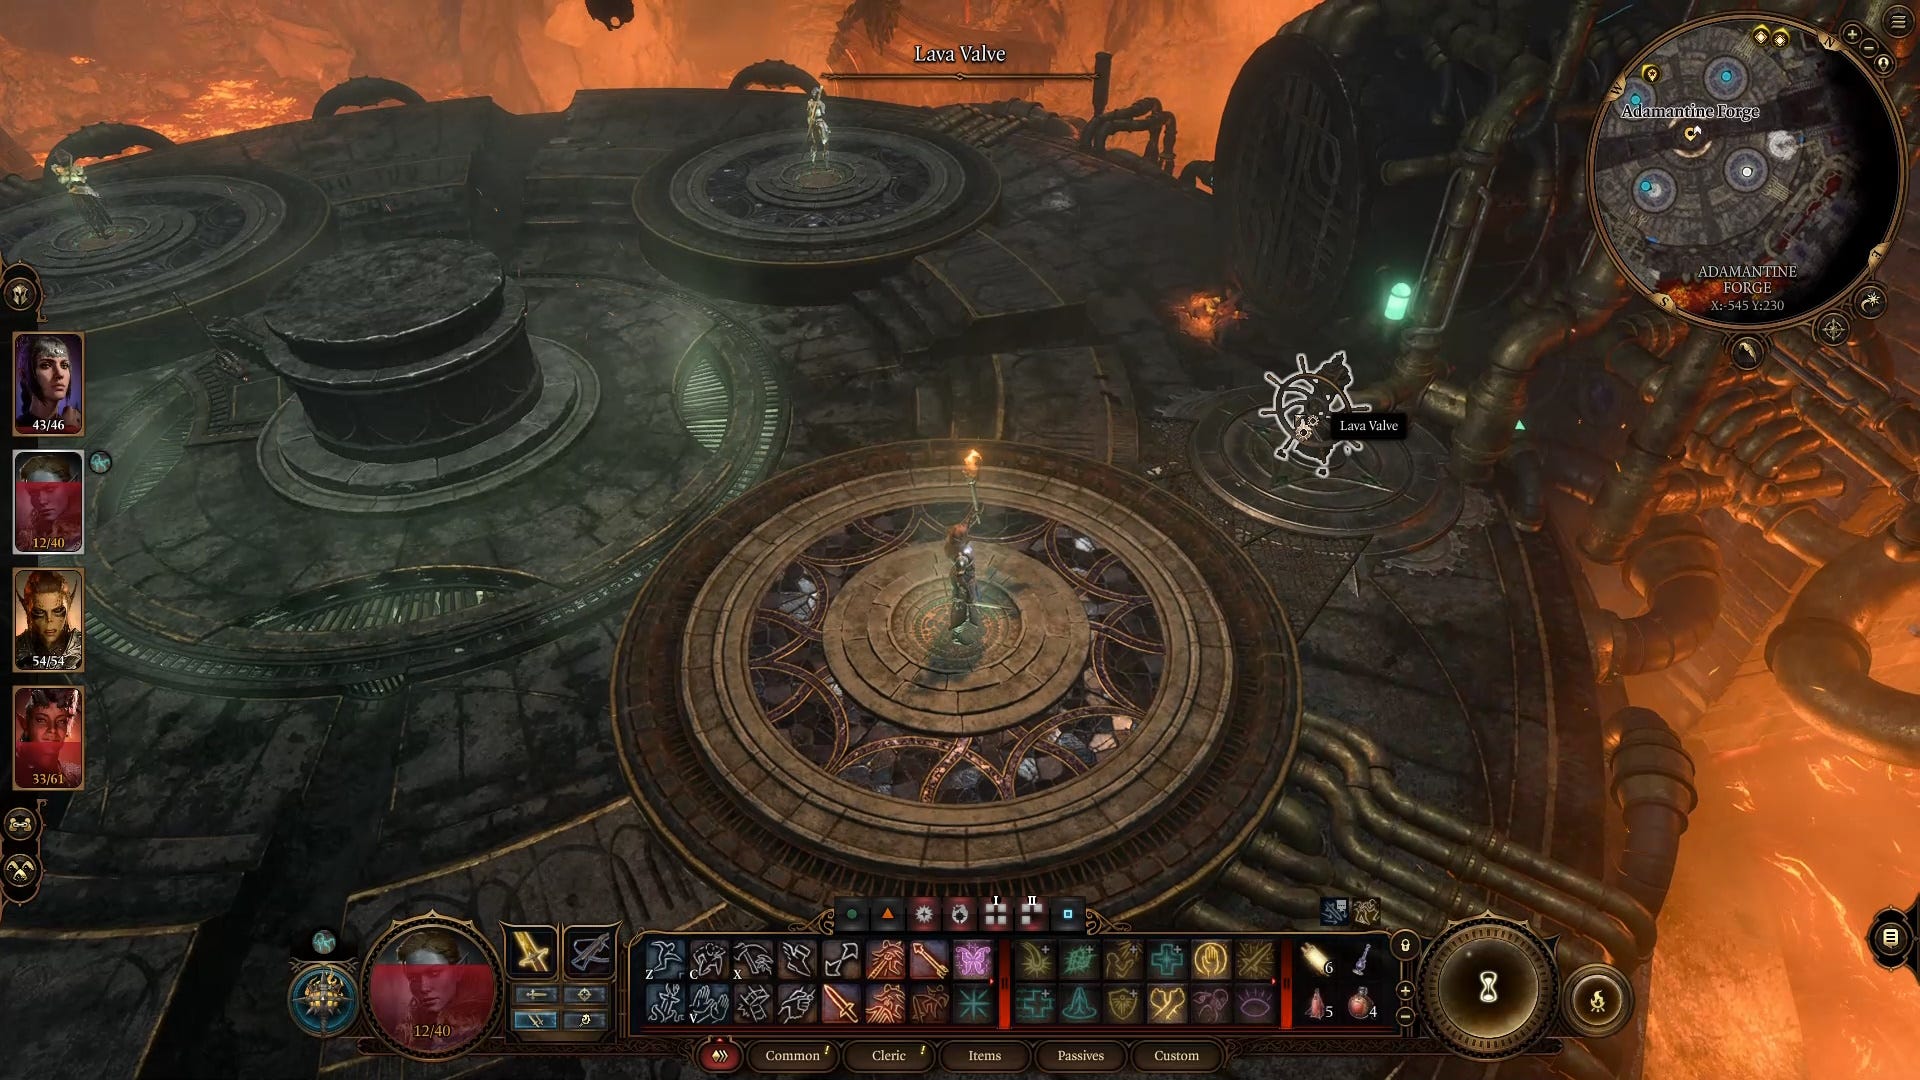
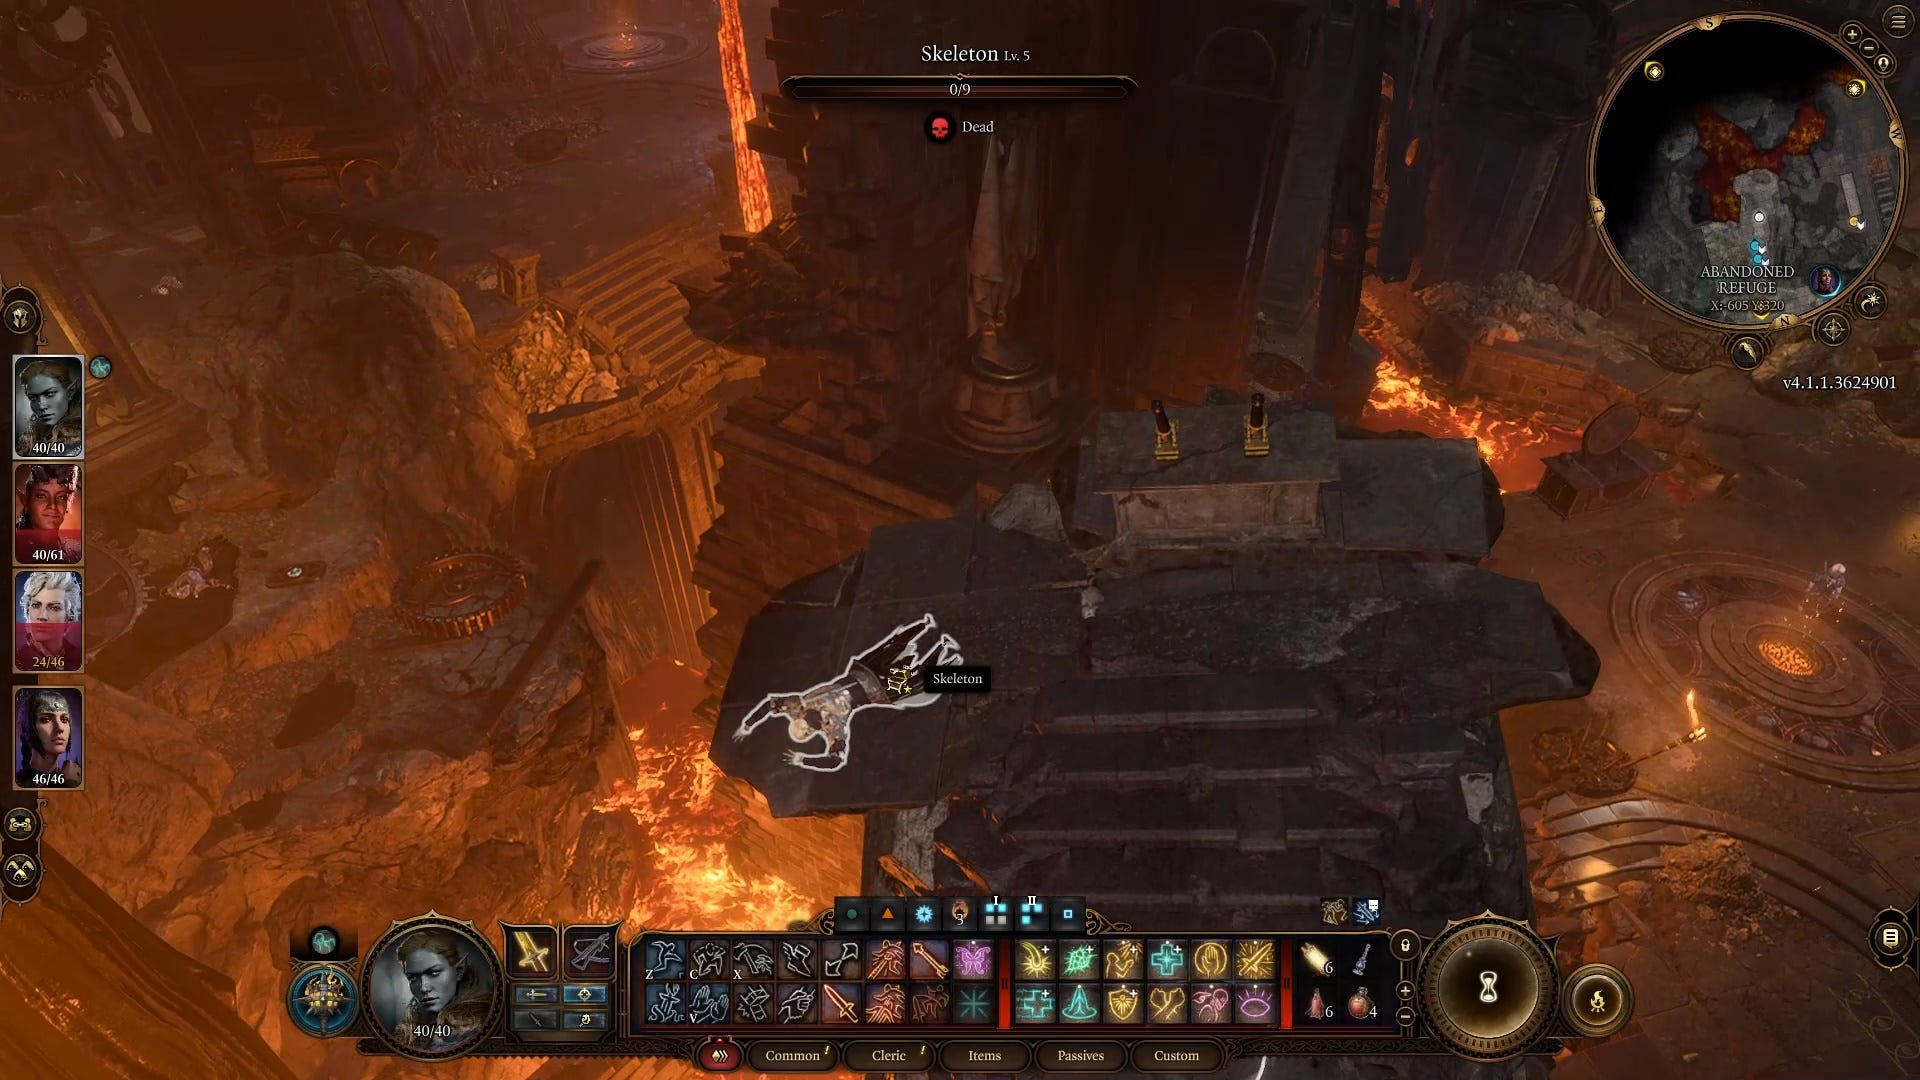
With the Mithral Ore and mould inserted, all you need to do now is activate the Forge Lever on the southern side of the Forge, then select the Lava Valve when the platform has been lowered - but beware that using the Lava Valve will start the Grym boss fight! So rest up and position your party away from the middle of the platform unless you want a swift death.
We've got a quick and easy Grym boss strategy if you're struggling to take the boss down.
If you still need to find Mithral Ore or a certain mould, we've detailed their locations below.
Baldur's Gate 3 Mithral Ore location for Adamantine Forge
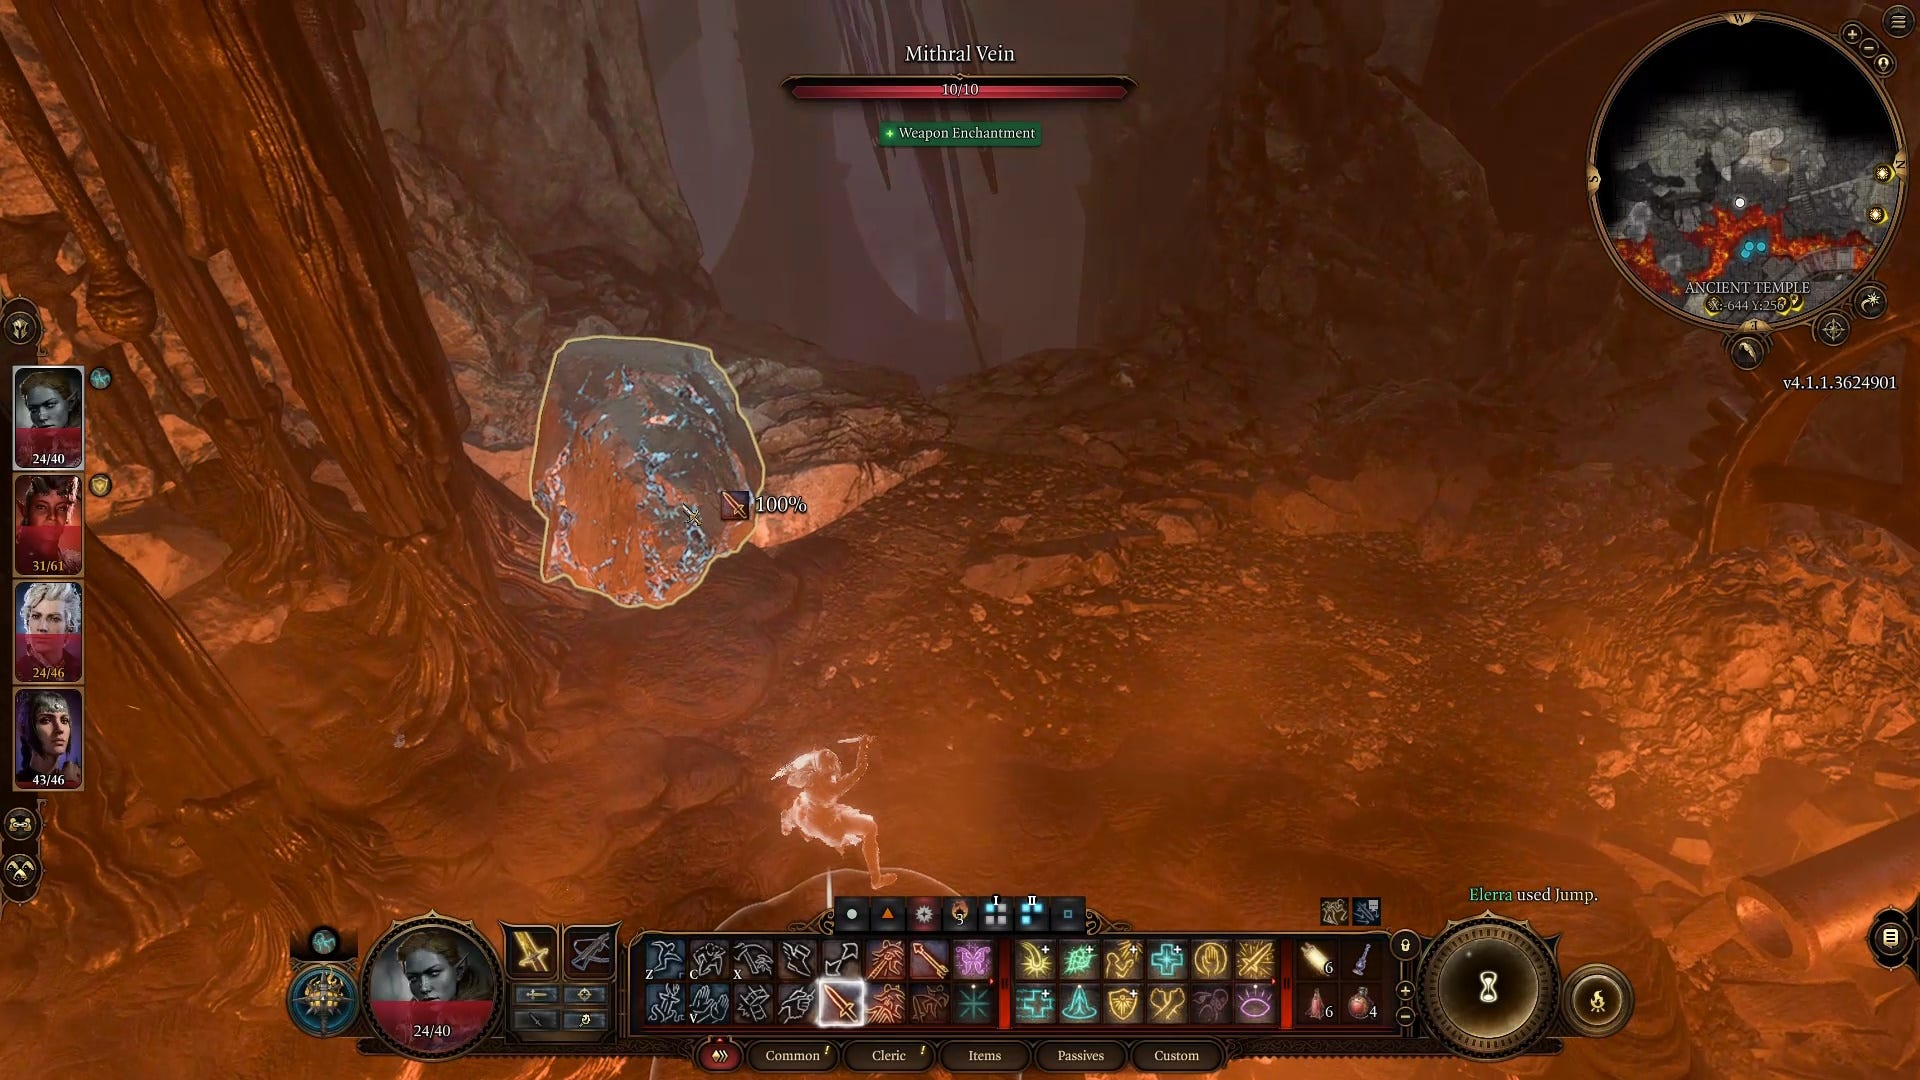
We found Mirthal Ore located in the southwestern lava region of the Underdark - Ancient Forge area.
To get to the Mithral Ore, you need to go down the path behind where the ladder and ramparts are in the southeast. There are multiple enemies on the ramparts here, however, so prepare for a fight.
Down the path you need to hug the edge and then jump your way over to the Mithral Vein on the other side of the lava river. You could also use spells or abilities like Misty Step to help you across.
The Mithral Vein is immune to some types of damage, but hitting it with a sword worked for us. Once the vein's health has depleted, you'll get a piece of Mithral Ore.
There may be other areas you can find more Mithral Ore, but we haven't come across it yet.
Baldur's Gate 3 mould locations for Adamantine Forge
There are six moulds to find, but you can only use one of them at the Adamantine Forge. We recommend using either the Scale Mail, Splint, or Shield mould, but it's up to you!
Here's where to find all six moulds in Baldur's Gate 3:
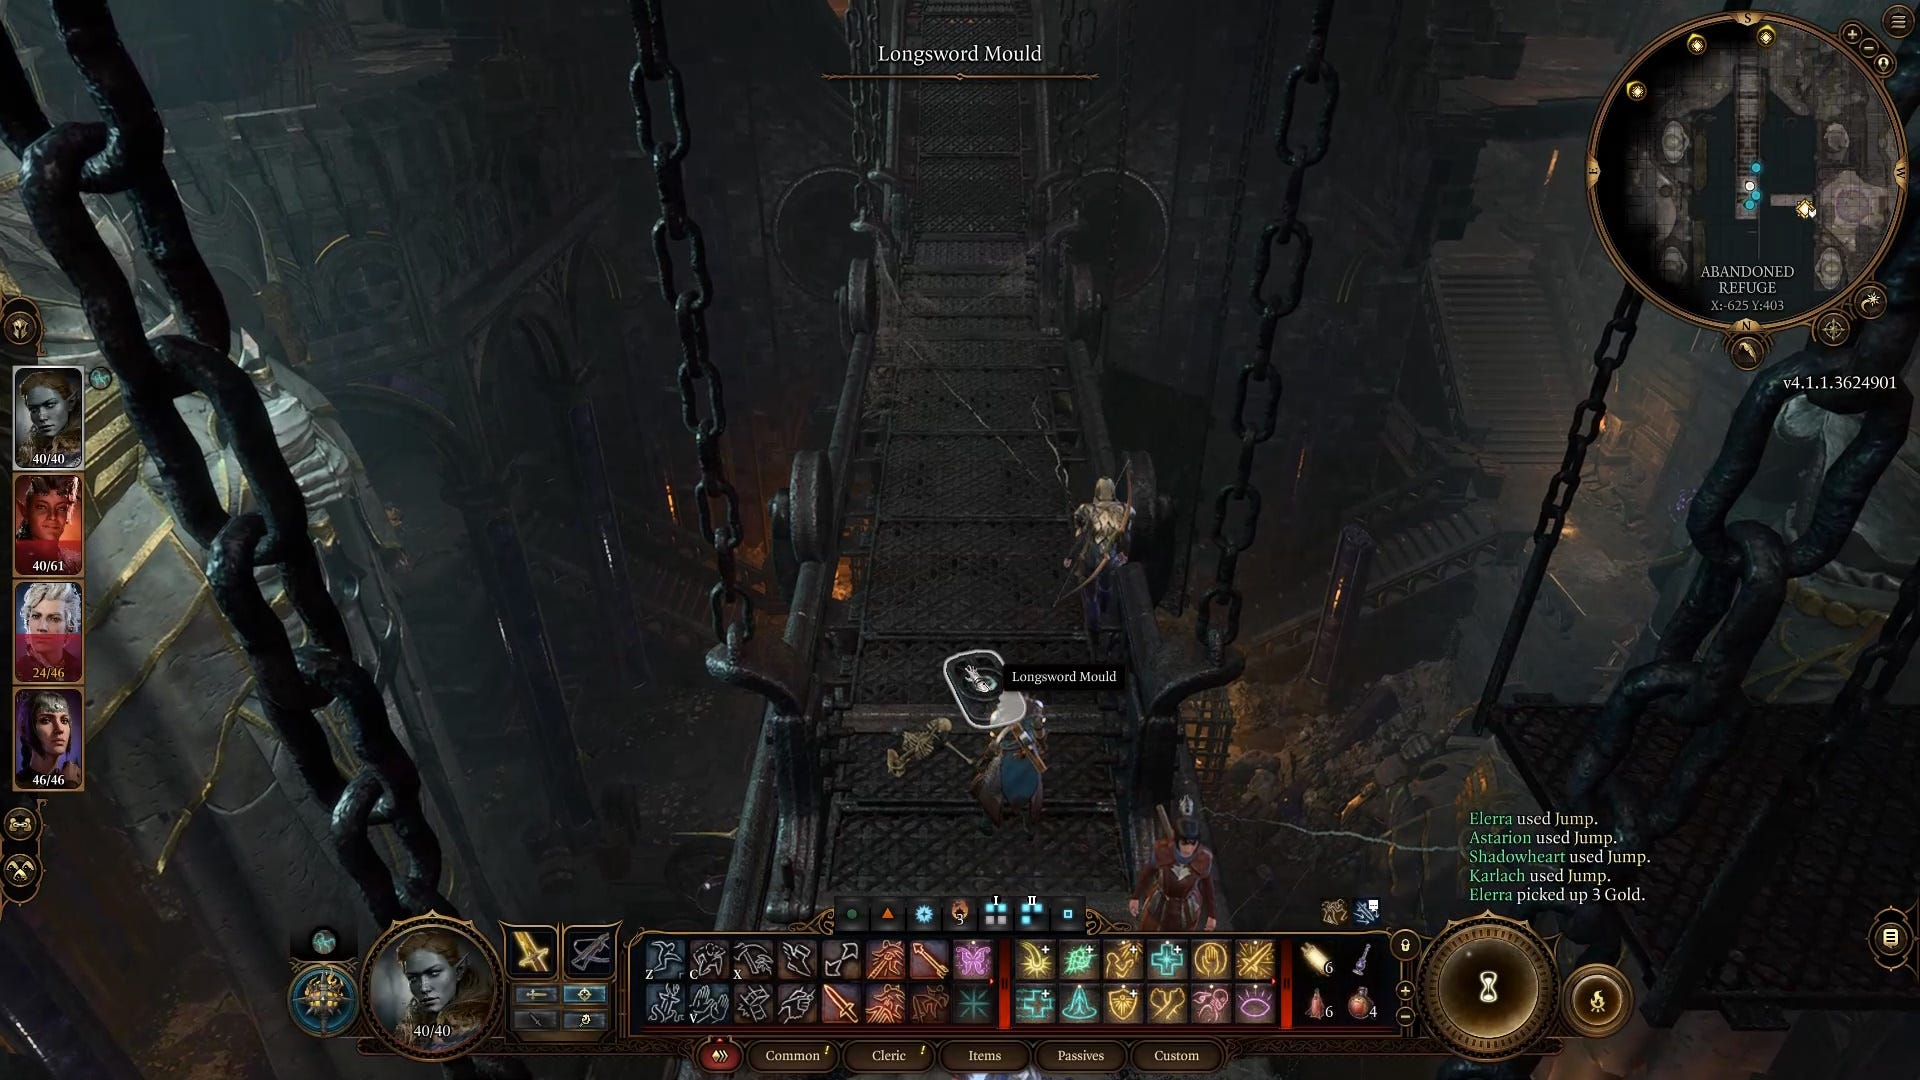
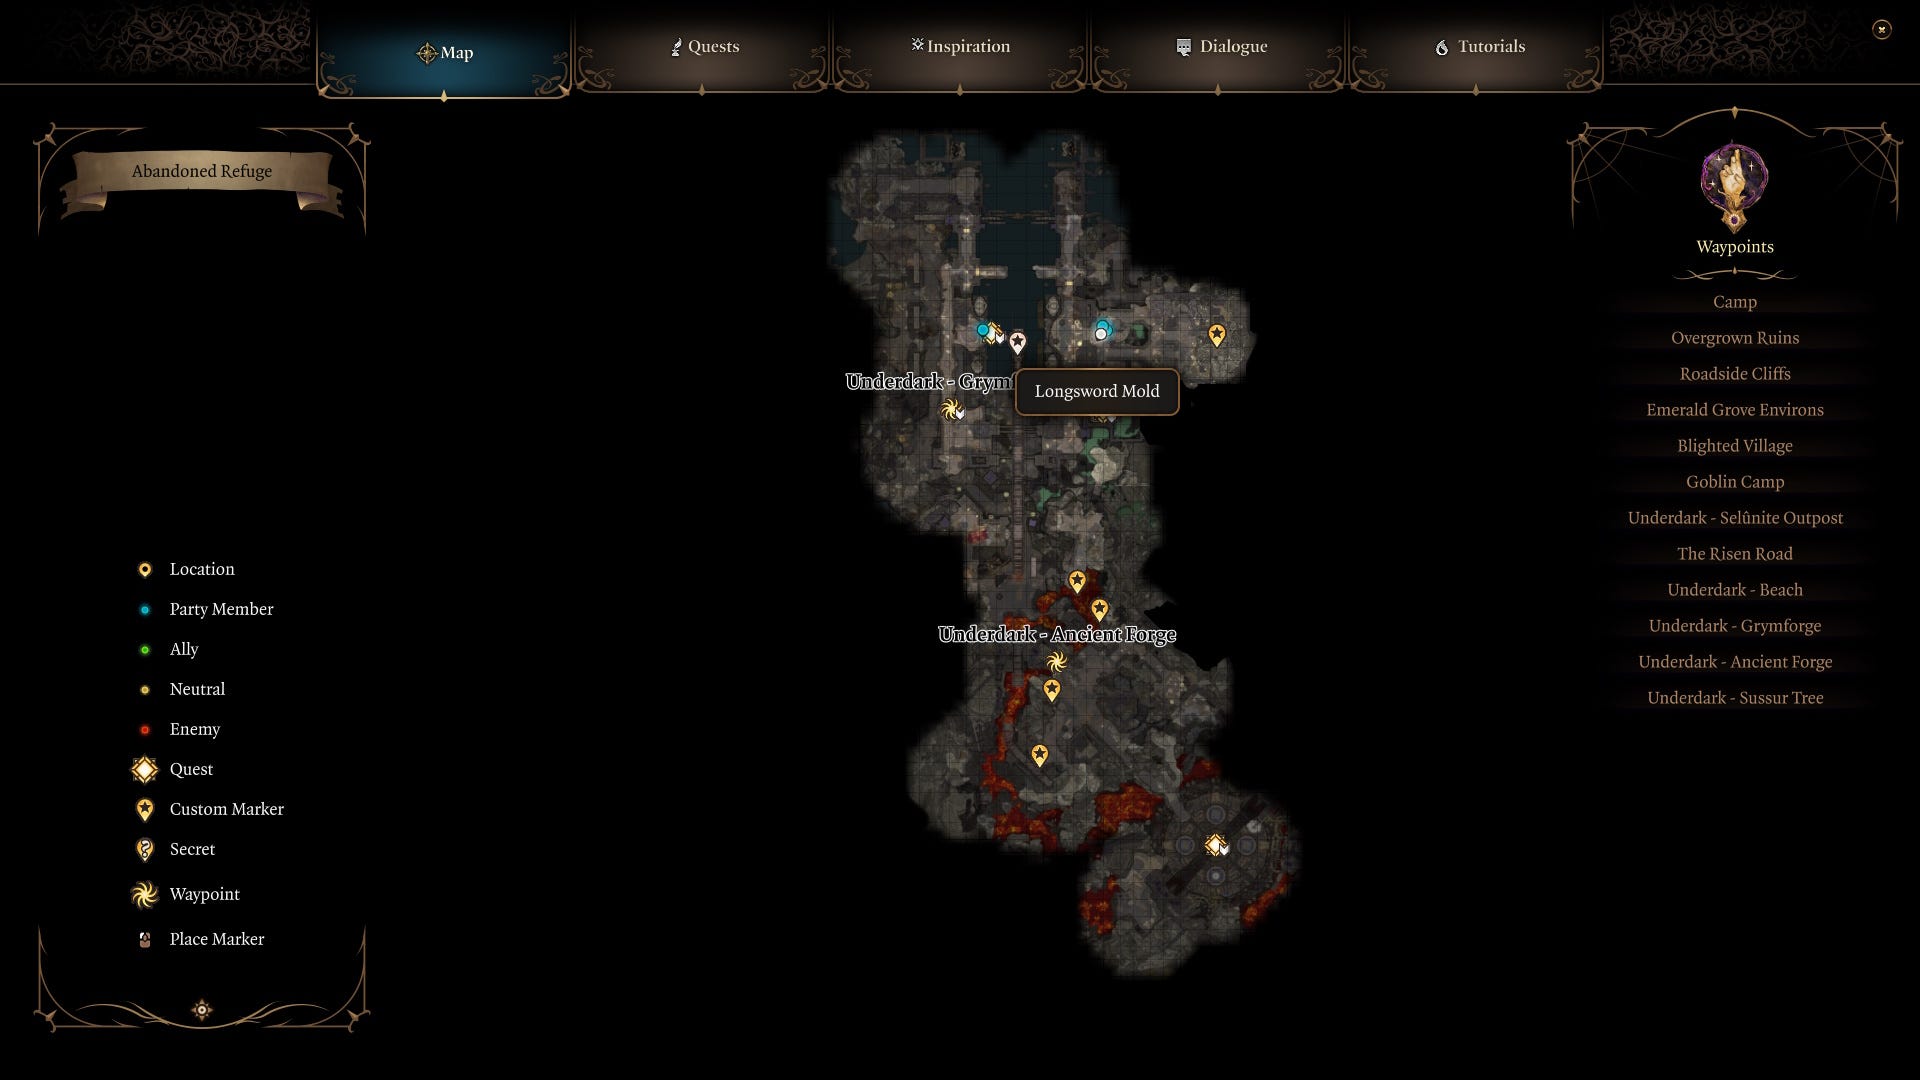
Longsword Mould location
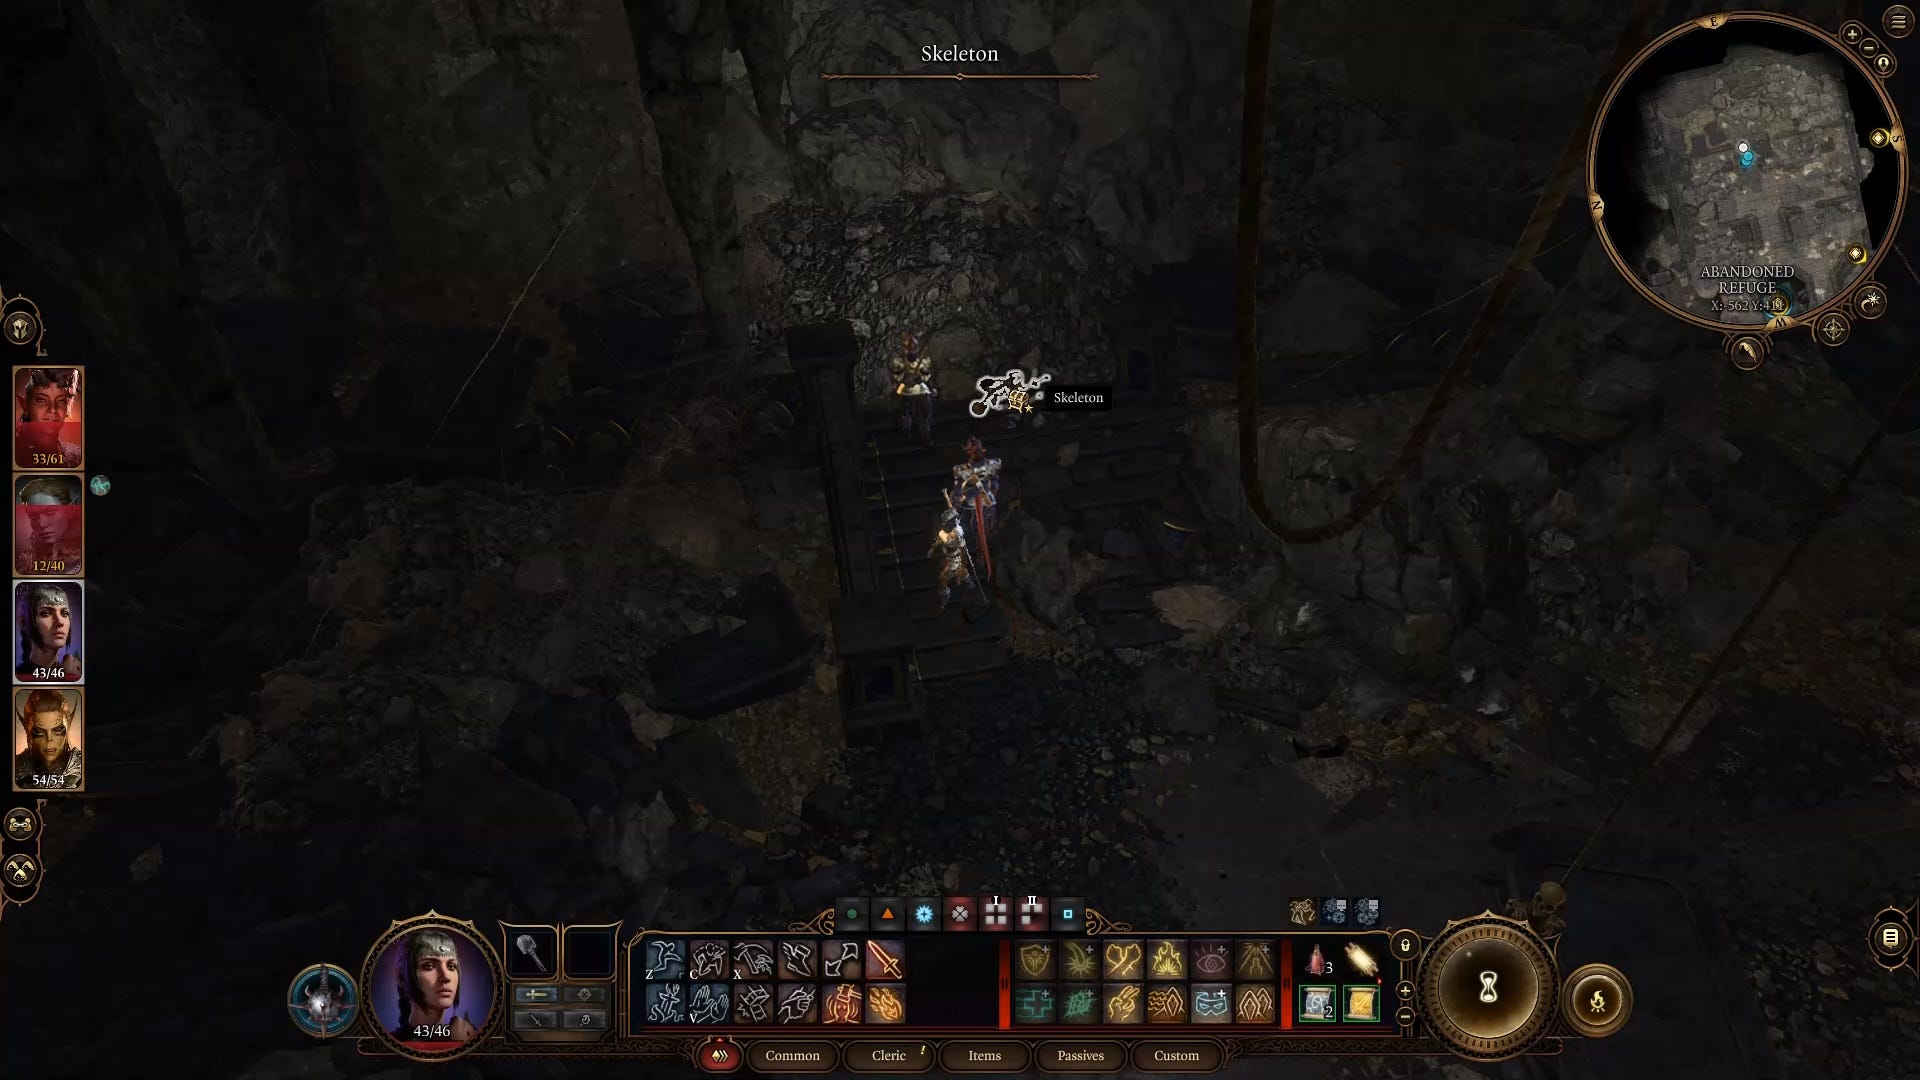
The Longsword Mould is found on the platform just past the first set of levers under the iron ladder in the Underdark - Grymforge area. It's on the floor beside a skeleton.
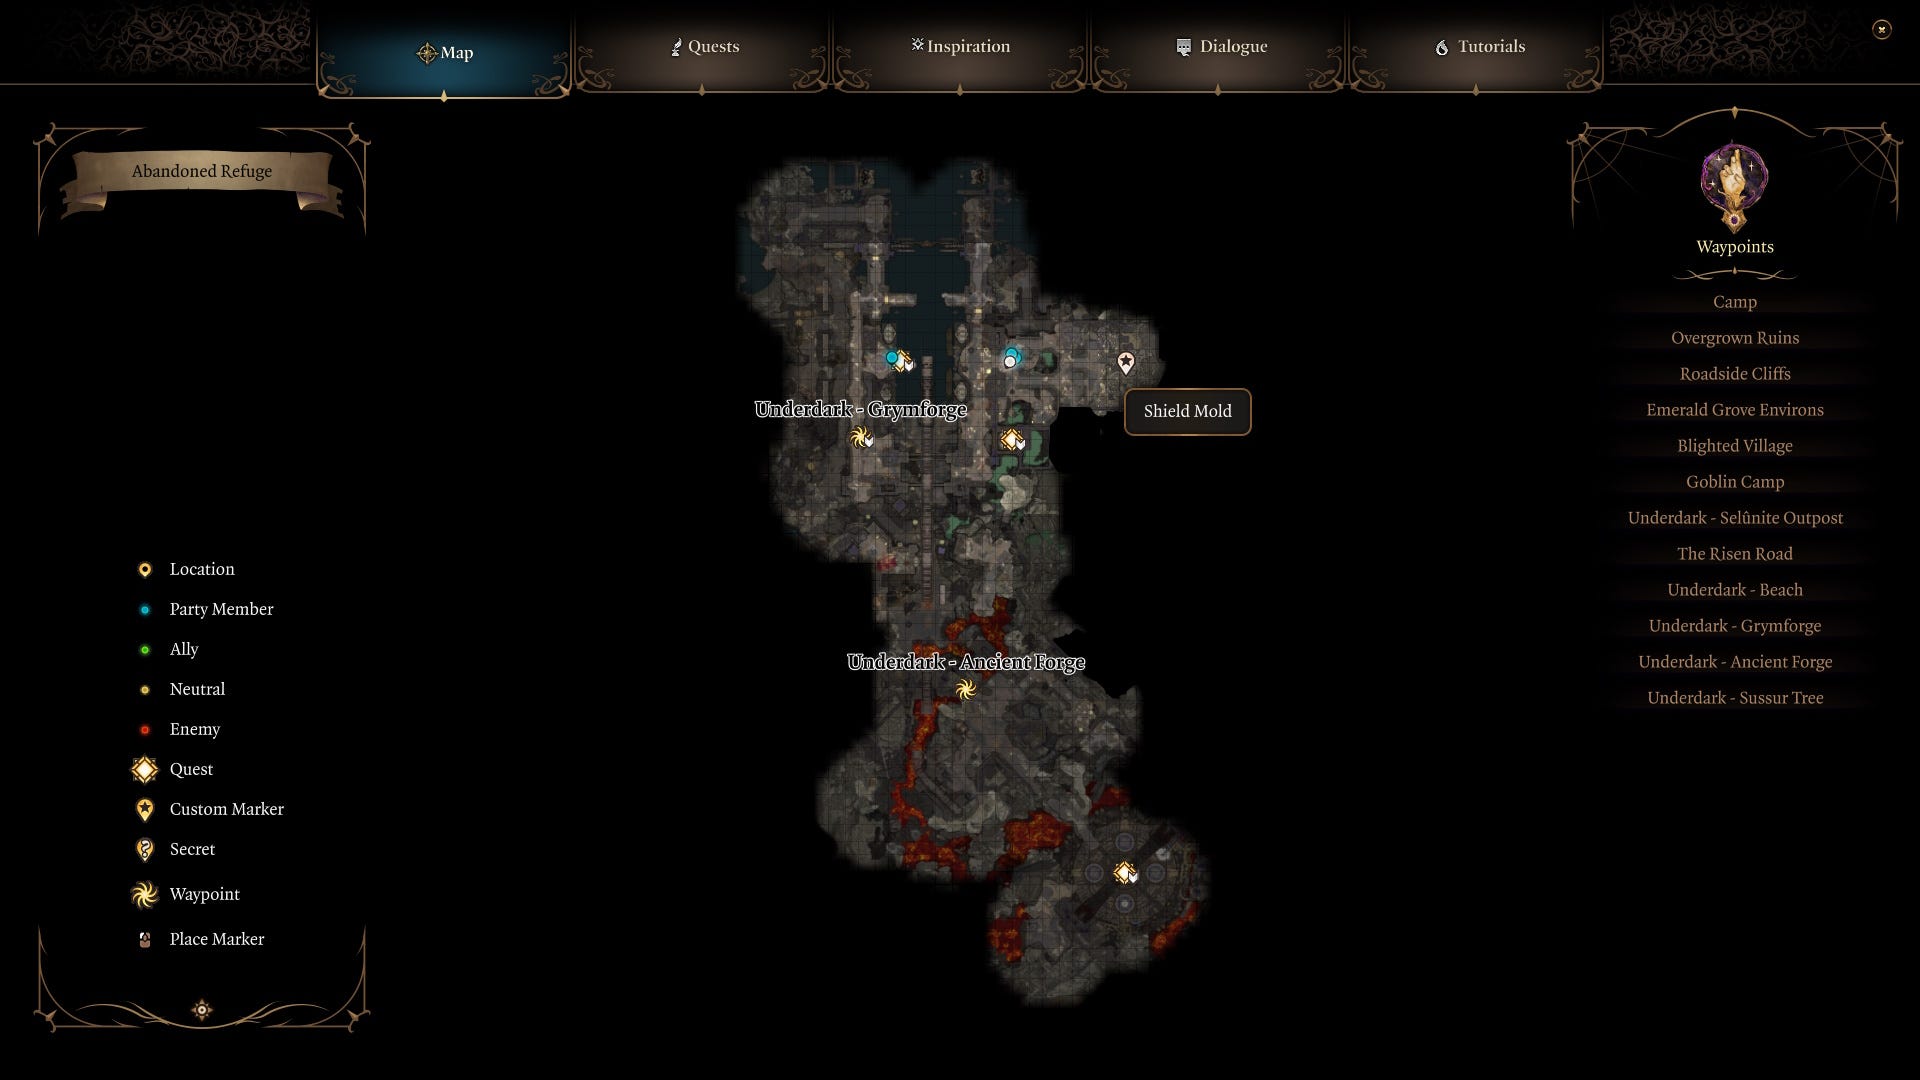
Shield Mould location
The Shield Mould is located on the top of the stairs found behind the double locked doors accessed by using the first platform and set of levers near the iron ladder. You'll need to successfully use a lockpick on the door, then search the skeleton beside the cave-in at the back to get the Shield Mould.
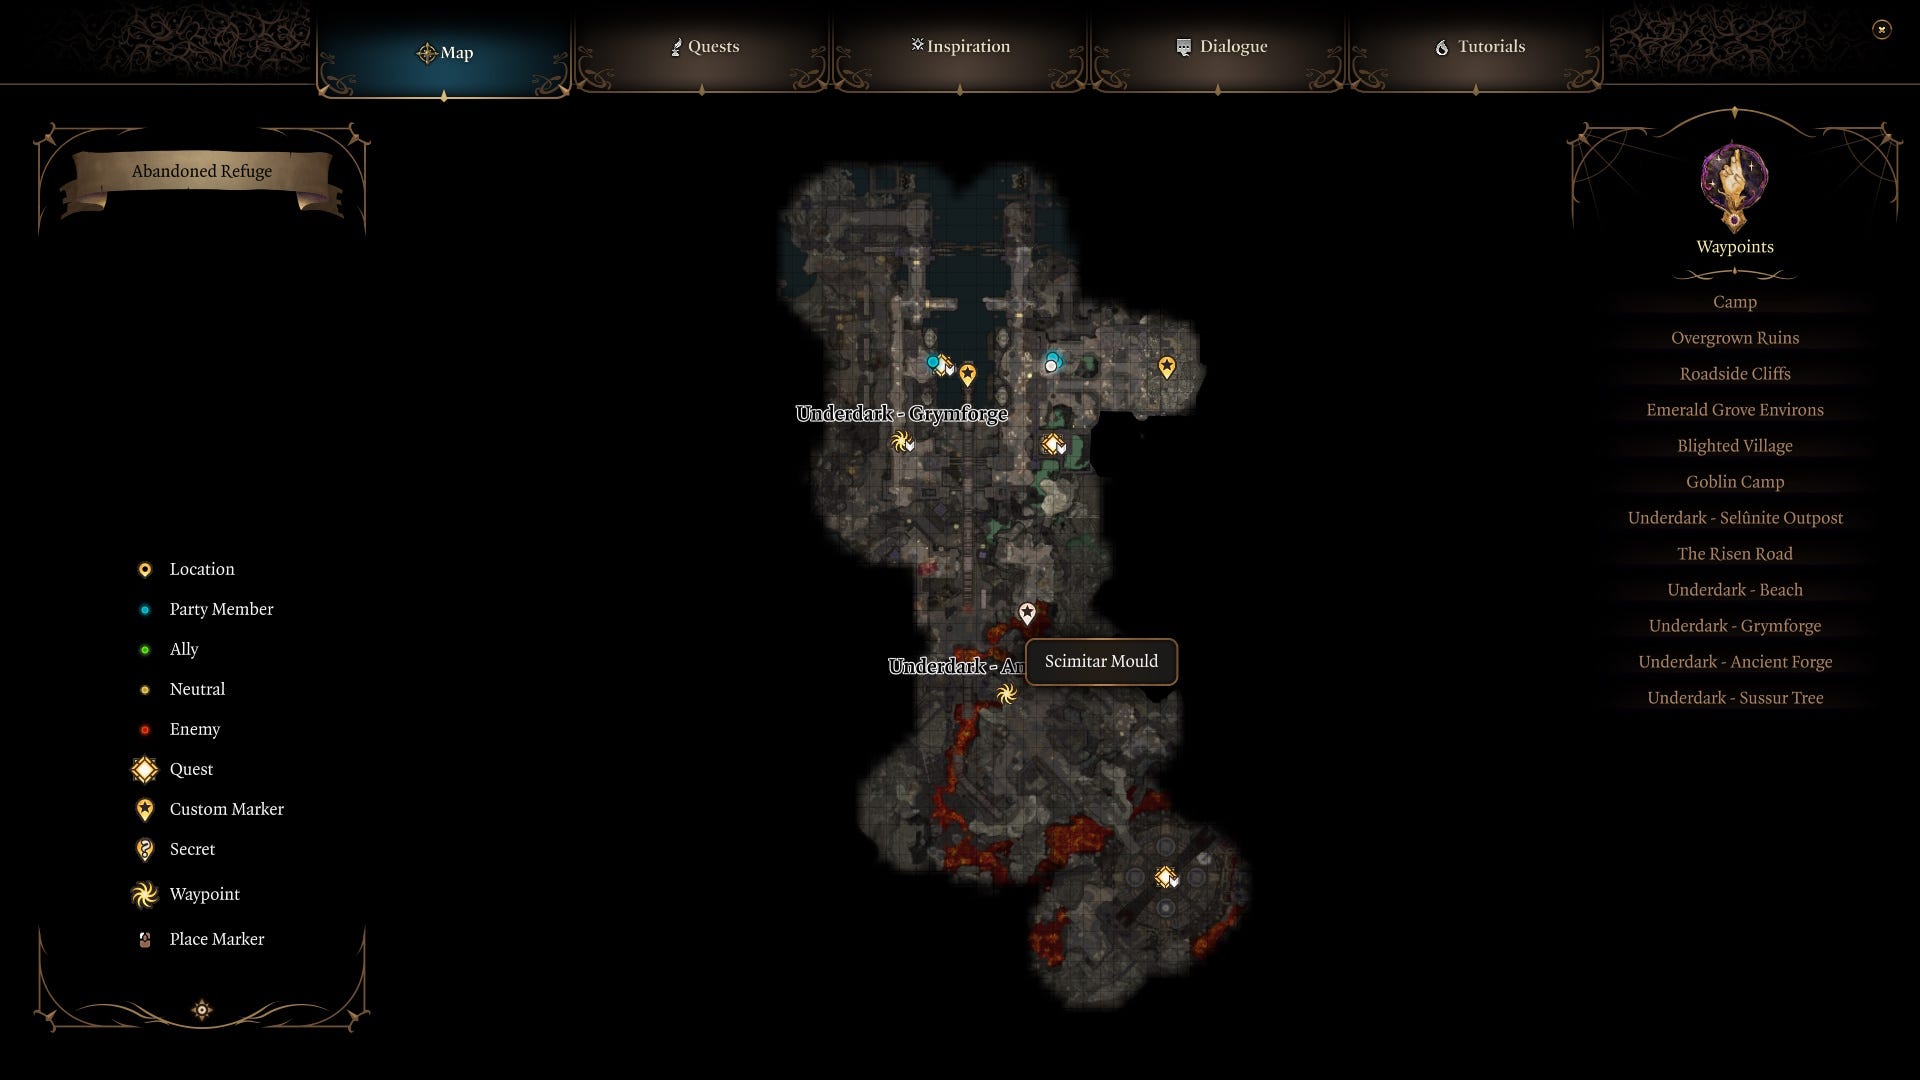
Scimitar Mould location
The Scimitar Mould is found on the corpse beside the second lever you need to use to get a character across to the Underdark - Ancient Forge area.
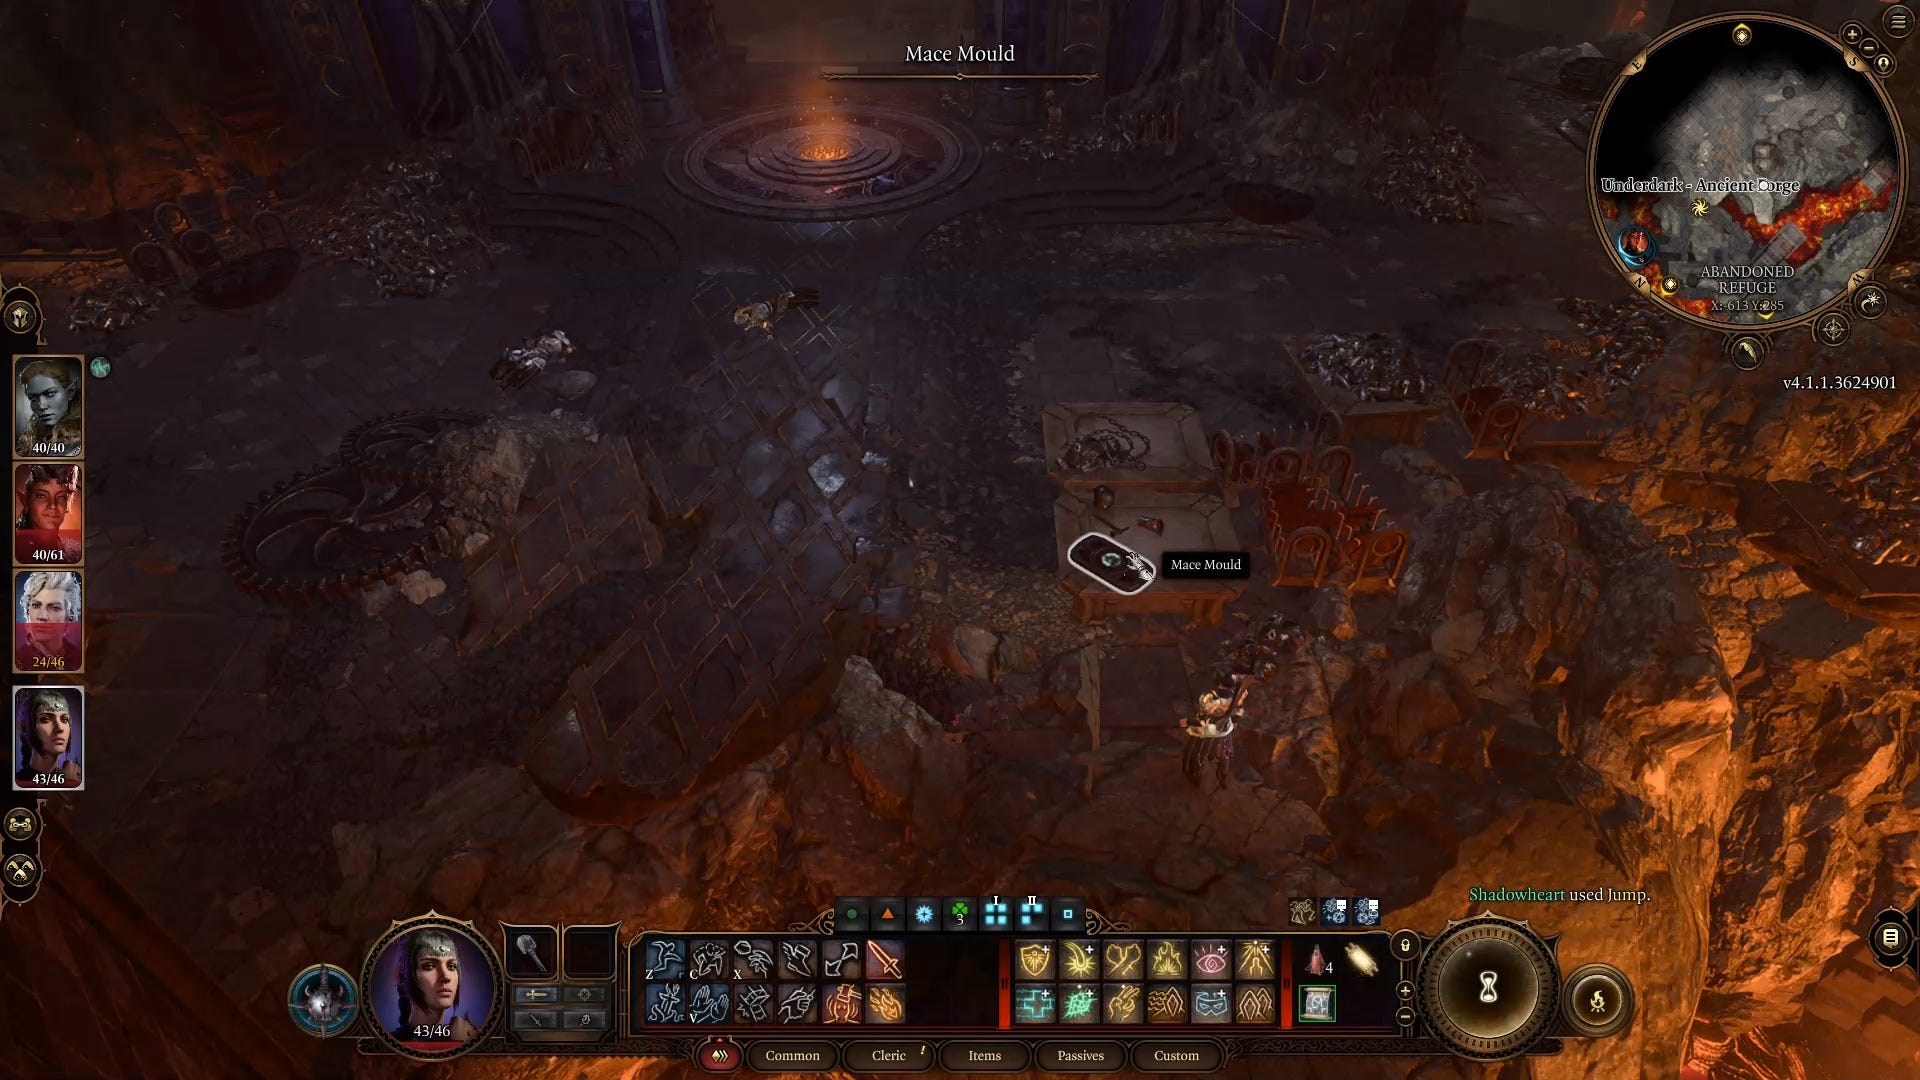
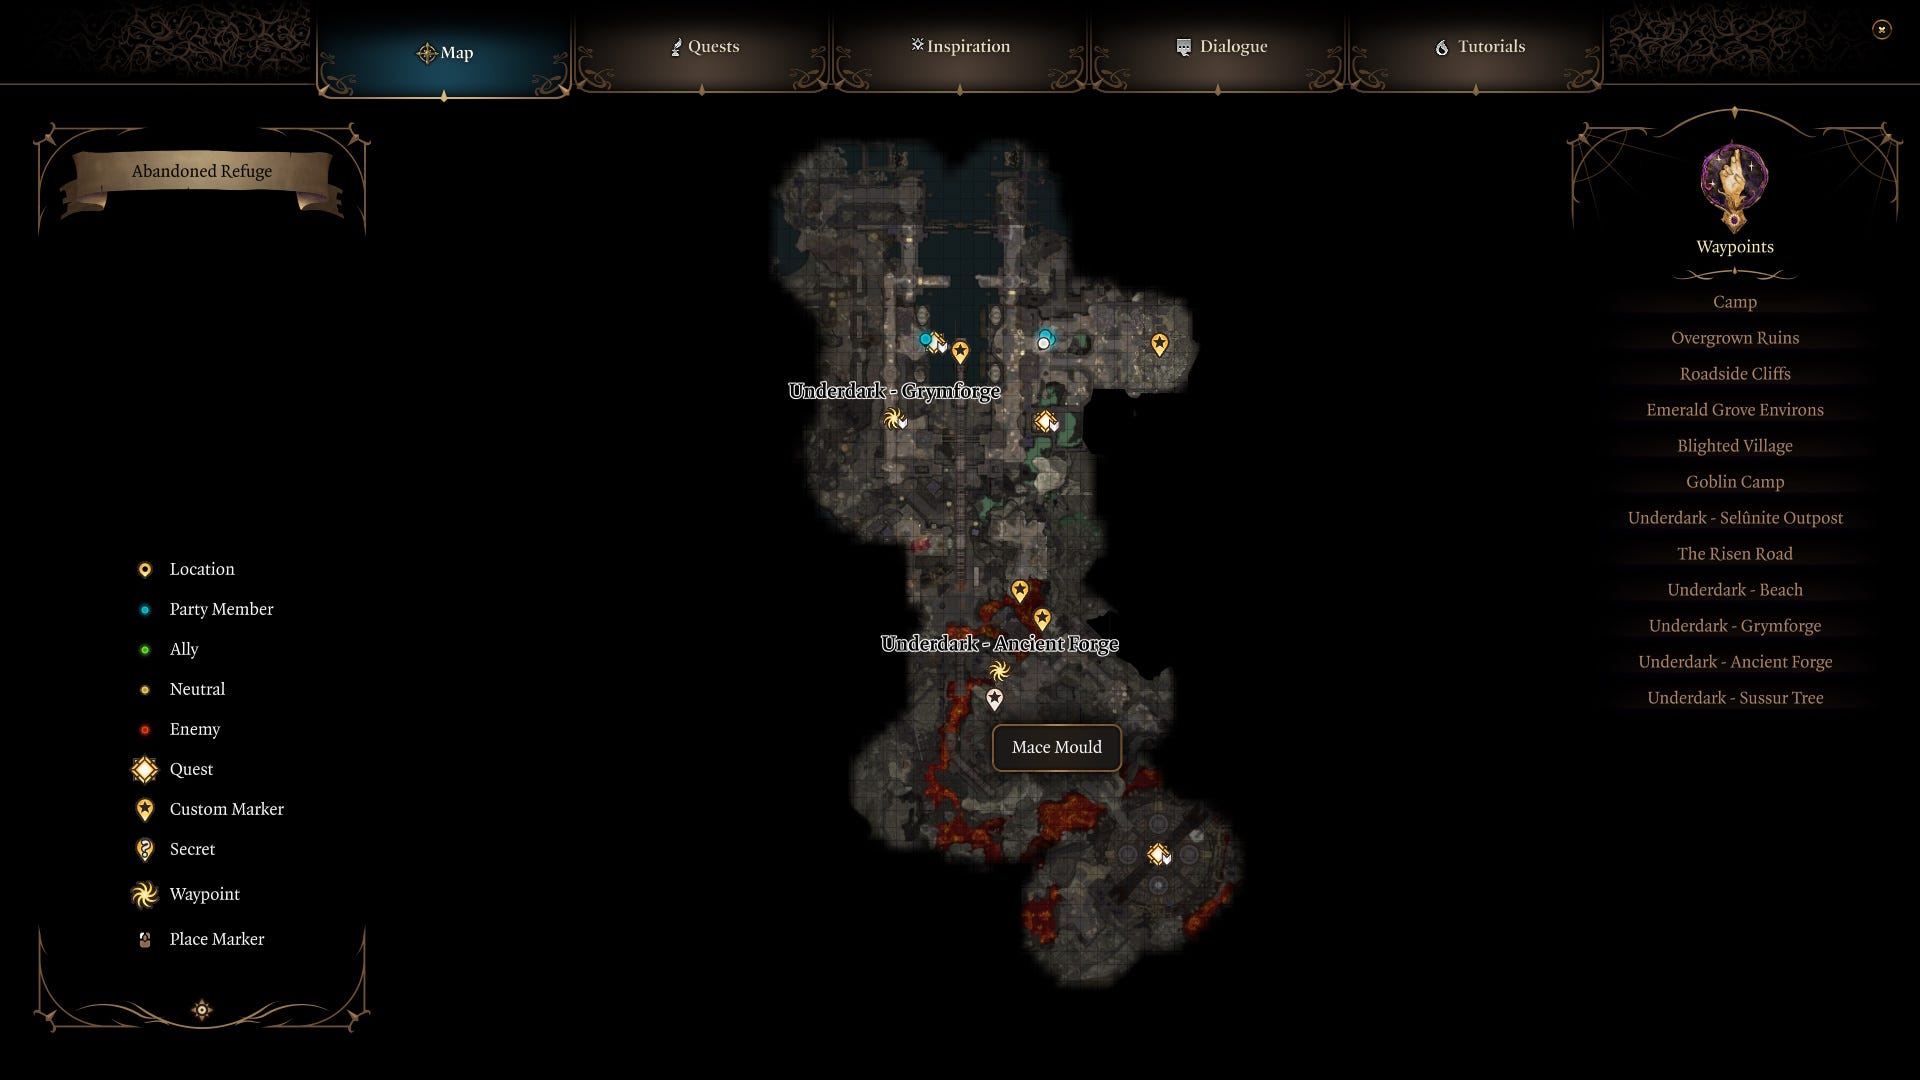
Mace Mould location
The Mace Mould is located on top of a table just right of the Underdark - Ancient Forge teleport waypoint.
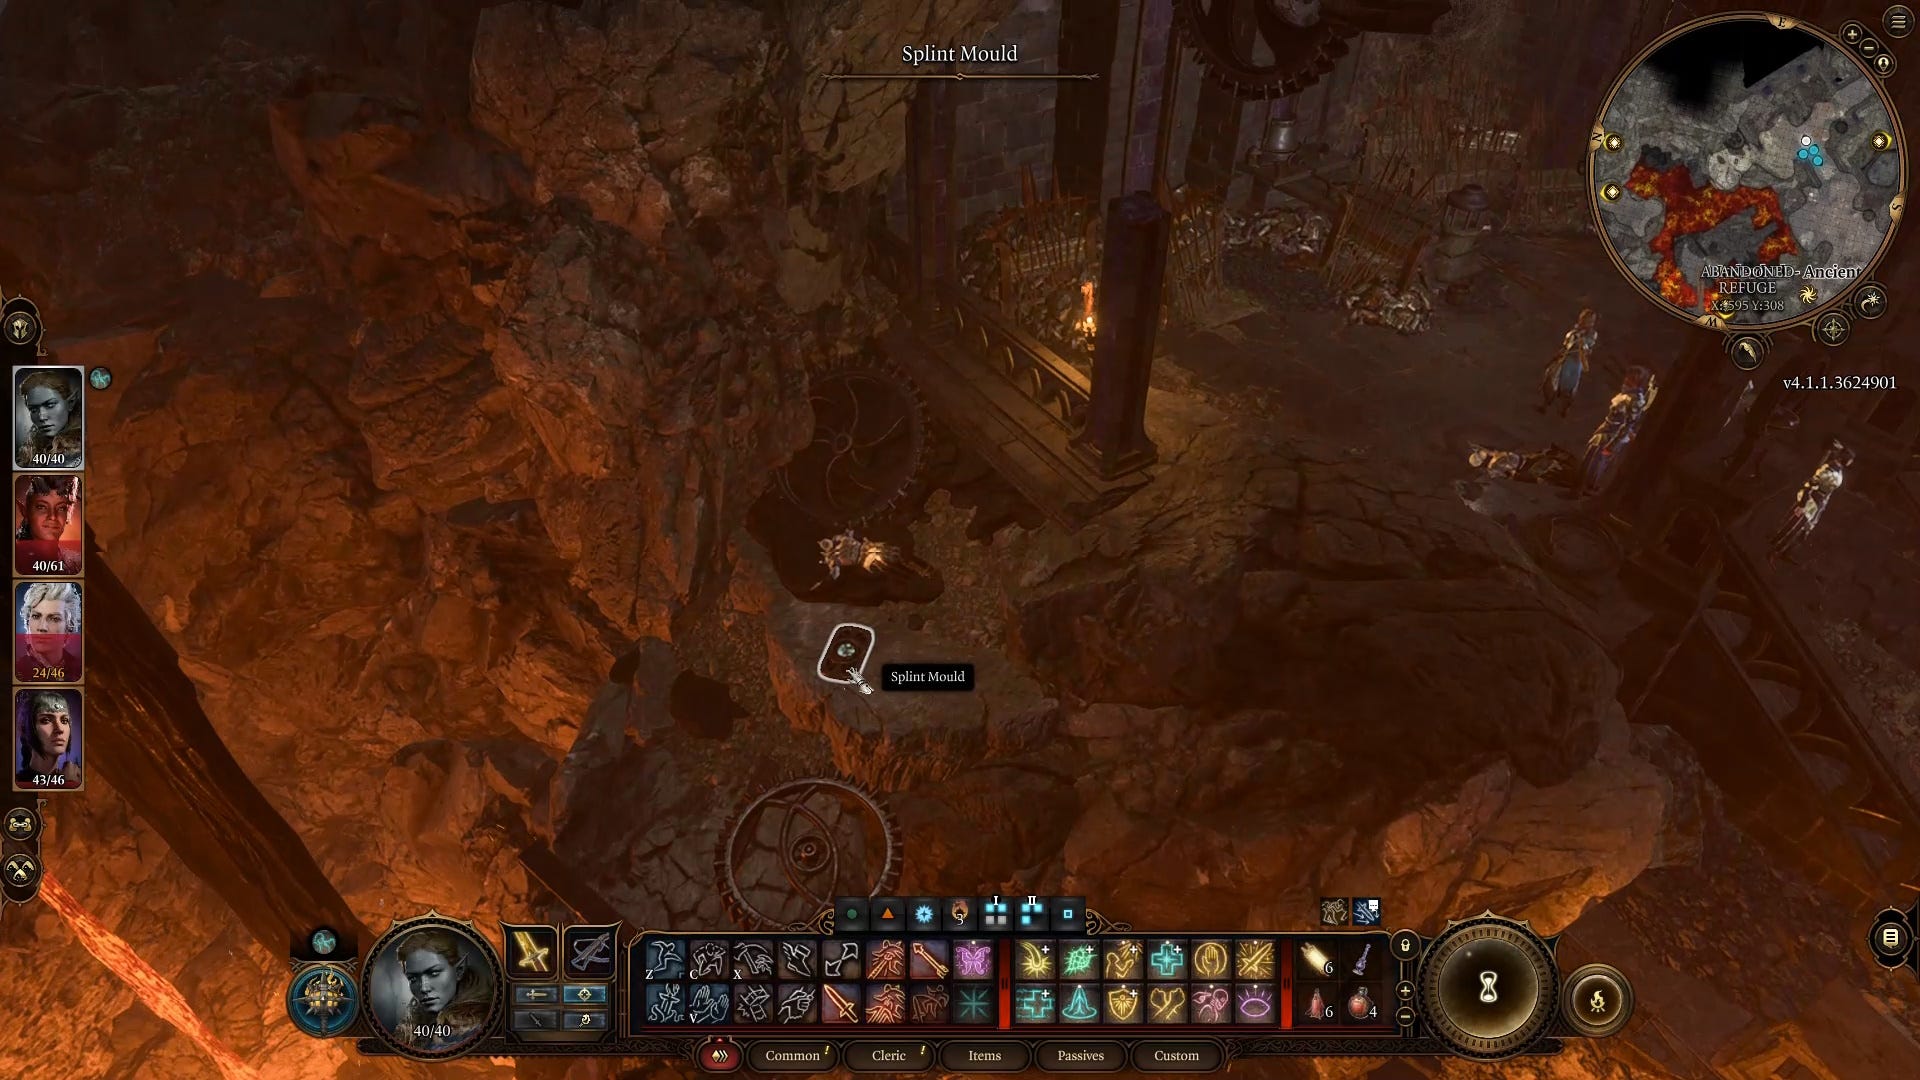
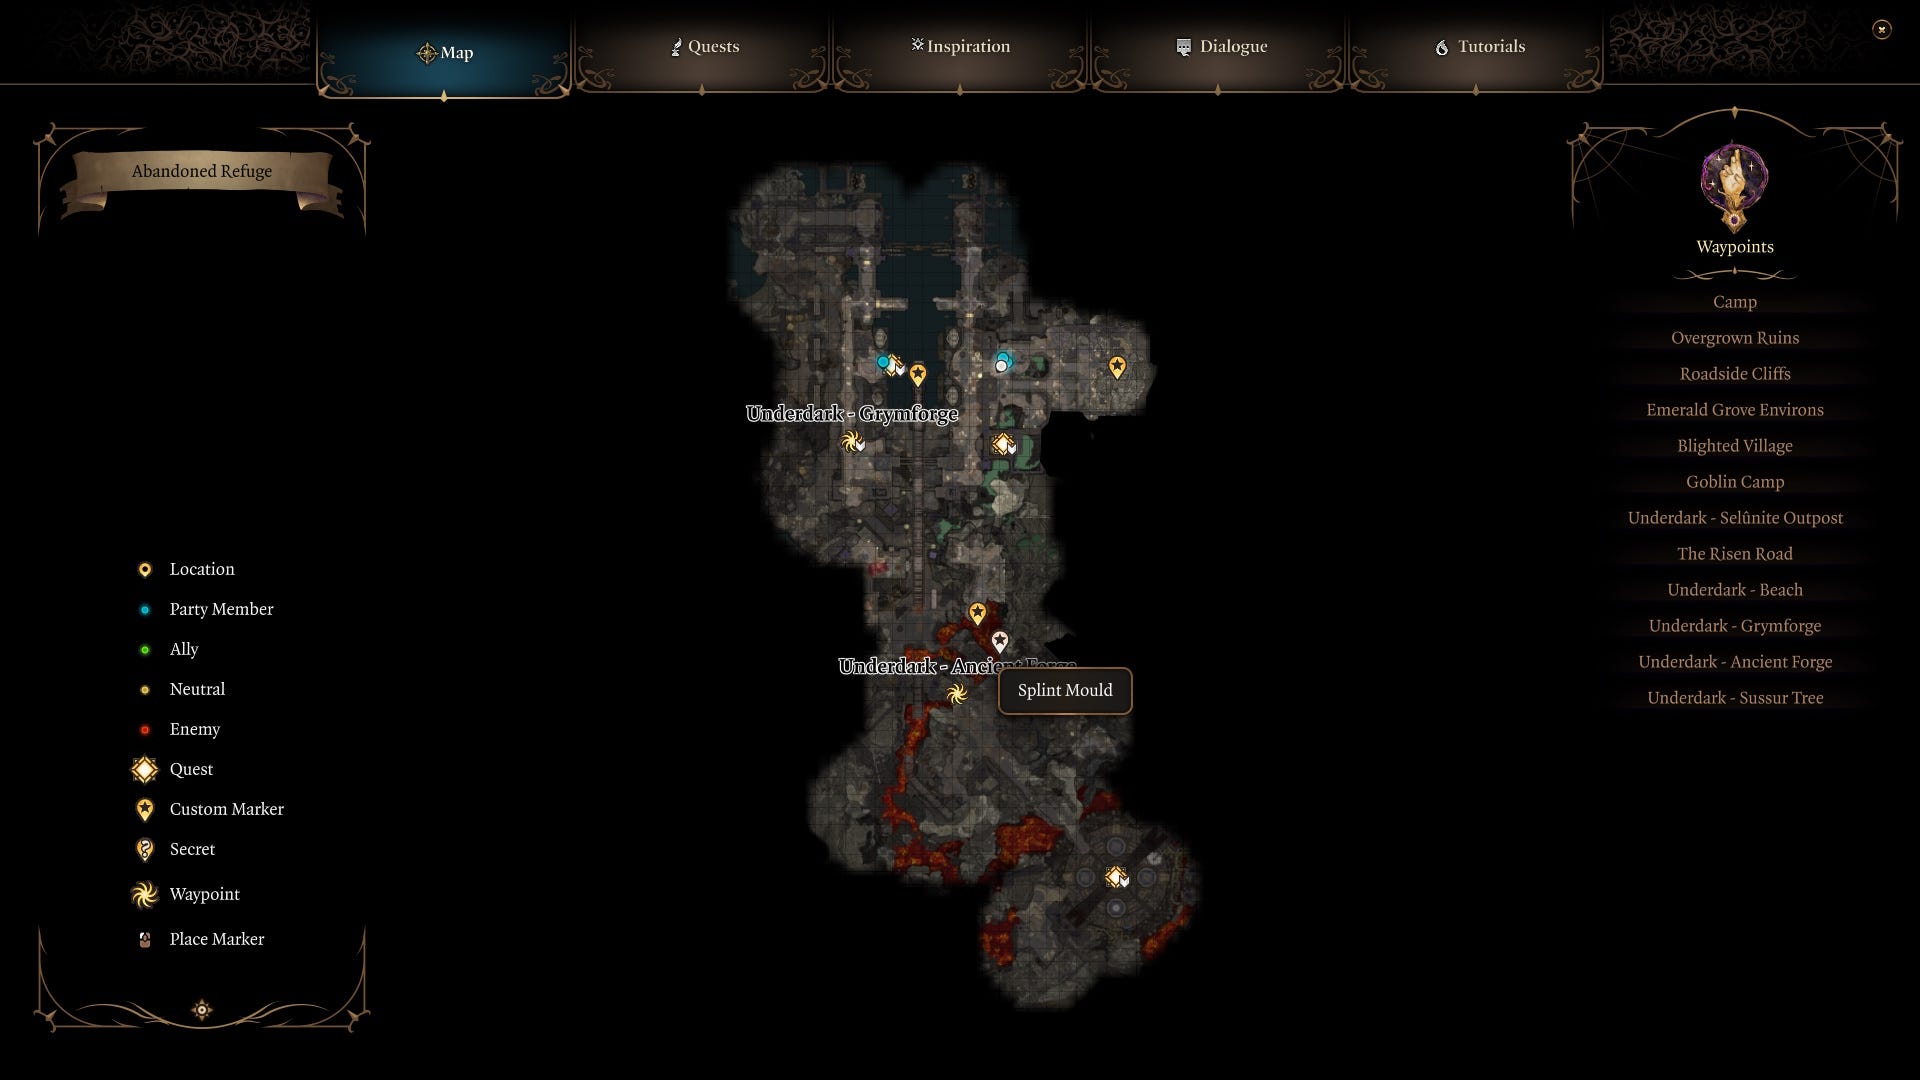
Splint Mould location
The Splint Mould is found on the left path from the Underdark - Ancient Forge teleport waypoint. Go all the way left, up a set of stairs, then turn left towards the lava to spot the Splint Mould between two large cogs.
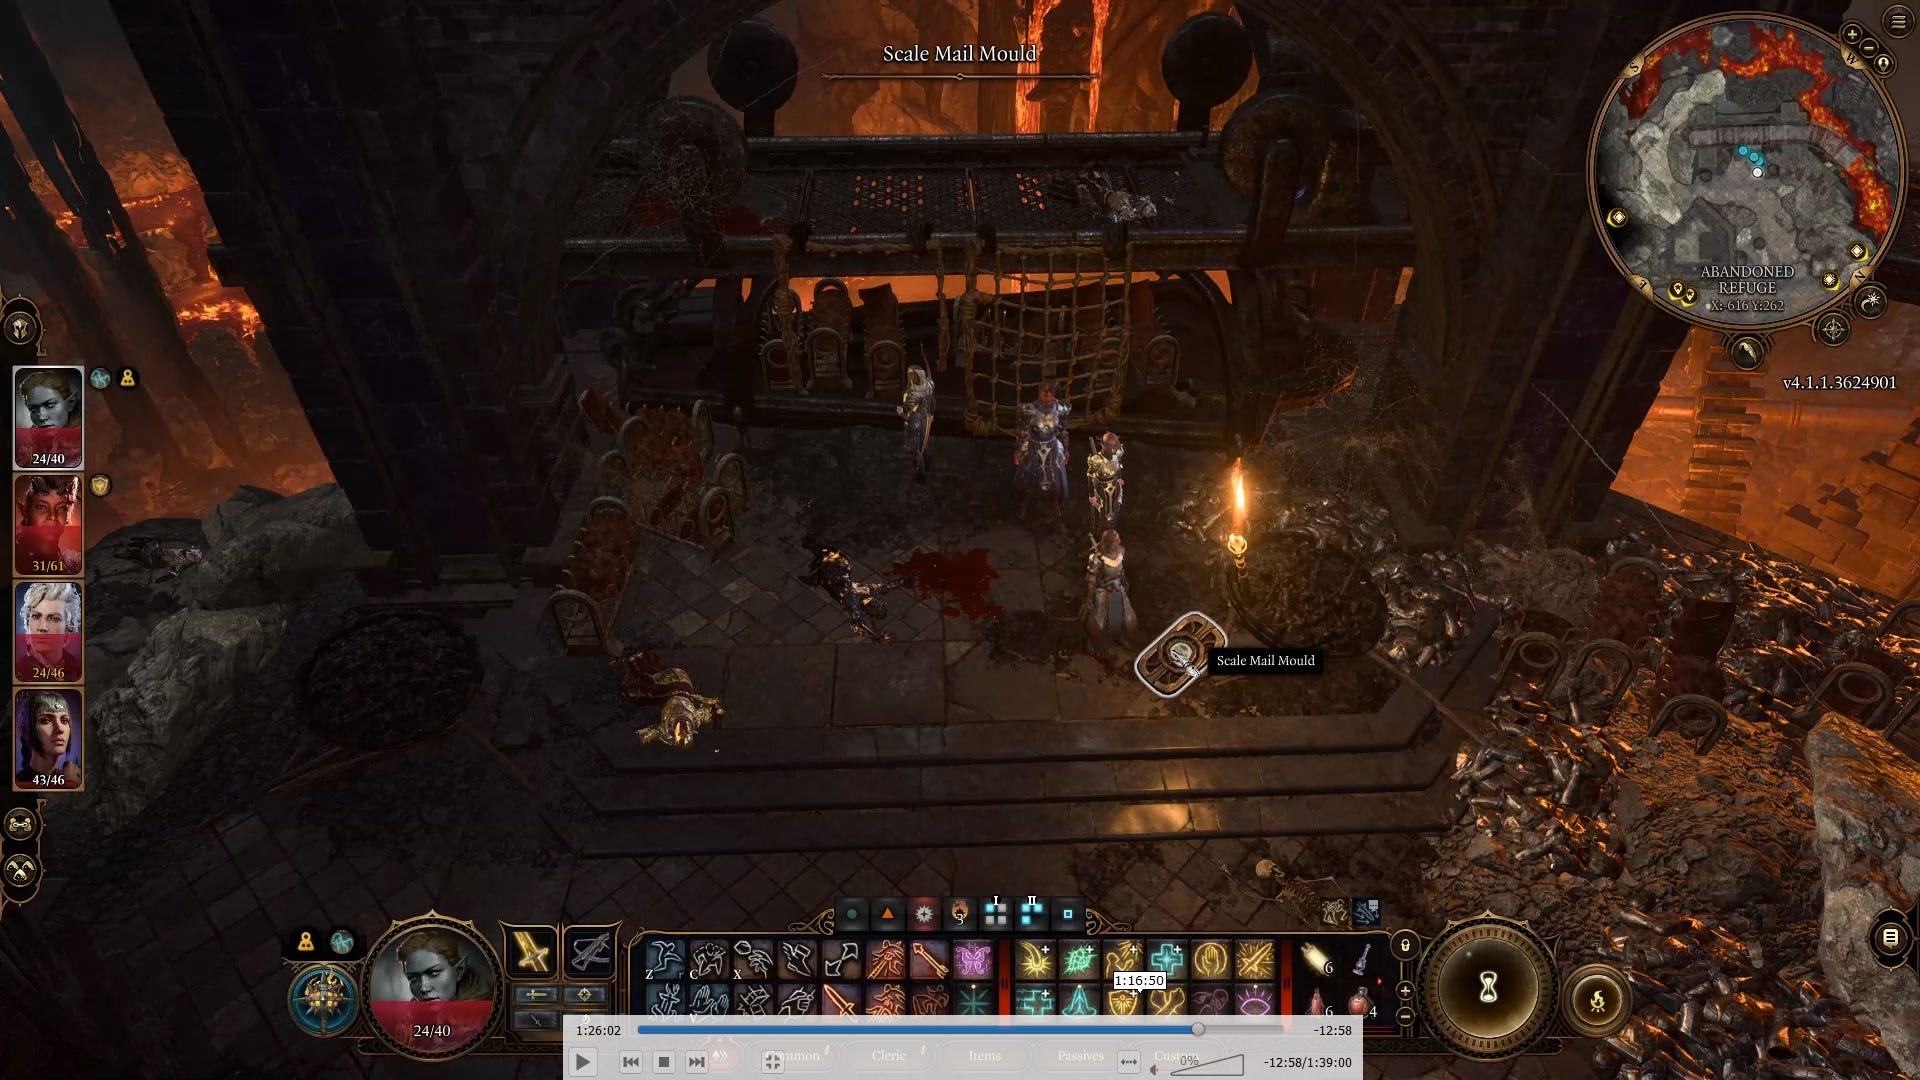
Scale Mail Mould location
The Scale Mail Mould in Baldur's Gate 3 is located by the base of the rope ladder to the right of the Underdark - Ancient Forge teleport waypoint. There are enemies on the ramparts though, so be prepared for a fight.

Good luck at the Adamantine Forge!