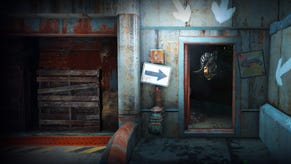
Fallout 4: Tradecraft quest walkthrough
How to complete the Tradecraft quest in Fallout 4.
Tradecraft is the second Railroad Faction quest in Fallout 4, and a necessary part of the main story quest in The Molecular Level if you decide to enlist the Railroad's help in order to build a device that will hijack the Institute's teleportation signal.
Completing this quest will get you Deacon as a companion, and set you on the path toward finishing the entire game, so follow our Tradecraft walkthrough for Fallout 4 guide below to wrap it swiftly.
Tradecraft walkthrough for Fallout 4
Approach Deacon and ask him if the cautious welcome was really necessary. Next, assure him that you'll keep the Railroad's existence a secret from the Institute. Ask why the Railroad needs you then tell Deacon that you're interested in helping their cause. Request specifics about the job he has in mind then agree to get started.
When you're ready to get stuck into the Railroad's dirty business, make your way out of the crypt and exit the Old North Church. Next, remove your hazmat suit and don your favourite combat-ready apparel.
Meet Deacon at the old highway
The old highway - your next destination - lies a short distance to the west of Lexington. As such, open your Pip-Boy map and fast travel to Lexington now. On arrival, turn south-west and locate the overpass in the distance. Make your way over and stand directly underneath.
Next, begin moving west toward the objective marker on your compass. Hop over the face and cross the railway track once you reach it then continue west. A short distance later, you'll meet a snazzily-dressed Deacon on the edge of the ditch.
Engage him in conversation and and tell him that you almost didn't recognise him in his disguise. Once he's explained the basics of your mission, ask for more details and he'll reveal that you're looking for something important that got left behind in the area. Tell him to go on and he'll suggest that you find and question the "tourist".
Follow Deacon and find the "tourist"
Once the conversation has ended, follow Deacon east. Climb up the roof of the abandoned bus and make your way onto the overpass. Continue east and be ready to take down a couple of feral ghouls as you near the large pile of tires to the right. More ghouls will attack from the rear as you pass the bus, so eliminate them before resuming your journey. A little further ahead, you'll spot Ricky, the 'tourist', looking out across the wilderness. Engage him in conversation and respond with the Railroad password.
Ask Ricky for a status update then request that he tell you more about the mines and "chrome-domes". Finally, thank him for his help to bring things to a close.
Next, about-face and speak with Deacon, inquiring why he lied to Ricky. Next, explain that you're unsure if Ricky is telling the truth. Deacon will suggest that you take Ricky at his word and assume that the entrance to the doughnut shop is protected by mines and synths. Ask for more information about the escape tunnel leading into the area then, finally, agree that the tunnel is your safest bet.
Get inside the escape tunnel
Retrace your steps along the road to the west and scramble back down to earth. Next, move north-east, using the objective marker as a guide.
Before long, you'll reach the edge of a ditch and spot a pipe directly below. Drop down and enter the mouth of the pipe. There's a door immediately ahead so use it to access the sewer beyond.
Get Carrington's prototype
Inside, speak with Deacon and find out more about the prototype. Next, let him know that you're ready to go and follow him along the corridor. Wait for Deacon to hack into the terminal then pass through the newly-opened security gate to the right.
Head forward along the corridor and take a right when you reach the metal walkway. Make your way down the slope and be ready to deal with the synth and RadRoach at the bottom. Once it's safe to proceed, turn left, splash through the water and enter the illuminated corridor. Follow it along then step onto the right-hand walkway. Access the terminal at the end and disable the turrets and spotlights.
Next, backtrack along the walkway and take a right at the end. Descend the stone steps then prepare to confront a veritable horde of synths. If you have a frag grenade, consider tossing one along the corridor to take your enemies out in one dramatic pop. When the coast is clear, head east and follow the passage along, descending the steps as you go.
Eventually, you'll reach the mouth of broken pipe. Cautiously peer inside and be ready to take down the synths inside. Next, enter the pipe and follow it along to the end. Activate stealth mode and, moving slowly to avoid alerting the synths in the next room, take a right. Locate the computer terminal and hack it to open the nearby security door.
Enter the room to the south-west and pass through the blue double doors. Quickly eliminate the synths in the area then take a few moments to hunt for useful items. On the ground floor, you'll find a cooking station and a number of beds (if you want to restore your health), plus an ammo box in the room to the north-west.
When you're ready to continue, climb the steps to the south-west and enter the room at the top. There's a (mostly uninteresting) expert-level terminal on the central desk and another alongside the door to the south-west. If you're suitably-skilled, use the latter to disable the laser tripwires along the next corridor then head on through the door.
When you reach the junction ahead, note the synth-filled room to the left then take a right, grabbing the medical supplies from the washroom at the end of the passage. You'll likely alert the synths as you go - so use the doorways as cover and take them all down.
Once it's safe to proceed, pick the locked door near the washrooms and clear out the ammo-filled storeroom beyond. Next, backtrack along the corridor and enter the room that you noted earlier. Pass through the door to the right and follow the corridor along as it turns south-east. Up ahead, you'll see a corridor leading left to Department X and R&D, plus a corridor to the right leading toward the Databanks room.
Enter the Databanks room first and access the research terminal on the central desk. When you've read through the logs, approach the terminal on the wall to the south-west. Hack into it and unlock the security doors. You can now enter the room to the north-west and grab the bobby pin box, Rad-X and Med-X inside.
Once you're suitably restocked, head back along the corridor and pass through the door marked Department X and R&D. Enter the room at the end and be ready to deal with another batch of synths. When all enemies have been defeated, Deacon will access the nearby terminal and open the large vault in the south-eastern wall. Head inside and grab Carrington's Prototype (plus the Stealth Boys) from the shelf on the back wall. After the vault has been opened, you'll automatically receive the fancy Deliverer weapon.
Leave the switchboard
Before you exit the complex, loot the room outside the vault (there's an armour workbench in the corner, which might prove handy) then walk back along the corridor outside.
Take a left at the junction and move along the passage marked 'exit'. Watch out for mines littering the floor and detonate them with a well-aimed shot before continuing. When it's safe to proceed, climb the steps and pass through the door at the end of the corridor.
On the other side, eliminate the final two synths in the area then head up the metal staircase. Locate the terminal to the left of the red column and use it to turn on the elevator and deactivate the turret system. Next, proceed east to the end of the walkway, push the call button to summon the elevator, step in and ascend to ground level.
At the top, shift the bookcase blocking your route forward and step out into the doughnut shop. Finally, climb the steps ahead and exit through the door to the right.
Meet Deacon at the Old North Church
When you emerge at the foot of the staircase, open your Pip-Boy's map and fast travel back to the Old North Church. Enter the building then work your way down through the crypt until you reach the Railroad's base. You'll arrive just in time to hear the end of Deacon and Desdemona's conversation; when Desdemona asks you if Deacon's story is true, decide whether you want to lie or not, then agree to join the Railroad. Pick a code name that you like and the Tradecraft quest will come to an end.
With the mission over, a new faction quest - Boston After Dark - will be added to your log. However, you won't need to do that in order to progress the main story quest. Instead, follow Desdemona along the passage into Railroad HQ - which will be now be available as a fast travel option on your map.
The Molecular Level (continued)
Approach Desdemona and, finally, she'll be ready to help with The Molecular Level story quest. Tell her about the Signal Interceptor and reveal what you know about the Institute's teleportation relay.
Impressed, Desdemona will offer the assistance that you need. This completes the 'Get help to build the Signal Interceptor' and '(Optional) Talk to the Railroad' objectives. Note that the next part of the quest will change depending on the faction you chose to align with - but we'll be sticking with the Railroad for the purposes of this guide.
Talk to Tinker Tom
Locate Tinker Tom nearby and engage him in conversation. Hand over the plans and ask if he can build the machine. Inquire about the parts and you'll learn that, in order to craft the interceptor, you'll need a safehouse with a workshop. If you don't have one already, you'll want to talk to PAM; if you do, you can advance to the next page and skip the first step - simply visit your safehouse and build the required reflector platform from the workbench Special menu.
(Optional) Talk to PAM about Mercer Station
When the conversation is over, follow the objective marker to locate PAM. Ask her about the distribution centre and the Mercer Safehouse sidequest will be added to your log.
- Our walkthrough continues with a step-by-step guide to completing Fallout 4: Mercer Safehouse sidequest.
- You can find the rest of our Fallout 4 guide from the first page of this article.
You can also read our guides on where to find all of Fallout 4's Bobblehead locations, how to locate and romance all Fallout 4 companions, how to use cheat and console commands to help you out in combat, and how to get started with Fallout 4's base building.
Plus, we've also got a Fallout 4: Far Harbor walkthrough if you're looking for how to complete Fallout 4's main expansion.


