The Maps of Battlefield 4
Heavy ordnance survey.

The Battlefield series has always been a cartographer's dream. Whereas other shooter franchises are content with densely packed arenas in which players can scurry about like well-armed lab rats, head-shotting each other over each piece of cheese, Battlefield maps have always felt like, well, like maps. Actual places, theatres of war, where terrain and elevation can play a tangible role in victory - or defeat.
With Battlefield 4, that tendency has reached its apex. The maps in this latest iteration are bigger and more beautiful, in their own scorched and ruined way. They're also more interactive, with real-world features like raised bollards that can be used to stymie enemy vehicles and elevators that will whisk you to a skyscraper roof for a truly elevated view of the warzone.
These are maps that will still be revealing new routes, fresh vantage points and cunning corners even after months of play. Here, then, is our introductory guide to the battlefields of Battlefield 4.
Siege of Shanghai
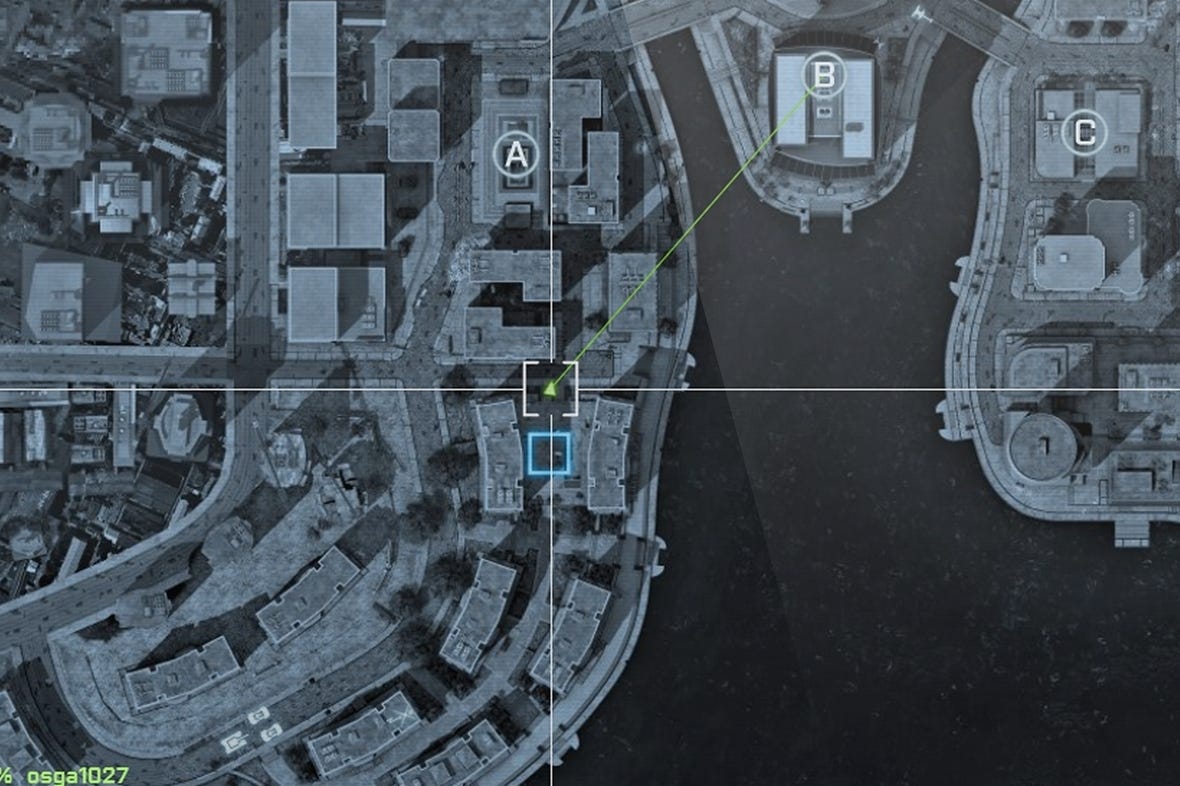
This is the map that most fans will be familiar with, since it formed the basis of the most recent beta. It's an urban map, set around a U-shaped waterfront area. The five Conquest capture points are spaced along the curve of the bay, with the central one the most tactically advantageous: whichever side claims that gets access to more options in Commander Mode.
Although you can use boats to cross the bay quickly, it's really a map where tanks are the vehicles of choice. Skilled gunners will clock up huge points here, as the streets offer long lines of sight, but anyone who can steer a helicopter between the skyscrapers intact will also do a lot of damage. Infantry will find progress tough without heavy back-up, especially at the bridges which form natural choke points. It's not entirely useless to be on foot, however, with two of the capture points located in shopping malls. One is underground, the other offers elevated positions on either side of the flag, creating a killing box that can defeat even the most heavily armoured intruder.
Siege of Shanghai's "levolution" moment is the demolition of the central tower, caused by shooting out the supporting columns at the front. It's a dramatic sight, but one that only really has a strategic purpose if you've got Commanders in play.
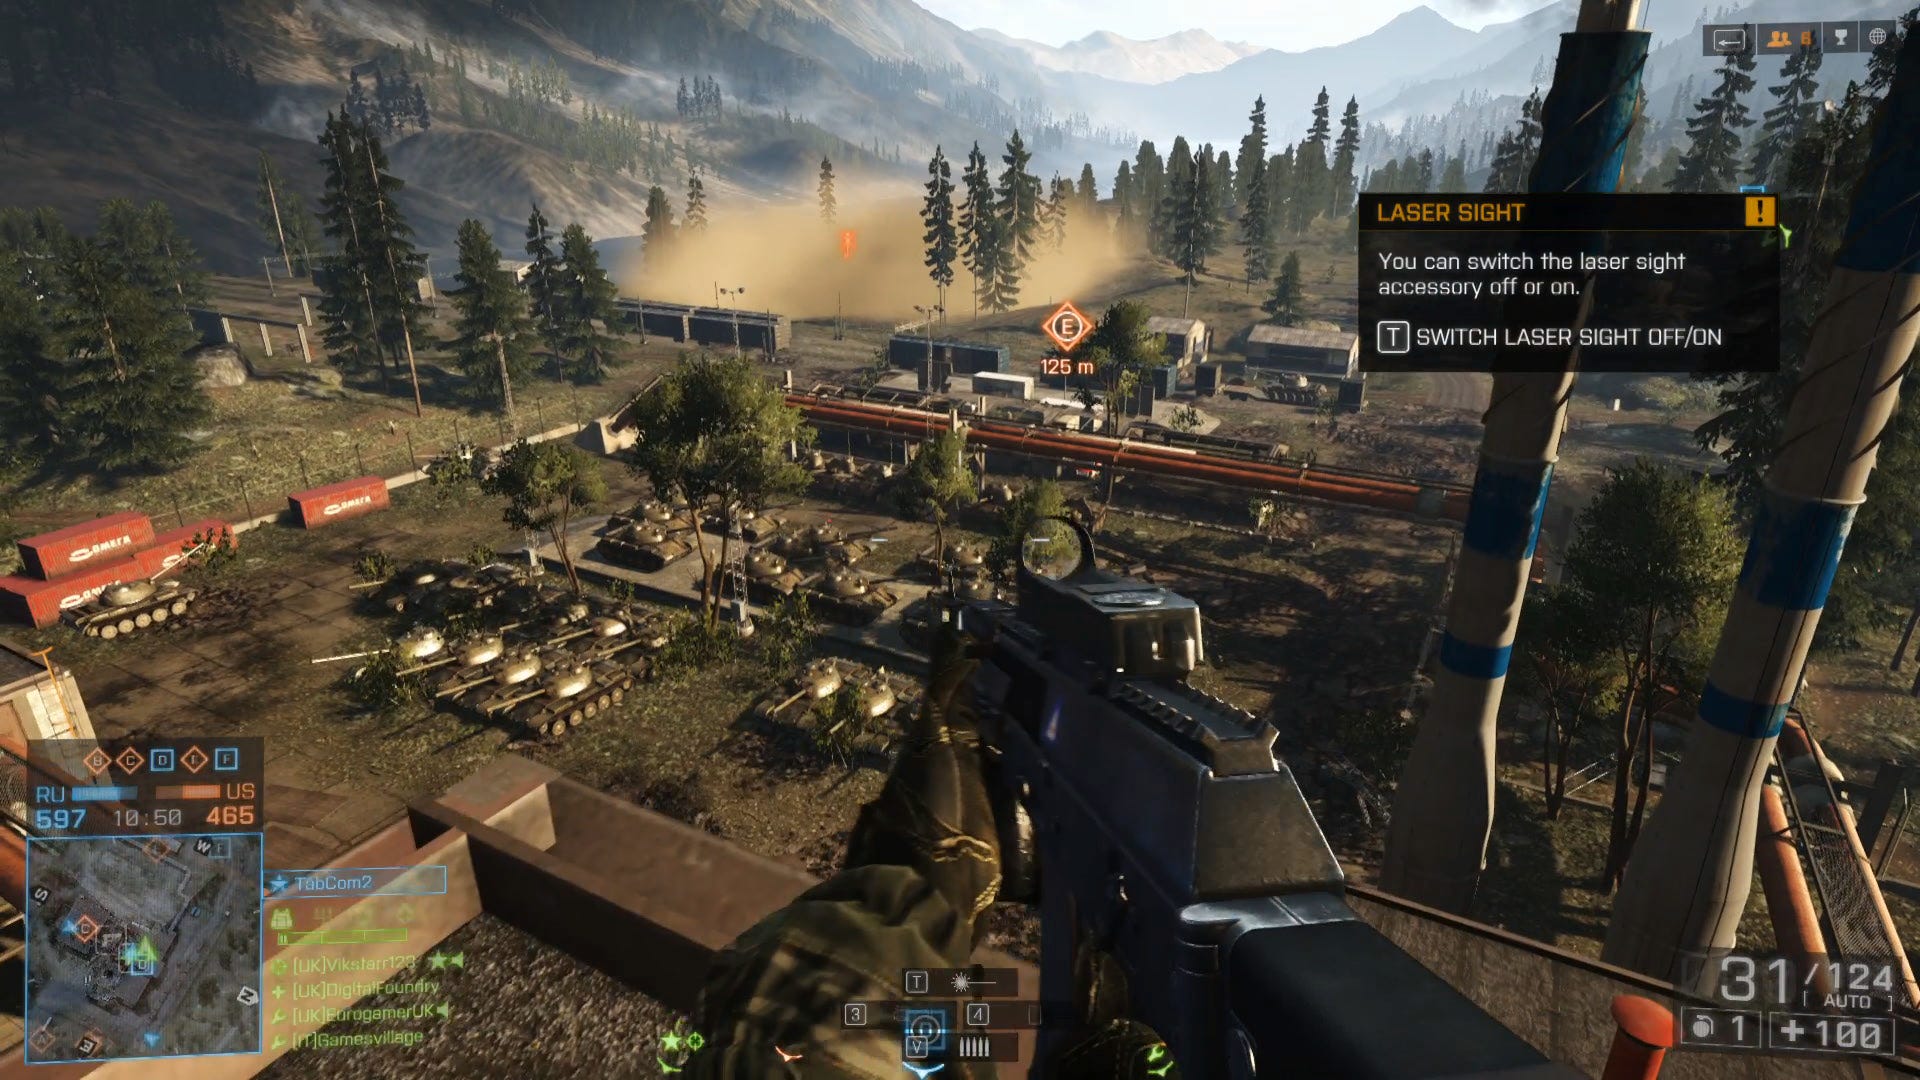
Golmud Railway
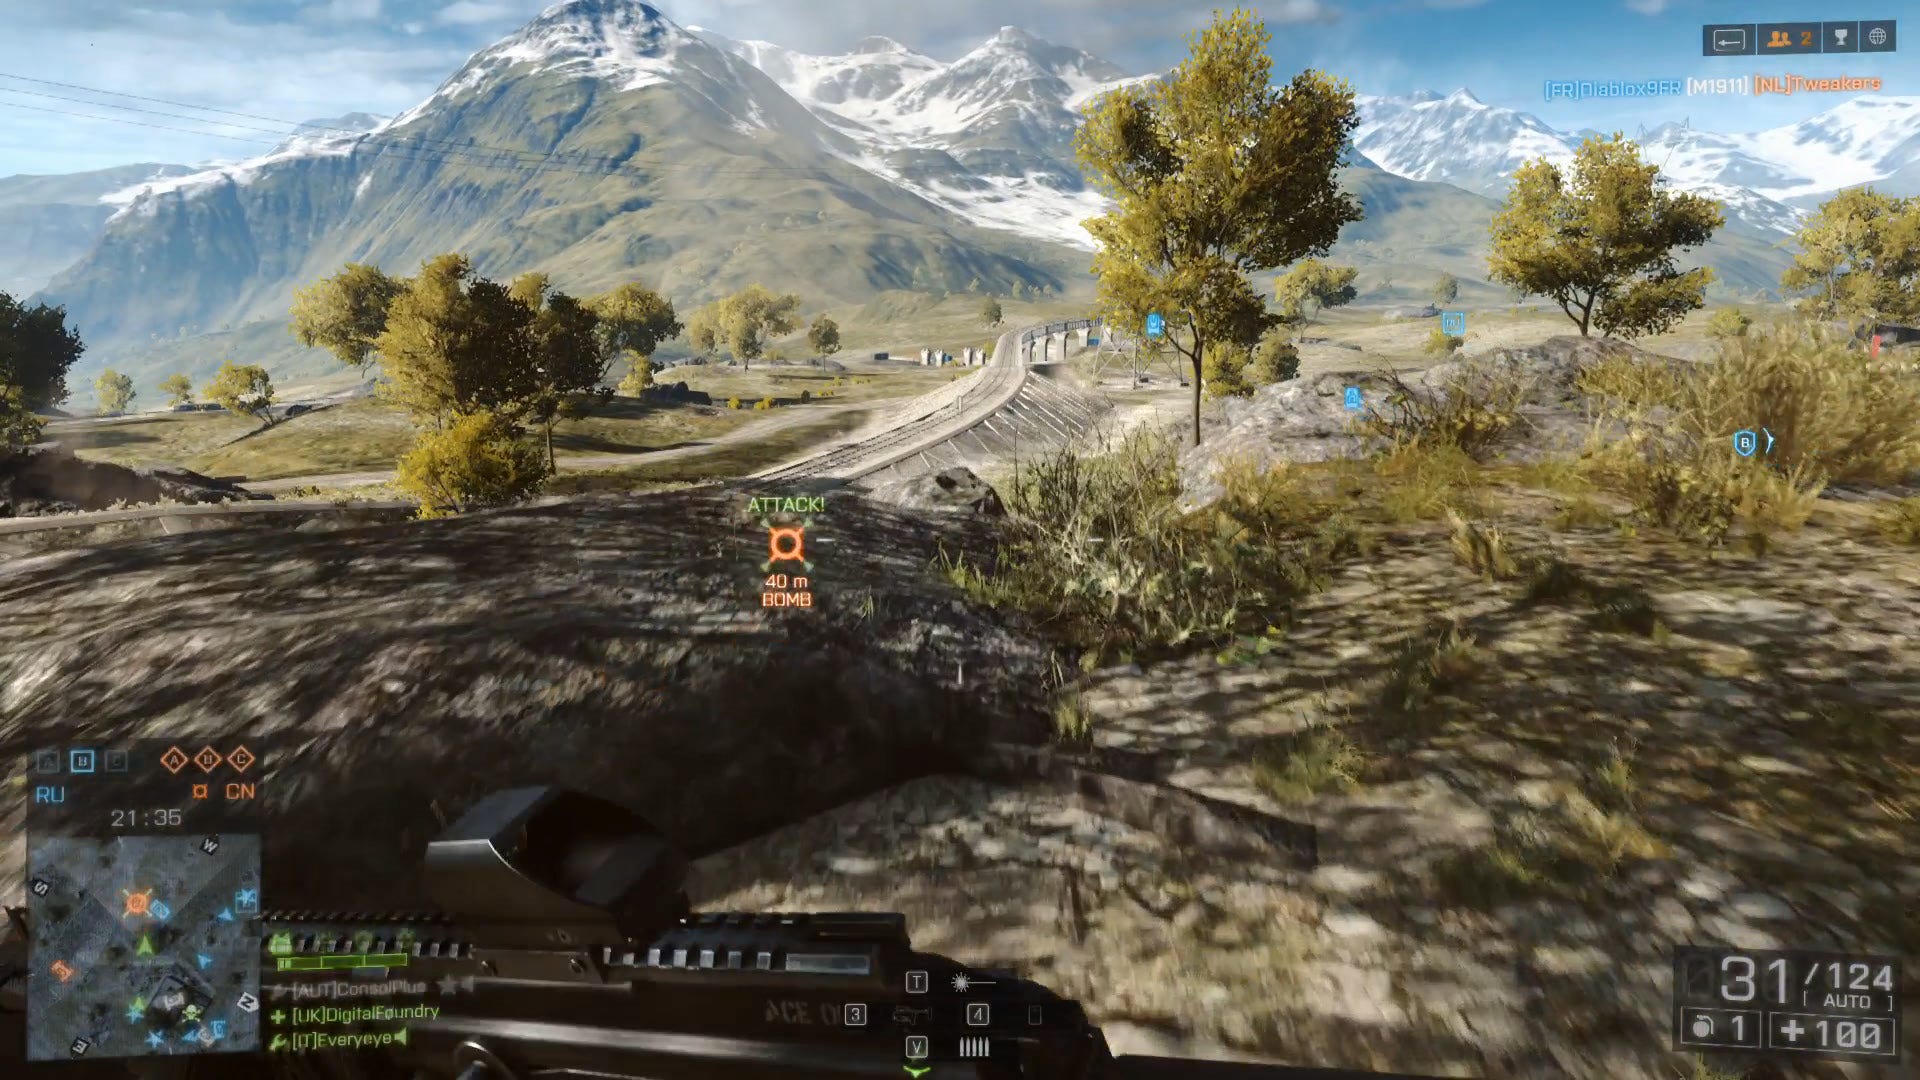
An early favourite, this is a Battlefield map par excellence. Broad and dotted with small hills, it slopes gently upwards to the north where small villages and farms supply the capture points in a line almost down the centre of the map. Combat here offers something for everyone, with ground troops essential for taking control of the cramped building clusters, land vehicles vital for covering the vast open spaces and air cover proving decisive with so little cover to be found.
Where cover is available, it's in the large warehouses at the south of the map. These don't stand up to much heavy punishment, but offer the most comprehensive places to hide from attack choppers and gunships.
The most interesting feature is the armoured train that carries capture point D. The train automatically moves towards the deployment zone of the controlling side, giving them the advantage when it comes to holding the point.
Mostly, Golmud Railway works because it's the sort of huge, flexible space that plays well regardless of which class you prefer and which vehicles you favour. The result is some of the best action in the game, with aerial dogfights and ground skirmishes all over the place.
Operation Locker
Set in and around a derelict prison in the Kunlun Mountains, this is the only snow-based map in the game. It's also one of the few that has limited use for vehicles, and openly favours infantry play. As such, it's perfect for Deathmatch and the new, fast and brutal Defuse mode.
The map splits almost exactly down the middle, from east to west, with one half set in the claustrophobic confines of the prison and the other set on the exposed cliffs outside. It's the interiors that offer the most exciting combat opportunities, with capture points located in cramped two-tier cell blocks and a large open circular hub with a control tower that can be destroyed as the map's levolution moment. More impactful is the simple fact that the doors in the prison can be closed, allowing players to break the circular churn by forcing pursuing players to find different paths to their target. It's a little touch that sets what could have been Battlefield 4's most COD-esque map apart from the crowd.
Lancang Dam
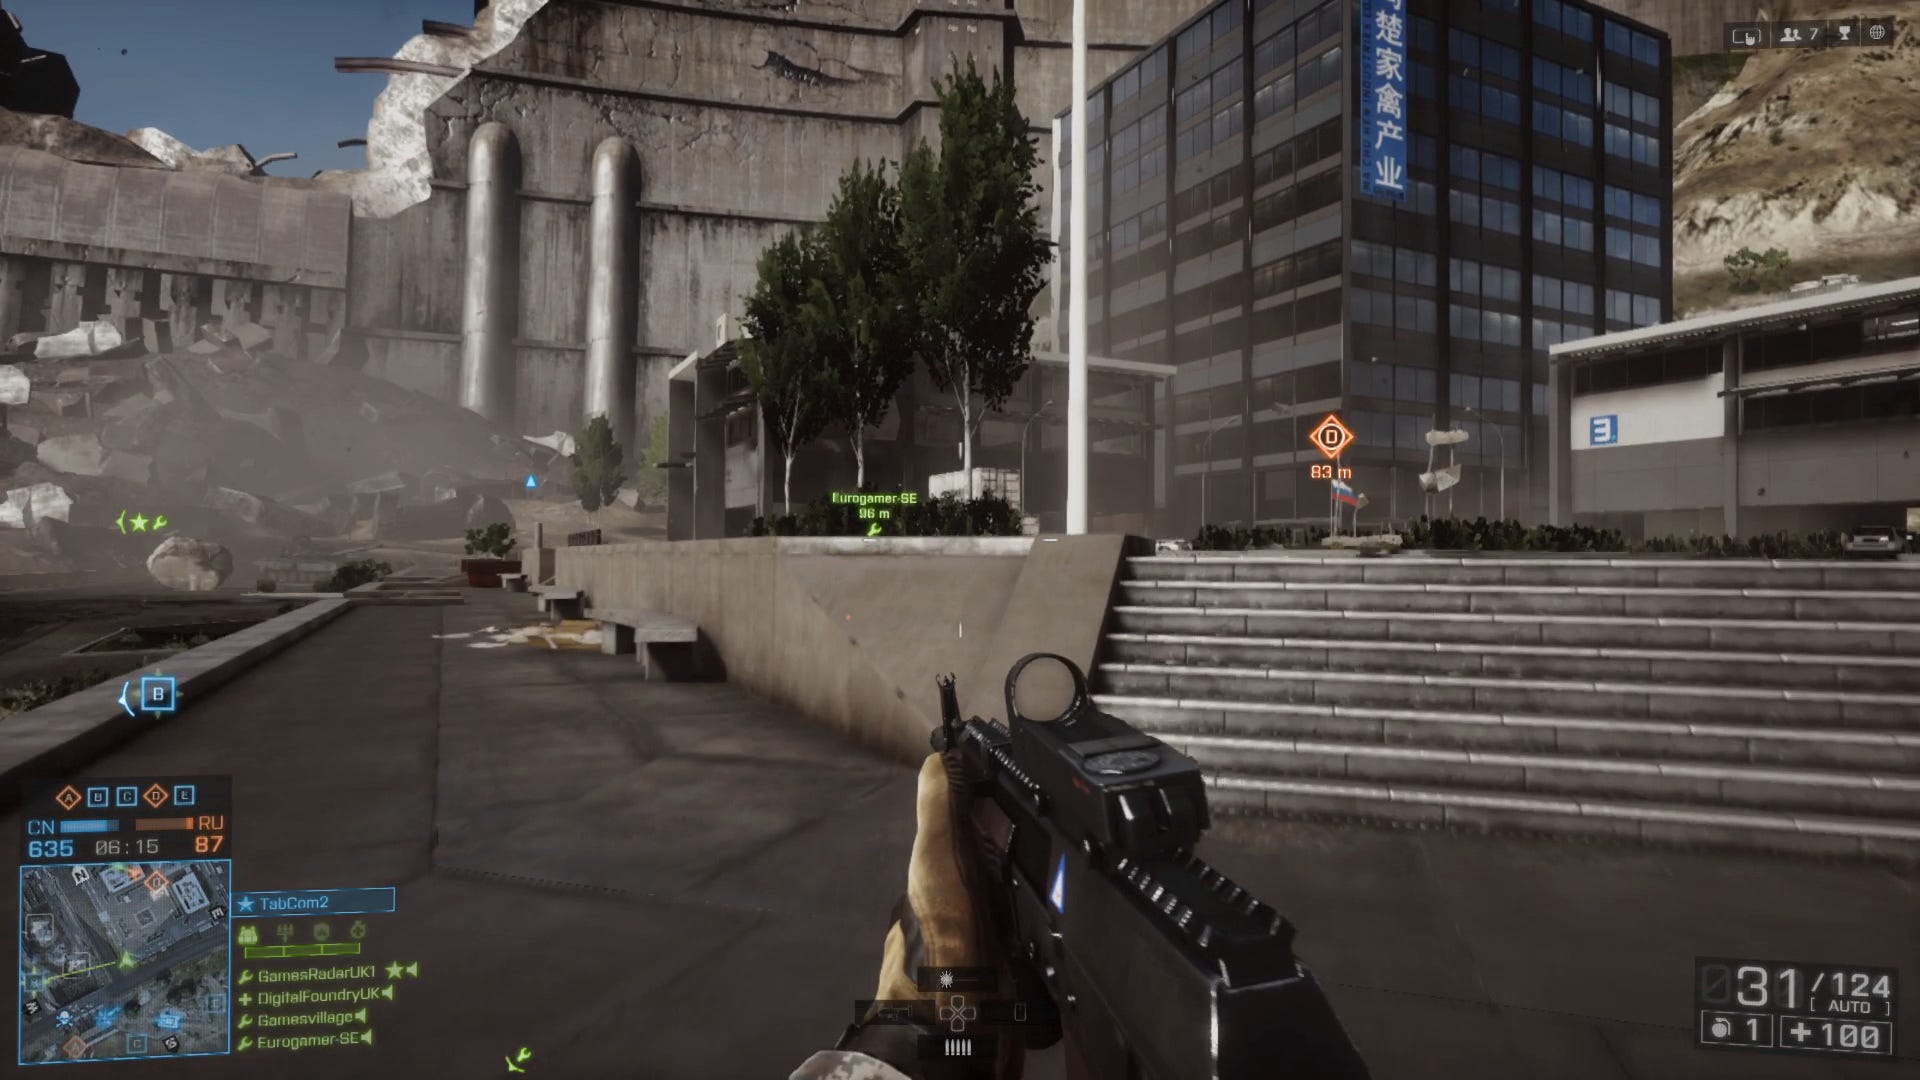
If any map showcases how well DICE's map design scales to suit the mode being played, it's Lancang Dam. Like Siege of Shangai, this is another U-shaped map, this time set at the base of the titular dam.
There are two main clusters of buildings, either of which would make for a fine map in a smaller-scale shooter. To the west there's a power station, full of dark corners and explosive canisters. To the east, a research station made up of multiple offices, all offering useful views over the external action but very exposed thanks to their plate glass windows. In between is a small chasm with the run-off from the dam, and a small network of roads that make good use of the land vehicles on offer.
Played on Conquest, all of this space is in play, and with a full 64-player lobby you can pretty much fill the map with meaningful action. Narrow the focus down to Deathmatch - a popular choice for this map - and everything centres around that rabbit-warren research station.
The levolution feature is as obvious as it is impressive. Land enough heavy impacts on the already-crumbling dam and it collapses completely, burying the northernmost edge of the map in rubble and triggering explosions as systems fail across the complex. It's not the most useful demolition in the game - destroying the dam takes a little too long and requires you to focus on shooting a wall at the cost of watching out for your own back - but it is one of the ones you'll want to show off when your friends play for the first time.
Rogue Transmission
Centred on a vast radio telescope array, this basin-style map allows you to fight both on top of, and underneath, the enormous radar dish at its heart. With so much of its space taken up by this gigantic smooth cup, drawing all the attention, it's easy to miss the score opportunities around the edges.
An under-construction visitor's centre, still mostly scaffold and beams, offers some much needed elevation if you can reach the top without being taken out. From there, you can spot and snipe across almost the whole map. A nearby helipad capture point provides a very handy attack helicopter when captured, and given that the dish at the centre of the map is essentially a large barrel full of infantry fish, that can make all the difference.
Flood Zone
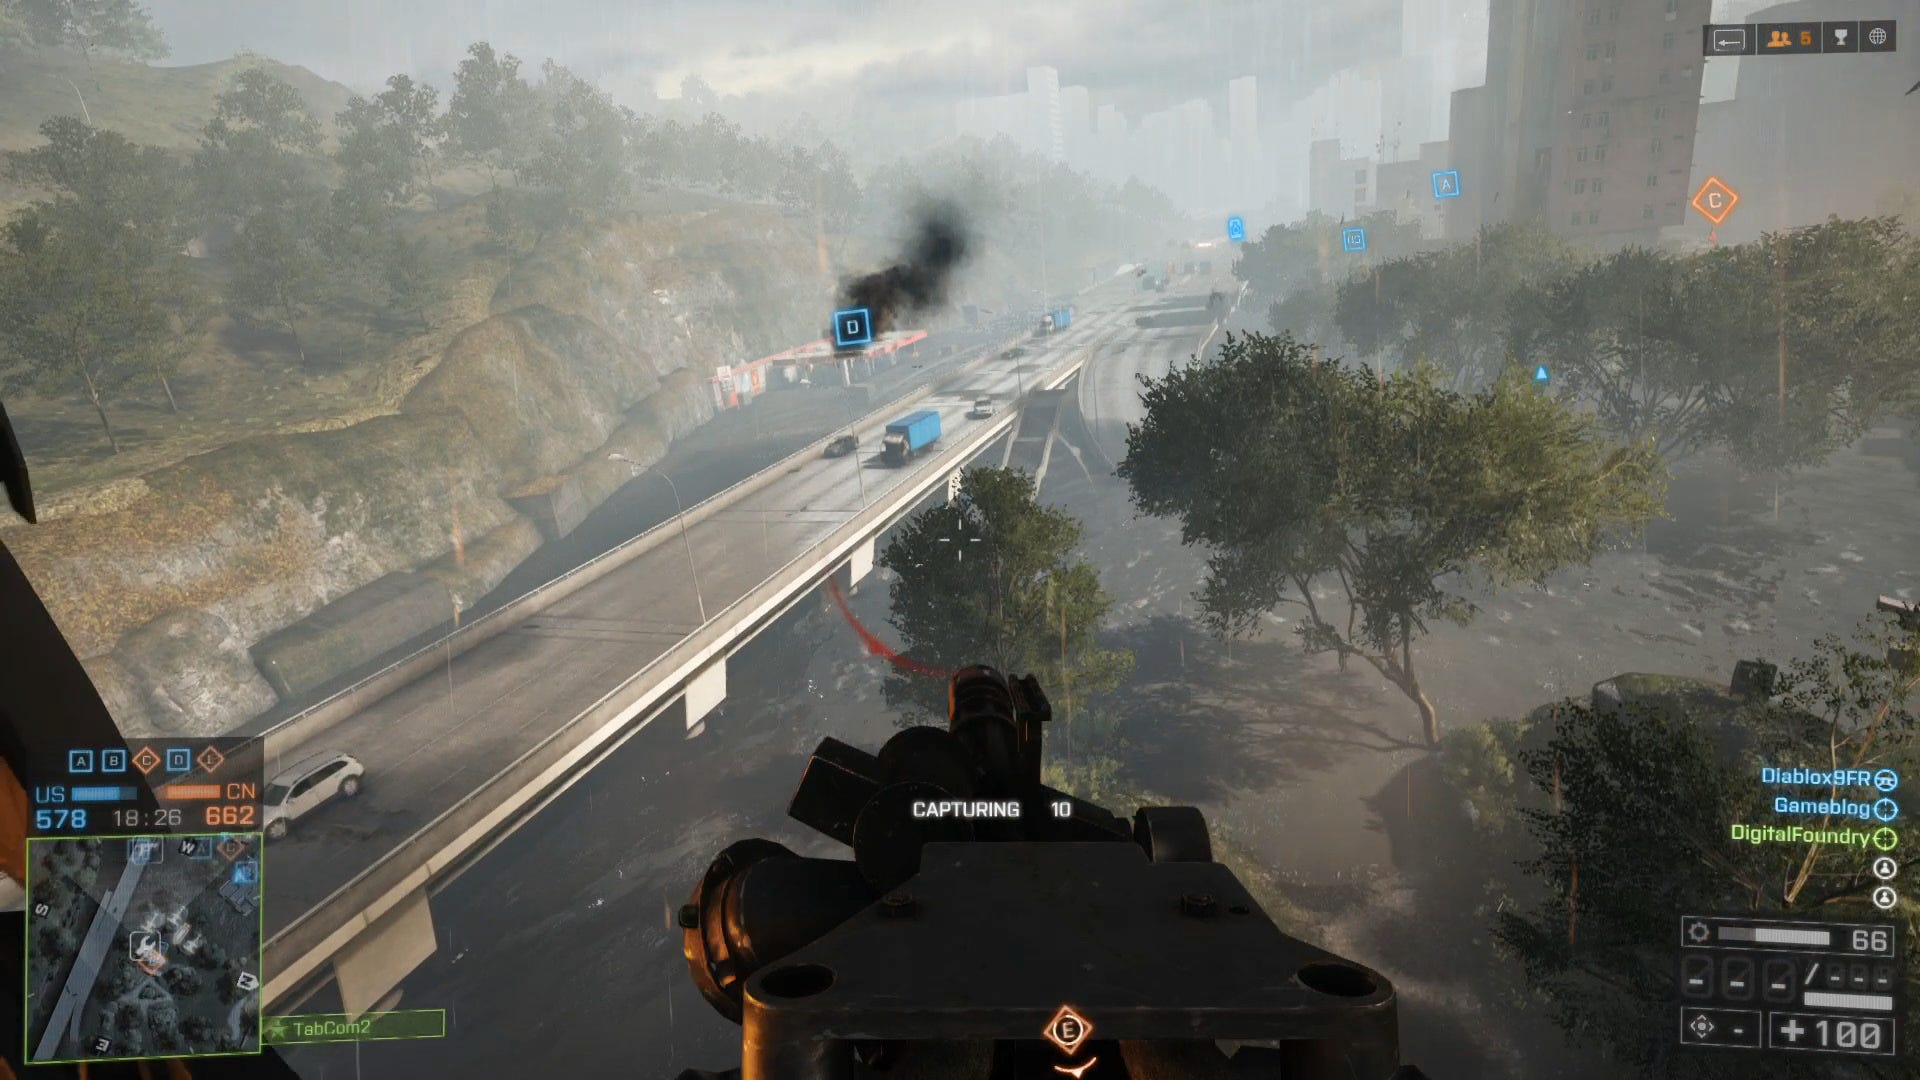
Another popular map, if only because it offers perhaps the most umistakable example of what "levolution" can do. It's a large urban space, with a park to the east and the capture point there nestled in the middle of small hills. Across from there is the on ramp to an elevated freeway, on the other side of which is a gas station. To the west, the map offers many four- or five-storey structures, and a sprawling shanty town sprouting across the rooftops. In the middle, a car park offers a dangerously exposed capture point.
It's a wet map, with ankle deep water all over, as if you're fighting in the aftermath of a monsoon. At the north of the map, just down from the gas station, is the levee which offers the levolution feature that gives Flood Zone its prosaic name. Destroy the levee and the water pours in, rising almost one story high and changing the nature of the battle completely. Land vehicles become useless, unless you can get one onto the freeway which offers a long straight shooting gallery over the rest of the map, but boats and amphibious vehicles become vital, allowing for incredibly quick movement around spaces that were previously dry land.
This isn't a map where you want to be caught on foot, however. Once the flood hits, any infantry not above the water level in the shanty town are easy prey for the miniguns of RHIB boats or helicopters as they swim slowly from place to place.
Dawnbreaker
It would be unfair to call Dawnbreaker Battlefield 4's least interesting map, as in any other company it would be a pretty great addition. It's another urban map, but one that lacks Siege of Shanghai's sense of scale, or Flood Zone's dynamic shift from land to water, and horizontal to vertical.
As the name suggests, this map is set as the sun rises making it the closest to a night map in the game. It's a city map with lots of long open streets, making it a veritable buffet of points for tank and gunnery experts. With all the capture points at ground level, cruising between the skyscrapers, crosshairs at the ready, is a great way to deplete enemy tickets.
Matches on Dawnbreaker can be fun, but it's a standard sort of fun for Battlefield and the only truly interesting capture point is in the Embassy, set slightly apart from the rest. It's here, in the gloomy interiors and bottleneck gateway entrances, that your skill at dominating the enemy will truly be tested.
Paracel Storm
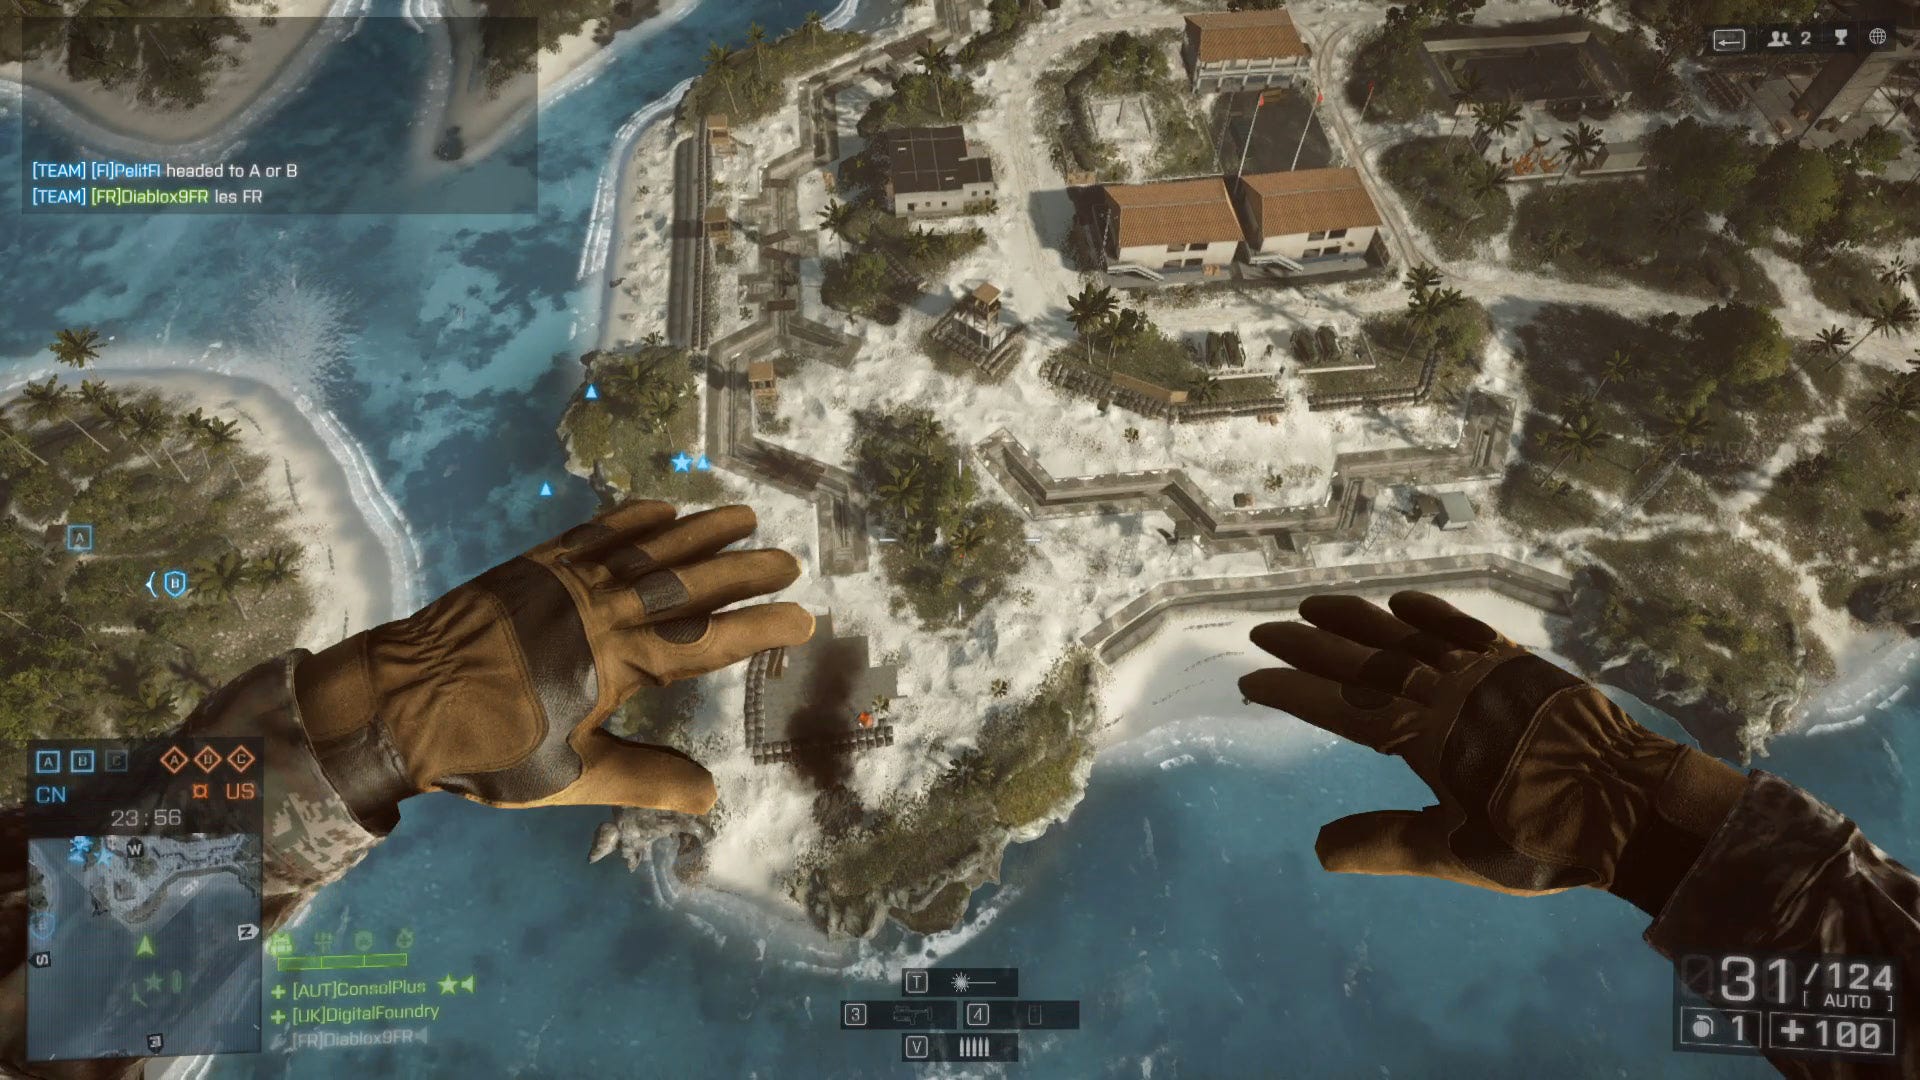
Battlefield 4 makes water a key feature, promoting sea vehicles from half-hearted addition to tactical necessity. Nowhere is this more clear than on Paracel Storm, a tropical map with vast expanses of open water and clusters of sporadic land masses to the east. It's a map that demands shrewd dominance of the waves to keep the enemy on the back foot.
One of the capture points, often overlooked in the rush to get to the familiarity of land, is found on a wrecked battleship, where the exposed deck is great for taking down incoming boats and choppers, but equally leaves those doing the capturing open to attack from above.
Other fun capture points spread across the derelict military base include one in an abandoned firebase, where concrete trenches are perfect for shotgun fanatics, a barracks, and at the very far end of the map, a dockside area where infantry and boats can go head to head. The more fiendishly inclined player can shoot out some of the wind farm turbines out to sea and set a ship adrift, which then crashes into the mainland.
The key feature here, though, is the storm of the title, which brews and breaks with uncanny realism. The subtle shifts in light as the skies darken, the first spatters of rain as the heaven's open, are just the overture to a truly fearsome tempest which impacts everything from boat handling to simple visibility. It's suitably apocalyptic, and shows that DICE is thinking about more than just making buildings fall down.
Hainan Resort
Hainan Resort perhaps suffers for being too similar to Paracel Storm in setting, but it plays very differently with a greater emphasis on land battles than sea.
At the southeast of the map there's a tangle of sandy pathways and grassy dunes. Past that lies a marina, and a capture point out in the open inviting attacks from both land and sea. At the opposite end, a close grouping of resort bungalows hides another capture point, with raised wooden walkways and bridges that allow stealthy players to belly-crawl past enemies. Bullets tend to shred this environment in minutes, however, so don't expect much cover when taking this spot.
Expect most of the fighting to centre around the hotel in the middle of the map. The Gold Coast has a central capture point in its under-construction reception area, with a mezzanine level around it and multiple points of entry that make it a ferocious infantry spot. This is a map where vehicles tend to dominate around the edges, while ground troops do the hard work in the centre. Throw in a few helicopters and fighters and you've got a fairly linear map that offers more variety than you might think.
Zavod 311
A derelict factory complex is the setting for this map, which is large without offering many open spaces. There's junk everywhere, not to mention ample foliage cover, making it one of the few sizeable maps where infantry can get from one end to the other without being too exposed.
Worker's habitation offers your first hotspot, just to the east of the map's centre. The capture point here is surrounded by two-storey homes, but the cover they provide quickly falls apart as the buildings take damage. At the opposite end of the map, butting right up against its western perimeter, a cluster of railroad cars hides one of the trickiest points to hold, surrounded as it is by multiple angles of attack and few long lines of sight. Sneaky players can even hide in the boxcars, closing the doors to stay out of view.
It's the two enormous factory buildings in the middle of the map that attract all of the attention, generally. At ground level, they offer dingy arenas where capture points are fiercely contested. Head for the various ladders bolted to the outside walls, however, and the map's strategy deepens. There are several rooftop levels, all of which provide the sort of aerial advantage that can turn the tide of a match, but also provide no cover at all. Maintaining a useful force of spotters, snipers and anti-air troops on these rooftops is the best way to dominate here.