Dark Souls 3 - Anor Londo, Aldritch, Devourer of Gods and Dancer of the Boreal Valley
How to kill Aldritch, Devourer of Gods along with a step-by-step walkthrough for making it through the Anor Londo section of Dark Souls 3.
From the Pontiff Sulyhan bonfire, head through the arch ahead to find a courtyard. There's a Large Titanite Shard to the right and a couple of gem bugs to collect below, before heading up the curved steps to your left.
At the top, rather than heading through the courtyard, instead make for the shelter on the left. Move through the arch, and head up the steps, but be aware that the pyromancers up here shoot fireballs. They move fairly slowly so they're not too difficult to avoid.
Once the upper walkway is clear, climb the steps and head onto the small open courtyard to the right.
Drop down onto the area with the small spire on it and make your way up the narrow roof. Archers firing spears from giant bows will start taking shots at you, so don't stand still - the knockback will send you flying to your doom.
When you reach the end of the roof turn right, head down to collect some ashes, then return to the top.
Head for the other end - dealing with the knights as you go - make your way down the next sloping roof at the end, and then head into the arch and down the stairs.
The large statue in the next room is an illusion. Roll into it to reveal a hidden passage containing some brass armour. Grab it, then return to the circular room and head out onto the balcony.
Light the Anor Londo bonfire
Collect the Ember from the corpse, then pull the lever to rotate the nearby tower.
Climb the spiral staircase, push the lever attached to the large wheel in the centre, and when the tower comes to a stop, head towards the large steps ahead to find the Anor Londo bonfire.
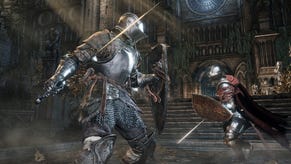
As you ascend the steps a couple of silver knights will show up, and these guys are trouble.
If you can take the first one out before the second one appears then they're manageable, but dealing with both at once is a tricky proposition. They have some devastating thrust attacks, are difficult to stagger, and they move very quickly.
You can also evade them and avoid the fight entirely, but whether you take them on or try and avoid hostilities, head left at the top of the giant steps and head into the far archway.
Grab the ashes from the dead giant and make your way up the stairs until you pass through a tall narrow archway.
Turn right, follow the balcony around to the left - you can see the fog gate in the distance - and head down the narrow stairs on the far side.
There are a lot of pyromancers down there who'll start shooting at you the moment you come into view, so don't stand still anywhere.
When you reach the bottom, you can either just run straight for the fog gate to face the boss, or fight them off.
If you choose the latter approach, deal with the group downstairs first, before working your way up the steps opposite the ones you came down and deal with a few more.
How to kill the curse damage spider-dog!
Next, head to the far end of the lower area by the large double doors and take on a cursed spider-dog monstrosity!
As long as you block his attacks he's relatively simple, but he deals curse damage which can kill you instantly.
You may want to get in a few blows, then beat a retreat up one of the flights of steps to let any damage wear off - a tactic which has the added advantage of leaving him perfectly positioned for a drop attack.
The slime blobs are more of an annoyance than a threat, so just ignore them and push the lever to the left of the doors to open them.
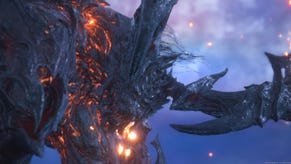
How to kill Aldrich, Devourer of Gods
This guy packs a huge punch and he has several main attacks, all of which are easily identifiable if you watch him building up towards them.
1) A lunge: easily dodge-rolled to the side.
2) A wide swing: harder to avoid, so either roll out of range or try and get behind him on his backswing.
3) A spin attack: dodge-rolling out of range is the only defence here.
4) Sinking into the ground and then emerging in a burst of flame: steer clear of the area until the flames die down.
5) Small missile attack: these can be dodged, and will be blocked by scenery (if there's any left). Individually they don't do too much damage but it's definitely best not to get hit by too many.
6) Large missile attack: he takes a brief moment to charge this attack, and it does does huge amounts of damage. It'll obliterate any scenery it comes into contact with, knock you off your feet, and take a gigantic portion of your health away. Dodge-rolling is your only option.
(In the first phase he fires two missiles each time, but in the second phase he can fire four or five if you're unlucky. On the plus side he doesn't seem to use it if he's within melee range, so you may never have to deal with it.)
7) Rain of arrows: this can be the make or break element of a fight as it breaks up your rhythm, and failing to avoid it can spell death.
(If you see him get his bow out, retreat to the middle of the room and let your stamina charge. As soon as he shoots start running away. In the second phase of the fight the rain lasts for much longer, so be even more careful.)
At around 60% health he'll add fire damage in the areas that he emerges from, and his attacks will be more powerful.
The strategy throughout remains the same, however. As soon as you enter the area charge him, roll under or around his first attack to get behind him to find his vulnerable tail, and deal as much damage as you can.
When he disappears underground, head for the centre of the area and watch for signs of him emerging in one of the corners, then head towards him as he reappears.
Dodge his attacks to get behind him and deal more damage, and keep repeating until he's down.
Note that RNG can make a huge difference to this fight. If he doesn't use the rain of arrows and you can keep him in melee range, it can be over relatively quickly. Once you've had to put distance between the two of you however, it can be hard to regain the upper hand.
Assuming you've tackled the areas in the same order we did you'll now get a cut-scene* and be teleported to the chapel from way back in the beginning of the game.
Talk to the NPC and collect the items, but do not approach the statue! It'll trigger another boss fight, and not only are you holding a lot of souls right now, you're also likely to be in a bit of a sorry state all-round.
Instead, leave the chapel and head for the bonfire at the other end of the area - where you defeated the second boss - to level up and gather yourself for the next stage of your adventure.
(* If you don't get the cut-scene it's because you've not completed Profaned Capital yet, in which case the cinematic will play out after you've defeated the boss there.)
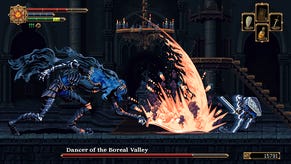
How to kill the Dancer of the Boreal Valley
From the Vordt of the Boreal Valley bonfire, turn around and head up the steps, then just keep going until you reach the chapel.
You'll pass a couple of skeletons and knights along the way, but these are low level enemies and shouldn't prove much of a problem by now. Once inside the chapel, approach the statue at the end to begin the fight.
The first phase of the fight is reasonably straightforward. Keep just out of her attack range, try and stay on her right side by circling her clockwise, dodge around her attacks and get in a couple of hits while she recovers, and then move out of range again.
Pay particular attention to her right arm. If she starts to lift if slowly, get as far away as you can as her grab attack is devastating.
It's much safer to get one or two hits in at a time and wear her down slowly, rather than trying to do a lot of damage at once.
At 50% HP she'll get a second sword, so you can no longer rely on sticking to her off-hand side.
Back off a little further and wait for her to perform an attack before jumping in and hitting her, and then back off once more. Again, doing a little bit of damage a lot of times is preferable to trying to do a lot of damage in one go.
If you've got any projectiles such as firebombs to hand, these can be used to get a bit more damage in between her attacks.
Once she's down, light the bonfire and return to Firelink to level up, restock, and relax.
- Keep reading for our guide to beating Dark Souls 3's Lothric Castle and Dragonslayer Armour encounters.
- Head back to the first page for the rest of our Dark Souls 3 guide.


