The Witcher 3 - Magic Lamp, braziers, statues, lamp, golem, escape
How to light the braziers in the correct order in The Witcher 3's Magic Lamp quest, then kill the golem as you make your way to the exit.
This page covers the Magic Lamp, braziers, statues, lamp, golem, escape. If you're looking for more assistance, our Witcher 3 walkthrough can help.
In order to retrieve the magic lamp, follow Keira down the steps to the north. At the bottom, examine the chiseled stone beneath the archway ahead to translate the inscription. To proceed, you need to solve the riddle and light the four statues flanking the inscription in a specific order. If you need to hear the clues again, simply speak to Keira.
Magic Lamp
Light the braziers in the correct order
For ease of reference, here are the most critical parts of the inscription:
- The first to light his fire dared not march on the end.
- The second, beside the first, played a woeful lament.
- The third kept close to his faithful beast.
- The fourth marched not beside the first yet, like the second, played a tune.
If you can't be bothered to solve the puzzle yourself, here's what you need to do: first, light statue number 3 (the first to the right of the inscription), then statue number 2 (the first to the left of the inscription), then statue number 4 (the second to the right of the inscription) and, finally, statue number 1 (the second to the left of the inscription stone). When you're done, the stone blocking the archway will slide open, revealing the laboratory beyond.
Look for the lamp in the mage's laboratory using your Witcher Senses
Make your way through the newly-opened entrance and approach the gravestone ahead. Once Keira has retrieved her magic lamp, there's one last bit of exploring to do.
Find an exit leading to the surface
Approach the archway you just came through and look to the right. Climb the stone ledges and continue along the passageway. When you spy the glowing purple stone to the left, examine it to receive one Ability point and a temporarily boost to your Yrden Sign intensity.
Our Witcher 3 walkthrough and guide can help you with the main story, including the Wandering in the Dark and Family Matters missions, and eventually, one of several Witcher 3 endings. There's plenty of side content, too, including Witcher 3 Contracts, White Orchard quests, Velen quests, Novigrad quests and Skellige Isles quests. Elsewhere, learn about the best Witcher 3 builds, the best Witcher 3 mods, how to make money in Witcher 3, find Places of Power locations, and learn how to do Witcher 3 crafting and Witcher 3 Alchemy And when you're done with all those - we can help you through expansions with our Hearts of Stone walkthrough and Blood and Wine walkthrough.
Kill the golem
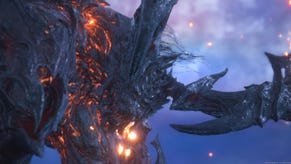
Push further along the passage and you'll encounter another golem. Deal with it as before, using your Quen Sign for added protection and attacking it from behind while Keira distracts it. Once the golem is defeated, loot its corpse and the various chests tucked around the room's perimeter. You'll find numerous goodies here, ranging from materials to fancy armour, making this little detour more than worth your while.
When you're done, make your way back to the statue room. Climb the steps into the next area and continue south, heading through the archway into the corridor beyond. Take the stairs to the right, following the objective marker, and examine the shimmering wall at the top to dispel the illusion. Head outside into the rain and say goodbye to Keira, ending the current quest.
- Keep reading for our guide to finishing The Witcher 3 - The King of the Wolves, the next quest in the game.
- You can find the rest of our Witcher 3 walkthrough from the first page of this article.


