Dark Souls 2 - Forest of Fallen Giants, key, knight, phantoms, white knight
Our walkthrough will help you beat every enemy in the Forest of the Fallen Giants, as well as avoid the deadly booby-traps throughout the zone.
When you reach the end of this section of the walkthrough, you'll be picking your first fight with one of Dark Souls 2's deadly bosses. There's quite some wandering to be done before you reach that point though, so start off by making your way down the river and bagging the Lifegem on your right as you pass by it. You'll also find a small alcove here with a bonfire to light.
Forest of Fallen Giants guide
Travel all the way down the length of the river to get hold of yet another Soul of a Lost Undead, then carry on up the path towards the corridor. Climb the ladder at the end, kill all of the enemies you come across, and make sure you also pick up the Broken Straight Sword and Lifegem items lying around up here.
Pass through the gap in the wall, but keep a close eye on the enemy who's firing arrows from above. Once you're through, climb up the ladder that's on the other side, but ignore the nearby knight for now. You'll be rewarded with a Heide Knight Sword for killing him, but you're in no position to take on this particular fight just yet.
Once you've climbed all the way up the ladder, you'll have to eliminate the pair of enemies who are waiting just around the corner. It's a surprisingly tricky fight due to the narrowness of the corridor you're passing through, so back up towards the ladder if you need to give yourself a little more breathing space during combat.
As soon as you've killed both of these enemies, make your way around the stairs and then across the section. Take a right when you come to a small fork in the path, grab the Soul of a Nameless Soldier, and then take the left-hand path to get stuck into the annoying archer who was bothering you earlier.
"There's an archer and a bomb-chucking enemy that you need to be wary of in this section."
When you get to the end of the path you'll be able loot a Soul of a Lost Undead and a Shortsword. Make your way down into the section just below you, then head through the mist. Take a left at the first opportunity, but keep a close eye out for the enemy that's loitering just around the corner. Deal with the creature, then kill the trio of enemies who are hanging around up ahead. Grab the Wood Bolt from the room that's just to your right - you'll find it behind the barrels over in the corner of the room.
Carry on along this hallway and then head up the stairs. There's an archer and a bomb-chucking enemy that you need to be wary of in this section. You should be able to see a ladder on the other side of this area, while on the opposite side is a Buckler. Go and grab the item, but be ready for a surprise attack when you do so.
Once you've bagged the Buckler, go up the ladder, and then run across to the other side to reach the Witching Urn. There's another enemy just around the corner here, so return to the middle of this area, then fall down the gap where the wall and the ground are broken.
Find the Human Effigy
When you drop down you'll have to deal with a couple of enemies pretty quickly, but if you then head over to the opposite side you'll be able to pick up one more Human Effigy - well worth the effort if you ask us. To get your hands on it, simply leap over the gap.
You'll need to use the nearby tree to get hold of the Torch and the Soul of a Lost Undead that are just below you. Now make your way down to the ground level and pick up a cluster of Lifegems. Next, you should head into the central cave to get hold of a Soul of a Proud Knight. Just be aware that when you do so you'll be attacked from the rear by two enemies, so make sure you're fighting-fit before heading inside.
Once the fire's cleared, open up the door to your left and grab the Fire Longsword from the coffer on the other side. Now make your way back up the tree, then go through the gap in the wall. Head up the stairway to get back to the upper part of the area. Once you're back up top, climb the ladder and go through the doorway that's in the centre of the right-hand balcony.
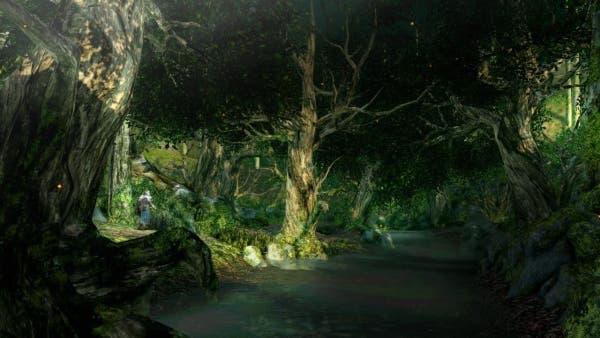
As soon as you get inside, make sure you light the bonfire. There's a woman nearby selling things, so if you've got a surplus of souls right now then you can have a mooch around the store and buy anything that takes your fancy. When you're ready to proceed, make your way down the ladder that's on the opposite side, away from the bonfire.
Be ready for a fight when you get to the bottom, and note the door down here. You can't open it from the side you're currently on, so head off in the opposite direction, kill the next enemy you come across, and then make your way up the stairs across the little bridge so you can get over onto the other side.
Kill the enemy you encounter, then make sure you pick up the Soul of a Lost Undead from the corner before you move on. The door you can see is actually locked right now, so make your way back up the stairs, go through the doorway ahead, kill the monster you come across, and then carry on moving through the mist.
Sprint over the tree to get to the wall, then make your way down onto the wooden platform below you. Make your way into this structure, killing any enemies you encounter along the way, and make sure you grab the Torch that's in the corner. Go back outside and then jump down when you reach the door. Now climb up the ladder to get to the platform above you, go up the ramp and across the roof, and kill any enemies you come across as you travel.
You'll need to jump to get to the next platform, and there's an enemy waiting for you so be ready to fight. Now make your way over to the right and jump down onto the platform below. Slither your way into the opening that's at the end of the platform you're on, but don't move at maximum speed until the massive rock has passed you by.
How to get the House Key
"Near the top is a man called Cale - talk to him until you have the House Key which you can use in Majula."
Once the boulder's well away from you, go inside to pick up a Human Effigy. Now turn all the way around and make your way along the corridor on your right. Near the top is a man called Cale - talk to him until you have the House Key which you can use in Majula. Look to the left, and make sure you pick up the Amber Herb that's at the end of the corridor.
Leave the cave by the same route you took to get in, then climb up the ladder on the left-hand side. Keep travelling down the path now, killing the enemy standing in your way, then jump down towards your left and go back up the ramp until you're on the roof of the house once more. Go over to the left-hand side of the house and jump down onto the wooden floor. Just be careful when you do this, as it can be easy to miss the platform here.
At the end of the house is a ramp. Follow it until you're down on the green grass below. If you travel all the way over this grassy section you'll find a Titanite Shard right by the gate. Go back up the ramp, then all the way around until you're at a ladder. Climb up it, then use the tree to get up to the very highest point of this area. As you go up, you'll need to kill an enemy to your left, then the enemy above you once you've climbed up the next ladder.
Go back down and then carry on towards the barrels at the end of the path. Draw one of the enemies up towards the barrels, wait for it to take a swing at you, then leap out of the way - the exploding barrels do all the counter-attacking for you! This will also blast a hole in the wall ahead, giving you very easy access to the bonfire that's just on the other side.
Kill the remaining two enemies, then climb down the ladder just ahead of you. Keep going down the stairs here and grab the Green Blossom that's behind the staircase. See that opening in the wall to your right? Walk in there and then back out immediately - the room is trapped, and if you hang around for too long you'll take a crossbow bolt to the face.
A handful of enemies will follow you out of the room, but once they're dead you can loot a Great Soul Arrow, a Blue Wooden Shield, and a Large Soul of a Lost Undead from the booby-trapped room.
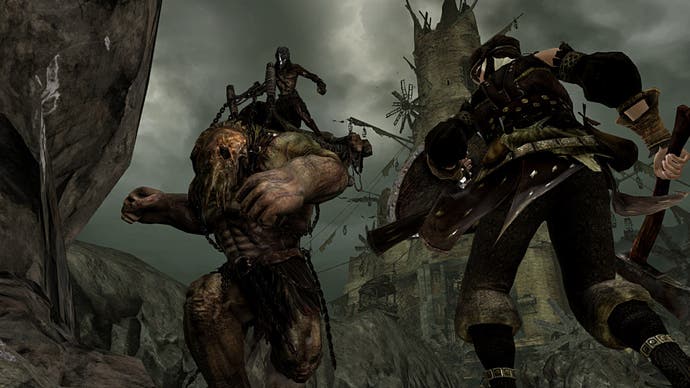
Just behind the crossbows is a ladder. Climb down it and open up the coffer at the bottom, but be ready for a blast of poison gas in your face - leave it be if you can't deal with the effect. Your reward for this potentially suicidal heroism is a Titanite Shard. While you can't do anything with it now, make a note of the face-shaped mechanism in the corner. You can head back here when you've got your hands on the Pharros' Lockstone.
Go back up the stairs and then leave the room and carry on walking straight ahead. Watch out for the fire-bomber above as you go through the right-hand door, then kill the enemy in front of you. Go through the next door along to loot a Large Soul of a Lost Undead behind the tree here.
Turn back around and go up the ladder on your left, then go down the path. Make sure you grab the Light Crossbow on your right. Now carry on through the door at the end of the pathway, keep walking down the corridor you find yourself in, then jump down towards the right when you're able to.
There are three enemies to deal with down here, but there's also a coffer to open up as well, and you'll be rewarded with an Infantry Helm and a Mail Breaker for doing so. To get back into the courtyard area, simply drop again into the area below you. Should you find yourself being attacked by the turtle-like enemy nearby, either give it a good clobbering one-on-one, or simply lead it into the crossbow room and watch it take arrows to the face.
Go up the ladder, and then jump down into the tatty-looking section of path to your left. Make your way up the nearby ramp and then smash up the wooden cart. Go through the window that's at the end of the path, but be ready to tackle a trio of enemies in the corridor that's just beyond this entrance.
Head downstairs and kill the next pack of enemies who are lying in wait at the bottom. Grab the item at the very bottom of the stairs to get your hands on a handful of Aromatic Oozes. Keep going down this hallway and take a right through the door you come to. Another pack of enemies are waiting in the courtyard - kill them and make your way back to where you came across that turtle-like creature earlier.
Move past the enemy's position - killing it first, if you haven't already done so - and keep travelling down the hallway beyond it. To your left you'll see two enemies, while a staircase sits to your right. Kill the enemies first, then head a little further on to find another enemy. Finish the monster off and then take the nearby Amber Herbs. Before climbing the stone sword, go up the stairs in the opposite direction to get a Homeward Bone and a Lifegem.
Climbing the stone sword
"We found shoving [the enemies] off the sword to be the most effective and amusing strategy."
Make your way up the massive stone sword and kill the two enemies - we found shoving them off the sword to be the most effective and amusing strategy - then grab the item you come across at the end of it. You should receive a Soul of a Nameless Soldier and a Halberd for doing so. Now make your way back down the massive sword, and keep pushing on through the mist that's ahead of you.
Head into the next room on your right, but put your torch away before doing so. If you enter the room with your torch out, the floor bug will run away from you. Put your torch away though, and you'll be able to kill the creature to get your hands on a Titanite Shard. Once you've killed both the bug and the main enemy in this room, you'll be able to head downstairs and pick up a Lifegem and a Large Leather Shield.
Leave this room and make your way all the way down to the right, where 10 Fire Arrows are lying around, just waiting to be looted. Next, open up the door ahead of you - it leads to a ladder which will take you right back to where the bonfire is. This is a very handy thing to have access to, and you should never pass up on an opportunity to visit it.
There's a lift ahead of you which you should now use to ride all the way down. Make your way through the corridor, kill the enemy you encounter right at the end, then walk into the mist to begin your first real boss fight. Gulp.
You can find the rest of our Dark Souls 2 guide from the first page of this article.






.jpg?width=291&height=164&fit=crop&quality=80&format=jpg&auto=webp)
