Captain Toad Gold Mushroom locations, 1-Up Mushrooms and all Treasure Tracker bonus challenge solutions
Bonus Challenges, solutions, and all Gold Mushroom locations in one place.
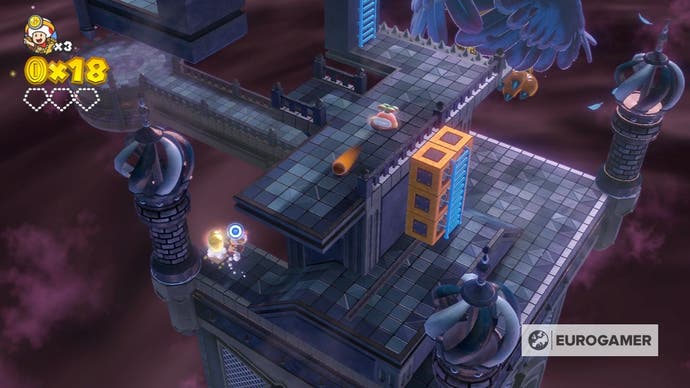
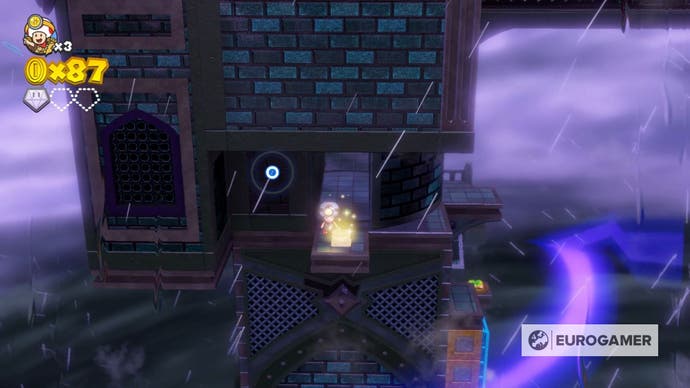
Gold Mushroom locations in Captain Toad: Treasure Tracker, as well as the locations of some 1-Up Mushrooms, are the key to a number of Bonus Challenges for those keen on completing the game properly.
Here on this page you'll find everything you need to know about those Challenges in Captain Toad, including a list of all Bonus Challenge solutions as well as those pesky Gold Mushroom locations and more.
On this page:
For more on Captain Toad, we also have a full Captain Toad walkthrough and guide to all Gem locations, as well as a guide to all Captain Toad Pixel Toad locations, too!
Captain Toad Bonus Challenge solutions
Captain Toad: Treasure Tracker Episode 1 Bonus Challenge solutions
| Number | Level | Bonus Challenge | Solution / Tips |
|---|---|---|---|
| 1-1 | Plucky Pass Beginnings | Gold Mushroom | See below |
| 1-2 | Walleye Tumble Temple | Don't destroy the bridge | Avoid walking on the bridge at all and just drop down the sides. |
| 1-3 | Touchstone Trouble | Clear the course in 3 touches | Tap pink, cross to blue; tap blue, cross to pink; tap blue again to finish. |
| 1-4 | Mushroom Mesa | Defeat all the enemies | Simple enough - throw turnips! |
| 1-5 | Double Cherry Palace | Collect 70 Coins | Be sure to get every pluck patch and it should be easy. |
| 1-6 | Shy Guy Heights | Don't get seen by any Shy Guys. | Tricky, but treat it like a stealth level - wait until they're turned away to dart by. |
| 1-7 | Spinwheel Library | Gold Mushroom | See below |
| 1-8 | Mine Cart Tunnel Throwdown | Defeat all Para-Biddybuds | Throw turnips at them and use POW blocks, which is easy enough. |
| 1-9 | Spinwheel Bullet Bill | Gold Mushroom | See below |
| 1-10 | The King of Pyropuff Peak | Collect 45 Coins | Collect all you see along the way and all pluck patches and it's no problem. |
| 1-11 | Piranha Creeper Cove | Collect 70 Coins | Hidden coins near the boat and coins from defeating Creepers will help. |
| 1-12 | Briny Bowl Swimming Hole | Gold Mushroom | See below |
| 1-13 | Turnip Cannon Jungle | Clear course using only 1 shot | Take out the one grey brick on the way to the star. |
| 1-14 | Pop-Up Prairie Town | Get the 1-Up Mushroom | From Blue Toad, low down under the bottom level. |
| 1-15 | Drop-Road Dash | Don't defeat any Para-Biddybuds | Easy to avoid defeating them but harder to get past them - be patient! |
| 1-16 | Bizarre Doors of Boo Mansion | Clear in 4 touches | Clear as usual but when you get to the stack of Goombas, simply drop down the short ledge rather than using the door above it. |
| 1-17 | Blizzard on the Star Express | Collect the 1-Up Mushroom | Tap the lever by Blue Toad in the room at the front of the train, and it drops down outside. |
| 1-18 | Wingo's Watchtower | Collect 70 Coins | Collect all you see and remember to get those inside the holes in the central tower too as you go - don't rush! |
Captain Toad: Treasure Tracker Episode 2 Bonus Challenge solutions
| Number | Level | Bonus Challenge | Solution / Tips |
|---|---|---|---|
| 2-01 | Chute Scoot Slopes | Gold Mushroom | See below |
| 2-02 | Stumper Sneakaround | Defeat all Piranha Creepers | Use the key to get rid of the first one you encounter, then turnips for the rest. |
| 2-03 | Mine Cart Sunset Rundown | Collect 140 Coins | Get all the coins you see, check under the ledge at the finish, use the POW blocks where possible, and remember enemies like Piranha Plants and Para-Biddybuds give 1 coin each too. |
| 2-04 | Sinister Street Signs | Defeat all Mud Troopers | Note that shining your light doesn't defeat Mud Troopers, it just stalls them. Use the Chargin' Chuck or drop on their head to properly defeat them. |
| 2-05 | Floaty Fun Water Park | Defeat all Goombas | Lure them towards ledges and drop onto as many of their heads as possible in one go! |
| 2-06 | Drift-Along Canyon | Don't take any damage | Simple enough - remember to keep moving side to side to dodge the Koopa hammers when on rafts. |
| 2-07 | Sliding Slab Shuffle | Clear course using 4 touches | Don't tap the first triangle, go up the side of it and drop off onto the higher ledge that way without having to move it. Then continue as usual! |
| 2-08 | Spooky Specters at Shadow Manor | Get the 1-Up Mushroom | From Blue Toad - before moving, turn around to face the dark corner and he's hiding there. |
| 2-09 | Draggadon's Revenge | Don't take any damage | Self explantory, just take your time! |
| 2-10 | Spinwheel Cog Ruins | Gold Mushroom | See below |
| 2-11 | Wind-up Stairs | Gold Mushroom | See below |
| 2-12 | Up 'n' Down Terrace | Only use the switches 3 times | Before you move the camera, fall to the left as you fist look at the level. Go up the ladder, hit the hedgetop P to lower the brown fences; drop off and run all the way to the other corner, on the side where the entrance to the star is, and press the P button on ground level; climb the ladder, go press the button at the far end of the hedges, and then drop off the white fences to the exit. |
| 2-13 | Clear Pipe Puzzleplex | Collect 70 coins | Easy enough if you get every one you see! |
| 2-14 | Midnight in the Wandering Woods | Gold Mushroom | See below |
| 2-15 | Double Cherry Spires | Gold Mushroom | See below |
| 2-16 | Bullet Bill's Touchy Trials | Gold Mushroom | See below |
| 2-17 | Spinwheel Sky Fort | Don't take any damage | Self-explanatory but beware the red Bullet Bills in particular. |
| 2-18 | Battle Tower Blitz | Collect 170 coins | Defeat all the enemies and collect every one you find and you'll be fine. |
Captain Toad: Treasure Tracker Episode 3 Bonus Challenge solutions
| Number | Level | Bonus Challenge | Solution / Tips |
|---|---|---|---|
| 3-01 | Rolling Inferno | Collect 75 Coins | Simple enough, just don't rush it! |
| 3-02 | Seesaw Sizzle | Don't defeat any Spikes | This means you can't use the ramps as catapults. Instead, wait for a Spike to drop the ball and then as soon as it's clear, make a dash for the ladder on the far side of the ramp you're on. You'll take damage the first two times (there's a Red Mushroom between the two); at the third, rush as fast as possible up the ladder and go hard right at the top of it to dodge the Spike and reach the star! |
| 3-03 | Beep Block Sky Plaza | Don't take any damage | Easy enough, you're most vulnerable when waiting for the long strip of blue blocks to appear in the middle of the course - keep moving while you wait! |
| 3-04 | Pickaxe Cave Plummet | Don't break any blocks | Ignore all the pickaxes along the way and it's easy enough to drop all the way down the course. |
| 3-05 | Stumpy Springs Sanctuary | Gold Mushroom | See below |
| 3-06 | Biddybud Snow Stroll | Don't break any tiles | Tough but doable. Follow the Biddybuds as far as the second patch of two pluck patches, then wait there for them to turn back, whilst memorising where they went up ahead. Follow their route all the way to the open square near your start position and drop down next to the star. |
| 3-07 | Cagey Conkdor Caper | Gold Mushroom | See below |
| 3-08 | Up 'n' Down Desert | Only use the switches 8 times | The toughest part is the final area with 3 P buttons and a Piranha Sprout. |
| 3-09 | Mine Cart Ruins Rumble | Got the 1-Up Mushroom | After the big drop, look up to your right to the row of blocks with a POW block in the middle - shoot that, and then quickly shoot the green 1-Up Mushroom that pops out! |
| 3-10 | Multi-Vator Mayhem | Clear course with 5 Toads | First four cherries are fairly obvious, the final one is on the grassy ledge near the starting position, where you drop down for Gem 3 from the very top of the level. |
| 3-11 | Flip Panel Footpath | Collect 45 Coins | The main missable coins are those inside the lower tower, and the hidden ones around the top ledge of the final tower. |
| 3-12 | Rock Block Badlands | Clear the course in 10 shots or fewer | Once you've cleared this once it's easy to figure out what needs destroying in order to progress, just focus on hitting the joins between blocks in order to destroy multiple ones at a time. |
| 3-13 | Secret of the Golden Realm | Clear the course in 10 touches | Prepare the touches for the bottom level before moving so you have time to line them up as efficiently as possible, and you should be fine! |
| 3-14 | Shy Guy Shadow Den | Don't get seen by any Shy Guys | Same as the previous version of this challenge, just be patient and treat it like a stealth level! |
| 3-15 | Razzle-Dazzle Slider | Don't fall into any holes | You can't get this one at the same time as getting the gems, so do it in a separate run and it's just about your own ability to control Toad! |
| 3-16 | Poison Canal Cannon Run | Clear the course with 4 Toadettes | The main missable cherries are in the two areas over in the opposite, back-right corner from your start position. |
| 3-17 | Fright Train Flight | Defeat all the Mud Troopers | To do this, don't disconnect the train carts and instead bait the Chargin' Chuck onto all three carts to wipe out all the troopers, and use the birds for the rest! |
| 3-18 | No Sleep at Kamek Keep | Collect 190 Coins | Don't forget the big stack on ground level around the back! |
| 3-19 | Retro Ramp-Up | Smash all the blocks | This one just requires quick fingers and planning for when you pick up the pickaxes. |
| 3-20 | Twisty-Turny Planet | Gold Mushroom | See below |
| 3-21 | Ghost Gallery Gambit | Gold Mushroom | See below |
| 3-22 | Touchstone Turmoil | Clear the course in 6 touches | Tap yellow, walk to blue. Walk into the hole in the yellow wall, tap yellow. Come out and go up the blue ramp, tap blue. Cross to yellow, tap it up to three times as you dodge the para-biddybuds. |
| 3-23 | Colour Crate Carousel | Gold Mushroom | See below |
| 3-24 | Trick Track Hall | Gold Mushroom | See below |
| 3-25 | Deep Space Gyromajig | Don't take any damage | Simple enough! |
| 3-26 | Magma Road Marathon | Collect 150 Coins | Two things to bear in mind: make sure you take all the detours possible, especially the one to the glass cannon on your left; also, if you're going too fast try running into a wall for a bit until the speed boost wears off. |
| 3-27 | Scalding Scaffold Sinkhole | Collect 200 Coins | Surprisingly doable, just be quick! |
| 3-28 | Wingo's Whackdown | Collect 220 Coins | This one actually relies on you finding two Gold Mushrooms, worth 50 coins each - see below for more! |
Captain Toad Gold Mushroom locations for Episode 1, 2 and 3
1-1 Plucky Pass Beginnings Gold Mushroom location
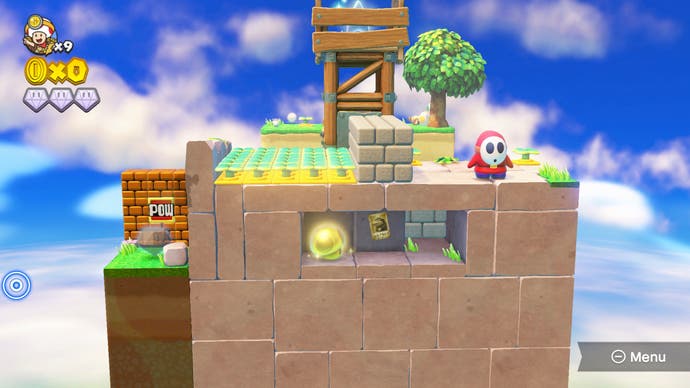
1-7 Spinwheel Library Gold Mushroom location
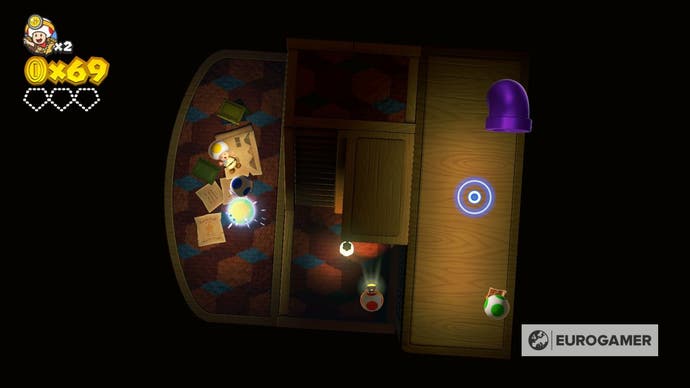
1-9 Spinwheel Bullet Bill Gold Mushroom location
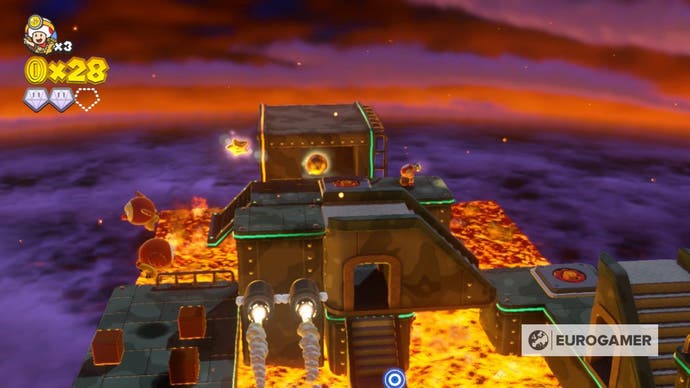
1-12 Briny Bowl Swimming Hole Gold Mushroom location
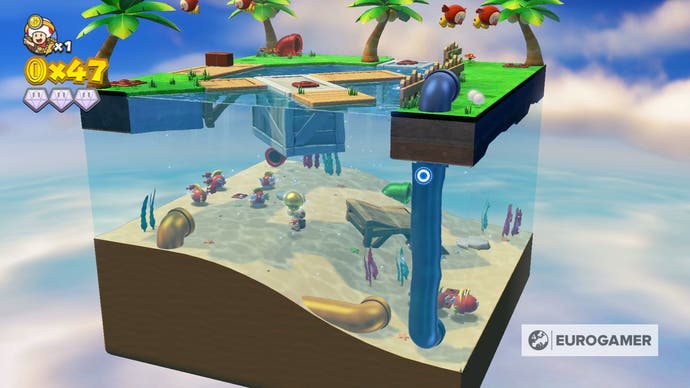
2-1 Chute Scoot Slopes Gold Mushroom location
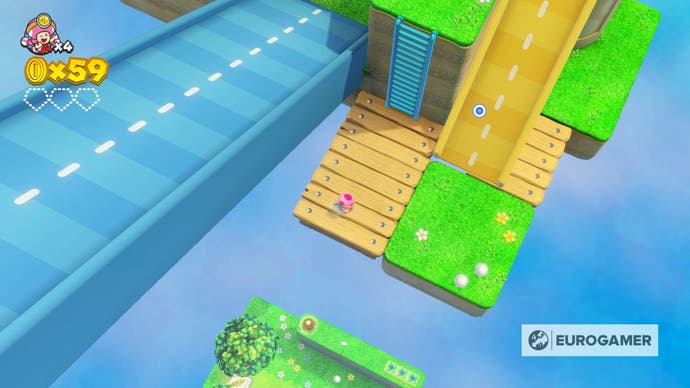
2-10 Spinwheel Cog Ruins Gold Mushroom location
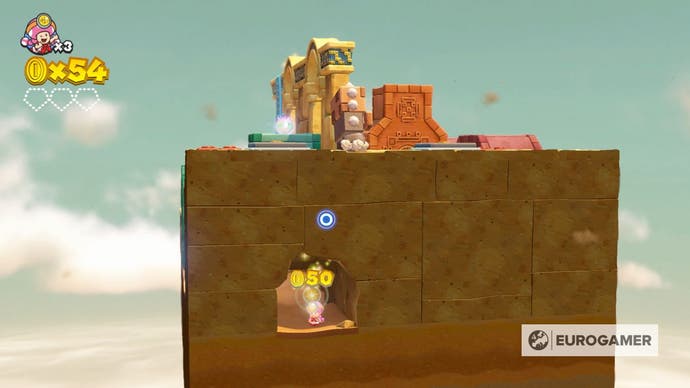
2-11 Wind-up Stairs Gold Mushroom location
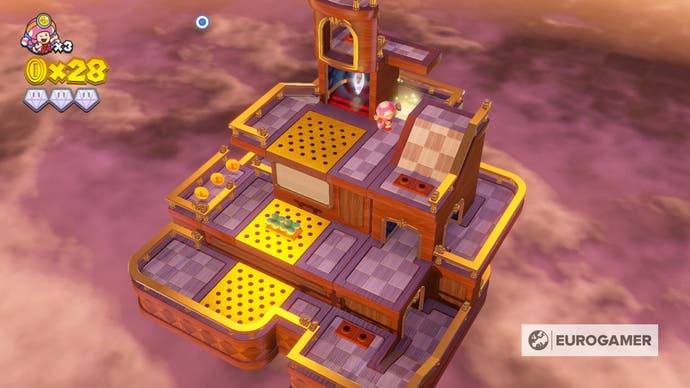
2-14 Midnight in the Wandering Woods Gold Mushroom location
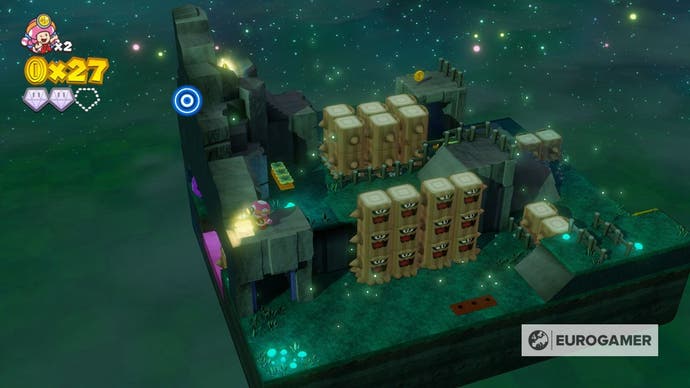
2-15 Double Cherry Spires Gold Mushroom location

2-16 Bullet Bill's Touchy Trials Gold Mushroom location
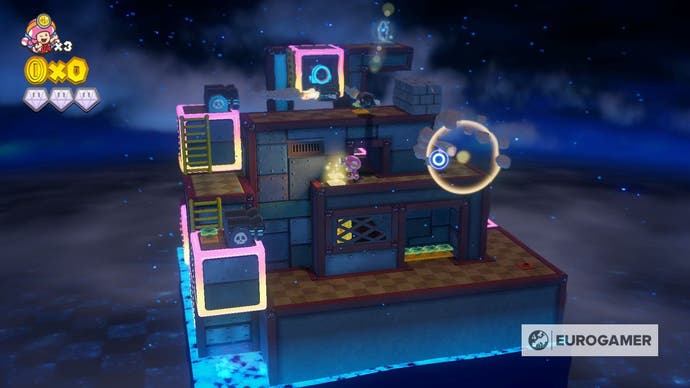
3-5 Stumpy Sprins Sanctuary Gold Mushroom location
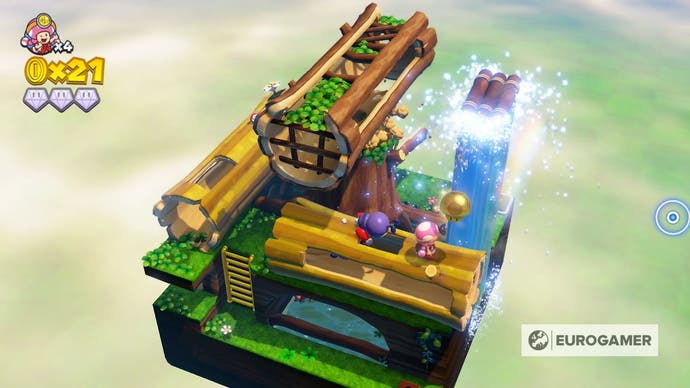
3-7 Cagey Conkdor Caper Gold Mushroom location
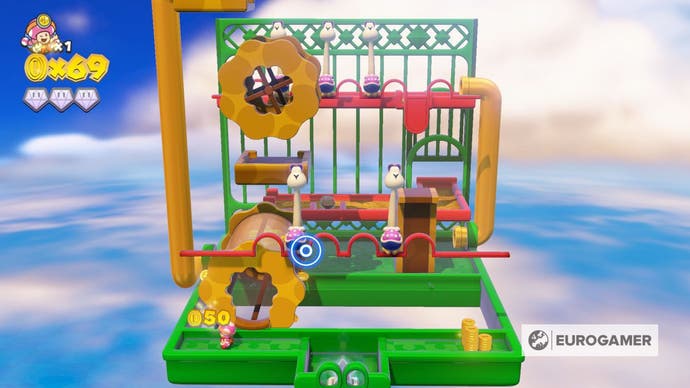
3-20 Twisty-Turny Planet Gold Mushroom location
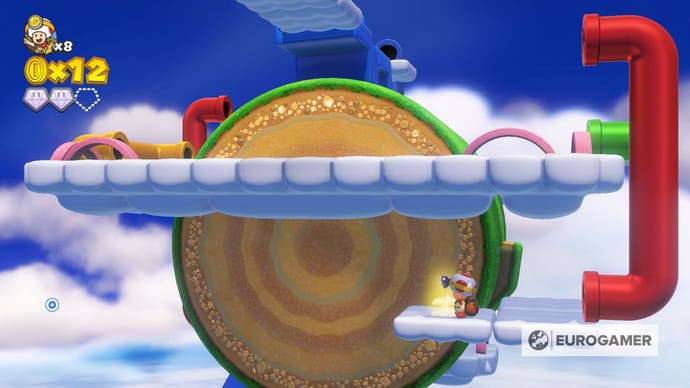
3-21 Ghost Gallery Gambit Gold Mushroom location
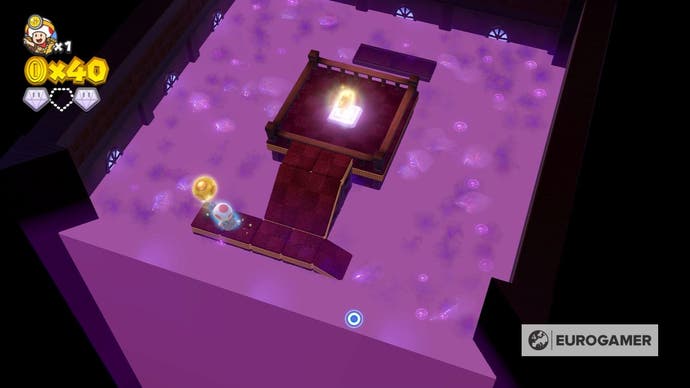
3-23 Colour Crate Carousel Gold Mushroom location
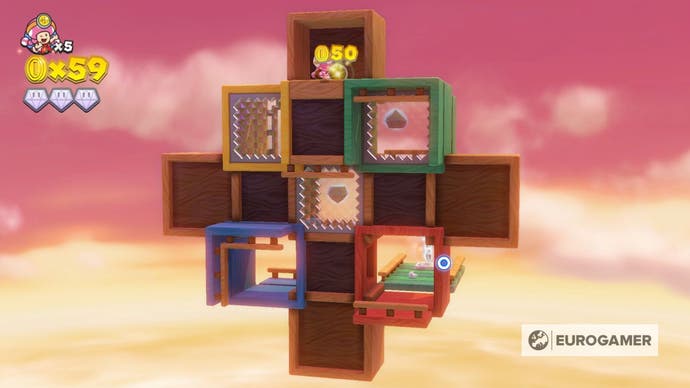
3-24 Trick Track Hall Gold Mushroom location
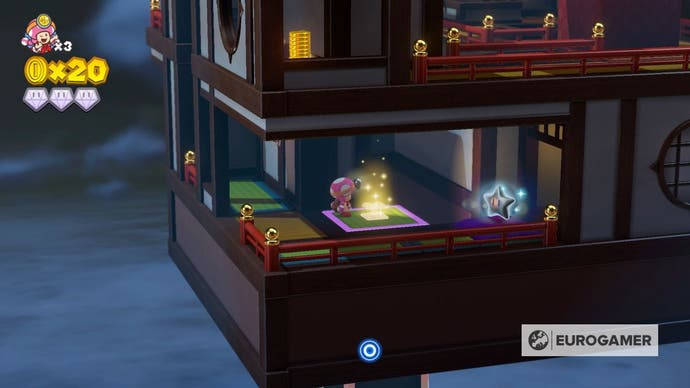
3-28 Wingo's Whackdown Gold Mushroom locations
