Rise of the Tomb Raider - Soviet Installation, zipline, Jacob, Communications Breakdown
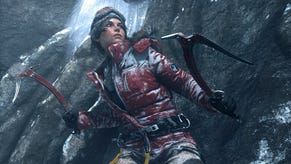
How to use ziplines, stealth kills and crafting components to complete the Soviet Installation section of Rise of the Tomb Raider.
The game really begins in earnest now, so you'll need to keep all the things you learned so far in mind as you make your way through hostile territory.
Among the Enemy
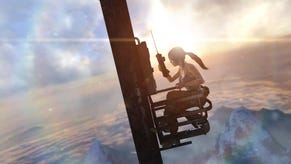
Rest up at camp, craft and upgrade, then leap onto the zipline. Make your way down the path, then pick up the recording from the tree stump the corpse is resting against. Tread carefully beyond this point - as you round the corner you'll come across a guard. Take him out from in the bushes before he spots you, then sneak towards the next two guards.
Grab a nearby bottle and throw it to the left to distract one guard, then throw the other to the right. When they're both distracted, sneak out and deal with the left-most guard, then hide inside the railway carriage until the other guard turns his back on you. Now take him out stealthily. Technically, you can just shoot these enemies, but it pays to get to grips with the stealth mechanics as you'll need them a lot later on.
Once the coast is clear, climb up the building to the right and drop down the other side. You can either take a stealthy approach or try a frontal assault, but at this point you're severely out-gunned, so stealth is preferable. Use distraction objects and cover to take out the guards, making your way into the building ahead and up the ramp to the next floor.
There are a few items to collect here, but they're best left until the coast is clear. Once the guards are incapacitated, use Survival Instincts to make sure you've not missed anything of interest, then make your way up the platforms surrounding the red silo. When you reach the top, jump onto the zipline.
Once you reach the ground, grab one of the oil lamps from nearby and turn on Survival Instincts to locate the destructible scenery. Toss the lamp, then head through the opening - finally we have a gun! Use it to shoot the two guards through the window, then jump through and talk to the prisoner. We can't yet pass through the door on the right, so head through the other one and climb through the small window in the far wall.
After the cut-scene you're again left with a choice of stealth or assault. The pistol evens the odds slightly, but stealth is still a safer option. The guard patrolling the back of the room should be dealt with first. Wait for him to get close to the concrete pillar to keep him out of view of the others, take him down, then head up to the upper walkway to deal with the sniper. Drop back down to the ground floor and make your way behind the cover of the crates to the gas lamp. Grab it and throw it at the cloth-covered machinery where the remaining guards are congregating - the explosion and fire-damage should finish them off.
A lone guard will run in through the newly demolished wall, but the fire should also make short work of him, and there's another guard positioned in the courtyard outside. A headshot with the pistol from the opening will finish him off fast.
Unexpected Discovery
Once the fight is over, loot the bodies and read the plaque on the wall outside, then climb over the gate to discover a new camp. Do any crafting and upgrading you may need, then head for the next objective. There's a hole in the fence to the right of the courtyard area where you'll find some loot, so pop in there before climbing up the guard tower and using the zipline.
At the bottom you'll come across a friendly who offers you the optional mission Communications Breakdown. Speak to him, then head to the objective marker. Apart from occasional wolves prowling the area you're free to explore without too much interference, but many of the secrets require equipment that's not yet been acquired - for now it's best to just press on with the story.
Climb the cliffs at the marker to find another camp, and do any upgrading or crafting you need. Make your way along the cliff path, go up the steps, and over the crest of the slope. Now's a good time to be careful as there are guards patrolling this area. We couldn't find a way to take them all out by stealth, but sneaking to the right of the abandoned truck should give you a good vantage point to take out the two near the fire before you're spotted. The remaining guard should be easy prey.
Once the area is clear, read the Russian plaque on the side of the building, then force open the door to get access to a shop. Chances are you won't be able to afford much yet, but it doesn't hurt to browse! Once you're done with retail therapy, exit the back of the building, climb the ladder, and drop down the zipline.
Prison Break
Interact with the pipe on the cell wall to detach it, then use it on the cracked wall next to the cell door. Squeeze through the gap into the next room and pick up the bow and rope from the table, then return to your cell. Shoot an arrow at the rope wrapped around the bars and climb out.
After the cut-scene, craft a few arrows then follow Jacob. When you reach the room with the projector, grab the audio log from the table, loot the chest and container in the corner, and flick through the slides on the projector. When you're done, force the door open, climb the stairs, ascend the ladder, and clamber out of the gap on the left.
Once you're outside, climb the ladder in front of you, sneak across the roof, and take out the guard in the nearby tower. From this vantage point you can easily get rid of the guard in the adjacent tower, the one repairing the transmitter, and the one patrolling the far roof.
Once they've been dealt with you can pick off the ones on the ground. Take a couple out from the guard tower, then use the rope to cross to the other building and take them out one at a time. When they're all down, loot the corpses, then head inside the hut, open the gate, and pick up the audio log from the table.
Get out of Dodge
Head through the gate and stand next to the rope post on the left. Fire an arrow to the rope above the broken stairs and climb up. Head to the end of the broken stairs, scramble up to the window ledge, leap across to the next window, then go up and round the corner and drop down to the open window below.
You'll end up in some grimy water under the floor. Head towards the end of the area and climb out. Grab the map and audio log from the tables, then force open the metal door. Loot the box then stand behind the rope reel. Fire an arrow at the rope on the other side of the water, then use your axe to turn the crank and lift the cable out of the way.
Cross the water, force open the door, then brace yourself for combat. As soon as you've grabbed the rifle you'll get a few seconds of bullet time, so headshot the guards, before fighting your way through the next area. Watch out for grenades, make use of the handily-placed oil barrels to set off some environmental damage, and make good use of the shrapnel grenade crafting you'll learn during the fight.
When it's all over, grab another audio log from the bunk bed and drop down the hole in the floor. Head down the passageway and you'll arrive at a new camp. Once you're ready, press on, and prepare for a big fight.
Before squeezing through the gate, equip the bow. To the right of the building ahead, just below the guard tower, is a rope block that you can use to wipe out a few guards quickly, and another on the building behind the fence on the right. After that, stay in cover, keep out of the range of grenades, and don't rush things. After the first batch of enemies is out of the way, some spec-ops types will swarm in - they're heavily armoured and well armed, so aim for the head, make use of poison arrows if need be, and don't let yourself get pinned down.
After the battle, you have a very brief period of relative peace. Follow the markers and make your way through the scenes of devastation in the train yard. After reuniting with Jacob you'll need to make a run - and a swim - for it. This section's again more or less on-rails, although keeping to the right of the path is advisable. There's a leap to a pole you can easily miss, and the left side of the platform leads to doom after the zipline.
Alone Again
Head outside and drop down the zipline. At the bottom is another friendly character who unlocks the challenge mission Dangerous Territory. Now is a good time to tackle it - along with Communications Breakdown if you didn't do it earlier -, and when you're ready, head for the marker and pull down the gate.
Once you've spoken to Jacob, head between the two sets of train carriages and scale the building to your left. On the roof you'll find a ladder, and at the top there's a rope block to your right that can be pulled down. Jump across the gap and climb the ladder - at the top you'll learn Molotov cocktail crafting.
Use it to your advantage to take a few of the enemies out, then use traditional methods to clear out any stragglers. When the danger has passed, take a quick detour into the locker room by climbing over the wall to the left of the doors. There are containers to loot here, and activating the panel at the rear of the room will open Optional Challenge Tomb Unknown Area (aka The Red Mine).
Head up the stairs and make yourself another cocktail, then use it to destroy the flammable barrier. In this area there's a briefcase to loot and a plaque to examine along with some assorted resources. Don't be tempted to see what's behind the destructible rope door, though - it's just a shortcut back to the ground floor!
Use a rope arrow on the rope swing to cross the gap, use another arrow to clear the debris, then balance your way along the narrow beam. As you cross over, it will start to give way, so near the end make a flying grab for the climbable rock face and head left and up.
Climb up the silo and jump off the other side onto the grab rail, then shimmy along and climb up and take the guard out stealthily. Inside the building, take a flying leap to the ladder, climb up and left round the building, and pull yourself up into the attic and slide down the zipline - alternatively, head left around the landing and make your way through the rafters.
Use an arrow to make a zipline across to the other side, jump on, and be ready to take on a group of enemies as soon as you land. Once the area is clear, jump across to the far side, head up the stairs, and clamber up the outside of the building. Collect the audio log, then use the rope-swing across the gap to the objective marker. Head down the stairs, then through the building, and up the other side. At the end of the crawl-space you'll find another group of bad guys.
In the small alcove to the left you'll find a bottle. Craft a Molotov and throw it at the enemies and you should be able to take them out as a group. Pick up anything of interest, then head to the far side of the area, make another cocktail, and burn down the barricade.
Just around the corner is another group of enemies - wipe them out and head up through the burning building, dealing with another couple of floors of enemies as you go. Finally, you'll be attacked by three guys carrying riot shields. The easiest way to deal with them is with more Molotovs, so keep moving behind cover, scavenging for bottles to throw.
When the coast is clear, head up the stairs, climb the ladder, and make a zipline using a rope arrow. Jump on and get reunited with Jacob once again.
- The next part of our walkthrough explains how to complete Rise of the Tomb Raider: Abandoned Mines, the next section of the game.
- Return to the index page for more entries in our Rise of the Tomb Raider guide.


.png?width=291&height=164&fit=crop&quality=80&format=jpg&auto=webp)


