Rise of the Tomb Raider - Abandoned Mines, minecart, Coin Cache, smoke-screen, crane
How to complete the Abandoned Mines section of Rise of the Tomb Raider, from managing the minecart to manipulating the crane.
Follow Jacob, and make a run for it after the passage collapses. When it's all calmed down again you'll be in another enemy-infested cavern. You can either rush in all-guns-blazing or wait for them to finish their conversation, at which point they'll split up and can be taken out stealthily.
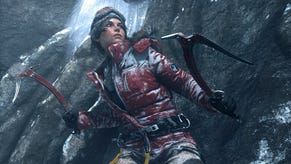
Whichever way you choose to handle things, when the coast is clear try the elevator controls, then push the mine-cart towards the illuminated rocks. Climb up and collect the knife, then use it to cut through the ropes to drop the elevator to the floor. Jump down, climb onto the elevator, then jump for the rough ice.
Climb up, then leap across to the elevator shaft, head up and round, and jump to the ledge. Read the journal that's sitting on the crate, then head down the passageway into the ancient ruins. There's a Coin Cache and a journal to read, a pit trap to avoid, and a new campsite just ahead. Check out the mural, then do your upgrading and crafting as required.
When you're ready to move on, head round to the left. There are a fair number of enemies here, so stealthily taking down as many as possible is recommended in order to minimise risk. Once the area is secure, collect the journal from the back of the large room, force open the crate to the left of the swimming pool to acquire the crafting tool, and collect another journal from the stack of crates next to the machinery.
Jump up to the cable and shimmy along it. Drop down at the other end, then take a running jump from the small ramp to the cable to your right. At the other end, hit X to avoid falling from the truck, then move round and onto the broken stone bridge. Half way up is a trailer full of rocks. Push it over the edge, then use a rope arrow to connect the other trailer to the rope reel.
Wind the winch until it will go no further, then use your knife to cut the rope and send the truck plummeting into the chasm. Unfortunately that's also cut off your way back, so head behind the ice-covered archway and climb up to the rope. Make your way across and follow the curved stone passageway, dropping down at the end to enter a combat scenario.
After the first wave of enemies, some more will drop in to say hello, bringing with them a smoke screen - it makes visibility difficult, but luckily they make use of laser scopes which show up quite nicely in the cloud. Clear them out, then loot the area- there's a monolith to translate and a couple of Coin Caches to empty.
Head down the stairs in the left-hand corner from where you entered. They'll quickly give way, so leap from the bottom and grab the ice with your axe. Climb up, and at the top head left to find an artefact. Head the other way and jump across the stone pillars. Straight ahead and to the right are a Coin Cache and a satchel containing a map guarded by a pit trap. In the short passage to your left is a blockage that can be pulled down with your rope arrows.
Ahead is an ice wall, but be careful of the pit trap in front of it. Jump across to loot the container first, then grab for the ice and climb up to return to the area next to camp. Enemy forces have returned, and this time around you won't catch them off-guard, so make a beeline for cover. One enemy has a riot shield and another is camped on a high platform.
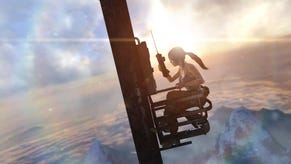
Once they're dead, head up to the platform and climb the wall in the right-hand corner. Collect the map, jump across the gap, and take a leap off the ramp onto the zipline. The crane will start to give way, so shimmy around to the right and climb onto it, then go down the arm, and onto the metal grating to the left.
Drop down into the next area and push the cart along the tracks until it's clear of the obstacle. Stand in front of it and use a rope arrow to connect it to the thing dangling from the crane, then use your axe to wind the winch until the whole thing comes crashing down.
Another sprinting section follows on from this, so run up the ramp and jump onto the crane arm, go over the gap in the middle, and then off the end. Keep running forwards, then jump as the steps collapse underneath you to make it to the interior, just as a rockfall buries the doorway.
Warming Up
Despite the grandeur of this room there's not much to see here - a couple of parts boxes to loot and a Coin Cache at the foot of the statue. Head down the steps and turn left, but mind the pit trap along the corridor. Time for a little swim now, and there's a small air pocket half-way down - just mash B until you emerge from the other end.
- Keep reading for our guide to completing Rise of the Tomb Raider: Geothermal Valley.
- Stuck somewhere else? Head back to the first page for the rest of our Rise of the Tomb Raider guide.


.png?width=291&height=164&fit=crop&quality=80&format=jpg&auto=webp)


.jpg?width=291&height=164&fit=crop&quality=80&format=jpg&auto=webp)


