Thief (2014) - The Forsaken, Night Warden, kill Freaks, safe code, raise gates
Eurogamer's guide to fighting the Freaks in the Forsaken chapter of the new Thief game. We'll make sure you get every last bit of loot as well.

You'll have to deal with some pretty meaty enemies known as Freaks in this next chapter of Thief. If you follow our advice then you shouldn't have too much trouble dealing with these brutes, but you'll want to be very mindful of what lies around each and every corner of this area. This section of the walkthrough will give you a heads-up on the dangers lurking all around, as well as the hiding spots of all that lovely loot.
Just like in the previous chapters, pay a visit to the Shady Merchant before setting out on the next part of your adventure. You want loads of arrows, particularly Fire Arrows which you should max out. You should have more than enough cash by now to afford the Bow Strength upgrade as well, and our walkthrough makes heavy use of it.

Reach the Asylum Grounds
First things first, get inside the grounds of the asylum by running forwards and climbing up the wall. Now head to the left of the building ahead of you to get your hands on City Heritage Plaques (9/16) - Moira Asylum. Now make your way to the other side of the building, which should then cause the main door to open. Before rushing in, go and grab the treasure from the statue at the front - it won't appear until the door has been opened.
Find Information About Erin
Once you're inside the building, take a look through the peep-hole. Once the doors have opened, make sure you loot every last item in the lobby, hunting upstairs and downstairs. Once you've got your ill-gotten gains, enter the Men's Ward via the revolving doors to the south.
Head right when you're in the ward itself, and keep your eyes peeled for a valve in one of the offices. Once you've turned it a gate will open, which in turn allows you to pass through another set of revolving doors. Go through these and you'll find yourself in the old inmates wing.
Before you do anything else, give the place a thorough shakedown and plunder everything you can find. No-one will bother you while you're doing this, so go about it at your leisure - just stay out of the M02 and M12 rooms until you're finished. Once you've looted everywhere else, go into M02 and interact with the peep-hole on the southern wall.
Now leave the room and use the Razor Tool to steal the painting. This will grant you The Court of Montonessi (10/12). If this isn't the item number you receive, you need to check against earlier sections of our walkthrough, or go hunting around The City.
If you head into the other uncleared room, called M12, you'll find a key on the floor. Picking it up will automatically finish this objective, and allow you to gain access to the Women's Ward.

Enter the Women's Ward
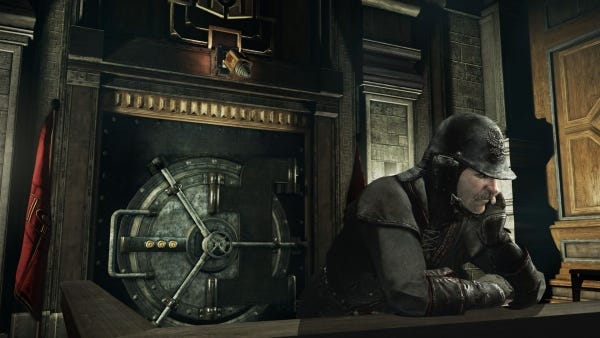
"Believe us when we say you do not want to pick a fight with this guy."
Once you've finished picking up all the loot in the room, head back outside and take note of the document that's on the wall. If you pick it up, you'll be notified that the Night Warden is on duty. Believe us when we say you do not want to pick a fight with this guy, but it's possible to avoid him entirely if you read ahead and choose the correct path.
First of all, move as quickly as possible to the left, then make a right-hand turn and pass all the way along this corridor. Enter the first hall to your right and run as quickly as possible to the end of it. If you look to your left, you should see a set of revolving doors. Pass through them to escape the attentions of the Night Warden entirely.
You'll need to go through two different sets of revolving doors now to get into the Women's Ward. Go to the locked door and use the key you looted a little earlier to unlock it. Once you're inside, find the valve and turn it.
Now exit the room and make your way towards the stairs to your north. Rather than heading down, fire a Rope Arrow at the anchor beam that's above you. Make your way down the rope to get on top of the lift, then drop down into the room below to get your hands on Flowers Eternal (5/6) - Rose Brooch. If you're having a little trouble spotting it, activate your Focus ability to find it with ease.
Head back the way you came and keep making your way towards your objective, which is just outside of the office where you tuned the valve. Make your way through the revolving doors to trigger a new objective. There's a fair chunk of treasure dotted around the asylum, so come back here another time if you find yourself in need of a little cash.
Search for the Asylum Records
Make your way into the southern office, then loot everything you can find - there's no-one around here to interrupt you, but leave room W07 for last. Once you've finished pilfering, pick the lock on the door of this final room, then crawl through the small space in the wall to get into room W05. If you climb the window here, you'll be able to jump across to an office to the south. Grab the handful of documents in here, using your Focus ability if necessary.
Move to the Treatment Wing
There's nothing too complicated about this part of the chapter. Just keep walking towards your objective, shoving away any debris that's blocking your path.
Descend to the Treatment Level
"You'll find a gate blocking access to the path, but if you head upstairs and turn the wheel, the gate will raise up. "
Take the document that's on the wall opposite you, then head down the stairs and pass through the door at the bottom. Get onto the beam and then jump over to the platform ahead. You'll find a gate blocking access to the path, but if you head upstairs and turn the wheel, the gate will raise up. Go downstairs until you're at ground level, and then keep heading forwards until you get an updated objective.
Access Room 3F
Head forwards, grabbing any loot you can from the rooms close by. You'll find Room 3F down towards the south, although you'll soon discover that you need to activate the power if you want to get in.
Find and Start the Power Generator
Before getting the lights back on, pinch all of the treasure from the office and corridor, although note that there's a trap around here - use the control box nearby to disable it. Once you're done, keep travelling in a westerly direction until you find yourself in a room with a switch. Activate it to turn the power back on, then grab the nearby loot.
Find a Way into Room 3F
There's no more shadow to skulk in, but you're on your own so don't worry about any interruptions. Do save the game using the cabinet over by the generator though. Once you've saved, head back into the office and then interact with the switch to open up the cells. This will cause a rabble of patients to start wandering around, but they can't reach you as long as the gate remains shut.
Get out of the office and then go through the door that's just across the hall. Steal everything you can once you're inside, then crawl through the small space to get into room 3F.
Descend to the Asylum's Lowest Level
You need to watch out for the patients now, so move carefully. There are three to handle in total, and how you deal with the threat is entirely up to you. If you prefer to deal with the danger directly, you should find it pretty easy to sneak up on two of them and take them out. Alternatively, you can throw a bottle into the corridor to pique their interest. At this point, you can either kill both of them with head-shots, or set fire to the liquid on the floor. We'll deal with the third cell-bound inmate in a little while.
After you've dealt with the patients, make your way into cell 3E. Grab all the treasure you can from here, and don't miss out on the safe - you'll be able to loot Serendi Stone Circles (5/7) - Ivory Circle from it. The combination is 7-3-1 if you need it. You should now go and loot all the treasure you can from all of the other cells - including cell 3C which contains a rather unfortunately trussed-up gentleman. Use the lever to raise and lower this device - there's loot stashed above and below it.
There's a crawl space in here that will take you into 3B - go through it. There's a patient waiting for you on the other side, but he's a little distracted, so just sneak up behind him and take him out. Take all of the loot stashed away in this room, and then crawl back through to the last room you were in. Jump down into the lift shaft and then use the vent. If you keep heading forwards, looting as you go, you should eventually trigger a new objective.
Locate Erin's Holding Cell
There are eight of the so-called Freak monsters to deal with in this portion of the chapter, and it's at this point you'll be glad you stocked up on Fire Arrows. These arrows, combined with the Bow Strength upgrade you invested in, will make light work of things.
"For extra laughs, consider setting fire to the flammable liquid on the floor when they [the Freaks] pass through it."
A Fire or Blast Arrow to the body will take them out pretty cleanly, but whatever you do don't melee fight them - you'll regret it instantly. For extra laughs, consider setting fire to the flammable liquid on the floor when they pass through it. If, for whatever reason, you don't have the arrows or the upgrade, you'll have to sneak passed these brutes undetected - tricky, but definitely possible.
We'll make use of the feisty option. Once you've taken all of the treasure from the reception area, make your way through the door that's to your north, but do so sneakily as there's a Freak waiting for you. He's a bit preoccupied with smashing his head into the wall, so just fire off a Fire Arrow to see off this first threat.
Keep heading in the same direction until you spot two more Freaks, just to your west and along the wall. Sneak your way up a little closer to them, and take them out with Fire Arrows one by one, just as you did with the first of these enemies.
Before moving on, make sure you break the vase that's located in a corner of the room. If you do so, you'll be able to get your hands on Memories of the Dead (4/6) - Child's Memory. If you've looted a different part of this collection, you'll need to reference earlier parts of our walkthrough, or go for a hunt in The City where lots of these items can be found.
Now head all the way back to the reception area, and get up by the railing that's just behind the reception desk. If you use your Focus ability, you'll be able to spot a pair of Freaks ahead of you and to the left.
It's extremely important that you hit your target first time when dealing with these enemies - if you miss, they'll start actively hunting you down. When one of the Freaks wanders into a corner of the room, take him out quickly. Now deal with as many of the other Freaks as possible while you're in this handy position.
Vault over the railing, then move forward quietly until you come to a pile of crates just to the south. Climb up them, then fire a Rope Arrow at the anchor beam to place a new rope alongside the one that's already there.
Jump between these ropes, then make your way onto the walkway that's in the centre of the room. You can get another piece of special loot here: Unique Loot (6/9) - Mechanical Eye. Again, you'll have to refer to earlier parts of our walkthrough if this isn't the item you receive, or explore The City, where many collectible items are hidden.
Once you've picked up your loot, drop down to the floor below and then make your way towards your objective. Just make sure you don't land on the glass or walk through it - Freaks can't see you, but they can definitely hear any noise you make. Keep making your way forward quietly until you're given a new objective.
Leave the Asylum
All you need to do here is exactly what the objective tells you to do - head on outside. Once you've done so, you'll complete this chapter, and unlock a trophy/achievement called The Forsaken.
We've got an essential tip to help you kill the Thief-Taker General. Check out the first page of our walkthrough for more details.