Castlevania: Lords of Shadow 2 - Discover the Revelations Behind Satan walkthrough, kill Death, kill Alucard
We'll guide you through the final chapter of Lords of Shadow 2, and show you how to beat Satan himself without breaking a sweat.

It's the end of the road for our Castlevania: Lords of Shadow 2 walkthrough, and there's a fair bit of content to charge through before we reach the finishing line. From a rumble with Death himself, to a rather disappointingly brief battle with a possessive Satan, we've got the complete lowdown on how to survive the final chapter of the game.
Discover the Revelations Behind Satan walkthrough
When the cut-scene finishes, jump down onto the area below you, and then head forward until you trigger a new cut-scene. The battle that follows features a handful of Dark Monks who join forces to form a deadly Dark Apostle. As if that wasn't annoying enough, they'll also summon a handful of trash minions to help them out during the fight.
While the monks are split up, focus your attacks on one monk at a time so as to thin their numbers out as quickly as possible. Just make sure you dodge out of the way whenever they glow green, as there's an unblockable attack coming your way. When the Dark Apostle is formed, fire off a Void Projection to split the enemy up into individual monks once more. Keep repeating your strategy of thinning down the ranks until the fight is over.
When all of the monks are dead, make your way over to the opposite side of this area, and replenish Dracula's health via the statue over on your right. Now interact with the device in the centre of this room, and request the Lieutenant's assistance. There's another cut-scene to watch, after which you'll need to use your Mirror of Fate once more.
"When the Dark Apostle is formed, fire off a Void Projection to split the enemy up into individual monks once more."
You'll need to put it into a different formation this time around. Take the upper right-hand piece first, then rotate it so that the black part is over on the left, then place it in the upper left-hand section of the mirror.
Now grab the piece from the upper left corner and rotate it until the black part is on the left, then put it down in the lower left-hand corner of the mirror. Now grab the piece from the lower right, point the black section to the left, and place it right above the previous piece.
Take the piece at the top and turn it until the black piece is in the upper right, then place it in the lower right-hand section of the mirror. Pick up the final remaining piece, point the black section to the lower right-hand corner, then put it in the last available slot in the mirror.
Now go through the floor, head over the bridge, and enter the throne room to trigger another cut-scene. As it plays out, you'll have to make a few actions as Dracula relives past fights. These are all pretty easy to complete, and once the cut-scene finishes you'll be ready to take on Death himself.
How to kill Death
The fight against Death is pretty easy at the beginning. Simply use your Shadow Whip from maximum range, and just dodge left or right out of the way when he starts swirling his scythe around.
Your opponent will block more than a few of your attacks. When this happens, simply remain at distance, and then use your upgraded Guillotine ability to keep dishing out damage. Death is able to block the initial aerial attack, but he can't avoid the second charged attack. As soon as that charge hits him, you can follow up with a little more regular damage from your whip.
After a certain amount of time has passed, Death will summon a handful of Servant Corpses to assist him. These aren't too annoying to deal with, and you can actually use them to handily top up your health and magic pools. Try hitting them with your Sustained Sweep skill to take them down quickly and cleanly. If you don't need any top-ups, just fling your Chaos Bombs at the Servant Corpses sat above the battle area - when they die, so will the weaker minions below.
When the fight against Death enters its second phase, you'll need to be ready to deal with a pair of new attacks. A green glow indicates that a massive projectile shot is coming your way. Just keep dodging to avoid its impact. When you see Death swirling his scythe around, you'll either get the regular attack from the first phase, or a very wide attack that takes in a huge amount of space ahead of him.
"After a certain amount of time has passed, Death will summon a handful of Servant Corpses to assist him."
Fortunately, there's a way of spotting which version of this latter attack he intends to launch. If the scythe is swirled very high above Death's head, you can expect the basic linear attack to come your way. If they start to swirl in a wider range, however, you need to be ready for the area-of-effect attack instead. If you struggle to tell the difference between the two build-ups, simply jump when you see either being charged up, then dodge or use your Demonic Wings to correctly avoid the attack type that occurs.
Once you've dealt a certain amount of additional damage to Death, he'll once again summon a pack of Servant Corpses to help him out. Use them to top up your health and magic if you need to, or just Chaos Bomb the ones above to continue the fight against Death.
During the final phase of the fight with Death, he'll use his scythe to create a chain of danger that swirls all around him. Simply activate your Mist Power to bypass this barrier, and then slip through it to trigger a new cut-scene. Be ready to complete the QTE during this cinematic to destroy Death once and for all.
Where to find Alucard
Once the fight's over, make your way down the hall until you come to a Memorial and a Pile of Sacrifice over on your right. There's also a Dungeon Key slot on your left. Rather than gifting a Kleidos, this particular Pile of Sacrifice confers the ability to carry more Dodo Eggs.
Keep making your way along the hall and then head into the new area where a Riot Mech's squaring off against a pair of Horned Demons. Make your way over to the wall over on the far left and climb up it. You can kill all three of the enemies if you wish, or you can just run away while the Mech deals with the Demons.
Now make your way back to the room where you interacted with the Mirror of Fate, kill every single enemy that spawns, then climb up to the top of this area. Go through the round door you come to, then turn right at the rubble and climb all the way up.
As soon as you get to the top, use your Demonic Wings ability to get to the platform above you. Now use Mist Power to pass through the first gate, then keep going forwards and slip through the second one. As soon as you come to a neon sign, climb your way up onto the platform above you, then jump to the left to get another Memorial.
Keep climbing up the wall that's behind the Memorial, then bear left. There are some steel girders nearby that you can leap over to. Now jump over to the next platform and loot a Void Gem from the Pain Box here. Go back the way you came and drop down to your left when you reach the very end.
Keep walking down this path, then drop down onto the bit of walkway that's just above the lowest part of this area. Go right and head up the ramp, then climb up onto the walkway above you. Travel left now and pass through the gate, go all the way down the walkway, use your Mist Power to slip past the danger of the fan, then climb up the towers you reach at the very end.
Go all the way along the walkway on your left, then jump up and activate your Demonic Wings to get to the Pain Box below you - there's a Void Gem inside it. Now drop down behind that Pain Box and head back to the higher platform you were on just a moment ago. As soon as you're back on that platform, take a right and go through the gap in the wall.
Activate your Mist Power to get up to the level above you, then climb up the ladder and go through the door when you get to the end of the tunnel. Jump down into the next area below you, then climb the ladder on the opposite side of the room. Go up the rubble, through the opening, then kill the enemies you find on the other side.
Keep heading towards the objective marker on your map, killing any enemies you encounter along the way, and go through the blazing rubble before heading up to the next floor. When you get there, turn around and climb the broken ladder to the very top, then go through the door.
Pull the lever at the end of this hall to get the power back on, then walk through the door. Go all the way across the roof, then jump down to the street below. If you need to stock up on any supplies, go left and make use of the wolf to head back to the shop. If you're good to go, just turn around when you reach the street and go through the corridor ahead of you, before heading left.
You'll need your Mist Power again to get through the gate. Now approach Alucard who's over on the opposite side of this area. Climb all the way up the wall corner until you're at the top, then drop down into the church. Walk down the hallway here until you come to that dreaded Mirror of Fate puzzle once more.
Take the piece in the bottom left-hand corner, and turn it left twice before putting it in the top left corner of the mirror. Take the piece from the upper-left, turn it left twice, then put it just to the right of the first bit you laid down.
Now take the upper right bit of the puzzle and turn it to the right three times before placing it to the right of the previous piece. Take the bottom bit, turn it around to the right four times, then put it underneath the other pieces. Next, take the piece on the left and turn it right twice, before putting it in the bottom right-hand section of the mirror. Turn the final piece twice and place it in the puzzle.
Now go through the door and head upstairs to trigger a cut-scene. Head towards the side of the beast here and look out for the black holes - they indicate that slime's about to start flying out. Once you've climbed up high enough, there'll be another cut-scene. When it's finished, run down the creature's back, then grab the chains to start a new cut-scene.
Now climb towards your left, then up the monster's back, and then kill the creatures that spawn as you make your way towards the chains over on the right. Grab onto these to start yet another cut-scene, and then get ready to face the final showdown against a Satan who's taken possession of Alucard's body.
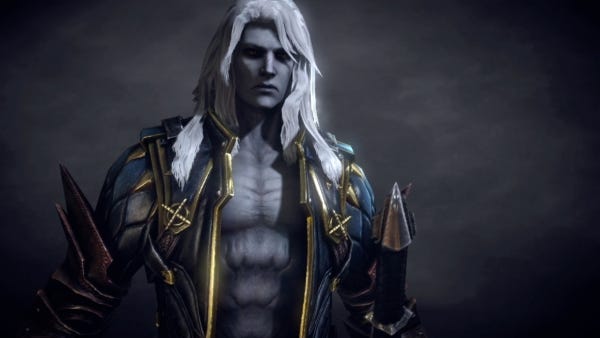
How to kill Alucard
"As soon as he vanishes, just dodge around the area repeatedly until he returns to the battle and starts fighting once more."
The trickiest thing about fighting Alucard is that so many of his attacks are so tricky to spot. Just keep smacking away at your opponent until he begins to flinch. When he starts moving, dodge out of the way as quickly as possible. When Alucard attacks, he tends to do it twice in rapid succession, so just make sure you evade enough to avoid all the damage.
After each attacking manoeuvre, stick very close to the boss and throw the most powerful attacks you have at him. As soon as he vanishes, just dodge around the area repeatedly until he returns to the battle and starts fighting once more.
Once you've dealt out a certain amount of damage, he'll leap up into the air and commence a massive barrage of attacks from the air. These leave black marks on the ground which you must not touch if you want to avoid taking massive amounts of damage. When Alucard comes back down to earth, just stick to the same strategy and you'll have him down in no time.
With Alucard dead, you've beaten Castlevania: Lords of Shadow 2 - congratulations!
You can find the rest of our Lords of Shadow 2 walkthrough from the first page of article.