Monster Hunter 4 Ultimate - hunting the Great Jaggi, Kecha Wacha, Seltas, Tetsucabra and Basarios
All the tactics you need to kill the first massive monsters in Monster Hunter 4 Ultimate, from the grim Great Jaggi to the beastly Basarios.
You'll have to contend with a large number of creatures both great and small in Monster Hunter 4, and while this part of the guide is by no means exhaustive, we've put together some essential tips for dealing with the first five massive monsters you'll encounter in the game. From staying alive to besting the beast at hand, we'll help you bag your first big kills.
Before heading out to kill any of these monsters, we recommend stocking up on the essential items you'll need for staying alive and slaying the beast.
Great Jaggi tactics
No-one forgets their first Great Jaggi encounter, and it's the first tough fight you'll come up against in Monster Hunter 4. Try to stay to the rear of the beast whenever possible, and learn to recognise the animation that signifies a pending tail-sweep. This crushing blow can take a decent chunk off your health pool, and knock you down and away from your target, leaving you vulnerable to follow-up attacks.
The Great Jaggi will also periodically emit a barking, howling noise. When this happens, you can expect any Jaggis and Jaggias in the area to join in the fray. Either keep rolling around your new friends while focusing on the main target, or pick them off one by one to bag yourself a bit of breathing space. Just make sure the big guy isn't right behind you as you're clearing out the trash, just waiting to tear a chunk out of your behind.
How to kill the Kecha Wacha
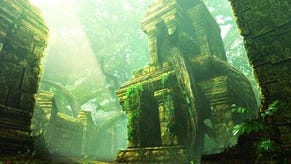
The Kecha Wacha can be the most annoying of the early massive monsters to take down, and you'll find the creature swinging around the canopied forest areas of the game. Make sure you tag the Kecha Wacha with a paintbomb before the fight proper begins, as the beast will sporadically fly to a new location all throughout the fight.
At range, the creature will fling horrible globs of mucus your way, so try to avoid the cone directly in front of the Kecha Wecha if you're knocked back or trying to close distance. From time to time the creature will also smash the ground in front of him while turning around in a circle. Hang well back this happens, or at least do melee damage while positioned to the rear of the animal's claws. All in all, this can be a tough encounter for the new hunter, so don't be afraid to get a few safe shots in before retreating to avoid the counter-attacks.
Most importantly of all, watch out for when the Kecha Wacha covers its face, as this signifies an enrage state where it's capable of dishing out a lot more damage, a lot more quickly. If your armour is still very weak then we recommend hanging back during the enrage phase, and waiting for the Kecha Wacha to return to normal before getting stuck in again. It'll prolong the fight, but perhaps also your life as well.
Surviving the fight with the Seltas
The first flying monster you'll come up against is the Seltas, and its aerial nature means you'll benefit most from using a weapon with a decent amount of reach, rather than the very close-range weapons like Dual Blades and Sword & Shield. Watch out for the poisonous globules this creature spits out in a cone directly in front of it, not to mention its deadly aerial strike. When you see it getting ready to swoop, get out of the way.
When the creature adjusts its position so that its stinger points directly ahead, be ready to roll right out of the direct path lying between you and the Seltas. That swooping manoeuvre can take off a large amount of your health and knock you back. The creature can also perform a series of these assaults in fairly rapid succession, so don't assume that danger has passed after you've dodged the first one.
Taking down the Tetsucabra
This heavily-armoured creature has a few moves up its sleeves that can really wreck you if you're not careful. Watch out for the boulders the Tetsucabra tears up out of the ground. Sometimes it'll use these rocks as a defensive shield, while at other times it'll just throw them into your face. Don't be in the line of fire until you've established which move is being lined up.
Be careful too about the big spitball it'll periodically hurl at you, as this can take a worryingly large chunk off your stamina bar. You must also watch out for a side-roll that can pin you down and leave you extremely vulnerable if you can't evade the creature immediately afterwards.
The best course of action all-round is to stay to the rear of the beast for as much of the fight as possible, and deliver measured and consistent damage against the Tetsucabra when the combat timing is in your favour. That will ensure you avoid the worst of its attacks, and while slowly but surely whittling the creature's health down.
How to beat the Basarios
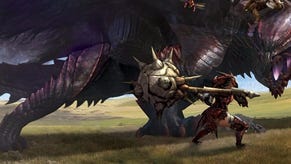
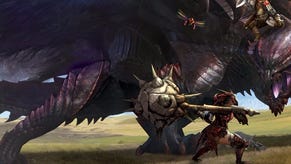
This is one fight where you'll benefit from fighting at range as much as possible. The Basarios has some deadly moves, but they tend to affect the area immediately around the beast's body, and it's not exactly the zippiest monster on the block either.
If you want to tackle the fight in a melee fashion, it's time to get a Hammer upgraded so you can smash through that tough-as-nails exterior shell. You'll find it very hard to dance around this creature with regular blades, so it's time to get out of your comfort zone if you've been using simpler melee weapons up to this point.
As for the Basarios' special moves, his ranged attacks are very clearly telegraphed and not hard to roll away from. Do be aware of his poison gas discharge if you're fighting at close-range though - it'll emerge in a radius all around him, and you'll need to use an Antidote if you get tapped by it.
Additionally, watch out for his massive sweep manoeuvre, particularly if you're fighting near a wall or a cliff - you can end up trapped and vulnerable to follow-up attacks very easily if you're not careful.
- Read on for our guide to food and consumables in Monster Hunter 4 Ultimate.
- You can find the rest of our Monster Hunter 4 Ultimate guide from the index page of this article.

