Monster Hunter 4 Ultimate - how to complete Expeditions, locate resources and master fishing
How the new Expedition system works in Monster Hunter 4 Ultimate, where to find precious crafting materials, and how to catch the fish you need.
If you're struggling to track down the ingredients you need, we've put together a useful starter guide for finding these precious materials, and making sense of the new Expedition system introduced in Monster Hunter 4. We've also got some useful tips for taking some of the pain out fishing.
How to gather materials in Monster Hunter 4 Ultimate
There are a few items that it's always worth packing in your pockets before heading out on a quest in Monster Hunter 4. You will almost certainly want to take the BBQ Spit (if you don't have any stamina-boosting steaks on you), bug nets and pickaxes - pack at least a couple of these last two, as they break after a certain number of uses.
Taking these items out with you means you can grab any of the juicy resources you encounter while going about your quest, without impacting too much on your bag-space.
As well as being able to grab various goodies as you go about your work, after a while you'll unlock the ability to go on a free roam in your starting region. In this quest you'll be free to simply pick up whatever you want for your resource collection, with the option to bail out after a couple of minutes have passed.
Finally, there's the new Expedition system which is a much more profitable way of going about hoovering up your essential crafting materials.
A quick guide to Expeditions
The new Expedition system offers a slightly different way to go out and harvest materials when you're not on a specific quest. To take part in an Expedition, you simply need to tap the World Map icon to the right of the bottom screen, then select the blue icon to bring up the starting screen
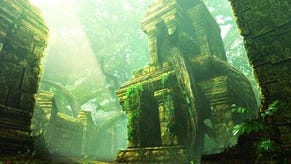
The Expedition system is comprised of a zone called the Everwood, which is randomly generated each time you visit, ensuring a fresh collection of creatures and resources every time you head out for a hunt. You can also expect to encounter two large beasts during your time in the Everwood, and the pre-departure info screen explains which two creatures these are. Keep in mind, however, that if the region is described as Unstable on that same screen, then you may encounter a handful more.
As for your time in the Everwood, make sure you pick up any of the shiny baubles that drop on the floor while you're bashing away at the beasts. These items represent proof of your encounters to the Guild, and the more of these that you grab, the better your rewards for clearing out the particular patch of virgin territory.
When you're out in this zone, you'll also want to tap every ore node that you encounter, as there's a chance of looting a new type of equipment known as Rusted gear. These bits and pieces of equipment can be traded in for new armour and weapons when you get back home, and the stats on this stuff can often surpass the gear you craft.
You'll unlock the vendor you need for Rusted equipment by completing the second half of Three-Star Village Quests.
A final note on Expeditions. Before hitting Depart, make sure you've taken everything you need! There are extremely limited supplies waiting for you in the Expedition zone, so any bug nets, pickaxes or fishing bait you want to take with you need to be in your knapsack before you head out. If you take nothing else, you're definitely going to want to pack a couple of pickaxes so you don't miss out on any Rusted equipment.
Where to find crafting materials in Monster Hunter 4 Ultimate
As a very general rule, you'll typically find items like plants, herbs, honey and so on in the grassier regions of the game. Look for areas on your map that are shaded a lighter, brighter colour. Sensibly enough, you're likely to find a greater collection of mineral nodes in the rockier areas that have a grey/mauve shading. For your fishing needs, sea and river areas are marked in shades of blue.
Elsewhere in this guide, we've rounded up a list of the most common crafting items you'll want to make in your early days, along with a breakdown of where you can find the resources you need to create them.
A beginner's guide to fishing
The fishing minigame in Monster Hunter 4 Ultimate isn't exactly tricky to wrap your head around, but it can be enormously fiddly if you don't come prepared.
First things first though, the act of fishing itself. To cast your line, simply approach a pool of water and press the Y button. The first creature to turn - if necessary - and reach the hook will start nibbling. Don't hit Y again though until the bobber actually disappears underwater - this takes between two and four nibbles typically.
If you want to catch a specific fish, it's well worth crafting the bait preferred by that creature. If you do so, only the type of fish you actually want to snag will actually appear in the pool when you cast your line. If you don't use bait, you're going to need god-like timing, patience and a keen sense of anticipation to ensure the fish you actually want arrives at the hook first.
- Bored of hunting on your own? The next part of our guide covers all things multiplayer in Monster Hunter 4 Ultimate.
- Head back to the first page of this article for the rest of our Monster Hunter 4 Ultimate guide.

