Castlevania: Lords of Shadow 2 - Find the Pieces of a Mirror of Fate walkthrough, avoid Agreus, play puzzle, kill the Toy Maker
The next section of Lords of Shadow 2 is packed full of puzzles and challenging fights. We've got an essential guide to surviving every assault.

There are two fun boss fights in the next chapter of Lords of Shadow 2, but before you can get stuck into them you'll have to avoid the attentions of Agreus. We'll help you keep out of his grasp without breaking a sweat, then detail some essential tactics for taking him down in pretty short order.
Find the Pieces of a Mirror of Fate walkthrough
Go upstairs and then get onto the hallway. Now go through the door on your left. There's a device on the left-hand side that can be used to open up the door ahead of you. Interact with it, then go towards the door to trigger a cut-scene. When it's finished, go into the darkened room to your right to get a Soldier's Diary entry from the fallen soldier over by the rubble.
Leave the room and head to the right, down the hall. When you come to a fork in the path, take the right-hand option, noting a - currently - inaccessible Pain Box to your left. Grab one more Soldier's Diary entry from the fallen knight on your left-hand side, then kill all the enemies ahead of you. At the end of the pathway, enter the new room and interact with the device to open the next door. Go through it to start the next cut-scene.
How to avoid Agreus
Your next challenge is to make your way through the environment without being detected by Agreus. Stepping on the dead leaves is a sure-fire way of doing just that, so watch your step if you don't want to have to start all over again.
Fortunately, you can distract Agreus by firing Shadow Daggers at the bells decorating the walls in this area. Don't rely on this entirely though, as you must also remain at a certain range from Agreus - if he gets a sniff of you, you'll find it very hard to lose him. Keep in mind that there are a couple of secret side areas around here as well, but you won't be able to access them until you acquire another one of Dracula's special abilities.
"You can distract Agreus by firing Shadow Daggers at the bells decorating the walls in this area."
Fire one of your Shadow Daggers at the bell hanging on the wall to your left, and then wait over by the right until Agreus has wandered over to investigate the noise. As soon as he's gone by you, jump ahead and towards the right so you don't disturb any leaves. Now grab onto the structure that's to your right, and keep travelling around until you come to the opposite side. You can actually pull this manoeuvre off without ringing a bell, but only if you're extremely fleet of foot.
Go down and then keep following the road ahead and to the right. Keep leaping over any leaves you come across, then get hold of the structure in front of you and move round to the other side so you can drop down once more. Remember to keep your Shadow Daggers skill handy if it looks like Agreus is onto you, and fire a shot at the bell by the entrance.
Make your way over to the right-hand wall and then use the structure to avoid the leaves as you carry on towards the corner. As soon as you get to it, bear left until you come to more leaves. Assuming Agreus isn't near you at this point, run as fast as you can towards the right, and don't worry about moving through any leaves.
Keep heading right, leap up onto the structure as quickly as you can, and then go all the way over to the other side. If you do this quickly enough Agreus will saunter back off, as you should be too far away for him to smell you. If you look back over towards the entrance, you can see yet another bell on the left-hand wall. You don't have to worry about making any more noise with the leaves now, as you should be able to get to the wide open section near the centre of this region before your opponent can get too close.
Go back round to the opposite side of the structure you're on, then jump down into the safe spot ahead of you. Jump over the top of the railing on the right, and then move your way around until you're in a new safe area. Get into the corner, and leap over to the other structure - just make sure you do this quickly, as you're making quite a racket by doing all this.
You've got a couple of options to play with after ringing the bell on the left-hand wall. It depends on how agile you are really. If you're not feeling confident, run as fast as you can to the corner where the device is. You'll make a lot of noise by doing so, but you should get there in time to interact with the device before Agreus gets you. The gate will open, and you can run towards it on your second attempt.
To get the job done in one sitting, you're going to need to make use of the bells to distract Agreus. Fire a Shadow Dagger off so you can run towards the device, then fire another one off to make it to the gate. We favour the first method for nailing this section - it takes a little longer, but the timing can be annoyingly fiddly if you take the other option.
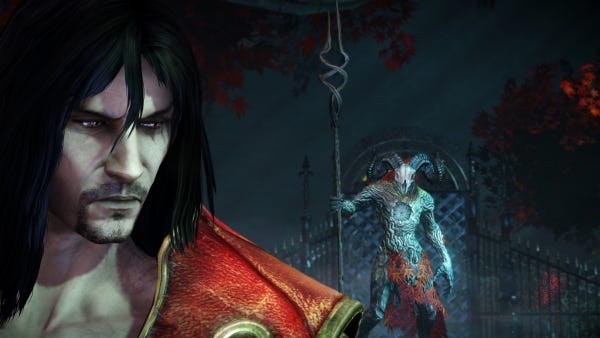
As soon as you're through the gate, keep following the path all the way along towards the lift, then use it to ride up to the next level. You can top up your magic and health when you get there. Now head down the path, fire a Void Projection at the creature up ahead of you, and grab the Mirror of Fate fragment it leaves behind. Straight after doing so, you'll start a fight against Agreus himself - and this is certainly going to make plenty of noise...
How to kill Agreus
Dodging Agreus might be tricky, but killing him is considerably easier. He's got a pair of different weapon types in this fight - two scimitars, and a long javelin - and he'll switch between the two as you fight. Be careful of the spear's unblockable ranged attack which comes at you in two rapid shots. Dodge out of the way to avoid this barrage, otherwise you'll have to complete a QTE to stave off the worst of the damage.
"As soon as you've dodged out of the way of one of his lunges, make sure you use dodge to get right back in his face again."
As for the scimitars, Agreus will throw these at you, then follow up with a straight attack immediately afterwards. Don't move out of the centre position when the swords come flying (dodging will only cause you damage), but be ready to dart to the left or right as soon as the first phase of the attack is over.
Whichever weapon Agreus has equipped, he also makes use of a lunging attack that you just can't block, so get ready to dodge to the left or to the right in order to miss it. He'll block quite a few of your own attacks against him, but don't be tempted to switch out to your Chaos Claws. You'll do just as well with your whip, and do a better job of managing your range from him at the same time.
As for the projectile shots Agreus fires at you, if you stick close enough to him then he won't be able to use them, leaving you with just the lunge attack to worry about, in addition to his basic melee damage. As soon as you've dodged out of the way of one of his lunges, make sure you use dodge to get right back in his face again. Note that he can't block any of your attacks just after a lunge, so make good use of this opportunity to speed up the fight by inflicting a lot of damage.
Agreus won't stomach much of this action for long, so just keep chipping away at his health. When he's blocking your attacks, just keep battering away at him until you break through - you'll be able to get a fair few hits in before he recovers enough to start battering you again.
Reaching the theatre
Once the battle's finished, jump down into the water that's to your right and grab the Soldier's Diary entry by examining the fallen knight by the tree. Make your way back up to where you were, head left, carry on running up the path, and then go back into the hallway. There's a device you can interact with to get the door open. Once you've gone through the door, carry on over the bridge and kill the Harpies you encounter.
Keep travelling along the path and you'll eventually run across some more Harpies. Once they're dead, go into the castle and run towards Trevor. This starts a new cut-scene. When it ends, run through the door to your left and interact with the lever that's in the centre of the room.
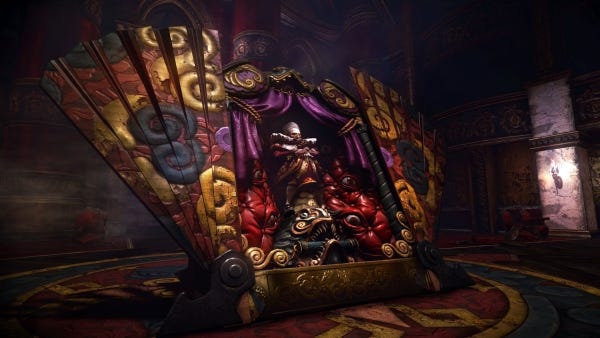
Time to test your aim with the Toy Maker. Aim your shots correctly at the tapestries, then fire a Shadow Dagger as soon as you see the face appear. If you manage to do this successfully three times, you'll be rewarded with some extra experience points.
Carry on down the hall, go through the door, and finish the fight with the Cleric and his chums. Head towards the pillar by the cliff-edge, then complete the QTE to form a bridge towards the next platform. Be quick on your feet once it's in place, as it won't stick around for long.
If you go over to the other side of the platform you'll find a Pain Box with a Life Gem in it. You can use your Mist Power to get through the gate and back to the City of the Damned if you wish, otherwise just go back to the pillar, extend the bridge and make your way back up.
Get in the castle and take the stairs on the right-hand side to get hold of a Chaos Gem-bearing Pain Box. Jump down into the area below you, kill any monsters in your way, then grab yet another Soldier's Diary entry from the poor fallen knight over in the corner.
Climb up the fish-head door, but head left rather than straight up. If you keep going down the hallway you come to, you'll loot a Life Gem from a Pain Box. Go back to where you were climbing before and carry on straight up. When you're at the top, run along the corridor, then drop down into the area below you.
While you're in this new room, make sure you smash up all of the furniture you can see, as you'll get some useful experience points for doing so. If you head over to the left-hand side of this room, there's a similar pillar to the one you used a little earlier. If you interact with it, you'll get access to an alcove where you can restore your magic. Be quick about it though, as it doesn't hang around forever.
"Over on the other side of the room is a lever, but you won't be able to interact with it until you've turned the power back on."
How to solve the theatre puzzle
Over on the other side of the room is a lever, but you won't be able to interact with it until you've turned the power back on. Get onto the stage, then head up to the balcony that's over to your right. Grab the Soldier's Diary entry from the body of the knight, then make your way through the opening and into the next room.
There's a Pain Box here which contains another Void Gem. Shift into your rat form using the shadowed area just ahead of you. Go through the vent in the corner, then go all the way over to the other side of the stage. There's a patch of darkness to your right which you can use to switch back into your Dracula form. Top your magic up here if you need to, then light the furnace with one of your Chaos Bombs to switch the juice back on.
Get back into your rat form again and run up the ramp that's in the corner behind the furnace. Stop when you reach the spikes, and wait for the first of these to move twice quickly, before trying to pass through the danger. When you reach the next spike along, wait for it to finish its rapid movements, then again dart through when there's a break. The third spike you face behaves exactly like the first one, so follow the same strategy for making it through in one piece.
As soon as you've made it safely through this section, have a nibble on the rope that's to your left. This'll kill one rat, then take the other one. Ignore the spikes on your return journey - eating through the rope put paid to that danger. When you're out of the vents once more, shift back into your regular blood-sucking form.
Now make your way up the wall, then jump down to get at the lever. Interact with the device that appears after pulling it. Now you have to put all the characters and decorations on the stage at the right time - for each placement you successfully complete, you'll be awarded 500 experience points. If you ask for the story to be repeated, you'll be docked 300 points, so just use our chart below to get everything right the first time.
- Toy Maker + Workshop
- Walter Bernhard + no decoration
- Change + Castle decoration
- Demon + no decoration
- Kid + Theatre decoration
As soon as you're finished with the play, get up on the stage and take the Toy Maker's heart from the kid. This will trigger a cut-scene, followed shortly afterwards by a fight with the Toy Maker.
How to kill the Toy Maker
At the very start of the fight, you can only engage with the puppet nearby. This side enemy has three different attacks to watch out for. There's a strike along the horizontal plane, one along the vertical and a stomping attack after jumping. The puppet switches between the horizontal and vertical attacks so dodge in an appropriate direction for the angle of attack. If it jumps up in to the area dodge away quickly so you avoid the impact when it hits the ground.
Once you've killed the first puppet you'll get your first chance to take a swing at the Toy Maker himself. Watch out for the shockwaves when he slams his fists into the ground - these are easily avoided by keeping your distance or jumping up in the air. When you're warned of an unblockable attack, dodge very quickly away from the Toy Maker. If you get caught by this attack and mess up the QTE associated with it, you'll take some seriously nasty damage.
When it comes to your own attacks, stick to aerial assaults using your whip to take him down and ultimately spawn a second puppet. This snake delivers four separate attacks and the Toy Maker will give you clues as to what's coming up next. As before, stay in the air and keep using your whip to deal with this new threat.
"Watch out for the shockwaves when he slams his fists into the ground - these are easily avoided by keeping your distance or jumping up in the air."
Jump back if the snake breathes fire at you and it gets just a little too close for your liking. You can avoid the worst of the spinning attack by staying in the air as much as possible. When the snake jumps up, get ready to leap off the floor to avoid the shockwave when it hits the ground. The final tail spin attack is telegraphed by the snake beginning to rotate - just dodge out of the way of this.
Once you've destroyed the snake puppet, it's time to get stuck into the Toy Maker again. Use the same tactics as you did in the first phase of the fight, but watch out for the additional flaming circles that appear between his attacks. Stay airborne in the centre of these circles as much as possible, and dart out of the way when they stop moving. If you dodge them before they stop moving, they'll just follow you along and burn you.
After a certain amount of damage, the Toy Maker will stand up and start throwing sharp, linear attacks your way. Use either a Void Projectile or a Chaos Bomb to knock him back down to size, then attack him with everything you've got while he's down and - nearly - out. Just keep this strategy up until he drops down for good.
Make your way back to Trevor, killing any trash enemies and Clerics you encounter along the way. As soon as you get close to him, you'll trigger another cut-scene that concludes the chapter.
Struggling to beat Inner Dracula? Take a look through our complete guide to the boss fight.