Shooting cars: The art of Gran Turismo 6's photography
How to become the Cartier-Bresson of the virtual automotive world.

The fine achievements in car dynamics and mastering of car control to win a million races aren't the only source of fun in Gran Turismo 6 - anyone can undertake a side quest to get the perfect picture in photo mode.
GT6 offers two types of photography: Photo Travel and during replays. Photo Travel is best kept for another time, though, as you'll likely get far more fun out of race snaps than Photo Travel's static displays. In both contexts, Gran Turismo 6's photo mode is so close to Gran Turismo 5's that there aren't really any significant differences aside from some new filters.
However, Polyphony really takes simulation to heart, making sure that photo mode includes a simulated DSLR camera. It's a pretty straightforward affair - leave the default settings as they are and you'll get some decent pics - but there's plenty of experimentation and a few tips from real-world motorsport photography that can spice up those photos of beloved cars, tracks and racing action.
Basics
After you've finished a race, skip the finishing replay and then launch the 'proper' replay from the next menu screen. As soon as the replay begins, pause with Start and set the replay camera to exterior view (the chase cam). This will let you place yourself on the track and see where your car is in relation to others. When you want to photograph something, pause and select photo mode and get hyped for PHOTO TIME.
You'll be presented with a screen showing one or more viewpoints to chose from. The first one is a freely moveable camera, the others are static positions (and often rubbish). Pick the first option and find a rough position you want to photo from, then enter the camera mode proper. From here, you tighten up the details of your shot. If you want to make any major changes to camera position, back out to the previous menu and adjust. It's an awful lot faster and doesn't upset the framing and zoom bugs that have been faithfully carried over from GT5.
The frame's the game
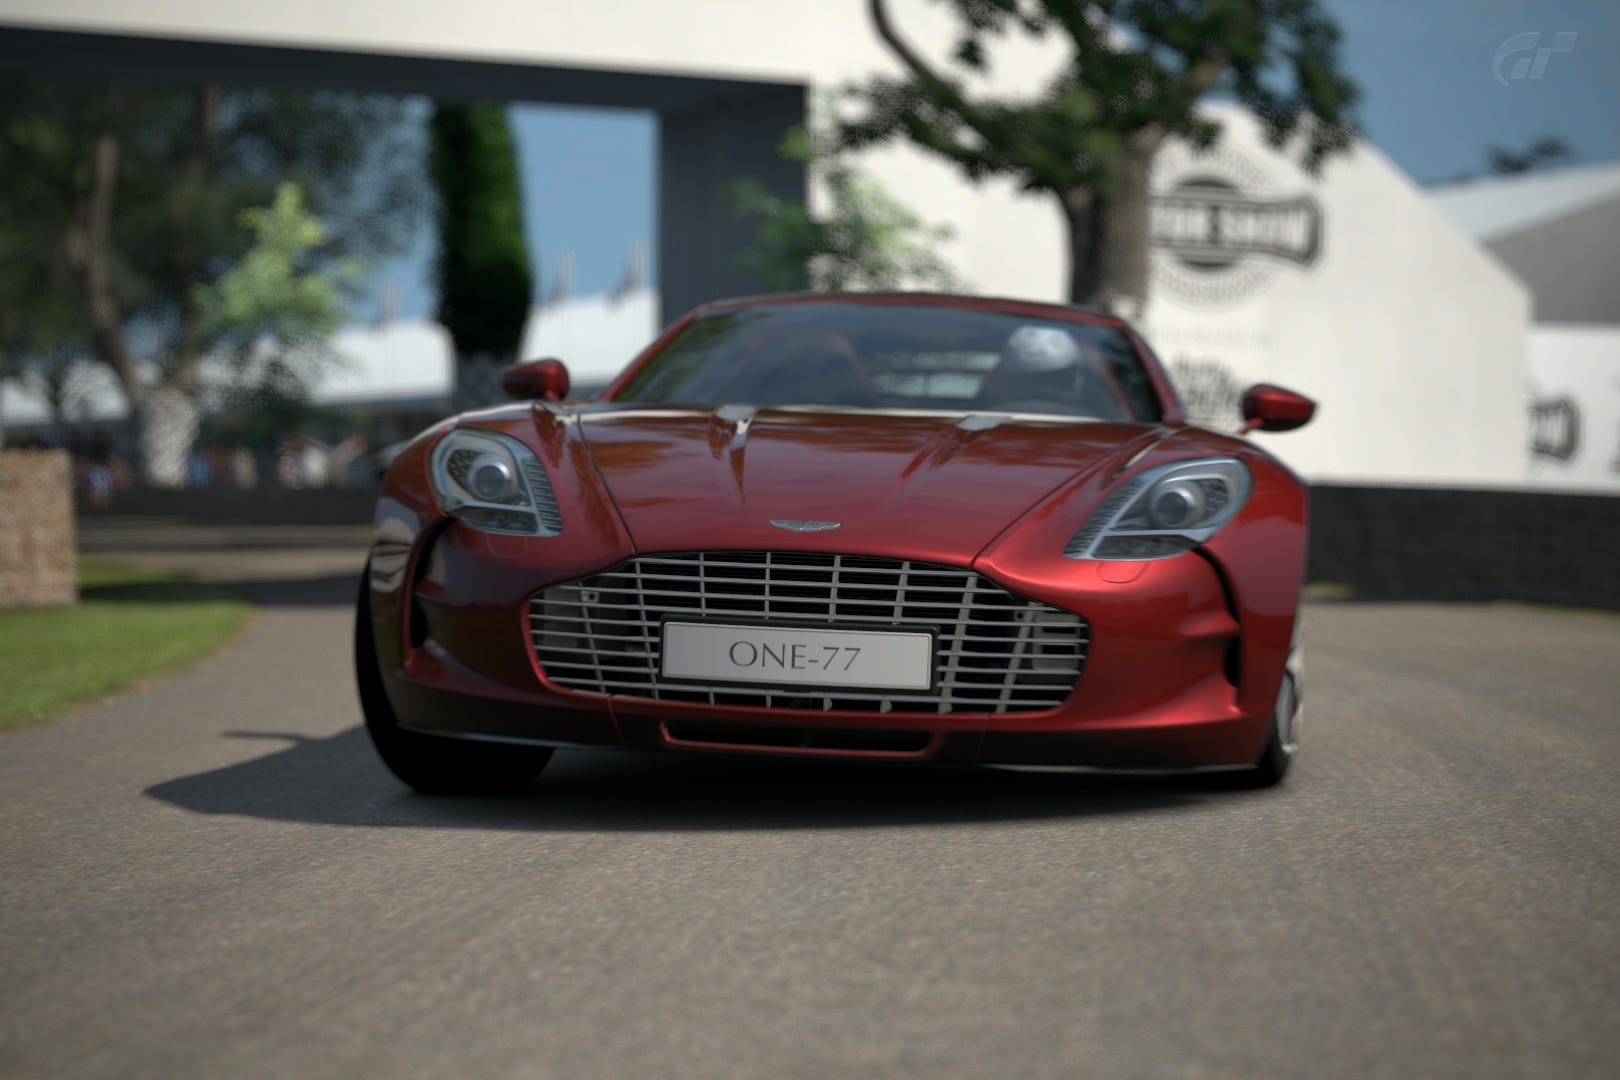
The most important skill to learn is framing your composition. There are lots of rules to follow, but the simplest principles are often the best. For front-on car views, keep it central and let the car fill the frame. Here, we're not trying anything fancy, just a shot of the One-77 at Goodwood, leaning hard as it rockets terrifyingly out of a corner and into an off-track disqualification. To get the composition central, I put the Aston badge right in the middle of the viewfinder crosshairs, pressed square to autofocus and didn't have to worry about anything else.
But hold on - what about framing some track action? Surely you can't just find a badge and everything works out by magic, right? Actually, when there are multiple cars in a frame, you're better off centring on a headlight.

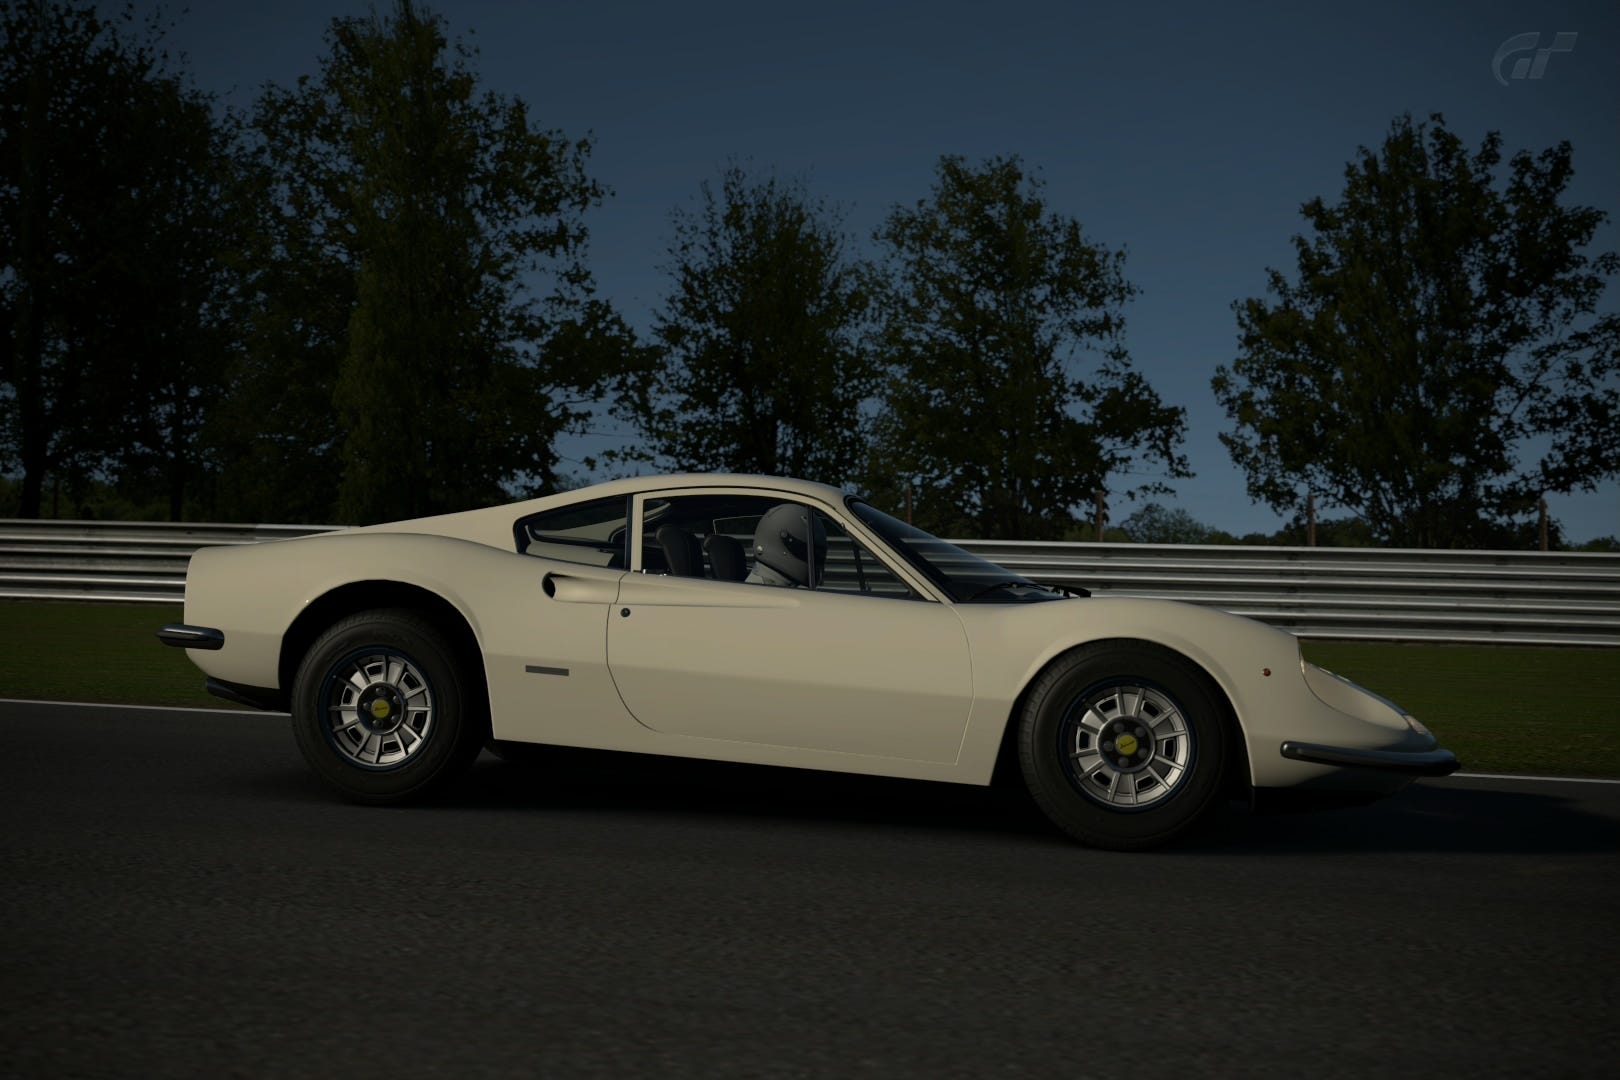
The Dino's left headlight is the centre here, and it helps anchor the composition nicely, even if it's still a bit wonky. In general, headlights are great anchors for three-quarter views, though sometimes they're a starting point to refine the composition further. The key is balance, and the oft-quoted Rule of Thirds is a fine principle to follow. Split the frame into three equal sections and arrange the view so the interesting elements of the shot fall into their own third. It's not a strict rule - a lot of composition is about feel, so snap away and experiment (as well as compare with work on GT Planet's photo forums or professional real-world photos) until you get good results. Now, notice that the view is slightly slanted. This is part of motorsport photography voodoo - a slight rotation will amplify the sense of action. Witness:
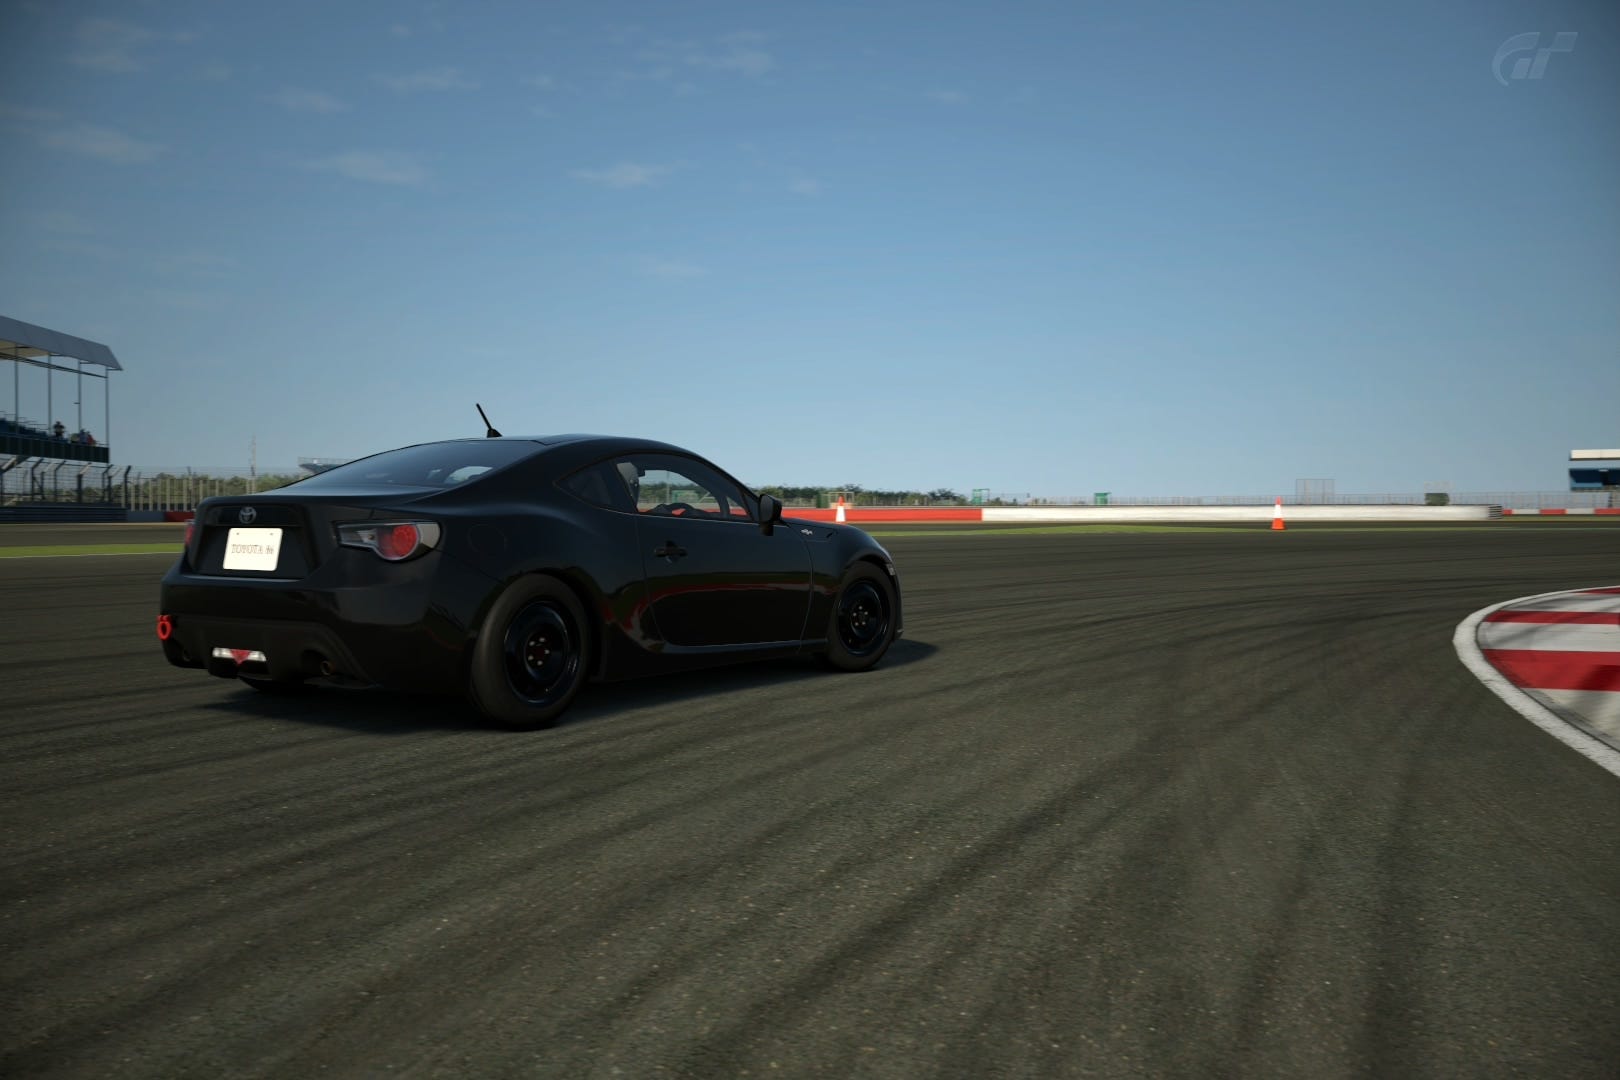
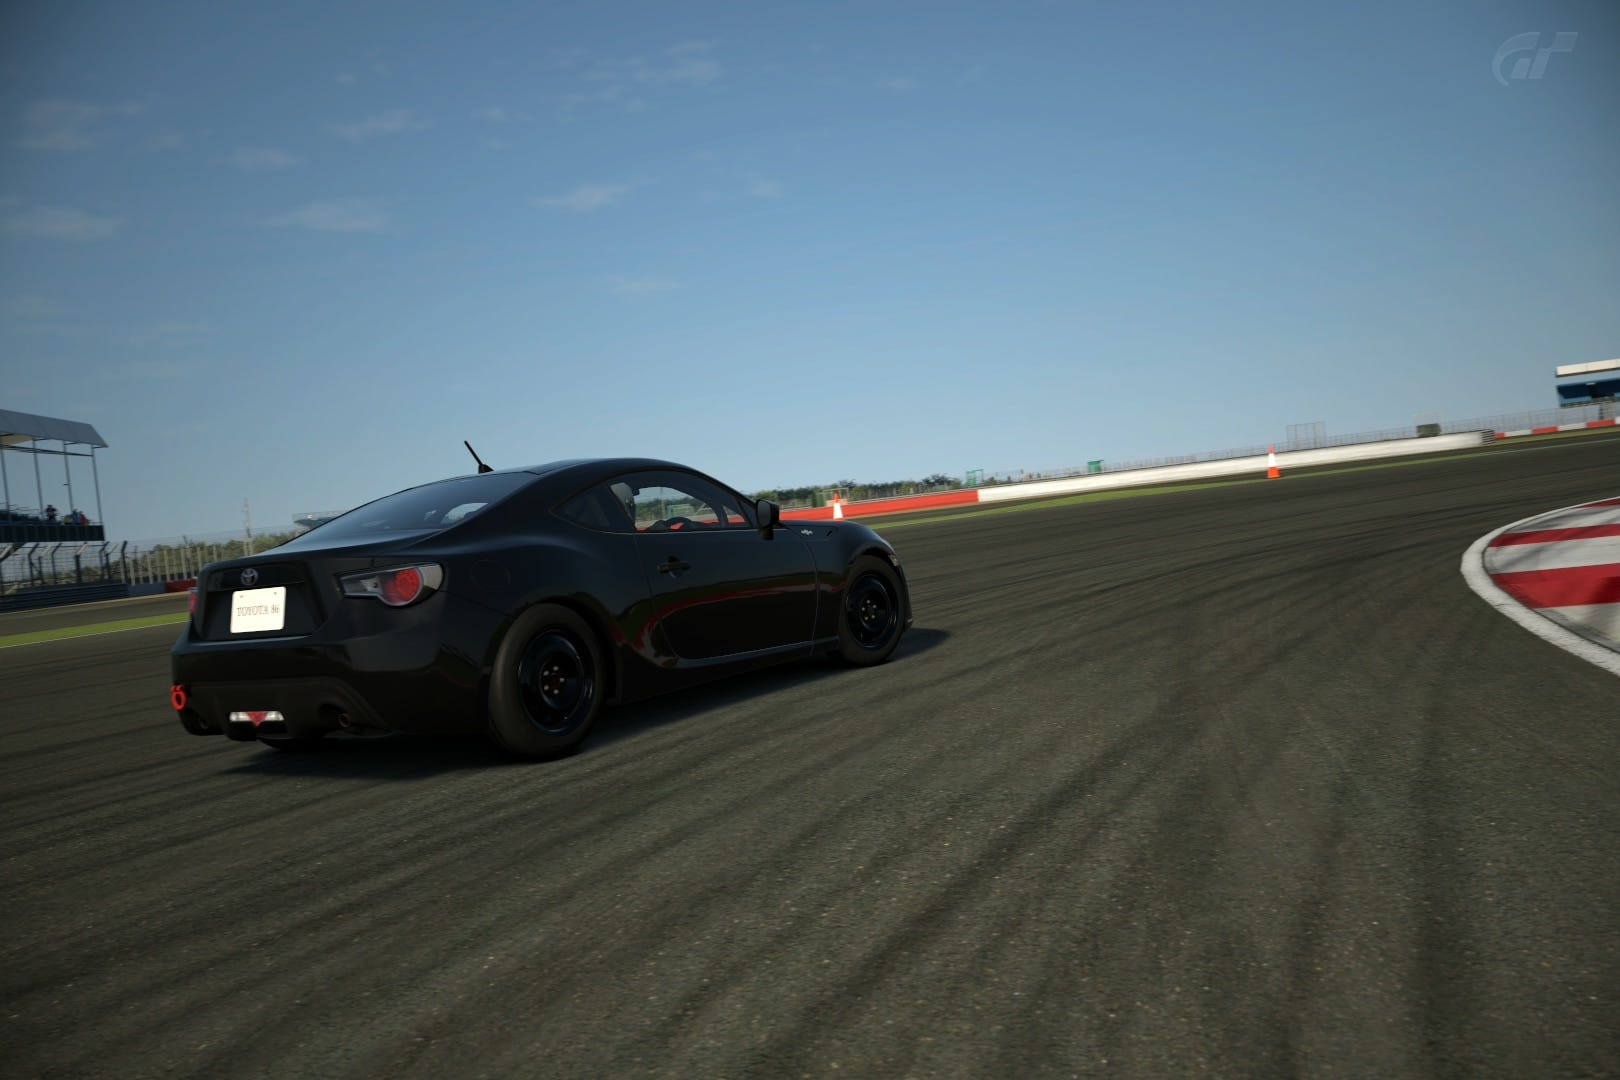
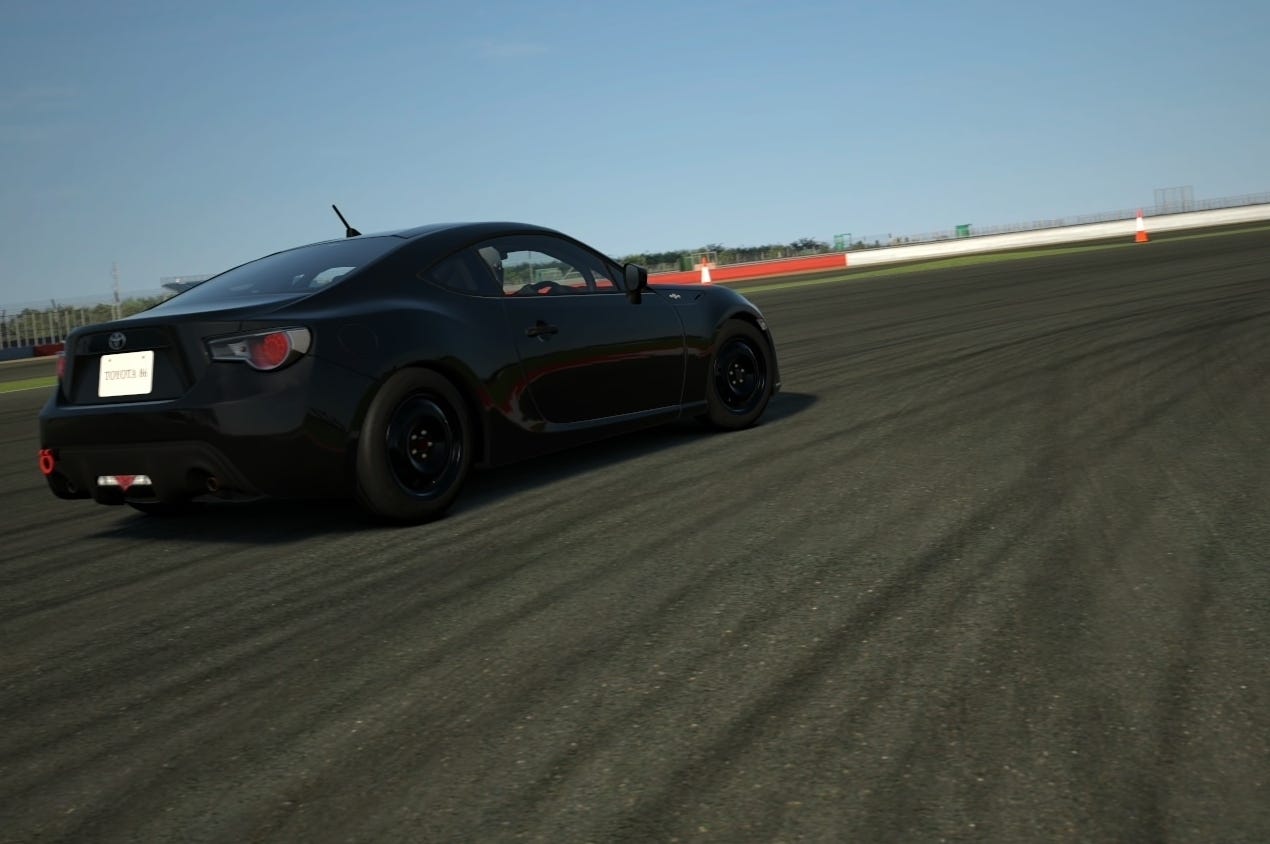
The wonderful GT86 at Silverstone. These two pics are identical, but the one on the left has a slight rotation and looks a lot more dynamic for it. Hold down R1 and push the stick left or right to rotate the camera. Pushing up or down on the stick zooms the camera in and out, and if you're pro, you can do both at the same time.
Too much rotation looks silly, but just enough adds a touch of magic. In terms of composition we're centred on the GT86's front tyre here, and zoomed out to include a bit of the inside kerb on the corner, which lets us see that the car is going into a corner on maximum attack. If your pic is about what the car is doing rather than the car itself, compose so the viewer will know what's happening instinctively, but make sure it's balanced. Here, the kerb comes in roughly the same as the distance from the rear of the GT86 and the left edge of the frame. This is using the rule of thirds in a different way: two thin strips at each edge to show the environment and a wide oblong in the middle for the subject, much like the front-on One-77 view earlier.
Shutter speeds
Another pro tip from real-world photography is to slow down the shutter to increase the sense of speed. Gran Turismo 6's camera shoots from a hundredth of a second right up to the thousands. Here's an example of the difference between fast and slow shutters:
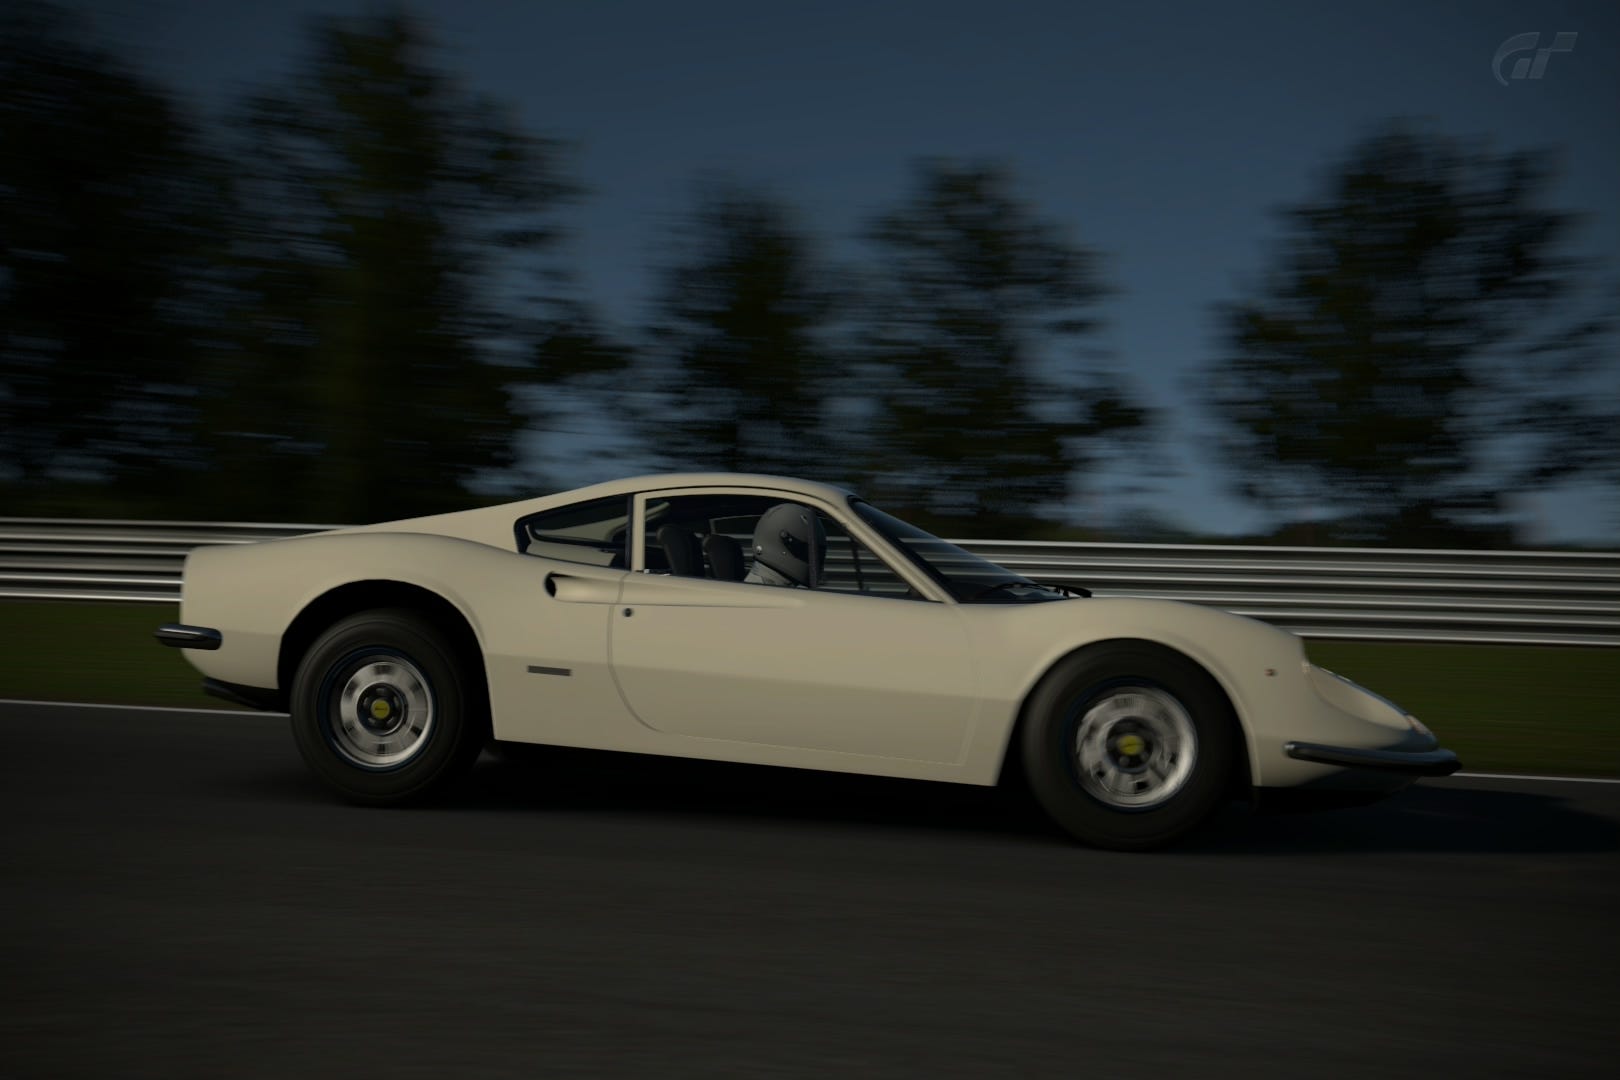
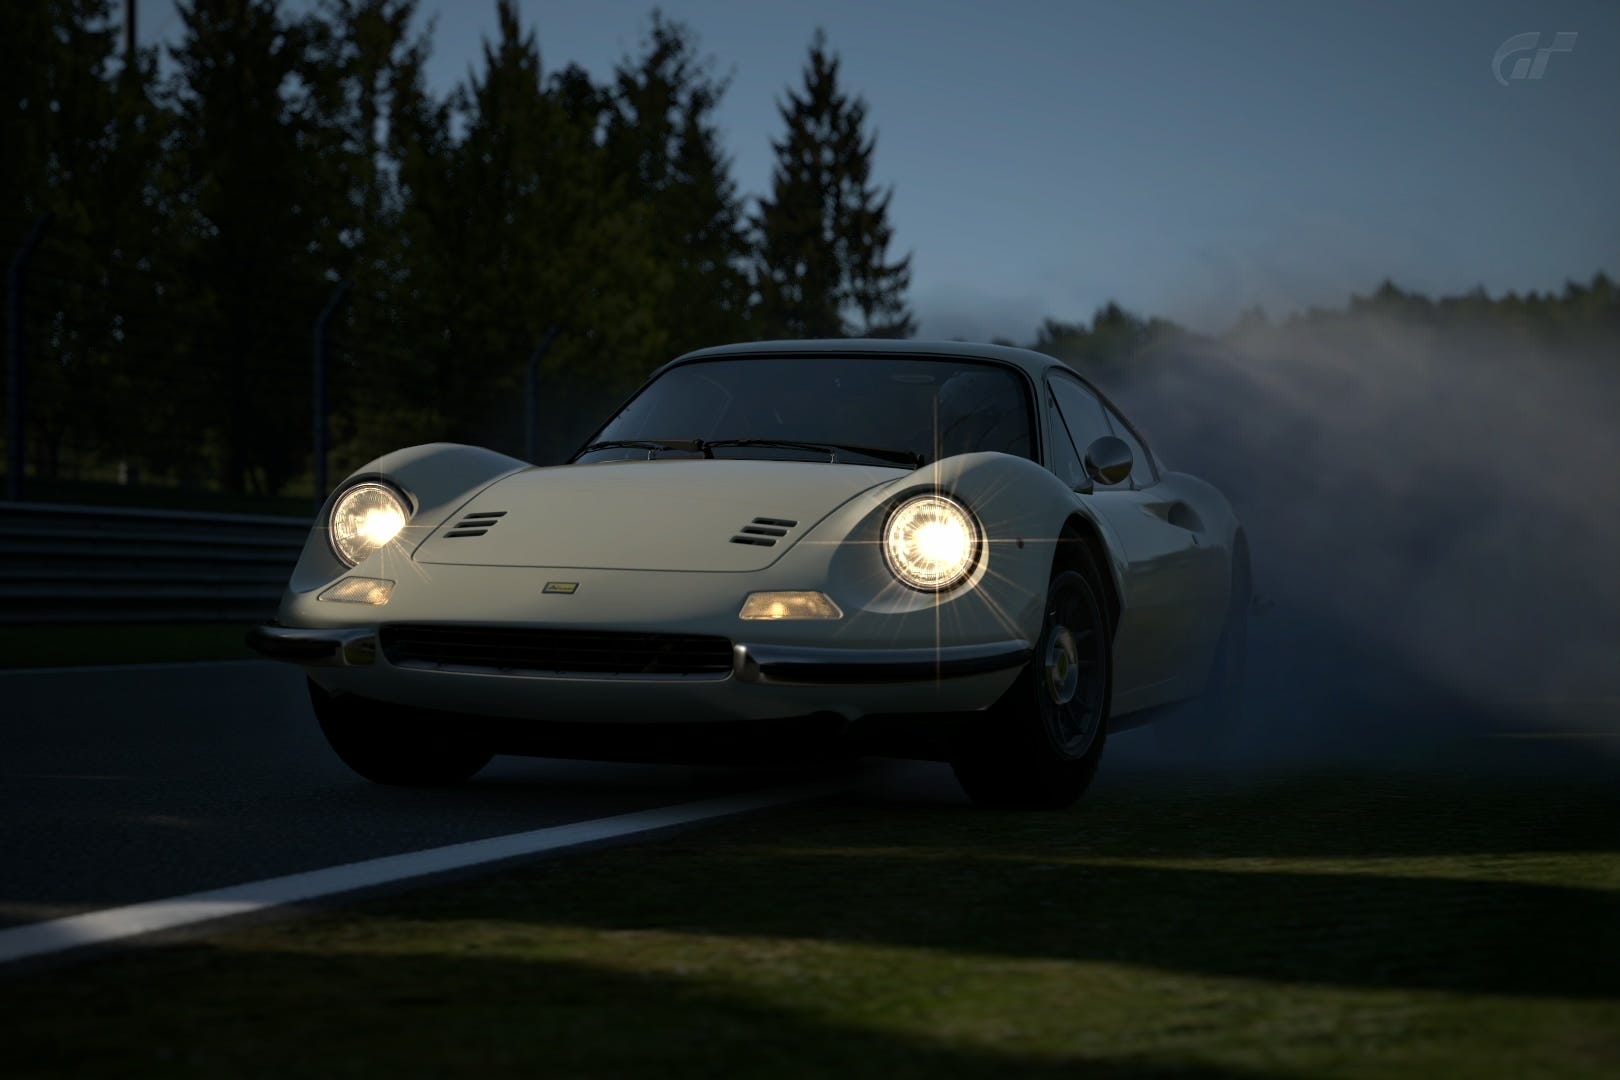
I love the smell of Nurburgring in the morning. Here we have the Dino braking hard for a corner at 8am. On the left, the shutter is at 1/8000ths of a second. On the right, 1/250th. The lower the number, the slower the shutter. In the fast shot, the car looks as static as the background. It looks more like there's something really heavy under the car's front bonnet. On the right, it's PURE RACING ADRENALINE. The wheels are a blur and the background is just whizzing by. All it took were a few prods at the d-pad.
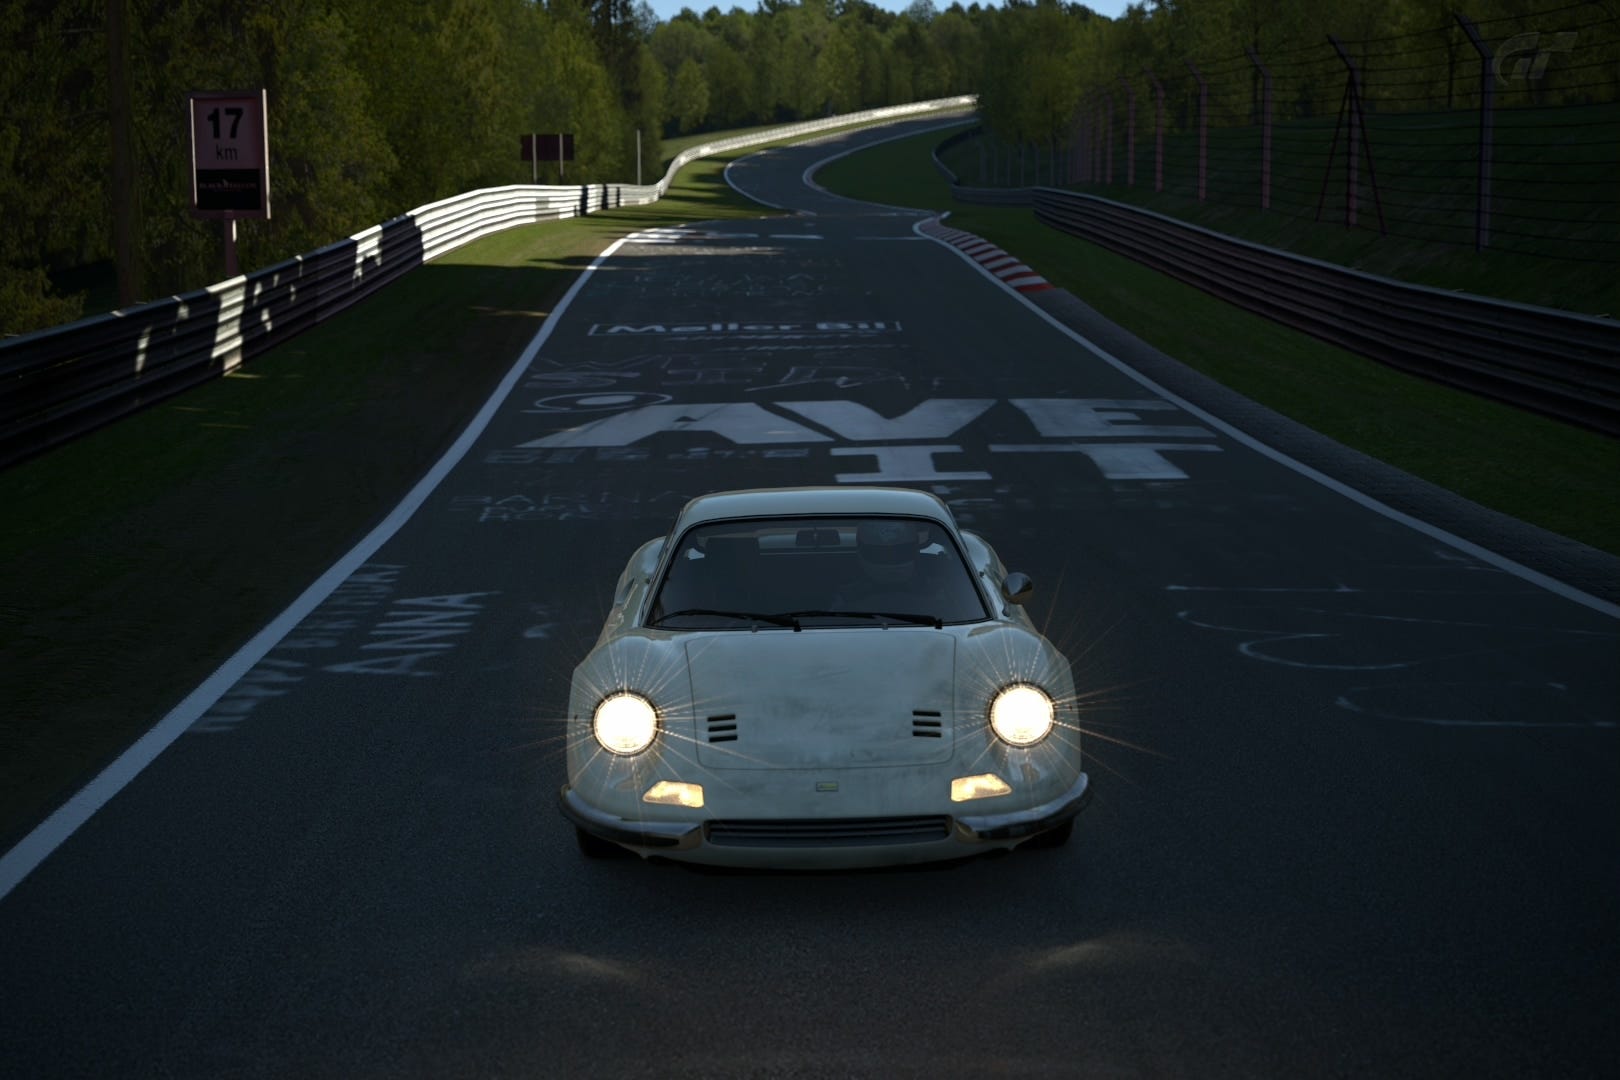
Speaking of time and place, the tracks with time changes are fantastic for photos. Set the time to morning or early evening, and you get a much nicer quality of light. Also, get to know the tracks intimately and you'll get some lovely shots. The Nurburgring is fantastic, thanks to its multiplicity of curves and changes in elevation.
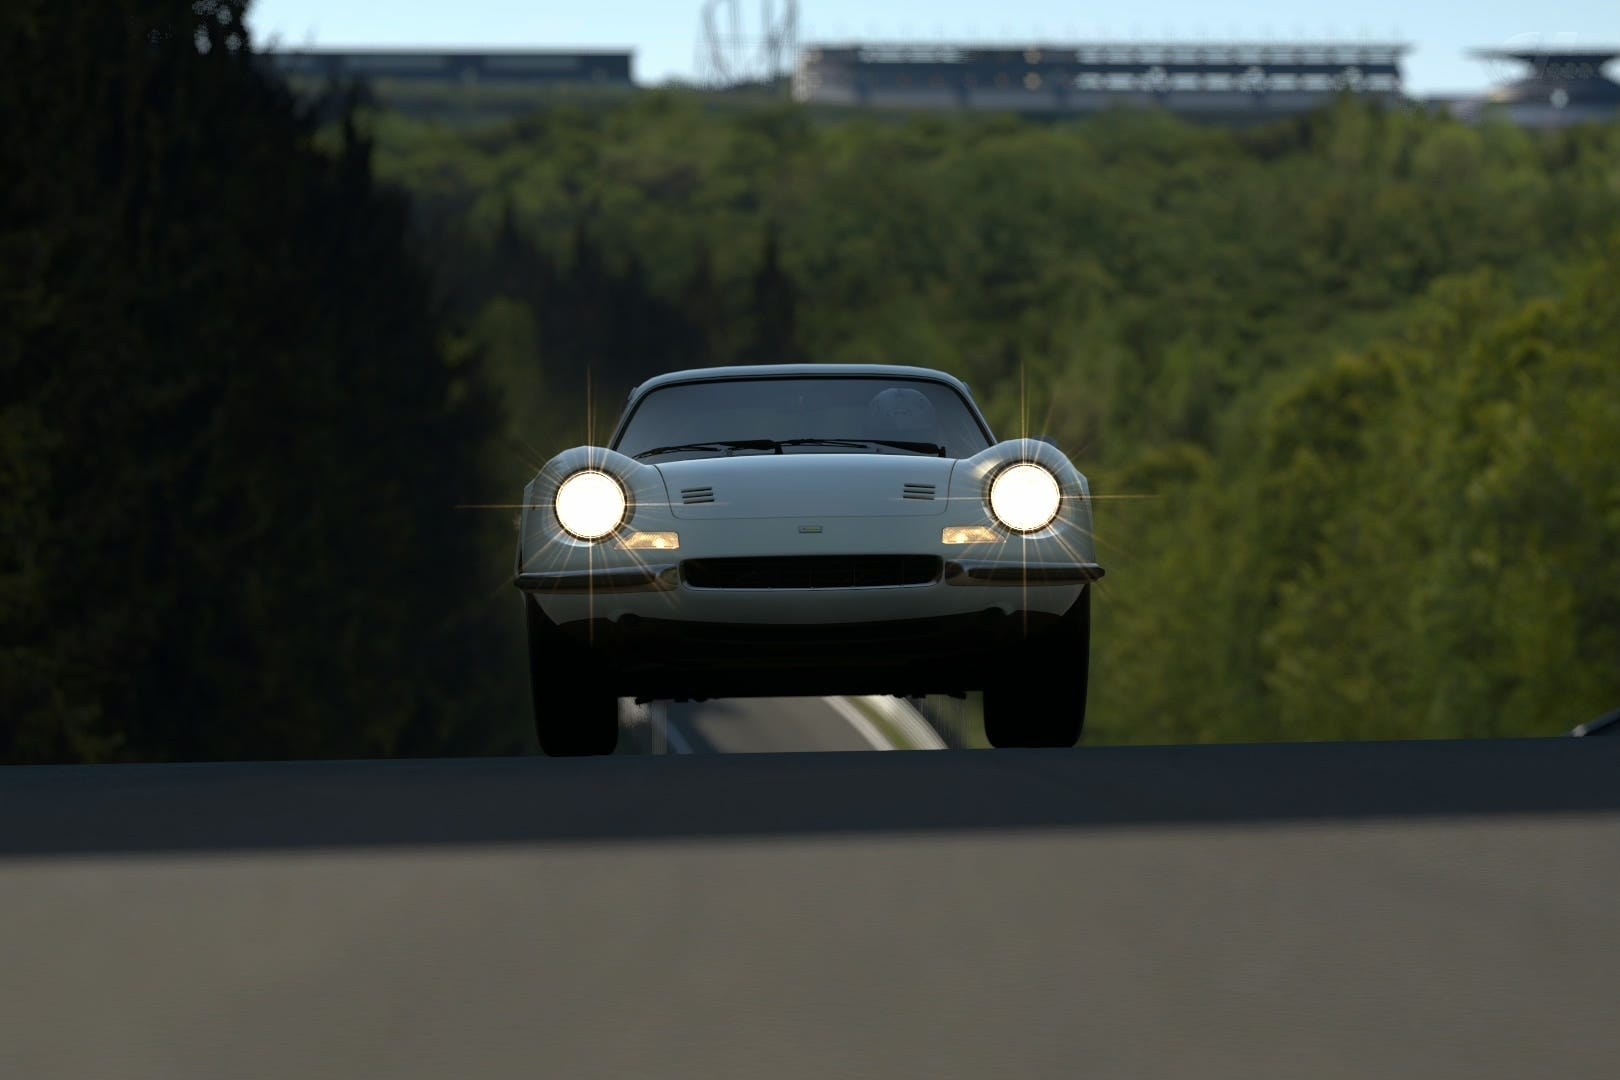
This is just before the Flugplatz, and just before the road curves to the right. It's a prime spot for front-on photos that really capture the environment as well as the car. Here I've also fiddled with the F-number, or "aperture", to make the car stand out from the background, but more about that later - we're talking about location now. On the 'ring, there's a fine spot in the last third of the track, in the windy terror from the Karussell to Plfanzgarten:
I really was 'aving it, but you can see that it's taken a toll on my poor Dino. That said, good photos don't only come from driving like a flawless pro. Your mistakes also make great shots, and the off that lead to my Dino getting battered actually presented a nice opportunity:
Less-than-stellar driving is pretty much the only way to get Gran Turismo 6 to show off its lovely smoke and dust effects, but man - the camera really captures the light!
Focussing on the details
In real-world photography, the dreaded F-stop is one of the most confusing things for a beginner. GT6 models it fantastically well, but leaves out the exposure problems that fiddling with real F-values can create. In general, Gran Turismo 6 takes the best shots with a low F-stop, allowing sharp focus on the car and some nice bokeh fuzziness in the background.
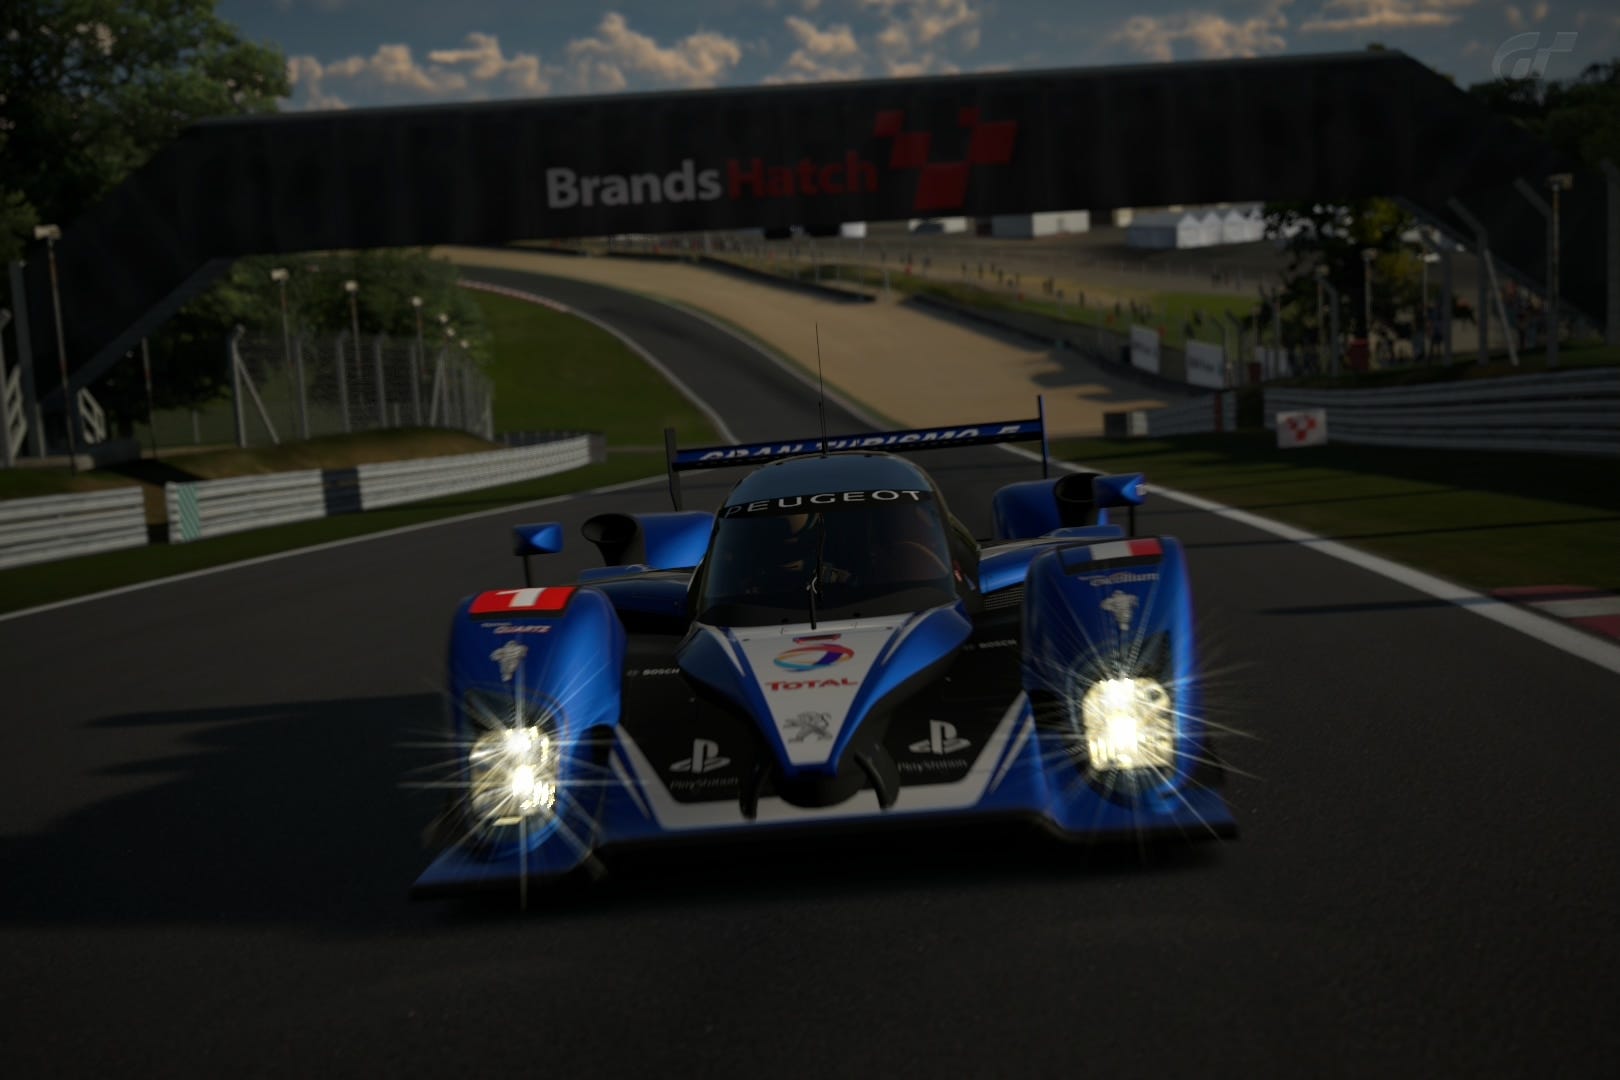
Peugeot's awesome 908 TDI FAP hammering out of Paddock. With the F-stop at 2, a 1/250th shutter and focus on the driver, we get a nice view without flattening the entire image or making it feel static. It's not all about slow shutters with low F-stops, though.
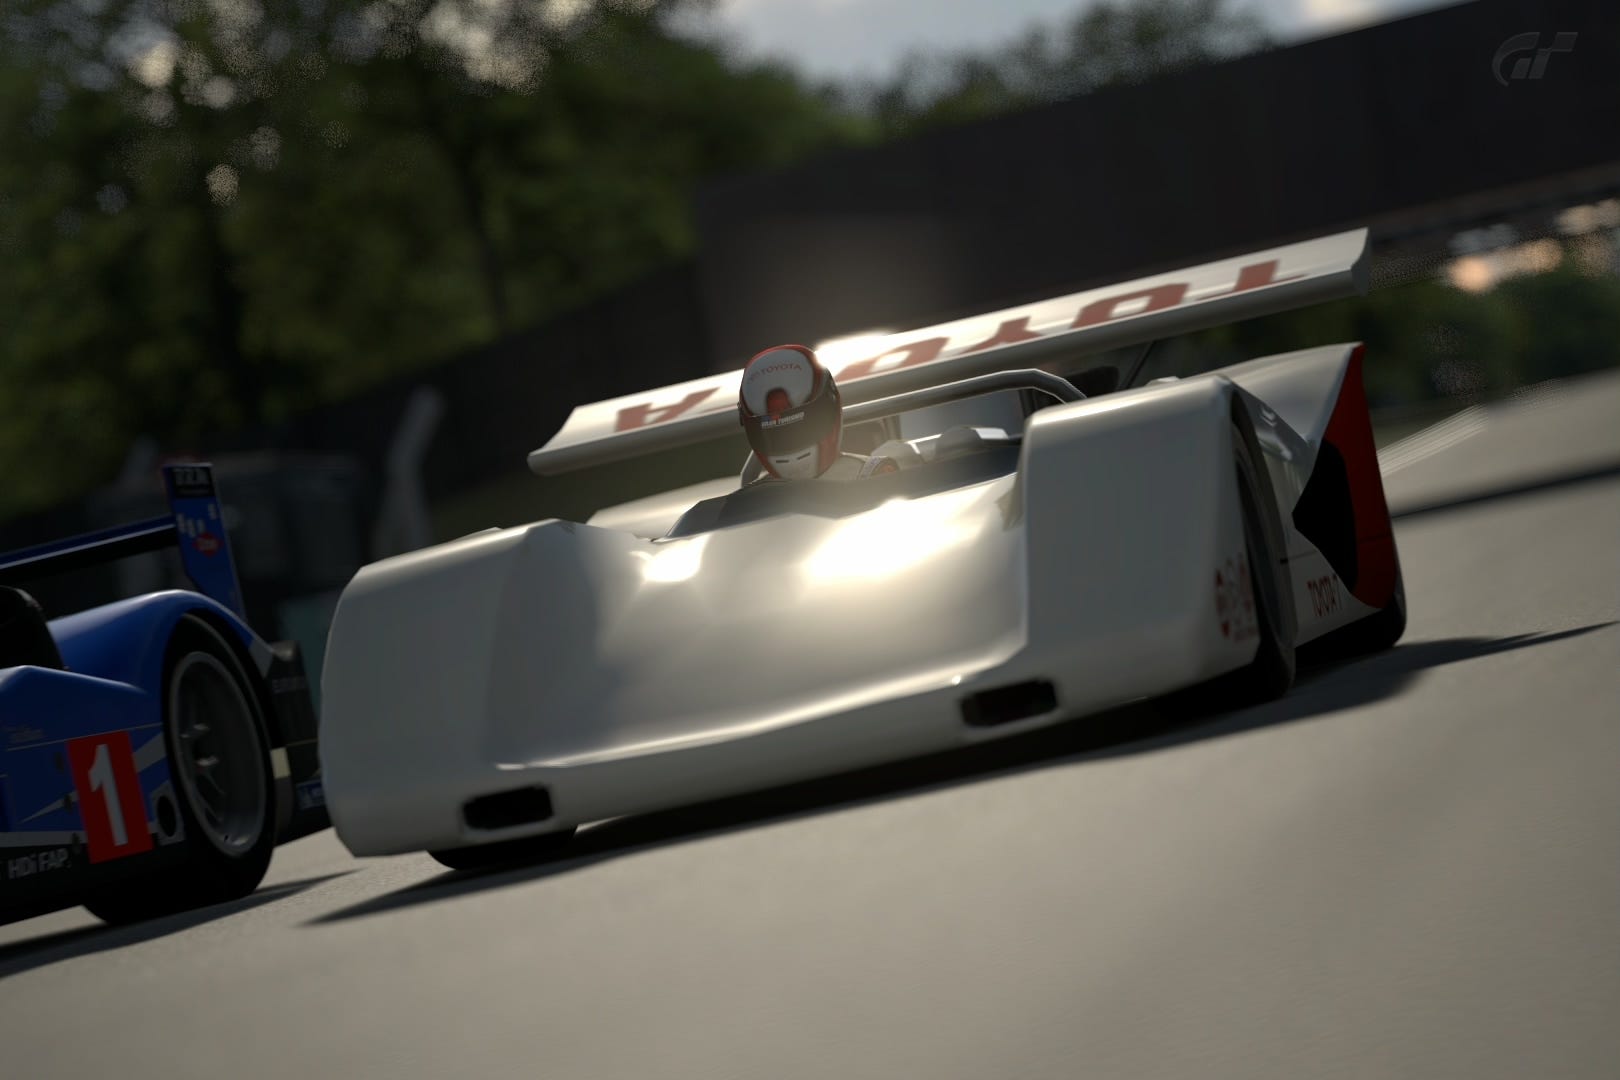
My 908's just nipping by the deliriously insane Toyota 7 here, so I went for a photo at an even lower F-stop (1.4), but a high shutter speed (2000), as the light was amazing. Not bad for a shot of a standard model car, and the bokeh in the background is as intense as a repo man's life.
Sometimes, a good shot isn't about getting the whole car nicely framed, but just a bit of it. Again, the F-stop is key to getting a nice image:
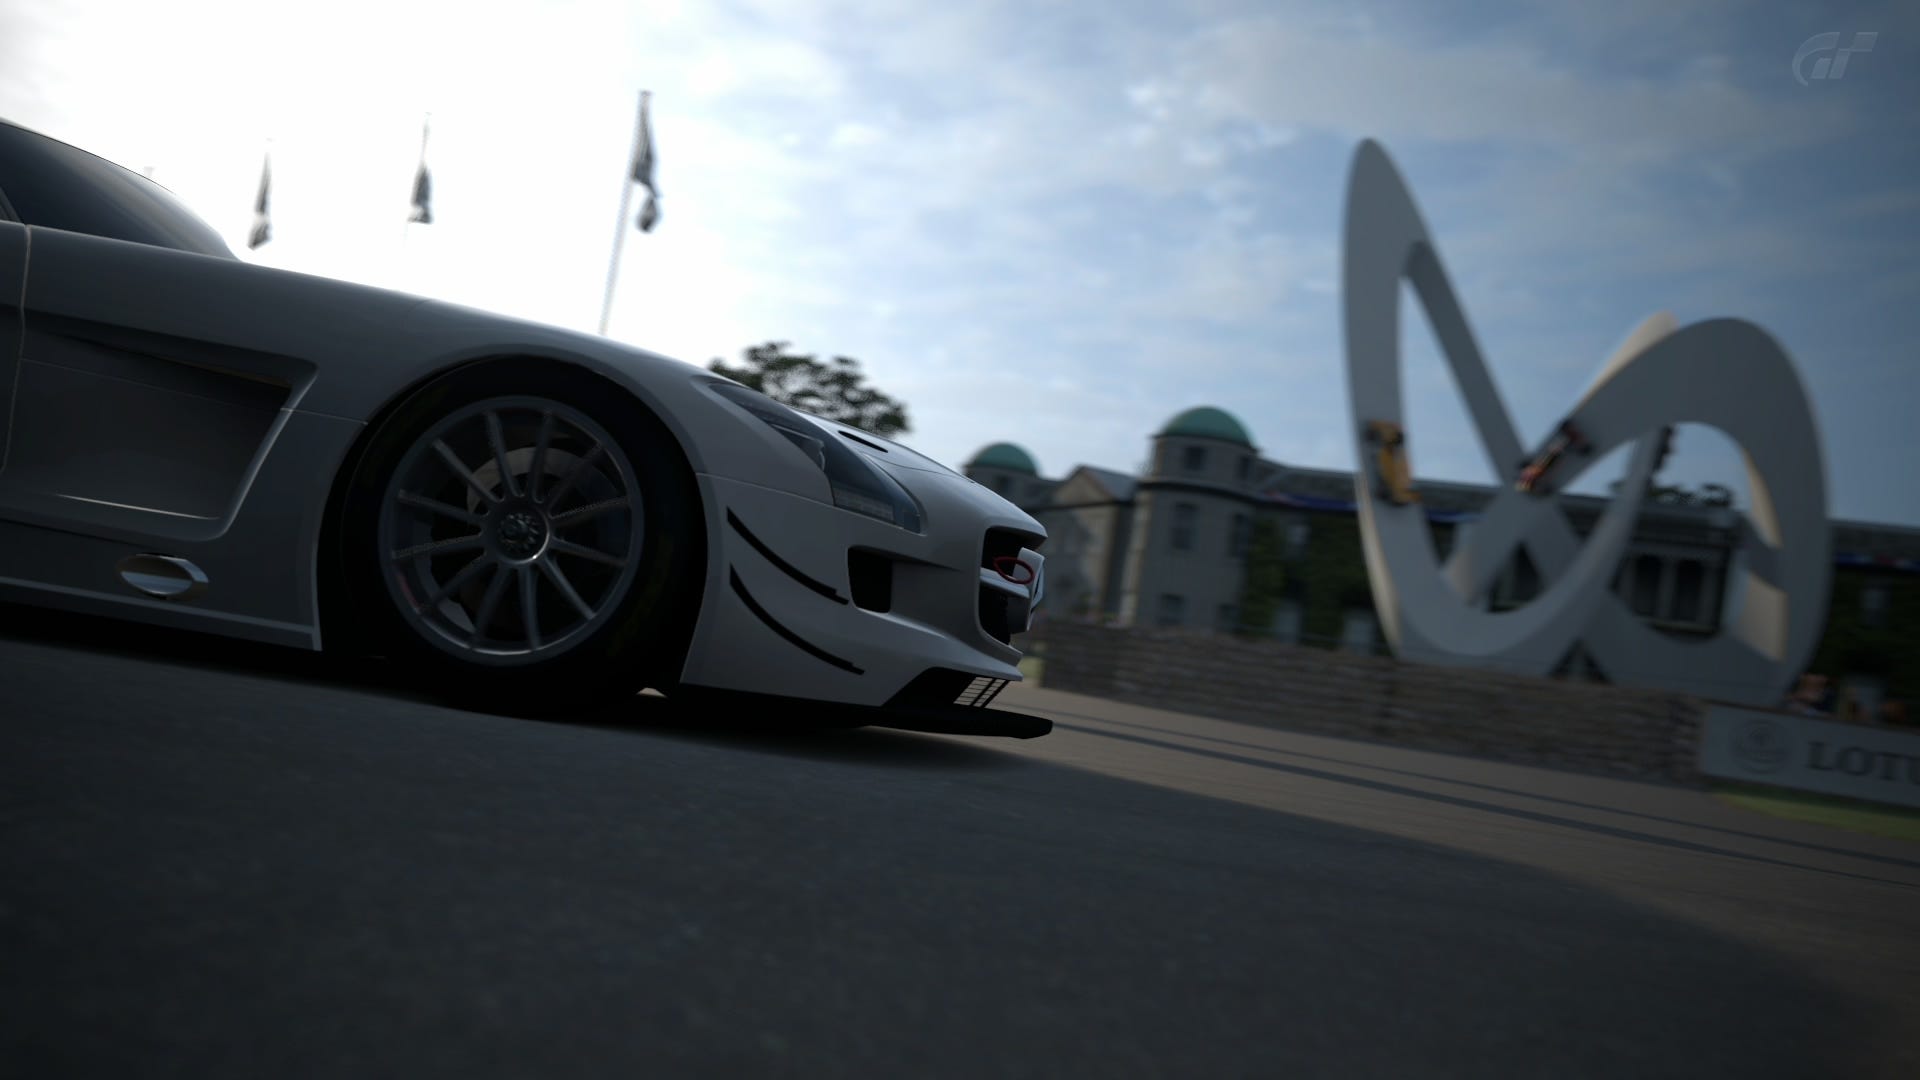
The Mercedes SLS GT3 at Goodwood. I was trying to get a bit of the front aero that makes the GT-spec SLS a downforce monster and the fabulous Lotus F1 display from Goodwood 2012, which we're all secretly hoping is a hint about future DLC and not some cruel red herring (one of them is a Senna car, after all). F-stop is at 2 here, to preserve detail in the Lotus sculpture while keeping the SLS nice and tight. However, taking the F-stop to its minimum is often when GT6 delivers its most realistic results:

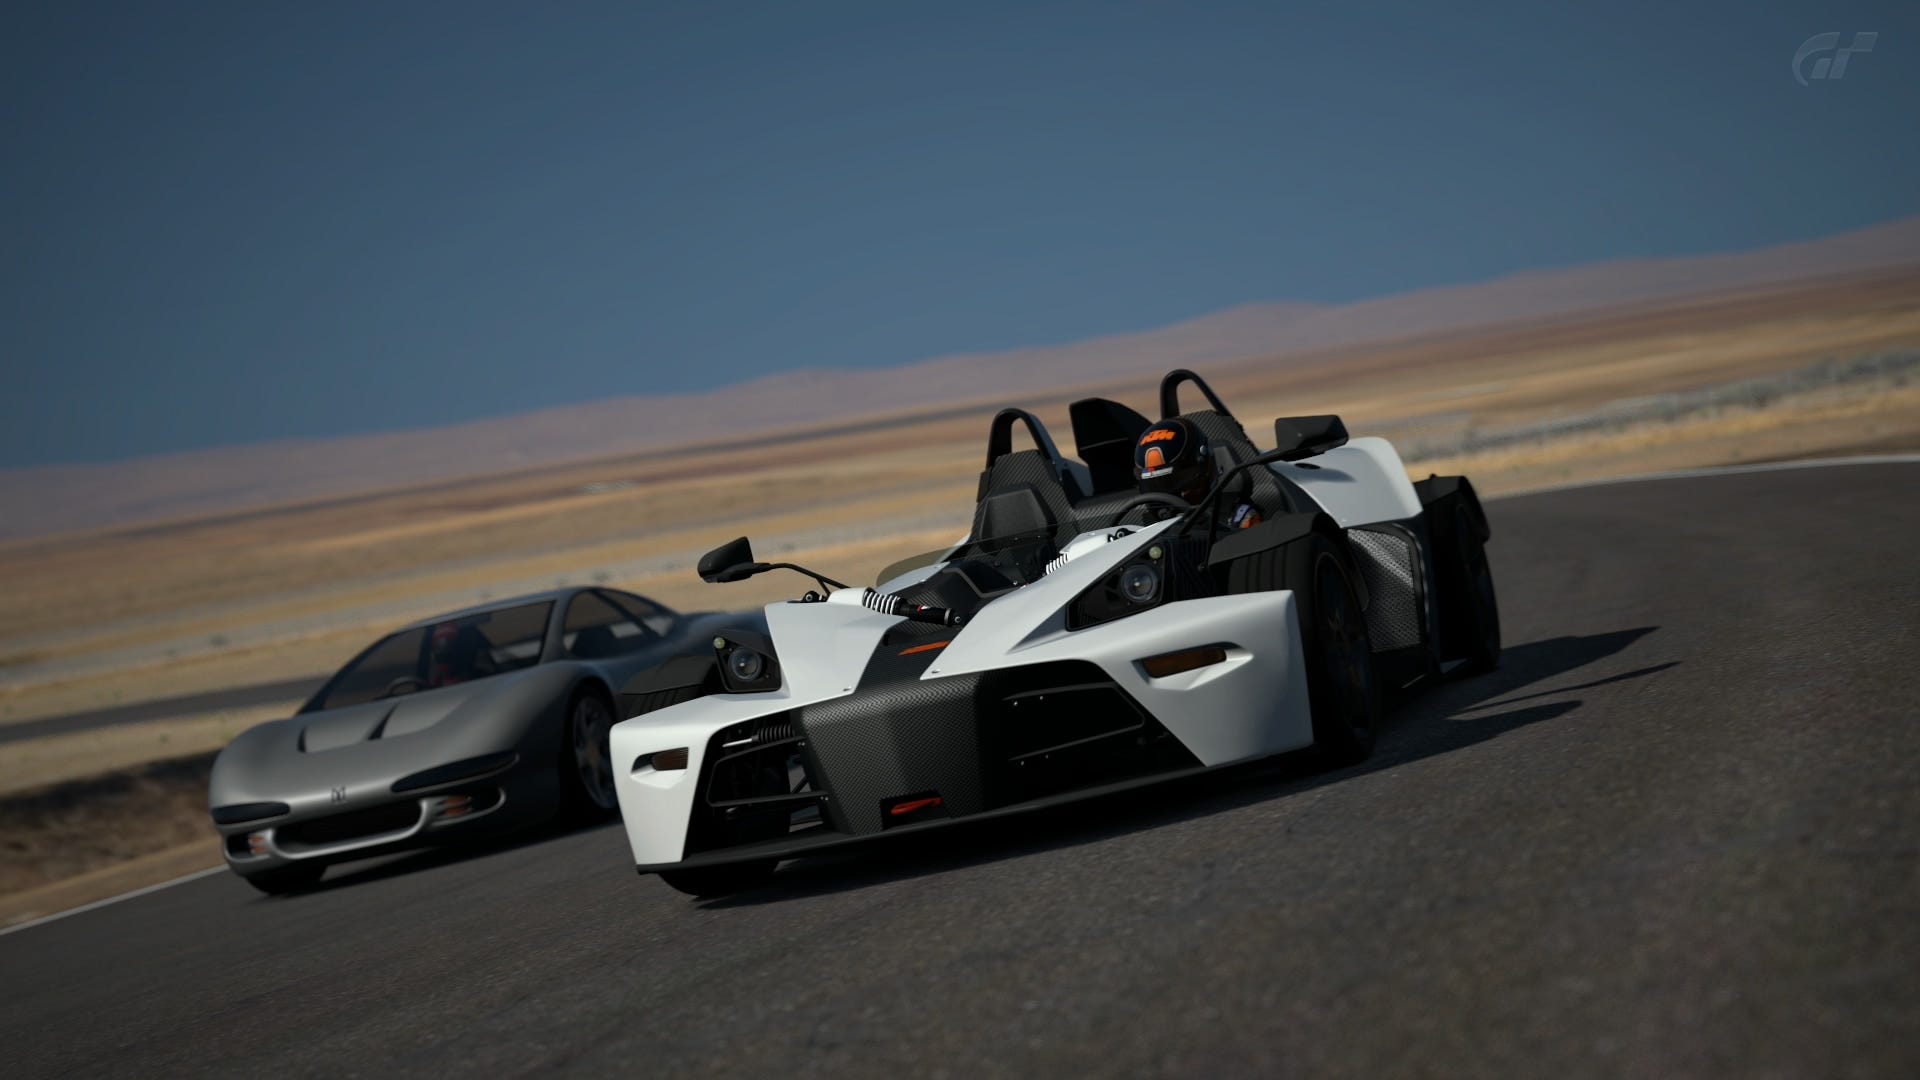
This is the KTM X-Bow at Willow Springs, a course that has some of the best light in the game. We've really zoomed in on the driver going through a turn here, and GT6's detailing and lighting model really show how magnificent they can be.
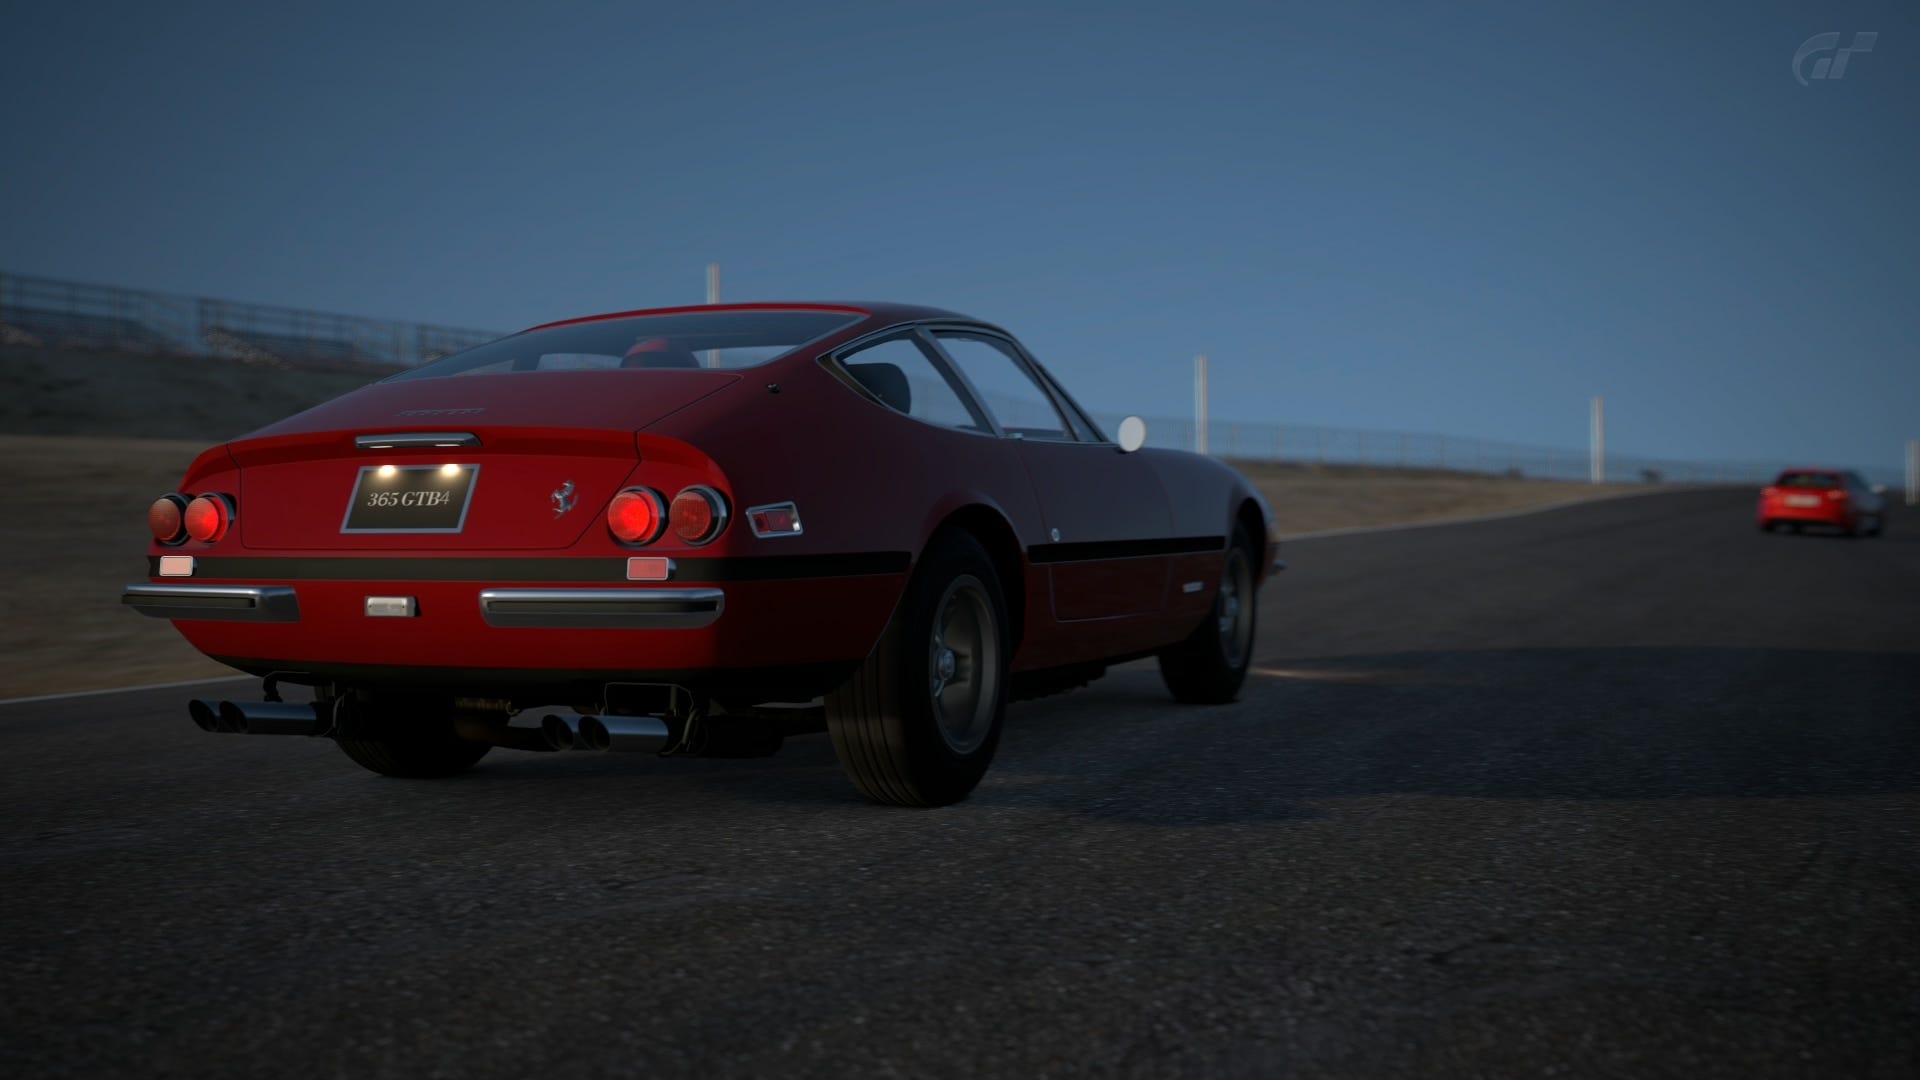
Likewise, the Daytona steps into the Uncanny Valley with aplomb with the F-stop at 2, The out-of-focus car in the background is utterly convincing.
So here ends our guide to track photography in Gran Turismo 6. I hope I've covered off enough basics to inspire some of you to get snapping, as there's plenty more to talk about. Photo mode is a great wind-down after a race, as each replay contains an infinity of snaps to capture. Remember that you can export every shot to the PS3 dashboard, and you can save them off to share on the internet, use as desktop backgrounds or private purposes which aren't fit for public discussion. The key thing is to keep taking photos and just play around - you'll be surprised what shots you can get, and hopefully delighted at how rewarding virtual motorsports photography can be.