How to build a white gaming PC 2024: part selection, deal-finding and more
The build process and NZXT H6 Flow mini review.

Once your list of parts on your screen has turned into a pile of parts in your room, it's time to get started with the build process. Here's how it went for me, including some tips that should make it a little easier for you if you're still new to PC building! I'll also detail the NZXT H6 Flow case that forms the centrepiece of this build, as it's a brilliant option that balances aesthetics, thermals and ease of assembly. What this section won't include is specific advice on PC assembly - that isn't the point of this article and there are far better resources in both written (eg RPS) and video (eg LTT) form.
When assembling a white PC build in particular, it's worth thinking about how each of your components will look once all are installed in your PC. You might be able to cover up messier and less-themed parts with a vertical graphics card mount, for example, and you'll probably want to consider whether you're happy with the black cables that are provided with most power supplies (even from the aesthetics-focused NZXT) or whether you want to get white-coloured replacements or extensions.
Otherwise, the build process is the same as other PCs: put as much onto your motherboard as possible before it goes in your case, including your CPU, RAM and NVMe SSDs. If your cooling setup allows, test out your components first with the motherboard sitting on top of its box rather than installed in the PC. This makes it easier to swap out any misbehaving parts and reduces troubleshooting complexity. Once you've proved the essentials work, you can move the motherboard into the case and add on your other components - fans, add-in cards, fan/RGB controllers, additional storage and so on.
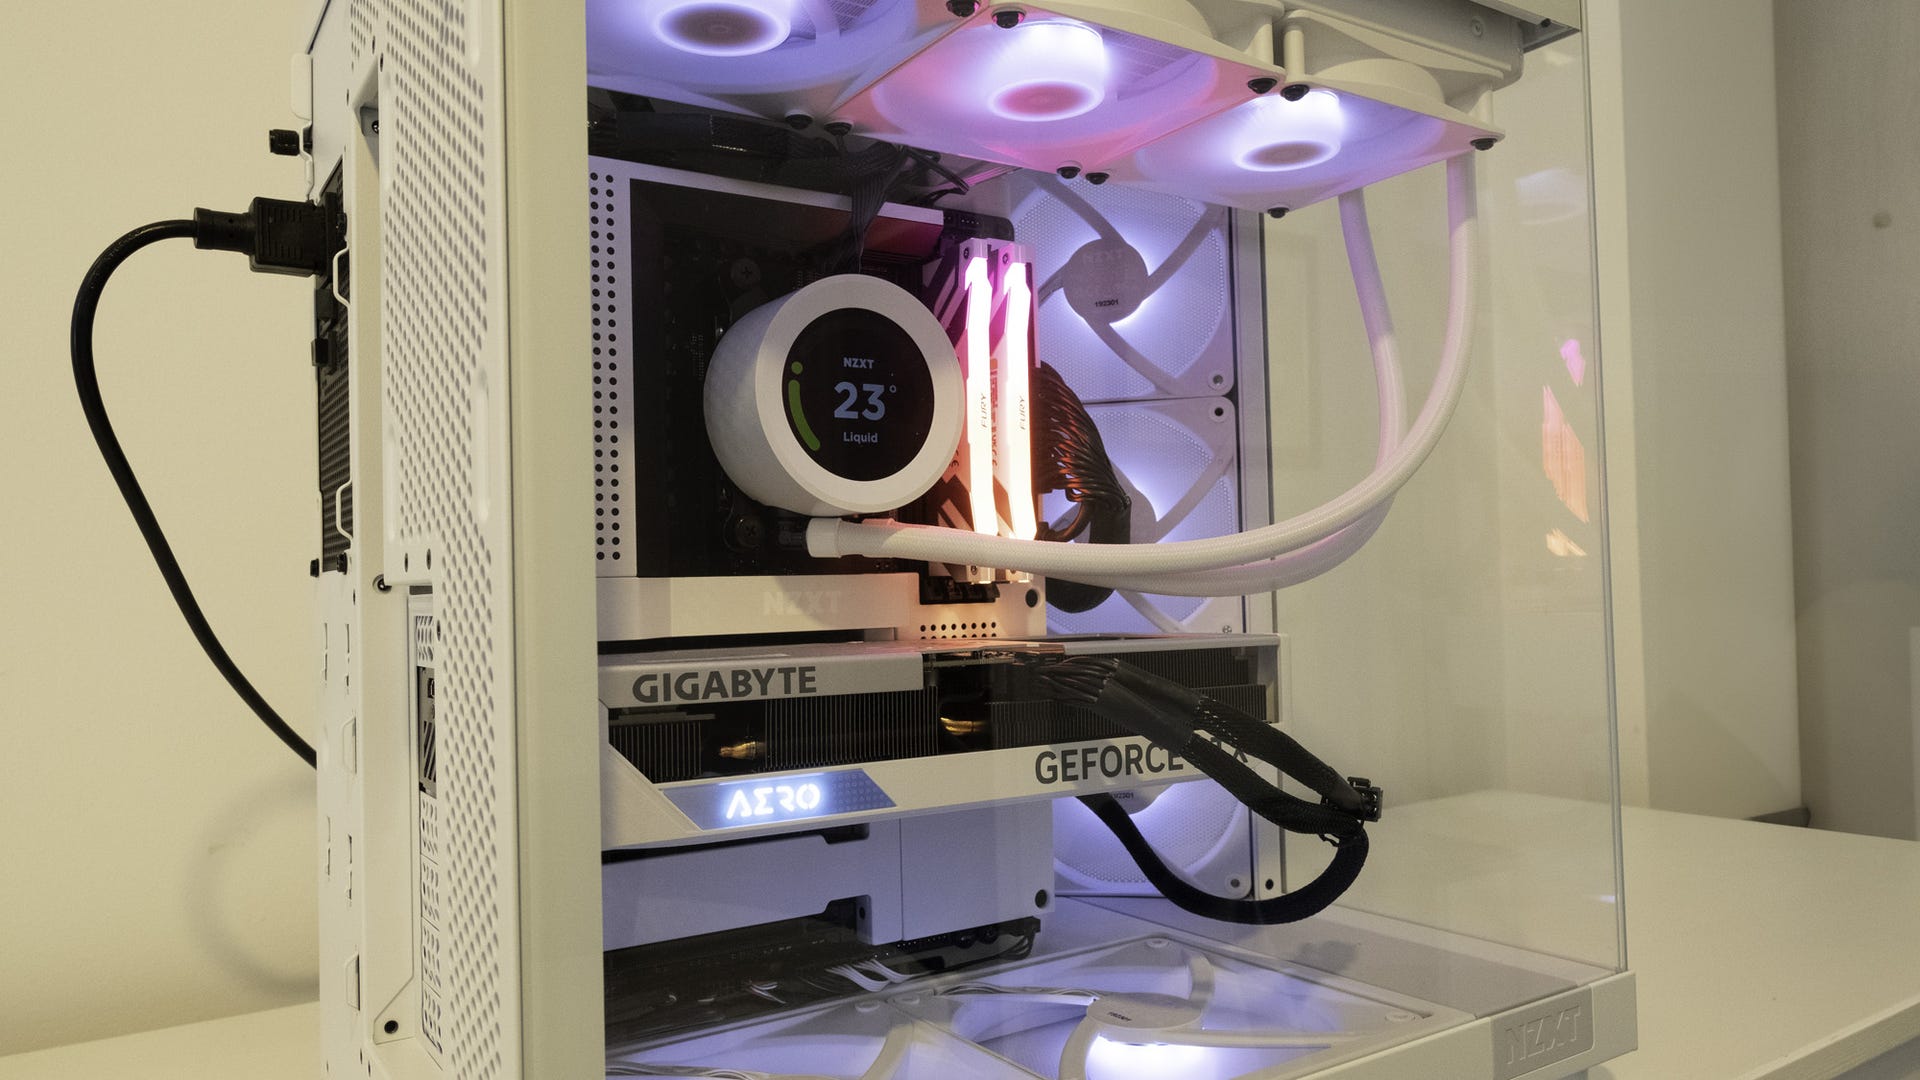
For a build focused on aesthetics, I find it nice to fill in all available spaces with fans, even if they're not strictly necessary for airflow, and try to route cables nicely so that they're hidden behind other components or the motherboard tray. I'm not super happy with the positioning of the graphics card power cable in my build, for example, so I might try either replacing the cable with a cleaner-looking version (eg CableMod) or rerouting it below the motherboard tray rather than off to the side.
Speaking of my build, the NZXT H6 Flow case I used made the assembly process straightforward, with the dual-chamber design affording plenty of space for (hidden) cable clutter while keeping the main chamber clean and beautiful. The angled side fans here look fantastic, and there's space enough for three 120mm fans up top, three more on the side, two 140mms in the floor and even a 120mm on the rear (unused in my build). (It's a bit weird that the bottom tray doesn't support smaller 120mm fans, even if they'd look a bit odd. )
The downside to all of these fans is that there are an absolute metric butt-ton of cables. Each fan comes with separate RGB and power cables, and they don't link together like more modern designs a la Corsair, and NZXT's provided fan and RGB controllers only have room for three fans each - so you need three controllers - or a combination of two controllers and some motherboard headers in my case - to fully populate the case. This setup also required four USB 2.0 headers for the three controllers and the AiO itself, adding to the chaos.
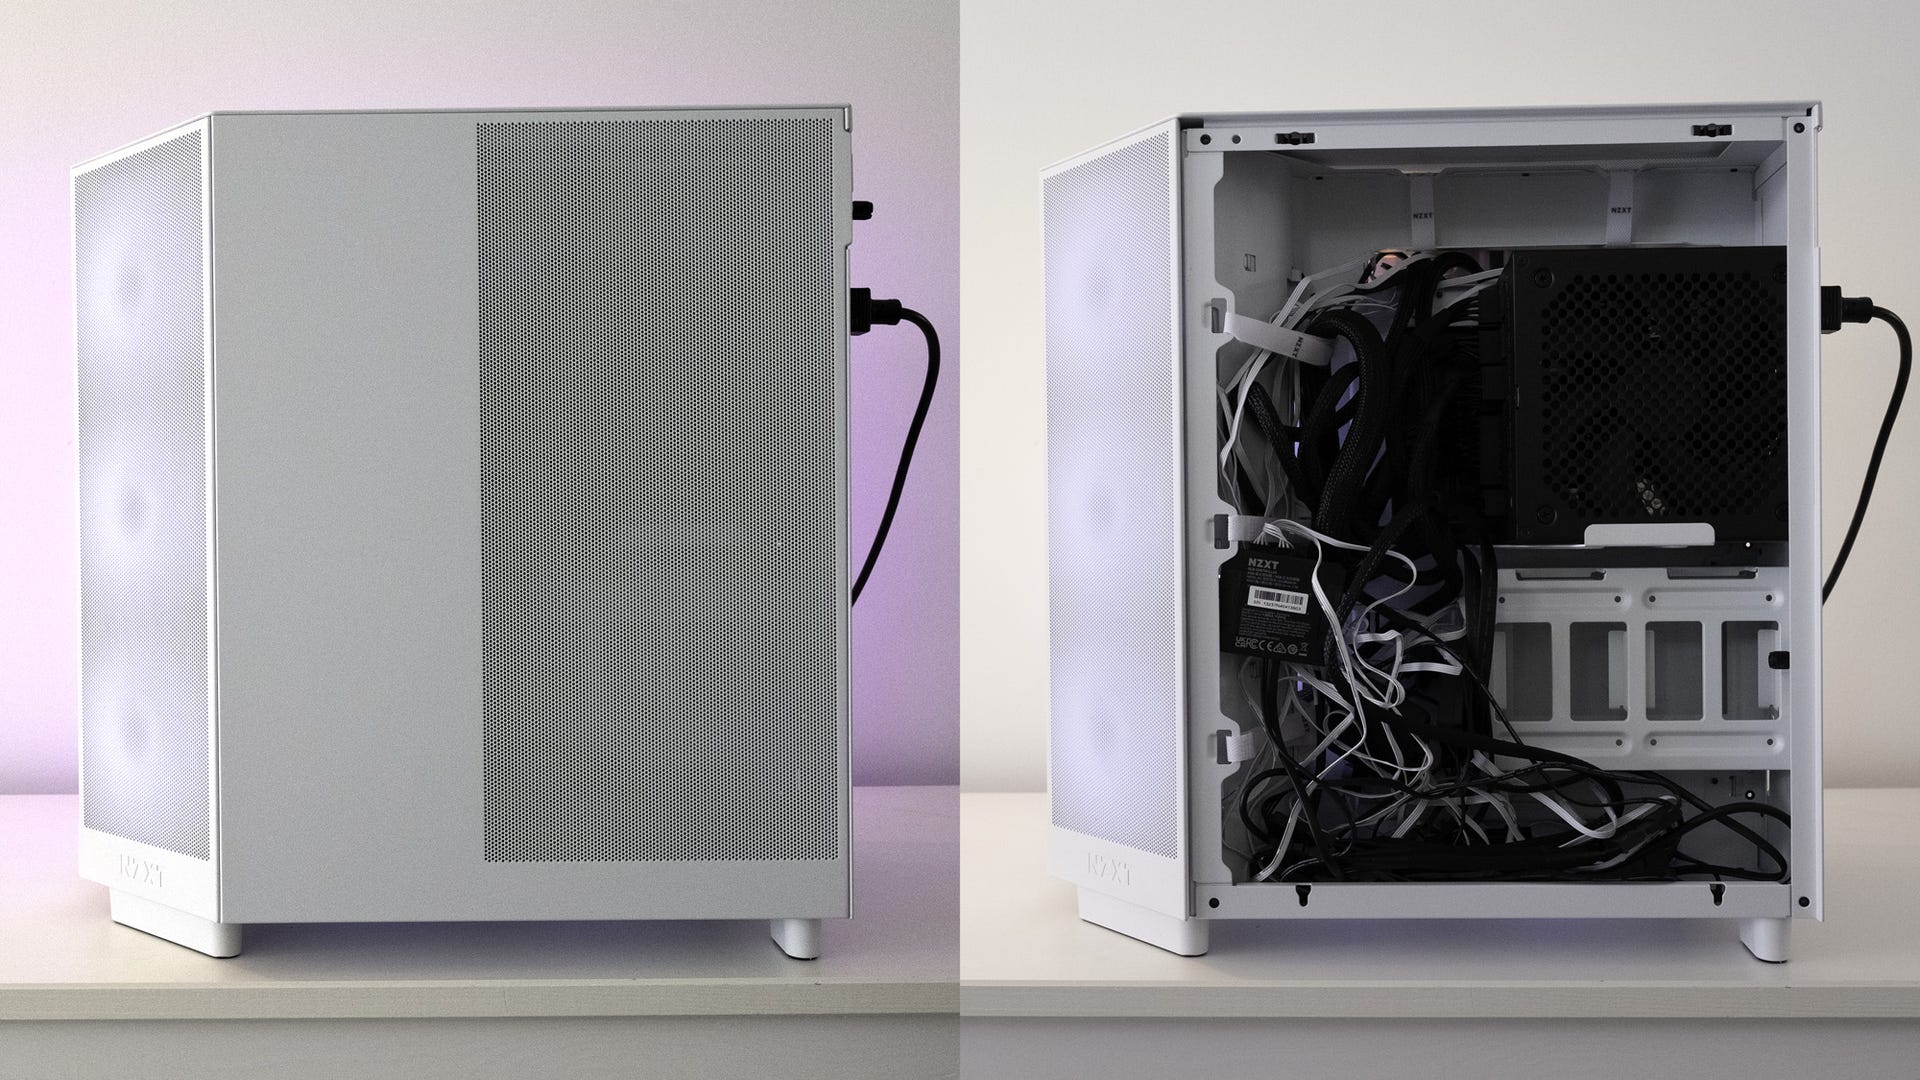
That means that the back side of my case is an absolute disaster zone, a proper spaghetti nightmare, that is just barely hidden when the side panel goes back on. Clearly more modern fans that snap or otherwise connect together, or a nine-port fan and RGB controller, would result in less cable clutter and a cleaner build overall.
Other case elements are generally well thought out. Front I/O is simple - two USB-A, one USB-C, two 3.5mm, power - but effective, the front panel connector plugs in as a single unit by default, and the top-mounted PSU is easier to access than the usual floor mount that puts cables in direct competition with storage locations. There are velcro-style straps provided within for cable management and generally plenty of tie points for cable ties as well.
Finally, temperatures and noise here were surprisingly good, with CPU and GPU both running beyond their rated frequencies without noticeable fan noise. Fitting higher-end components would provide more of a challenge, but if you're going with this case and a similarly powerful AiO or tower cooler like the D15, you should be in a good place.
Of course, the whole point of this build is to marry performance with aesthetics, so let's move onto just how powerful - and how aesthetic (?) - the new machine is.