Zelda - Mogg Latan and the Synched Swing trial solution in Breath of the Wild
How to solve the Ridgeland region trial.

Mogg Latan is one of the many Shrines located throughout Zelda: Breath of the Wild. The challenge inside, named the Synched Swing trial, is a puzzle that has you use Megnesis to manipulate a variety of swings and obstacles. Get it right, and you'll walk out a success.
If you need help finding and solving other Shrines, our Zelda: Breath of the Wild Shrine of Trials locations page can help, while our Zelda: Breath of the Wild walkthrough and guide covers other aspects of the game.
Where to find Mogg Latan
The Mogg Latan shrine is located within the Ridgeland region, specifically in a hillside a fair way south and slightly west of Ridgeland tower. To get there, follow the road south of Ridgeland Tower until you're due west of Central Tower.
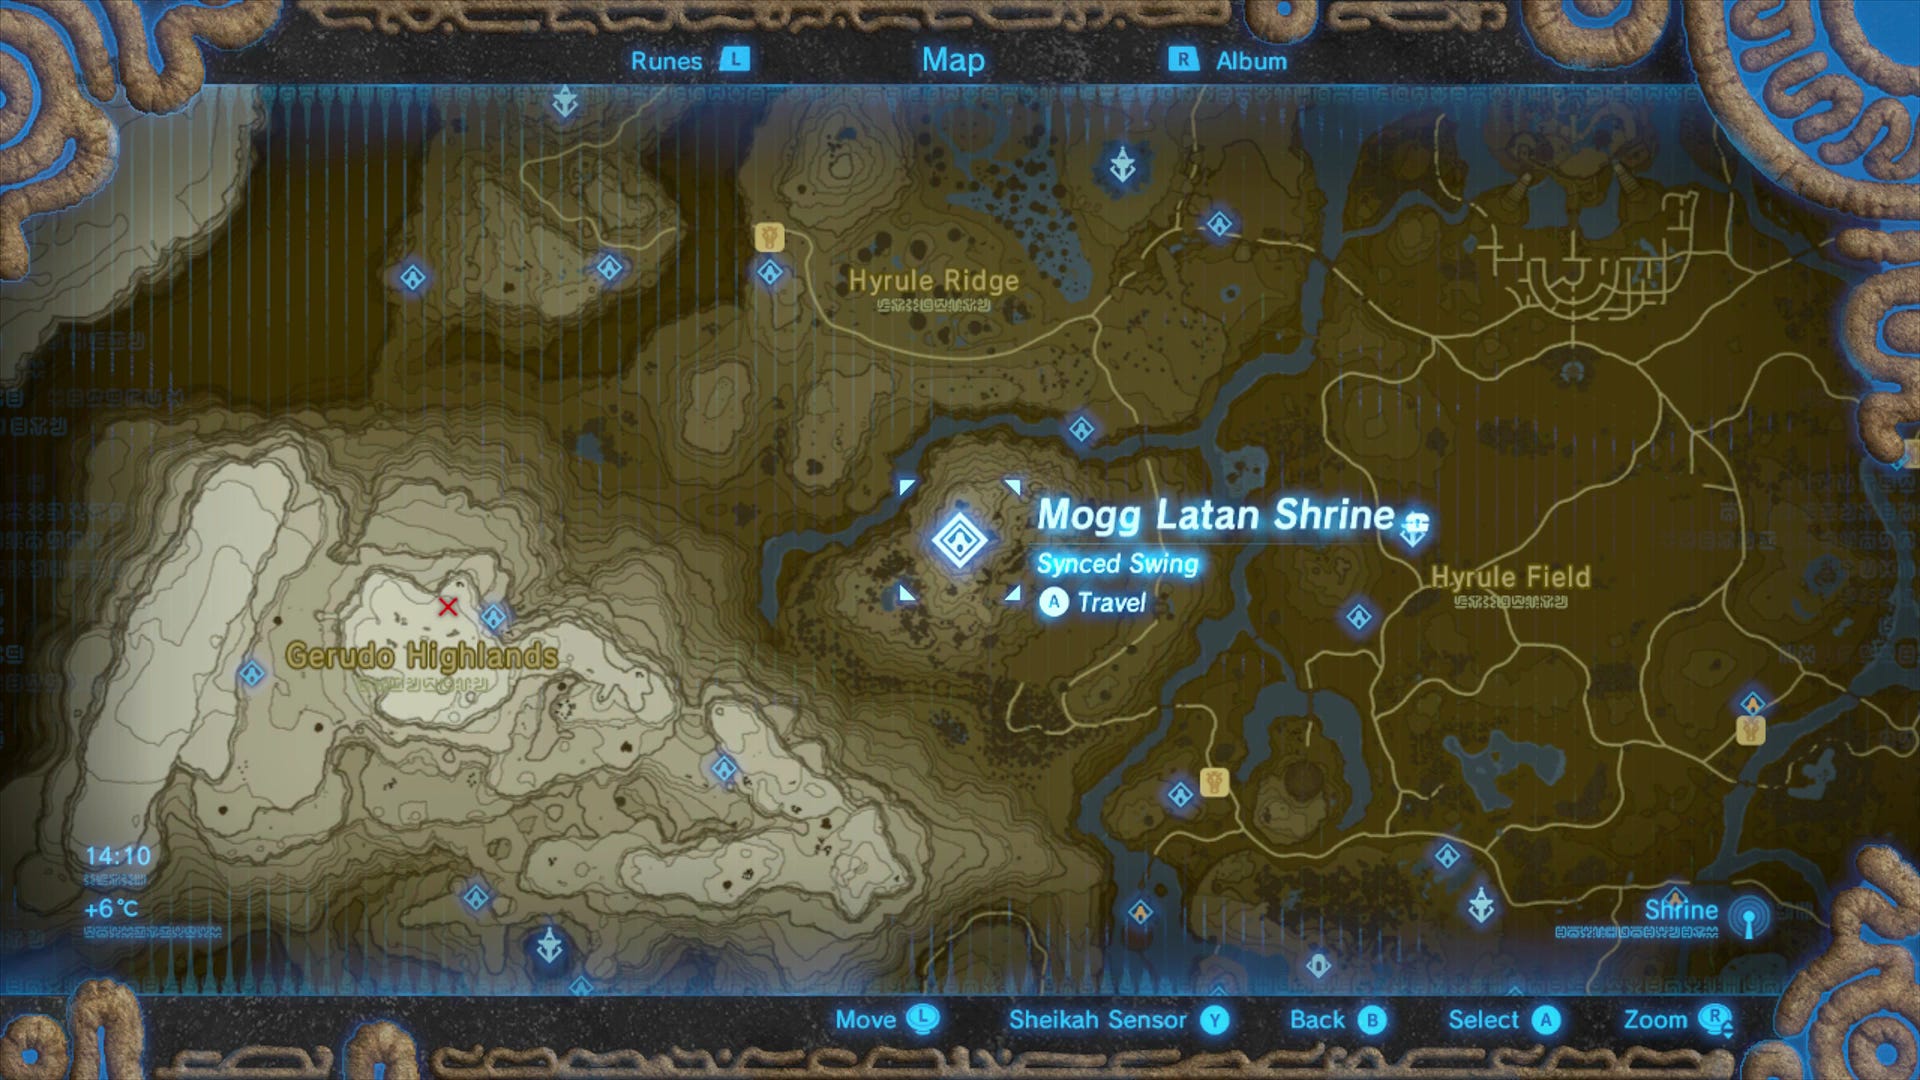

Then, head due West from there, up the rocky, uneven hillside, and you'll find the shrine tucked into the south side of the hill, near the top.
There's no puzzle to solve here in order to access the shrine, so simply dive in when you're ready.

Mogg Latan and Synched Swing trial solution
Mogg Latan requires you to use some pretty tricky mechanics. As soon as you enter, there's a moving swing just in front of you. Before doing anything, hop across that swing and get to the other side before it stops moving (you can start it moving again with Magnesis if it stops, but it's better to save yourself that hassle if you can).
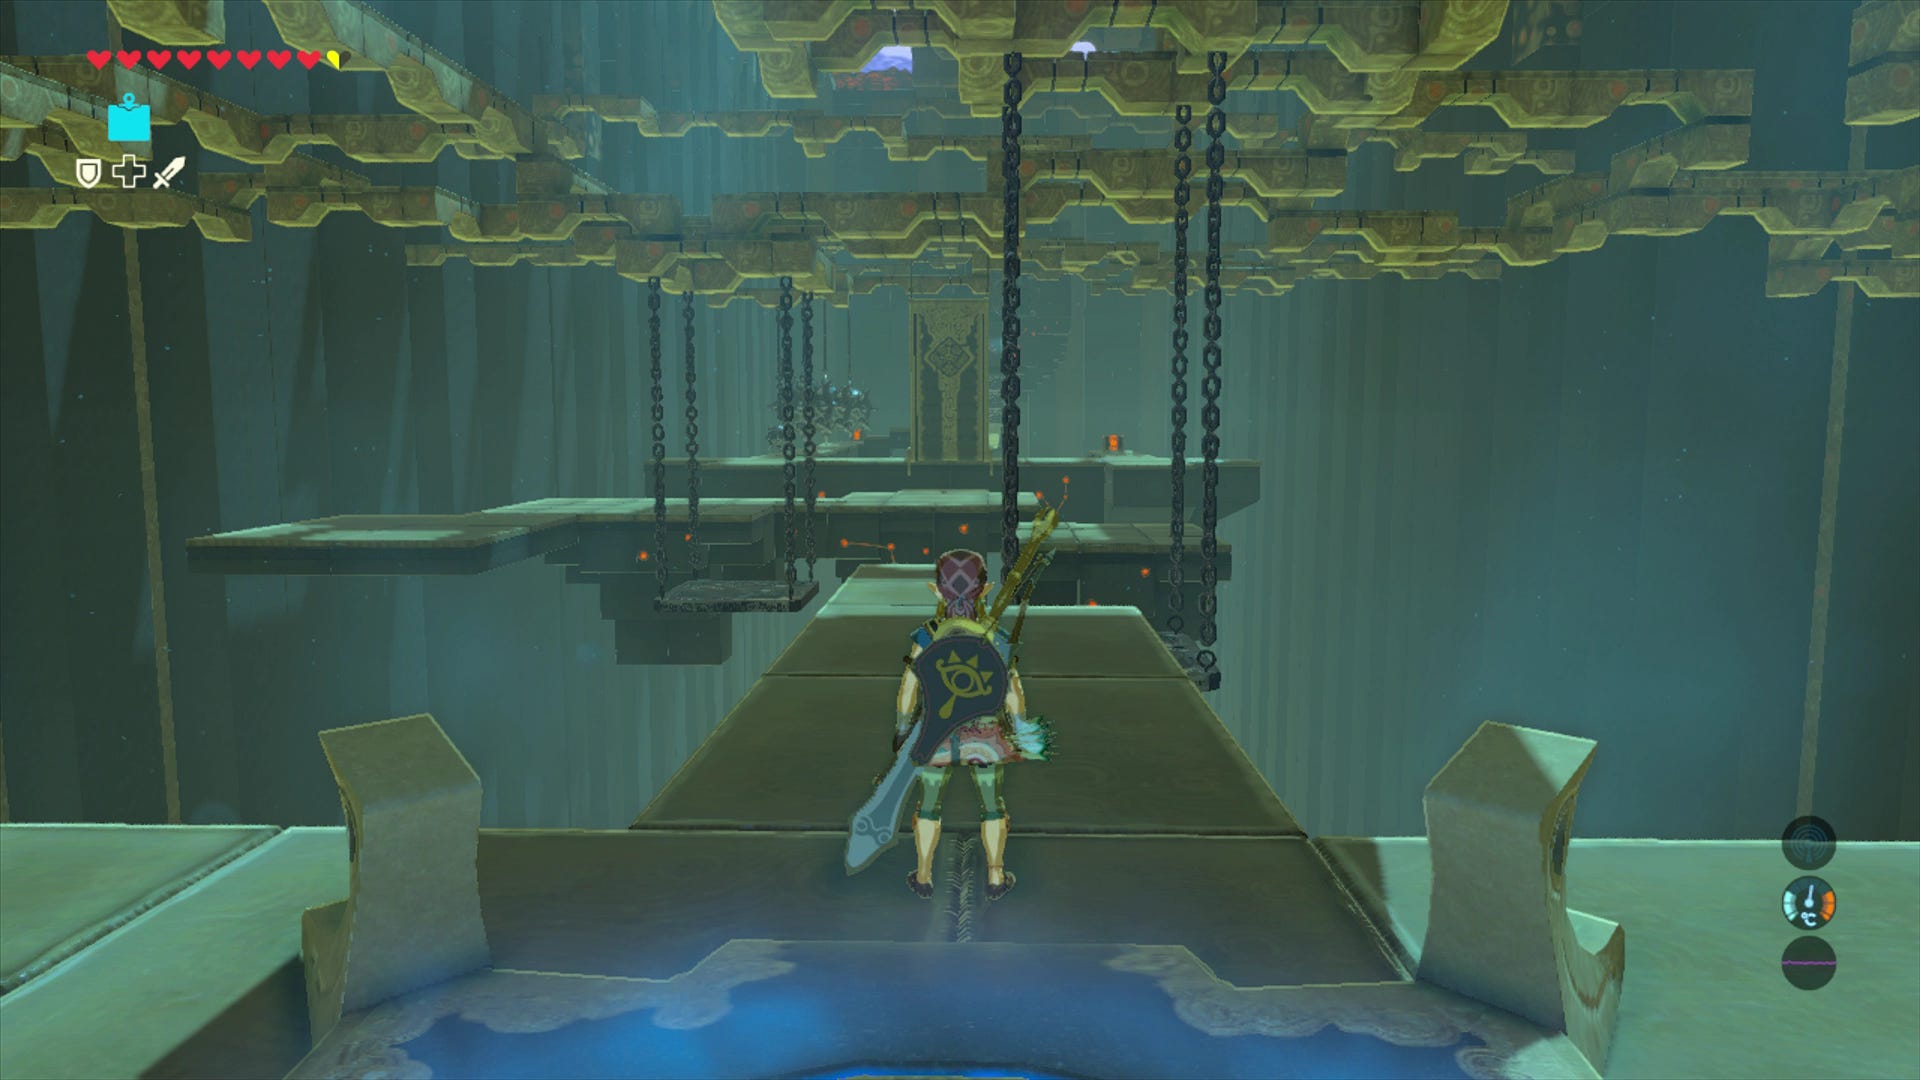
Next, another swing, but this time you need to move it with Magnesis first. Grab the swing, and pull it directly towards you as far as you can, without moving it from side to side at all if possible. Release it, and time your jump to hop across - this may take a few tries!
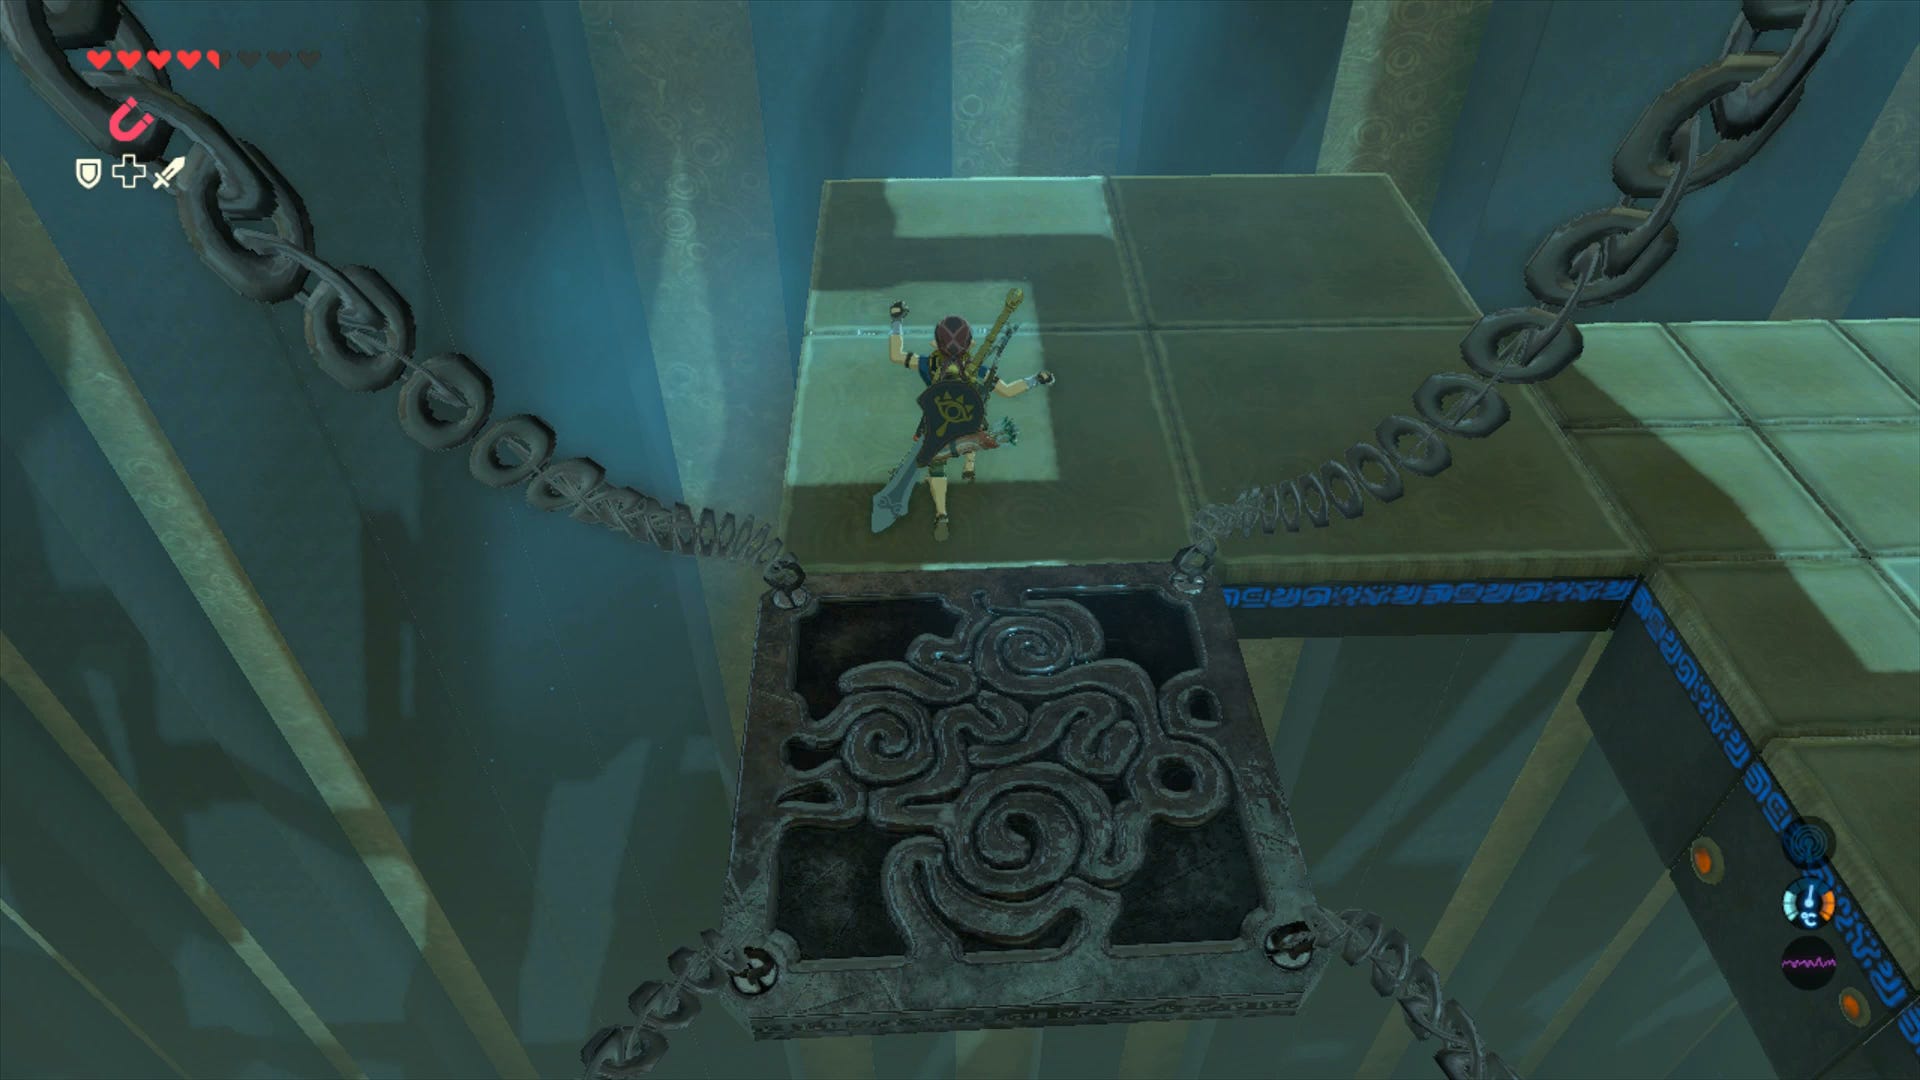
Once across, you're faced with a kind of drawbridge. You'll need to shoot or otherwise break the ties at the top of it - the easiest way is to shoot the two thin ropes with an arrow each.
Thanks to a new update, it's now possible to play Zelda Breath of the Wild in VR. Want help with the main game? Our Zelda: Breath of the Wild walkthrough can help complete Divine Beasts Vah Ruta, Vah Rudiana, Vah Medoh and Vah Naboris and more. There's also how to get the Master Sword, Hylian Shield and all Zelda Captured Memories and Great Fairy Fountain locations, while our Shrines locations and Shrine maps hub explains where to find and solve every puzzle room, including dragon locations and Labyrinth solutions. We also have a DLC 1 guide and DLC 2 guide, including all Tingle, Majora's Mask, Phantom, Midna outfit locations.

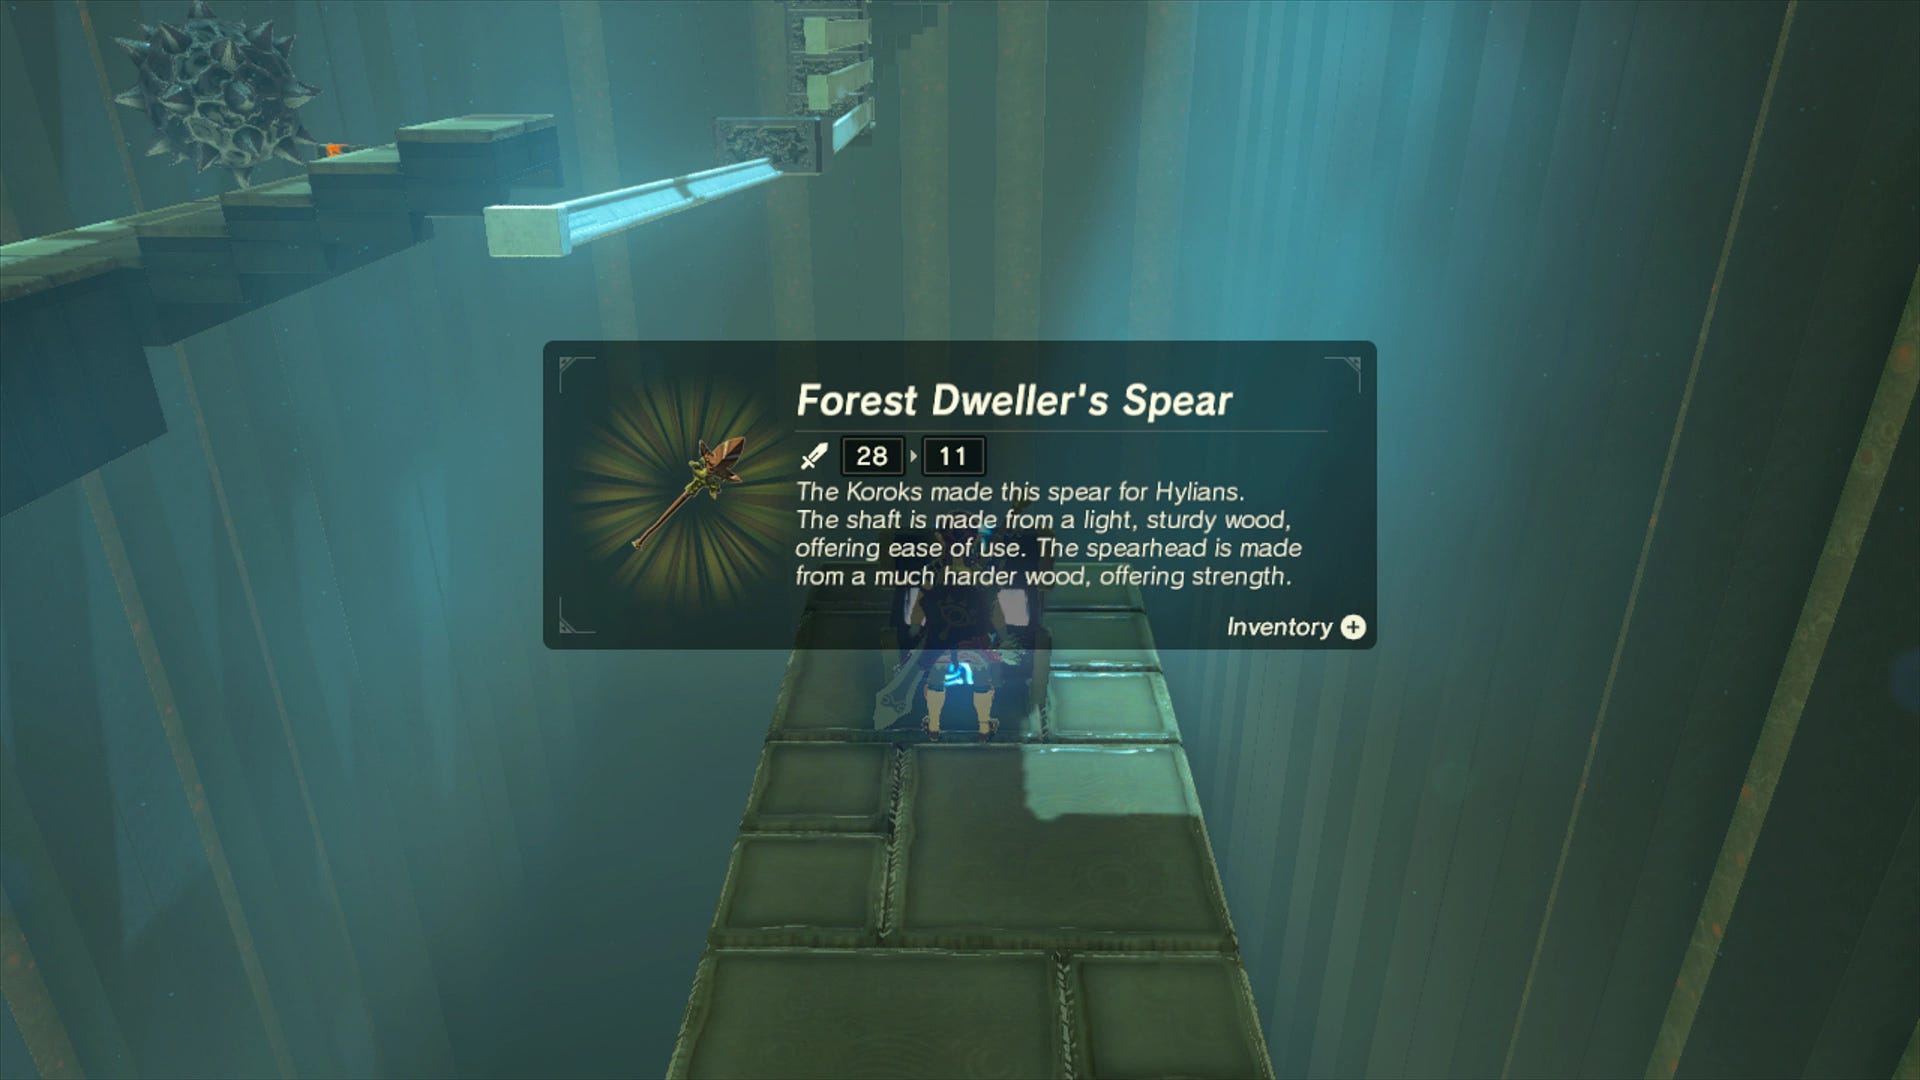
Just ahead is a chest containing a Forest Dweller's Spear, which you can grab now.
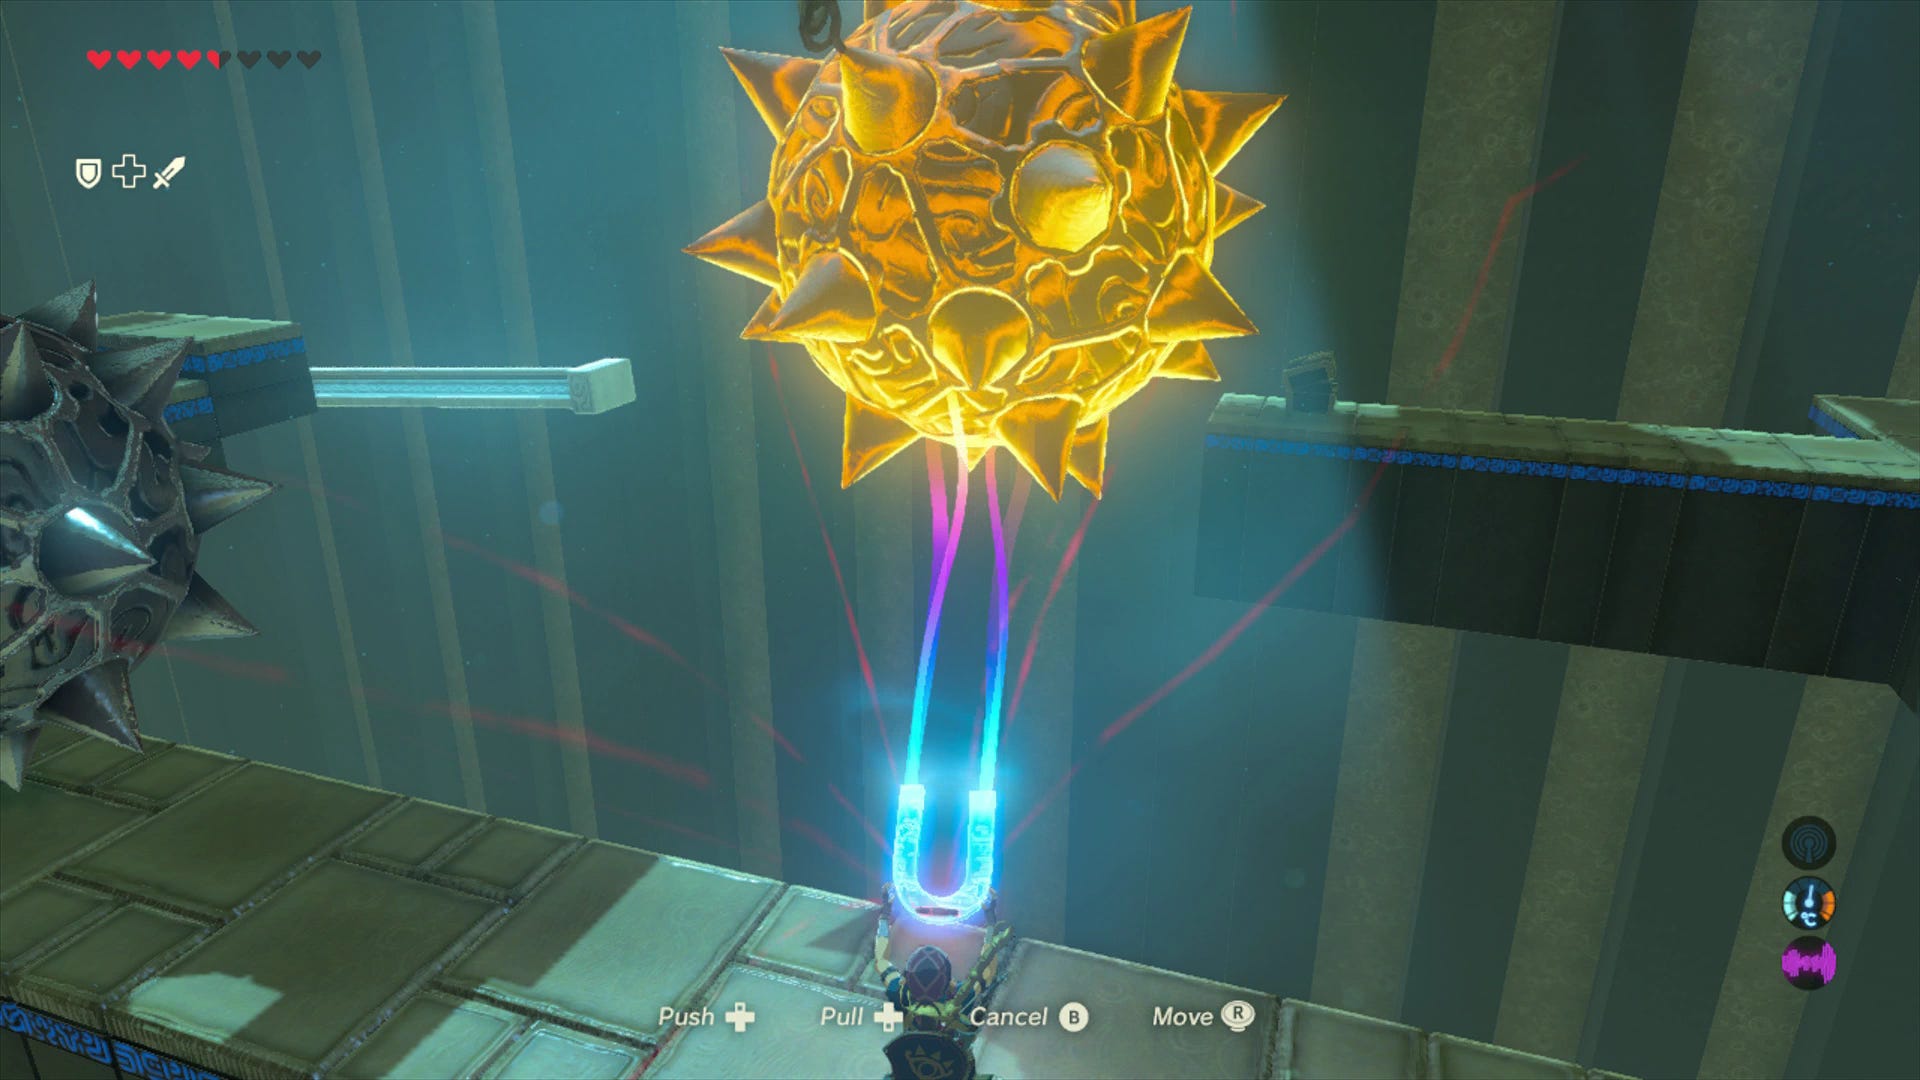
Next, a narrow walkway full of spiked boulders. Fortunately they're magnetic, so one at a time, use Magnesis on them to move them out of the way, and then carefully place them back where they started so they don't keep swinging and knock you off!
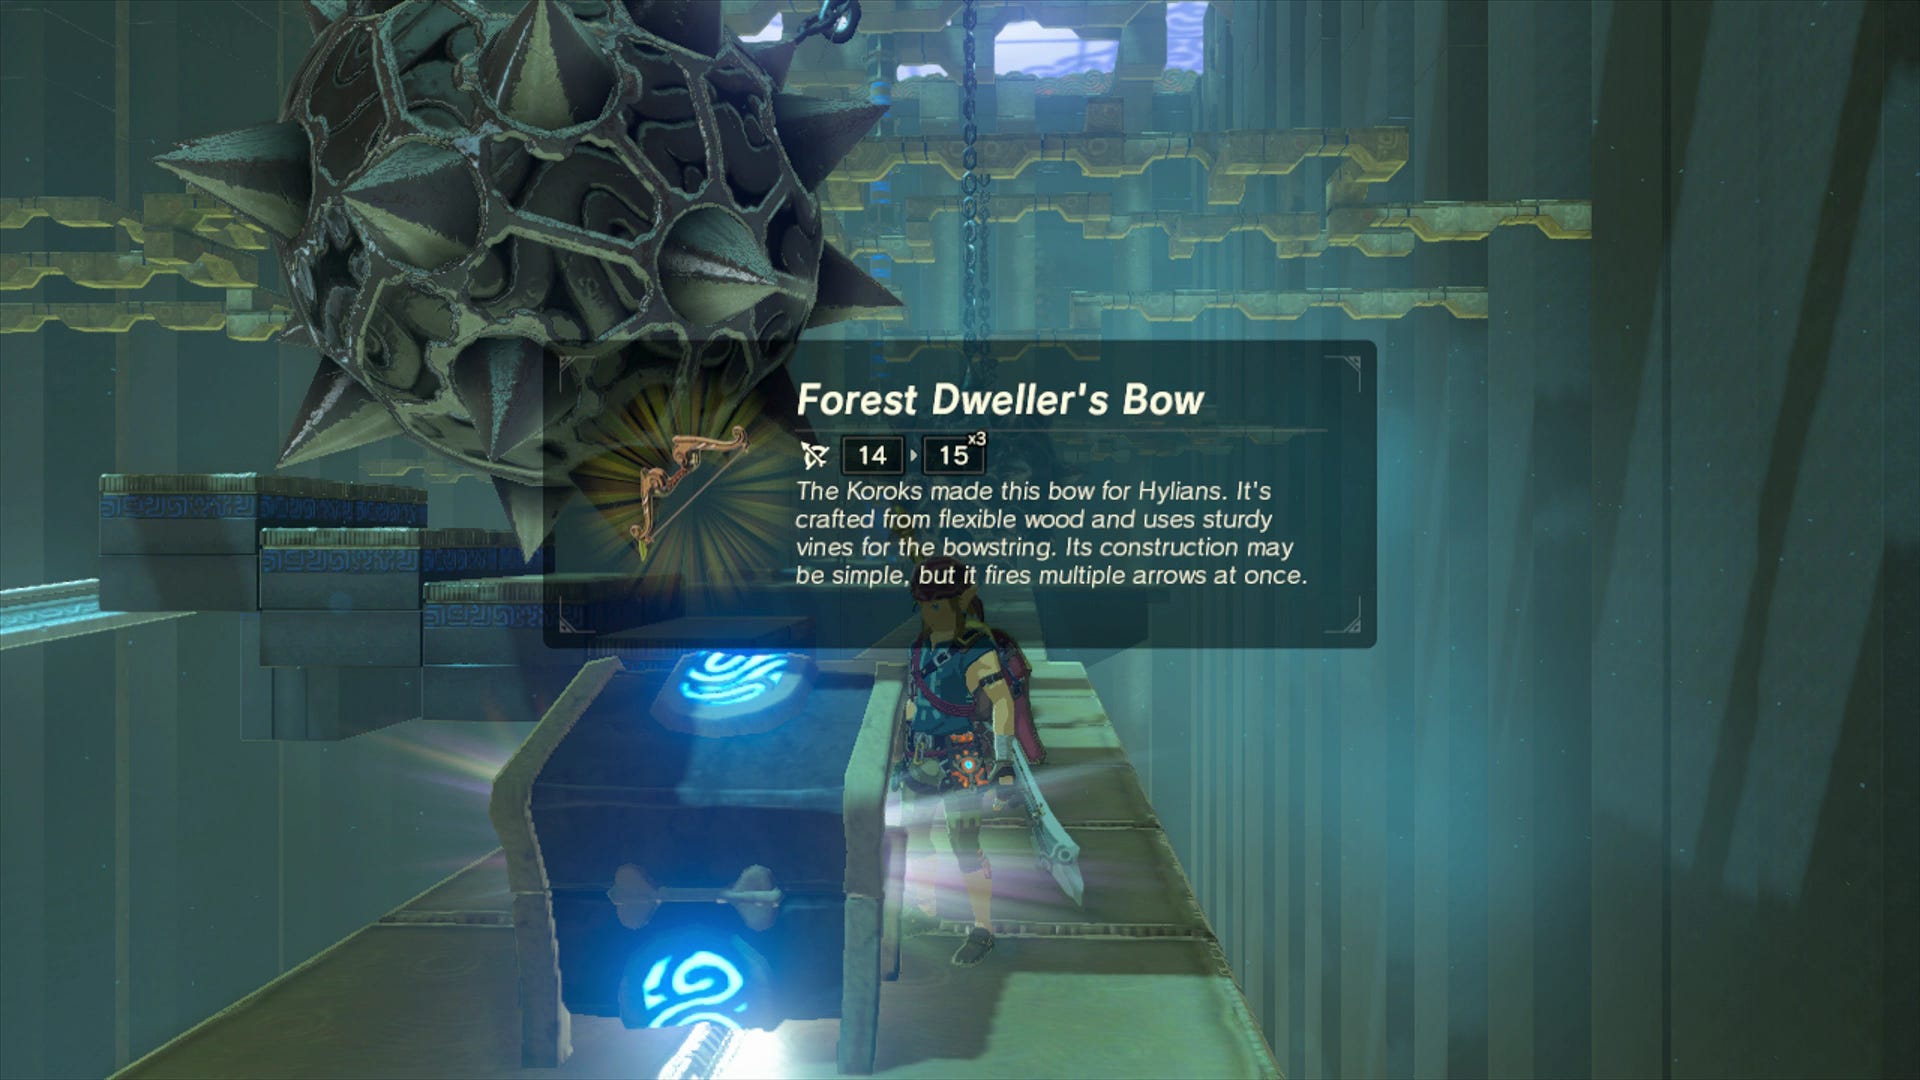
At the far end of that is another boulder, behind which you'll find a chest - move the boulder as before to get a Forest Dweller's Bow, which shoots three arrows at once!
Work your way back round that last boulder to the steps, and then it's time for more Magnesis.
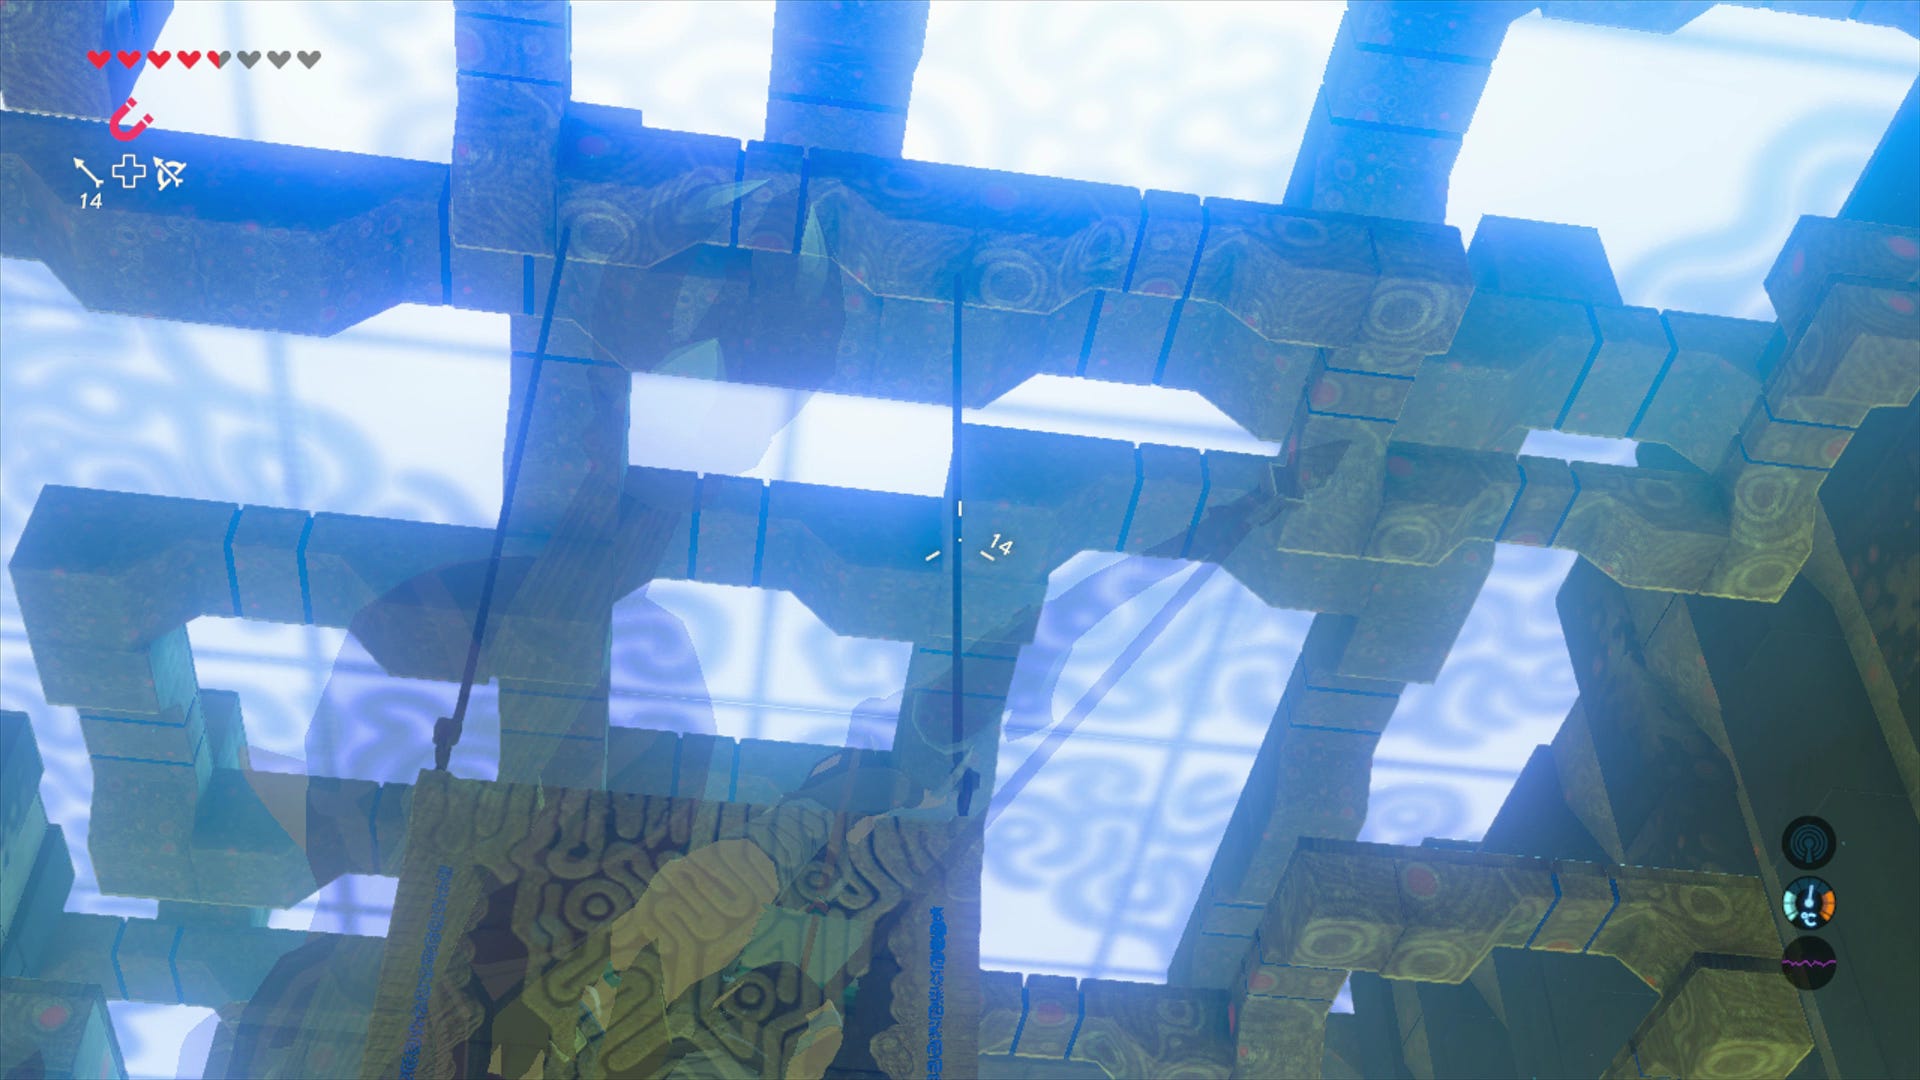
First, pull the nearest metal block towards you, and hop on - it doesn't sit still, so be prepared to get on quickly and slide back down to the end of the rail it's on.
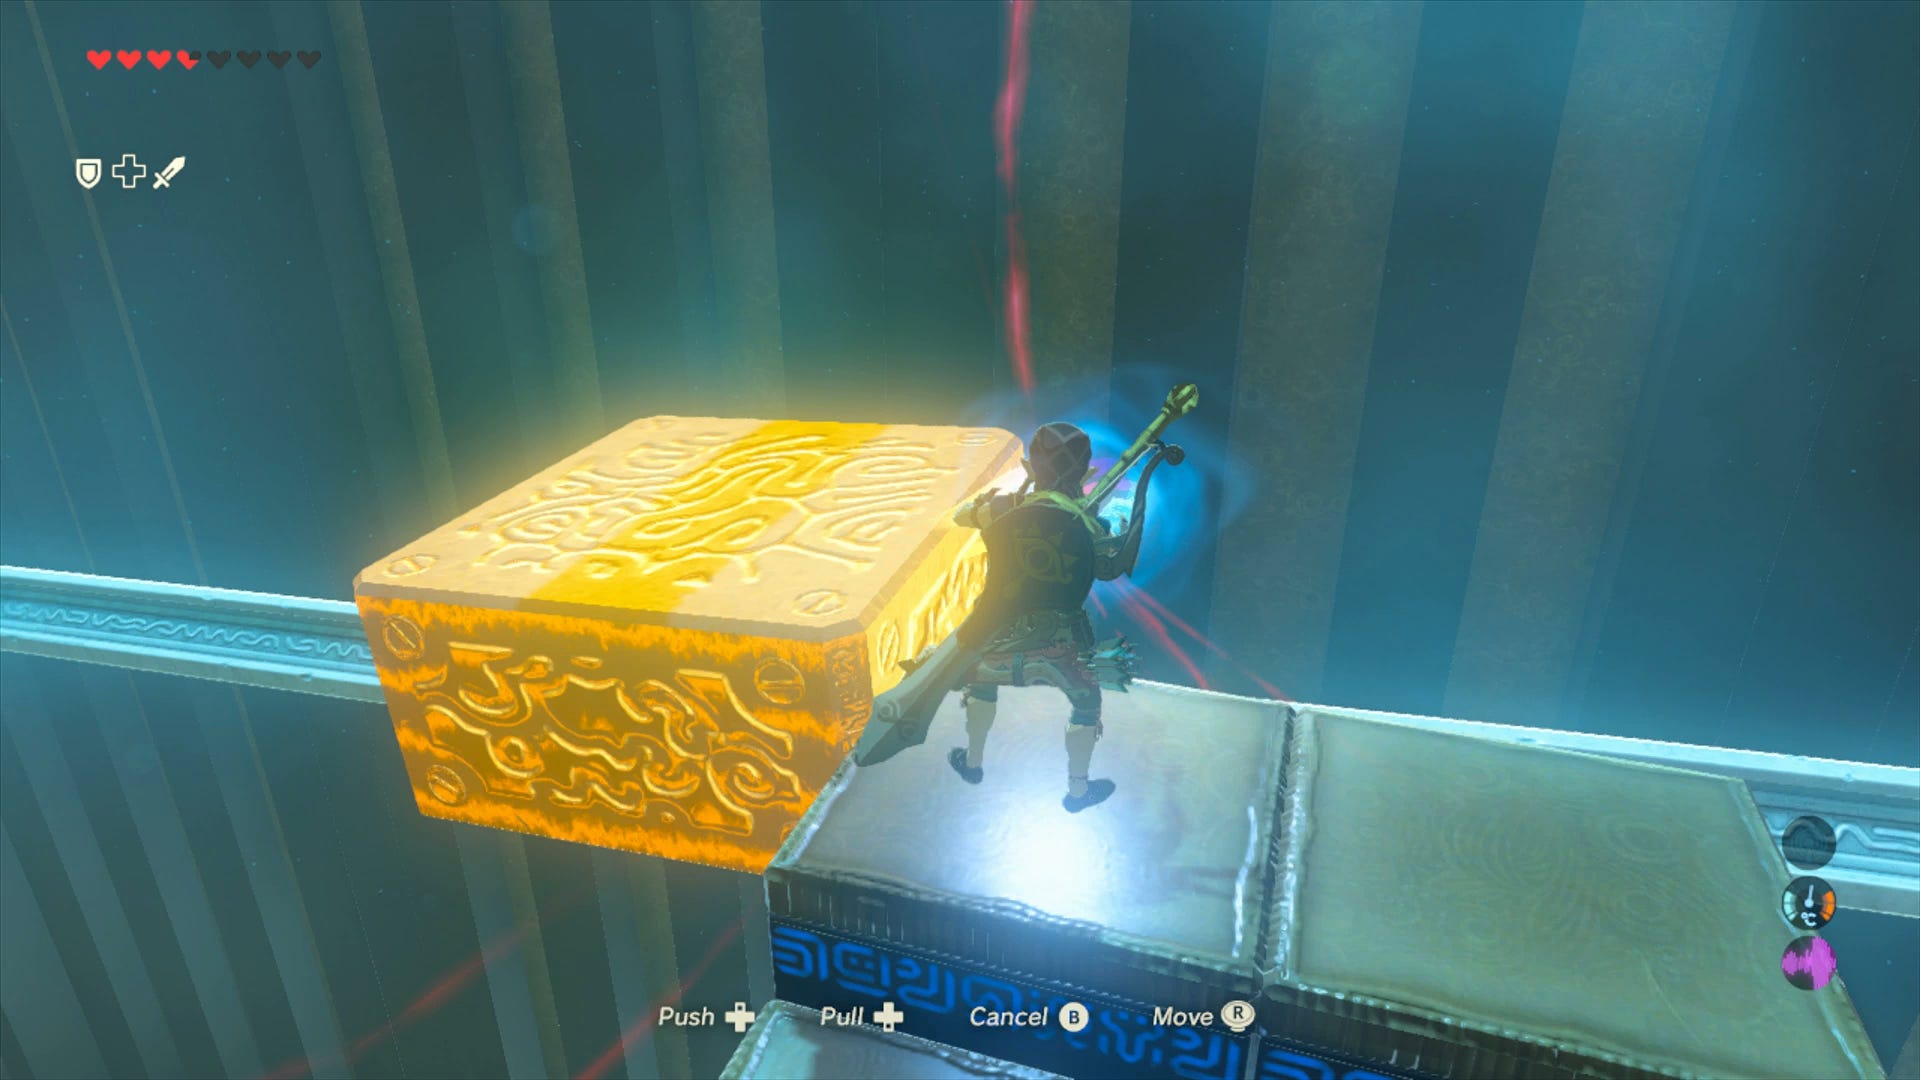
Then, you need to pull all four other blocks towards you to create a set of stairs.
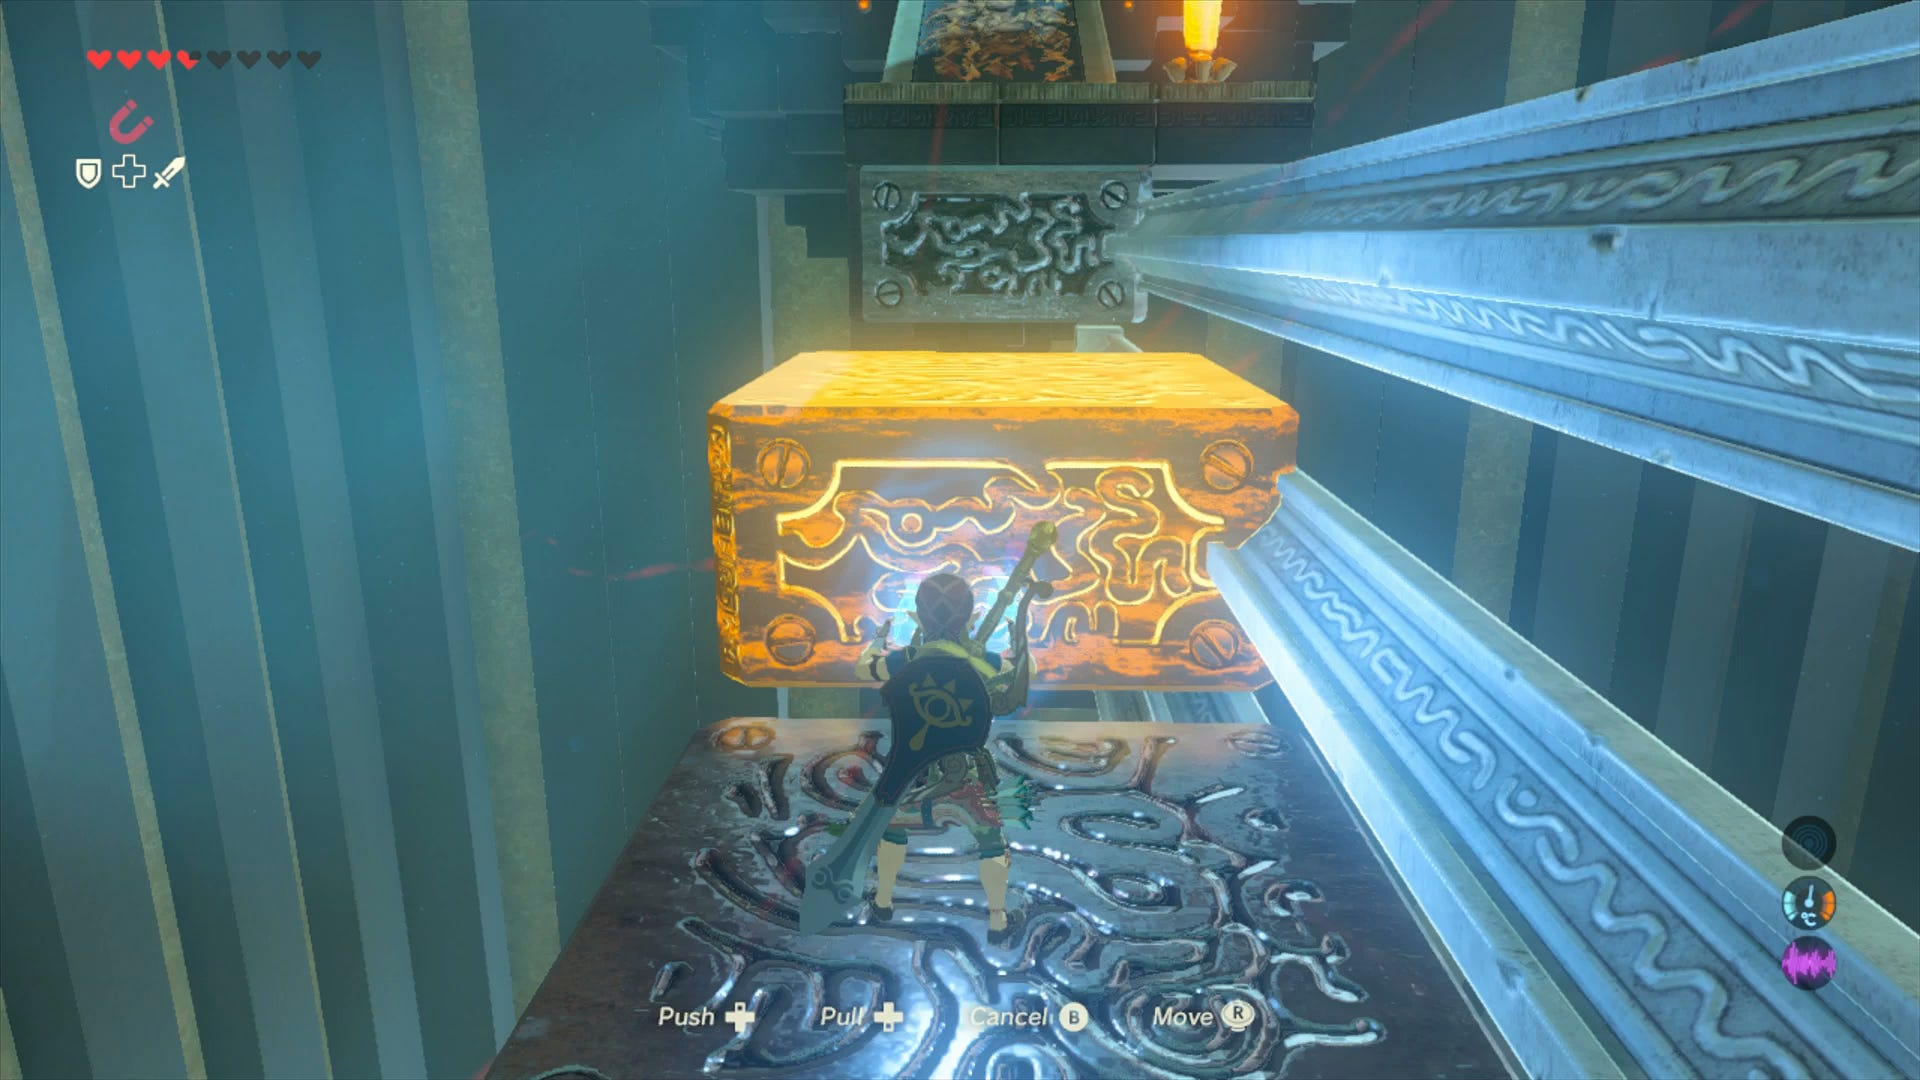
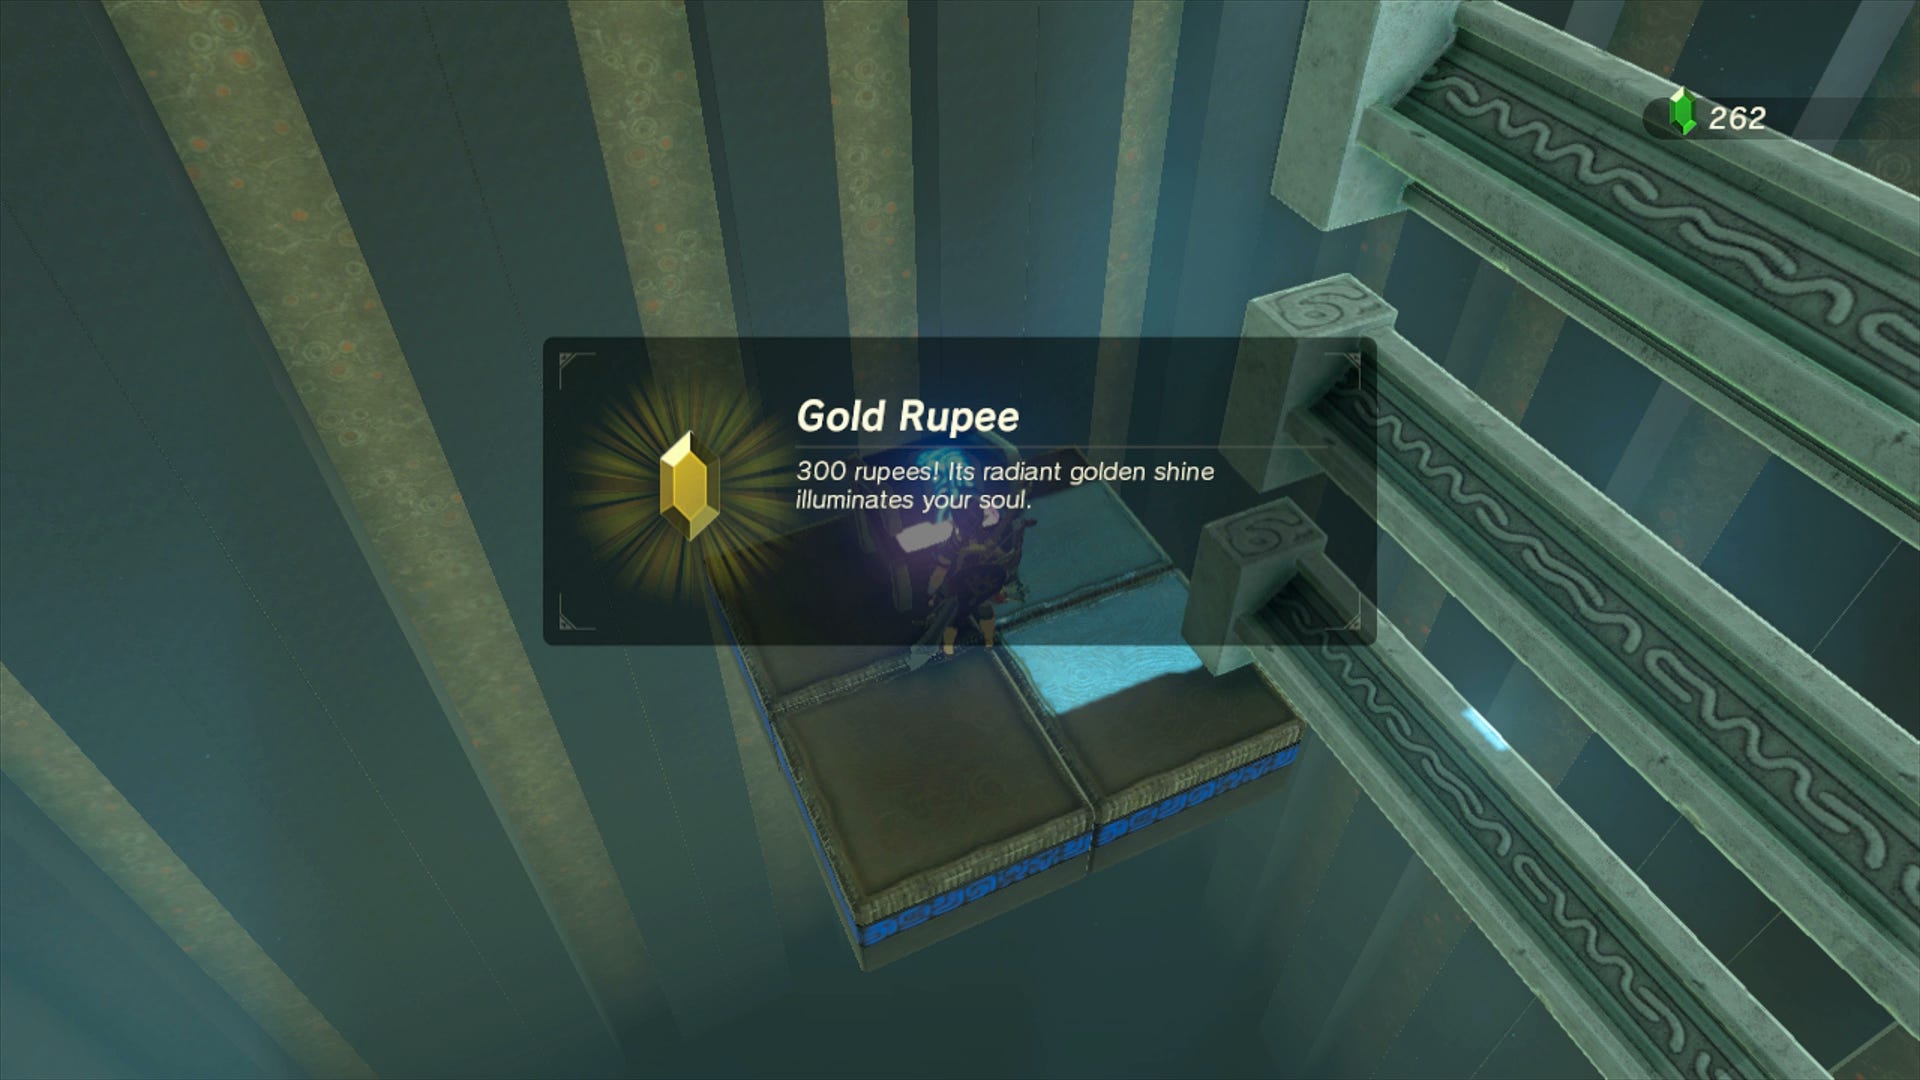
Jump off the end of the top one - but instead of going for the exit, drop down just below to the chest, which holds a Gold Rupee (which is 300 Rupees!).
Now, rearrange the blocks into steps -first going away from the exit, until you hop off onto the original block, and then back into steps going towards the exit again.

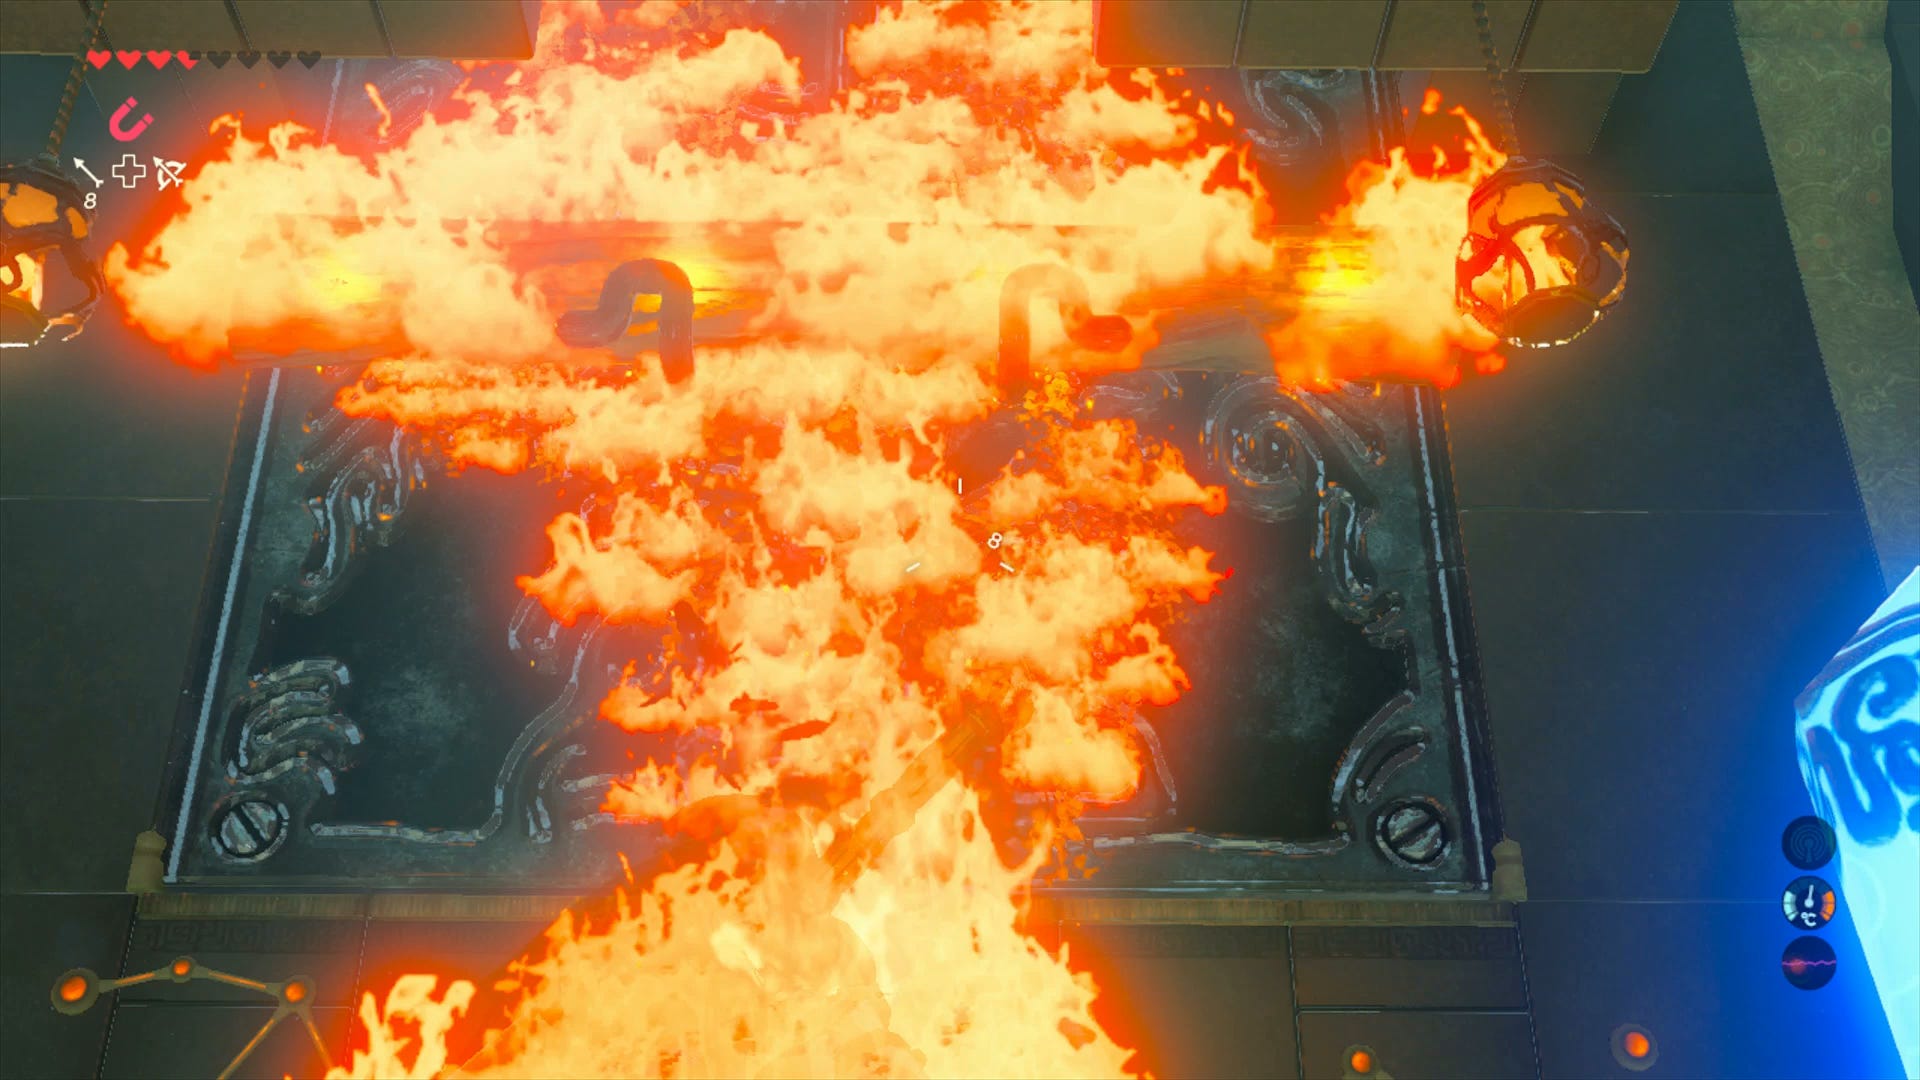
Finally, there's one more task in front of you before you can leave - you'll need to set the vines in front of the doors alight in order to leave.
There are two ways of doing this - you can hit the nearby crystal to drop a couple of lanterns down, which you then need to manipulate, or you can just use any flaming item in your inventory (like arrows or swords) to set the vines alight.
Then, open the large doors with Magnesis once more, and you can finally leave!
While you're here, here are other Shrines within this region:
Ridgeland region (7 Shrines)
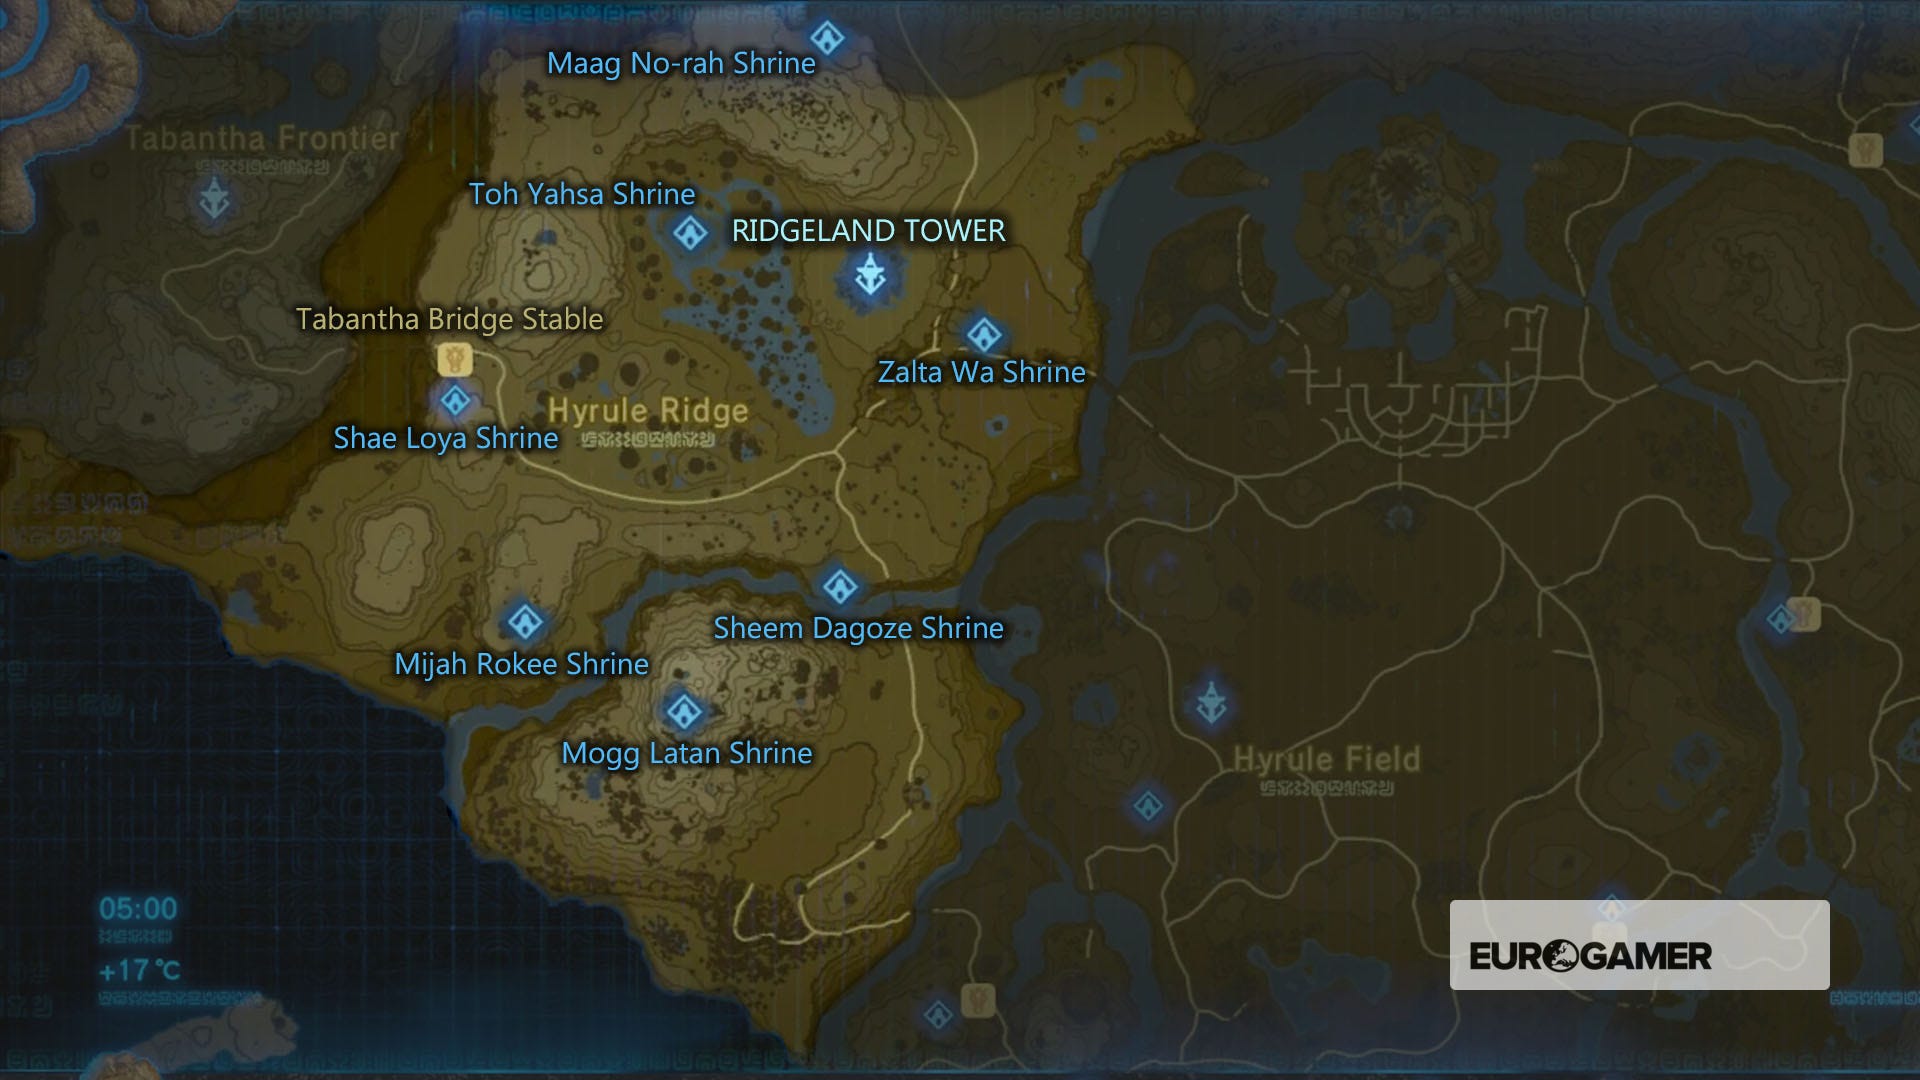
- Maag No'rah and how to find it in the Ridgeland region
- Mijah Rokee and Under a Red Moon quest solution
- Mogg Latan and the Synched Swing trial solution
- Shae Loya Shrine and Aim for the Moment trial solution
- Sheem Dagoze, the Two Rings quest and Moving in Parallel trial solution
- Toh Yahsa, Trial of Thunder and Buried Secrets solutions
- Zalta Wa and the Two Orbs to Guide You trial solution
If you're after other trials, then our Zelda: Breath of the Wild Shrine locations and maps hub page can help with other regions.