Rise of the Tomb Raider - The Gathering, Atlas, shop, Trinity, plough
Our complete walkthough for Rise of the Tomb Raider continues with a guide to The Gathering section of the game.
Head up the path to your right, grapple-jump across the broken bridge, and follow the trail to the marker. Next to the campsite is a map, and a relic is hidden behind the destructible wooden barrier. Camp up, then reunite with Jonah, use the Atlas, and say goodbye to Jonah again.
The Rescue
Head for the marker and loot the chest to unlock climbing arrows. A map can also be located around the side of the building near the broken bridge. Use your new arrows to ascend the front of the building, read the plaque, then grab the zipline onto the raised platform. Jump onto the next zipline, then follow the markers up the side of the cliff.
We're now back to the shop, and by now you should be able to afford something handy. When you're done in the store, use climbing arrows to ascend the cliff face, loot the chest at the top, then pick up the map from the satchel around the corner. Follow the trail into the cave and watch the flashback.
Squeeze through the small opening and either create a zipline using rope arrows and cross the lower platform and climb the rock-face, or grapple-jump across the gap and take the upper pathway. Whichever way you go, scramble up the wooden wall and follow the narrow passage. Cross the chasm at the bottom of the passage and exit the tunnel at the far end.
Tracking Down Trinity
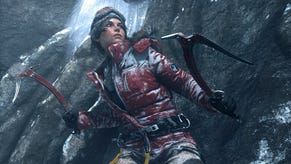
Follow the ravine, cross the fallen tree, rope swing across the gap, grab the ice with your axe and haul yourself up. After the cut-scene, climb the tree, jump across to the ice, and follow the handholds right and up to another narrow ravine.
When you reach the marker you'll find a set of vehicle tracks; follow them up the slope. When you hear gunshots, lurk in the bushes and wait for the guards to split up. Take them out using your preferred method, then check the area for resources.
Behind the crane is a fallen tree. Clamber along it, then make your way across the tree branches. Wait for the guards to disperse, then pick them off one by one: jump to the wooden platform and take out the guard who's standing still, turn around and take out the one patrolling behind you, and then wait for the third to reappear near the first. When they're all down, head towards corpses one and three, bear left, and climb the tower. Make a Molotov and dispose of the two guards chatting below, and when another guard runs in, just wipe him out with an arrow or another Molotov.
Drop down and check the area for goodies. There's a map hidden behind the wrecked plough, and a couple of crafting ingredients scattered about. Use arrows to ascend the wall to the right of the plough and keep an eye out for patrolling guards. Take out as many as you can stealthily, and when the area is clear head towards the marker. Translate the plaque next to the gate then crawl through the hole in the wall and make camp.
- The next part of our walkthrough explains how to complete Rise of the Tomb Raider: Research Base.
- Return to the index page for more entries in our Rise of the Tomb Raider guide.


.png?width=291&height=164&fit=crop&quality=80&format=jpg&auto=webp)

