Here's what Dishonored 2's Custom Difficulties let you adjust
Select weapons in real-time! Heal slower! Enable permadeath!

We knew Dishonored 2 would get a series of Custom Difficulty options, allowing players the ability to tailor the game's challenge to their liking, but until the patch launched we didn't know exactly what this would entail. Now that the update is live, we can offer a full detailed list of all 22 variables you can set.
It's worth noting that selecting one of the four already available difficulty settings (Easy, Normal, Hard, or Very Hard) will show where each variable is set by default. You can tweak it from there.
So, without further ado, here's all the ways you can make Dishonored 2 easier or harder:
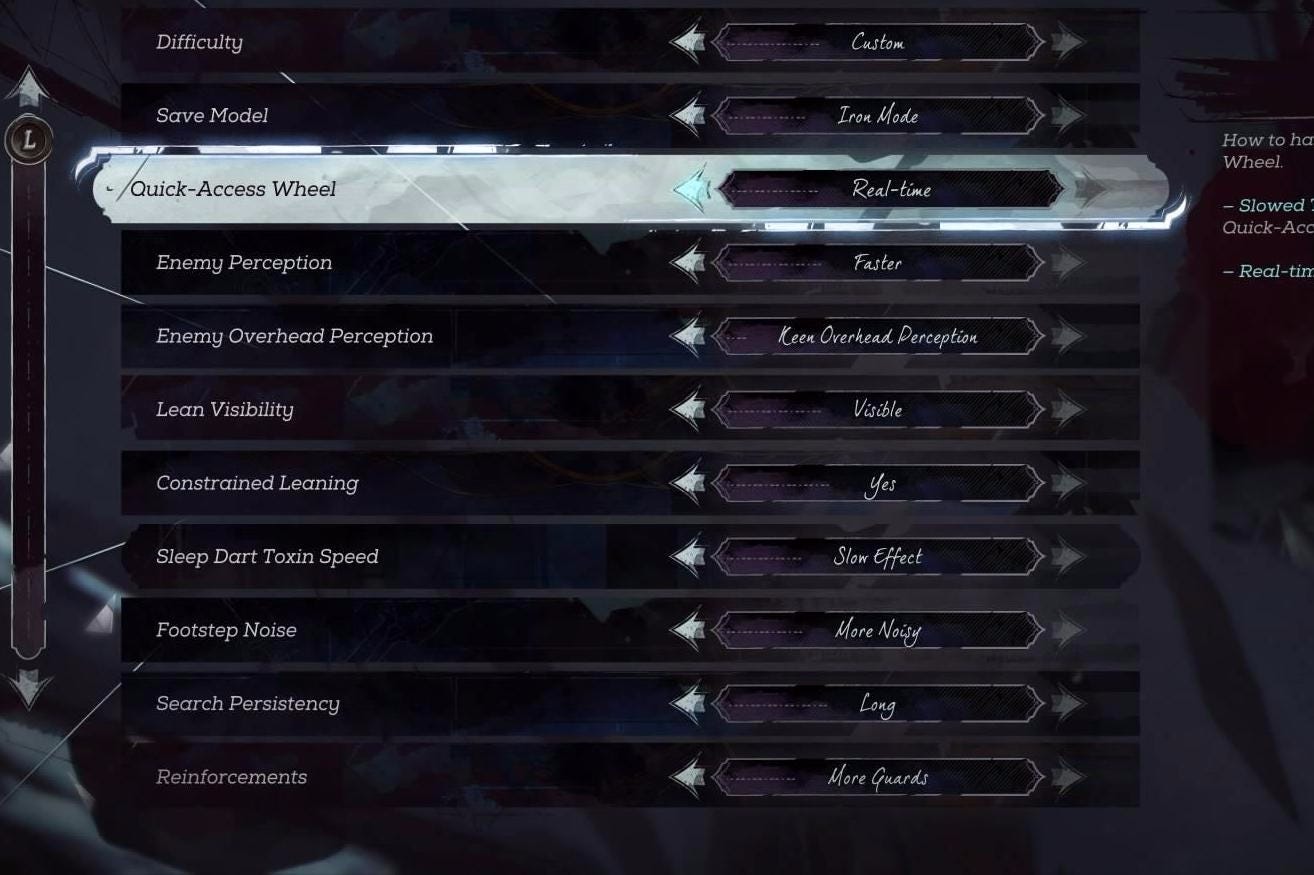
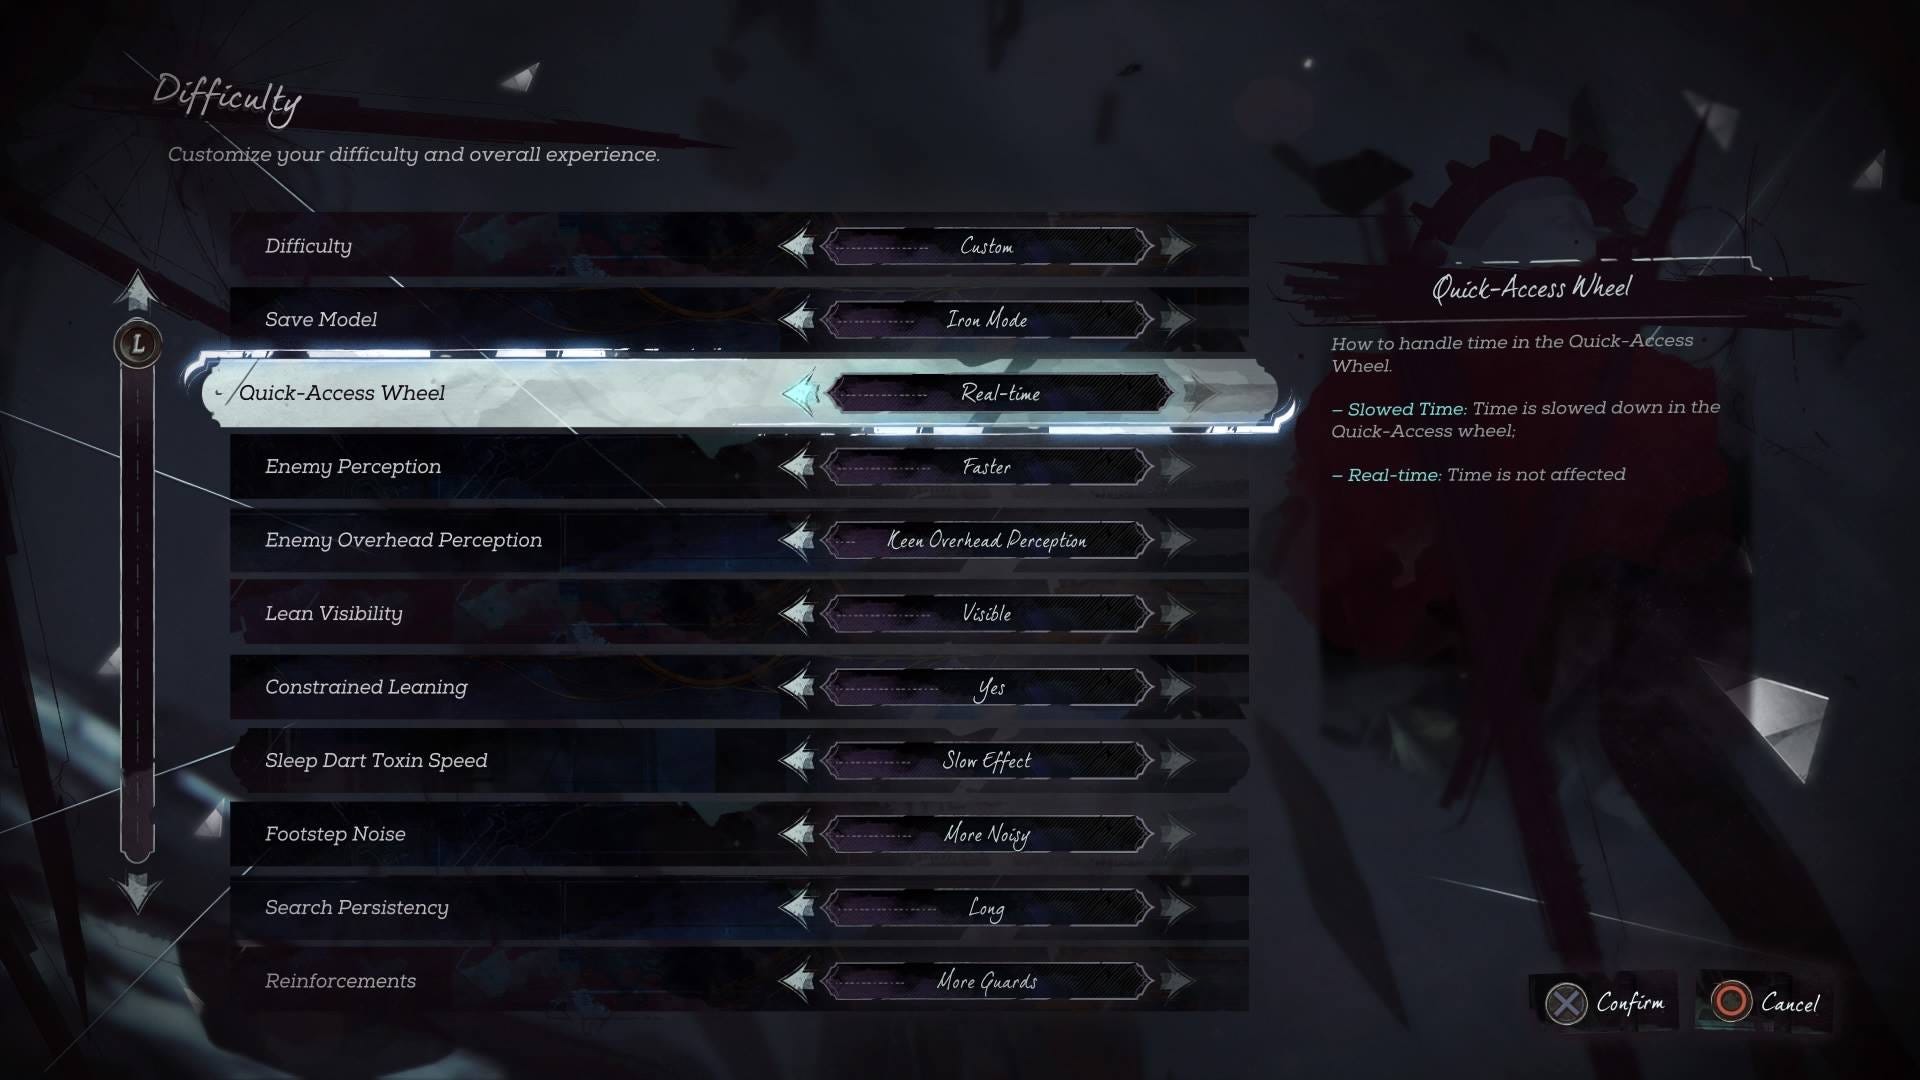
Save Model: Adjust whether you want multiple save slots per playthrough, limit yourself to one, or go for the permadeath Iron Mode where you cannot reload and your save file is erased upon death. (You can however take breaks, as the game offers a temporary save when you quit.)
Quick-Access Wheel: Select whether selecting gear slows down time or happens in real-time.
Enemy Perception: Choose between three speeds at which enemies will detect you.
Enemy Overheard Perception: Select between three levels of how perceptive enemies are of those above them.
Lean Visibility: Decide whether enemies can't see you when you're leaning, can slowly make you out, or spot you straight away.
Constrained Leaning: Turning this on mean you can only lean half as far.
Sleep Dart Toxin Speed: Three different speeds at which sleep darts can take effect.
Footstep Noise: Three levels determining how much noise you make by walking.
Search Persistency: Three levels dictating how long enemies will pursue you upon being alerted.
Reinforcements: Three options for how many guards you want to respond to alarms.
Health Regeneration: Two options for how much health is replenished from food.
Enemy Damage: Three options for how much pain enemies inflict.
Group Attack: Three options for many enemies will attack at the same time.
Attack Frequency: Three settings the speed at which enemies attack you.
Ranged Accuracy: Three options for how accurate enemies are from afar.
Enemy Bravery: Three settings for how likely enemies are to panic during combat.
Mana Replenish: Decide whether your mana will automatically replenish once drained.
Ammunition Quantity: Three options for how much ammo you can hold.
Elixir Speed: Three settings for how quickly you replenish health and mana.
Elixir Strength: Three options for how much health and mana are replenished by elixirs.
Chase Tenacity: Two settings for how long enemies will pursue you once in combat.
Stealth Visibility: Three setting determining how visible you are in brightly lit areas.

If you're crazy like me, you can try turning all of these on and giving it a go. The two variables that I think had the greatest effect in doing me in after a scant 48 minutes were making the Quick-Access Wheel real-time, and turning Elixir Speed to very slow. It was all going so well until a cluster of foes cornered me and I didn't have time to properly heal or reload my pistol before the gang viciously made mincemeat out of poor old Emily Caldwin.
For what it's worth, playing the game on the normal Very Hard mode enables the hardest setting on most of these with a few exceptions. It lets you save however much you like, the Quick Access Wheel still slows down time, Mana Replenishment is automatic, and your Ammo Quantity, Elixir Speed, and Stealth Visibility are all switched to their the middle settings. No wonder I wasn't prepared for such a vicious beatdown!