Forspoken final boss tips and strategy
Save Athia once and for all.

Having learned the truth of her origins and gained all the Tantas’ powers, it’s time for Frey to take on the final boss of Forspoken, so beware there may be spoilers.
The final battle of Forspoken takes place in Cipal overrun by Susurrus’ corrupted forces while its citizens take refuge. Fortunately, Frey won’t be completely alone in this fight, and she will also awaken to her true power including a new useful ability.
This guide will prepare you for how to complete Forspoken’s story, including a Susurrus’ boss strategy.
On this page:

How to prepare for Susurrus in Forspoken
You will fight Susurrus in Chapter 12 of Forspoken after choosing to stay and fight at the end of Chapter 11 in Junoon. You won’t be able to return to the rest of Athia until the boss has been defeated so be sure to complete any quests, unlock any additional gear you need, or unlock any outstanding abilities from the Founts of Blessing before making your choice.
Of the abilities you can unlock from Founts of Blessing, we recommend Alb from Prav’s magic set, which dramatically reduces the damage caused by a single unblockable or piercing attack. Also tied to Prav’s set is Fortify, which allows you to use your crafting to increase the defence stats of your gear, while Diversify from Olas’s Magic will allow you to craft a fourth perk to your necklace of choice.
Chapter 12 is set in Cipal where you will begin with taking on enemies summoned by Susurrus laying siege to the city. Fortunately, you won’t be launching straight into the final boss from here and have time to recover from these fights in the archives where other citizens are taking refuge.
Here you’ll have time to make necessary preparations, like upgrading your spells and crafting improvements to your gear as well as healing draughts. This is also a good time to speak to other characters you’ve met throughout the game, in particular the members of Cipal’s council who will also provide you with some useful items and materials.
Once you’re ready to face Susurrus, just speak to Pilo at the door and the next, and final, part of Frey’s journey will begin.
How to defeat Susurrus Murmuration in Forspoken
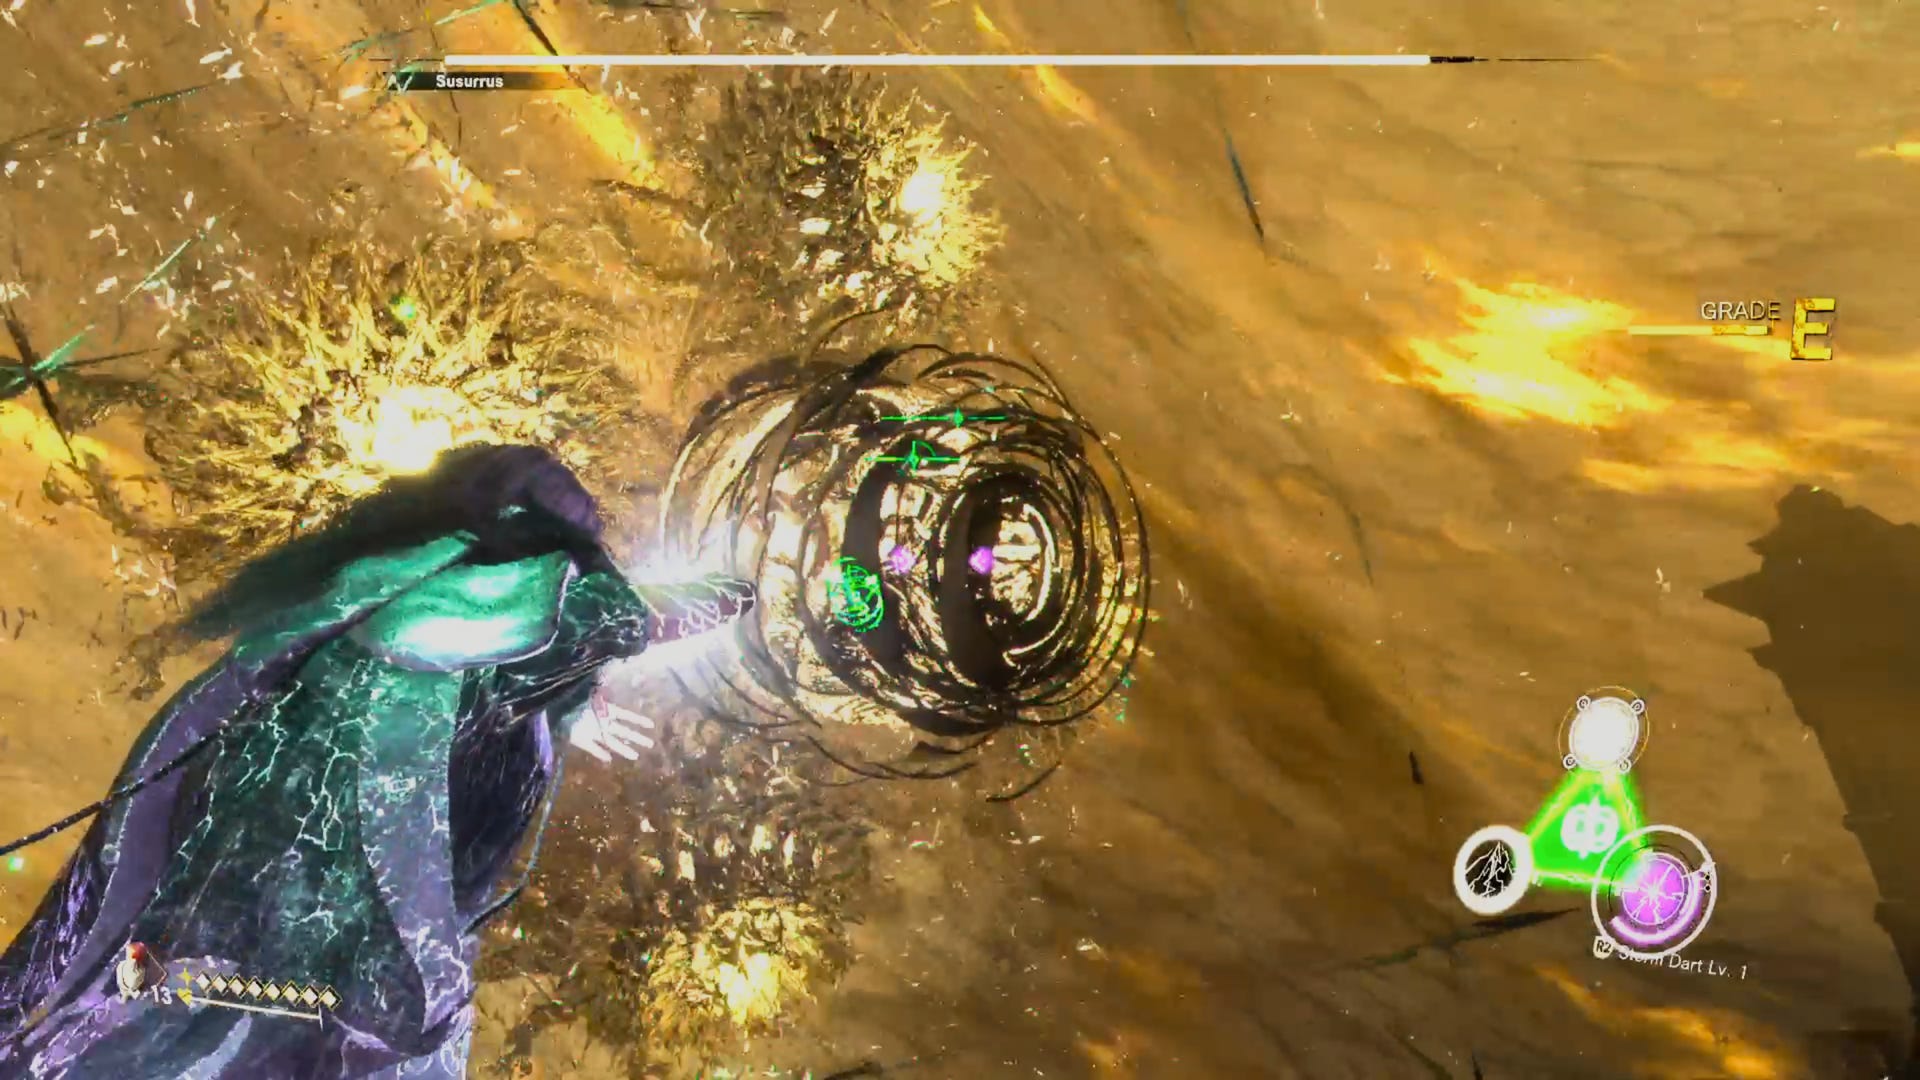
Susurrus is a winged demon figure, although the form you first encounter is referred to as his Murmuration, which looks like a floating evil vortex that can fire a powerful laser beam, while also surrounded by four evil eyes.
To reach Susurrus Murmuration, you’re going to need to take to the air as well with the help of a flying fire-breathing dragon. You’ll be assailed by bird demons in the air and, while there are lots of them, you can hold down R2 to make the dragon unleash its fire breath attack, roasting everything in its path. If you get hit by anything, it’s mostly just chip damage, though focus on aiming the dragon’s breath at any areas where an unblockable attack cue has been indicated.
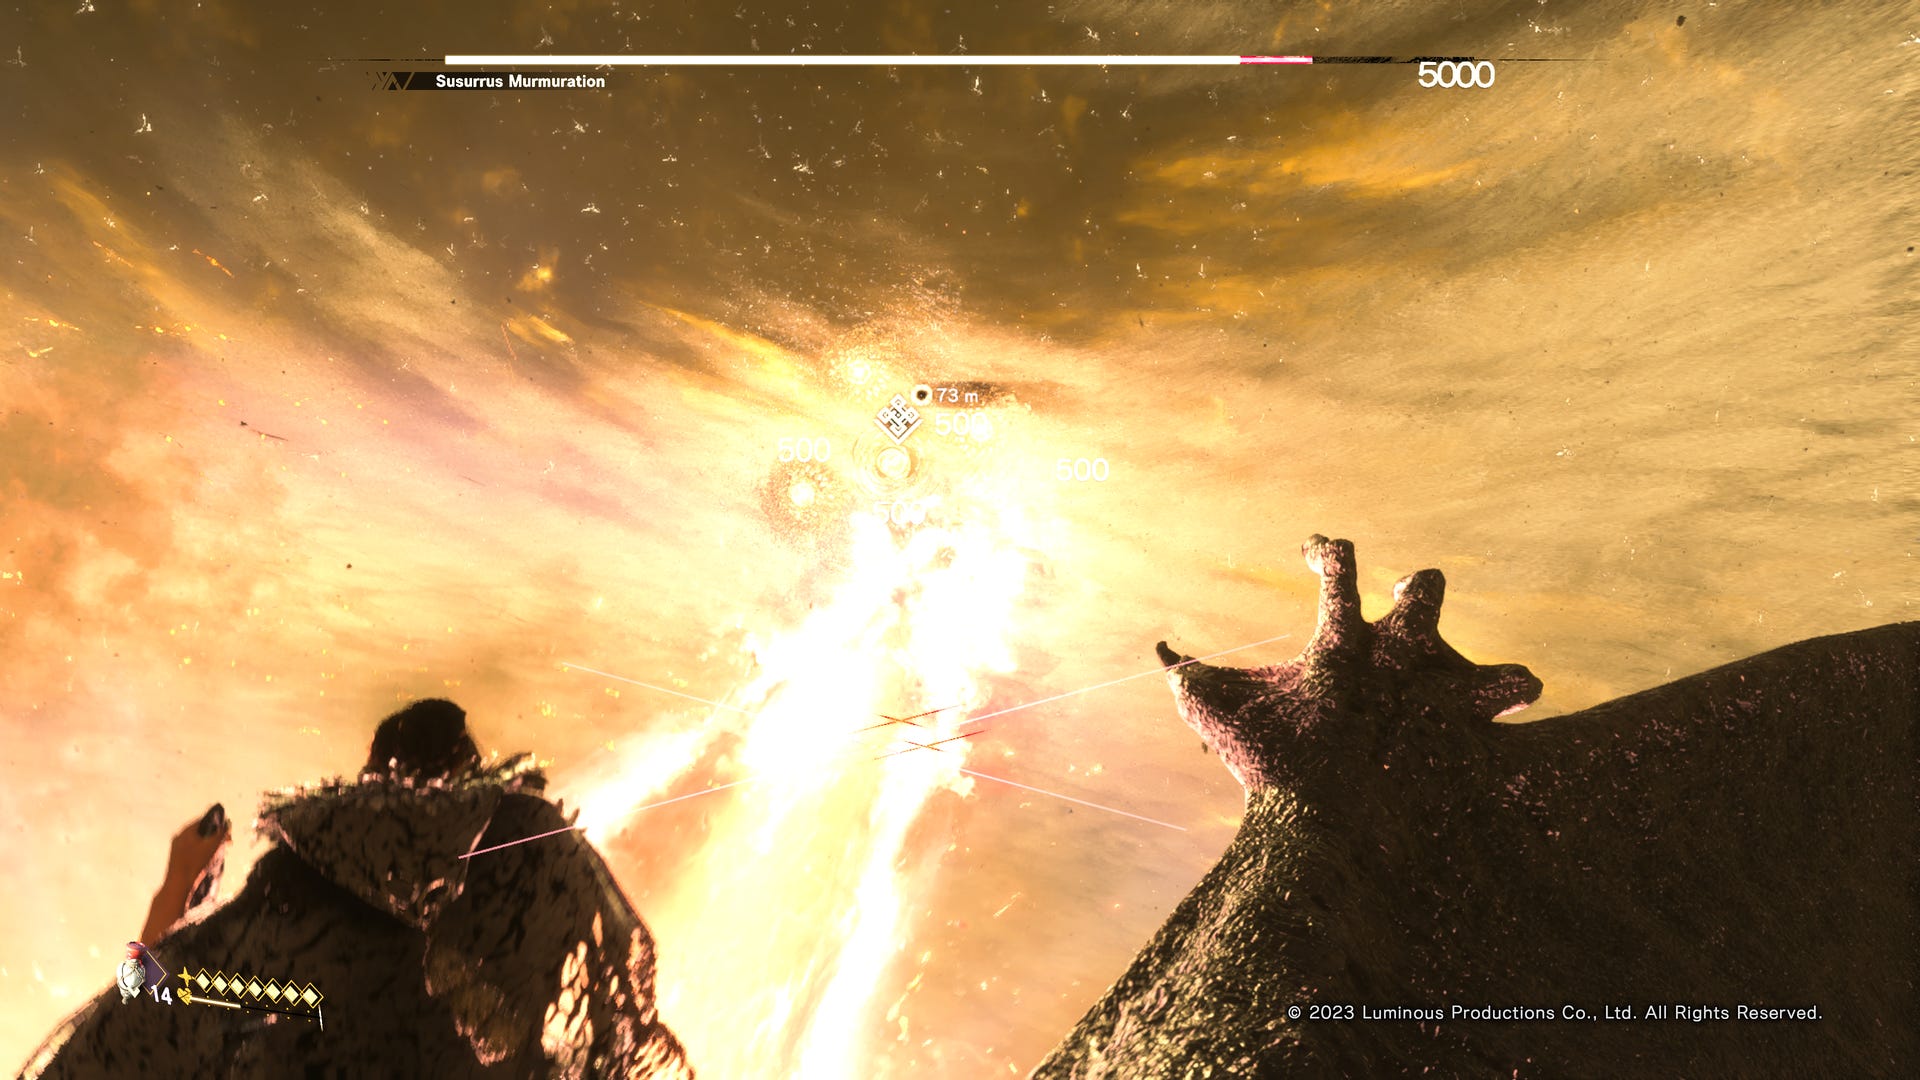
You’ll also see Susurrus Murmation in front of you, though he’s not always visible. We find that just by holding down fire breath, you’ll likely get some hits anyway, and you can quickly deal a lot of damage. Of course, when he does show up clearly, hit him with everything you have. If you’re taking damage from the birds, just be sure to use a healing draught when prompted.
After you’ve taken down Susurrus Murmuration’s health, a cut scene will play, leading to a QTE where you’ll be prompted to hold L2 and R2 for an ultimate attack from the dragon. Alas this won’t manage to defeat Susurrus Murmuration, who has in fact multiplied, hitting the dragon with multiple powerful beams.
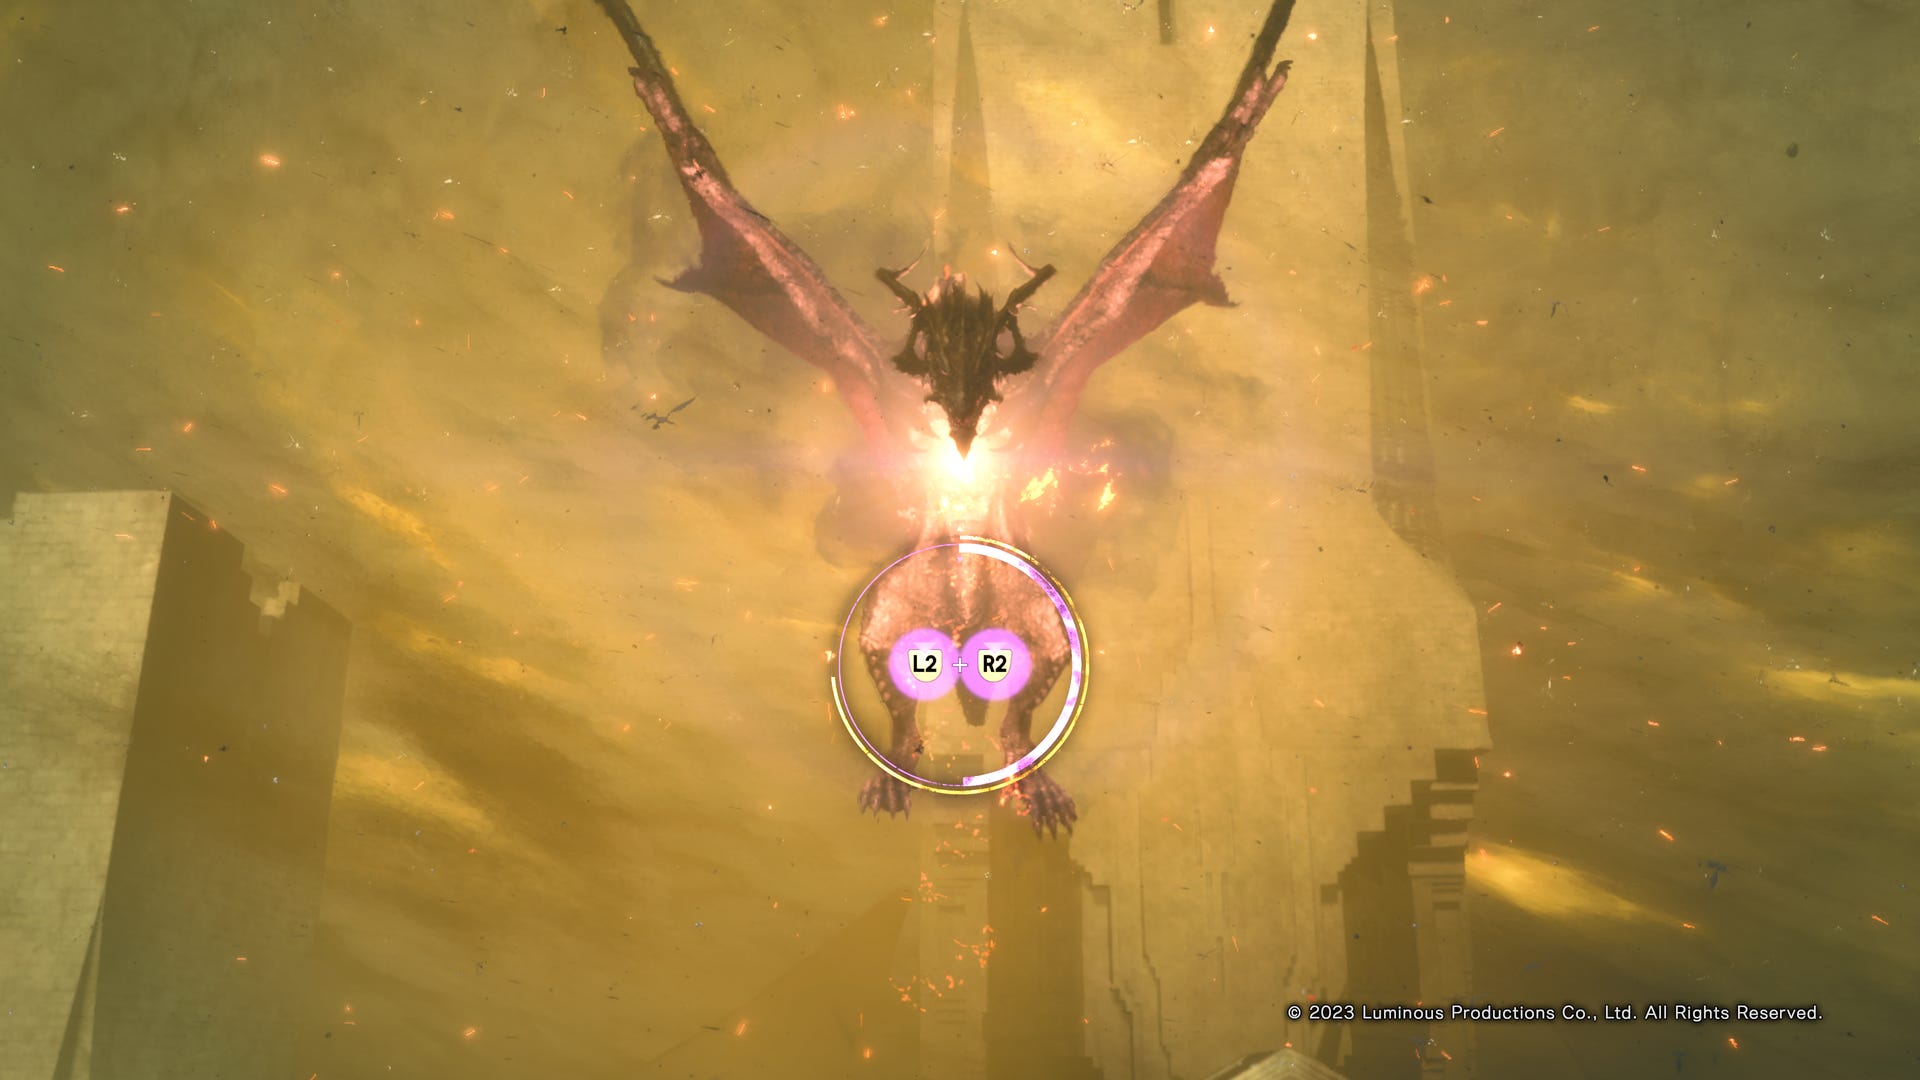
You’ll sadly lose your dragon companion, but in their place, Frey will finally awaken to her true power as a Tanta. Not only will her magical abilities be more powerful across the board, but you will also unlock a new spell called Skip, which allows you to warp around the environment making you immune to any damage at the same time. It’s exactly what you need as we move onto the next phase.
How to defeat Susurrus in Forspoken
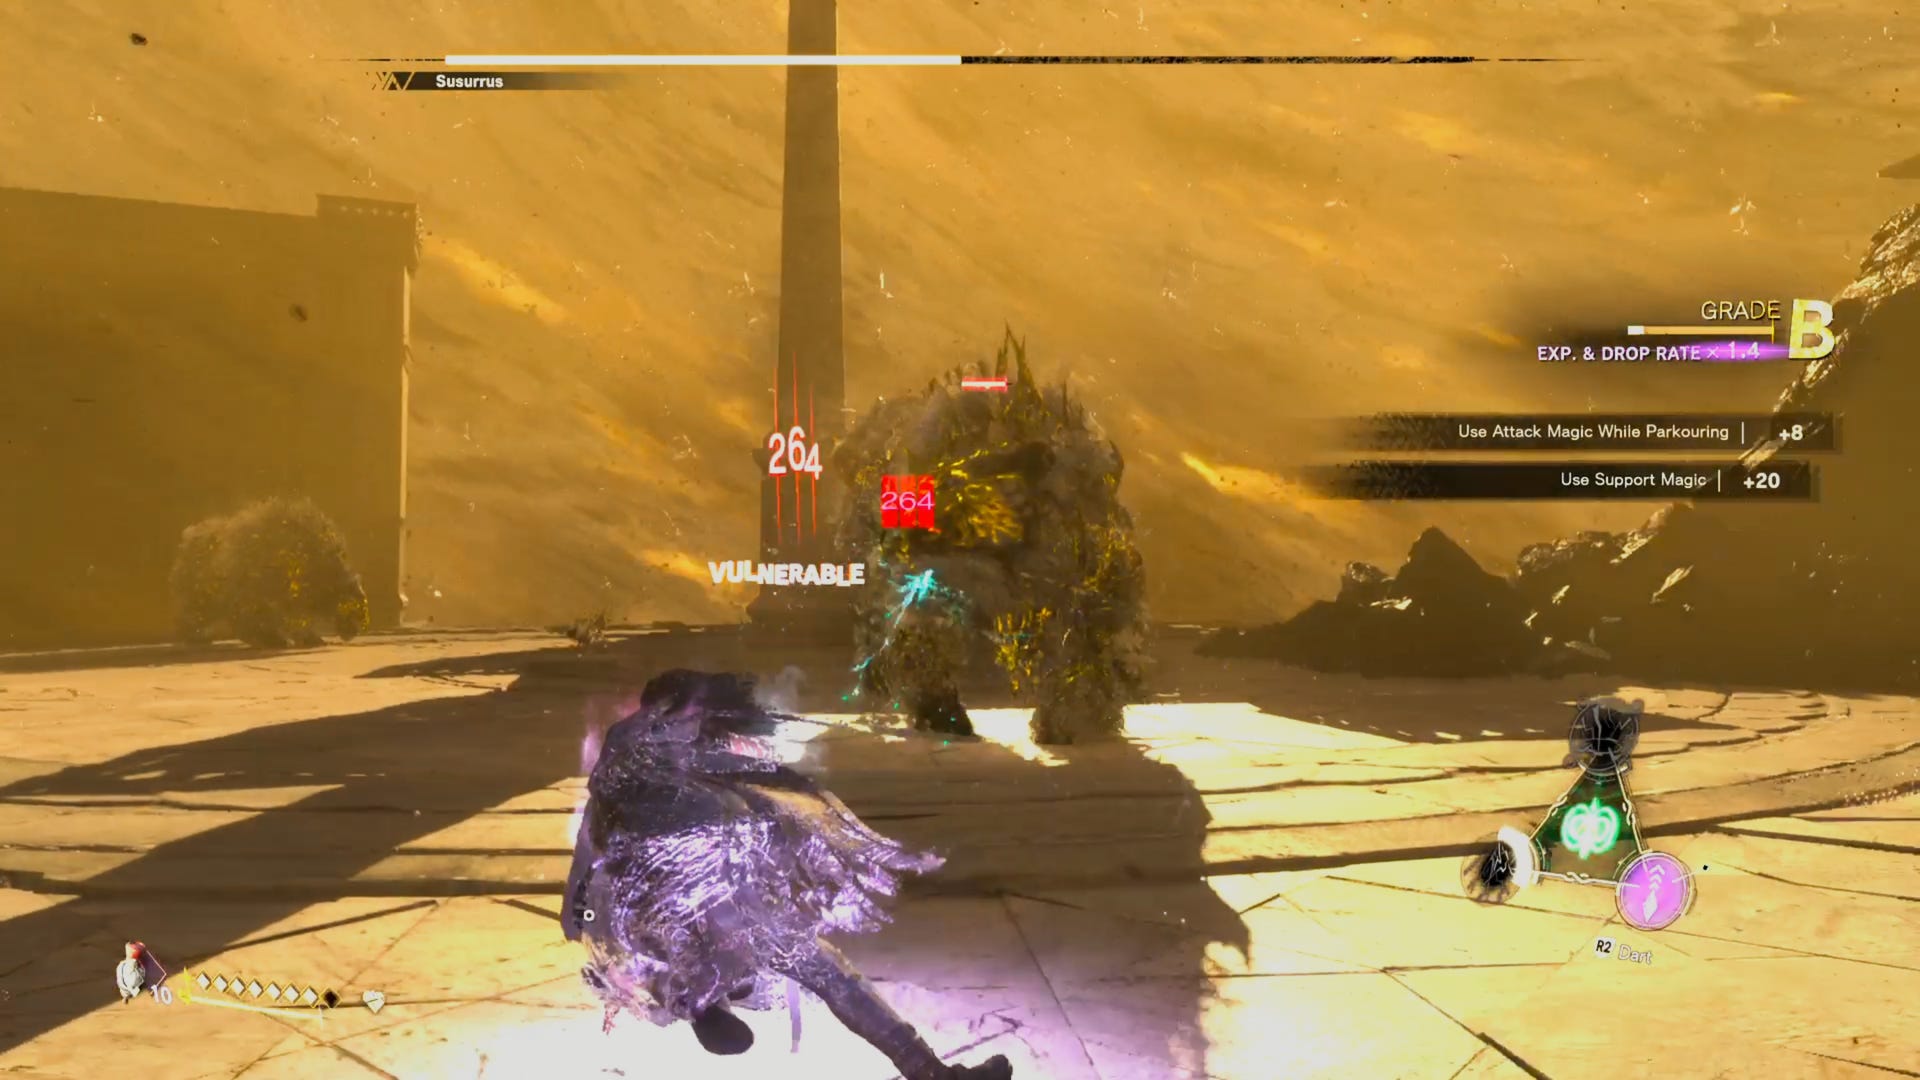
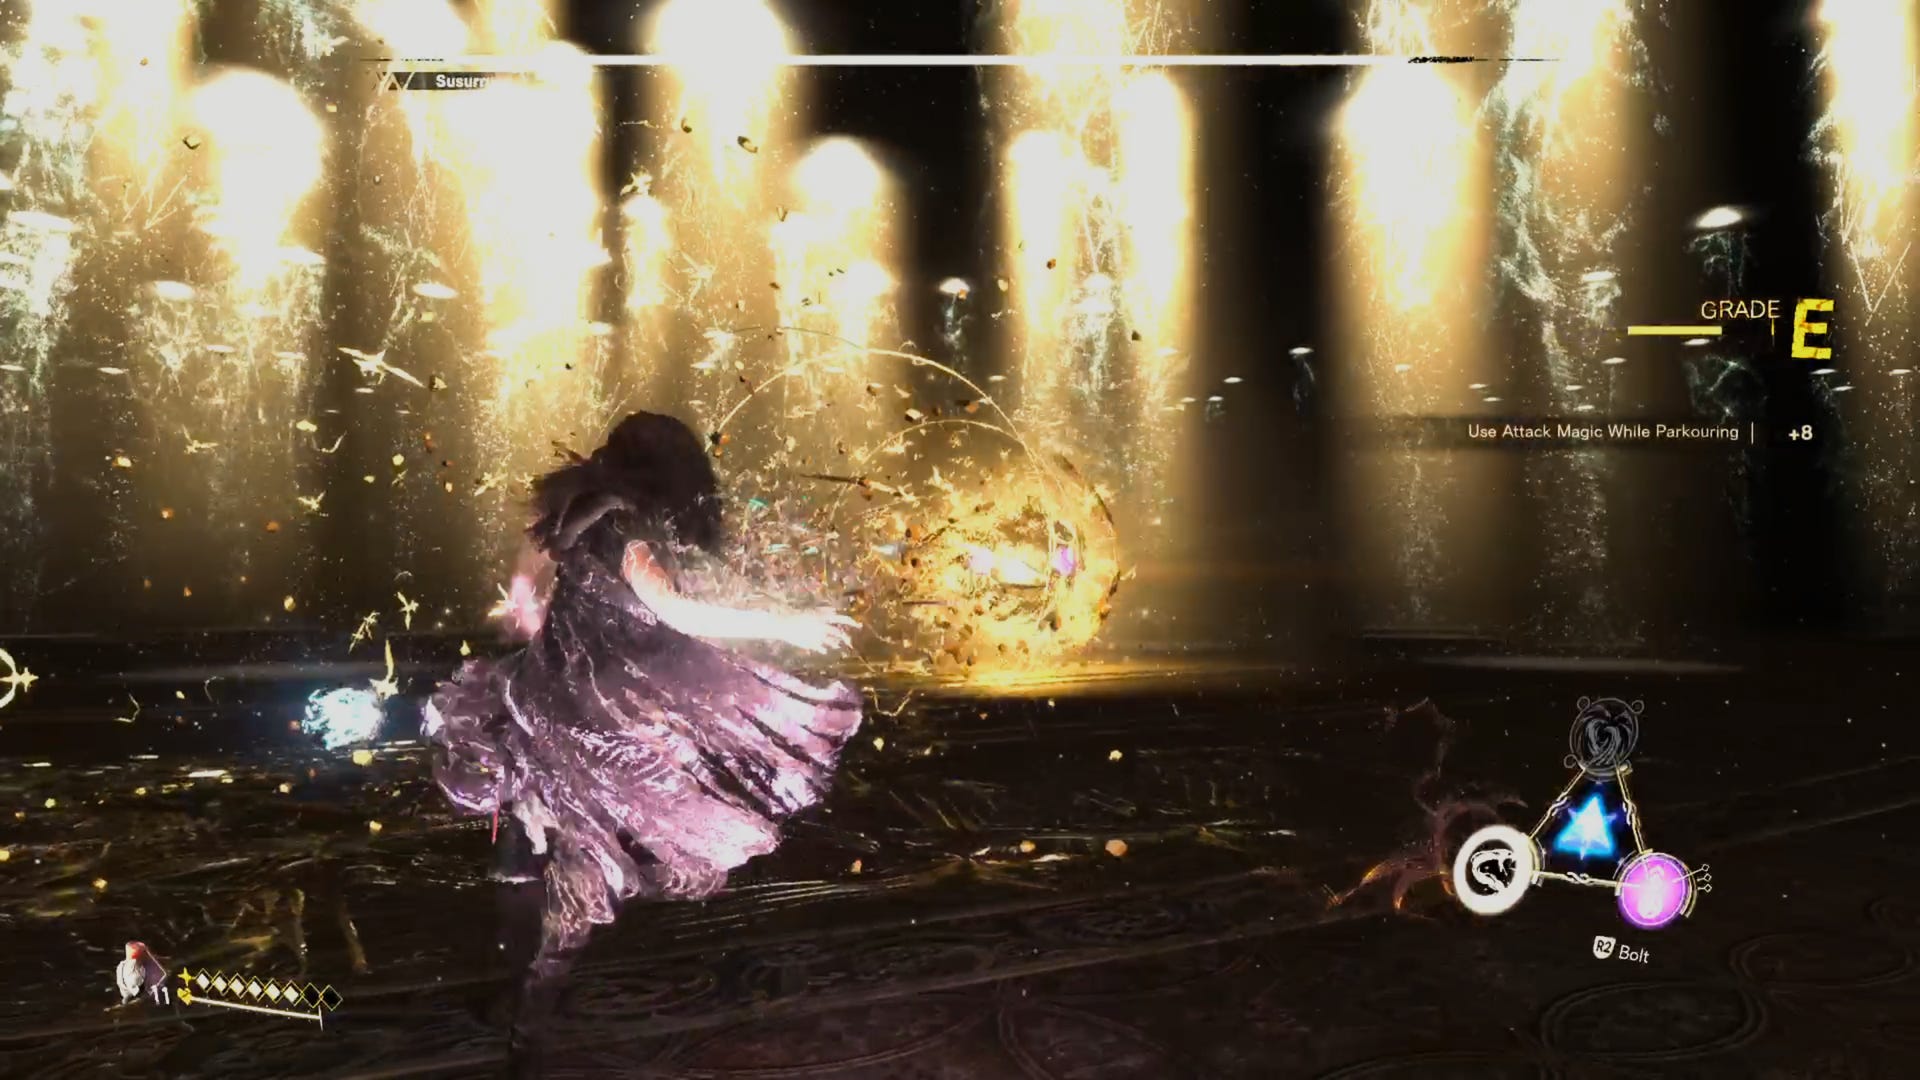
Susurrus will still be in his Murmurations form to begin with in this phase, but this time the fight takes place back on ground level in Cipal’s town square. He will appear to the side, open to attacks, but also sometimes higher up, though you can reach up to him by parkouring up the buildings. There’s also the obelisk in the centre of the town square, which Susurrus uses to charge up a big blast attack, and is your cue to Skip to avoid any damage. Be careful - he can also bind you with his birds, temporarily leaving you unable to move or use any attacks, which, again, can be avoided with Skip.
Susurrus doesn’t appear to have any vulnerabilities or resistances in this form, so just hit him with the strongest magic you have. Ranged magic is recommended over melee, and for rapid fire, the darts from Olas’s Magic is probably your best bet, especially as you follow up with extra damage by charging up Pulse Dart afterwards.
Of course, to make things less straightforward, Susurrus will also summon other corrupted enemies into the arena, so be sure to have your powerful crowd control spells to hand. Corrupted beasts are vulnerable to Sila’s fire magic although any heavily corrupted enemies with gold crystals like the ogres are vulnerable to Olas’s electro magic.
When a third of his health has gone, Susurrus will also have a new attack in the mix where his four evil eyes spin around as he charges up a devastating beam attack focused targeting Frey. Again, you’ll want to use Skip for this or otherwise use a healing draught to recover.
Once down to half his health, he’ll cowardly disappear and summon more beast enemies so take care of these as quickly as possible. Note that the bears are vulnerable to electric spells as they’re so corrupted they’re covered in gold crystals.
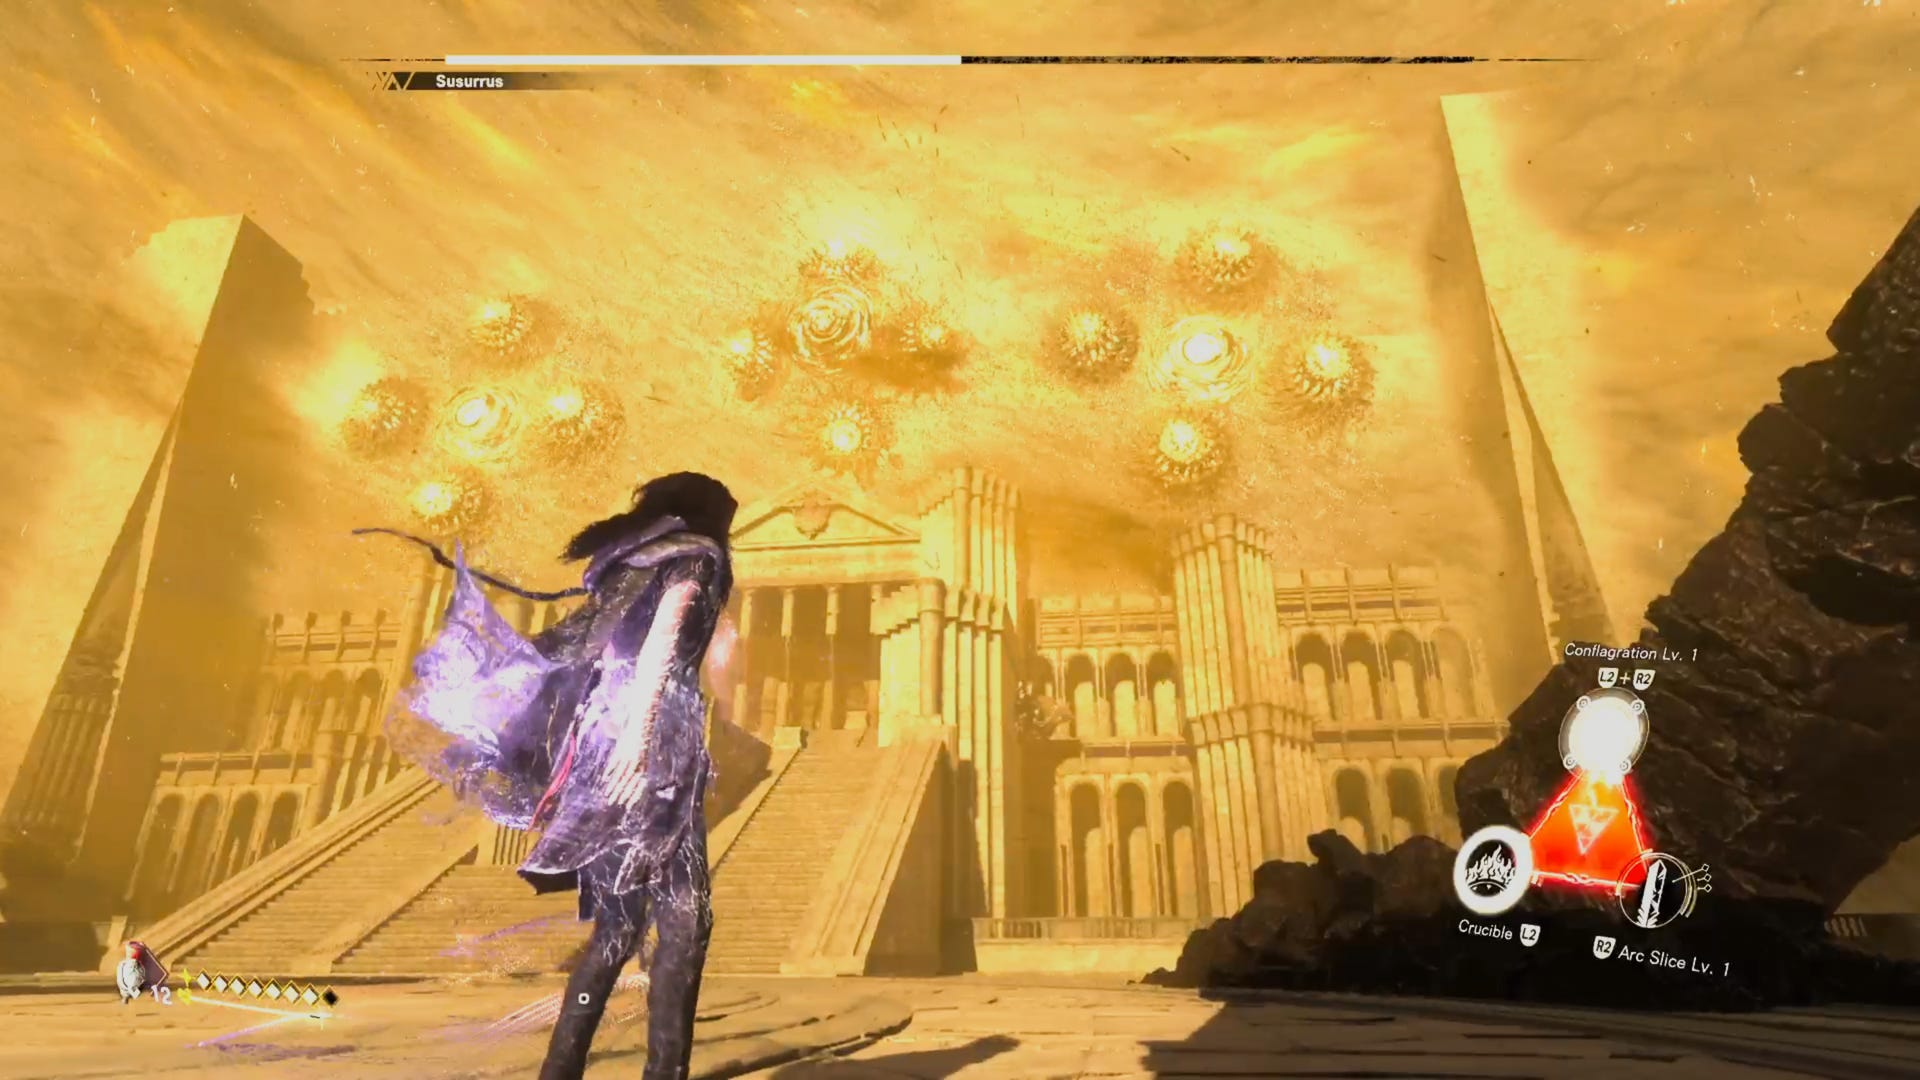
With these taken care of, you’ll see that Susurrus has moved to higher ground but also multiplied with two more Murmuration forms. These all start charging up an attack, which is something of a deadly spinning laser show that covers most of the arena. In other words, use Skip to avoid this, which you should do while making your way towards the building they’re floating above.
It’s time to parkour your way up the building so that you’re in range to let rip your attack spells. It’s best to parkour up from the side and then, once you’re on the roof, just unleash your most powerful attacks while targeting Susurrus from the side, and you should be able to get in some decent hits before he reacts.
With about a third of his health left, he’ll return to ground level, so head back down and keep up the offensive, while remembering to Skip whenever he looks like he’s about to charge up another powerful attack - charging up audio cues or the screen being engulfed in bright light is your best indication.
He’ll also move back up to higher ground and repeat the big spinning lasers attack, so it’s also your cue to get higher up, either by parkouring or zipping up one of the buildings, though it can be annoying finding a level footing while also locked on to him.
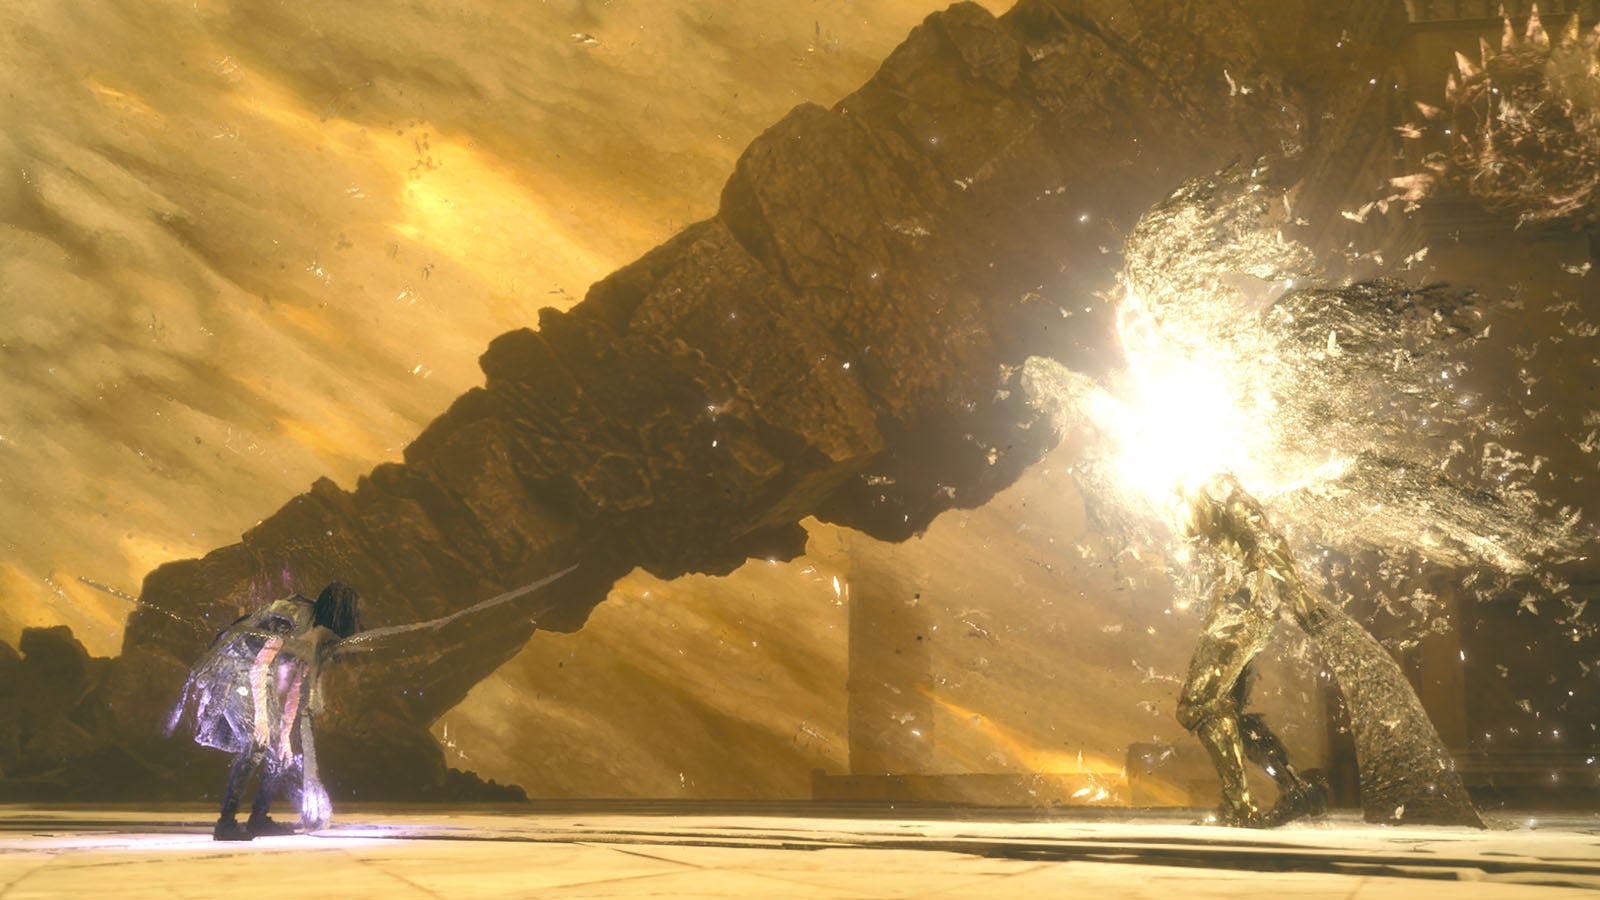
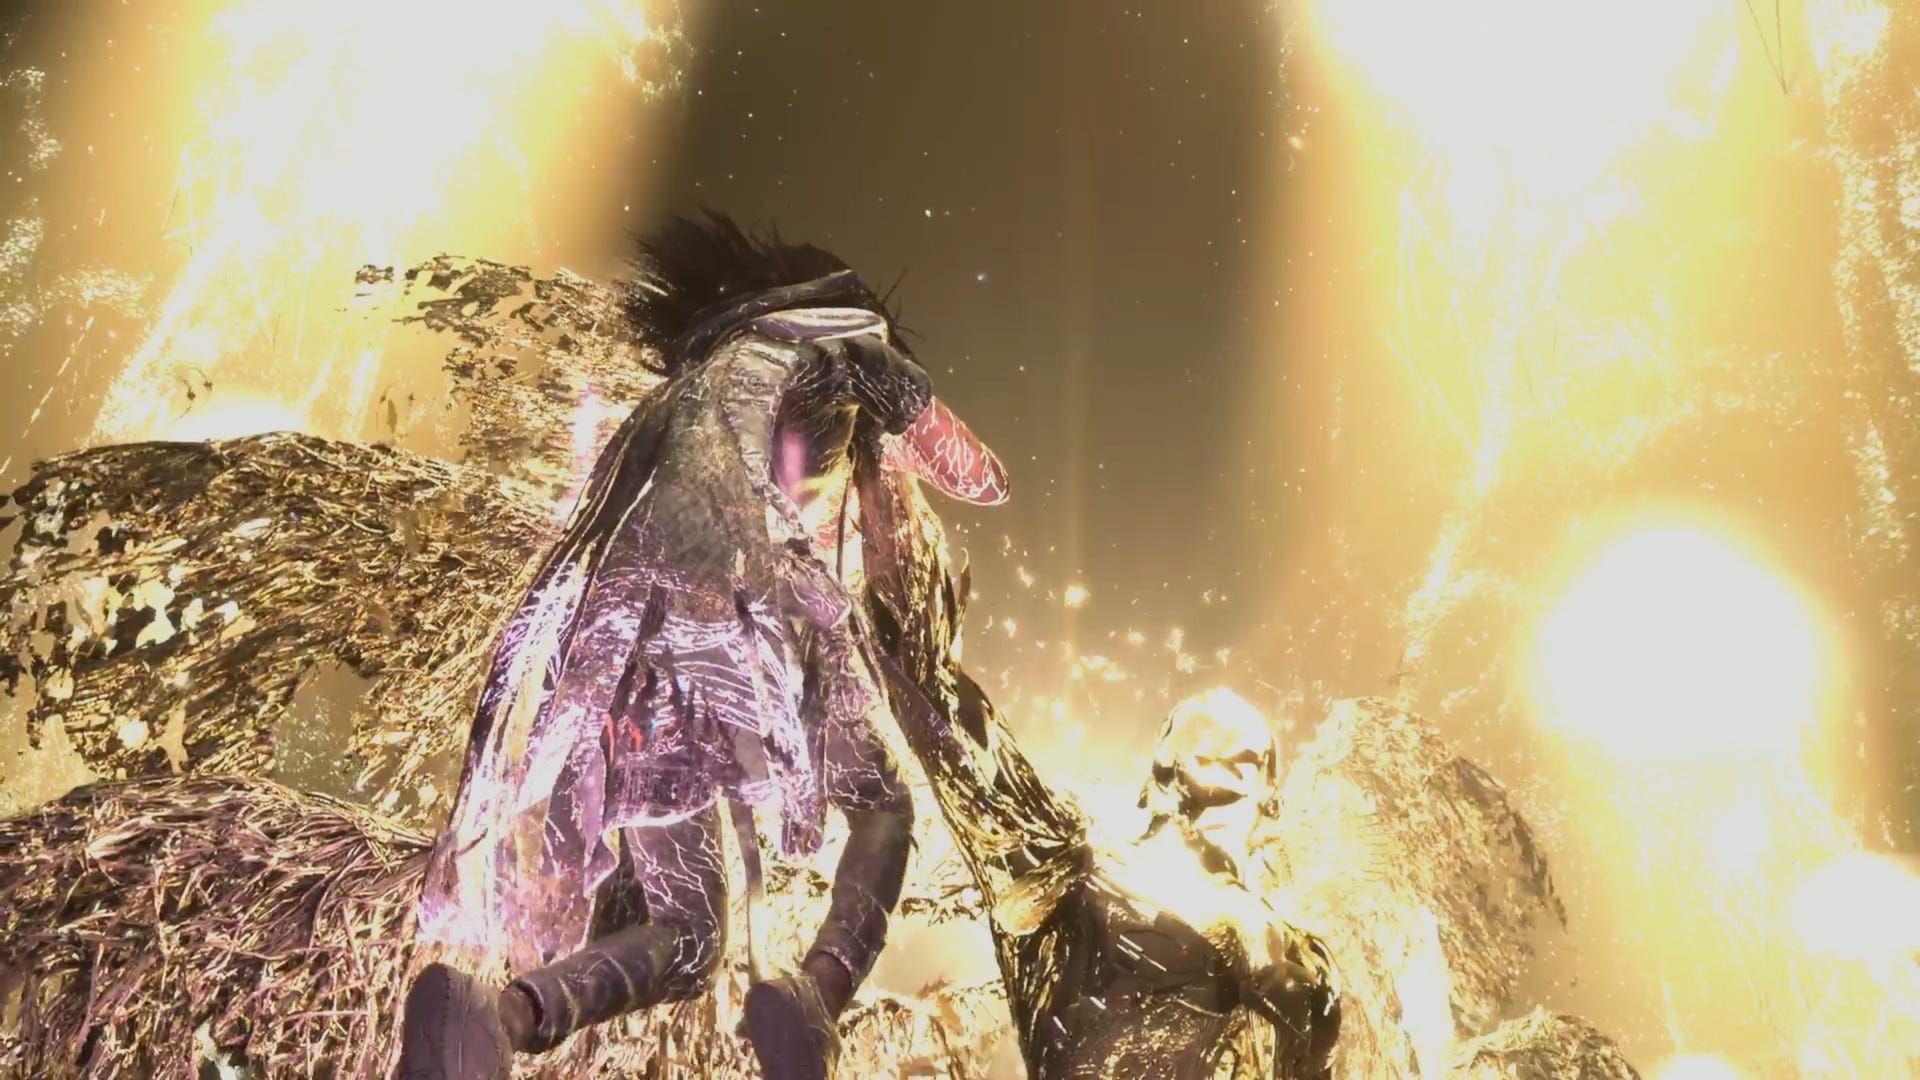
Once you’ve taken down his health, Susurrus will finally reveal his true winged demonic form, with tiny flocks of birds also following him. The fight now moves to a different arena while his health bar is refilled, but this really is the final showdown.
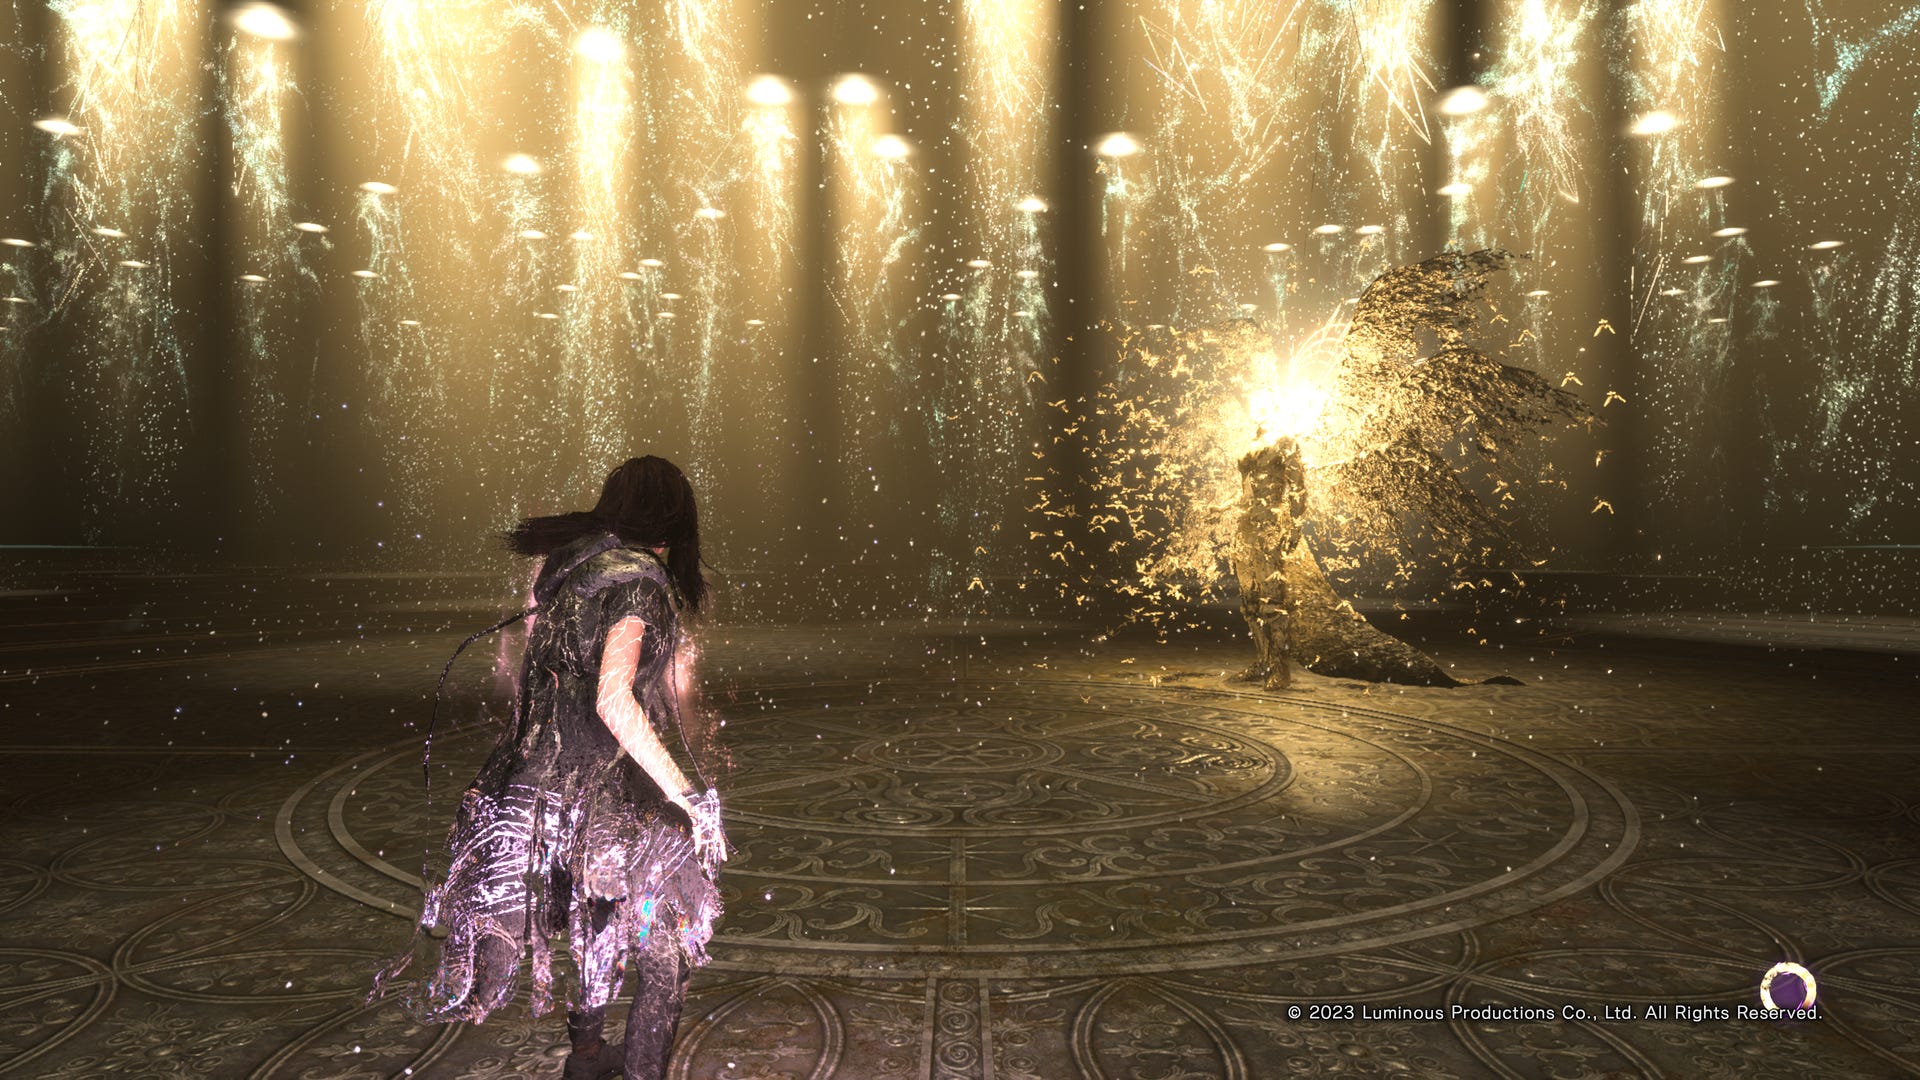
In his first phase, it’s best to keep your distance as he can warp around, coming in for a melee strike with his arm, and, if he kneels down fist raised, he’s about to bring down an AOE attack. When a blinding light forms in front of him, it means he’s about to fire a massive beam blast at you, which you should either avoid with Skip or immediately heal with a draught.
After this initial phase, the camera will move in on Susurrus who seems to change stance, and take note of the colour that appears above him for a brief instance. He now has a more aggressive attack style, warping in to strike you with melee weapons. He also charges up an attack where he will move around the arena like a massive fireball. This all might remind you of Tanta Sila’s attacks and fiery element. As it turns out, Susurrus is actually vulnerable to Sila’s magic while in this stance, so dodge his attacks but charge in with some Arc Slices and if you’ve got it charged up then hit him with Conflagration.
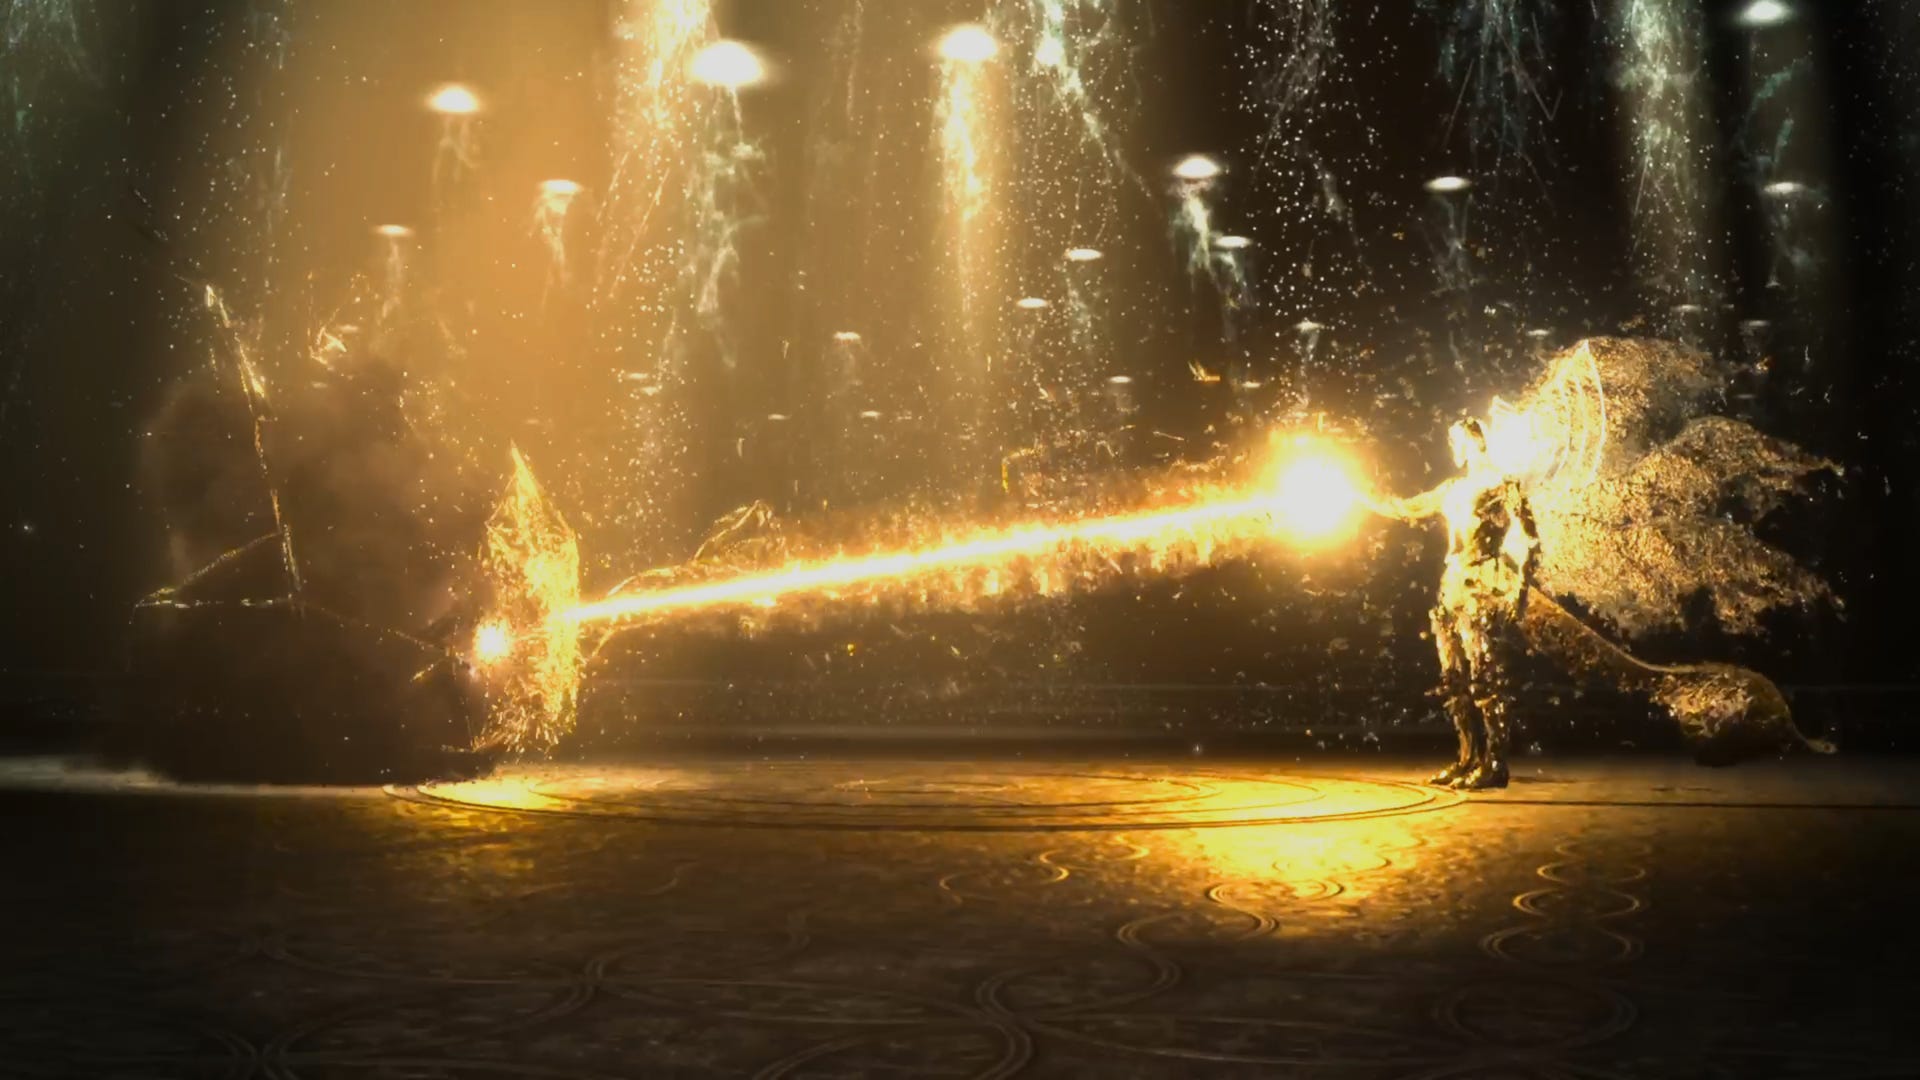
With a third of his health down, Susurrus will knock Frey down, taunting her before changing stance again. This time he takes to the air, flying around while pelting you with magic, including his blast beam as well as a flurry of fireballs. But if his floating figure reminds you of Tanta Prav, then that’s a sign that he’s also vulnerable to Prav’s Magic so switch to her set and let loose your bolt magic while he’s fairly open in the air.
With about 40% health left, Susurrus changes stance again and as there’s a green hue showing, you should also switch to Olas’s magic, which he’ll be vulnerable to. Again, he’ll continue hitting you with his powerful beam attacks which you should take care to dodge. He also summons columns of tornadoes around the arena, though they’re not too close to be an issue, and another attack has him stomping his foot that sends a shockwave trailing along the ground towards you, which is easy to dodge. He also warps into the air before dropping with a massive AOE attack, which is your cue to Skip.
Before you can even deal much damage, with just a third of his health left, a cutscene will trigger with Susurrus grabbing Frey and slamming her to the ground. But you’re not about to give up, so the fight continues with another stance, which means it’s time to switch to Frey’s earth-based magic. Susurrus will mostly be attacking from the air, those big blast beams still a favourite of his. Ranged attacks like Burst Shot or Scatter Shot are recommended, and since you’re using Frey’s Magic, you may as well use Screen support magic to protect you from one hit.
This phase doesn’t last long before an enraged Susurrus comes back down to earth and the final stretch gets pretty hectic. He starts bringing a barrage of every attack - from warping in with melee strikes, to raising fiery columns that you might run into while trying to dodge his other attacks, and, of course, more of his beam blasts. He has no vulnerabilities or resistances now so it’s just a case of throwing any powerful spell while dodging to the best of your ability, remembering to make use of Skip, and hopefully you have enough healing draughts to get you through it.
When Susurrus’ health is finally depleted, a cutscene will be triggered where it seems Frey’s energy is all spent, leaving her open to a deadly attack from the winged demon. Fortunately, you’ve already won, and, with the combined power of the Tantas, it’s just a case of following the QTE prompt to finish this once and for all.
Congratulations, you have completed Forspoken’s story!
Forspoken has arrived and we have boss strategies to help you defeat Tanta Sila, Tanta Prav, the Senseless Savant and the final boss. Before facing these bosses, however, you may want to learn how to craft, upgrade your gear and find all of the Founts of Blessings. Meanwhile, understanding fast travel and clearing Monuments will also help you in Fray's journey across Athia.
Forspoken final boss reward
Having triumphed over Susurrus, your journey in Forspoken comes to an end, or is it just the beginning?
After you have gone through the ending cutscenes and credits, you will now start Chapter 13, which is essentially Forspoken’s postgame where you may continue completing other activities in the world, while new detours also become available.
You may have unlocked all the magic spell sets and also awoken as the Tanta of Tantas, but have you unlocked every ability by finding all the Founts of Blessing or upgraded every magic skill tree? There’s plenty out there in Athia still to do.
What’s more, you’re also reunited with your talkative companion Cuff, whether you like it or not.