Final Fantasy 12 - Adrammalech the Wroth location, requirements and strategies
Everything you need for tackling the tricky Esper.

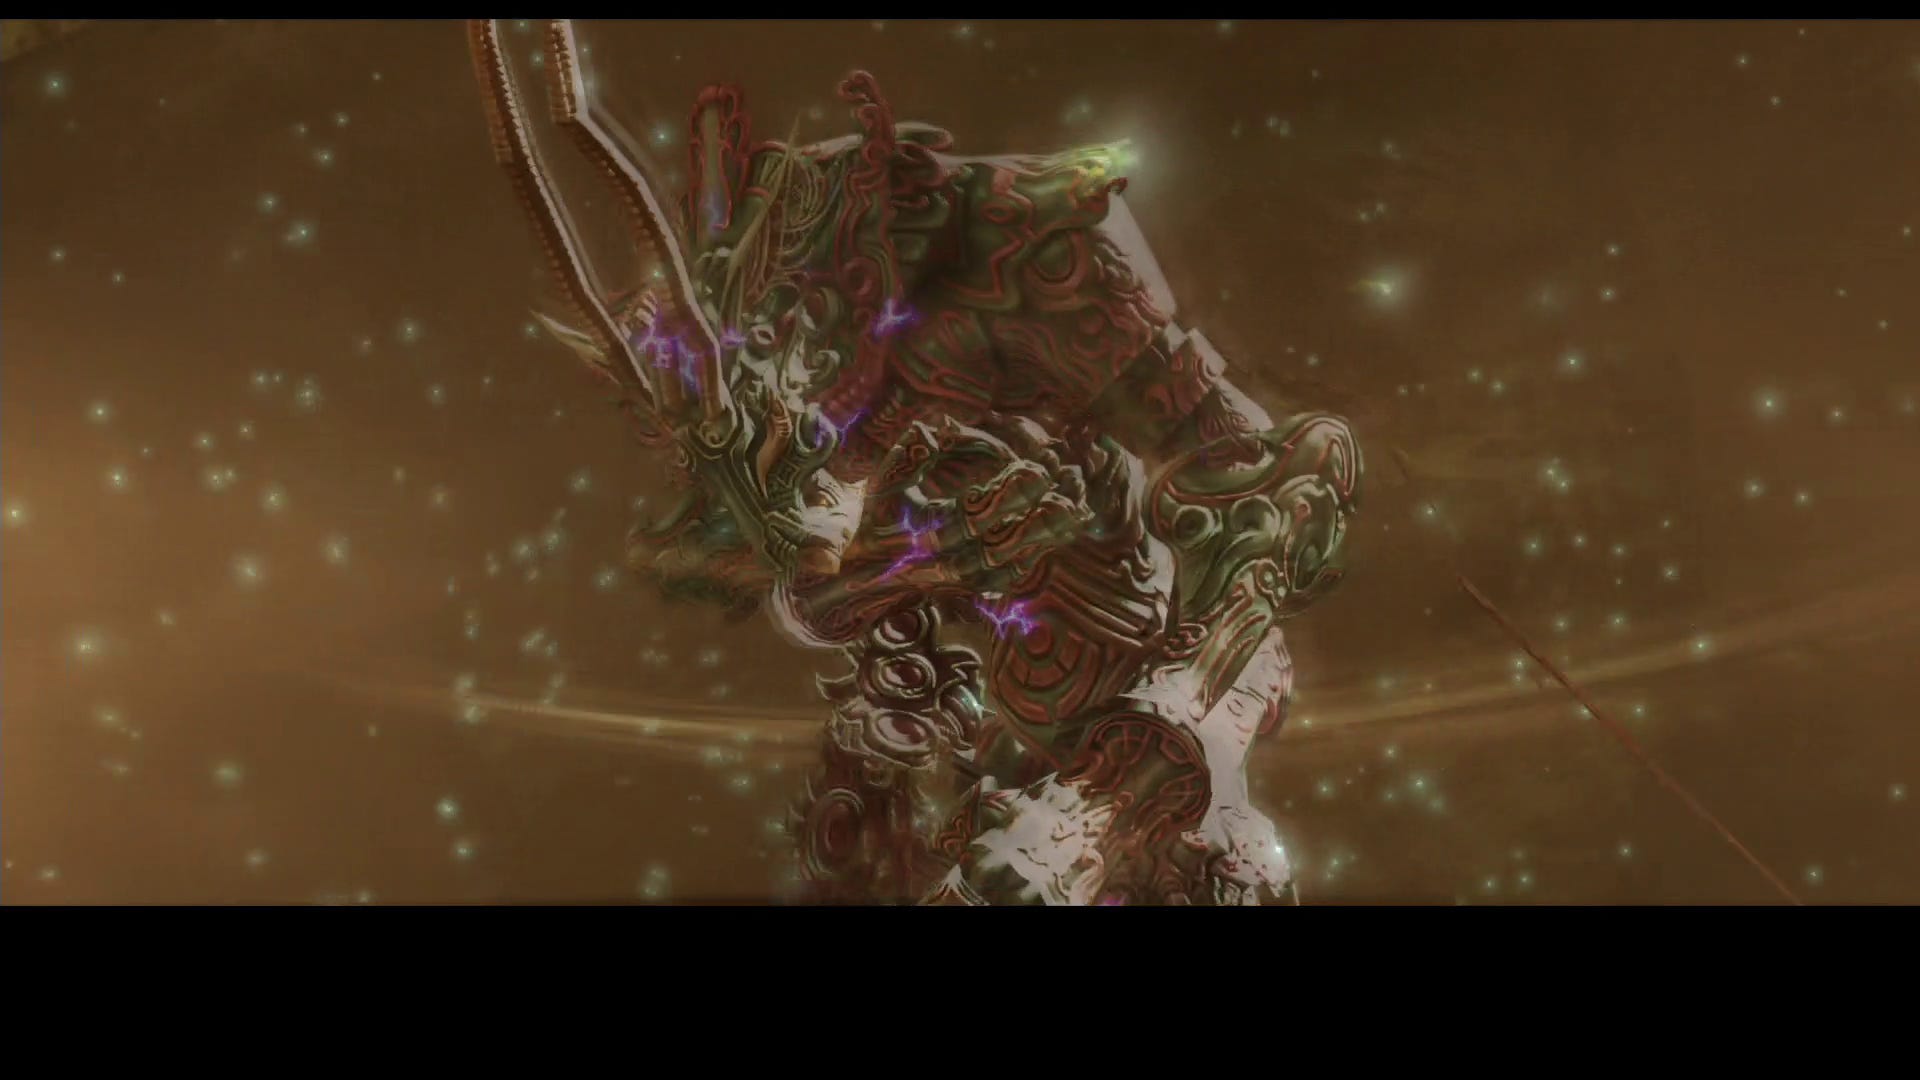
There are thirteen Espers in Final Fantasy 12, eight of which are optional foes outside of the main story. Addrammaech, the Wroth is the first of those optional Espers that you'll be able to attempt tackling, but don't expect it to be easy!
All of the Espers are highly challenging, so here on this page we'll be taking you through Adrammalech's location, requirements, and of course strategies for how to defeat Adrammalech in combat, too.
If you're looking for one of the other Espers, you can head back to our Esper battles, locations, and strategy hub. For other tips and explainers meanwhile, head to our Final Fantasy 12 The Zodiac Age guide and walkthrough, where we cover plenty more.
Adrammalech, the Wroth location and requirements
Before you get to the actual battle, here's everything you need to know about Adrammalech, the Wroth:
- Prerequisites: Dawn Shard.
- Location: Zertinan Caves, accessible from Dalmasca Westersand (Shimmering Horizons), Nam-Yensa Sandsea (Yellow Sands), Ogir-Yenza (East Junction), or Ozmone Plains (The Switchback).
- HP: ~40,000
- Weaknesses: Ice.
- Absorb: Thunder.
- You'll need: Shell, Chronos Tears, Blizzard/Blizzaga, Quasimodo Boots.
- Recommended level: 40.
- Steal: Capricorn gem, pebble, High Arcana.
This is the first optional Esper available to you, but don't be tempted to take him on too early! We made the mistake of attempting him as soon as he was available and the fight lasted a matter of seconds so we'd recommend being level 40 or above for this encounter. You'll also need Dispel (or a Dispel Mote), Blizzard, and Disable available in your magic arsenal, Quasimodo Boots equipped to counter Sap, and some Chronos Tears to deal with Stop. The hunt A Tingling Toast also takes place in the same area so you may want to pick that up too to save a return journey.
On your journeys you may have spotted a mysterious unmarked exit in Dalmasca Westersand (Shimmering Horizons), Nam-Yensa Sandsea (Yellow Sands), Ogir-Yenza (East Junction), or Ozmone Plains (The Switchback). All of those lead to Zertinan Caverns, home of Adrammalech, although Ogir-Yensa or Westersand are your best bets as there's a save crystal on the east of the cavern to get your party to full power. Head for the centre of the caves - depending on which route you take you may need to move a boulder out of the way by standing next to it and hitting X - and when your minimap gets disabled your foe will make his entrance.
For more help with? Final Fantasy 12? Our Final Fantasy 12 The Zodiac Age guide, walkthrough, Switch and Xbox differences gives an overview of the game to get you started. Elsewhere, there's our hidden Espers strategy and locations and Elite Hunts and Marks pages, how to get the best Zodiac Jobs for each character, advice on farming LP from Jellies and even how to get the Zodiac Spear.

Adrammalech strategies and how to defeat it
As soon as combat begins use Dispel on him if you have it - he casts Haste and a random buff or two on himself to get things going. He's a flying enemy so ranged or magic attacks are your only options - his weakness is Ice so use it if you have it. During the fight Zombies will spawn around you, but killing them will only cause more to appear so using Disable on them is more effective; it won't hit all of them, and it won't last forever, but firing one off every now and again will at least keep the minions mostly out of the way.
During the first phase he'll stick mainly to Thundara and Bleed, so without Quasimodo Boots you'll have to keep up the healing to counteract the Sap effect.
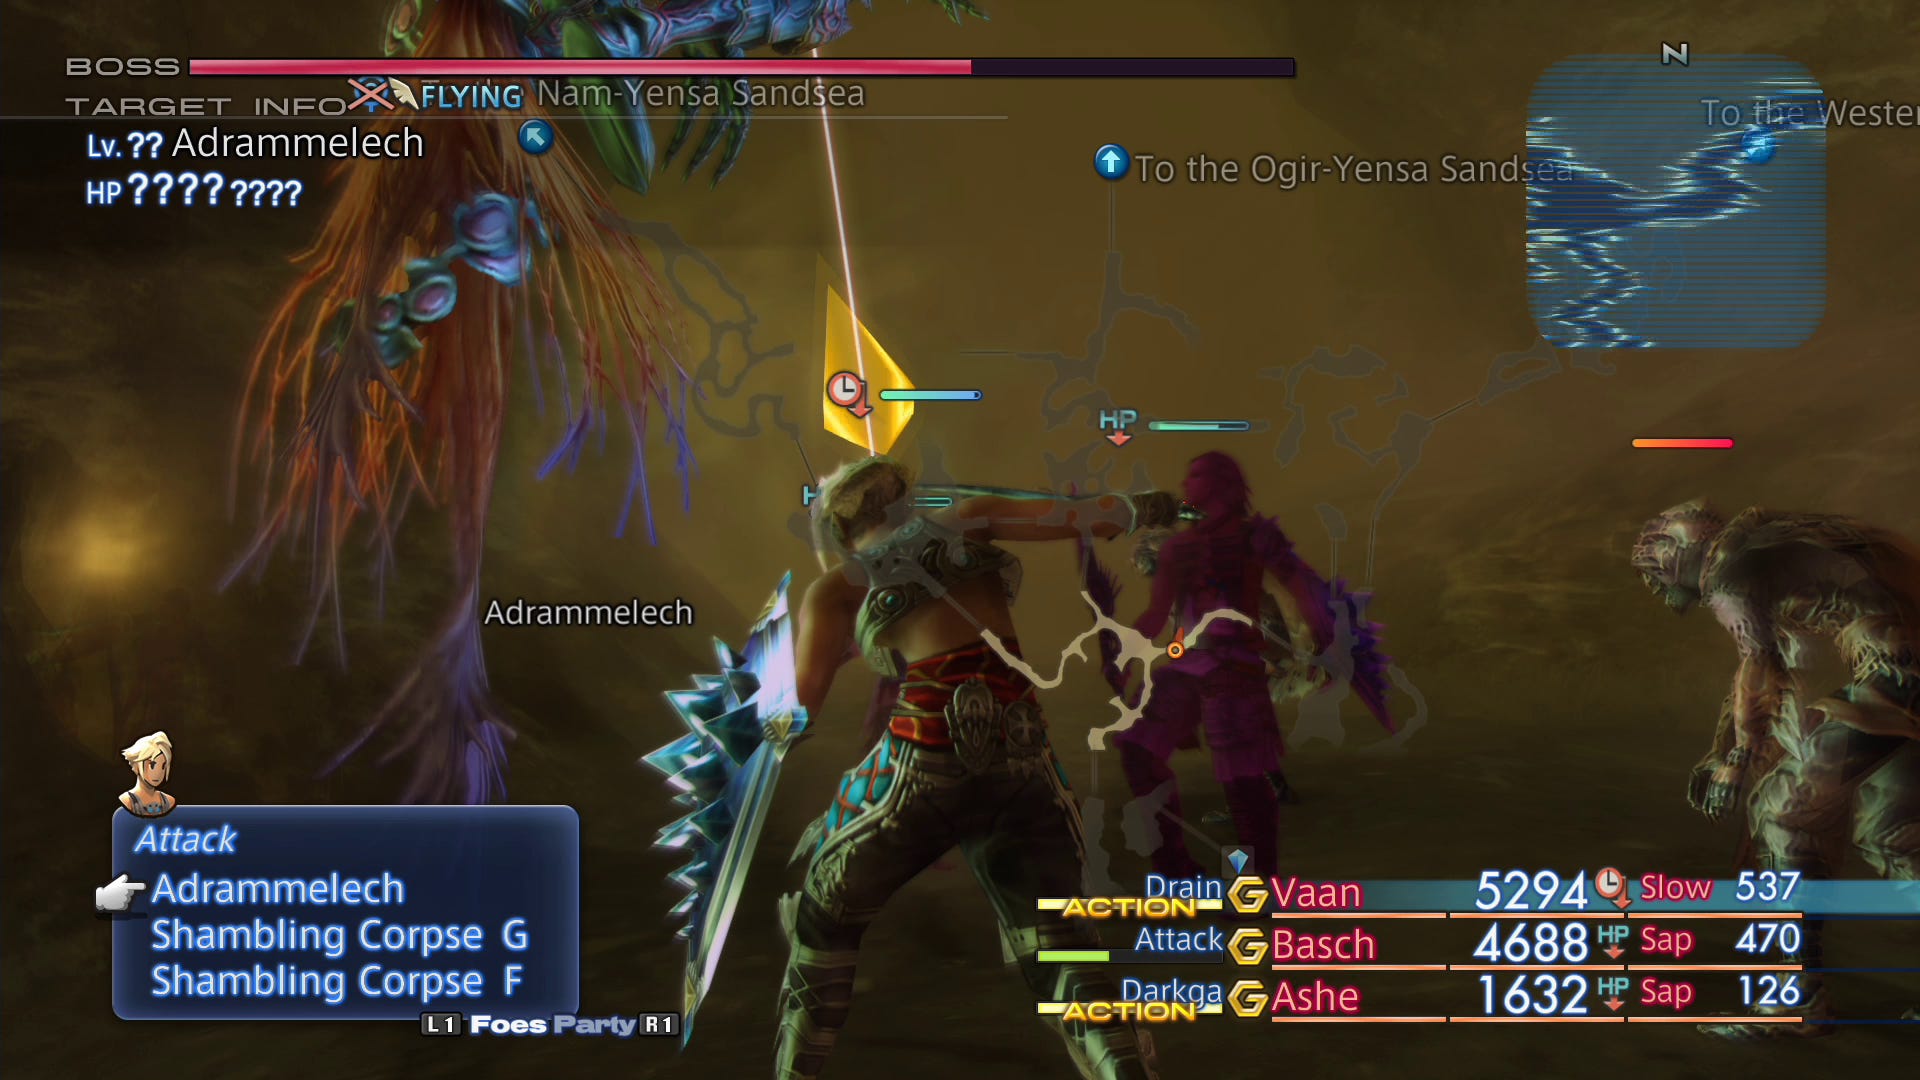
Once his HP approaches 50% cast Shell on your party - he'll charge up Thundaja, and unprotected it can take over 1000HP from everyone and has a chance of inflicting Stop so be ready with the Chronos Tears.
At around 30% HP he'll cast Perfect Shield on himself which will make him completely invulnerable to magic so fall back on ranged attacks until it wears off. Once he's vulnerable you can either return to chipping away at him or try and use a Quickening chain on him to finish him off - the lower his HP gets the more he casts Thundaja, so at this point in the fight speed is of the essence.
Once he's dead, beat a retreat - the zombies will keep spawning, and you're almost certainly not going to be in great shape…
Head back to our Esper battles, strategies and locations hub for more on the various other Espers, or our main Final Fantasy 12 The Zodiac Age walkthrough and guide hub for plenty of other guides, too!