Final Fantasy 12 - Gil Snapper location, requirements and strategies for the Rank III Paradise Risen
How to take on Gil Snapper in Final Fantasy 12.
Here on this page of our Final Fantasy 12 Elite Hunts and Marks guide, we'll be taking you through everything you need to know in order to defeat Gil Snapper - a Rank III Elite Mark for the Paradise Risen Hunt - including the Petitioner and Mark's locations, the Hunt requirements, and strategies for the battle itself.
If you're looking for one of the other Marks however, you can head back to our Final Fantasy 12 Hunts and Marks locations, requirements and strategies hub. For other tips and explainers meanwhile, head to our Final Fantasy 12 The Zodiac Age guide and walkthrough, where we cover plenty more.
Gil Snapper and the Paradise Risen Hunt location and requirements
Before you get to the actual battle, here's everything you need to know about Gil Snapper and the Paradise Risen Hunt:
- Prerequisites: complete Raithwalls' Tomb.
- Recommended level: 33+
- Petitioner location: Crystal Glade, Giza (The Rains)/Nomad Village, Giza (Dry)
- Mark location: Tracks of the Beast (hidden area), Giza (The Rains)
- Reward: 3000 Gil, Phobos Glaze
The petitioner and monster only appear when it's raining in Giza so if it's dry you'll need to go away and come back later; the weather runs on a roughly two hour cycle, so how long a wait you have depends on how recently it stopped raining, but other than visiting the plains there doesn't appear to be any way of telling what the weather's like so just come back every 30 minutes or so. (Note that it's two hours of game clock time.)
Once you've spoken to the petitioner you need to create a bridge to the monster spawn area by knocking down six withered trees in the area to form a bridge. One can be found directly opposite the petitioner (so now you know what you're looking for), there's one on Throne Road, one in Nomad Village, one in Toam Hills, one in Starfall Field, and the last one is in Giza North Bank. Once they're all knocked down head for Giza South Bank and they will have formed a bridge on the eastern shore which will allow you to cross into Tracks of the Beast.
Gil Snapper only spawns when the weather is really bad, so you may need to leave and re-enter the area a few times to get favourable conditions - you'll know it's right when Bansat, the guy from the Clan House that piped up when you took the hunt, is there to greet you.
Gil Snapper strategies and how to defeat it
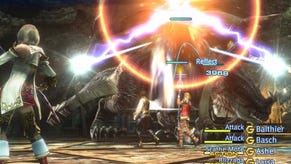
Unlike the previous tortoise this guy uses Blizzara in preference to physical attacks, so Shell, high magic resistant armour, and Ice Shields are good to have as defence, and maybe some Argyle Armlets to protect against his attempts to Blind you. He's weak to electrical attacks, so just throw Thundara at him, whack him with your biggest weapons, and heal when required - Bansat will help out during the fight, and if you still have a guest with you it should be over in no time.
For more help with? Final Fantasy 12? Our Final Fantasy 12 The Zodiac Age guide, walkthrough, Switch and Xbox differences gives an overview of the game to get you started. Elsewhere, there's our hidden Espers strategy and locations and Elite Hunts and Marks pages, how to get the best Zodiac Jobs for each character, advice on farming LP from Jellies and even how to get the Zodiac Spear.
Return to where you spoke to the petitioner and read the Soggy Note she's left, then wait for the rains to stop and head to the Nomad Village for your reward. 3000 Gil is nice, and Phobos Glaze is used to unlock several bazaar items when sold in conjunction with other items.
Be sure to cycle back to our main Final Fantasy 12 Marks and Hunts strategy guide for more on those, otherwise head to our primary Final Fantasy 12 The Zodiac Age guide and walkthrough hub for plenty more on the game in general!


