Destiny 2 Insurrection Prime, Kell’s Scourge strategy
How to beat both encounters against Insurrection Prime, Kell’s Scourge.

Insurrection Prime, Kell's Scourge follows on from the Sewers and Botza Underground, and is a two-part encounter that finishes off the Scourge of the Past raid.
After all that time without killing any enemies, you finally get to go toe to toe with more Fallen - and on this page, we explain how to divide your team, navigate the bottom layer of the map, reset the circuits on bottom, free the players trapped in the bottom, and destroy all the machinery in the centre of the map.
If you want to read more about the raid, our Scourge of the Past guide can help.
On this page:
Destiny 2 Insurrection Prime, Kell's Scourge Part One step-by-step
A summary of the steps to complete the first part of Insurrection Prime, Kell's Scourge are:
- Split into two teams: Top and Bottom.
- Kill the servitor to gain access to the bottom.
- Players enter the bottom and pick up a buff from the consoles underground, without standing next to each other for too long.
- Players on top prevent Shanks from entering the bottom and kill the next servitor to reset the consoles.
- Bottom team pick up a second buff of the same colour/shape as their initial buff while rotating clockwise/counter-clockwise.
- Top team prevent more shanks from entering bottom and kill the second servitor to release players.
- Bottom players exit and use their buffs to spawn in drake tanks.
- Players enter tanks and shoot the machinery in the centre of the map while avoiding barrages of missiles.
- Exit tanks prior to detonation and return to the bottom area to collect buffs again.
- Repeat buff process of killing servitors to reset consoles until bottom team have two stacks of a buff and exiting to spawn more tanks until machinery in the centre of top map has been destroyed.
Destiny 2 Insurrection Prime, Kell's Scourge Part One strategy
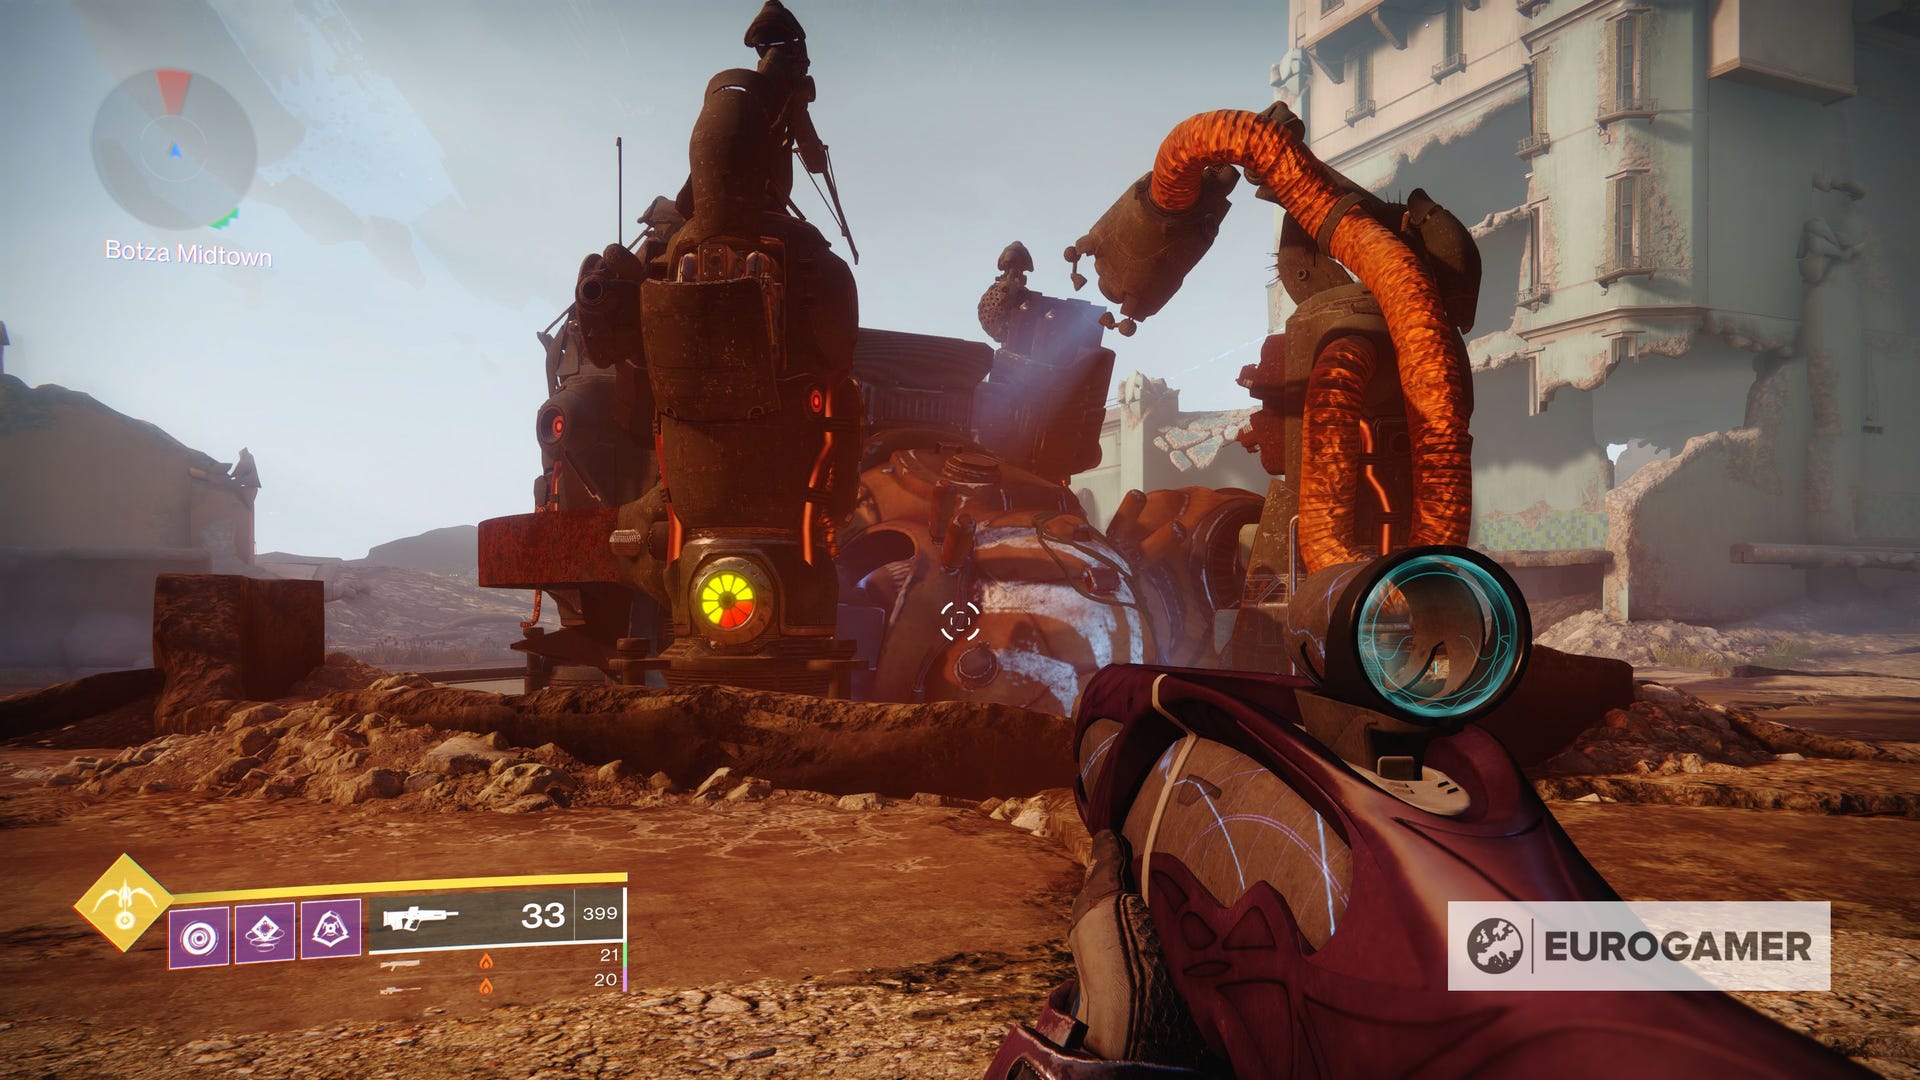
Upon opening the door at the end of the previous phase, you'll be greeted with a more open planned stretch of land. This decrepit city will be the staging area for both the first and second part of Insurrection Prime, Kell's Scourge. So, it's best to familiarise yourself with the surroundings.


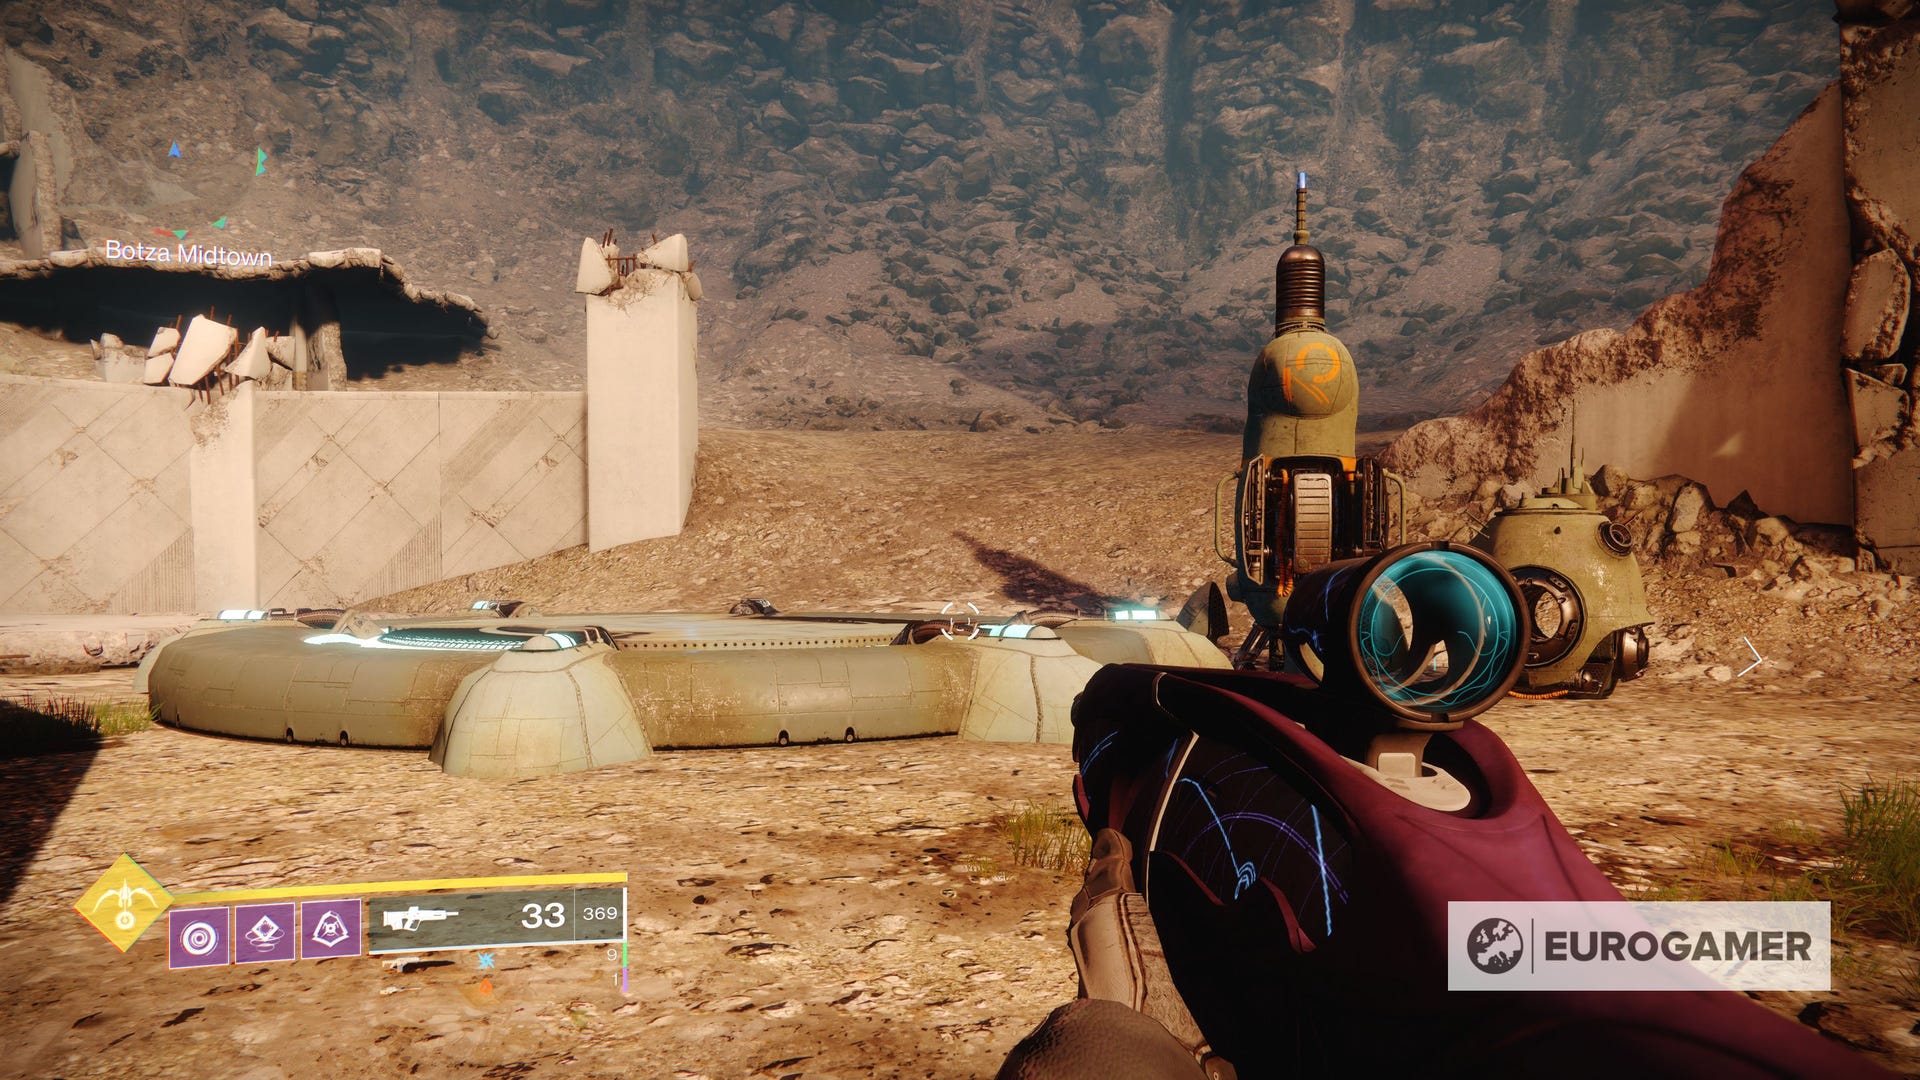
Surrounding the map there are four buildings that can be used for shelter, three pads with accompanying terminals for charges, four entrances protected by an electric shield, and a servitor.
Before you kill the servitor, you'll need to split your fireteam in to two different roles; top and bottom with three guardians in each team. The top team will primarily be in charge of killing shanks and servitors, while the bottom will navigate a circular series of tunnels with terminals and enemies within.

As a member of the team on the top you will need to contend with all potential energy types, so ensure that all three guardians have equipment to deal with waves of shanks effectively. Within the team your primary goal will be to prevent shanks from entering the bottom level and killing your runners. On top of that, you'll also need to await the players on bottom level notifying you that they have all collected their initial charges.
When the bottom time signal that all three guardians have a charge, you must take down the new servitor. This will reset all the terminals in the bottom floor and enable the team to pick a second charge. When the team indicate that they have their second charges, you will once again have to destroy a servitor to release them from the bottom floor.
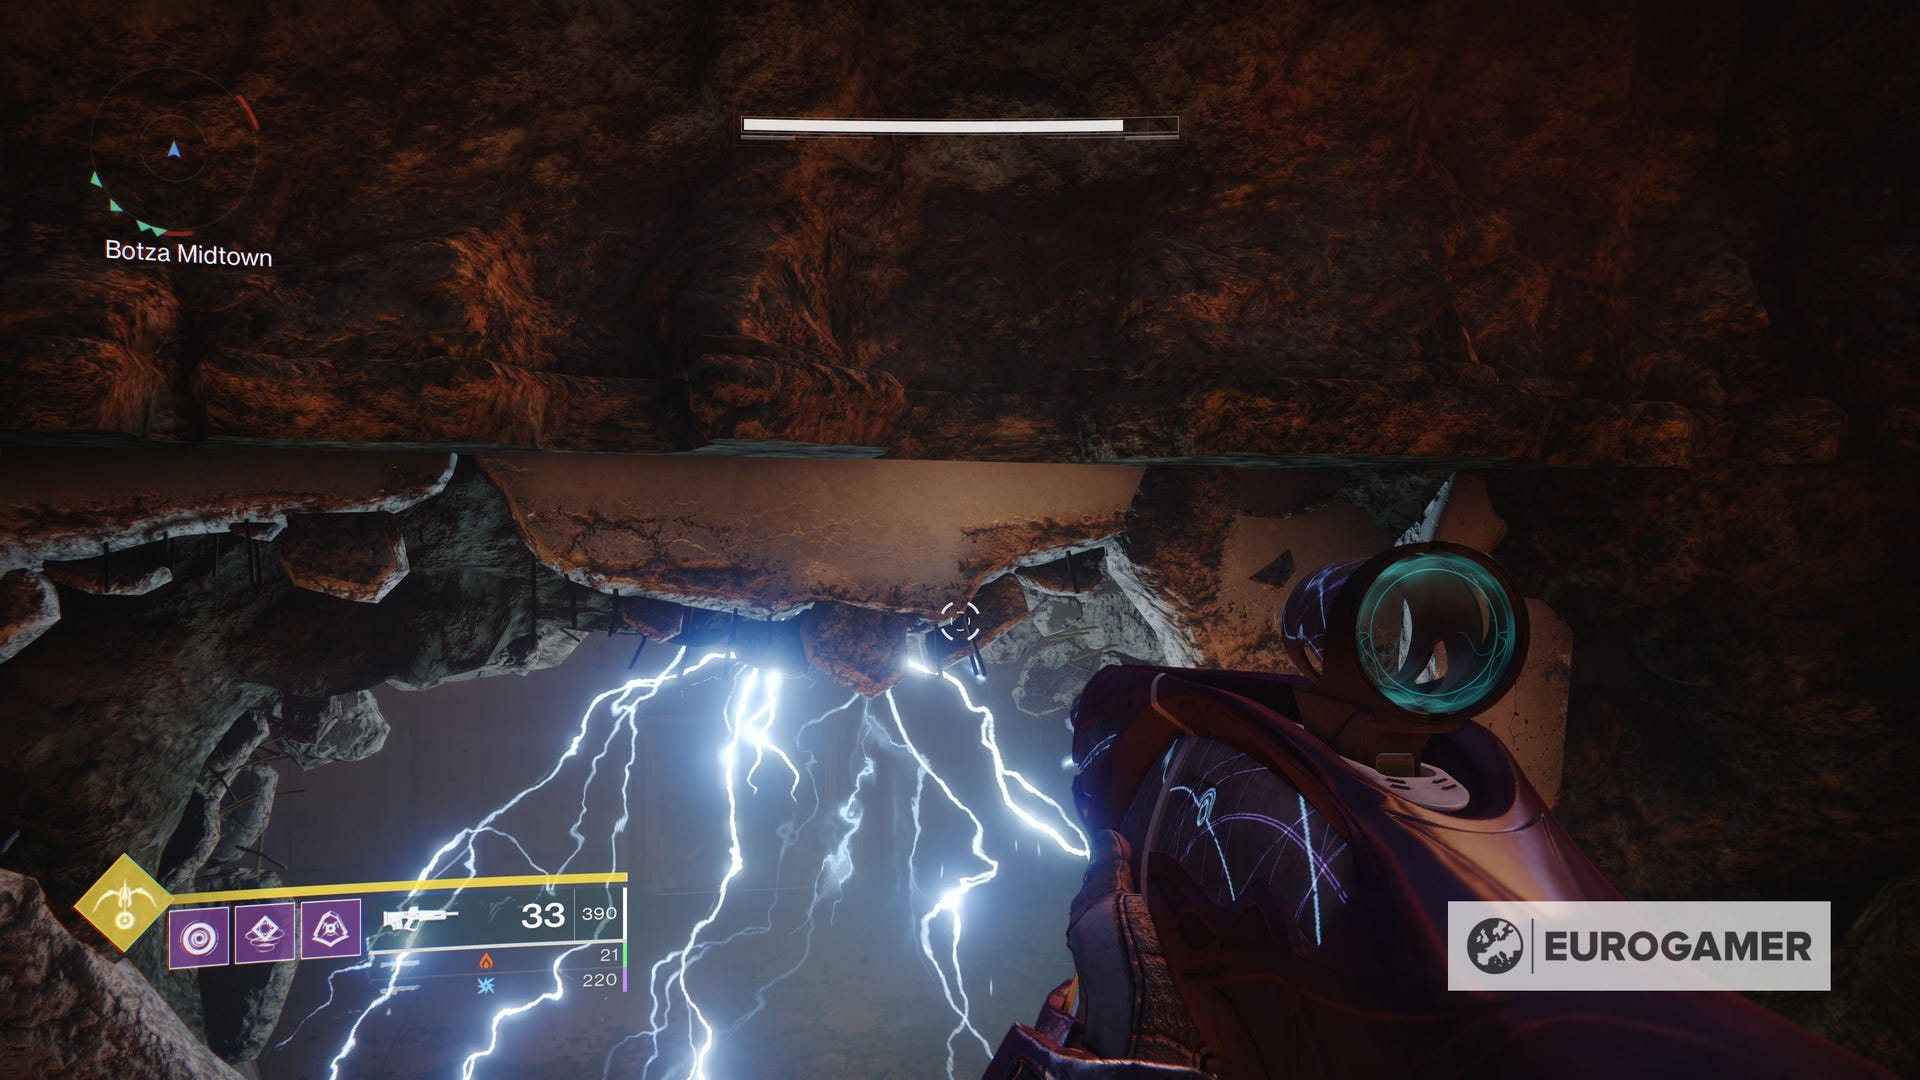
After the initial servitor has been vanquished, the bottom level of the map will open and allow you to enter. Each guardian should pick a door to enter by and run to their right to find their first terminal, noting the colour and shape of the terminal unless it is a self destruct terminal, and melee the console to acquire the buff.

In the bottom section there will be a total of four terminals, three standard terminals and one destruct sequence terminal. The destruct sequence terminal should never be activated or the encounter will cease and will be visibly flicking between several shapes while glowing bright red.

So, the players who successfully pick up a charge should defend their position, without moving, until the remaining player runs around the tunnels to pick up their charge.
When the players all successfully pick up their first charge they should signal to the team on top that they are ready and to destroy the servitor. After the servitor has been destroyed, the consoles in bottom will be reset.
The team in the area should check the console they are currently standing at and pick up the buff if it matches their initial buff by meleeing the console again. Should it not match, players will need to coordinate with each other and move around the bottom layer in a clockwise fashion. If players get too close, their buff will turn red and they will die after prolonged exposure to a buff that does not match.
This also extends to picking up a second buff, should a player pick up the incorrect buff, they will also die. After the players have picked up their second buff, they must once again communicate to the team on top to kill a further servitor and allow those in the bottom layer to leave through the doors they entered.
As the players on bottom exit the bottom floor, they should still ensure that they do not cross paths. These players should head towards one of the three points throughout the map where they can place their energy.
This will spawn a drake tank. Players should then enter these tanks and shoot the machinery in the centre of the map.

The health of the tank will slowly diminish over time and the machinery will attempt to protect itself with barrages of missiles. Successfully using the tanks to destroy one of the four corners of the machine will reset the timer for the encounter indicated on the legs.
When your team's tanks have run out of health, you will need to repeat the bottom layer process again. Guardians in charge of the bottom should quickly return and pick up a buff and repeat the rotation process, requesting that a servitor is killed to reset the switches and then a further servitor is killed to release them to spawn further tanks.
You will need to repeat this process until you complete the encounter, but it is possible for teams to complete the encounter in two runs.
Destiny 2 Insurrection Prime, Kell's Scourge Part Two step-by-step
Now that you've awoken the menace that remained dormant in the centre of the map, you'll come face to face with Insurrection Prime, Kell's Scourge in the final phase of Scourge of the Past.
A summary of the steps to complete the final encounter, Insurrection Prime, Kell's Scourge Part Two, are:
- Split in to three teams; map reader, first Berserker team, second berserker.
- Kill the initial Berserker and map readers pick up Radiant Battery to power the map and activate Insurrection Prime.
- Map reader calls out first location of Berserker for the first team.
- First Berserker team head to the enemy to kill it while remaining players destroy the 6 shield generators on Insurrection Prime.
- One member of the first team picks up a radiant battery and receives a node callout from map reader, followed by second battery pick up and second call out.
- First team places batteries while the map reader communicates location of second Berserker for the next team.
- Next team kills the second berserker while map reader and remaining guardians kill snipers on top of buildings.
- One member of the second team picks up a radiant battery and receives a node callout from map reader, followed by second battery pick up and second call out.
- All players, bar the final player to deposit the battery converge on map room.
- The final player to deposit a battery summons a tank and drives to ensure the face of Insurrection Prime is facing the other players before shooting the boss.
- Players start initial damage phase until Insurrection Prime releases an emp with a buff/debuff to all players.
- Players quickly move away from red tethers and towards players with matching buffs for further damage until a second emp is released.
- Players rearrange based on buffs after their second emp phase and continue to do damage.
- Insurrection Prime's shield starts to regenerate and the first Berserker spawns on the map for the first team again.
- Repeat the Berserker process until a further tank is spawned and the initiate the damage phase again until Insurrection Prime is defeated. (This can be done a total of four times until the encounter fails)
Destiny 2 Insurrection Prime, Kell's Scourge Part Two strategy
As you complete the previous encounter, a chest will spawn where you originally entered the arena and signify that you are about to start the next phase. The room in which you collect your loot is the map zone, you'll need to remember this for later.
Before you event consider starting the encounter, you'll need to organise teams and get a feel for the map. There will be three teams in total and their goals will be a mix of all the skills gained throughout the previous encounters.
All of these teams should familiarise themselves with the layout of the encounter and the numbering of the tank pads. The tank pad opposite the map room at the other end of the map is One, the pad to the right is two, and the final pad to the left is three.


The first team will be the map readers. This team is typically formed of one full time map reader and a floating guardian that will offer support wherever it is needed throughout the map, including killing frequently spawning enemies.
The second and third team will be formed of two guardians each and their predominant responsibilities will be to hunt down Berserkers on the map and collect their radiant batteries to deposit in the tank terminals, similar to the previous encounter.
There is an additional role for the guardian in team two who picks up the final radiant battery to enter a tank and shoot Insurrection Prime to initiate the boss phase, but this responsibility can be shared if communicated well.
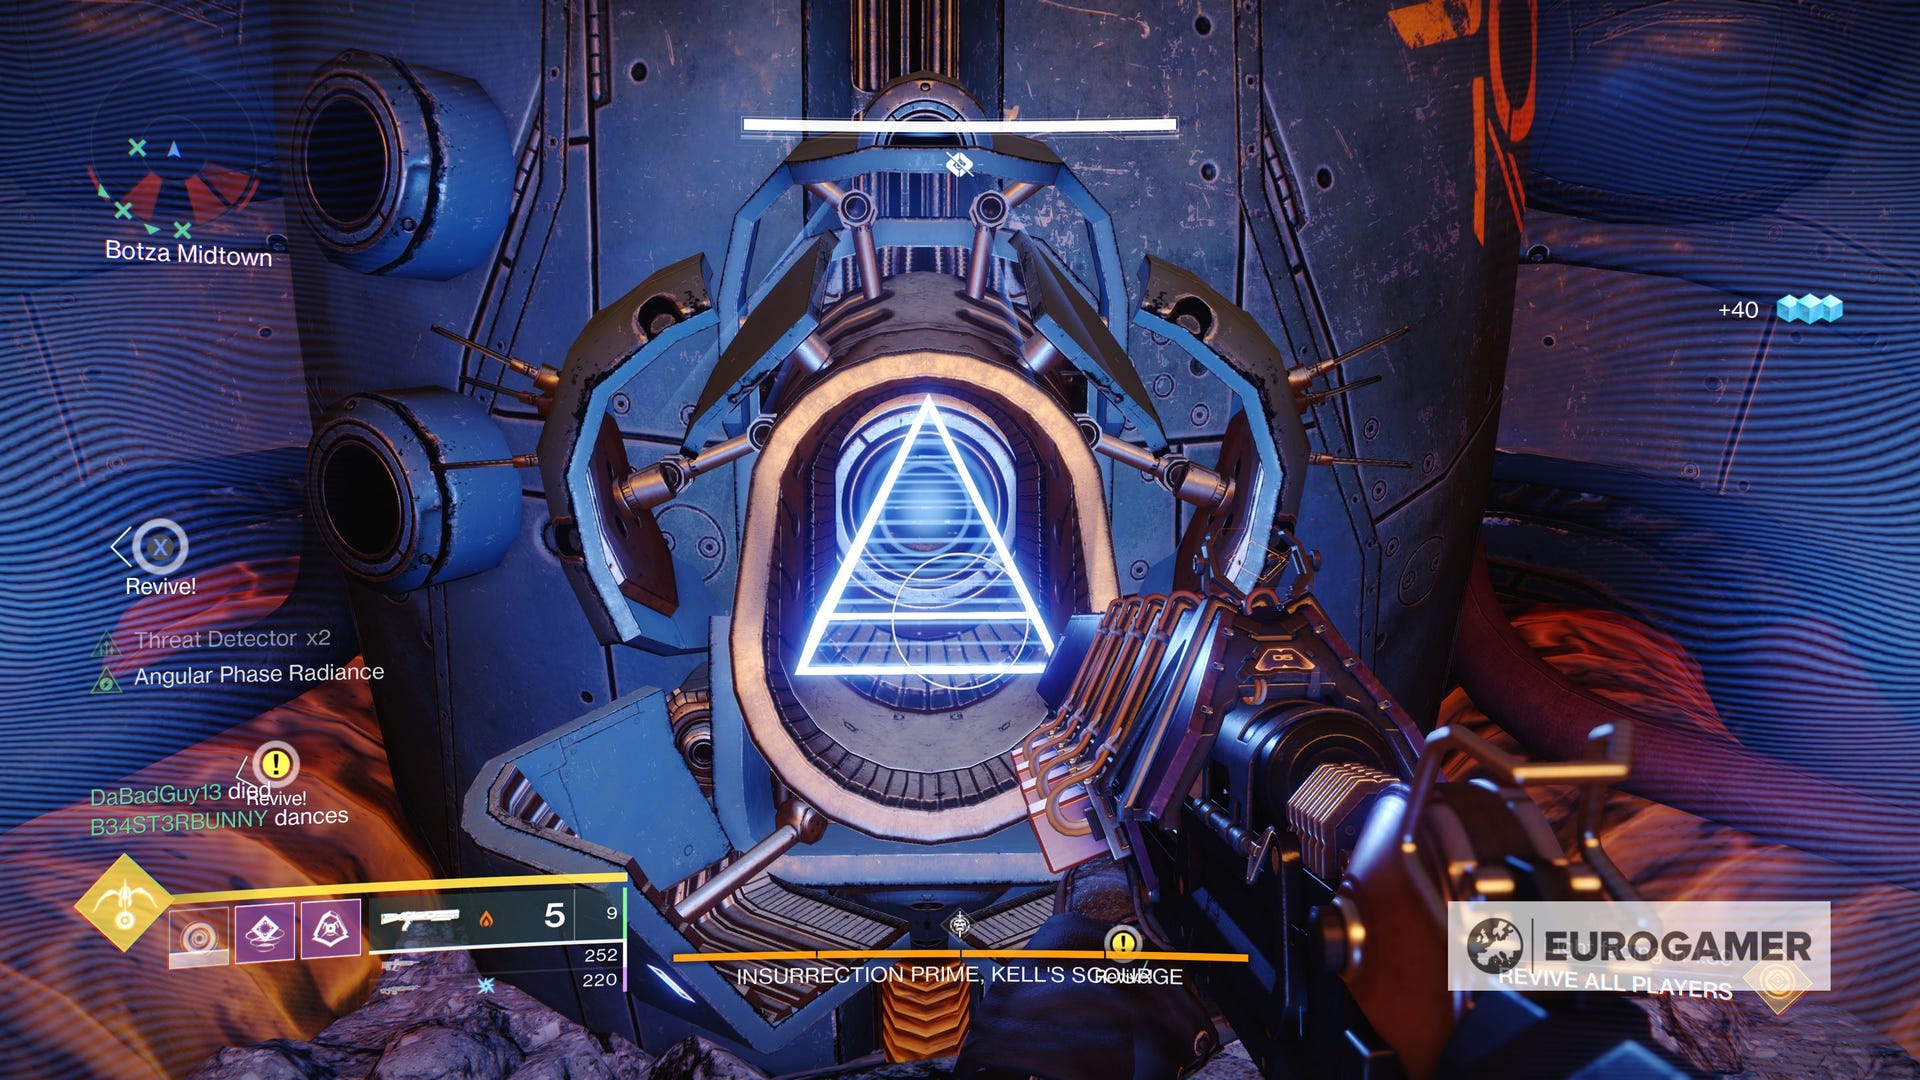
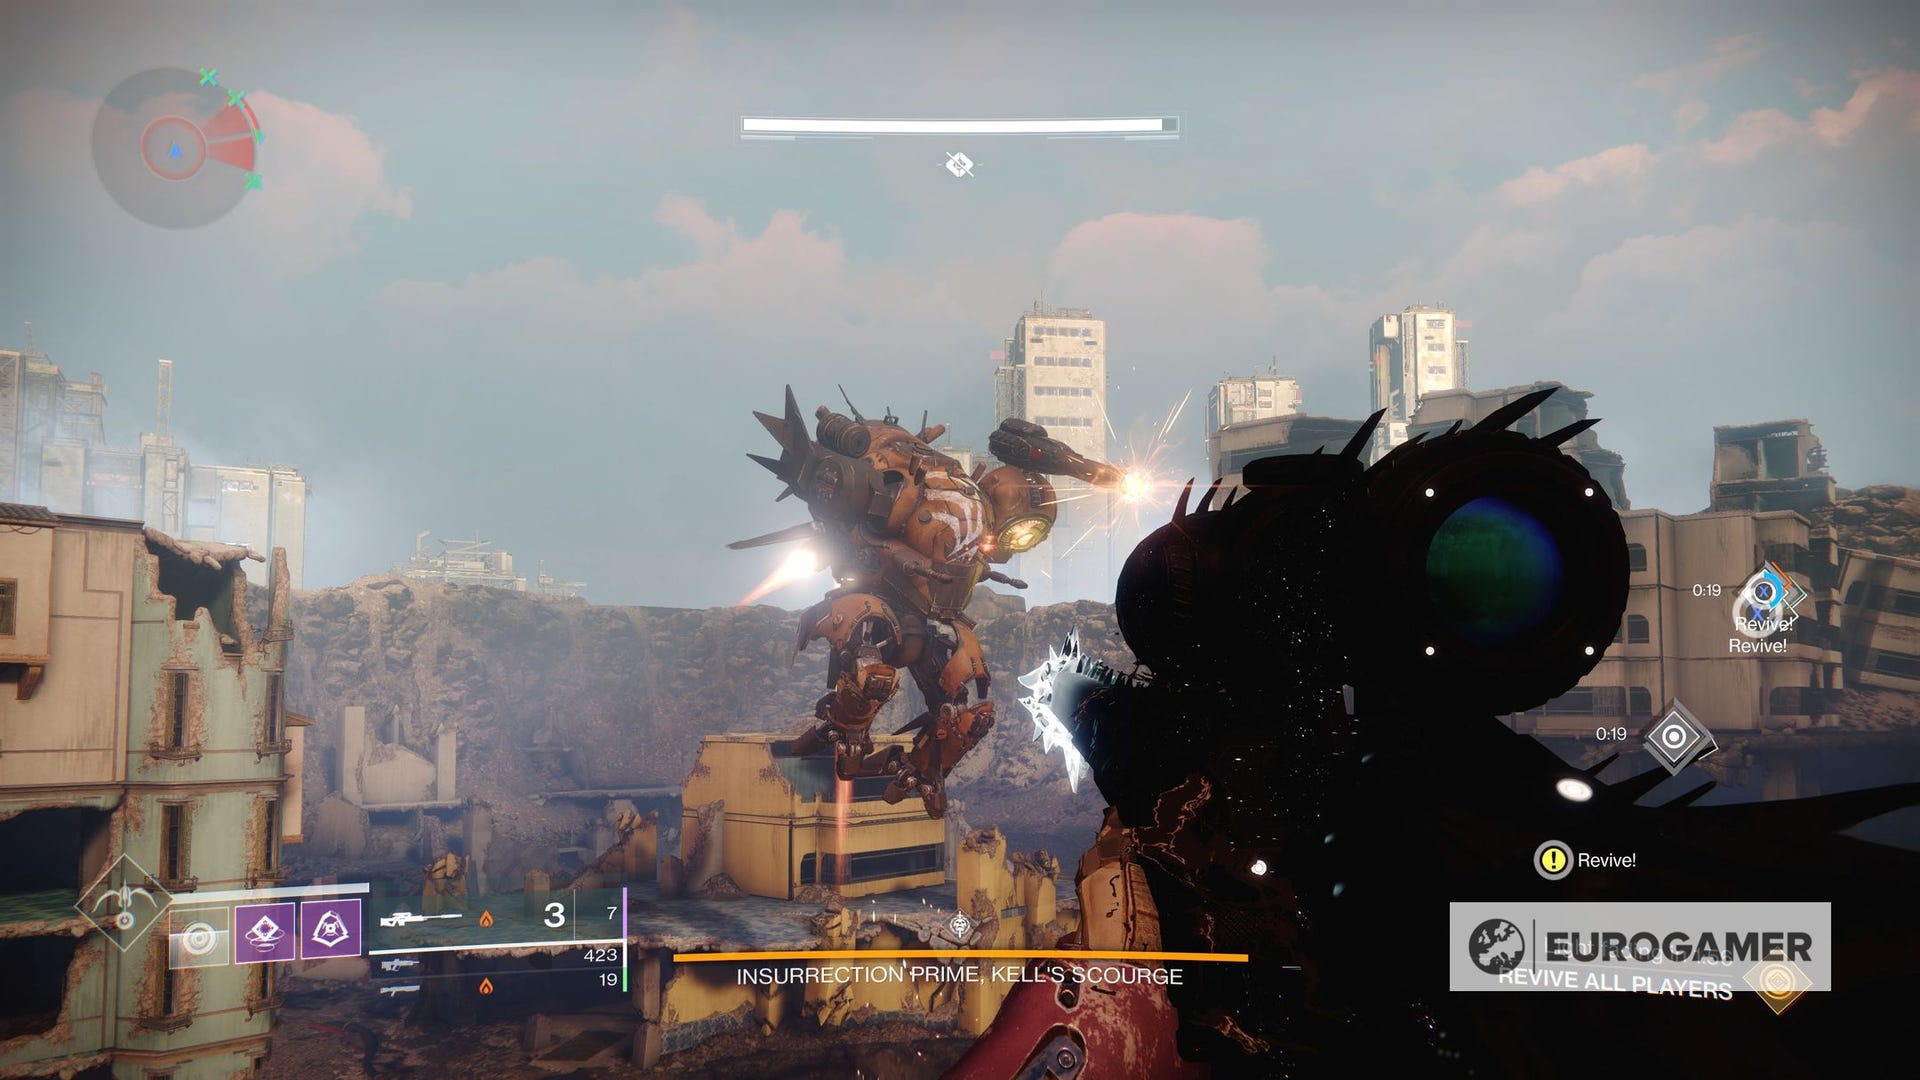
Regardless of what team you are in, all guardians will need to clear any enemies in their vicinity and shoot Insurrection Prime's weak spots to lower his shield. If there are any weak spots remaining when you spawn your tank, you will not be able to enter the damage phase.
Insurrection Prime's weak spots are indicated by six light blue tanks covering Insurrection Prime's chassis; a weak point on each knee cap, two on the back, one on the right should, and one under the left arm.
There are also additional red tanks that are attached to Insurrection Prime's weapons, dealing damage to these points will interrupt Insurrection Prime while they attack. So, if you aren't actively pursuing a Berserker to acquire radiant batteries or reading the map, you should try and take out at least one of these points.

Now that the formalities are out the way, it's time to start the encounter. To do this, your team need to kill the first Berserker. The Berserker can be found directly outside the map room and will be taken down in the same fashion as the first encounter by baiting him to exposing his cores.

After the Berserker is down, the map reader should pick up his core and place it in the terminal next to the spawn. The map will then spawn and indicate where a new Berserker is that's holding two radiant batteries.
All of these Berserkers are found in the structures on the outskirts of the map. The map reader should guide the first team of guardians to the position for them to kill the Berserker. When the radiant batteries drop, the guardians should pick the batteries with a stagger between each to allow the map reader to communicate what terminal they need to place them in.

While the first team are dealing with their duties, team two and the floating member of the map reader team should focus on destroying the sections weak spots of Insurrection Prime.
As the first Berserker falls, be aware that fallen snipers will spawn on the roofs of all four buildings in the centre of the area. Before team two starts to move towards their Berserker, they should try and defeat these enemies with the aid of the other guardian. Then it's time for the second team to work with the map reader to locate their berserker.
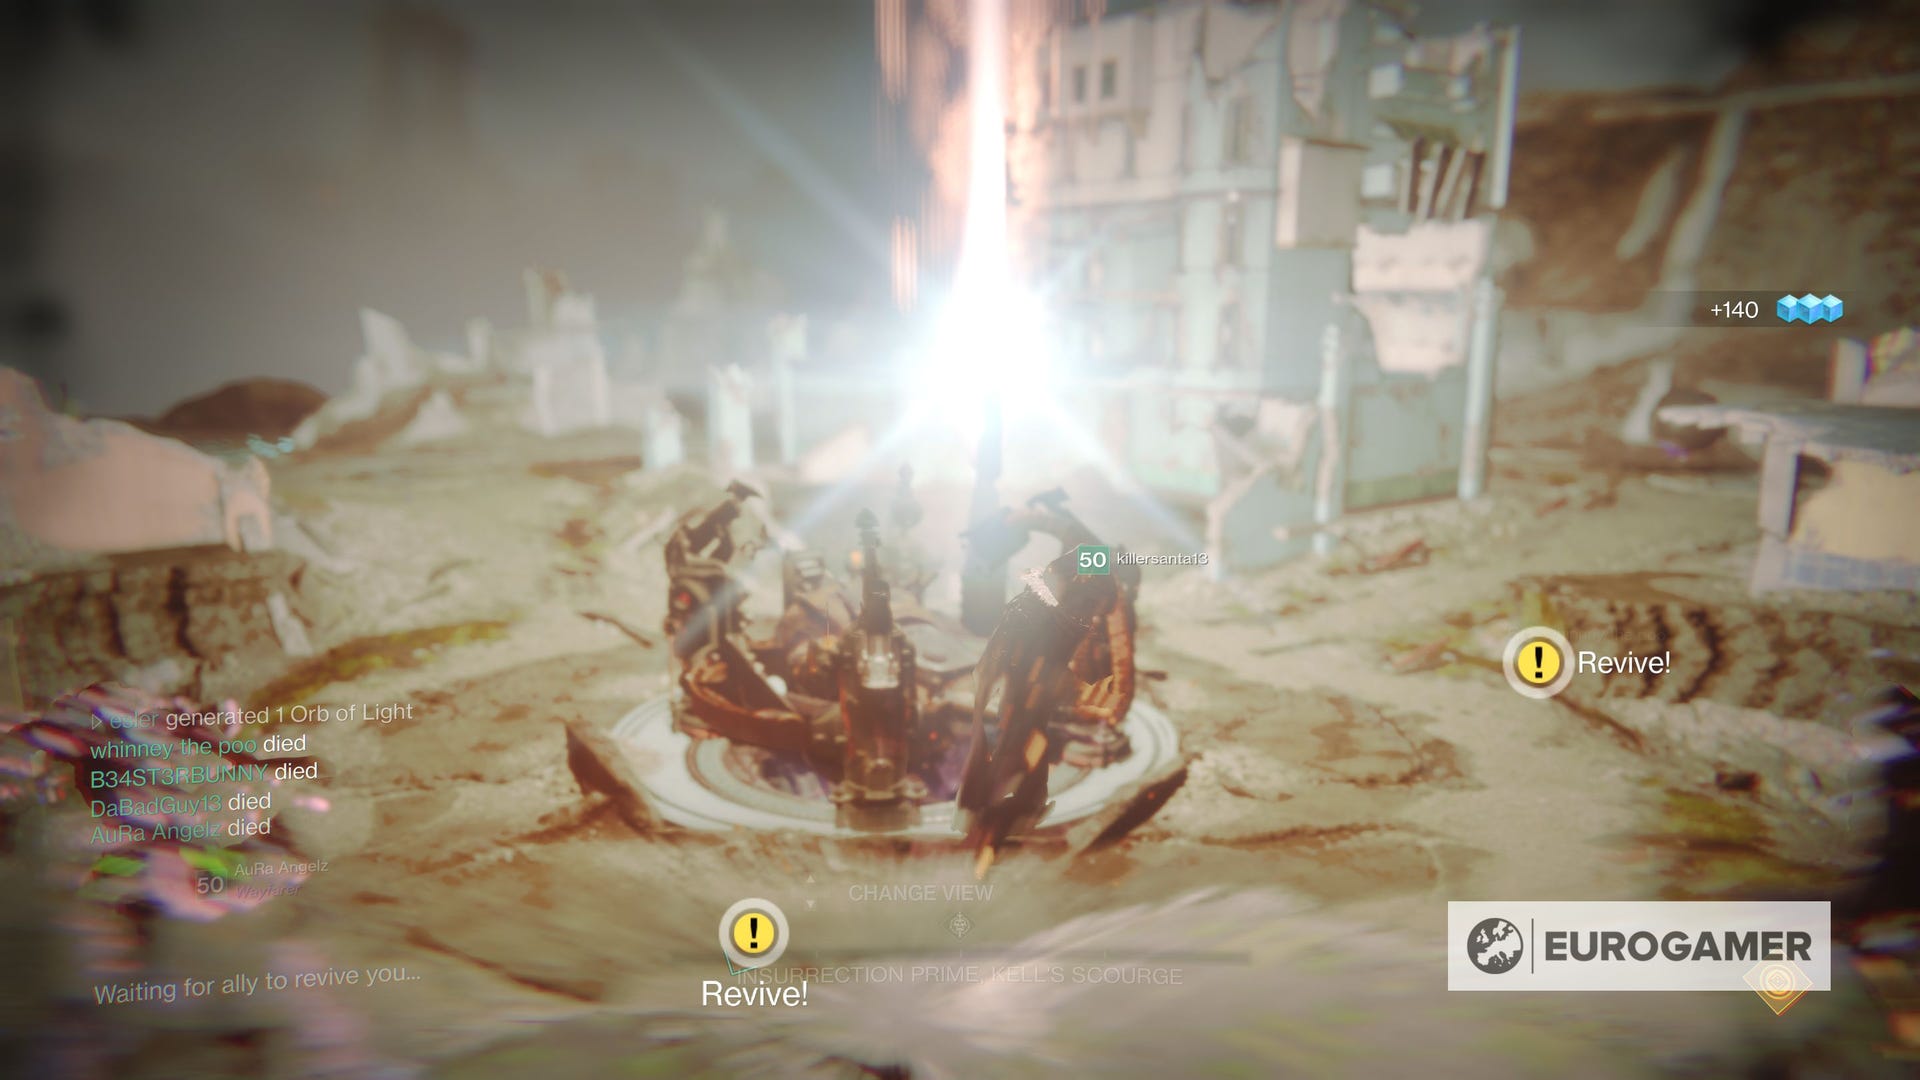
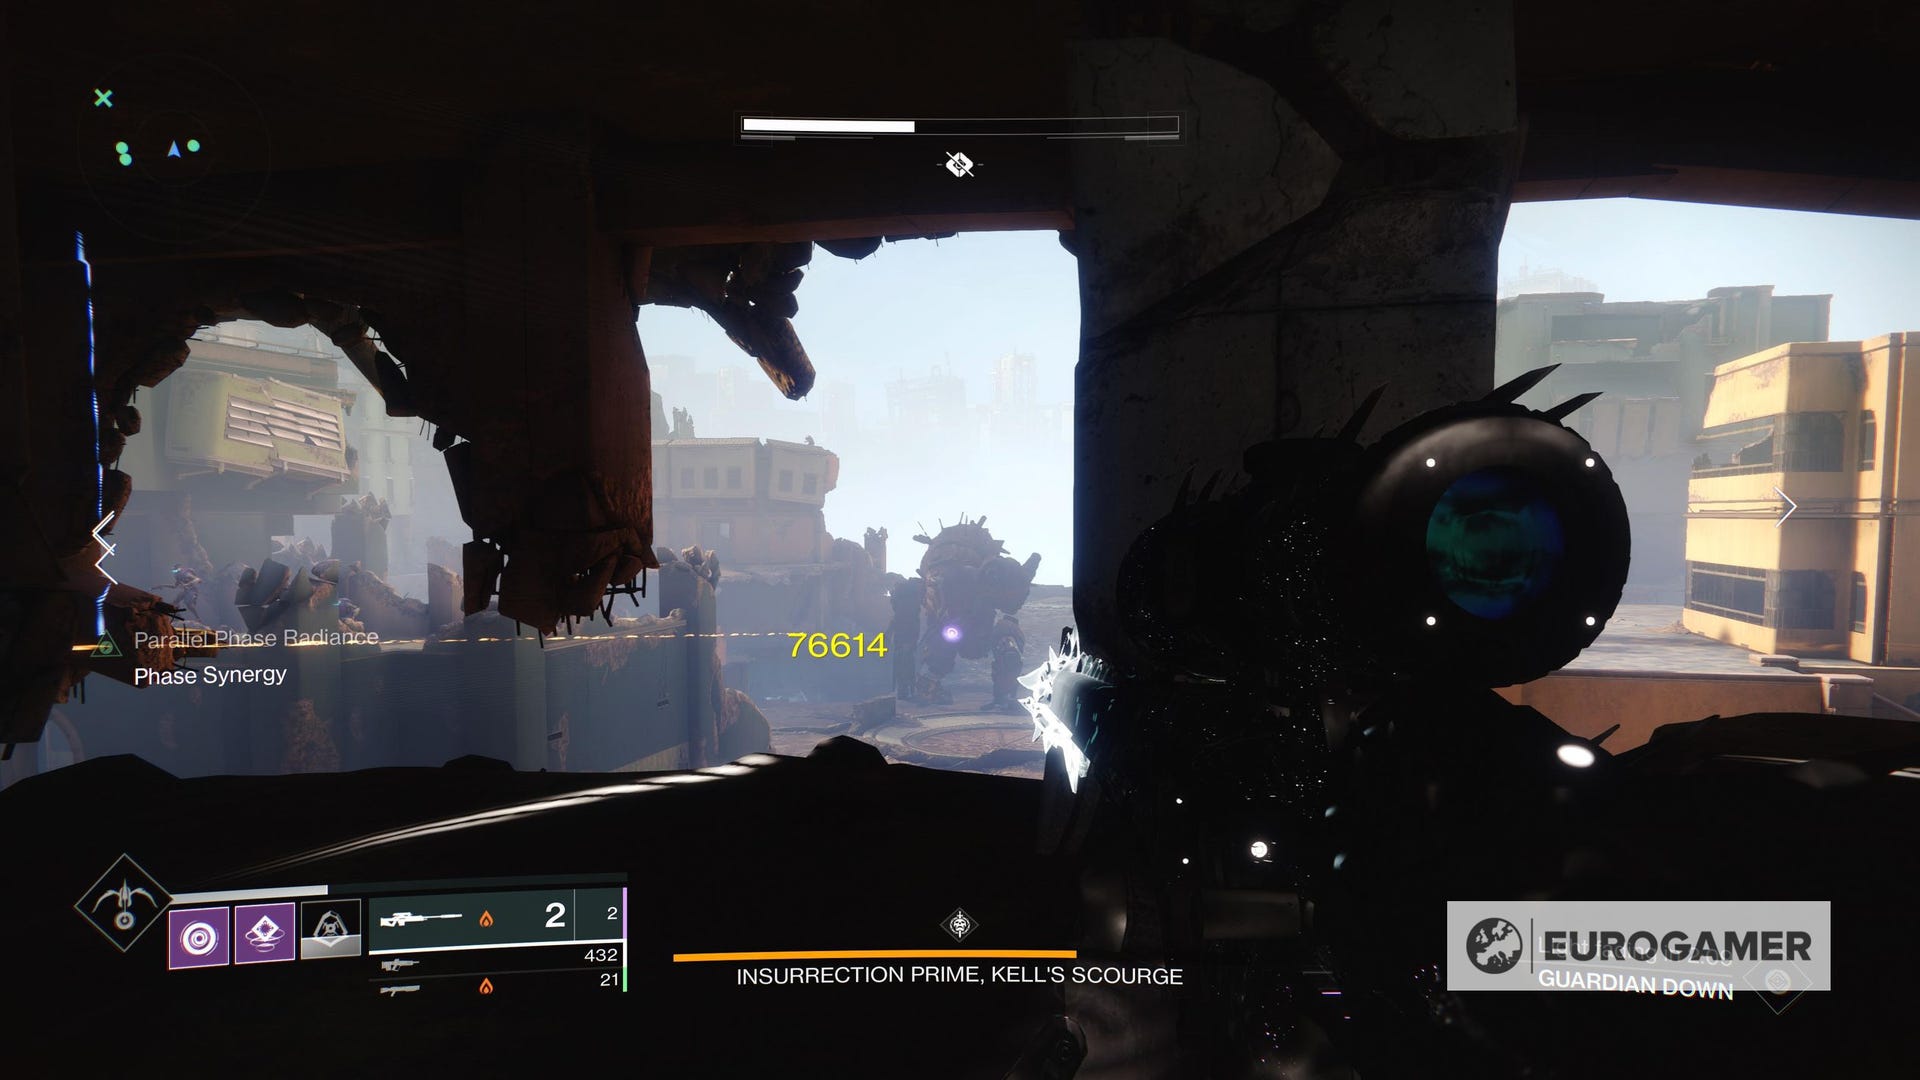
It's at this stage where the final battery deposited will spawn a drake tank. The player to deposit the battery should immediately get in and ensure that Insurrection Prime is facing the map room. Simultaneously, all the remaining players should converge on the map room and prepare for a damage phase.
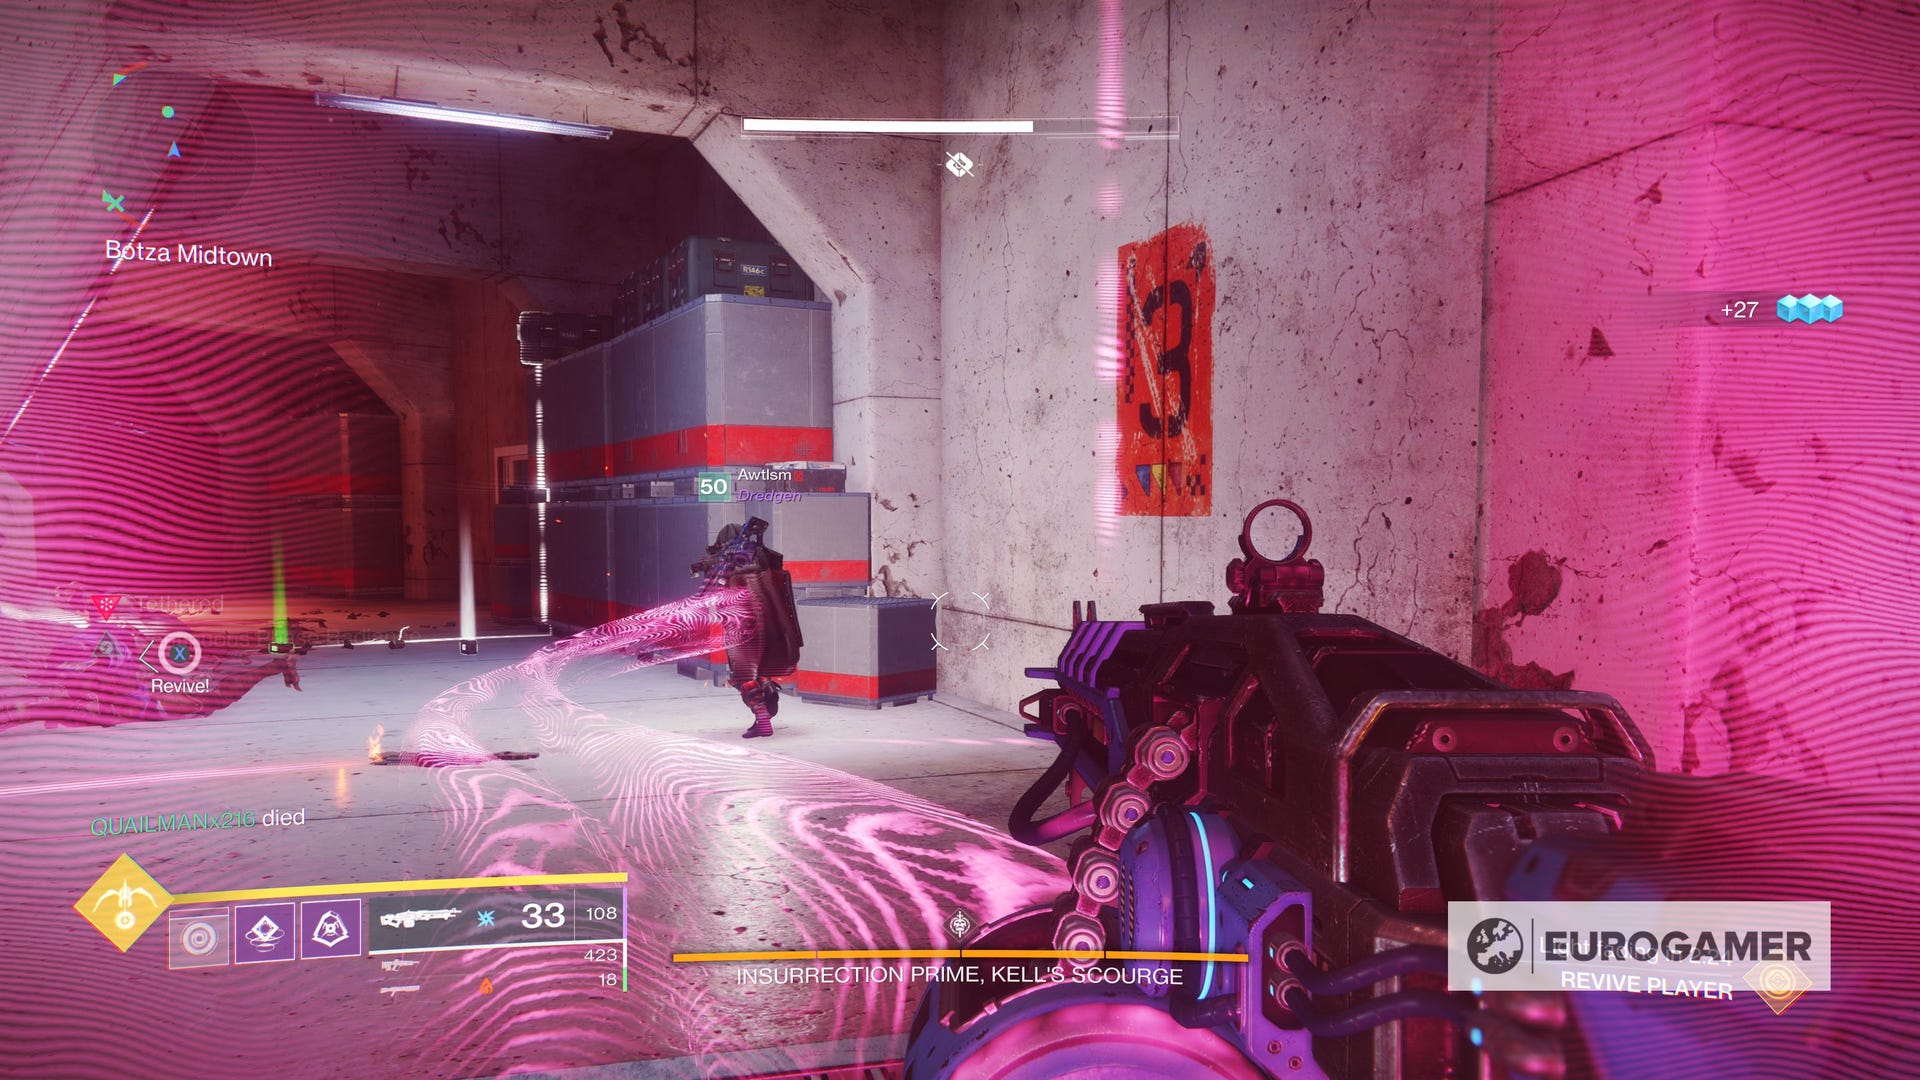
When the players are in position and Insurrection Prime is facing them, the guardian in the drake tank should shoot Insurrection Prime to begin the damage phase. The start of the damage phase is indicated by a small pink servitor type area becoming exposed. Players should unload as much ammo as possible at this stage. After a set period of time, a wave of energy will burst forth from Insurrection Prime and spread three different buffs between the guardians; angular, circular, and parallel.
It's now time to organise your team based on their buffs. If players with matching buffs are in close proximity and their aura doesn't overlap with those that do not match, they will receive a drastic damage buff. But, when players have an overlap with buffs that do not match their own, they will receive a debuff that reduces their damage and hurts them over time. This will happen twice per damage cycle.

The buffs can be extremely difficult to deal with and will make or break your encounter. Should players managed to negotiate the buffs correctly, they will be able to take down Insurrection Prime in two phases. The recommended strategy to ensure players are not overlapping buffs is to agree on a triangular formation with each point of the triangle assigned to one of the buffs in spawn.

It's recommended that one point is based at the door at the back of the map room, one point at the window to the front left of map room, and the final point of the triangle at the front right window. This allows all players to see Insurrection Prime if they are positioned correctly and provide cover against any enemies that spawn.

And on top of all this, the encounter is timed. After a set period of time, Insurrection Prime will notify the players that an attack has started. It's impossible to interrupt this attack after the message is displayed on screen, even with the tank.
Thankfully, when you do defeat Insurrection Prime it signifies the end of Scourge of the Past and it is time to collect your loot. All you gotta do is drop down the hole that Insurrection Prime previously occupied. Congratulations!
Now it's time to wait for the next weekly reset to do it all all over again!