Dark Souls 3 - Foot of the High Wall and the Curse Rotted Greatwood
How to kill the Cursed Rotted Greatwood, as well as a complete walkthrough for surviving the Foot of the High Wall region of Dark Souls 3.
Light the bonfire, then descend a short flight of steps. Along the battlements to your left is a corpse to pillage, so grab the soul and then continue downwards. About half way down there's a narrow ledge on the right.
Walk to the end of that and the dogs and zombies below will start fighting each other, which will make your job a little easier. When they've finished slogging it out amongst themselves, head to the bottom and finish the job.
To the left of the heavy wooden portcullis is a lever. Give it a tug and kill the dog that comes bounding out, then head through the archway. The small hut ahead and to the right contains the Undead Settlement bonfire, so light that and then head through the dilapidated town.
In the next building you'll encounter a number of speedy foes wearing hats. They can inflict bleed damage and spring from quite a distance, so it's easy to get mobbed or disorientated - stay away from the corners of the room if you can.
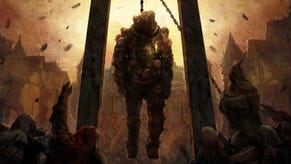
There's a corpse with some loot hanging from the balcony outside - cut it down and you can pick the item up from the ground outside later,. Around the corner on the balcony is more loot guarded by a scarecrow.
Once the building is clear, head out through the ground floor. To your left you'll see a large number of enemies but they're all preoccupied, so ignore them and stick to the right-hand side.
Turn right and cross the bridge where you'll meet two scarecrow types coming towards you. There are another two in the building ahead, and then a hat-wearer will drop from the ceiling in the next one along.
Once it's safe, open the doors, head outside, grab the goodies from the corpse up the slope to your right, then head the other way and over the stone bridge. Be careful on the other side as there are two zombies sleeping in front of some exploding barrels. There are also fire grenade throwers just ahead - a combination that can easily lead to injury or death.
Kill the enemy with the bucket attack!
Once past the barrel peril you'll meet a large enemy carrying a heavy stone bucket which he likes to pound on your head.
Either try and lure one of the grenading zombies into blowing up barrels as he passes, or take him on the old-fashioned way. Make sure you dodge back when he raises the bucket above his head, then dodge in and hit him a couple of times after his attack.
Head through the wooden arch out of the reach of the attackers above, towards another set of steps. Check behind the building to your left for loot, then head down the steps without attracting the attention of the enemies ahead.
Turn right and double back along the lower level and then turn right into the sewer entrance. Kill the dog and then descend the ladder to confront the RPG staple: Giant Rats.
Foot of the High Wall farming spot
In the cloud of mist ahead are a couple more of these massive rodents, and an even bigger one that will drop a Bloodbite ring. Climb the ladder on the right at the far end, open the metal door, and then cross the bridge to find the Dilapidated Bridge bonfire.
Through the broken stone arch ahead there's a heavy saw-wielding enemy with a quick attack that can induce bleeding. Dodge his blade and catch him from behind until the fight's over.
(This is another good farming location incidentally. Expect a rate of around 600 souls per minute, plus a decent item drop-rate available by running from the fire to the enemy and back.)
Survive the spear-throwing section
Head through the next archway and two more enemies will approach from ahead, before they're wiped out by large spears that fly in from stage right.
Once they're gone, the projectiles will start coming your way, and they have a fairly large area of effect - retreat for the safety of the arch until the barrage stops. Head towards the door again, and more enemies will appear.
Turn tail and run, as the spears will also deal with them. When the coast is finally clear, head for the door at a brisk pace.
There's an enemy just on the other side, but dodge past him before engaging, as fighting him in the doorway runs the risk of spear damage. There's a second enemy inside to deal with, plus a risk of splash damage from the spears - even through the wall. Keep your cool, pick them off and eventually things should calm down.
Head up the stairs at the back of the room and make a beeline for the building ahead. The area to the left contains a boss fight, so take a deep breath...
How to kill the Curse Rotted Greatwood
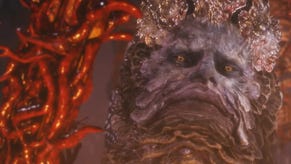
You'll be fighting a rather disturbing looking tree here, in a multi-stage battle spread across two locations.
Most of his attacks are heavy or area-of-effect, so shields aren't much use here. Concentrate on evasion and damage instead, and two-hand wield if you can. Due to the size of the boss, the way he moves, and the fact you need to target specific points on his body, using the lock-on camera is not recommended here.
During the first phase you can only damage the boss by hitting the white lumpy area between his legs, so stay out of the way until he sits down, then roll in and get off a few shots. His attacks at this point largely involve lifting himself up and squashing you if you don't get out of the way quickly enough, and your main threat comes from the loose zombies in the area.
At two-thirds health the lumps will burst and the centre of the arena floor will collapse. If you don't automatically fall in then just take a leap of faith - despite the size of the fall it'll do no damage to you.
There's now a larger cluster of white lumps to go at on his torso, so give them a few swipes while he's shuffling about on his bottom. He's now more mobile and makes a lot of wide sweeps with his arms, and if he grabs you with his central hand you're in trouble - keep clear until he's vulnerable.
When he gets to 50% health you need to concentrate on the lumps on his back. When he sits down violently, he'll now rock backwards bringing them into reach.
At one-third health it's time to concentrate on his extremities - first his left hand and then his right elbow. Tracking them is important, so keep your distance and try and predict which way he'll fall, so you can close in without getting too close.
Once he's down light the Pit of Hollows bonfire and loot the area.
Return to the Dilapidated Bridge bonfire, cross the bridge, enter the sewers and head left. Deal with the rats you come across, and then climb the ladder. There will be a number of enemies on patrol outside, so you can either wait them out or tackle them head-on before crossing the stone bridge ahead.
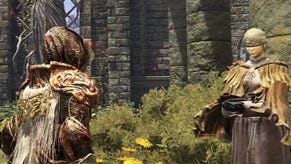
A scarecrow and three heavies occupy the ground the other side, so lure them out one at a time, then deal with the hounds hiding behind the building on the raised area to the right. Once it's clear, head into the next area, talk to the creature sat on the wall, and then push your way through the heavy doors into the church.
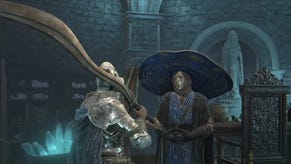
As you enter, the lift will disappear and then return carrying a rather eccentrically-dressed fellow. Talk to him twice to get the full story, then get on the lift. There's a single very tall and spindly armoured enemy in here who deals cold damage in addition to physical.
Once he's been dealt with, open the door to enter Road of Sacrifices.
- Our walkthrough continues with a step-by-step guide to completing Dark Souls 3's Road of Sacrifices and the Crystal Sage sections.
- Alternatively you can find the rest of our Dark Souls 3 guide from the first page of this article.


