Dark Souls 3 - High Wall of Lothric and Vordt of Boreal Fire
How to kill Vordt of Boreal Fire, along with a complete walkthrough for making it through the High Wall of Lothric section of Dark Souls 3.
Head forwards and talk to the Firekeeper. Before levelling up here, it's worth heading through the archway behind the NPC and talking to the shopkeeper who can be found just inside the entrance.
This will help you get an idea of the cost of items, and as Souls are used both to level up and to buy things you need to carefully weigh up your options. At this stage levelling up, is probably more important, but it's entirely a matter of preference.
The man with the beard by the forge can upgrade and repair items, so have a quick chat with him before returning to the central area and talking to the rather sad looking fellow on the steps. Now stand next to the dead bonfire in the centre of the area and activate it, then rest.
Finally, select Travel and head to the High Wall of Lothric.
You'll arrive in a small circular room. There's nothing of interest here, so open the door ahead of you and go down the steps. Light the bonfire, then head down the narrow steps behind it to an area filled with zombies. They don't take much killing, and most of them will pay no attention to you, so simply clear them out and push on.
Once inside there's a snoozing zombie to the left, an armoured zombie lurking behind some crates, and some remains to pillage hidden behind a table. Once the room is clear, climb down the ladder and head through the bars and back outside.
Just through the door you'll encounter an archer and a spear zombie - try and take them out as quickly and as close to their starting location as you can, otherwise the archer heading towards you may spot you and join in.
Head about half way up the steps to your left and wait. The dragon sat on top of the walls will wake up and lay fiery waste to everything on the upper level. Once he's calmed down, return to the bottom of the stairs and head for the zombies patrolling the far end. When you've got their attention, retreat and let the dragon deal with them for you.
Wait for the flames to subside again and then dash for where steps where the zombie patrol was - with any luck you'll avoid getting burned to a crisp. (If you wake the dragon and then die he'll still be flaming when you next enter the area, so be careful.)
Light the Tower on the Wall bonfire
Once you're out of reach of the flames, head up the short flight of stairs and take out the three sleeping zombies. A knight will follow you up the stairs, but if you stay out of sight he can be avoided if you'd rather not fight him.
The metal bars can't be opened from here, so head through the open archway. Immediately to your left is a hooded zombie with a very quick leap attack, so be ready for an ambush. Head through the door to the right of where you entered and go up the stairs to find Tower on the Wall bonfire, and don't miss the corpse hidden behind the corner on the far side of the tower.
Head back downstairs, but don't forget that if you rested at the bonfire the enemies will have respawned! Walk out onto the beam and pillage the corpse, then perform a drop-attack onto the patrolling zombie below. There's another hooded zombie with him, so dodge as soon as the first one is down to avoid his leaping blow.
The next ladder leads to a dead end as you don't have the requisite key, so ignore it for now and head through the archway. Go up the steps and take out the two oblivious zombies, then watch for an armed one climbing over the wall behind you, as well as an armed one rushing from the ladder. Use an Estus if you need to, as you're about to encounter a tougher enemy.
Kill the patrolling knight
Climb down the ladder, cross the roof and, approach the zombies. Most of them are harmless, but the one on the top of the roof has a trick up his sleeve - if you don't kill him very quickly, he will transform into a smaller version of Iudex Gundyr.
If that happens, either brave it out and try and dodge his attacks where you are, or retreat to the top of the ladder you came down and throw a few firebombs at him if you've got them. It takes five or six of these Molotov cocktails to get the job done, and his attacks can still occasionally reach you - still, it's a much safer way to deal with the threat.
Carry on across the roof and turn left at the ledge. Pillage the corpse, and then keep an eye out for a small shiny creature - it moves quickly but doesn't attack, and killing it will drop a raw gem. Climb down the ladder from the wooden platform. Directly ahead is an archer, and around the corner there's another one, followed by two more creatures that will climb up to greet you.
From here you can either climb down the next ladder, or head back round the corner and through the building you just climbed over. It's a bit tough for you down below right now, so head through the building where there's another patrolling knight.
Wait for him to start walking away from you, then run in and through the arch to the left. Kill the archer inside, tackle the zombie that rushes from behind, and then take out the one in the next room before he attacks. Make sure you loot the remains.
Head back towards the knight room, but before you go in smash the pots to your right, kill the zombie that was hiding behind them, and then pillage the corpse.
Stay out of sight until the knight has his back to you again and grab the opportunity to get a critical hit in from behind. He has a spear and a very effective shield, so roll to your right (his left) in order to avoid his attacks, and when he lunges simply roll in and make a couple of quick swings.
Once he's down, head into the dingy corridor. Immediately to your right is an alcove blocked with a wagon wheel, barrels, boxes, and so on. Smash your way in and then head to the far side of the room to loot the corpse.
Back in the corridor, watch out for the zombie in the archway to your left, and head to the end, down the steps, and back inside. Before heading to the main floor, take a detour along the wooden walkway to the right, take out a couple of snoozing zombies, and then loot the chest.
There are three medium sized zombies with long-reach weapons, as well as two zombie dogs in the area below. If at all possible you want to avoid them all attacking at once. Wait until the patrolling dog is close to the bottom of the steps, run down to grab its attention, and then retreat a little to get it to follow you before killing it.
Next, the zombie that wanders in and out of the archway opposite the door can be tackled without alerting the others if you time your approach. The zombie that isn't patrolling up and down the stairs can be lured out onto the same balcony, leaving you with a single foe patrolling the area. Attract his attention to lure him away from the steps, as the second dog is down there and may come and join the fight. Finally, head down the short flight of stairs and kill the hound.
Collect the Estus shard from the table on the wall, grab the key from the corpse that's on the short flight of stairs, pillage anything that needs pillaging, and then head back towards the bonfire. You probably need to level up by now and you've got an Estus shard, so travel to Firelink and get yourself sorted before returning to the Tower on the Wall.
Kill the zombies and knights on the way to the second boss
Head down the stairs into the tower. A knight will begin leaving the room as you enter, and the speedy zombie will be back, so it's safest to wait for the knight to be out of sight before you enter the room.
Take out the zombie, head downstairs and deal with the two in there, and then drop down the ladder and deal with the halberd-wielding zombie below. The metal door is locked, so head through the arch into the next room.
To your right is a corpse to pillage, and ahead is another zombie who may throw incendiary grenades at you. Through the next arch there's a zombie to the left and more remains to be pillaged. Head down the next flight of stairs, unlock the door, speak to the strange man inside, and accept his quest.
Retrace your steps up the first ladder, then back out through the arch. Cross the roof again, climb down the ladder, take out the archers and his friends again, and this time descend the ladder. As you climb down you'll see a dead, rather large-looking body with spears sticking out of it.
When you reach the ground be careful - a couple of those corpses aren't quite as dead as the others and will attack you, so get in a pre-emptive strike or two if you can.
Head through the short tunnel to meet the source of all the dead bodies. He's not quite as tough as he looks, but he is surprisingly nimble. As with most long-reach enemies the trick is to stay out of range until he makes an overhead swing, dodge into him, strike quickly, and then retreat.
Once he's defeated check the area for items to collect - the corpse next to the item in the drain is also not as dead as it looks so swipe at it before it has a chance to attack - then head into the next area. It doesn't appear to have a name, but as we'll be back here later we've christened it Knight Garden.
There's an archer on the stairs to the right as you enter, so dodge the incoming fire and deal with him, then quickly turn around as another zombie will be attempting to rush you. When it's safe to do so, head up to the top of the first flight of stairs, then take a right to find another body to scavenge from.
Head back to the main staircase and continue upwards. When you reach the top you'll find another zombie patrolling, and as you approach him some more will appear over the walls.
Once cleared, head into the small building ahead and step on the lift. When it reaches the top, pillage the corpse then peer through the door. Keep an eye on the zombie on the stairs, and when he's out of sight open the door and turn to your left to face a just-woken enemy. Now wait for the patrolling one to return.
Now this path is open you can head straight back the way you came, but if you need a bit of a recharge then the High Wall of Lothric bonfire is nearby. Head up the stairs, but be careful of the archer above and to your right and the pack of patrolling dogs at the top.
Head to the right to return to the fire and get some rest, and return to Firelink if you need to level up, buy supplies, or do any other housekeeping. When you're done, retrace your steps to the lift - remembering as always that if you've rested then enemies will have respawned.
Either way, make your way back to the entrance to Knight Garden. From the entrance, head down the steps to the left and then straight across. There are two knights patrolling the area, so make your move when they're heading away and wait at the bottom of the short flight of stairs opposite.
There's a solitary knight patrolling here, so wait for him to turn his back before attacking to get in a critical strike if you can. Pillage the corpse, then head down the steps at the far end and enter the door to your right.
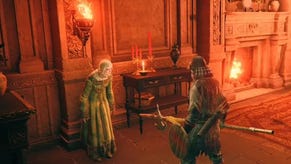
Talk to the woman sat on the throne to collect a banner, then double back towards the garden entrance, this time descending the long set of stairs on your left. There are two spear zombies on the steps and an archer to the right, so secure the area and head through the portcullis into an ominously open area.
Walk towards the large double doors at the other end to trigger the second boss encounter.
How to kill Vordt of Boreal Fire
This boss has assorted sweep and jump attacks, and can launch a series of concentrated blows at you. He also possesses the ability to inflict cold damage and slowdown debuffs in addition to physical damage. As with the first boss you faced in the game, the fight consists of two phases.
During the first phase, his attacks will all be made at short range, although he will leap in from a distance to get this damage in. Watch for the telltale sign of him squatting, then dodge-roll towards him when he leaps. This should leave you nicely positioned behind him when he lands, allowing you to get in a number of swift attacks from a position of relative safety.
At 50% health he adds a long-range ice-breath attack that can cripple you, so keeping your distance at this point is absolutely crucial. While he's breathing ice you have ample time to down an Estus if you need it, but if you get caught in the blast you may find yourself in deep trouble.
As with the first phase, wait for him to leap towards you, then use his momentum to get behind so you can start chipping away at him.
Once the boss is dead, light the bonfire and return to Firelink to attend to any levelling up, shopping, and weapon upgraded tasks you need to complete, and then return to the previous area. Stand on the end of the crumbling path and raise the banner to travel to Foot of the High Wall.
- Keep reading for our guide to beating Dark Souls 3's Foot of the High Wall and the Curse Rotted Greatwood encounters.
- Head back to the first page for the rest of our Dark Souls 3 guide.


