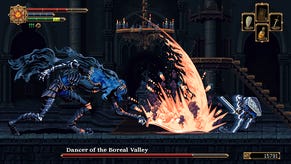
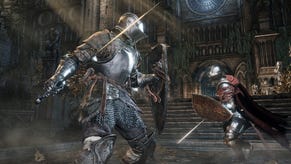
Dark Souls 3 - Kiln of the First Flame and Soul of Cinder
Here's our strategy for killing the final boss, Soul of Cinder, whom you'll find in the Kiln of the First Flame area of Dark Souls 3.
Place the ashes you've gathered on the empty thrones around the Firelink bonfire. The Firekeeper will move towards the bonfire, so drop down and speak to her, then interact with the bonfire. Head outside and use the bonfire to the left to teleport to the final location.
Light the new bonfire, take a deep breath, and head up the slope. As you approach the centre of the ash-strewn area, the final fight will begin with Soul of Cinder.
This guy is, unsurprisingly, no pushover. He switches tactics frequently, deals a lot of AOE fire damage - and just for good measure, you need to kill him twice.
Phase 1: He's got five sets of moves to call on here, each with its own strategy. You can tell when he's about to switch tactics as he'll drop to his knees - this provides you with a small window to get in some hits unchallenged, but as soon as your stamina gets low use the last bit to roll away, as you don't want to be anywhere near him when he stands up.
Fire sword. He'll start with this, and generally sticks to making regular slashes and thrusts. If you've got a shield with good physical and fire damage reduction then you can attempt to block. Otherwise you'll need to evade and roll in between his combos to deal a bit of damage before retreating.
2) Lance. Here he'll largely stick to overhead and charging attacks. Dodge-roll to the side, keep moving, and whatever you do don't let him hit you head on.
3) Pyromancy. Here he deals AOE blast damage, throws fireballs, and whips out a flaming scimitar to rain fiery vengeance down upon you. Keep your distance, choose your moments carefully, and watch your stamina - even when you manage to get behind him, he can turn quickly to throw a fireball, so always try and keep enough in reserve for a dodge-roll or two.
4) Staff. This involves a lot of crystal attacks, but as most of them are long-range it's a good opportunity to stick close and deal more damage. Just make sure you keep enough stamina in reserve to retreat when he charges his magic sword.
5) Miracles. During this phase he may heal himself a little, but he's slightly less aggressive so, again, you can risk getting closer. If he starts to curl up, then dodge back quickly as he'll unleash a short-range blast attack that can deal massive damage and knock you to the ground.
Phase 2: Once his health is gone, put some distance between yourself and him - his HP will fully recharge and he'll be back with a new set of moves, opening with a very wide AOE blast.
His movement is slightly slower now, but it's important not to get greedy: as always,dealing a small amount of damage a lot of times is a much safer strategy than trying to take huge chunks off. (If you've played the original Dark Souls you'll instantly recognise him, and that may give you a tactical edge.)
Aside from standard slash and thrust sword attacks, he has a series of five-strike combos that end with him slamming his sword into the ground for a fire AOE attack, and you need to avoid getting hit by these at all costs.
If he catches you you'll end up being juggled and stunlocked, and the AOE blast at the end can be fatal. Luckily, it's easy to see the combos coming as he'll raise his sword slowly before he starts, so when you see him winding up for one, get out of harm's way as fast as you can.
Pay close attention to his left hand, as he has a nasty grab attack that can spell death. If he draws it back slowly, put some distance between you and him.
Finally, he has a couple of ranged spear attacks. Spears launched directly at you can be sidestepped, and when he throws them up into the air it causes an AOE effect when they come back down, so roll clear of where you were standing when he launches them.
When the battle is over, make your choice. Congratulations, you're done!
- Keep reading for our guide to the basics and the best farming spots in Dark Souls 3.
- Head back to the first page for the rest of our Dark Souls 3 guide.


