Dark Souls 2 - Drangleic Castle, location, Castle bonfire
Those terrifying Sentinels are back in the Drangleic Castle section of Dark Souls 2. Read our guide to beating them, and grabbing some new loot.
If you've lit your fourth primal bonfire, you're ready to make the perilous journey towards Drangleic Castle. We'll help you find the intimidating building in this section of the walkthrough, and show you how to snag a few handy bits of loot on your way there.
How to find Drangleic Castle
After killing the Old Iron King, make your way back to the Shaded Woods' Ruined Fork Road bonfire. Now take the stairs to your left and go through the door on the left-hand side. There are four enemies up ahead that you'll need to kill as you make your way down the path. Veer left when you pass beneath the stone archway, then kill the two enemies ahead of you. Carry on towards your left to loot a Soul of a Proud Knight and a Ring of Life Protection.
Make your way back down the path again, and kill the enemy when you come to it - it pays more than a little resemblance to the Flexile Sentry from the No-Man's Wharf region of Dark Souls 2. Fortunately, this new creature is a good deal easier to kill, but watch out for the weaker enemy hanging around nearby.
We recommend backing up a little to separate yourself from this smaller opponent, killing it, then getting back into range to kill the Flexile Sentry-like enemy. To make life easier on yourself, either fight it from range as much as possible, or simply block its relatively feeble attacks before counter-attacking.
Go to where the enemy was standing and then take the Golden Falcon Shield and the Dragonslayer's Crescent Axe. Now take the path on your left until you arrive at the Shrine of Winter. Go up the stairs here and open up the door in front of you.
Walk through this room and then carry on down the path ahead of you. Now take a right until you come to a Large Soul of a Lost Undead and a Repair item. Next, travel in the opposite direction until you've picked up a Divine Blessing from the left-hand section of the path. Carry on along this path and kill the white knight on your left to gain a Heide Lance.
Keep travelling down the path and grab a Human Effigy and a Large Soul of a Nameless Soldier, then enter the tunnel ahead of you. Make your way upstairs and kill the three enemies hovering around the middle of the stairway. Once they're dead, go all the way up to the top, and move around the massive boulder here to get a pair of Holy Water Urns. Keep heading to the top of the stairs to enter Drangleic Castle itself.
Drangleic Castle guide
Walk down the path and kill the crystal bug nice and quickly to get a Titanite Slab and a handful of Titanite Chunks. Talk to the woman at the bottom of the stairs, then go up them until you reach the top.
Be ready for the statues up ahead to come to life as you approach them, and there are four more enemies to deal with just a little further along. We recommend killing the statues first, then making your way further up the stairs to engage the larger pack of opponents.
Once inside the castle proper, go up the stairs and have a chat with Chancellor Wellager to learn a new gesture - This One's Me - and also have a mooch through the store for any handy items. Go back downstairs now and travel around to the left. Kill the enemy you come to, then make your way into the next hallway. Lure back each of the enemies hovering up ahead one by one to make the overall fight a little more manageable.
Go through the door on your right and kill the pair of enemies lurking in the next room. Now climb down the ladder, open the door at the other end of the room below you, then walk through the next door along to light a bonfire. Now head out of the room and take a right, but be ready for the statues by the doors to come alive. Kill them all, two at a time.
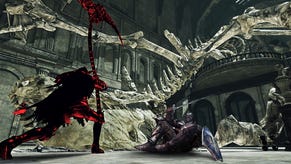
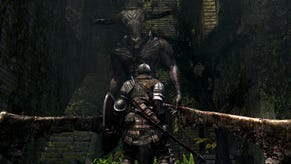
Behind each door lurks a mighty Sentinel, just like the ones you faced in the Lost Bastille. Yes, those guys. The middle room on your left has a Pharros' Lockstone in it, which is well worth grabbing, but watching out for the final room on your left as the floor will collapse if you go too far into it. You can head down there to get a set of Faraam armour if you wish, but you'll need to be able to return to a bonfire afterwards. Unless you're wearing truly dreadful gear, you shouldn't really need this hard-to-get set.
How to fight the Sentinels
"Make sure you take off all your equipment before passing through the [acidic] pool. If you don't, your gear will rapidly deteriorate."
In terms of clearing the rooms, the sensible thing to do is lure each Sentinel out into the much bigger main room one by one, and finish them off with a little more movement space to hand. Repeat the process of looting and killing with the right-hand set of rooms, and make sure you loot the coffer in the centre-right room - there's a Mastodon Greatsword inside it. You can also get a Royal Soldier's Ring +1 from the final room on the right - it's in a chest.
Go through the first door on the right-hand side of the room, then go around the corner until you're in a new room altogether. Open up the chest in here to get 15 Dark Arrows, then make your way upstairs to get a Monastery Charm, a Soul of a Hero, and a handful of Old Radiant Lifegems. Once you've got all these items, make your way up the stairs.
Go all the way upstairs until you find yourself in a room with a pool of acidic liquid inside. Just to the corner of that pool, by the stairs, is an Elizabeth Mushroom. There's a chest in the corner that contains some Corrosive Urns, but make sure you take off all your equipment before passing through the pool. If you don't, your gear will rapidly deteriorate.
When you've finished looting, make your way upstairs, and then go through the doorway and into the next room. Kill the enemy inside, then go around the corner and up the stairs. Go through the door that's ahead of you, but watch out for the faces on the wall of this new room - they fire darts at you. Inside this room, you'll be able to loot a Twinkling Titanite and a Soul of a Brave Warrior, so grab 'em all, then go to the door in the corner. Use your shield to avoid the worst of the dart damage.
Go upstairs and then kill the trio of guards waiting for you in the room above. Go through the next door along, take a right, then go upstairs and kill the enemy at the very top. Walk down the next hallway, kill the enemy you find, then go back to the entrance until you see a ladder. Climb all the way down it, kill the enemy waiting at the bottom, then walk around the corner and take the Soul of a Brave Warrior from the ledge.
Go down the next ladder along, and then open up the coffer beneath you to get 20 Iron Arrows and a Hunter's Blackbow. Climb back up both of the ladders you just came down, then take the stairs to your left.
Turn right when you get to the top, then enter the room on your left and talk to Nashandra, Queen of Drangleic. Take the passage on your right to leave the room, then travel down the path and into the misty patch to start a fight with a pair of Dragonrider bosses.
The first page of our Dark Souls 2 walkthrough will help you find guides for even more bosses.


