Dark Souls 2 - The Shaded Woods, fog, scorpion, frog, joy gesture
Lost in the fog of the Shaded Woods? Follow our guide to surviving this area, killing every creature, and grabbing all of that lovely loot.
The path to the Shaded Woods is only a short one, but there are some really useful items to grab if you've got a spare Fragrant Branch of Yore about you. We'll walk you through this brief section of the game, and get your prepared for the woods ahead.
How to find the Shaded Woods
There's a path just to the right of the one that leads to the Forest of Fallen Giants. Start walking down it, and then talk to the man called Benhart at the very end of it. He'll tell you all about the statue located in the structure ahead. Go into it, and then use a Fragrant Branch of Yore to reinvigorate the statue. We've taken you to two of these at this point in the walkthrough - one from the Gutter, and one from Sinner's Rise.
Now talk to Rosabeth to get hold of a Prism Stone. If you carry on talking to her, she'll even open a pyromancy store you can use. Have a rummage through your inventory for any unnecessary armour that you can trade with her to make the store appear permanently in Majula.
Now pull the lever that she was blocking earlier on. When you do so, you'll be attacked by a swarm of enemies from the rear, so be ready to kill them all as quickly as you can.
How to unlock the joy gesture
Once all of your opponents are dead, talk to Benhart to learn the joy gesture, and then pass through the doors that have just opened up. Go into the room, and then open the door over on the far right. Open the coffer inside to get hold of an Estus Flask Shard. Now go through the door over on the opposite side of the room to light a bonfire.
After you've lit the bonfire, make your way upstairs, then leap over to the left-hand side to find an enemy. Once it's dead, take the Human Effigy and the Soul of a Proud Knight by the second door. Now jump to the other side to find yet another opponent, as well as an enemy by the Broadsword at the second door.
Interact with the lever by the entrance at the bottom of the stairs to get both doors open, then go up the stairs and through the door. Keep heading along this path, and you'll eventually find yourself in the Shaded Woods.
Exploring the Shaded Woods
As soon as you enter the Shaded Woods, you'll have to deal with a pair of enemies. Kill them both and take the Falchion weapon. Now keep walking along the path and kill the next set of enemies. You'll also have to contend with two enemies who attack from above. Once they're all dead, keep walking forwards, then go up the hill and kill another pack of opponents. You'll be able to grab a Pharros' Lockstone after doing so.
Walk down the path, kill the trio of enemies waiting for you in the clearing up ahead, then carry on along the path to your left. Kill the next enemy you come to, then light the bonfire. The room you're now in has staircases to the left and to the right, as well as several exits: one to the right, one straight ahead, and the last one on the left. For now, take the stairs on your right, talk to the man at the very top, then go through the door and into the dense fog.
How to fight in the fog of the Shaded Woods
Sadly, your torch won't help you see through the fog much, so just make sure you creep through this area with your shield up and ready for battle at all times. We recommend sticking to the left wall. When you reach a little clearing, go all around the perimeter of the area to get a Fire Seed, then continue hugging the wall until you reach a staircase that leads you down and out of the fog.
"If you try to tough out the fog itself, just be aware that you'll be attacked by some tricky enemies that are very hard to see, let alone fight."
If you try to tough out the fog itself, just be aware that you'll be attacked by some tricky enemies that are very hard to see, let alone fight. They will circle around you and attack from the rear with a critical strike, or even fire arrows at you from range. Difficult though these battles are, the enemies can be defeated if you're determined to clear out the area.
Keep an eye out for the very faint white shadows that appear, and try and do at least a small amount of damage to them when you can - that'll force their health bar to show up, which makes them much easier to track. You'll need to enable this setting in the options if you've turned it off previously.
It's worth clearing out the fog if you can, as there are quite a few useful items littered throughout - Lifegems, souls and the like. If you can find your way to a little circular clearing, you can also speak to the head of a deceased mercenary who has some interesting things to say. Do watch out for the cliff edge elsewhere in this area, though, as there's not really much you can do about pinning down its position in the fog!
Finding loot in the Shaded Woods
When you've finished picking up as much loot as you dare, go up the stairs over on the far left-hand side of the fog, which brings you up to a moss-covered old ruin that barely looks like a building any more. Enter it, then go up the ramp you find. Carry on up the next ramp you come to until you reach a platform. Walk to the end of that platform to loot a Radiant Lifegem. Make your way back down the previous ramp and light the bonfire near where you entered.
Carry on towards the end of the platform, and then drop down onto the path below when you come to a gap on your right. Try and time your jump here so that you roll right through the window and into the dark room. Take the path to your left, then go into the room on your right when you reach the end. Finish off the enemies lurking around inside - one of whom will attack from the rear - then grab the item to get hold of a Twinkling Twilight.
Now go through the door at the end of this tiny room to loot a handful of Firebombs and a Soul of a Brave Warrior. Now make your way back outside and head over the bridge until you get back onto the main platform.
From here, drop down onto the same path as before but don't go through the window. Instead turn right and go up the hill until you reach a petrified enemy. If you still have a Fragrant Branch of Yore left, reverse the petrification and kill the enemy to claim a key that will come in useful later.
Now head back to the bonfire platform and go to the very end of it, hugging the wall to your left as you pass beneath the chest.
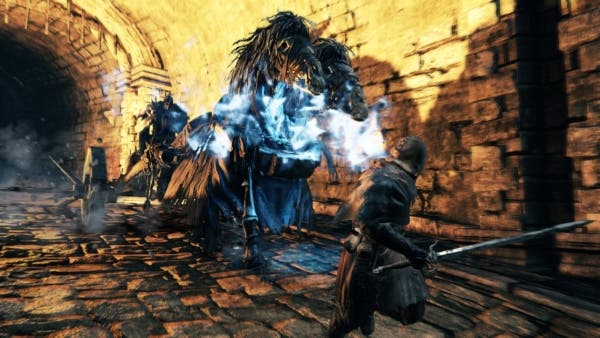
Slip through the opening on your left, and then turn to the left straight away. You need to be very careful when it comes to the jars in this new area. If you stick too close to them, they'll curse you. Fortunately, you can smash them to pieces to stop this happening.
Kill the trio of enemies here, but leave the frog alone. When fighting these enemies, you'll need to evade or block their attacks quite often as they're very hard to stun. When it comes to your counter-attacks, stick to a single swipe before getting ready for the enemy's response. If you try to get any more hits in than this, you'll likely set yourself up for taking some serious damage.
Make your way into the structure over to your right, then head down the ramp you come to when you get inside. Smash open all of the barrels down here to get hold of a Pharros' Lockstone and a Soul of a Brave Warrior. Now make your way through the opening and head to the left until you come to a coffer. You'll be able to take a Dark Scythe from inside it.
Now look for a small ledge in this area. Jump over it, then make your way around until you're positioned over the mighty scorpion if you want to kill it. Alternatively - if you have the Whispering Ring - you can talk to the creature to make an ally of him. If you choose to destroy the scorpion, you'll be rewarded with a Whispering Ring.
How to kill the frog in the Shaded Woods
"The damage the frog can put out is pretty impressive, but blocking those attacks won't drain your stamina too badly."
It's now time to kill the big frog up ahead of you. If you're a sword-and-board type of fighter, get in front of it and wait until it gets ready to spit some nasty gas in your face. When it does so, get over to the side of the creature and throw a few whacks its way - don't be greedy though, as you need to be ready with your shield for the next attack. The damage the frog can put out is pretty impressive, but blocking those attacks won't drain your stamina too badly.
When the frog's dead, loot a Petrified Dragon Bone from the corpse. Now carry on beyond where the frog was located and kill the enemy you come across. Carry on all the way around the corner to your far left, then go upstairs and take the Soul of a Brave Warrior and the Pharros' Lockstone. Turn all the way around, make your way back into the open area, and then take a left.
Kill the enemy ahead of you, then grab the item from the corner to get a Lifegem. Watch out for the fragile wood here, because if you mistakenly step on it you will plummet into the room below and be ambushed by a pack of vicious enemies. But you do actually want to go down there, so carefully dislodge the fragile wood and then prepare yourself for a fight.
Drop down when you're set and take care of the enemies that emerge from the caves around you. Watch your footing here as there's acid all over the place that erodes your equipment, which could very soon send you back to Majula for expensive repairs. Once you've cleaned out the area, go for the door near where you dropped down. You'll find the key from earlier unlocks it.
Inside, there's a very strange-looking bird woman whose name is Ornifex. She rewards you for helping her by leaving and setting up a useful blacksmith shop in an area you'll come to later on.
It should be easy enough to navigate out of these dark areas back to the bonfire, so do that, then head back up to where you killed the big frog, follow the path round past the hole you dropped down and over to the ruins on to your left, killing the hairy axe-wielding enemies as you go, then go up the nearby staircase. As soon as you get to the top of it, go to the very end of the new section to loot a Skeptic's Spice and a Soul of a Brave Warrior.
Now go back downstairs, leave via the doorway, and then take the next door on your right. If you carry on down this path, you'll eventually come to a new misty door that leads to the next boss fight against Scorpioness Najka.
If you're try to find all the Estus Flask Shard locations, take a look through the first page of our walkthrough.






.jpg?width=291&height=164&fit=crop&quality=80&format=jpg&auto=webp)


