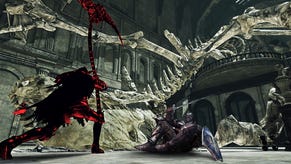
Dark Souls 2 - Flexile Sentry, soul, boss guide
Don't start the fight against the fearsome Flexile Sentry without reading our essential guide to beating this boss before you run out of time.
The Flexile Sentry isn't just a powerful boss to spar against, you'll also have to take into account an environmental danger that forces to you to fight fast. If you're struggling to take out this deadly opponent, we've broken the fight down into its constituent elements, and also sussed out a few tactics that can help turn the tide of battle in your favour.
How to kill the Flexile Sentry
There are a few important things to keep in mind during this fight. First, stick to ranged attacks whenever possible, as it's a much safer way of dishing out damage. If your combat speciality doesn't lie with ranged weapons, use spells instead - anything that means you don't have to get too close to the action basically. Secondly, make use of the mast that's located in the centre of the room to stop the Flexile Sentry from getting up close and in your face by using its deadly jump attacks.
The third piece of advice is perhaps the most important. It's imperative that you take down the Flexile Sentry as quickly as possible, as the water in this room gradually rises as the fight wears on. The higher the level of the water gets, the tougher it is to get about, making it harder and harder to avoid the Sentry's devastating attacks. It's as good an enrage timer as any, really, because the fight is essentially impossible to win after a certain point.
"It's imperative that you take down the Flexile Sentry as quickly as possible, as the water in this room gradually rises as the fight wears on."
As for the Sentry's actual attacks, there are two in particular to watch out for, and the one that's used depends on the direction the boss is facing you from. He'll attack you with two spiky clubs from one side, and use a pair of swords from the other. While both attack types are pretty similar, you'll find it easier to deal with the club swings, as attacks from this long-range aren't quite as frequent. If at all possible, control your positioning so that you're dealing with the meaty clubs at all times.
The mast in the middle of the room serves as a very handy shield you can use to prevent the Sentry coming at you with massive leaping attacks from range. For the most part though, you're going to have to deal with a horizontal slicing attack, or a pair of vertical slicing attacks. Note that the enemy may also end any series of attacks using a pair of club whacks.
That latter attack is second only to the leaping attack when it comes to range, so be very careful about falling within its grasp. When you see it coming, counter as fast as you can with at least two of your own attacks - more if you're got the kind of zippy weaponry required.
While you should always keep moving around the mast, don't forget that a watery clock is ticking, and so you must allow the Sentry to get near enough to you that you can actually attack it. The boss rarely uses a single attack, so just wait until it's swung twice before launching your own counter-attack. Just keep in mind that if you're too close to your opponent, it's possible to find yourself on the receiving end of a third battering.
How to find the Lost Bastille
As soon as you've killed the Sentry, make your way through the door and then up the ladder you come to at the end of the passage. Make sure you grab the Fireball and Pyromancy Flame from the coffer that's in the corner of the room.
If you take a closer look at the round object in the very furthest corner from you, you'll be shown a cut-scene. Once it's finished, make your way down the pier and towards the left, before heading through the corridor, and then on into the next room ahead of you.
Use the lift here to get to the next floor up, then grab the Radiant Lifegem and the Soul of a Proud Knight from the middle cell to your left. Now go through the door and walk up the stairs to gain entry to the Lost Bastille.
We've got plenty more Dark Souls 2 boss tactics for you over at the index page to our walkthrough.


